What Paste Application Method do You Use in 2020?

What Paste Application Method do You Use in 2020?

  • Pea sized ball in center

    Votes: 78 36.3%
  • X accross heatspreader or die

    Votes: 34 15.8%
  • Spread evenly (credit card, or other straight edge)

    Votes: 62 28.8%
  • Spread evenly (using finger wearing gloves)

    Votes: 15 7.0%
  • other

    Votes: 12 5.6%
  • Grain of rice

    Votes: 14 6.5%

  • Total voters
    215

Zarathustra[H]

Extremely [H]
Joined
Oct 29, 2000
Messages
38,819
Hey all,

Figured it was time to revisit this, as I haven't seen this topic in a while.

I used to always use the pea sized ball in the center method, but with some pastes being thicker these days, I have considered spreading thinly instead.

What do you use these days?
 
For "normal" CPU's (i3, i5, i7, Ryzen, etc) I put a roughly grain-of-rice sized/shaped dollop in the center of the CPU and use mounting pressure to spread it. This has proven to work very well over the years and years I've been using this method.

For larger less normal CPU's (Threadripper, etc), I'd probably go with an X pattern or similar (X pattern with a few dots) to make sure enough TIM was applied (I think AMD even recommends this method with Threadripper but I could be wrong).

With the physically larger CPU's we have the option of now, one method no longer covers all the bases.
 
i use the X method on my systems all X299 then i give the heathsink a small turn left/right. seems to work rather well. used to sue the pea sized dot in mid on other platforms.
 
I have used the pea/dot method and the spread method over the years. I find the spread method seems to offer me better coverage over the entire spreader. I have a little spatula I got with a tube of Kryonaught so I don't have to clean my finger for ever to get the crap off. Whenever I did the dot method, and maybe I never had a big enough dot, it seemed to not cover the whole die so I just spread it myself now for my own peace of mind.
 
Credit card / equivalent and the spread method.

Bottom line: the only reason for using TIM is to fill in the (micro) gaps between the two flat surfaces. So no point in using more than is necessary, especially since some TIM can cost $$$.

I used to use the pea method when I was using the more-liquid-y type TIMs but the denser stuff doesn't spread as well / evenly on it's own - while the spread with card method you can be sure by just eyeballing before re-assembly.
 
gonna try this next time since my cooler doesn't have a perfectly flat surface, but rather a convex one
save.PNG
 
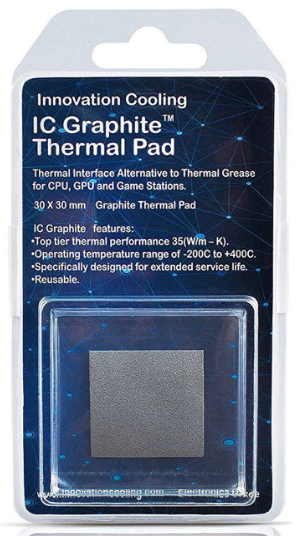
I've got the graphite thermal pads in two systems right now. They work perfectly well but run a little hotter than traditional TIMs. Not a big deal for me, since I'm not OC'ing at the moment but if you are planning on OC your rig, keep this in mind, it will take away some thermal headroom you might otherwise have with a good thermal paste.
 
Last edited:
I've got the graphite thermal pads in two systems right now. They work perfectly well but run a little hotter than traditional TIMs. Not a big deal for me, since I'm not OC'ing at the moment but if you are planning on OC your rig, keep in mind, it will take away some thermal headroom you might otherwise have with a good thermal paste.
that makes perfect sense to me....but in my case its impossible to apply paste correctly. I guess im kind of hoping the pad squeezes in the center and allows the entire hole heat spreader to make at least better contact. Lesson learned i should have stayed with thermalright brand of coolers:(
 
I got a little blob in the mid section, so I tend to use a little blob in the mid section of the heat spreader as well :ROFLMAO:


Also, can't forget about the trial and error of PC building way back when:


Well at least he cleaned it up good after :D
 
Same as I've always used: using a hard plastic card, spread a very thin, even layer over the entire heatspreader then, depending on cooler, buff some paste into the heatsink/coldplate base and wipe off. Has never failed.

GPUs are a different matter due to the exposed die. Even using non-conductive thermal compound I'm OCD about getting it on and between the tiny components around the core. A line seems to work fine for GPUs with rectangular dies (dice?)
 
Last edited:
Pea sized blob for standard CPUs but spread for larger HEDT stuff.

Back in the day I used to apply the heatsink, apply full pressure, remove the heatsink and remove the spread TIM from the heatsink. Then apply the heatsink to the CPU with just the spread thin TIM layer on the CPU. Worked ok, never got round to doing any tests.
 
The 'X' method has given me the best results on everything I've used for CPU. GPU I use the spread method on the die and then a rice-sized drop on the cold plate of the heatsink/pump.
 
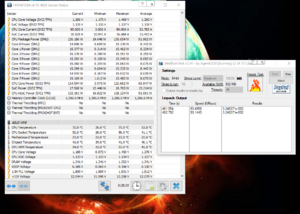
i just used the thermal pad and got 10-15 degrees better results :) I will never use paste again! This is to easy considering how easy it is to screw up a paste install. I was hitting mid to high 80s with crap paste install. And NEVER have to worry about my dang cpu pulling out of the socket....like to gave myself a heart attack :(
 

Attachments

  • Capture.PNG
    Capture.PNG
    331 KB · Views: 0
Last edited:
i just used the thermal pad and got 10-15 degrees better results :) I will never use paste again! This is to easy considering how easy it is to screw up a paste install. I was hitting mid to high 80s with crap paste install. And NEVER have to worry about my dang cpu pulling out of the socket....like to gave myself a heart attack :(


10-15 degrees? That is nuts. Something was really wrong with your previous paste application in that case.

There shouldn't be more than 1-2C difference from mount to mount, all else being equal.
 
10-15 degrees? That is nuts. Something was really wrong with your previous paste application in that case.

There shouldn't be more than 1-2C difference from mount to mount, all else being equal.
lol it had WAY to much.....like retarded amount to much. Even i do stupid shit on occasion. Now picture in your mind all this thermal paste and the cpu pulling right out the socket. Try to imagine paste on the bottom side of the cpu?:) I got it all sorted out with a shit load of alcohol and patience
 
Dot in the middle for pretty much all CPUs besides Threadripper. That is a whole other animal.

Agreed.

First time I applied Kryonaut to the Threadripper I used the spreader tip on the tube it came in. That resulted in WAY too much paste.

Next time I am going to try putting a dot or two in the center and spreading it with my gloves finger. I suspect that will work better.
 
Agreed.

First time I applied Kryonaut to the Threadripper I used the spreader tip on the tube it came in. That resulted in WAY too much paste.

Next time I am going to try putting a dot or two in the center and spreading it with my gloves finger. I suspect that will work better.
Need heat with Kryonaut...
 
Need heat with Kryonaut...


Yeah, it congeals when it is cold.

I tried using a hair dryer once to warm it up, but that just made even more of a mess :p

Might stick the tube in a Ziploc bag and pre heat it Inna water bath next time to make it more spreadable. Not sure. Or maybe apply it in front of a space heater :p
 
Yeah, it congeals when it is cold.

I tried using a hair dryer once to warm it up, but that just made even more of a mess :p

Might stick the tube in a Ziploc bag and pre heat it Inna water bath next time to make it more spreadable. Not sure. Or maybe apply it in front of a space heater :p
Or just do it like I showed in the mounting video. Much easier.
 
Or just do it like I showed in the mounting video. Much easier.

I watched that back when you first did it, but I can't remember the details.

Ever since the front page went down, I've been living in a world where all the old [H] stuff is gone, but I forgot that stuff may still be up on Youtube. I'll take a look and see if I can find it.

I'll take a look.
 
Last edited:
I watched that back when you first did it, but I can't remember the details.

Ever since the front page went down, my default take is just that all the old [H] stuff is gone, but I guess you did use Youtube for those videos, so unless you took those down as well I guess I could still find them!

I'll take a look.


Found it.

Couldn't watch with sound right now, so I likely missed a lot of details, but looks like an interesting method.


Finger cot it out over the entire heatspreader, then add an extra dot over each of the main chiplets, and apply the heatsink.

Interesting method. I was going to just do the finger cot method and leave it at that (but I was going to use a glove) but maybe I'll add a dot over each pertinent chiplet.

I did a follow up a few months after that, that is a bit better. It was in a mounting video.
 
Yeah, start at about 10:30. More applicable to using a more viscous TIM.


Appreciate the help.

I'll be doing this again as soon as my Gigabyte RMA comes back.

That bathtub curve is a bitch... My original motherboard just died on me out of nowhere. One day it just refused ot power on :(
 
gonna try this next time since my cooler doesn't have a perfectly flat surface, but rather a convex one
View attachment 221035

that's what i've been using out of pure laziness and being a cheap ass that hates having to buy thermal paste since we have zero stores locally that sell it.. it works pretty well, i'm sure kryonaut would get better results but meh, it's survived a r5 1600, r5 2600x, and now my r5 3600 so the investment was worth it since it made swapping cpu's a 1 minute task vs having to spend 5-10 minutes cleaning everything.
 
I voted "Other" because no matter which method you use, it's all the same once the heatsink/waterblock is tightened.
 
I voted "Other" because no matter which method you use, it's all the same once the heatsink/waterblock is tightened.

Not completely true. If you use a heatsink that has direct touch heatpipes the blob method does not work because it squeezes out from the grooves instead of spreading evenly through the heatspreader. And the new rectangular CPU's like Threadrippers may also have their own requirements.
 
According to Stephan previously from The Verge, aren't you supposed to smear it into the pins, and then put a toothpaste size patty on top of the cpu?

on a more serious note,

I typically heat the syringe in hot water prior to application and couple it with another, move it back and forth between the two to mix it, (i know unneccessary)
then put a rice sized spot in center and smash it with the hsf
 
Last edited:
I used a big grain of rice for awhile, but recently went back to the line, with a dot on each side, like a division symbol. Plant the cooler down and give it a tittie twister before I give her the clamps. On my 970 and 980 I did the spread method.
 
I still follow the way I read in an article in some magazine. Spread some TIM on both surfaces and really work it in. Then use a lint free cloth to wipe away most of it. Then apply a very thin layer with a credit card to both surfaces. It results in quite a bit of waste but is like poor-mans lapping. The only time this has failed is when the IHS or HS surface wasn't flat.
 
I still follow the way I read in an article in some magazine. Spread some TIM on both surfaces and really work it in. Then use a lint free cloth to wipe away most of it. Then apply a very thin layer with a credit card to both surfaces. It results in quite a bit of waste but is like poor-mans lapping. The only time this has failed is when the IHS or HS surface wasn't flat.
i kinda thought the same thing on one try.....i figured any excess just goes off the side (no biggie) with barely any force my hole cpu pulled out the board when redoing it a year latter. Guess where all the excess goes if the cpu accidentally pulls out? when the pins where on the board it was one thing...but not now lol.....NEVER AGAIN
 
Just a blobb in the middle. No reason to make this more complicated then it should be.

with Ryzen that really isn’t the best way to do it. The way the dies are under the ihs you might not get the best coverage.

either two or three smaller dots where the dies are or spread it with a cc to get full coverage.
 
Back
Top