• Some users have recently had their accounts hijacked. It seems that the now defunct EVGA forums might have compromised your password there and seems many are using the same PW here. We would suggest you UPDATE YOUR PASSWORD and TURN ON 2FA for your account here to further secure it. None of the compromised accounts had 2FA turned on.
    Once you have enabled 2FA, your account will be updated soon to show a badge, letting other members know that you use 2FA to protect your account. This should be beneficial for everyone that uses FSFT.

Thermaltake Gallery

DSCF0016.jpg
 
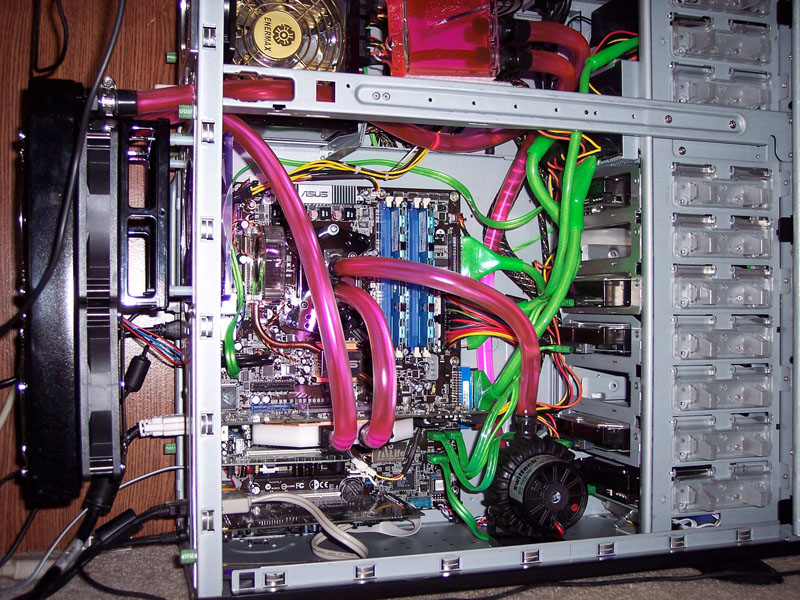
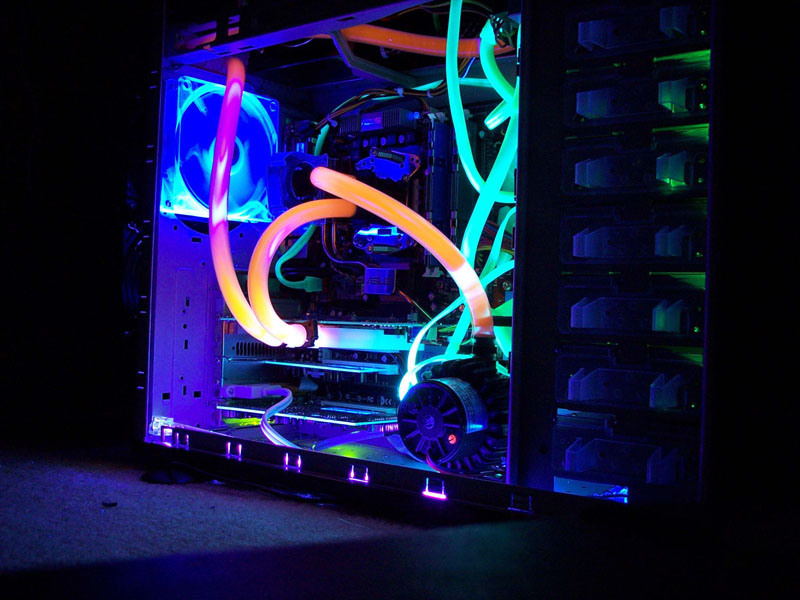
Time to add my case:

newater2.jpg


newater3.jpg


newater5.jpg


I still have to get a pump relay switch, but its up and running at least..
 
nice looking rig sycoraX
do you get and preasure build up after running the system all day? i uest to run a bay res with the pump pumping into it before anything else and i had to unscrew the lid everynight to relieve the preasure in my loop
now i hav found that when you suck water from the res like in my loop theres no preasure
 
lol SycoraX thats a lot of $$$ invested in cooling just to leave the side of your case off :p
 
.xXLucidXx. said:
nice looking rig sycoraX
do you get and preasure build up after running the system all day? i uest to run a bay res with the pump pumping into it before anything else and i had to unscrew the lid everynight to relieve the preasure in my loop
now i hav found that when you suck water from the res like in my loop theres no preasure

Thanks. My pump doesn't pump directly into the reservoir. It goes like this: pump>rad>cpu>gpu>res>pump So it's not an issue really for me. However, the one problem I noticed with it, is that where the inlet barb is, it creates kind of a water vortex, and emits a noise that reminds of a dripping foset. Doesn't really bother me much though.


reins said:
lol SycoraX thats a lot of $$$ invested in cooling just to leave the side of your case off :p

Hehe yea I know, but I was too anxious to get everything started, couldn't wait to get the relay switch :p
 
TT Armor Black w/ window. Had to pay a lot of $$ to get it through the airport during winter break from college. Will have to pay more on the way back because I've added a ton of heavy stuff (casters, watercooling, etc.)

cimg00091uo.jpg

My cables were so nice before the watercooling...

cimg00046hj.jpg

Shows off my meshing skills. (Burned my finger with the hot glue gun to stick that mesh on there.)

cimg00106yp.jpg

Hand painted most of those components... that's why they look so crappy.

cimg00131ih.jpg

Will replace the watercooling setup with blue UV reactive hoses and blue dye, when I can find one that isn't freaking crap like PC-ICE.

cimg00146yx.jpg

Took a s+ark design microsoft mouse and painted it black, then devoured it to produce this. I like the texture. Also replaced the red scanning LED with an IR led for invisible operation like so:
cimg00167rm.jpg
 
Hey everyone, there are some amazing cases in this forum, it made me go through and clean up mine, so here is my work in progress. any suggestions are welcome!


Misfit79 said:
Hey everyone, there are some amazing cases in this forum, it made me go through and clean up mine, so here is my work in progress. any suggestions are welcome!

Dang nice! 4 UV CCFLS or what?
 
got my Tsunami today, my first Pc build will post pics when done, im just waiting on my Processor :D cant wait!! wish me luck i wont screw anything up!
 
Here's mine. I still have some more stuff I would like to do.
Misfit, I love what you did with the lettering. I might have to try that. ;)


Thanks! the only uv paint I could get here is garbage, took for ever to get it to stay on lol
heres some new pics from some work I did this week


Nice rig^^

My PC pics

Anybody know the best LED arrangement to make the inside a good balance of blue and green? I was thinking get the zalman LED cpu fan, then replace the 2 existing non LED fans with green ones...
 
DSCN1658.jpg

DSCN1655.jpg

DSCN1652.jpg

DSCN1649.jpg

DSCN1641.jpg

DSCN1638.jpg

DSCN1636.jpg

DSCN1573.jpg

DSCN1578.jpg

DSCN1566.jpg

Here is mine. this weekend, i am painting the inside black, adding a 120mm blowhole, 50+leds on 6 switches, massive cable management.
 
any1 ever replaced their fans on the Tt Tsunami?? im looking to change the fans because they are way too loud, so i just wanted to know if any1 has replaced them and how it went?
 
miskari said:
any1 ever replaced their fans on the Tt Tsunami?? im looking to change the fans because they are way too loud, so i just wanted to know if any1 has replaced them and how it went?
I put gaskets on all my fans and replaced them with Thunderblades, which aren't much quieter. I do have them all hooked up to my Vantec controller though, so that helps.

Swapping them out was very easy, and I got rid of those screwless mounts.
 
Here's my black Shark in it's glory. Please excuse my mess...I'm somewhat of a pack rat when it comes to my man room.


Sheesh that webcam is filthy! It's not even plugged in and has been sitting on top of my monitor for a good 3 years. I should get rid of it.

I got the holographic sticker off my hsf as best as I could, as the nick mark is clearly visible. Those things are fragile! I was thinking about contacting AMD and see if they could send me a new (and more importantly, a whole) one.
 
Well I've made some improvements since my last post. I swapped out my NB fan for a Vantec, put an aluminum fan on the side, gasketed all my fan mounts, added a new Zalman HSF, and......took scrap pieces of Lian Li aluminum and cut them to cover my drive cages. :D Unfortunately, the pics really don't do the aluminum justice. :(
Before:
dcp02998eh.jpg


After:
newpclit0037kb.jpg

newpclit0017pb.jpg

newpclit0027mg.jpg
 
Yeah, that does look nice.

Unrelated, does anyone know if any fan controllers fit under the front door of the Tsunami?
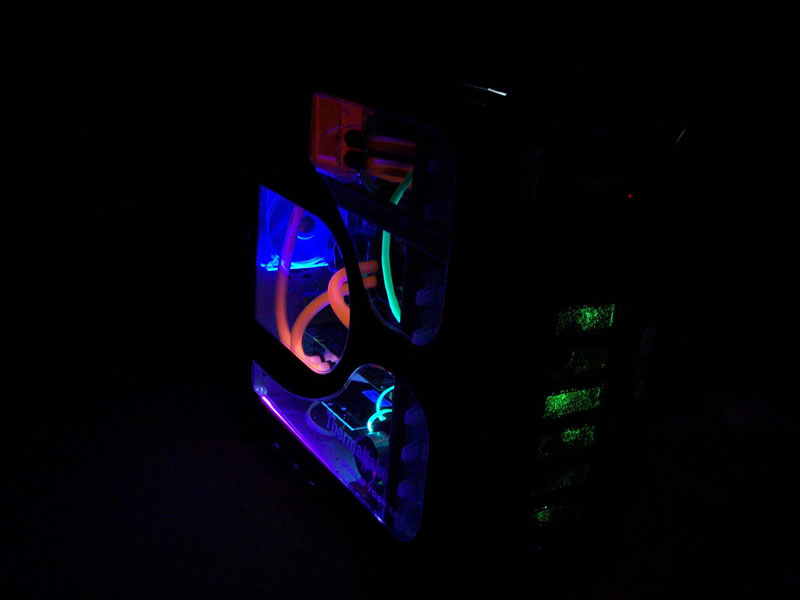
 
I'm using a Silverstone in Euodemon in the 5.25 and a Vantec Nexus in the 3.5. The Silverstone is knobless and the Vantec knobs clear with no problem, plus they are both aluminum, which looks sweet.
 
Kind of a long story, but it starts in the middle here:

It's a bit of a worklog, but what the heck...

Here's where I was yesterday; a leaky mess... I can't say it enough, get the good tubing. It's 100 times easier to work with, and the end result is MUCH nicer.
Wrong.jpg


After ripping all that apart this evening, I started to assemble all the bits and parts into a proper, functioning water cooled PC...
I started with installing the GPU blocks onto the 7800s. This was very easy, and took less than 10 minutes for both!! Swiftech really knows waterblocks!
GPUBlocks.jpg


Next, I installed the CPU block, it's a Danger Den water block, and it too is an amazing piece of gear!! The great part about this waterblock is that it doesn't require you to remove the motherboard. it screws straight in. Again, less than 5 minutes.
cpu.jpg


Oh, I almost forgot, before I started, I laid out where everything in the PC was going to go (obviously!), as it turns out, the rad was going to go into the front of the case. This still leaves me enough room for 3 HDDs and a single DVD drive. I can also still fit a shallow fan speed controller infront of the HDD cage.
The fans pull air through the rad as opposed to pushing it through, this is because there's less resistance for air to being pulled through...I guess it builds up pressure infront of the rad...
Rad.jpg

(yes, it's a used radiator, but for $50 for a big one like that you can't go wrong!)

Next, I went to work on the GPU tubing, notice the "Y" connectors, one split goes in to both, the other sucks out of both...very slick if I do say so myself. This would have been impossible with the vinyl tubing I was using yesterday...
GPUs.jpg


So here's a picture of what's done so far. The pump came with some heavy duty double sided tape, and that's all that's holding it in place. Works quite well. You can see it's starting to come together by now...
BeforeRad2.jpg


Ok, big jump ahead...Now the system is filled and running. I opted not to put in a reservoir, I don't see the point in it. The system holds over 2 cups of liquid. Instead I purchased the filler valve you see above. A "AAA" battery would have worked just as well...Oh well. The flow comes out of the top of the pump-->into the rad-->out to the CPU-->to the GPUs-->back to the pump.
Notice that the liquid looks quite foggy, these are tiny bubble (makes you wanna sing doesn't it?) that are always there, the pump generates them from larger air bubbles in the system. As the coolant circulates and passes the top point (the fill line), the bubbles are deposited there. All the little bubbles should be gone by tomorrow. Since I've started typing this, the fill tube has gone down to half full, and the rest is air being release from the...you guessed it, Tiny Bubbles!!
Donewflash.jpg


And just for kicks, and because I like lights;
Glowing.jpg


This was the most difficult thing I've done with computers. However, because the new tubing fit so well, I didn't even leak test it before I installed it!!! Not a drop came out. Perfect.

The total project time in labour is about 4 hours, filling is quite slow, and getting all the hose just the right length can be a bit slow too. However, I'm quite happy with the result. I need to spend some time cleaning up the wires, and I really think it needs a couple more UV lights, but other than that, it's done.

Here's the finished product:
external.jpg
 
Thanks, I still have alot of work to do on it though...gotta clean up the wire a bunch, get rid of all the tiny bubbles, etc etc...

I appreciate the props though, my girlfriend doesn't appreciate my hard work!!! LOL
 
Some pics of my Tsunami. I'll get some good inside pics as soon as my camera batteries recharge.

ttcasetopsmall.jpg


ttcasesidesmall.jpg
 
Back
Top