Navigation
Install the app
How to install the app on iOS
Follow along with the video below to see how to install our site as a web app on your home screen.
Note: This feature may not be available in some browsers.
More options
You are using an out of date browser. It may not display this or other websites correctly.
You should upgrade or use an alternative browser.
You should upgrade or use an alternative browser.
Project: PrometheusCu
- Thread starter SaibotC
- Start date
seriously,
the further along this mod comes, the less I like it.
In my opinion, the carbon looks cheap and detracts from the clean look of the mod.
Same with the LEDs and especially their fittings. Drilling miniature holes into a solid black plate and using fiber optic threads to guide the light from a far source would´ve been less distracting.
Same goes for the heatsinks on the back of the graphics cards.
It all looks cluttered now, like an uncoherent mess.
Replace ALL of the carbon fiber with simple brushed black anodized aluminium (like the material of the original case) and the look will be far more elegant.
Amber lighting could also be a good choice instead of blue.
Thanks for the opinion mate, but I'm sure you'll change your mind when it's done because all of your concerns are merely a product of witnessing a project still incomplete.
It won't look anything like what you see now. =) The design in it's physical form is still in it's infancy and it will remain that way - until I manufacture the scads of components from solid copper plate that will adorn my creation.
There are reasons behind most of your 'dislikes' anyway:
- LEDs are used because there is a very complicated lighting control system that will make for quite the show across the White 127LEDs (where did you get blue?) in and outside the case. As well there are 12 BlinkM programmable RGB LEDs that will alternate their color based on certain watercooling functions (eg: water temp rises -> colour turns warmer, sudden drop in flow -> lights flash in a epileptic manner, and so on). As a side note I'm quite partial to the look of the little LED holders. I don't know what's not to like really- I can say with the utmost confidence that this is the most complicated lighting system to ever to into a case mod (show me a mod with a separate computer dedicated to controlling lights?)
-The heatsinks on the graphics card are only part of the equation. The cards will get their own solid copper shroud complete with 40mm fan and carbon accent to match.
- The bottom will be covered and hidden behind a copper "rad grill" of sorts.
- The HDD bay area will be completely enclosed.
etc. etc. etc. What I'm trying to say - in a few weeks you wouldn't recognize this machine.
You're free to express your feelings, in fact I really appreciate the criticism - but let me put your concerns to bed. The mod IS an incoherent mess - because it's still very much a 'work in progress". Come back at the end of the month =).
(All these ideas and the rest of my intentions are outlined and explained throughout the worklog - several times in fact. If you take the time to actually have a read your inquiries would have already been addressed).
formula409
Limp Gawd
- Joined
- Apr 7, 2005
- Messages
- 311
This mod is out of control in a good way. The carbon looks awesome! Cant wait to see the final parts come togther to form this masterpiece.
I would like to add this to those who complain or comment about a clean look, or something else not to "your" taste. Some contructive criticism is a good thing and can be a big help and at the same time if this case were to "your" tastes, then I would imagine you would be the one building it. try not to make a final verdict on an incomplete project if its not looking good to you. Beauty is in the eye of the beholder and so far its beautiful to me. Putting that much time into the carbon fiber and then ditching it would be foolish. Thats not some cheep faux plastic or vinyl decal he has on there. Thats the real deal.
Clean or cluttered....this case has both going as of right now and will only get better as it comes to completion. All great works of art look like chaos until finished. In this case, even the chaos of it all is awesome looking. I dont think there are to many people reading through this post with the resources and ability to make such a Case Mod. I would say enjoy this as soon...it will be finished and with Langers next crazy project in the wait....it could be a while before we enjoy another one of his builds.
For anyone lost on whats really going on behind the project, I would suggest actually reading through and not just looking at the pretty pictures. Lots of insite on the method behind the madness. Alot of reposts by Langer on here are just to show people what they skipped over.
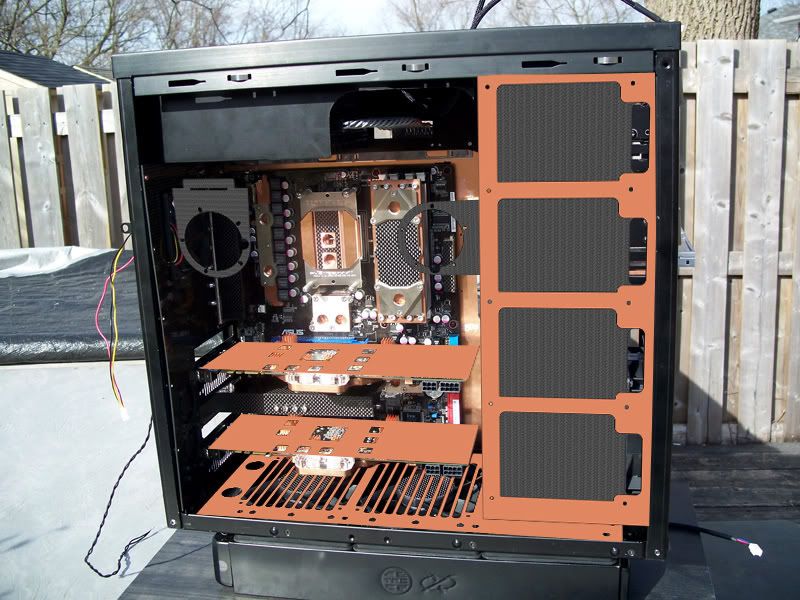
This is far from the prettiest thing I ever put together - but it gets the point across and I did it very quickly.
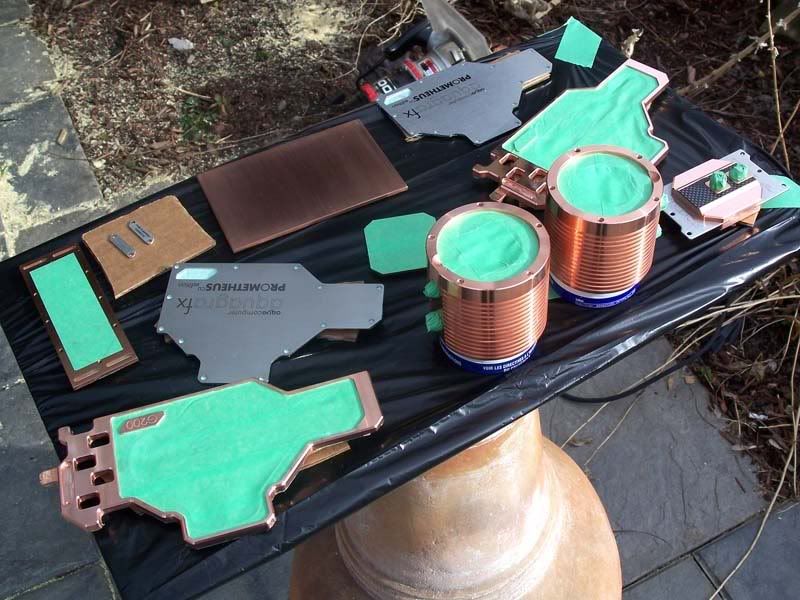
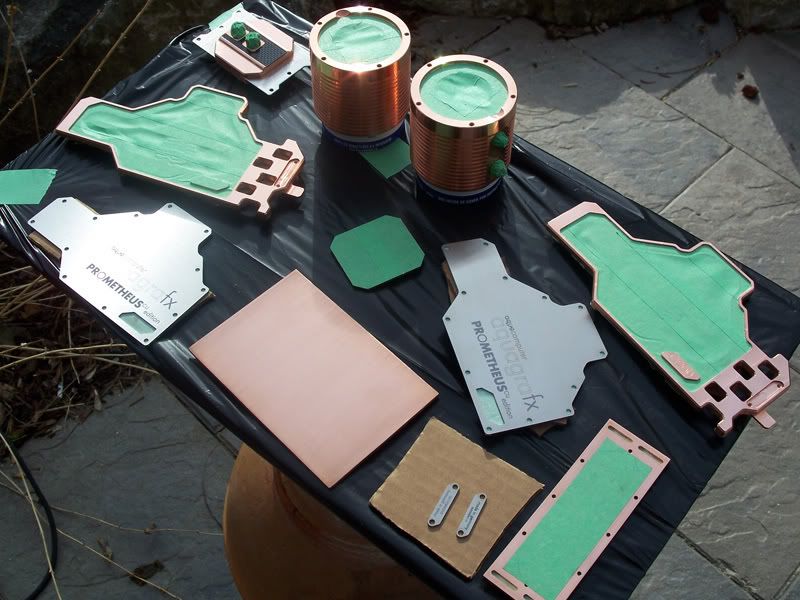
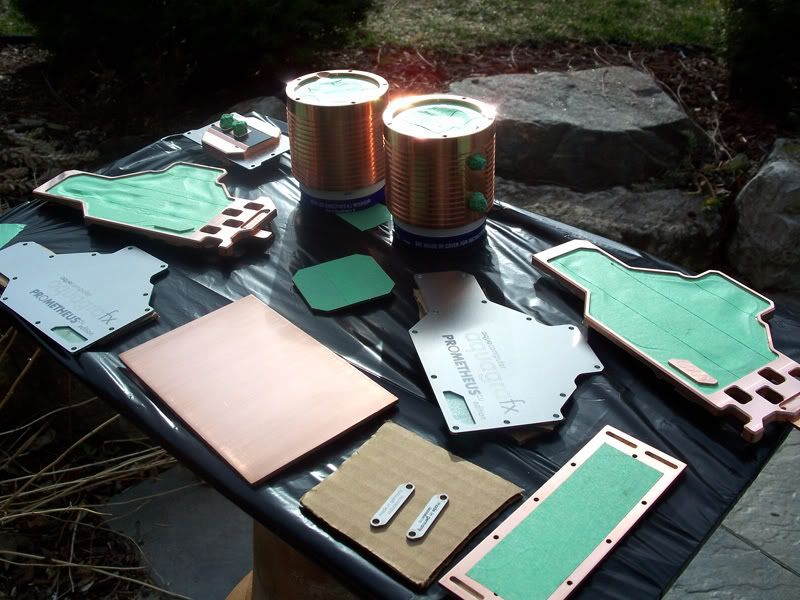
I crudely added in some of the parts. Including a very rough idea of the final reservoir locations:
Here are the latest iteration of the reservoir mounts - it took about 5hours of measuring and remeasuring to be certain that they are level with one another. I don't want 2kilos of copper throwing off the visual balance.

The "right" res will hang from the PSU area in the front and the back will mount to the fan - it's mounted so that it flows straight into the mosfet block. I'll need 4 spacers at the back to keep the reservoir fronts flush with one another.
The "left res fits into the slots on the hdd bay cover plate.
More soon.
I crudely added in some of the parts. Including a very rough idea of the final reservoir locations:
Here are the latest iteration of the reservoir mounts - it took about 5hours of measuring and remeasuring to be certain that they are level with one another. I don't want 2kilos of copper throwing off the visual balance.
The "right" res will hang from the PSU area in the front and the back will mount to the fan - it's mounted so that it flows straight into the mosfet block. I'll need 4 spacers at the back to keep the reservoir fronts flush with one another.
The "left res fits into the slots on the hdd bay cover plate.
More soon.
ah, that explains a lot 
Now I can envision it as a whole, and adding more copper will definitely improve the looks. Still don't like the mix with the carbon fiber, but that's down to personal preference (and me having used industrial strength carbon fiber parts a few years ago - killing several diamond-coated drills just trying to add a single hole - they were leftover parts from an aircraft manufacturer which didn't pass QA).
The LED controller thing is interesting, I´ve never seen someone dedicating a whole computer to control them, but I´ve often seen people program microcontrollers to do the trick (actually last year at the GCCM, Games Convention Casemod Masters, the "project Atlantis" hat LEDs under every key which responded to keypresses controlled by an Atmel iirc, the blue fuzzy "Oscar" mod had a software running under windows though which controlled the cameras, movement and lighting of the beast.).
Using a separate computer gives you the ability to change settings and things on the fly, though a microcontroller-based setup would use less space, heat, power, and be more robust in terms of OS stability.
Good luck with the mod, though I´ll probably never see it in person (since I live in the country where a lot of your watercooling goodies come from ^^ )
So; I made a 'little' spreadsheet this evening.
It's a complete itemized list of every part and component in Prometheus - it's price, retailer, SKU, etc.
It turns out that Prometheus consists of 227 different parts (meaning duplicate parts are not counted).
This composes a total of *1413 individual pieces (not including the molex pins 1642 pieces if you count the pins.)
The total MSRP value of this project is a fair bit higher than I had expected actually... My heart jumped a couple beats when I totaled the bottom line.
Turns out I'm bat sh*t crazy afterall.
*edit 1413 individual pieces not including pins. I miscalculated.
Last edited:
EndersShadow
[H]ard|Gawd
- Joined
- Dec 27, 2008
- Messages
- 1,228
Many thanks make.
So; I made a 'little' spreadsheet this evening.
It's a complete itemized list of every part and component in Prometheus - it's price, retailer, SKU, etc.
It turns out that Prometheus consists of 227 different parts (meaning duplicate parts are not counted).
This composes a total of 1209 individual pieces (not including the molex pins 1642 pieces if you count the pins.)
The total MSRP value of this project is a fair bit higher than I had expected actually... My heart jumped a couple beats when I totaled the bottom line.
Turns out I'm bat sh*t crazy afterall.
So you just gonna leave us hanging without a number huh? lol...even just a ballpark figure would be nice...I think 15k was the last one I saw
Significantly higher. I'll drop the # when it's finished.
As a frame of reference there is over $2900 in redundant hardware that was replaced or revised during construction.
hehe, that sounds familiar.
I modded a Dell XPS case from BTX to ATX, turned out that none of the components I did the measurements with actually wound up in the finished buil. I am currently thinking of ripping it all apart again and changing a few things... argh. Need a donkey that shits money
Today I added another 144 pcs to the list.
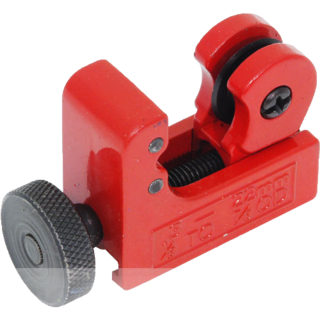
I spent the past 5-hrs using a mini 22mm pipe cutter to fabricate 144x 17mm long spacers.
My hands are now crippled and blistered.
I used some old copper pipe I had laying around - the scratches and corrosion made the job about 10x harder than it needed to be.
The spacers were cut from 10mm OD copper pipe and will be used 72per side to keep the copper fins evenly distributed.
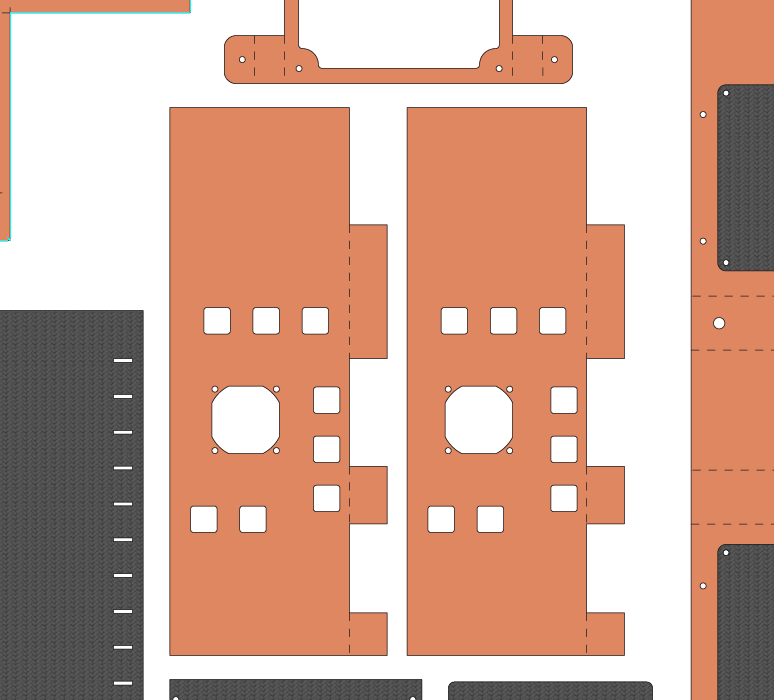
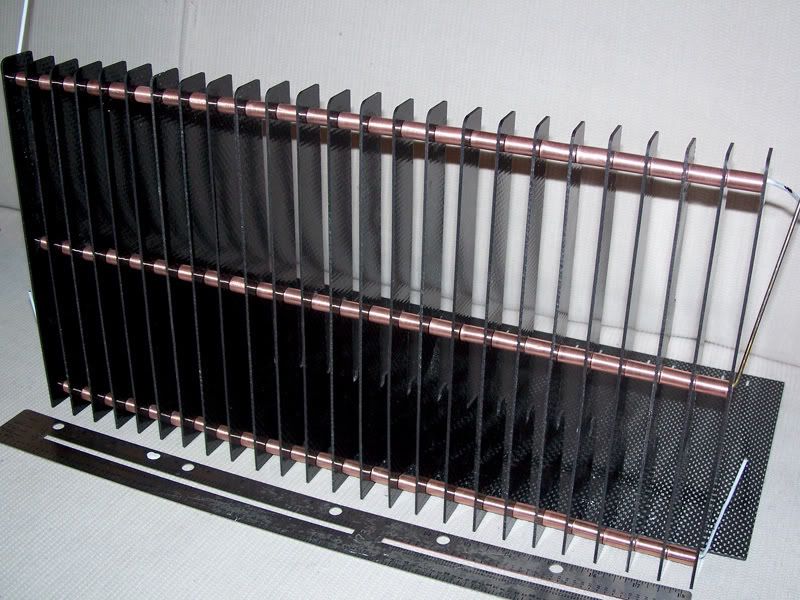
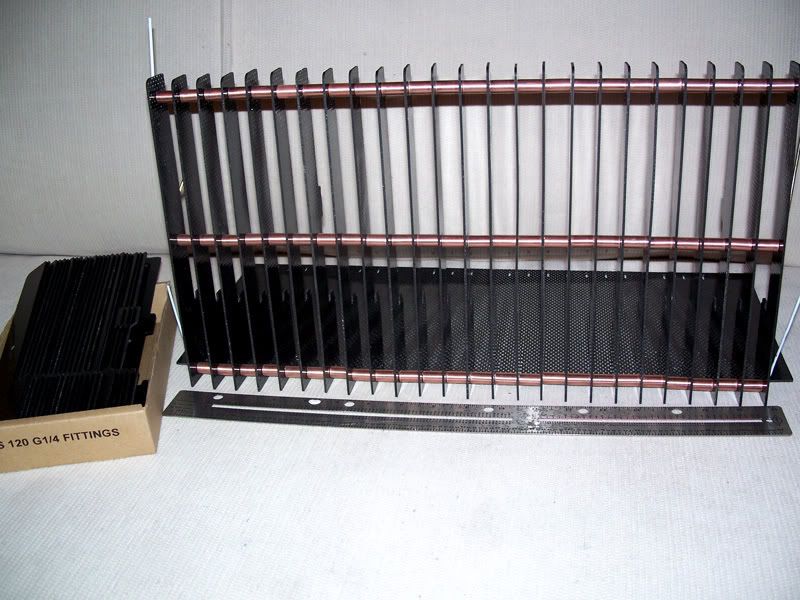
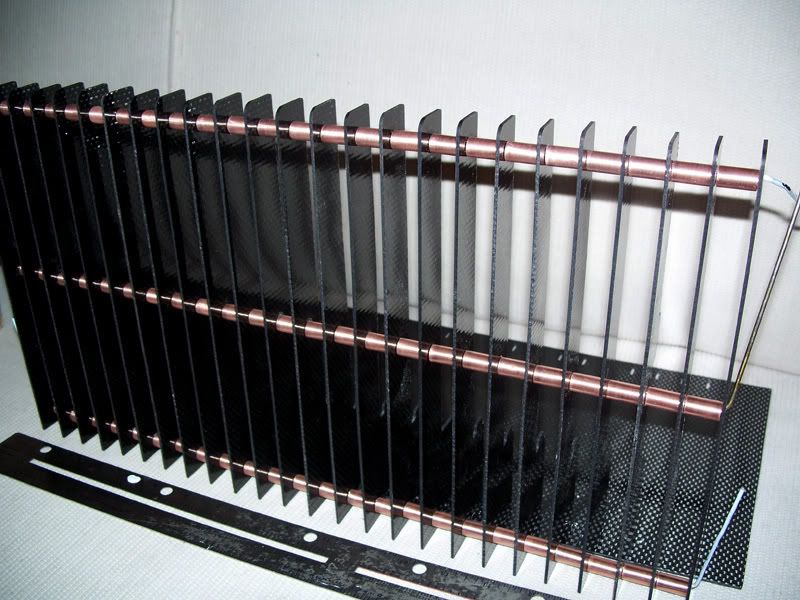
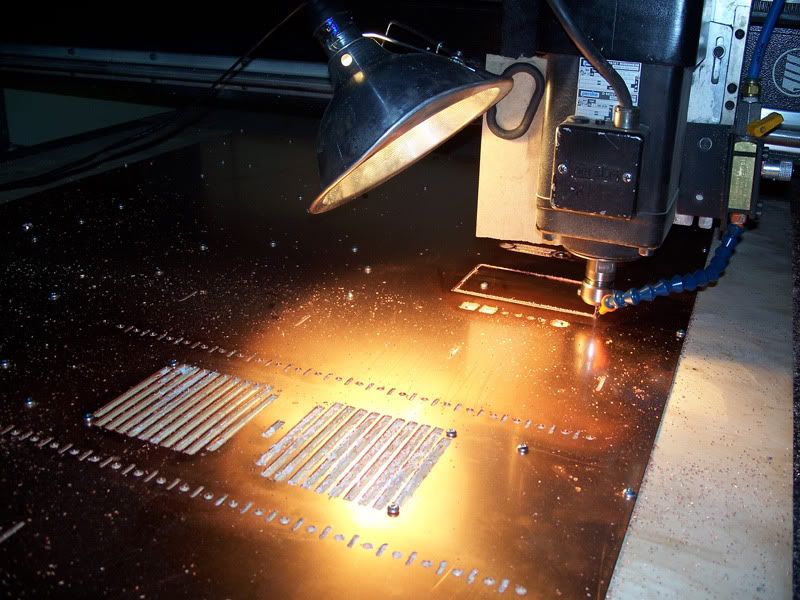
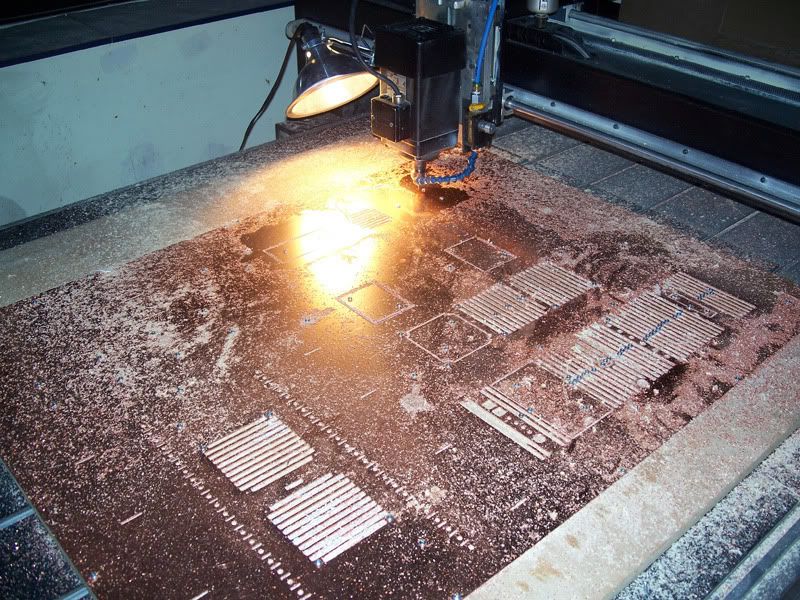
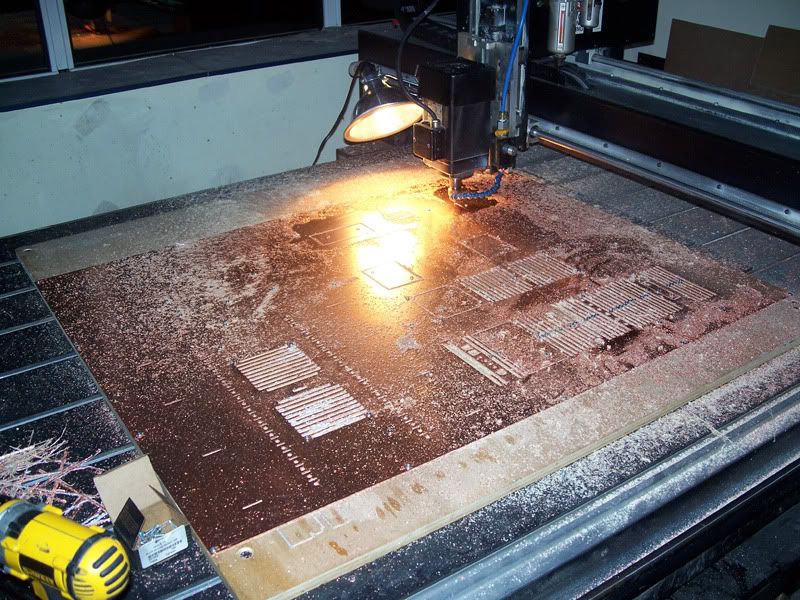
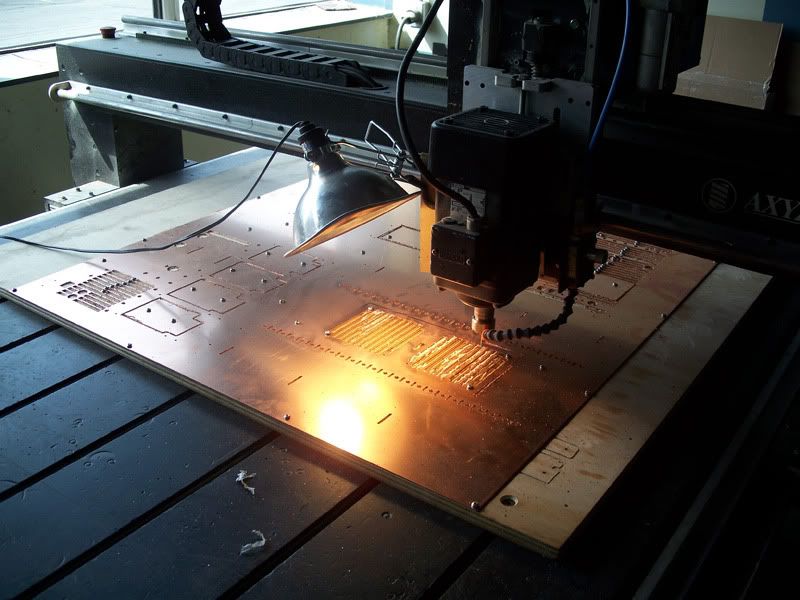
Here are the fins in question:
*click for big*

Here's a really quick Teaser:
Thanks for reading - tune in soon.
I spent the past 5-hrs using a mini 22mm pipe cutter to fabricate 144x 17mm long spacers.
My hands are now crippled and blistered.
I used some old copper pipe I had laying around - the scratches and corrosion made the job about 10x harder than it needed to be.
The spacers were cut from 10mm OD copper pipe and will be used 72per side to keep the copper fins evenly distributed.
Here are the fins in question:
*click for big*

Here's a really quick Teaser:
Thanks for reading - tune in soon.
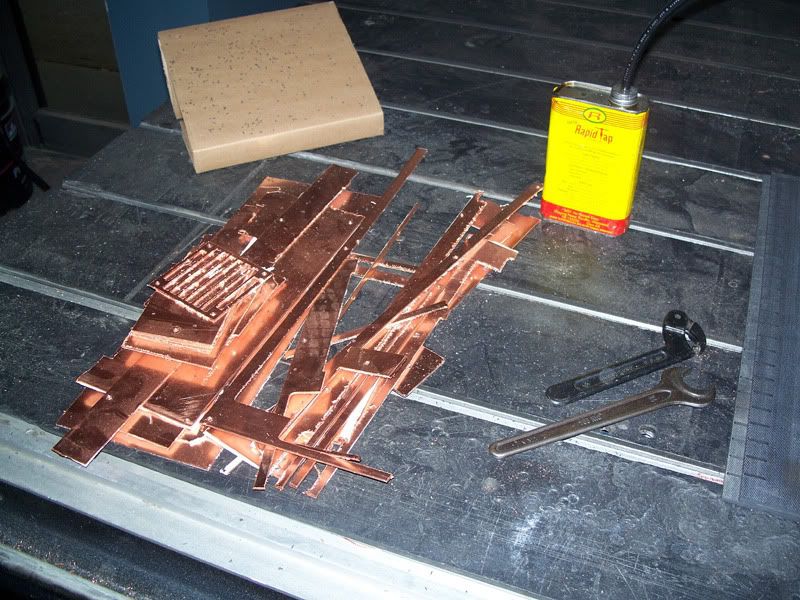
Here are some detail shots showing the pain in the ass that was.
Here's the making-of the spacers:
First up some dimensions:
Here are the tools involved:
The stages of construction - because I used a displacement style cutter I'm left with a large burr on the edge. I used a countersink bit to ream out the inner edge.
Note the funky looking tool on the right.
I made this little device using some plastic washers, some old hardware, a micro nut driver, and a broken dremel bit. (The nut driver was replaced with a drill for most of the sanding). When you tighten the screw the rubber expands ans holds the spacer nice and firmly to make sanding easier:
Repeat process 144 times... and as my joints stiffened and as the blisters grew in number I soon learned to loathe these items:
formula409
Limp Gawd
- Joined
- Apr 7, 2005
- Messages
- 311
Man...144 of theose tiny things and getting them the right size and cleaned up....Thats [H]ard core....I think i would have found a different solution after about 20 of those deals. Great job though.
Thanks a lot. =)
==== Morning ====
No breaks...I can honestly barely move my left wrist and my joints on my right hand are all but seized but there's work to be done.
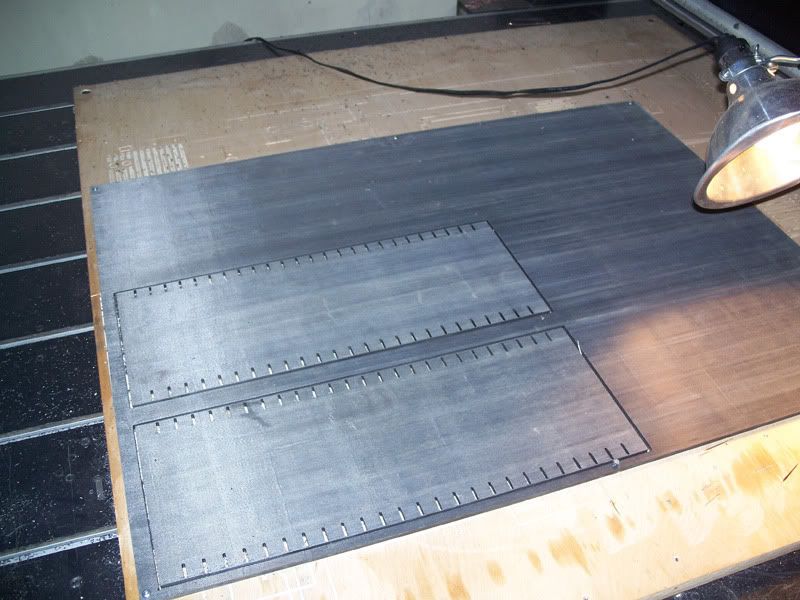
There are 25fins along each side of the case, 50 total.
Each fin has 3 holes for support rods.
Each hole had to be drilled larger...
If not enough I had to step my hole size 3x to ensure they remained centered...
That which makes for a total of 450 holes.
Then -oh yes there's a 'then'- to clean the edges of each hole I had to go at them with a countersink bit (on both sides of the fin no less) which makes for another 300 'holes'.
To wrap it up - last night I made a whopping 750 'drills' and needed to cycle my 12v DeWalt battery 6xtimes.
For now I'm going to soak my hands. I've been working at it all night. More progress later I'm going to rest for a couple hours.
==== Afternoon ====
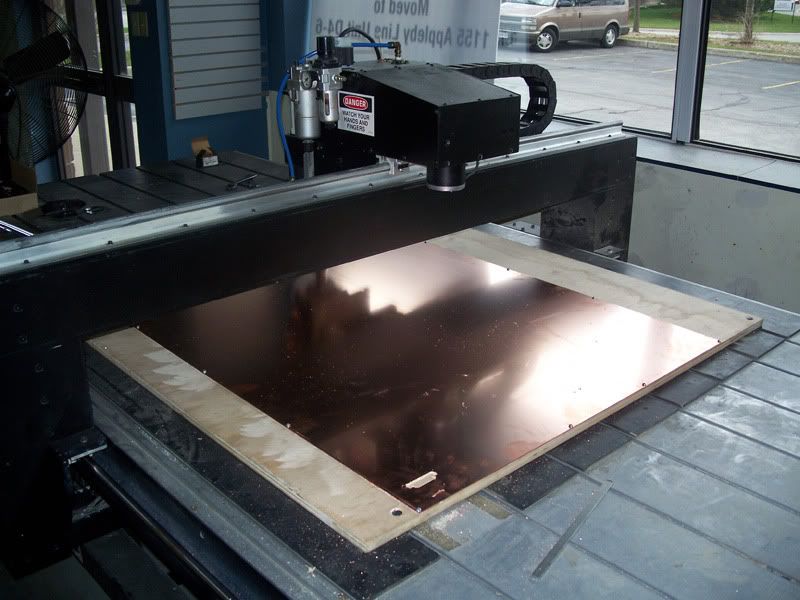
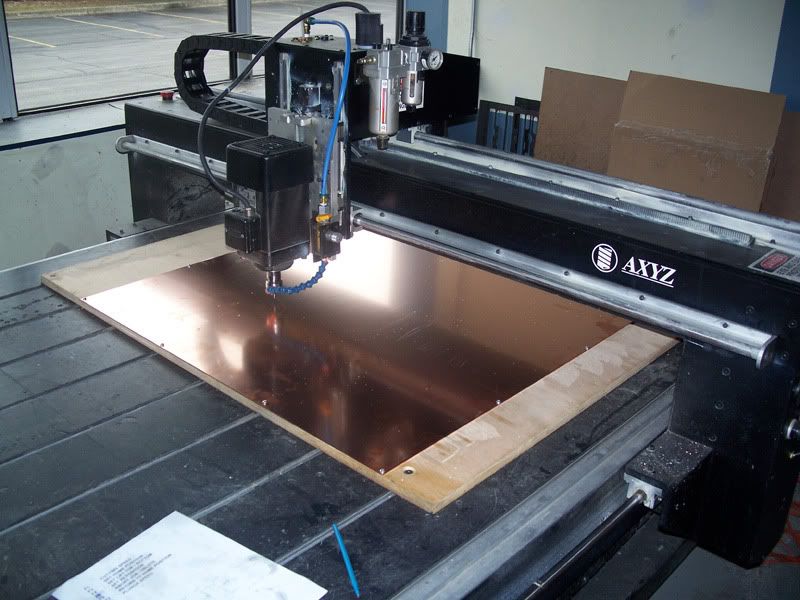
I ordered another sheet of copper this morning as well.
The weight of the pieces would be far too great if I went ahead and cut them from the 1/8" plate I have now.
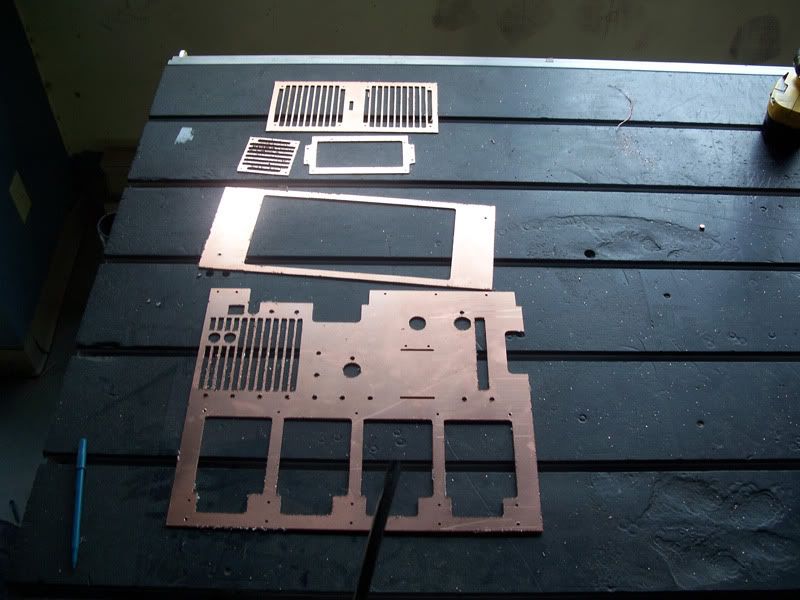
You'll note that my latest part revisions focused on copper layered over carbon fiber... well there's method to this madness.
I'm going to now use 1/16th inch copper plate (48"x48") to fabricate my parts - and it'll be reinforced from behind with carbon fiber where necessary. This works two ways structurally and most definitely aesthetically as well. This will also half the weight of those parts.
==== Evening ====
Spacers are all complete now - they have been given a coat of Varathane and are currently drying. Pics will follow tomorrow - or soon after.
I ordered a special gauge of threaded rod. 1/32" larger than the ID of my spacers.
I put the rods in my drill and filed them to the exact size of the spacer ID.
The size of the holes I drilled in the carbon fiber fins is 1/32" under the ID of the spacers.
This means that I actually have the "thread" the rod into the fins and the copper spacers fit between.
I did a test fit before I cleaned and painted the spacers - the fit is so perfect that it becomes quite a pain in the ass to assemble. 0 tolerance. =)
I estimate 4-5solid days on this fin assembly (from cutouts, to cleanup) but I'm very pleased with the results.
Thanks for reading... much more to come. Copper arrives Wednesday.
==== Morning ====
No breaks...I can honestly barely move my left wrist and my joints on my right hand are all but seized but there's work to be done.
There are 25fins along each side of the case, 50 total.
Each fin has 3 holes for support rods.
Each hole had to be drilled larger...
If not enough I had to step my hole size 3x to ensure they remained centered...
That which makes for a total of 450 holes.
Then -oh yes there's a 'then'- to clean the edges of each hole I had to go at them with a countersink bit (on both sides of the fin no less) which makes for another 300 'holes'.
To wrap it up - last night I made a whopping 750 'drills' and needed to cycle my 12v DeWalt battery 6xtimes.
For now I'm going to soak my hands. I've been working at it all night. More progress later I'm going to rest for a couple hours.
==== Afternoon ====
I ordered another sheet of copper this morning as well.
The weight of the pieces would be far too great if I went ahead and cut them from the 1/8" plate I have now.
You'll note that my latest part revisions focused on copper layered over carbon fiber... well there's method to this madness.
I'm going to now use 1/16th inch copper plate (48"x48") to fabricate my parts - and it'll be reinforced from behind with carbon fiber where necessary. This works two ways structurally and most definitely aesthetically as well. This will also half the weight of those parts.
==== Evening ====
Spacers are all complete now - they have been given a coat of Varathane and are currently drying. Pics will follow tomorrow - or soon after.
I ordered a special gauge of threaded rod. 1/32" larger than the ID of my spacers.
I put the rods in my drill and filed them to the exact size of the spacer ID.
The size of the holes I drilled in the carbon fiber fins is 1/32" under the ID of the spacers.
This means that I actually have the "thread" the rod into the fins and the copper spacers fit between.
I did a test fit before I cleaned and painted the spacers - the fit is so perfect that it becomes quite a pain in the ass to assemble. 0 tolerance. =)
I estimate 4-5solid days on this fin assembly (from cutouts, to cleanup) but I'm very pleased with the results.
Thanks for reading... much more to come. Copper arrives Wednesday.
Damn it man, post more pics and updates, ive been following this for months, and im drunk right now, because (4/20) i turned 21 and i pissed because i see youre at teh top of the list and yet theres really nothing new. im a crack attic for your mod. post more pics.
Well you see I'm moving to Vancouver to go to School.
I leave on the 27th.
School Starts on the 3rd.
I don't even have an apartment for my first month (May) - I'll be living in a hotel.
What this means - I need to get all my major fabrication done before I leave/ship my stuff.
I'm not going t have access to my shop for over a year, and for the next month I wont even have a place to do simple fabrication.
...therein lies the reasoning being my haste.
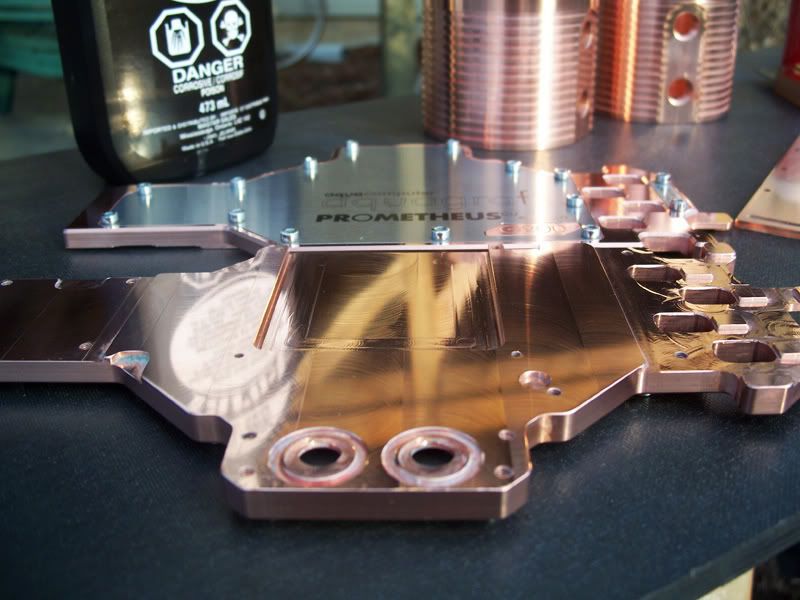
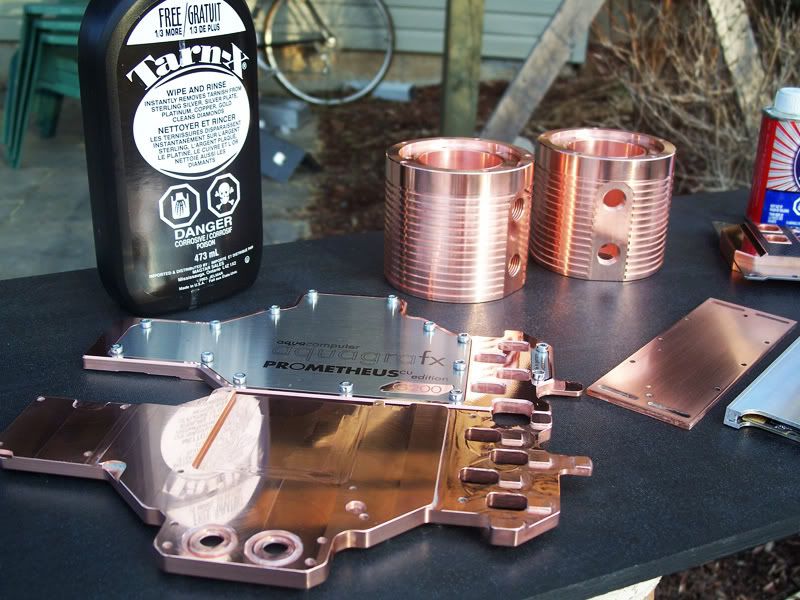
Today I did some polishing.
First up... I NEED to share today's discovery:
I went to Canadian Tire today looking for some more Tremclad anti-oxidation clear cloat.
While looking I found a product called Tarn-X... and this stuff is unreal!
It's only 8.99 for LOTS, it has the consistency of rubbing alcohol and it smells like death.
{edit}"That lovely stink is thiourea. This is probably what your piss would smell like if you were a sulfur-based organism and not a carbon-based one." -Rubidium{/edit}
Here's my little demo.
BEFORE:
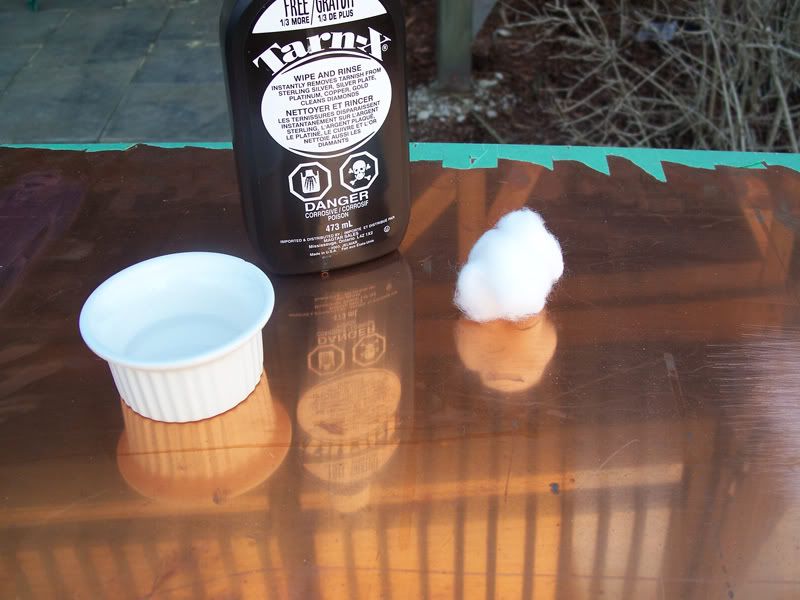
AFTER: (elapsed time... 1second)
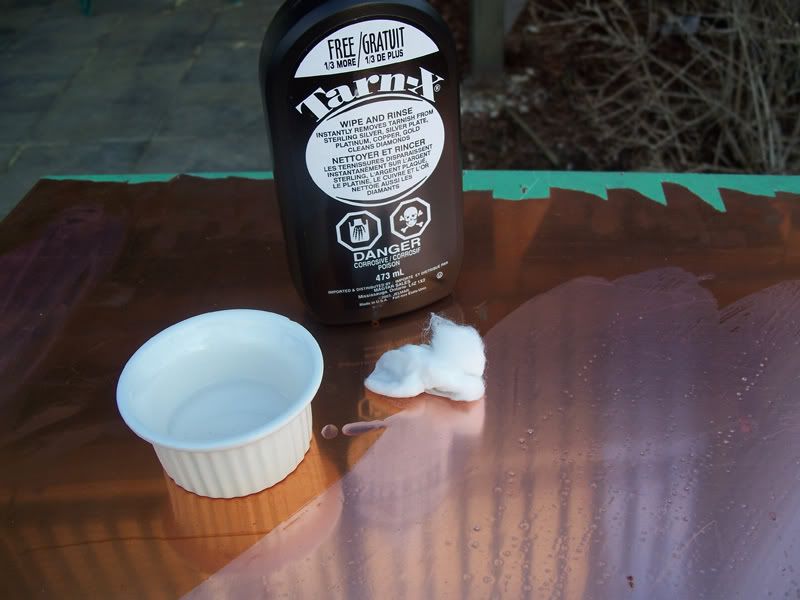
Unreal, eh? I know you wont believe it until you see it, so I took a video with my berry:
VIMEO.COM VIDEO LINK
===
note: I'm not finished polishing yet, but I wanted to get the pics in before the sun went down.
Here are some incomplete results:
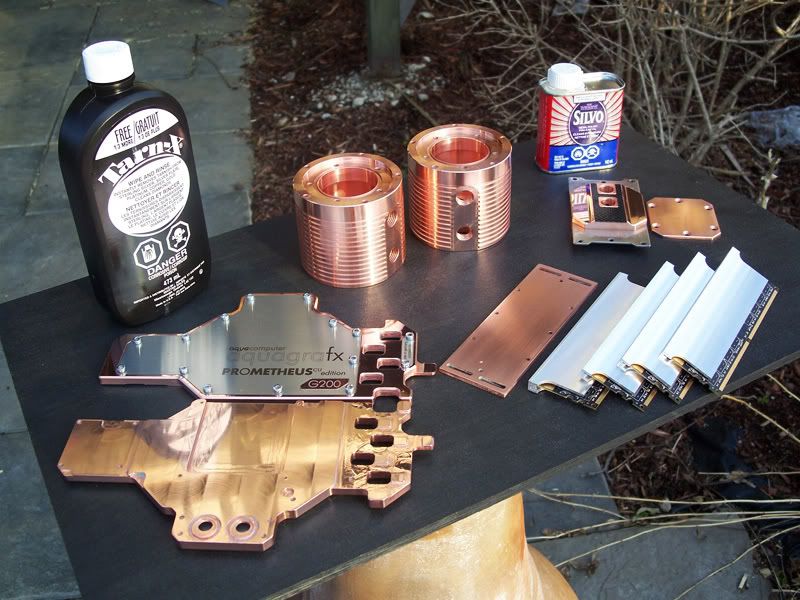
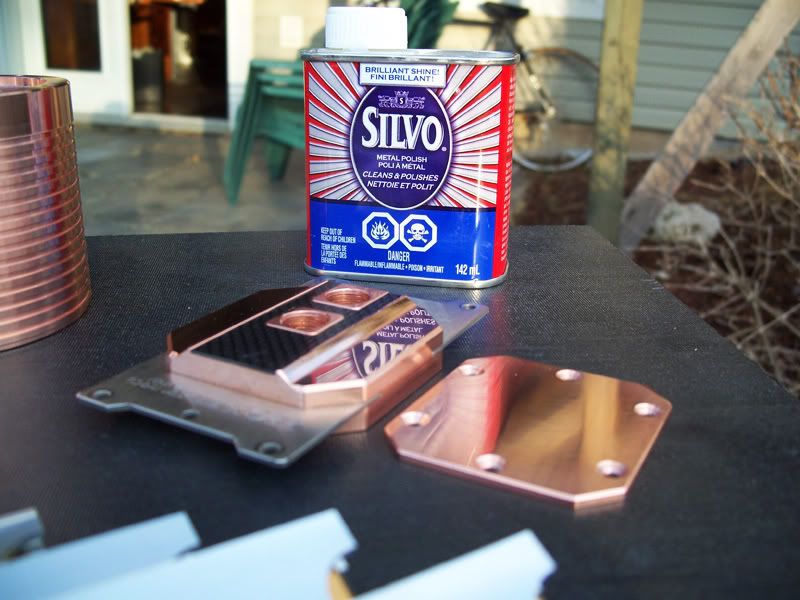


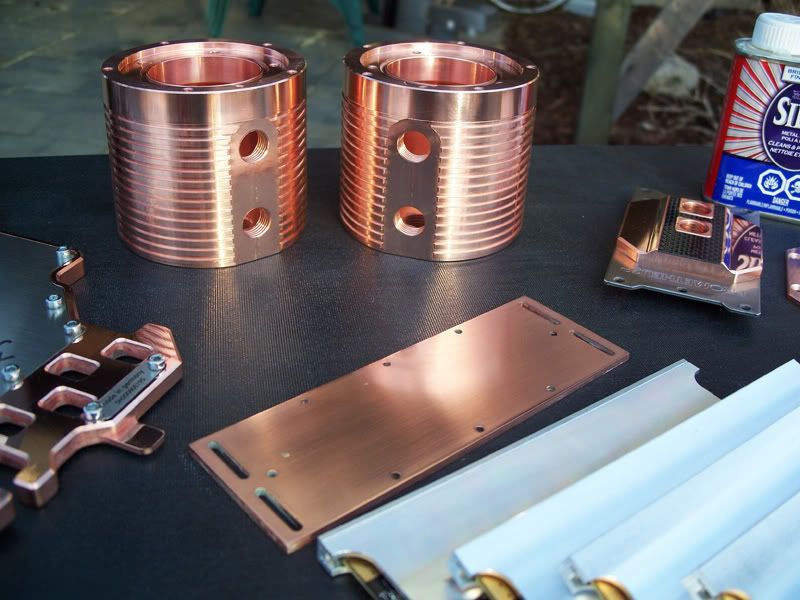
and before I forget, here are the fin spacers drying:

Thanks for reading, tune in soon for more.
First up... I NEED to share today's discovery:
I went to Canadian Tire today looking for some more Tremclad anti-oxidation clear cloat.
While looking I found a product called Tarn-X... and this stuff is unreal!
It's only 8.99 for LOTS, it has the consistency of rubbing alcohol and it smells like death.
{edit}"That lovely stink is thiourea. This is probably what your piss would smell like if you were a sulfur-based organism and not a carbon-based one." -Rubidium{/edit}
Here's my little demo.
BEFORE:
AFTER: (elapsed time... 1second)
Unreal, eh? I know you wont believe it until you see it, so I took a video with my berry:
VIMEO.COM VIDEO LINK
===
note: I'm not finished polishing yet, but I wanted to get the pics in before the sun went down.
Here are some incomplete results:
and before I forget, here are the fin spacers drying:
Thanks for reading, tune in soon for more.
Last edited:

Jeeeze... this stuff is unreal.
150years of rust and grime... gone in 5 mins.
[ig]http://img.photobucket.com/albums/v60/Langer/misc/Tarn-X-test.jpg[/img]
you could make infomercials
in case anyone was wondering i just found a picture of Langer:


(sry about the pisspoor chop. got a midterm in the morning, and only mspaint to work with)
edit: sry langer, there you go. so when do we get to see more pictures with these shiny new parts in the computer?!


(sry about the pisspoor chop. got a midterm in the morning, and only mspaint to work with
)edit: sry langer, there you go. so when do we get to see more pictures with these shiny new parts in the computer?!
Last edited:
Wahoomcdaniel
Weaksauce
- Joined
- May 2, 2005
- Messages
- 117
Don't get too carried away with you newly found tarnish removing discovery, especially with restoring antiques. Tarn-X shouldn't have a negative impact on your flat stock for the PC, but it is known for being corrosive. Clean residue off before you apply polyurethane.
It looks great, though.
It looks great, though.
brasherman
Gawd
- Joined
- Sep 10, 2004
- Messages
- 715
Dunno about that extinguisher though, I like it looking old like it really is! Good job on the mod; been reading the thread slowly in my free time and I am glad to see you making headway in the final stretch.
EDIT: NVM, Tarn-X is not recommended for aluminum. Perhaps I better ask that question in the general case forum. Please disregard!
EDIT: NVM, Tarn-X is not recommended for aluminum. Perhaps I better ask that question in the general case forum. Please disregard!
....MUCH PROGRESS TO SHARE.... after I've rested.
I've been awake and up since Thursday!
At 12:30 Thursday I went to the shop to finish the fabrication on the parts needed to assemble Prometheus.
It's 9:22PM on Saturday now... I got home about 8mins ago.
For the last 3 days I've had more problems and setbacks than I thought to be conceivably possible.
Countless frustrating hours of MASSIVE problems later I'm done (but an LCD monitor took one for the team during my fits of rage, Hahaha)
I haven't slept more than 4hrs (becuase I passed out when I sat down... lol), and all I've eaten is a dry unsatisfying plain bagel.
I'M EXHAUSTED AND ABSOLUTELY STARVING (I'm about 10mins away from having a distended stomach methinks) ALL THE COPPER AND CARBON PARTS ARE CUT.
Here's the low-down now:
I am 100% complete all the Carbon components.
All that needs be done now is to debur and file the copper, then have it bent to shape.
The next couple days I'll take care of that... then I'll pack everything up and have it shipped to BC.
If you're wondering why I'd do that; it's because I'll be moving to Vancouver this week (I'm located in Toronto currently).
That means fabrication will be done this week - FINAL assembly happens next week.
THAT MEANS.... PROMETHEUS WILL BE RUNNING IN A FEW SHORT WEEKS.
I was supposed to be complete before moving to BC... but a couple people and many 'things' prevented that.
AFTER TWEAKING AND SOFTWARE ADJUSTMENTS - 100% COMPLETION IS SCHEDULED FOR MAY 31ST. (this time the date is absolute).
C'mon... would I do that to you?
Here's a general hodge-podge of the work in progress... too tired to organize or caption.

I knew I should have paid extra for instructions... It's been so long now; how the hell does all this fit together again?
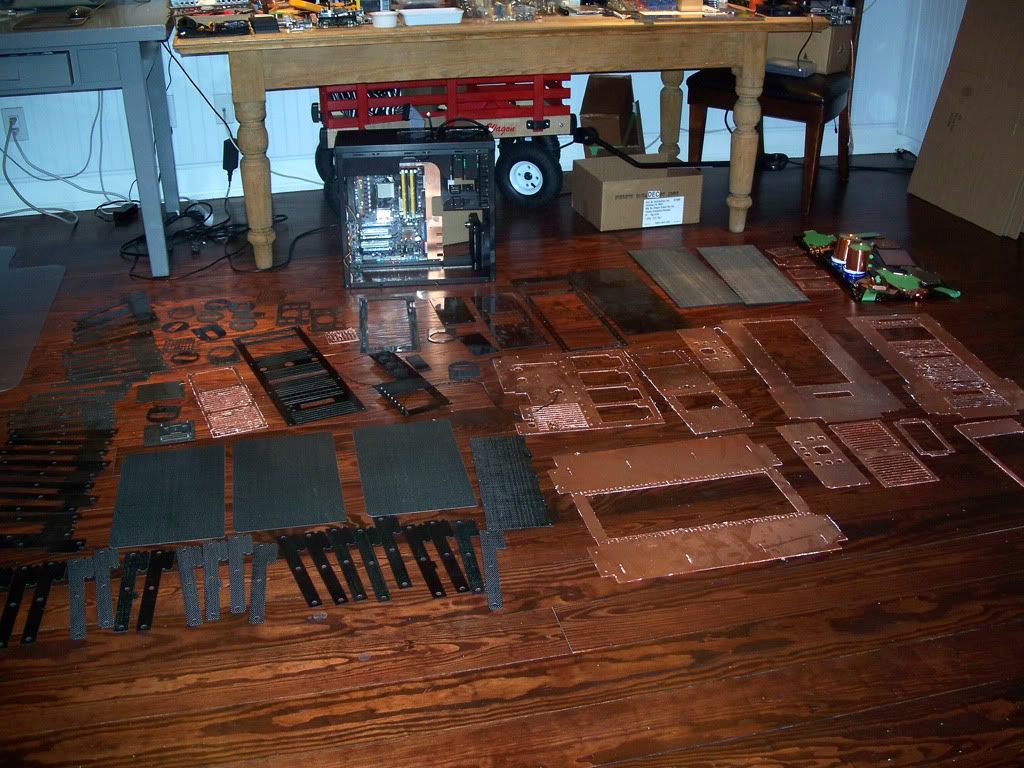
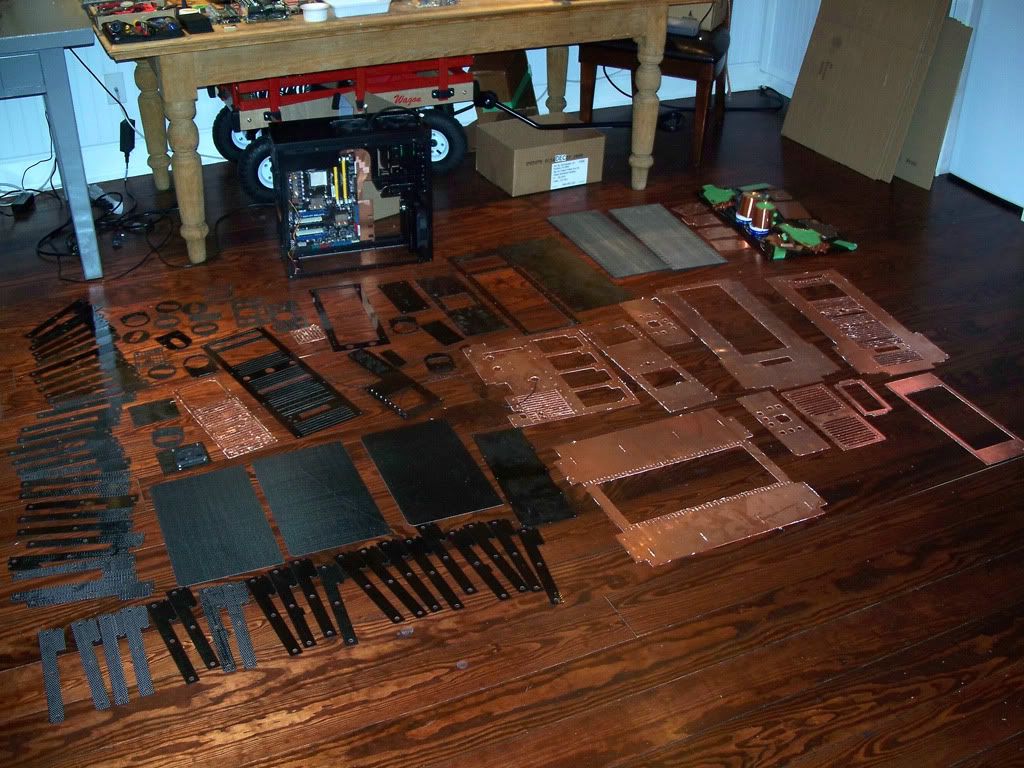
Tune in soon, more on the way.
Here's a general hodge-podge of the work in progress... too tired to organize or caption.
I knew I should have paid extra for instructions... It's been so long now; how the hell does all this fit together again?
Tune in soon, more on the way.
ric0chet06
Limp Gawd
- Joined
- Jan 19, 2007
- Messages
- 474
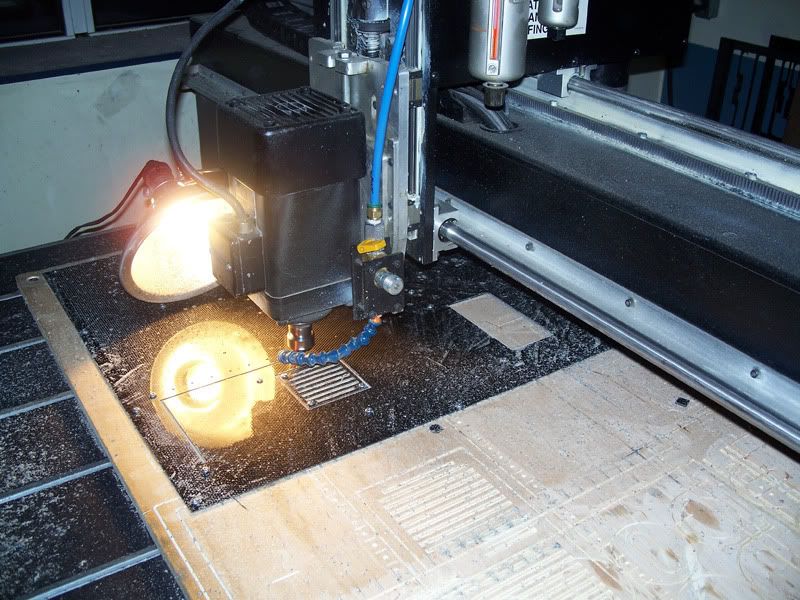
how are you acquainted to the laser cutter?