NCASE M1: a crowdfunded Mini-ITX case (updates in first post)

According to the latest email, the new V3 should be shipping today.

Are we going to be sent a tracking number?

What shipping company are you using?
 
According to the latest email, the new V3 should be shipping today.

Are we going to be sent a tracking number?

What shipping company are you using?

Shipment started. We will post tracking numbers on PayPal as we get the tracking information.
 
No tracking for my order yet. Now that we know shipments have begun, I'll keep an eye on my PayPal account.
 
First, we will update PayPal with tracking number - it's a PayPal policy thing.

Second, we will email tracking numbers within a 5 days after PayPal tracking numbers are updated.
 
Probably a NOOB question but I saw an article elsewhere and was just wondering if this is really true.

'Take note that if you plan to install a optical drive in this case, the drive cage must remain'.

Can someone let me know if this is correct?
If so, I need to reassess my NCASE build.
 
My experience with my V1 case would have me struggling how that is true....

AFAIK, the drive cage (the one on the side panel) is not related to nor affects the CD drive location. Do you happen to have a link to this article?


Edit**
I did a quote search and found the review. Its for a totally different case!

http://www.silentpcreview.com/article1424-page4.html
rosewill-w1s-1.jpg


A Very different case with a Very different design goal. Really really makes you appreciate the attention to detail, comprehensive and intelligent design behind the M1. I feel so proud to be an owner of a case that aims to perfect a design goal that suits my needs for an elegant but effective design.
 
Last edited:
EDIT: nevermind, okwchin already found the article and answered it.

It is however remarkable how one could mistake a 12L SFF case for a 31L cheap knock-off. But I've seen worse with consumer electronics I guess.
 
But he use two drives, right?

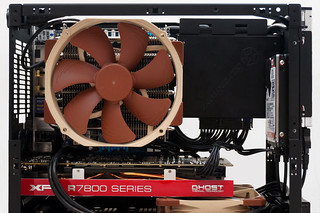
I don't know which build your second photo is from. In the photo I can see only one fan at the bottom of the case, so perhaps the owner has a 3.5 inch drive at the bottom (below the graphics card), between the rear panel and the bottom 120 mm fan.

You can piggy-back two 2.5 inch drives behind the ODD using the included mounting brackets. Theses are narrow plates, one for each side that attach one drive's side holes to the other drive's side holes. However, the combined height of two piggy-backed 2.5 inch drives might collide with the H100i radiator and fans, but I'm not sure.

It's from this build http://oliver.st/blog/ncase-m1/, i considering using the 3.5" HDD on the bottom but i want use the two fans for better airflow intake to my 780DCII-OC, but maybe i put on the drive under the PSU.
 
Yeah, it's sold out apparently. You guys all have V1/V2 cases already, right? Because V3 comes with the bracket.


oh no .... I wanted one for my M1 V1 :(

I just wanted to wait until the SX500-LG from Silversonte is finally available :(
 
It's from this build http://oliver.st/blog/ncase-m1/, i considering using the 3.5" HDD on the bottom but i want use the two fans for better airflow intake to my 780DCII-OC, but maybe i put on the drive under the PSU.


Thanks for the link. That's a nice build. I love his custom (shortened) PS cables. I was able to enlarge the photo that you referenced and can now see that there is no 3.5 inch drive beneath the graphics card. Also, you were right, he has two 2.5 inch drives piggybacked together using the included narrow brackets (link to original photo on Flicker). I wonder if you can have two drives like that and still fit the H100i and its fans?
 
Yeah, it's sold out apparently. You guys all have V1/V2 cases already, right? Because V3 comes with the bracket.

Ouch, I was waiting for the options of TW Air/TW Surface shipping then it was sold out!
Hope we'll get some stock soon with additional shipping options! :D
 
Are you saying it will be problematic? From the thread, the load temp was 50C for the CPU/GPU, which is very good. If I go with the H220, I would have to buy a GPU block to expand that loop.

Nah, all I'm saying is... good luck ;)
 
It seems getting hold of reference 980's is awkward at the momnent and even if I managed to get one I would be paying more than I would for a blower design. Is there much difference in noise/temperature between a reference design and a Asus Strix for example?
 
It seems getting hold of reference 980's is awkward at the momnent and even if I managed to get one I would be paying more than I would for a blower design. Is there much difference in noise/temperature between a reference design and a Asus Strix for example?

Well in this case you tend to be better off with a 'blower' reference cooler. Usually reference designs are louder, but the custom coolers may actaully be the louder ones as they recycle hot air.
 
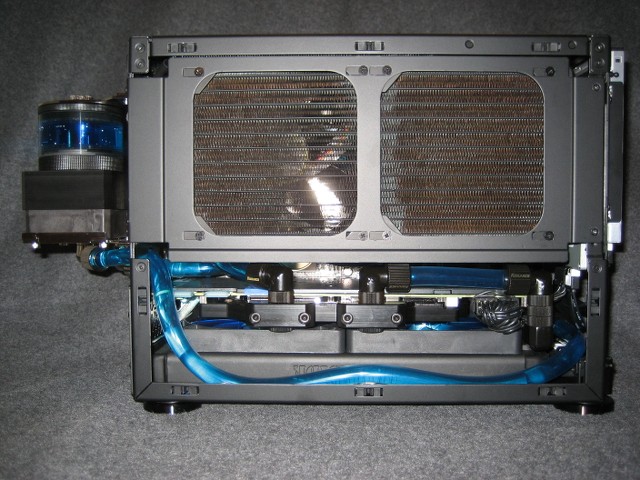
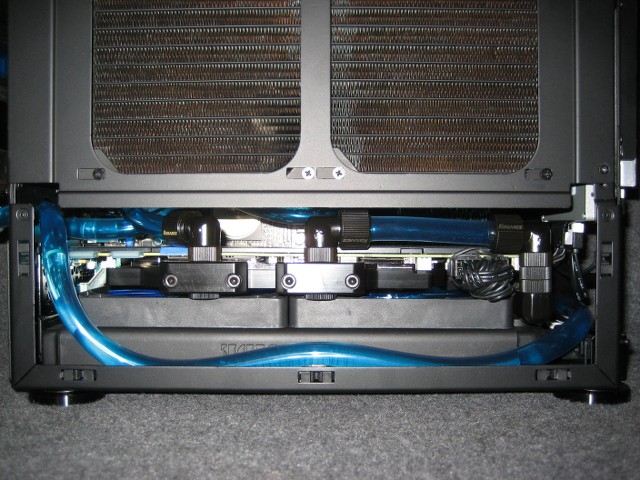
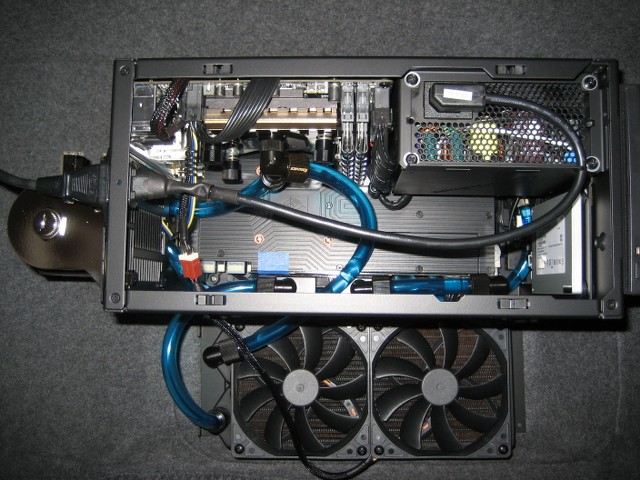
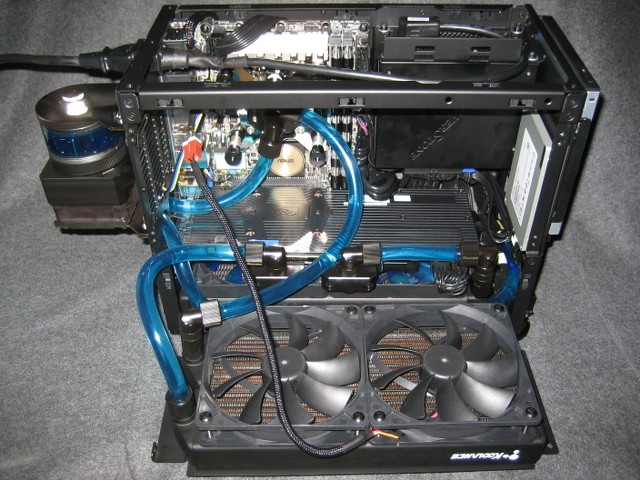
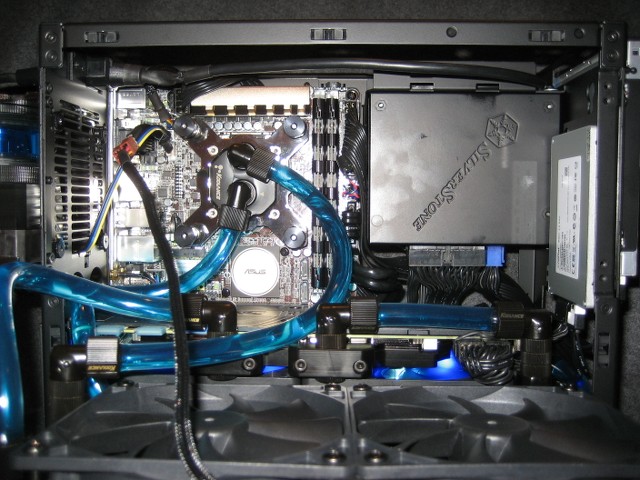
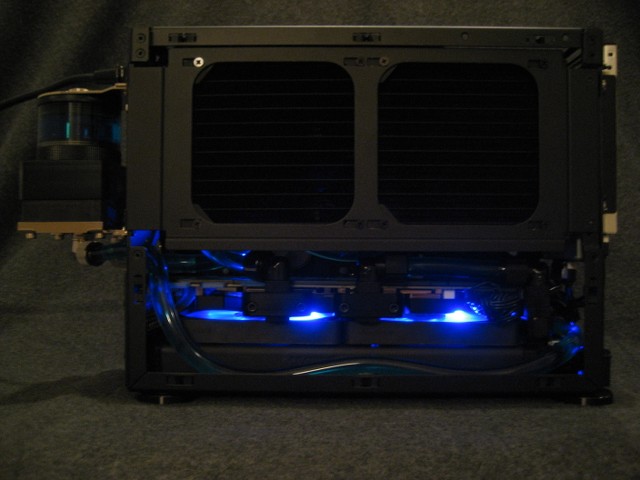
This dual radiator build, where one of the radiators is located in the bottom of the case, is a continuing evolution of earlier iterations: 11884.

You may notice that this build is a derivation of one of Necere's earlier conceptions: 1635.


Side View

Rtwtxo.jpg


Bottom Radiator

928QaT.jpg


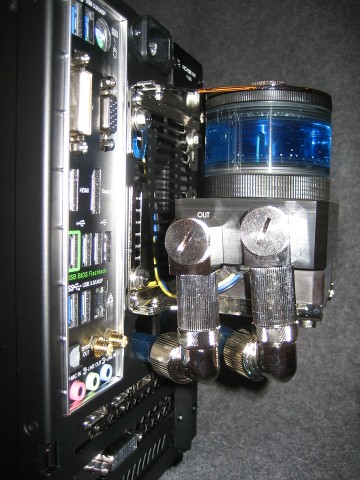
Pump and Reservoir

K8ZeRM.jpg


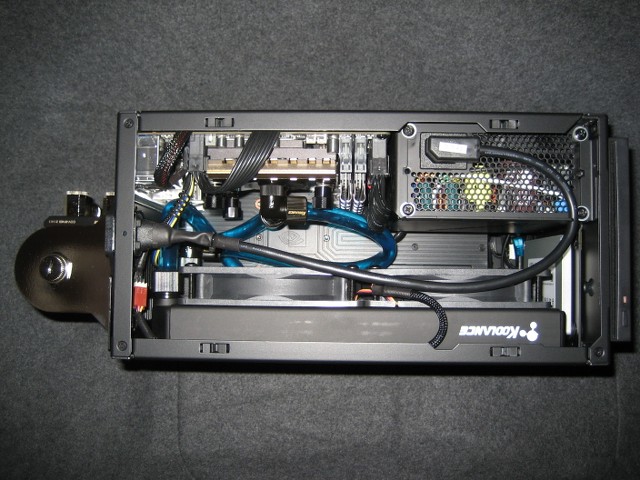
Top View

8iiggT.jpg


Top View -- Case Open

cekFg0.jpg


Case Open View

BJ0K7F.jpg


Interior View

VZQjWU.jpg


Slim PWM fans tend to be rare. Some glow.

yGWzh1.jpg
 
Component information for post 14851:


Case: M1 NCase, Version 2 (Thank you again Necere and Wahaha360) https://www.ncases.com/

Power Supply: Silverstone SX600-G http://www.silverstonetek.com/product.php?pid=524&area=en (I removed the stamped fan grill. Yes, the fan chirps like a bird or cricket.)

Motherboard: ASUS Z97I-Plus http://www.asus.com/us/Motherboards/Z97IPLUS/

CPU: Intel Core i7-4790K http://ark.intel.com/products/80807/Intel-Core-i7-4790K-Processor-8M-Cache-up-to-4_40-GHz

RAM: Mushkin Enhanced Blackline 16GB (2 x 8GB) SDRAM DDR3 2133 http://poweredbymushkin.com/index.ph...ine/806-997125

GPU: Asus GeForce GTX 980 GTX980-4GD5 http://www.asus.com/us/Graphics_Cards/GTX9804GD5/

SSD: Crucial M500 240GB http://www.crucial.com/usa/en/storage-ssd-m500

SSD: Crucial M550 256 M.2 http://www.crucial.com/usa/en/storage-ssd-m550

Reservoir: Koolance http://koolance.com/index.php?route=product/category&path=57_112 ; Reservoir Body, 60x30mm, 59ml, BDY-TK030; Adjustable Reservoir Bracket, BKT-TKF3; Reservoir Top with Fill Port (60mm OD), COV TKTOP; Pump Fitting & Reservoir Base for PMP-400, Rev.2.1, COV-RP400

Pump: Koolance PMP-400 Pump, ID 10mm (3/8in), PMP-400 http://koolance.com/pmp-400-pump-id-10mm-3-8in

CPU Water Block: Koolance CPU-380I Water Block (Intel Processor), CPU-380I http://koolance.com/cpu-380i-processor-water-block

GPU Water Block: Koolance VID-NX980 Water Block (NVIDIA GeForce GTX 980 Video Card), VID-NX980 http://koolance.com/video-card-vga-nvidia-geforce-gtx-980-water-block-vid-nx980

GPU Backplate: Supplied with ASUS GeForce GTX 980 GTX980-4GD5

240 Radiator (upper side panel): Koolance 2x120mm 30-FPI 30mm thick, HX-CU720V http://koolance.com/radiator-2-fan-120mm-30-fpi-copper

240 Radiator (bottom): DarkSide 2x120 17-FPI 27mm thick, LP240 https://www.dazmode.com/store/product/dual-lp240-extra-slim-27mm-radiator/

Fittings: Koolance http://koolance.com/index.php?route=product/category&path=62_63_99_161
-Compression for 10mm x 13mm (3/8in x 1/2in) NZL-V10-BK
-Swivel Angled Compression for 10mm x 13mm (3/8in x 1/2in) NZL-L10-BK
-Swiveling Elbow NZL-LXG1-BK
-Swiveling Elbow (Low Profile) NZL-LXG2-BK
-Coupling Adapter, 20mm, ADT-XMF-L-BK
-Coupling Adapter, ADT-XMF-BK

Tubing: PrimoChill PrimoFlex Advanced LRT 3/8in. x 1/2in. Tubing (clear) http://tylernm.wpengine.com/product/...-advanced-lrt/

Coolant: Koolance LIQ-702 Liquid Coolant Bottle, High-Performance, 700mL (UV Blue), LIQ-702BU-B http://koolance.com/liq-702-liquid-coolant-bottle-high-performance-700ml-blue

Fans (upper side panel): Scythe Slip Stream 120 SY1225SL12M http://www.scythe-eu.com/en/products/fans/slip-stream-120.html

Fans (bottom): Gelid Slim 12 PL Blue, FN-FW12SlimBPL-16 (15.8mm) http://www.gelidsolutions.com/products/index.php?lid=1&cid=2&id=84&tab=2
 
I have a question related to placing radiator and the fans on the sidebracket.

What do you guys recommend?
  1. place the fans that they blow air into the case?
  2. place the fans that they blow air outside the case?

I'm planning to use the Cooler Master Nepton 240m.
 
Nice work GanderGray! Consider please also posting in MrJerico's topic http://hardforum.com/showthread.php?t=1838367&page=4 so that we have the 4x120 rad builds together and easier to find :)


What do you guys recommend?
  1. place the fans that they blow air into the case?
  2. place the fans that they blow air outside the case?

Always, in any build, test all configurations of fans yourself. Because, while forum posters may have experience with their own builds, they may offer advice that does not take into account all the idiosyncrasies of your build.

Having said that... Radiators work best with fresh air, so best CPU temps will be with air blown into the case (intake). However, that's provided your GPU is a "blower" type with closed shroud. But if your GPU is open-shroud type with axial fans, then radiator with intake might compartmentalise the airflow and make your GPU run hotter. In that case, radiator with fans set to exhaust could improve overall airflow in the case with improved GPU temps at expense of CPU temps.
 
Last edited:
Always, in any build, test all configurations of fans yourself. Because, while forum posters may have experience with their own builds, they may offer advice that does not take into account all the idiosyncrasies of your build.

Having said that... Radiators work best with fresh air, so best CPU temps will be with air blown into the case (intake). However, that's provided your GPU is a "blower" type with closed shroud. But if your GPU is open-shroud type with axial fans, then radiator with intake might compartmentalise the airflow and make your GPU run hotter. In that case, radiator with fans set to exhaust could improve overall airflow in the case with improved GPU temps at expense of CPU temps.
Dank je wel :cool:

That was exactly the reason why I had to ask this question. When looking closely into installation instructions of many AIO coolers, they always seem to recommend to place the fans to push air upwards outside side the case. (2x120mm radiators always seem to be placed on the upside and above the motherboard). However that principle is contradicting with the pictures in the NCASE user gallery found on the ncases.com website.
 
When looking closely into installation instructions of many AIO coolers, they always seem to recommend to place the fans to push air upwards outside side the case. (2x120mm radiators always seem to be placed on the upside and above the motherboard). However that principle is contradicting with the pictures in the NCASE user gallery found on the ncases.com website.

Generally cases were designed for open air, and hot air rises... so it would make sense that a lot of cases exhaust through the top. With AIO solutions, they don't make the tubing too long, and that means you have very limited options in mounting the radiator - so the top is where a lot of them are mounted.

The problem is, as Wisk says, radiators do work best with fresh air; that is, air from outside of the case. And using a top-mounted intake is a tricky proposition (you have to rethink the airflow for the case).

I think a few posts either here or in the build thread have discussed using the radiators as an exhaust - that is, to push the air from inside the case outside. Again, Wisk's advice is sound - you will want to experiment a little before you finish the build to see what works best for your situation. Remember to change only one thing each time you test (i.e. isolate your changes to one variable) or else you will create a lot more work in trying to figure out what effects are linked to which changes.
 
Thanks for the link. That's a nice build. I love his custom (shortened) PS cables. I was able to enlarge the photo that you referenced and can now see that there is no 3.5 inch drive beneath the graphics card. Also, you were right, he has two 2.5 inch drives piggybacked together using the included narrow brackets (link to original photo on Flicker). I wonder if you can have two drives like that and still fit the H100i and its fans?

Me too, maybe i'll cut the cables of my SX-600G. Not exactly, only one 3.5" drive where he has the two drives, i ordered the no odd version, so i'll use my ssd where do goes the odd.


Power Supply: Silverstone SX600-G http://www.silverstonetek.com/product.php?pid=524&area=en (I removed the stamped fan grill. Yes, the fan chirps like a bird or cricket.)

Can you explain that(the process, results, things like that)? please.
 
Power Supply: Silverstone SX600-G http://www.silverstonetek.com/product.php?pid=524&area=en (I removed the stamped fan grill. Yes, the fan chirps like a bird or cricket.)

Can you explain that(the process, results, things like that)? please.

It's 0.6mm steel, you can use tin snips or even garden secateurs to cut out the grill. Result is less noise from air turbulence and higher airflow.

It does void your warranty of course.

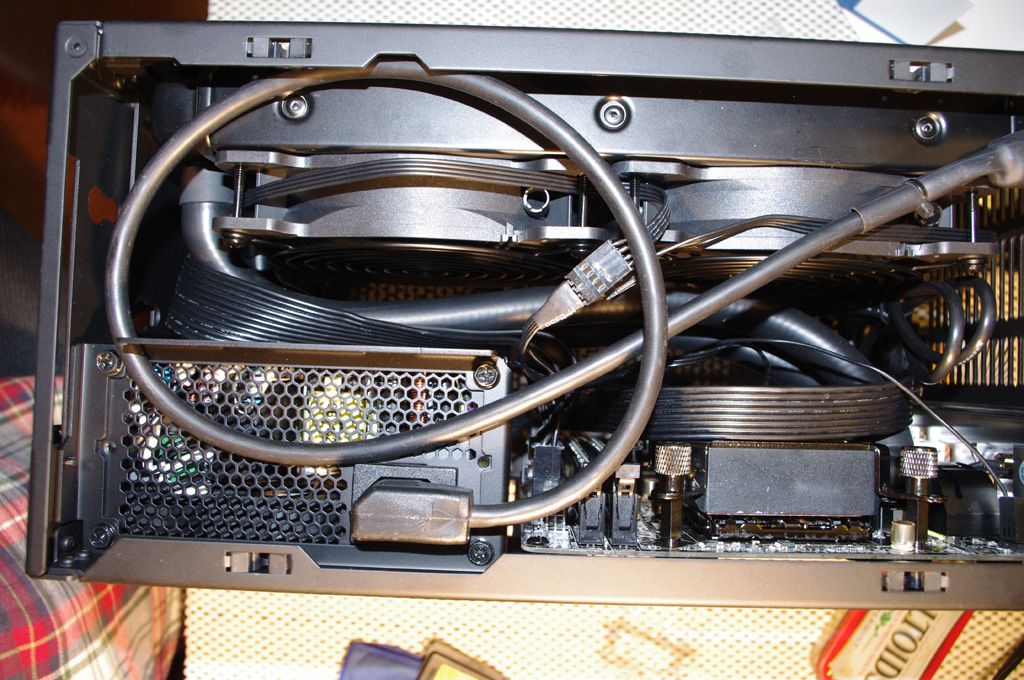
Edit: old picture of ST45SF-G with grill removed
 
Last edited:
It's 0.6mm steel, you can use tin snips or even garden secateurs to cut out the grill. Result is less noise from air turbulence and higher airflow.

It does void your warranty of course.

Edit: old picture of ST45SF-G with grill removed

So, the "bird" sound it's product of the fan grill on the psu?
 
Back
Top