• Some users have recently had their accounts hijacked. It seems that the now defunct EVGA forums might have compromised your password there and seems many are using the same PW here. We would suggest you UPDATE YOUR PASSWORD and TURN ON 2FA for your account here to further secure it. None of the compromised accounts had 2FA turned on.
    Once you have enabled 2FA, your account will be updated soon to show a badge, letting other members know that you use 2FA to protect your account. This should be beneficial for everyone that uses FSFT.

Custom Dell Case (Completed!)

NEW PSU

Reasoning

The system would definitely run without a new PSU so why get a new one?

--- 1. Stability ~ with the addition of the video card and extra stick of faster RAM and maybe some other extras, I want to be sure that the systems weak point wont be the PSU, since many annoying things happen when it is.
--- 2. Overclockability ~ the stock Dell 200W PSU just barely cuts enough power for it's own stock hardware, let alone upgraded hardware... and since I have a new mobo, I would love to get that Celly higher and the radeon higher aswell. As everyone here knows, overclocking with a low powered PSU means crashing to desktop, random restarts, artifacting, and many other misc problems.
--- 3. Cooling/Noise ~ The stock Dell PSU is really not that noisy but definitely does not blow very much air. Since the PSU in my mod will be acting as the only exhaust fan, I need something that will move more air. PSUs with 120mm fans are perfect for this and are usually very quiet.
--- 4. Aesthetics ~ Even though the only way to see the PSU is by looking at the back (I'm not planning on having windows... well maybe <:-/ ) you have to admit that the stock Dell PSU looks horribly ugly.

Silverstone 360W Strider Series

Here is the stock PSU:

stockPSU.jpg


And here is the PSU I just picked up:

PSUbox.jpg


PSU.jpg


Here is a comparison of the old and the new...
PSUcompare.jpg

Notice how there is almost 4 times the amount of cables lol... this will call for some serious cable management in my small case

Here are the specs for the PSU... I realize this unit is complete overkill for my system but I wanted a new PSU and this was the best for my price range that met all my requirements. It really wasn't that much either... $40.
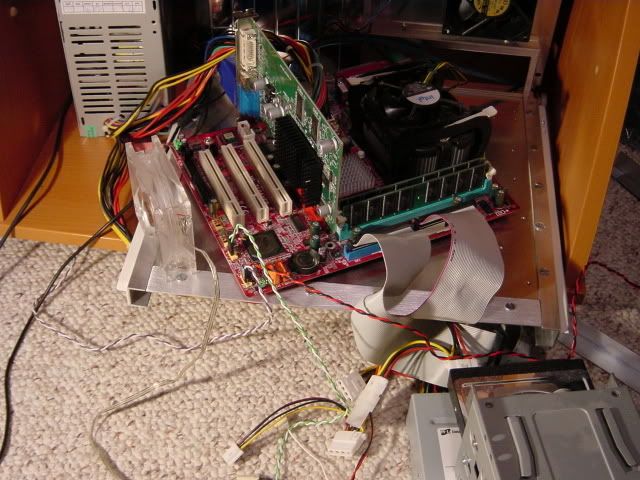
Mock Install

Here's a few pics with the PSU installed... I also repainted the back with 2 more coats of black paint and two coats of clear lacquer. It looks alot nicer than before!

PSUback3.jpg


PSUback2.jpg


I'm also really happy with the fact that the entire back is now black... The PSU grill really makes it look nice. Plus, now I have a 120mm intake and 120mm exhaust

What do you guys think? Nice eh? Definitely overkill but nice.

Geo
 
you'da had no breathing room with that 200watt dell psu, man. Good call with going for the silver stone!

My old setup was too much for my stock compaq 200W and i overloaded it with only a few lights, a handful of fans, on a 1.33ghz Thunderbird system with a 9000 AGP. And I never had enough power for a 9600.

Plus black on black looks great. :D
 
Oh yea the PSU fan blows onto the internals of the PSU and then out of the case... I'm not worried at all about the cooling of this system... plus the PC wont even use nearly enough of the PSU for it to get that hot.

This PSU has a variable speed fan with a motherboard fan header so you can monitor the speed. I hooked it up to my system just a second ago and at idle it runs right at 1000rpm and while doin some benchmark tests the highests the PSU fan got was around 1200rpm.

Not worried at all :)
 
Looking good,

A cellie ain't that hot so two 120mm should be plenty for this system, plus, if the comp ever has temp problems you can stick an 80mm right there in the grill in the back (intake, to get cool air to the proc) and turn the 120mm you have into an exhaust.

I'm eager to see what the top/front of this PC will look like :)
 
wow. that looks awsome. but i dont really think you can call it a dell anymore :p
 
filthysanchez said:
modders mesh on the front would be pretty nice and sleek.

I dont want to do modders mesh for 2 reasons:
1. It would make the case have too many holes :p
2. The case would be noisier than I'd like. Something solid would keep it quieter. Not only that but I'm not planning on having the inside look picture perfect; I never painted the inside of the mobo tray black (I wish I had tho :rolleyes: ) and no matter how good my cable management will be there's not much I can do with the abundance of cables I will have in that small space.

SC385 said:
wow. that looks awsome. but i dont really think you can call it a dell anymore :p
Yea I sort of realized that my title to my project wasn't that appropriate... I was just trying to do a run off of that guy from the commercials lol 'Dude, you're getting a Dell'. Infact I just realized just now that I used bad grammer saying "your" instead of "you're" in my title lmao :rolleyes: . Ah well

The only things from my original Dell will be:
-Mobo tray
-Celeron
-Hard drive
-random cables

OK well I'm working on a hell of an update... hopefully it will come soon. It will pretty much be the building of the case before I can install the motherboard into it. Obviously there's still tons to do, but this next update I'm planning on it being quite big...

I'm not quite sure on how I'm going to do the top. I have an idea but comments and suggestions would be great for influence. Stay tuned and expect some more stuff maybe tomorrow but most likely in 2 days

Geo
 
You know, I really like this mod alot. Constructing a case basically from cut down parts of another case, I give you props.

I love mods like this. I don't have the money for a ton of specialty modding stuff... so things like this, where you do with what you already have are more imspirational to me then a more expensive mod.
 
great work so far -
one thing i noticed is that the 120mm intake fan is going to be almost completely obstructed by an addition of a video card. maybe an agp riser / 90deg. riser?

that may do more harm than good tho since it'll cover up your other slots and potentially put the chipside down against your mobo...
 
at stormshadow -

If you read back a bit you'll notice that he said the 120 mm fan is there for a reason.

The 9550 has a passive heatsink, and, as such, needs excessive amounts of airflow when gaming/overclocking. thus, the fan being obstructed by the gpu's heatsink.

gfg :)
 
cudaman73 said:
If you read back a bit you'll notice that he said the 120 mm fan is there for a reason.

The 9550 has a passive heatsink, and, as such, needs excessive amounts of airflow when gaming/overclocking. thus, the fan being obstructed by the gpu's heatsink.

You are very correct ;). And in all honesty, I think the video card is really all that may need the cooling from that 120mm fan. The Celeron has its own heatsink/fan and can get fresh air from the open grill in the back... and any hot air around it will be pulled out from the PSU fan. When I was system testing the Celly would idle around 27C and get to around 38C load. This is in free air of course... I know it will be worse in the case but prolly not that much worse.

The small case and the limited cooling I have is the reason for not upgrading to a P4... I was PMed an offer to get a 3.2 P4 Prescott for cheap for this system but it would create too much heat in such a small case. Plus if I need anything, it would be a better video card since this box will be for gaming... but then again, I'm trying not to spend much :p.

But yea, if you look here...
systemupdate1.jpg


you'll notice that the 9550 is quite a small card and I will have about 1 inch clearance on top and 2 inches of clearance on the side for air to get to the Celeron.

Thank you all for your interest! It's very nice to have... I hope to have an update tomorrow; I've just been at my job all weekend and today, my next day off is actually Thursday :(.

Geo
 
CASE PART 3

Making The Pieces

I've been working on this update for some time now. It's one of my bigger updates but everything that I've been working on goes together so I figure I would show it all at once. It is basically the completion of the side panel (the part opposite the fan grill). Anyways, there is not much to talk about (since the pics are very self-explanatory) so lets get right to it.


I started with a piece of sheet aluminum

rawalu.jpg


And cut out something like this:

sidepanel1.jpg


which will become the actual side panel


Before sanding/polishing

sidepanel2.jpg


And after:

alumpolish.jpg


I'm not going for a complete mirror finish, just want it so be smooth and shiny


The back 'L' piece had a conflict with one of the PSU screws...

screwconflict1.jpg


so I used a round file and a grinder tool on my dremel to get this...

screwfix1.jpg


screwfix2.jpg


And now something to mount my buttons on... I fist took this scrap piece of aluminum from an old motherboard mount:

pp1.jpg


Cut out my desired shape

pp2.jpg


to get something like this

pp4.jpg


and after a little sanding, filing, and drilling I get this

powerplate.jpg


If you've seen Qtip42's Digg case then you'll notice that this is very similar to his switch mount. That's because I almost completely took the idea from him :p. Except I will sand mine down and paint it black not blue lol. And there will only be three buttons

Anyways, here are all the pieces for the side panel except for the duct tape and super glue, I mean screws :eek:

pieces.jpg


Piecing It Together

I put a strip of weatherstriping down here so the panel wouldn't vibrate on the mobo tray

insulation.jpg


Back corner on

step1.jpg


Front corner on

step2.jpg


Top piece on and side panel screwed to the corners

step3.jpg


Look how shiny it is! :D

And some final pics

final2.jpg


final1.jpg


So yeah... I think it's really coming together and starting to look more like a case. Let me know what you guys think
 
The side panel is very unstable, since it doesn't have much to attatch to. So i decided to brace it a little using a thin strip of aluminum...

support1.jpg


I just attatched one side panel to the other like this

support2.jpg


and now it is alot more stable. Since the power and reset buttons will be on the panel I needed it to not move when you push the buttons
 
nice.
it's like your building your own shuttle / sff...

don't know if you've mentioned it but how / where is the optical drive going to be mounted?
 
i was thinking that it would also be a cool setup if you stood it upright (where your 120mm fan is on the bottom as an intake) and mount your optical drive vertically along the side away from the output ports.

as my professional CAD desgined mockup shows:

upright.jpg
 
stormshadow said:
i was thinking that it would also be a cool setup if you stood it upright (where your 120mm fan is on the bottom as an intake) and mount your optical drive vertically along the side away from the output ports.

as my professional CAD desgined mockup shows:

upright.jpg

niice u gotta tell me what program that is!! maya?
 
Nah dude, gotta be 3DSMax! lol

I like it, building the case from scratch basically. I'm about to do the same thing but use acryllic.
 
stormshadow said:
nice.
it's like your building your own shuttle / sff...

don't know if you've mentioned it but how / where is the optical drive going to be mounted?

On the first page are some sketchup plans and they show the optical drive mounted right above the CPU... I'm pretty sure that would be the best place for it. Where you show it in your 'CAD' drawing :p I think it would be in the way of all my PSU wires. Remember that I've got A LOT of PSU wires to stuff in this small case and where you have the optical drive is where most of my wires will be stuffed. Thanks tho ;)

Well here is a preview for more updates.

Remember this

powerplate.jpg


Well I turned it into this

powerportf1.jpg


Thanks to Qtip42 for the idea :D... kinda looks like a face lol, didn't really plan for that but ah well.

Obviously lower button is power, top right LED will be a white HD activity light, top left LED will be blue power light... I wonder if anyone can guess what the middle toggle switch will be?
 
Obviously lower button is power, top right LED will be a white HD activity light, top left LED will be blue power light... I wonder if anyone can guess what the middle toggle switch will be?


strobe light?
 
Toggle switch?
Maybe a CD tray open/close?


The case is looking really cool, I like how the form factor is like nothing else out there. I don't like the 'support bar' that you put in there, but you probably need it to be there. In that case, I would make it easy to remove so it is not in the way when messing around with the computer.

Looks like you will be done soon, keep it up!
 
JinxyBoi said:
hydrolics?

lol jk, gonna be doing some case lighting?
Nope... the toggle switch isnt for case lighting, but I might do some case lighting. I'm still not sure yet, and if I do it will be nothing fancy


stormshadow said:
fat chick repellent toggle switch?
My brother said he saw this response and lol'ed heh


Ozone77 said:
Toggle switch?
Maybe a CD tray open/close?


The case is looking really cool, I like how the form factor is like nothing else out there. I don't like the 'support bar' that you put in there, but you probably need it to be there. In that case, I would make it easy to remove so it is not in the way when messing around with the computer.

Looks like you will be done soon, keep it up!
That's a good guess but no... and actually I am planning on having a somewhat hidden drive button ;). Thanks for the compliment but dont worry about the support bar, it wont be seen once I have the top cover on. And actually I have quite a ways to go with this project... or atleast so it feels :D
 
The switch is actually a DPDT switch. For those who don't know, it is basically a switch with 2 inputs and 1 output and you just switch between the inputs... and in this case the 2 inputs will be the 5V and 12V lines from a molex connector and the output will be a fan.

So... the Yate Loon will have it's own switch so it can run at 12V or an extreme quiet RPM at 5V

Here's a good example of what will happen

fanvolt-swtch.jpg


I've never been good at soldering so this will actually be a challenge for me lol... but the end result will be worth it i think :)

Geo

More updates coming soon
 
Hey, Just read through this entire thread and this is outstanding. It's coming along really well, and it's actually inspiring me to get off my ass and do some fun modding.

:) Keep up the good work.
 
CASE FEET

Here's a really small update... if I'm not too lazy I might have another tonight ;)

The bottom of my case

feet1.jpg

Again look at how nice the bottom looks even though no one will see it :rolleyes:


I went to the hardware store and picked up 4 of these rubber stoppers

rubberstopper.jpg


and then attatched them with some simple super glue

feet2.jpg


Simple enough I know... I was going to try to make some more impressive feet but I would rather spend more effort on something a little more noticable. Plus these get the job done and since they are rubber they should be great for absorbing vibrations if the case is set on something hard, like a desk or countertop.
 
simple and clean, but thy're probably going to break off.
try some gorilla glue, if you didn't already.
 
Yeah I was a little worried about that aswell but I made sure to get some good glue... I know I said I got normal super glue but I got this stuff made by Devcon and is supposed to be a 'permanent automotive and household adhesive' so it says on the back.
I applied it earlier this morning and let it cure all day. I tried pulling on the feet to see if it would give and it didnt even come close to coming apart.

If you think about it, many cases you buy from case companies use a simple goo to stick there cheap rubber circle feet on... and usually you can peel those off with your fingers. I think my feet are fine for their application :)
 
Geo Fry said:
If you think about it, many cases you buy from case companies use a simple goo to stick there cheap rubber circle feet on... and usually you can peel those off with your fingers. I think my feet are fine for their application :)

Very true but the ones you use look like they stick out a lot more. Personaly don't like them but if they work they work. Project still looking real good. Kinda funny all the work you are putting into it but then again I gave my bro a watercooled celeron 2.4 with 512 pc133 ram and a pci geforce 5200 a few years ago(the ram and video came out of the celeron like 633 I had setup for him before). O yea the celeron was stock. Board was some ecs board I got super cheap that would run ddr or pc133 but only had like 400 and 533 as jumper options. Never bothered to try 533(which would make it like 3ghz). Couldn't bare the idea of a 3 ghz machine with pc133......
 
Rear Brace / Top Attatchment

Instead of having the mobo tray support the left to right forces of the case I am going to have an external brace do it for me... this peice will also be the key peice for attatching the top cover to the case itself. Hopefully I can get enough done to show you how I am going to build the top and how it will be attatched by tomorrow.

Anyways here are some pics

As you can see once again I have a conflict with the PSU screws and the brace itself

rearsup1.jpg


So I start to notch out with a carbide cutter on my dremel tool

rearsup2.jpg


and then finish off with one of those circular grinder tools to get this:

rearsup3.jpg


It's not perfect but again it is the back so I'm not too worried :)

OK like I said earlier, next update will hopefully be the installation and hook up of the power button panel and the installation of the motherboard along with the explaination of how I will build/attatch the top cover and how I will mount the drives!

Stay tuned

Geo
 
swatbat said:
Couldn't bare the idea of a 3 ghz machine with pc133......
I run a 3GHz machine with PC133 :p. Not for long though, once I get my new video card and sound card I'll be upgrading to a P4C800-E Deluxe with 1.5GB of DDR.

[/hijack]

Great work as usual, though about the feet I'd run a screw through them with a rubber washer to dampen vibrations. Basically have the screw running through a hole with a larger diameter than the screw itself so it doesn't contact the case, and have a rubber grommet between the screw head and the case floor. It would probably be more secure than the glue, since I can see the feet coming off if the case is dragged around a bit.
 
Quick question.

Will having the optical drive mounted above the cpu interfere with airflow to the cpu?

I've seen your airflow diagram (top notch, professional work :p), and I was just curious.

Also, good that you didn't get the prescott. those run too hot as it is, that is, in atx cases with all sorts of aftermarket cooling.

If ya don't mind, could you possibly post a pic of the top on with the radeon in? I know you said like an inch clearance up top, but I was curious as to what it'd look like actually set up.

Don't bother if it's too much hassle, though :p
 
Back
Top