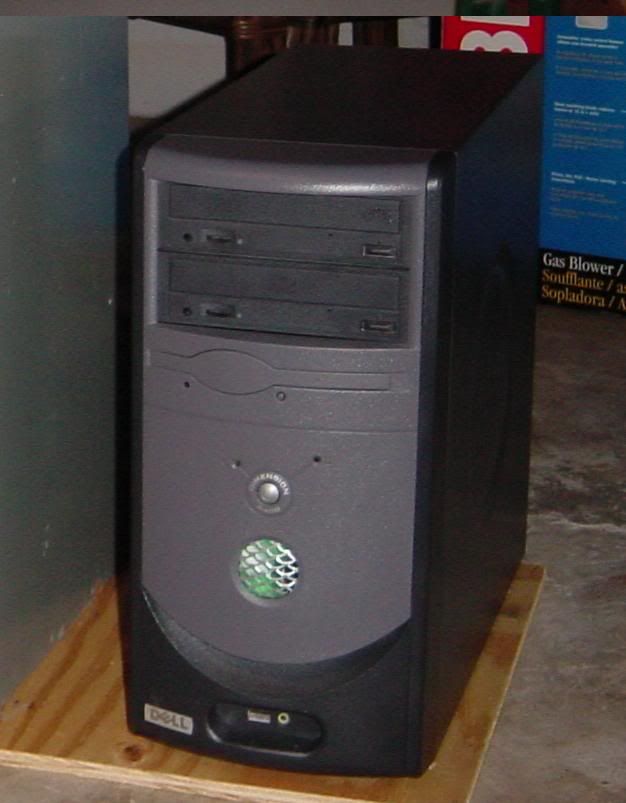
As a current 7600GS owner I can tell you it will more than likely fit just fine. The BFG 7600GS I have is really short. It looks to be about the same size as the current card you have in there. It's only sticks out maybe an 1" - 1.5" past the right side edge of the AGP slot. They also (well in my case) run extremely cool.Geo Fry said:Yeah I've thought about keeping the case for myself but the hardware inside is all that will fit in it. The MSI mobo that's in there is 9.6" by 7.5"... very small and it fits EXACTLY in the case. I wouldn't be able to get any size bigger than whats in there. Also the GPU is quite snug aswell. I could MAYBE fit a 7600GS or a X1600pro but it all depends on the molex power connector that needs to be connected (clearance to the front of the case is quite tight).
Plus it would just be mean to keep the case for myself
Navigation
Install the app
How to install the app on iOS
Follow along with the video below to see how to install our site as a web app on your home screen.
Note: This feature may not be available in some browsers.
More options
-
Some users have recently had their accounts hijacked. It seems that the now defunct EVGA forums might have compromised your password there and seems many are using the same PW here. We would suggest you UPDATE YOUR PASSWORD and TURN ON 2FA for your account here to further secure it. None of the compromised accounts had 2FA turned on.
Once you have enabled 2FA, your account will be updated soon to show a badge, letting other members know that you use 2FA to protect your account. This should be beneficial for everyone that uses FSFT.
You are using an out of date browser. It may not display this or other websites correctly.
You should upgrade or use an alternative browser.
You should upgrade or use an alternative browser.
Custom Dell Case (Completed!)
- Thread starter Geo Fry
- Start date
Geo Fry said:I will definitely have it finished by Halloween though
hmmmm
filthysanchez
2[H]4U
- Joined
- Jul 19, 2006
- Messages
- 2,669
agreed.hmmmm
GeoFry, you got some 'splainin to do.
Ah haha you guys...
Yea I was wondering if anyone would remember me saying that. Well you know how things go... ok fine. I'll admit I've been a little lazier with it than I was hoping. But I have the front aluminum panel polished and all the parts painted black. A few of them need a few more coats of clear-coat (actually I'm waiting for them to dry as I type). Hopefully I can get some pics up tonight.
But I have been working lots lately... I have today off (which is why I've been working on it today) and I have tomorrow off so much progress is happening.
Thx for keeping me on my toes
Geo Fry said:Thx for keeping me on my toes
We're just eager to see more progress!
OK well here are some pics I took yesterday. This is just a mock up... nothing is screwed together.


Notice the panel bends in the middle. Thats just because its not screwed down... trust me everything will be square as hell once it's put together for the final time. I've measured and remeasured every hole and cut I've made.
As you can see the top panel is still not polished (it will be by tonight though) and the peices don't have the greates reflection on them (again, I'm working on this tonight). I've also sanded the plexi to give it a nice diffused look.

Those rear brackets are what will be holding the back of the top cover down and in place.
There you happy

Notice the panel bends in the middle. Thats just because its not screwed down... trust me everything will be square as hell once it's put together for the final time. I've measured and remeasured every hole and cut I've made.
As you can see the top panel is still not polished (it will be by tonight though
) and the peices don't have the greates reflection on them (again, I'm working on this tonight). I've also sanded the plexi to give it a nice diffused look.
Those rear brackets are what will be holding the back of the top cover down and in place.
There you happy
BACKLIGHTING THE E
Small update but a cool one, atleast for me
Materials

and then finished... look at my L337 soldering skills

then I just hotglued the LEDs inside my panel

and FINALLY I have this finished...


I wish it was a little brighter but oh well.
Small update but a cool one, atleast for me
Materials
and then finished... look at my L337 soldering skills
then I just hotglued the LEDs inside my panel
and FINALLY I have this finished...
I wish it was a little brighter but oh well.
digital_exhaust
[H]ard|DCer of the Month - May 2008
- Joined
- Aug 14, 2006
- Messages
- 6,903
I think it looks great!
sowingseason
Limp Gawd
- Joined
- Oct 30, 2006
- Messages
- 342
keep it comming and keep us updated
WicKeDcHilD
Gawd
- Joined
- Oct 4, 2006
- Messages
- 568
that logo looks wicked good job on it
good job on it CrimandEvil
Dick with a heart of gold
- Joined
- Oct 22, 2003
- Messages
- 19,670
In a word: hawt!
Geo,
I just read through this whole thread today. All I have to say is. AWESOME. Totally awesome. I love mods that use simple tools and materials that most of us have, to make what I consider a very cool case. I love it. No drill presses, machine shops, fancy tools, etc... just some metal, a drill, sodering iron etc.Gets my mod juices flowing again. I need to make something and start another work log!
Some of my thoughts.
1. Love the dell cut out idea and how it came out. Just shows if you like the idea of something stick to it. At 1st, all the dell haters came out, and said, dont do it! But look how it turned out. Awesome.
2. Love the simplicity of the design, form, and simple solutions to the problems you ran into. I love the drive cover, and how it blends into the case, and the the blind push to open. Very nice touch.
3. Some ideas on extra cooling......is there room for an after market CPU HSF that might be better than the stock fan you have on it now? Another is how about a slot fan? Or an artic cooler fan on the GPU that exhuasts out the back... lastly you could always water cool it later
Awesome work man. Now get it done so your little brother has a cool PC!!!!
Thank you all for the compliments ...
@ bradyapba - Thanks for the nice words, but as far as an aftermarket CPU cooler, space is extremely tight... the only way it would make a difference is if I ould get something bigger that would probably not fit. I mean I could maybe get something better but at this point I just want to finish. And water cooling... lol, if my case design was more user friendly maybe it would be possible but even then, I'd rather watercool high performance parts, not 3-5 year old hardware. Ah well... my next project will be watercooled
...@ bradyapba - Thanks for the nice words, but as far as an aftermarket CPU cooler, space is extremely tight... the only way it would make a difference is if I ould get something bigger that would probably not fit. I mean I could maybe get something better but at this point I just want to finish. And water cooling... lol, if my case design was more user friendly maybe it would be possible but even then, I'd rather watercool high performance parts, not 3-5 year old hardware. Ah well... my next project will be watercooled
Oh and just to let you guys know, I am finally putting the case together for the final time, like as I type this. So... hopefully I will have completed pics up soon. I want to get my friends nice digital camera and take some nice high res photos ... We'll see...
... We'll see...Geo Fry said:Oh and just to let you guys know, I am finally putting the case together for the final time, like as I type this. So... hopefully I will have completed pics up soon. I want to get my friends nice digital camera and take some nice high res photos
oh such suspense.. hurry up with it!
newls1
Supreme [H]ardness
- Joined
- Sep 8, 2003
- Messages
- 4,627
Perfection GEO, great work
Ok well I actually have to go now... I'm going to transport the case over to my brother's house tonight. There are a few things I still have to do to it but for the most part it is done. If I had more time I'd do my entire update now, but I really need to leave before it gets to late. So in good ol' fashion suspense... I'll post one pic
This pic will be the pic used as the desktop wallpaper for his new PC at 1280 x 960

Alright well have a good night and I will hopefully do a complete update tomorrow
This pic will be the pic used as the desktop wallpaper for his new PC at 1280 x 960
Alright well have a good night and I will hopefully do a complete update tomorrow
GAME OVER
Final Time Putting It Together
Well like the title says this will put you through the process of completion...
I polished the aluminum... it isn't near as mirror finished as I'd like but it will do the job

Now we start putting it together..


These L pieces are what will hold and support the DVD drive to the top cover...

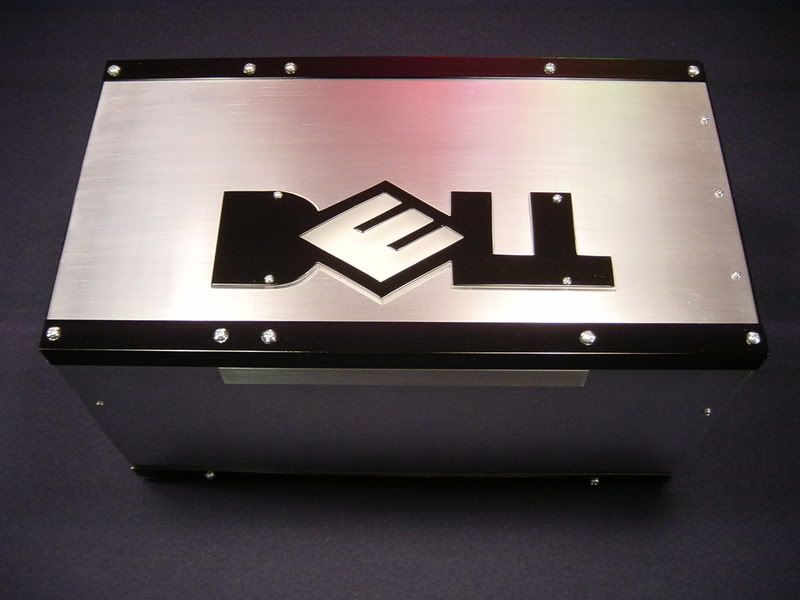
remember that the Dell logo has to go through these holes too... what nice drill accuracy I have

next goes the backlight panel

and to make sure it works before putting the drive in place


these brackets are what will loosely hold the top cover in place


next goes the hard drive

The front is held on by the bottom black strip and the middle support bar... it will also be wedged into the top cover's front L piece.

look at the lack of space I have inside here

Oh one thing I forgot to update on was the reset switch. Since it was no longer going to be located on the panel with the power switch, I needed to locate it somewhere.... I decided just to route in out the back to the I/O panel

And there it is

Final Time Putting It Together
Well like the title says this will put you through the process of completion...
I polished the aluminum... it isn't near as mirror finished as I'd like but it will do the job
Now we start putting it together..
These L pieces are what will hold and support the DVD drive to the top cover...
remember that the Dell logo has to go through these holes too... what nice drill accuracy I have
next goes the backlight panel
and to make sure it works before putting the drive in place
these brackets are what will loosely hold the top cover in place
next goes the hard drive
The front is held on by the bottom black strip and the middle support bar... it will also be wedged into the top cover's front L piece.
look at the lack of space I have inside here
Oh one thing I forgot to update on was the reset switch. Since it was no longer going to be located on the panel with the power switch, I needed to locate it somewhere.... I decided just to route in out the back to the I/O panel
And there it is
Then I just plop the top on and it's done (actually plop is a huge understatement... trying to get all the wires to cooperate and getting everything plugged in and out of the airflow's way was a huge PITA)
I have some more pics of the complete case but have not uploaded them yet...
I have some more pics of the complete case but have not uploaded them yet...
digital_exhaust
[H]ard|DCer of the Month - May 2008
- Joined
- Aug 14, 2006
- Messages
- 6,903
I've already said it, but nice work man. Very, very cool.
I'm really impressed with the thought and design that went into your mod, and the execution is top notch as well.
I'm really impressed with the thought and design that went into your mod, and the execution is top notch as well.
I have to completly agree with everyone on this. Excellent job executing great idea's. an A+ build. (I hesitate to call it a mod any more since it really has nothing except the mobo tray from the original)
But definately a great job. I really like the black and silver look. it turned out really well.
But definately a great job. I really like the black and silver look. it turned out really well.
meinzorn said:(I hesitate to call it a mod any more since it really has nothing except the mobo tray from the original)
There... title changed to better suit what has been done
TheOneGreatX
Weaksauce
- Joined
- Oct 1, 2005
- Messages
- 116
what material did you use for the box of LEDs?
I bought this 10ft. strip of flashing from Home Depot... not sure what kind of metal it is... it's definitely conductive ( I found out the hard wayTheOneGreatX said:what material did you use for the box of LEDs?
)OK more pics...


I love this mod.
I only wish there was a floppy drive there... I am not sure I could live without a floppy... but then again your brother is probably just going to use it and enjoy it, rather then tweak it like we do.
This looks about 5000X better then the original dell case.
I only wish there was a floppy drive there... I am not sure I could live without a floppy... but then again your brother is probably just going to use it and enjoy it, rather then tweak it like we do.
This looks about 5000X better then the original dell case.
kill4killin
Gawd
- Joined
- Jul 3, 2006
- Messages
- 842
Very very well done, glad to see it finally finished. I wish I had thought to do a similar mod with my old Emachines that I just sold. Still, it looks great, hope it works just as well.
filthysanchez
2[H]4U
- Joined
- Jul 19, 2006
- Messages
- 2,669
kudos.
nice to see it done.
nice to see it done.