Post your "rate my cables" here

I'd say that SATA cable looks long enough, you can flip that drive around the other way and route the cable differently.

Those white cables (USB, right?) could also use re-thinking, but beyond this, looks generally clean to me.
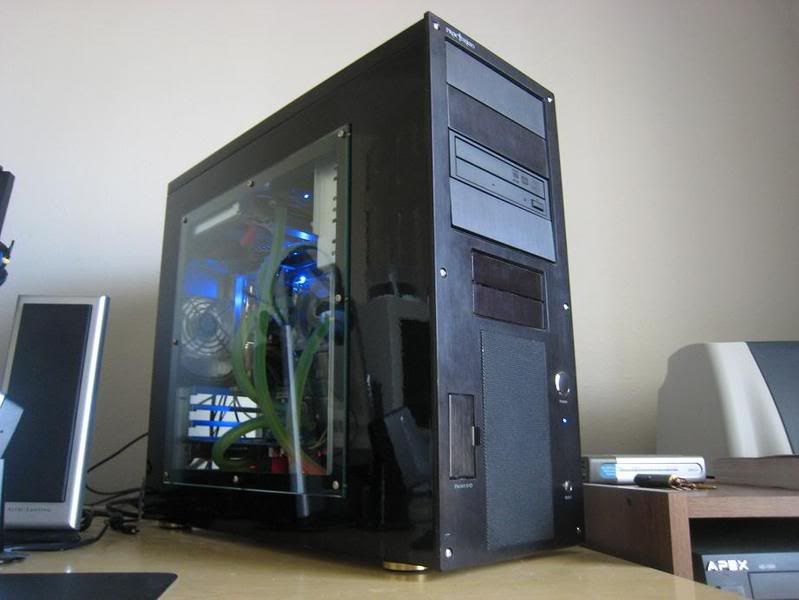
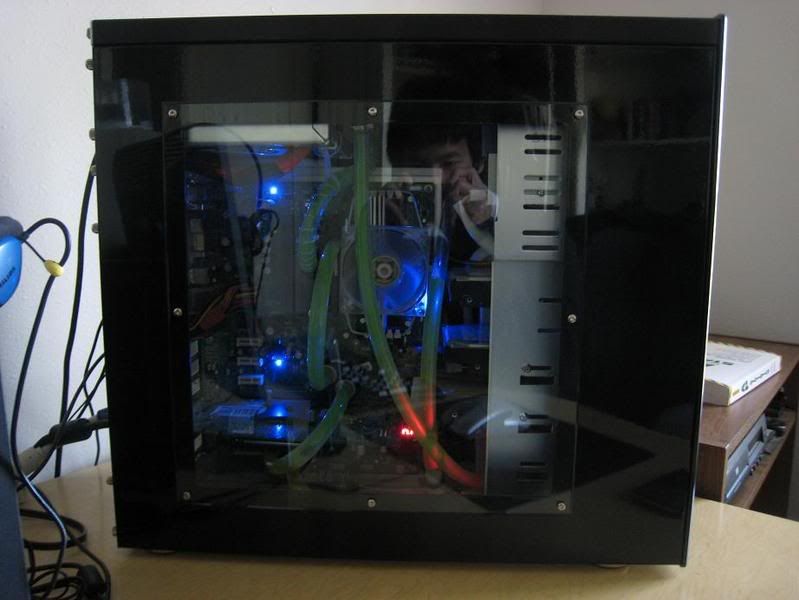
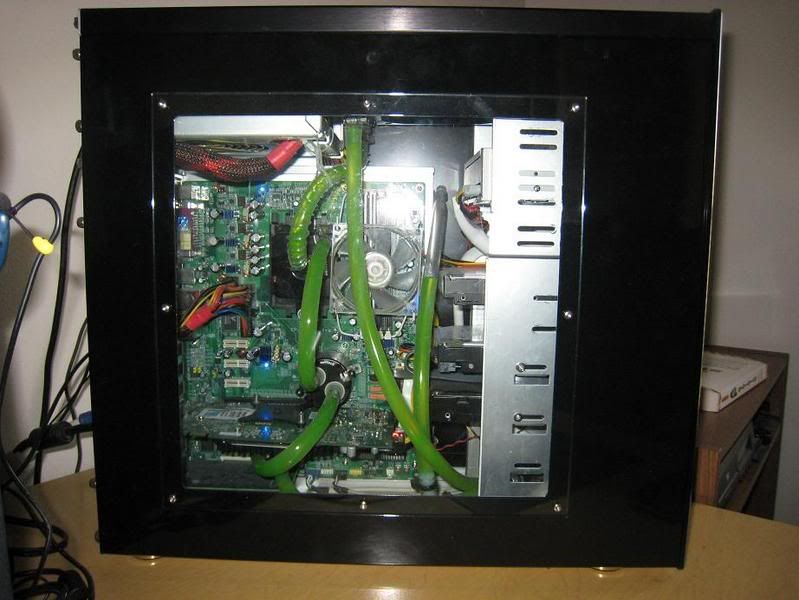
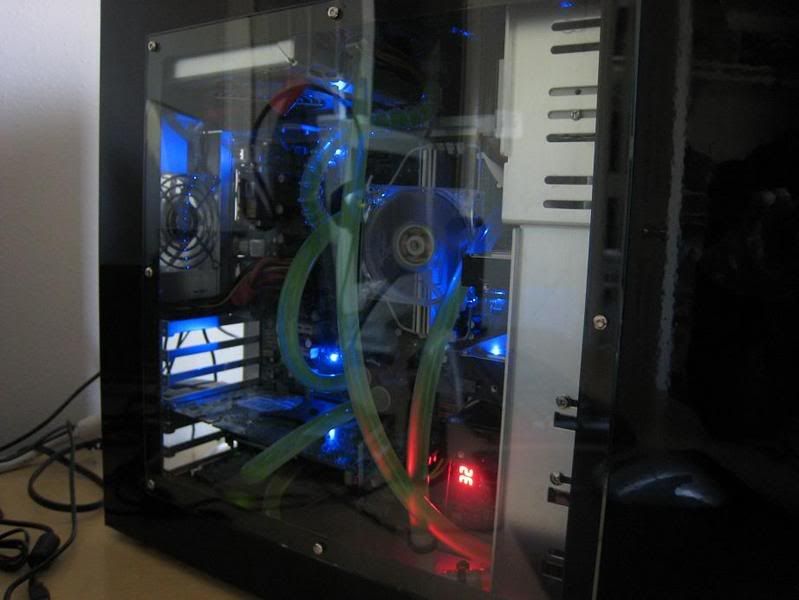
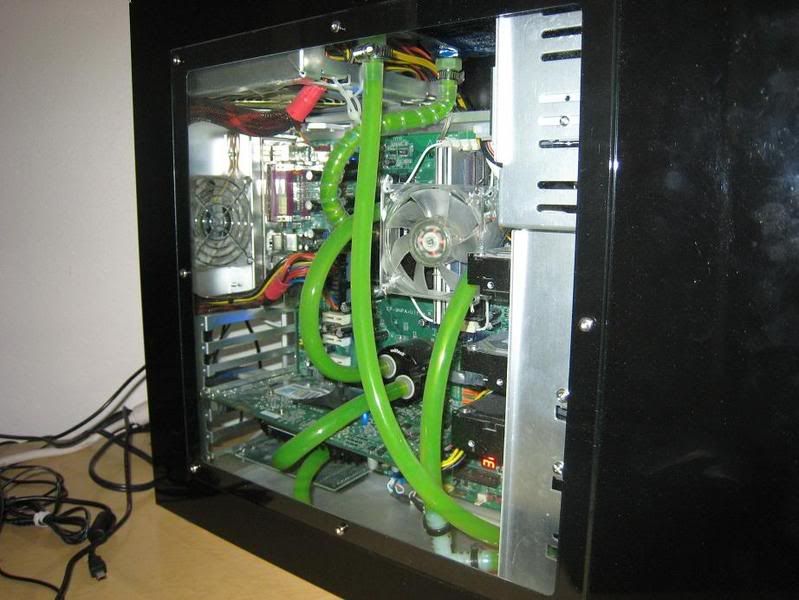
Agreed. I think the USB cables could probably be routed around, behind the mobo. That way they are not so stretched around the card, and don't cross in front of everything like that. I assume you have it like that because the front USB ports are on top of your case?
 
I never thought about mounting the HD the other way. That would probably work pretty good.
The USB cables are the ones I had the most trouble with. They are pretty much stretched as far as they will go right now. I'll maybe pull some stuff out and see what I can do. Looking at it they might be long enough to go behind the mobo. I'll never know if I don't try I guess :p
Thanks for the suggestions. :)
 
Post some pictures that show in the interaction between the wires and the drives, all you shots exclude your drives, where the wiring is the hardest! :)

I like it though!

Here ya go... I should have vinyl dyed the IDE cable to loose the white stripe, but I was on a bit of a time crunch... :(


Pic came out a bit darker than I wanted it too... but the general construction can be made out on this pic:
powercable1.jpg


Installed:
powercable2.jpg

powercable3.jpg


And the Power Supply lines have been loomed
ps_loom.jpg

ps_loom2.jpg


Oh yeah, and the coils are from www.lizard-tree.com. Shipped from Canada! Tell em Tech-Daddy sent ya!
 
Hello,

I have a Raidmax Sagietta and I'm wanting to reroute my cables... Right now I just have the cables stuck in the CD ROM area. I want to get my cables and my system to visually look good.

My PSU is a Antec Smartpower 500 using the cables that I came with it.

Any recommendations on how to do do this. I know this will also help with the ventiliation

My system specs are in the signature.

All help will be greatly appreciative.
 
Pics greatly help with a question like this. If you can get a few that'd be great :)
 
Take both of the side panels off and snap some pics of both sides and show us the current config.

We will be able to better assist you!
 
Hey there...
Your wife has an awesome rig! I checked out ur site and wow you do a great job tech-daddy!

Here is my finished (i think) product:
100_2858.jpg


That cross is for Disposable Heroes Clan :)
100_2820.jpg
 
Not too bad, but I have a couple suggestions. The black loom helps with looks, but I would try harder at hiding the wiring some more, along with keeping in mind the airflow through the case (looking primarily at the cpu cooler), which moves on to my next suggestion.

Is there a decent amount of space (read: 1/4" or more) between that 120mm fan and the bottom of the case? If there isn't, you probably aren't getting the full capabilities of the fan, and it's probably sitting there making noise. Get some #4 or #6 screws (whichever fits, I can't tell you what size for sure), adding ~1/4" to get your overall screw length, 4 lock nuts and 4 regular nuts. Thread the regular nuts on until there's enough thread engagement on the opposite side of the fan so the lock nuts will hold correctly. Tighten the 4 lock nuts down (leaving that 1/4" or so on the underside of the fan) and you're done! That way you'll have the option to slide the fan back & forth along the bottom of the case if you deem necessary. There's also a pci fan bracket available, but I don't remember what company offers it.
 
From This (August 2006)
0000791rt0.jpg

To This (March 2007)
wires.jpg

Sorry for the bad quality of pic, I will post new ones later today/tommrow
This is the last rebuild of my PC until late march when I replace my ide drives with SATA, case, power supply, and add two zalman coolers (cpu and video card which sounds like a jet)

Yes there is a X-Fi with a LiveDrive connected.
 
Thanks EET.

Haha I just cant believe that I was oblivious to that fact about the 120m at the bottom...now when I read what you wrote, im like "duhhh." One thing i got confused about though, when you say I can slide it back and forth you mean routing/cutting the bottom of my case so i can move it right?

About the wires, I am not entirely done. When are we ever huh? lol. But yeah thank you very much for the feeback, I will definitely look for that bracket.
 
Tower.jpg

[IM]http://i16.photobucket.com/albums/b23/baonho90/New%20Pics/CablesNoFlash.jpg[/IM]
[IG]http://i16.photobucket.com/albums/b23/baonho90/New%20Pics/CablesFlash.jpg[/IMG]
[IG]http://i16.photobucket.com/albums/b23/baonho90/New%20Pics/CablesAngleNoFlash.jpg[/IMG]
[IG]http://i16.photobucket.com/albums/b23/baonho90/New%20Pics/CablesAngleFlash.jpg[/IMG]

Nice setup. Plaement of the power plugs really screws it up a bit.

Might wanna remove fingerprints from the front of the case.
 
Tower.jpg

]http://i16.photobucket.com/albums/b23/baonho90/New%20Pics/CablesNoFlash.jpg[/IMG]
http://i16.photobucket.com/albums/b23/baonho90/New%20Pics/CablesFlash.jpg[/IMG]
http://i16.photobucket.com/albums/b23/baonho90/New%20Pics/CablesAngleNoFlash.jpg[/IMG]
http://i16.photobucket.com/albums/b23/baonho90/New%20Pics/CablesAngleFlash.jpg[/IMG]

nice rig ;)
 
If you don't wanna cut, route your PSU wires behind the drive cages and work from there.

Basically, just hide everything behind the optical/HDD cages if you don't wanna make cuts.
 
From This (August 2006)
0000791rt0.jpg

To This (March 2007)
wires.jpg

Sorry for the bad quality of pic, I will post new ones later today/tommrow
This is the last rebuild of my PC until late march when I replace my ide drives with SATA, case, power supply, and add two zalman coolers (cpu and video card which sounds like a jet)

Yes there is a X-Fi with a LiveDrive connected.

flip around your hardrives will look more clean, also try and get those wires behind ur motherboard tray/the back panel thats what i did, it help, also if u have lights try and hide the box back where u won't see it.


Plan on adding at least 2 more drives and 1 more grafix cards. Should be no problem hidind wires. I know the stock cooler looks dumb, but I haven't found exactly what I want yet.
 
You can fish most of the PSU wiring into that big hole beside the PSU area. It might not look like it works, but if you have patience they should fit. This does make putting the right side panel back on a bit more of a task but, it's well worth it to have a tidier look. :)

I've done it with my Enermax Liberty, it should work with the Corsair, as well.
 
All cables were built by hand from parts ordered from performance-pcs.com and my local hardware store. I started by chopping the cables at the PS and building each cable run by hand. All fan cables were unsoldered from the fan and built from new cable to custom lengths. USB cables were built from scratch to custom lengths for the front panel connections and VFD.

In the dark...

1.JPG


SCSI 320 15k Raid 5 Array with 150g Storage Drive

2.JPG


Power Supply Connections, Fan, and DVD-RW Drives

3.JPG


Poorly lit view of the digibus MO-VFD with temp probes

4.JPG


View of cards, cooler, and variosu cables

5.JPG


View of USB cables, front panel LED and switch cables, and MIDI & Firewire cables on sound card

6.JPG


View of case all closed up.

7.JPG

I have read so much about this case can someone repost the PICS I would love to see it.

Carter
 
Thanks EET.

Haha I just cant believe that I was oblivious to that fact about the 120m at the bottom...now when I read what you wrote, im like "duhhh." One thing i got confused about though, when you say I can slide it back and forth you mean routing/cutting the bottom of my case so i can move it right?

About the wires, I am not entirely done. When are we ever huh? lol. But yeah thank you very much for the feeback, I will definitely look for that bracket.

Sorry, I hadn't realized you replied. I just meant you would be able to slide it along the bottom of the case without having to unscrew anything, no cutting involved. The screw heads could just slide along the case bottom.
 
i have those same speakers. pretty nice for the price. certainly is no high end system but pretty good. i took off the grills on the front speakers for some reason.
 
Well heres mine with my new rig finally in it. I posted this case a little while ago but with an older P4 system, but now its got the system in my sig, so lemme know what you guys think.

100_3092.jpg


100_3090.jpg


100_3089.jpg


back of mobo tray:
100_3077.jpg


Hole cut to route the mobo molex connector, rear fan wires, cpu fan wire and cpu power cable:
100_3080.jpg


Other side showing where the cables come thru behind the tuniq tower:
100_3083.jpg
 
old school rig, circa '00/'01

Very nice, I honestly can't think of much to suggest that could improve that wiring job, and doing it in such an old and basic case only adds to your ensuing congratulations.

Well heres mine with my new rig finally in it. I posted this case a little while ago but with an older P4 system, but now its got the system in my sig, so lemme know what you guys think.

Nothing overly special in terms of the wiring, could be better...could be worse. Personally I really don't like the sound dampening mats at all, especially when used in abundance like you have. Sorry bro, but it's a personal thumbs down in the looks department from myself.
 
Very nice, I honestly can't think of much to suggest that could improve that wiring job, and doing it in such an old and basic case only adds to your ensuing congratulations.

Thanks. God only knows where that case is today! I haven't seen that Enlight in 3-4 years I think.
i remember when i started doing that to my PATA cables......btw putting a 45 degree fold in PATA cables like that pretty much kills them whenever you try to reuse them :D
but hey, i had plenty at the time, so i rocked on.
 
Back
Top