Navigation
Install the app
How to install the app on iOS
Follow along with the video below to see how to install our site as a web app on your home screen.
Note: This feature may not be available in some browsers.
More options
You are using an out of date browser. It may not display this or other websites correctly.
You should upgrade or use an alternative browser.
You should upgrade or use an alternative browser.
Project: Vapo Li PC-7A/B
- Thread starter officermartinez
- Start date
officermartinez
[H]ard|Gawd
- Joined
- Jan 21, 2006
- Messages
- 2,012
Well, I had ALOT of stuff powder coated.. Not just the big stuff, but TONS of little stuff as well.. In the end, EVERYTHING added up to about $300 for the powder coating.. $110 for the fabricated radiator box.. and about $100 dollars for the CNC'd parts. It's actually VERY amusing because the Lian Li case brand new only cost me $89 bux!
I do appreciate the compliment. It's a monster. I realized a few days ago that there really is NO WAY that I will mount my huge 42" Westinghouse LCD monitor AND my BIG Vapo Li case on the same desk. I bet their combined weight is close to 180 lbs (and thats not counting my speakers, subwoofer, keyboard, mouse, etc)..
I do appreciate the compliment. It's a monster. I realized a few days ago that there really is NO WAY that I will mount my huge 42" Westinghouse LCD monitor AND my BIG Vapo Li case on the same desk. I bet their combined weight is close to 180 lbs (and thats not counting my speakers, subwoofer, keyboard, mouse, etc)..
officermartinez
[H]ard|Gawd
- Joined
- Jan 21, 2006
- Messages
- 2,012
I made some progress today and found a stopping point to take a few pictures. Keep in mind that nothing is permenantly mounted (yet) but its almost there.. I need to test my water loop before sticking it all in the computer case only to find that I have a leak somewhere and end up pulling it all out. Oh, I also decided to take a few extra pics of my monitor / speaker setup. Nothing fancy, but it will get the job done.
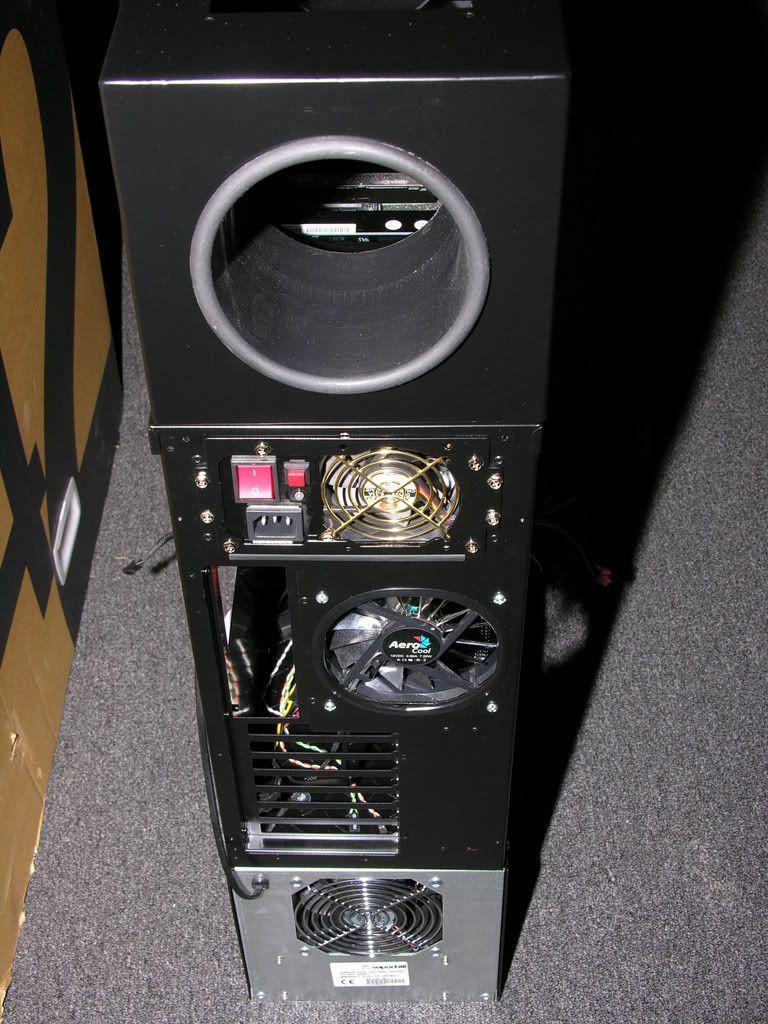
In this first picture, you will notice that I have the Vapochill mounted to the Lian Li case.. This is a pretty typical setup for the Vapochill / Lian Li users. If you look closely and after reading the Vapochill manual over and over, it suggested mounting the chill control pcb somewhere that was very accessible... So... I decided to mount it on the bottom side of the drive bay mount(s).
As you can see, there is not much distance between my big Enermax 1k PSU and the HDD adapter. After debating where to put it, I ultimately decided that I didn't want that big adapter sticking out of the bottom bay and into the area of the case. In my opinion, it would look cumbersome and out of place. Instead, I mounted it up high in the top bay.
This last picture shows just how the Vapochill hose comes through the bottom of the floor of the Lian Li case..
officermartinez
[H]ard|Gawd
- Joined
- Jan 21, 2006
- Messages
- 2,012
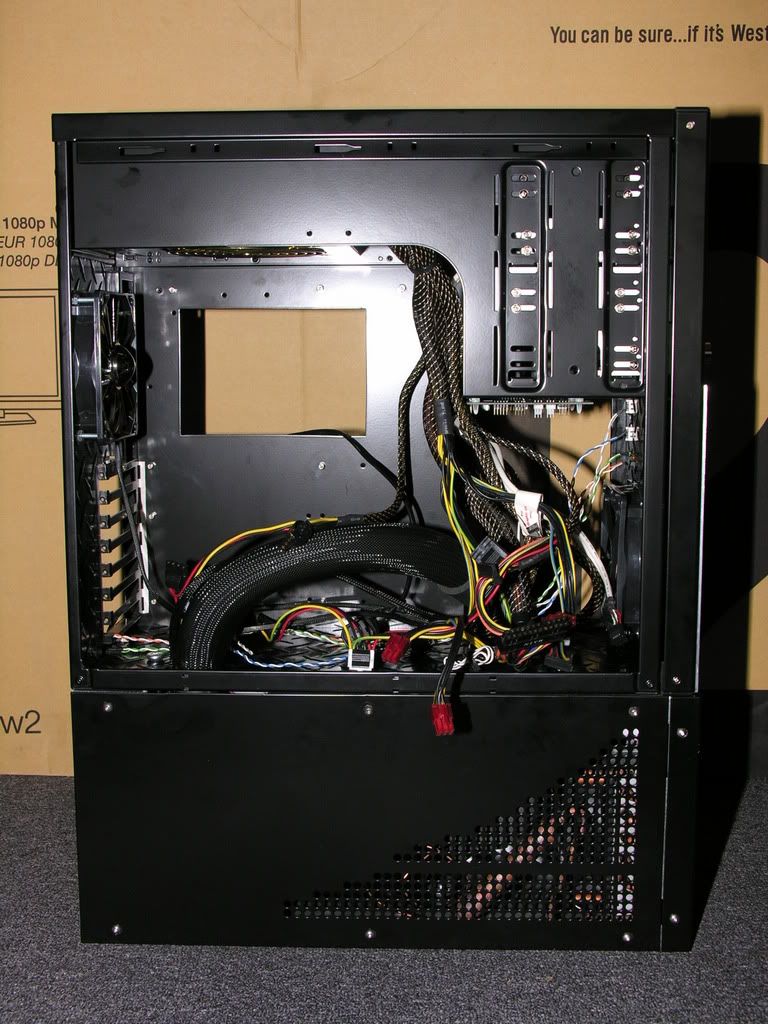
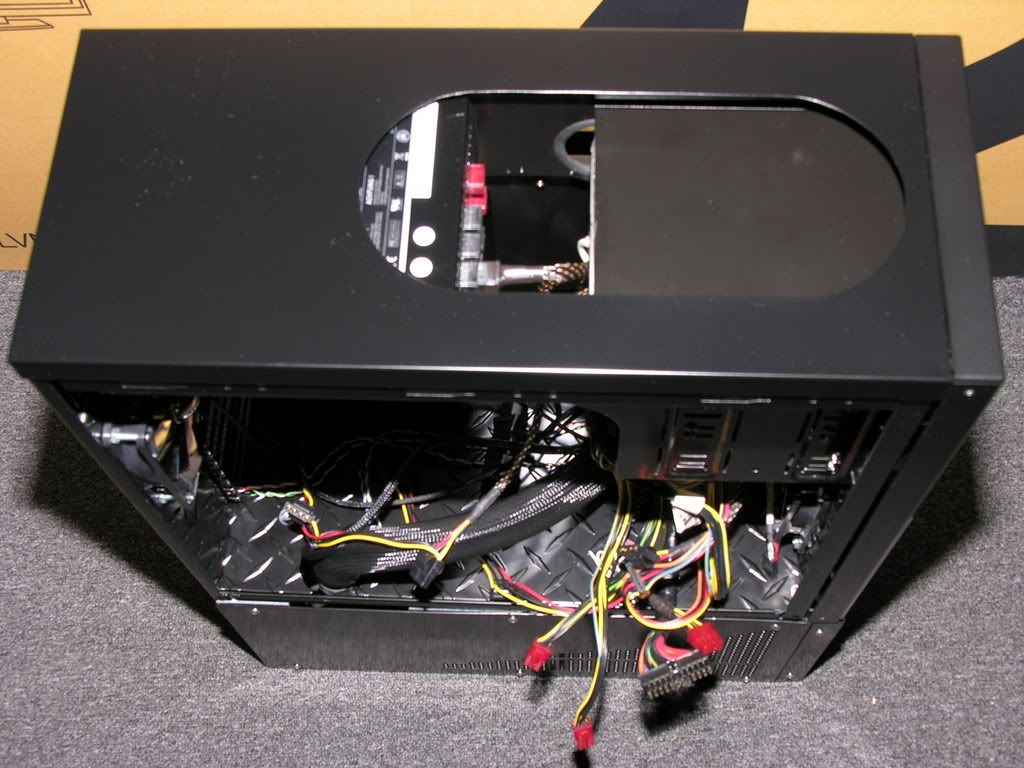
Gotta love all of those wires just hanging around.. LOL. OK, more pictures as promised..
For those who care, I just decided to take a picture of the back side of this setup.. Not that you will be able to really see it.. But hey.. I had a little extra time on my hands.
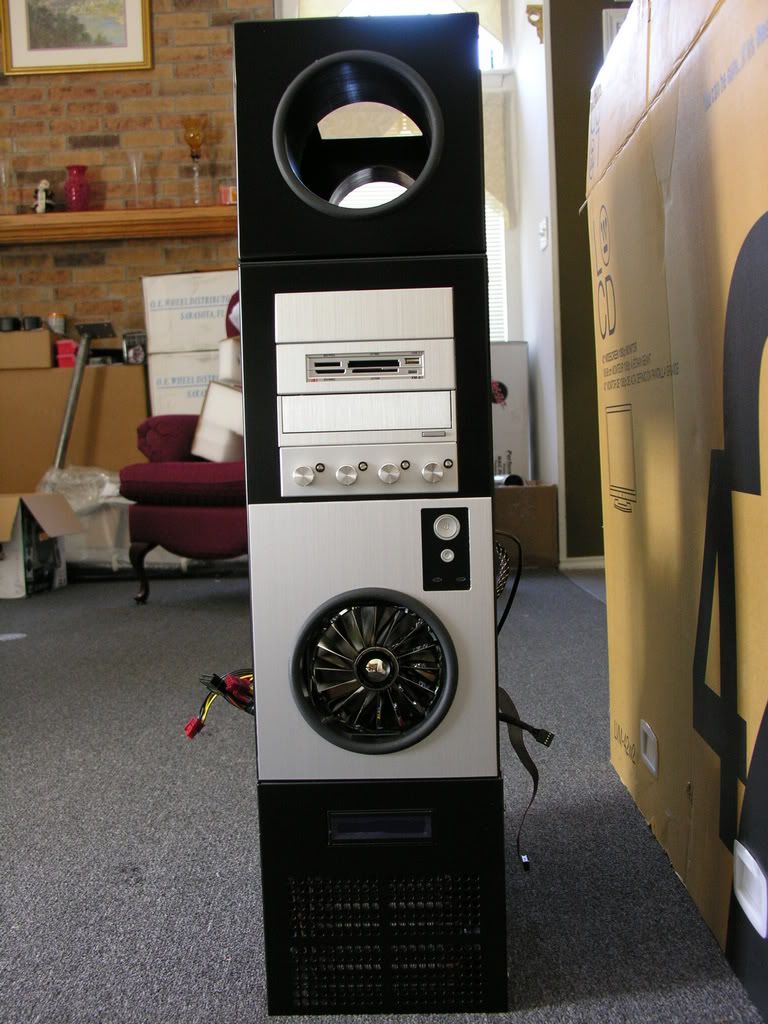
Here is a side shot of the case, in all of its raw glory.. LOL. I will say that the picture just does not do this thing justice. It's over 3 feet tall!
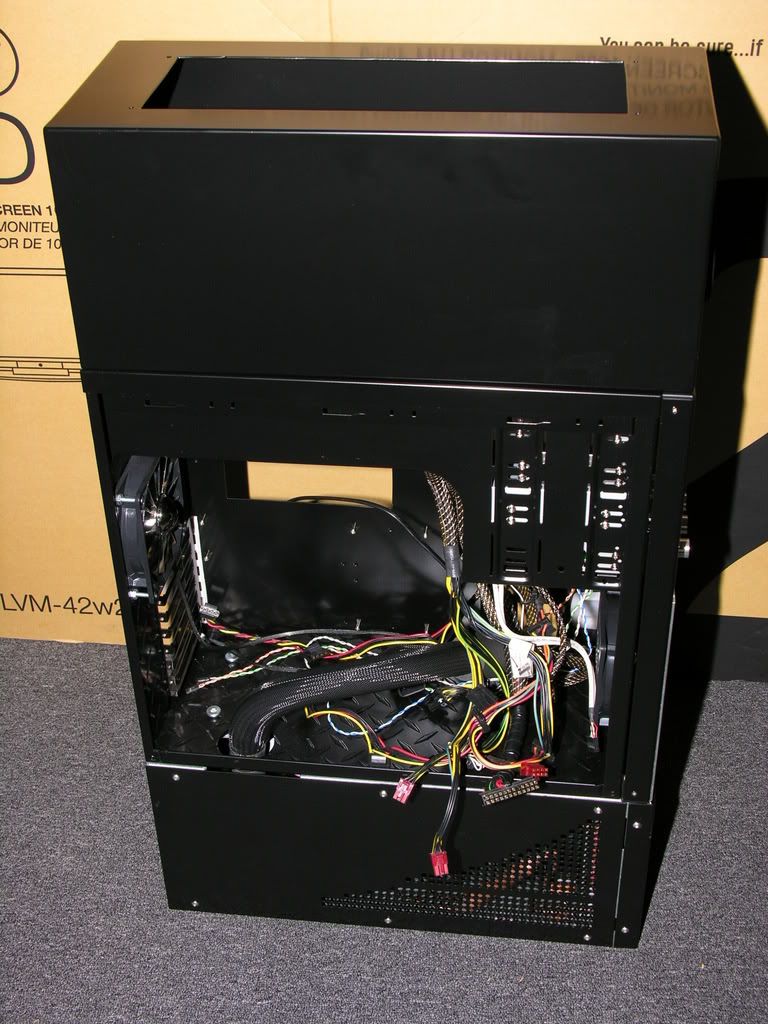
And finally, a shot of what the front of the case will look like..
(Flash On):
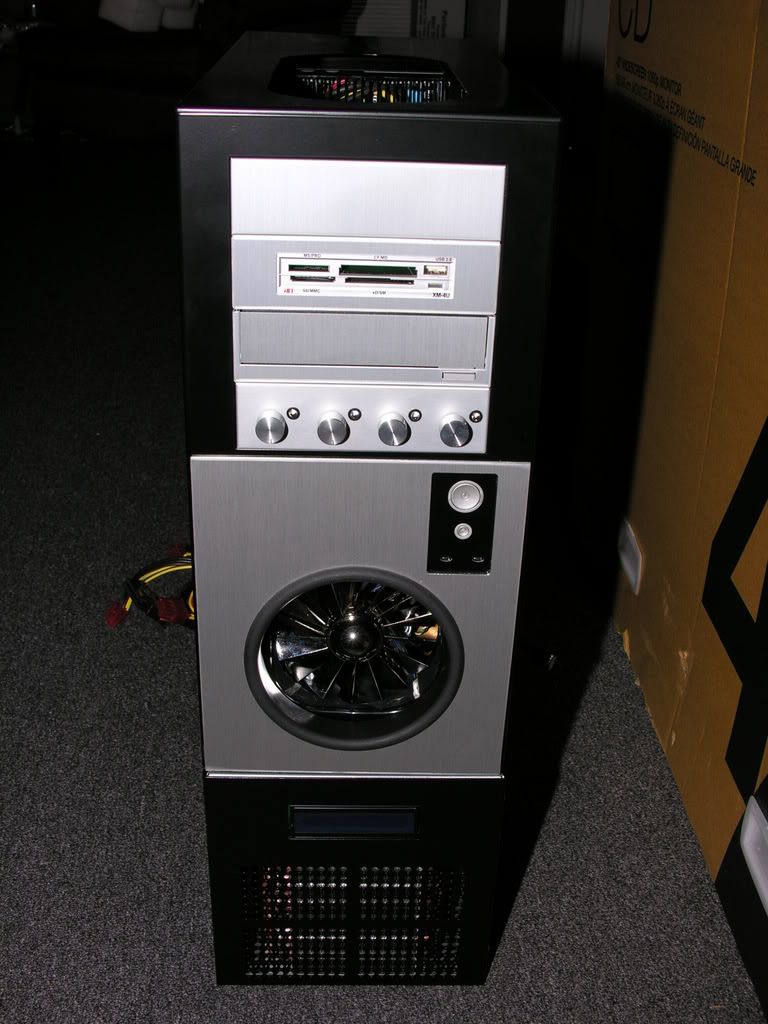
(Flash Off):
For those who care, I just decided to take a picture of the back side of this setup.. Not that you will be able to really see it.. But hey.. I had a little extra time on my hands.
Here is a side shot of the case, in all of its raw glory.. LOL. I will say that the picture just does not do this thing justice. It's over 3 feet tall!
And finally, a shot of what the front of the case will look like..
(Flash On):
(Flash Off):
officermartinez
[H]ard|Gawd
- Joined
- Jan 21, 2006
- Messages
- 2,012
Just arrived a few days ago.. When everything is up and running, I will be sure post a little more detailed screen shots of how and where everything will be setup..
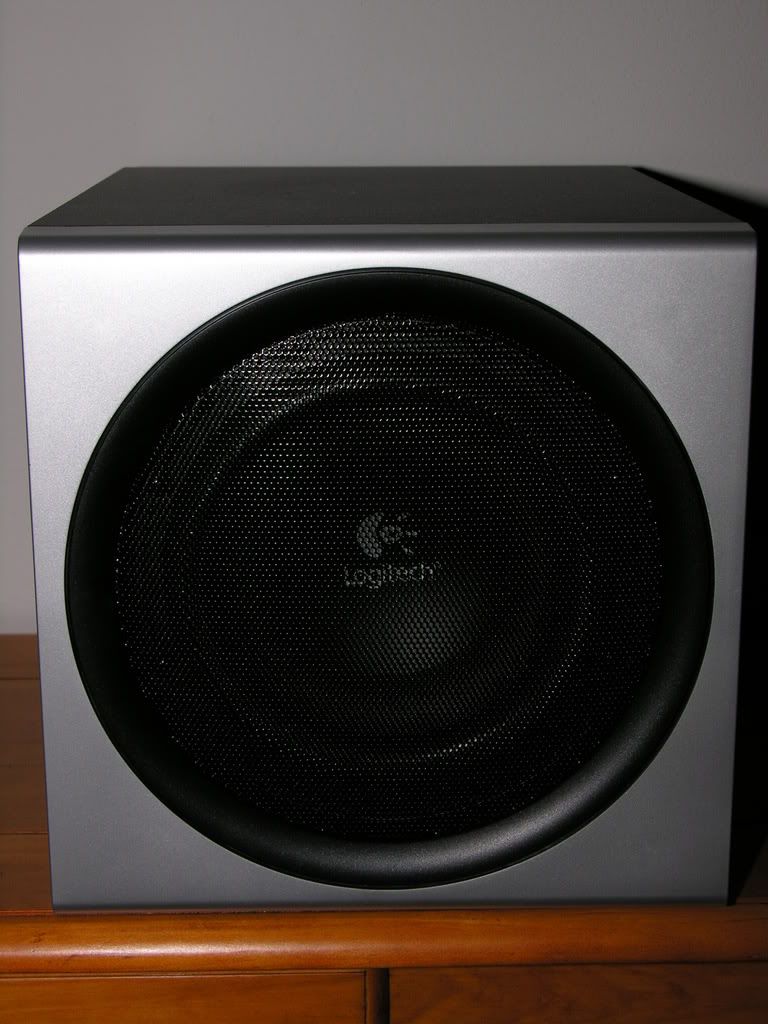
A little shot of the Z-2300 sub.. This sub will sit directly below the monitor. I had this same setup on my Z-2200's and it sounded awesome.
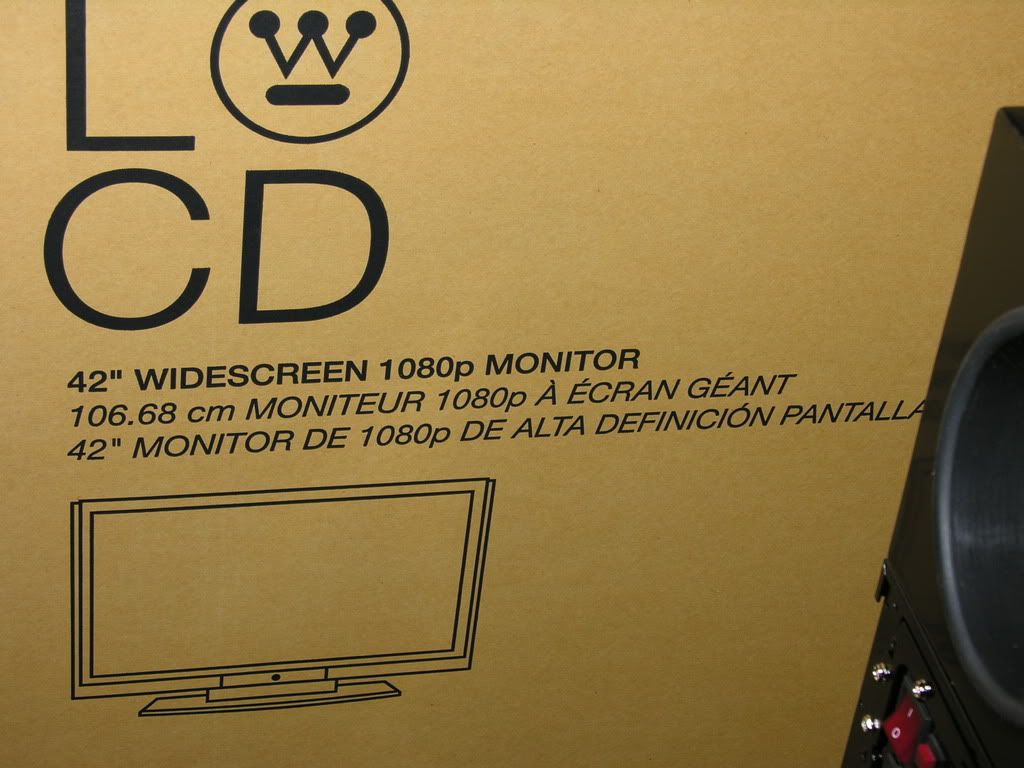
A shot of my 42" Westy on my corner desk.. As you can see, there is a little spot below the monitor.. The sub will sit in that area below.. It's a perfect fit, with exactly 1/8" on each side to spare..

A little shot of the Z-2300 sub.. This sub will sit directly below the monitor. I had this same setup on my Z-2200's and it sounded awesome.
A shot of my 42" Westy on my corner desk.. As you can see, there is a little spot below the monitor.. The sub will sit in that area below.. It's a perfect fit, with exactly 1/8" on each side to spare..
Damn dude! You have issues!
Don't say pics don't do your case justice, you can tell that thing is hella tall. Might want to drill some holes on the bottom for an anchor the the floor, lol. Definitely not a LAN machine!
I have Z2300s and they are sick, you'll really like them!
Your work is looking awesome man, really looking forward to seeing more pics.
ttys man.
tylerdustin2008
[H]ard|Gawd
- Joined
- May 6, 2006
- Messages
- 1,834
Nice work!
You should have purchased my phase unit and saved some money.... But mines not cheap, holds my quad at -41c loaded.....
Vapos can't hold a high load for long, it will burn them up.
You should have purchased my phase unit and saved some money.... But mines not cheap, holds my quad at -41c loaded.....
Vapos can't hold a high load for long, it will burn them up.
Nice work!
You should have purchased my phase unit and saved some money.... But mines not cheap, holds my quad at -41c loaded.....
Vapos can't hold a high load for long, it will burn them up.
I think he told me he's going to mod it.
")
officermartinez
[H]ard|Gawd
- Joined
- Jan 21, 2006
- Messages
- 2,012
Well I ran into a "snag" today.. After testing one of my EK waterblocks, I immediately noticed FLUID XP everywhere on my test table. Ughhhh! So I gave it a 1mm - 2mm turn in case the seal had a tiny gap. No luck. The fluid still poured out between the black delrin top and the copper block itself. So, after removing the derlin top, here is what I found:
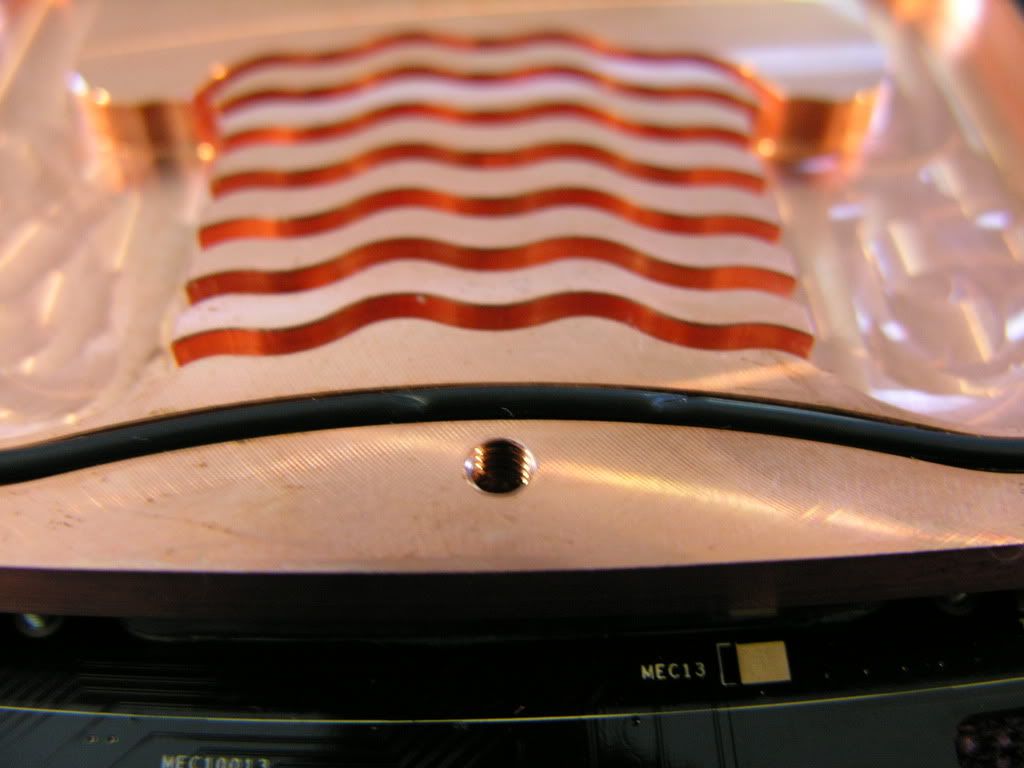
WOW! The ring had a few pinches in it. It was almost severed. That explains the leak. For a second there, I thought both of my EK waterblocks were leaky but it ended up that I tested the same card/block twice.. Whew! Anyway, I purchased them from www.performance-pcs.com and I quickly made a phone call. Upon speaking with one of the techs there (James), he said he would try to get me another ring for the waterblock and ship it out today. I still have a few days of testing all of the seals on all of the water cooling parts. This part of the build takes a bit as you really want to be sure that you take every precaution to prevent any leaks once everything is installed.
WOW! The ring had a few pinches in it. It was almost severed. That explains the leak. For a second there, I thought both of my EK waterblocks were leaky but it ended up that I tested the same card/block twice.. Whew! Anyway, I purchased them from www.performance-pcs.com and I quickly made a phone call. Upon speaking with one of the techs there (James), he said he would try to get me another ring for the waterblock and ship it out today. I still have a few days of testing all of the seals on all of the water cooling parts. This part of the build takes a bit as you really want to be sure that you take every precaution to prevent any leaks once everything is installed.
officermartinez
[H]ard|Gawd
- Joined
- Jan 21, 2006
- Messages
- 2,012
I have been testing the other 8800GTS / EK Waterblock and everything looks really good with it. No leaks. I will continue to test the remainder of the water cooling setup prior to installing it..
Here is a shot of the test area...
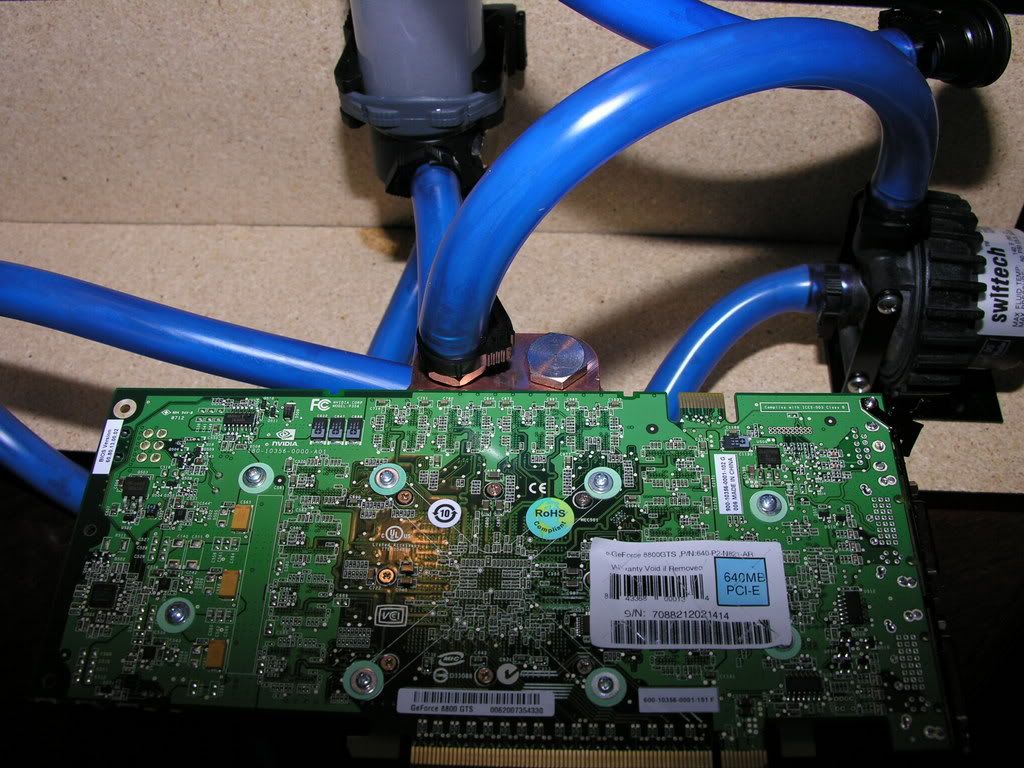
Here is a shot of the test area...
RX3
[H]ard|Gawd
- Joined
- Jan 12, 2007
- Messages
- 1,610
Marty!
Holy crap! I havent seen until now! All that work for that monster of a rig is going to be so worth it in the end...i was just telling dolph that your work is never done! It really looks awesome, then again your builds always do!
Anywho, thanks for returning my calls bro. Jk , I know ur hella busy. Hope all is going well with you. Talk to you soon.
officermartinez
[H]ard|Gawd
- Joined
- Jan 21, 2006
- Messages
- 2,012
Hey bro.. Man it's been awhile! Wow! Well, this is my current project.. LOL. I am never satisfied, am I? Dolph already thinks I am a weird-o already. Anyways, I am still testing my water stuff.. I've since leak tested both video cards (and obviously one was faulty) and now I am working on my triple radiator.. A few more hours and I will probably finish this up and start in on my swiftech chipset water blocks..
I know I am going to have a fill port but I just don't know where to put it..
I know I am going to have a fill port but I just don't know where to put it..
Bummer on the EK bro, but I'm glad Performance is hooking you up with another. They've helped me out before, I don't mind to pay a little higher for that kind of service.
Hope your loop continues to do fine.
Are you sure you are going to need a fillport? With that res you can just do what I did, take off the top, get a funnel, and hook a spare piece of WC tubing to the end and snake it in there.
A drain port might be a better option, i think, maybe, with the tightness you are going to have(it's looking super tight like prom night), probably isn't the best option to try and dump your res or whatever. Still up to you though.
Keep bringing on the sickness!
Btw, I better see a sound card in there sometime! I'm going to keep giving you hell about that man, lol.
Awesome work man.
officermartinez
[H]ard|Gawd
- Joined
- Jan 21, 2006
- Messages
- 2,012
Hey RSGUNTER.. I might give you a call soon. We were abruptly cut short during our last conversation.
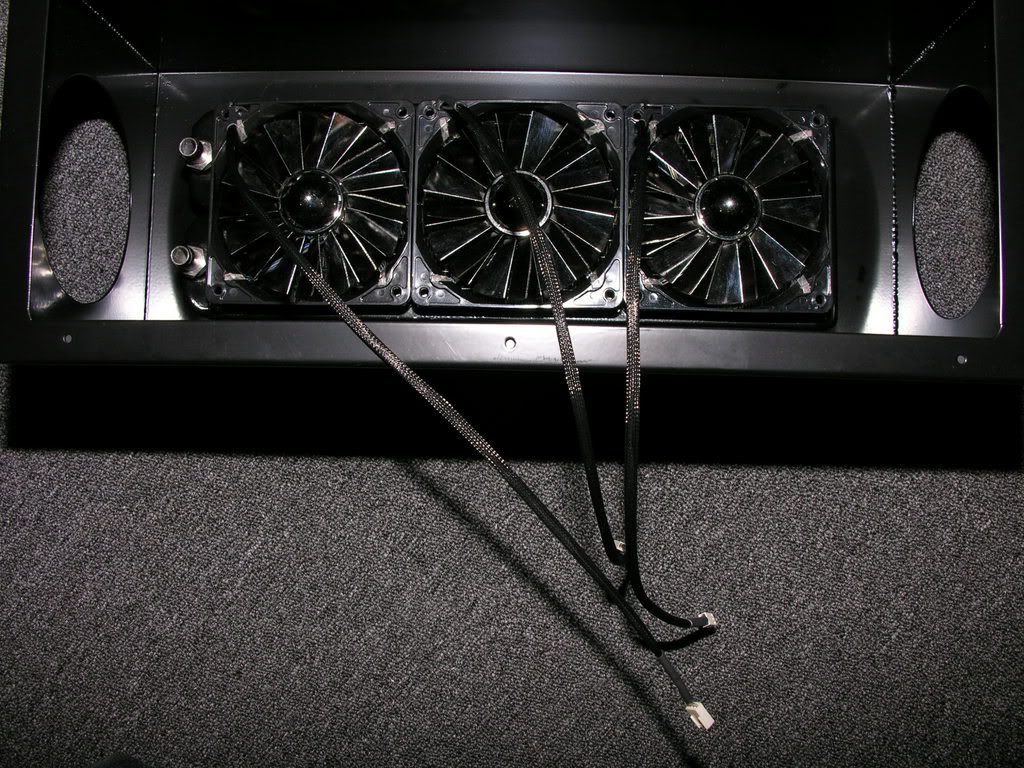
Back to the thread.. I just finished testing my triple rad and it passed like a champ (I pretty much knew it would as this radiator just came off of my rig from my last build.. LOL). Anyway, I just wanted to post a few more shots of my chipset waterblocks. I just started my leak testing on them about an hour ago...
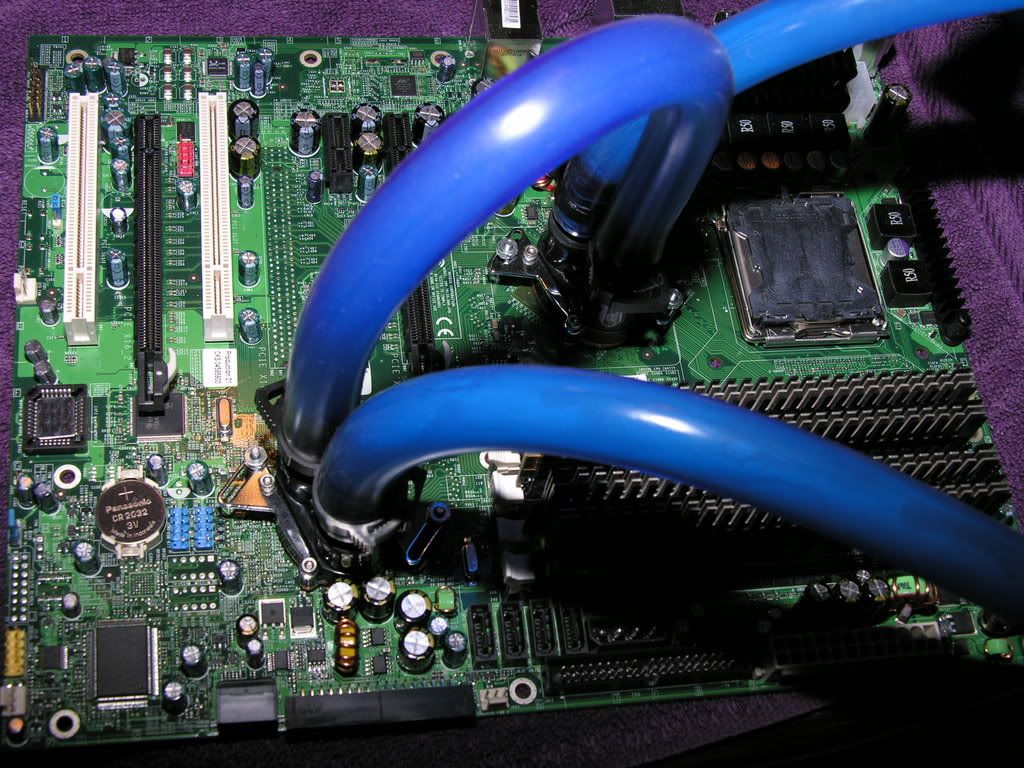
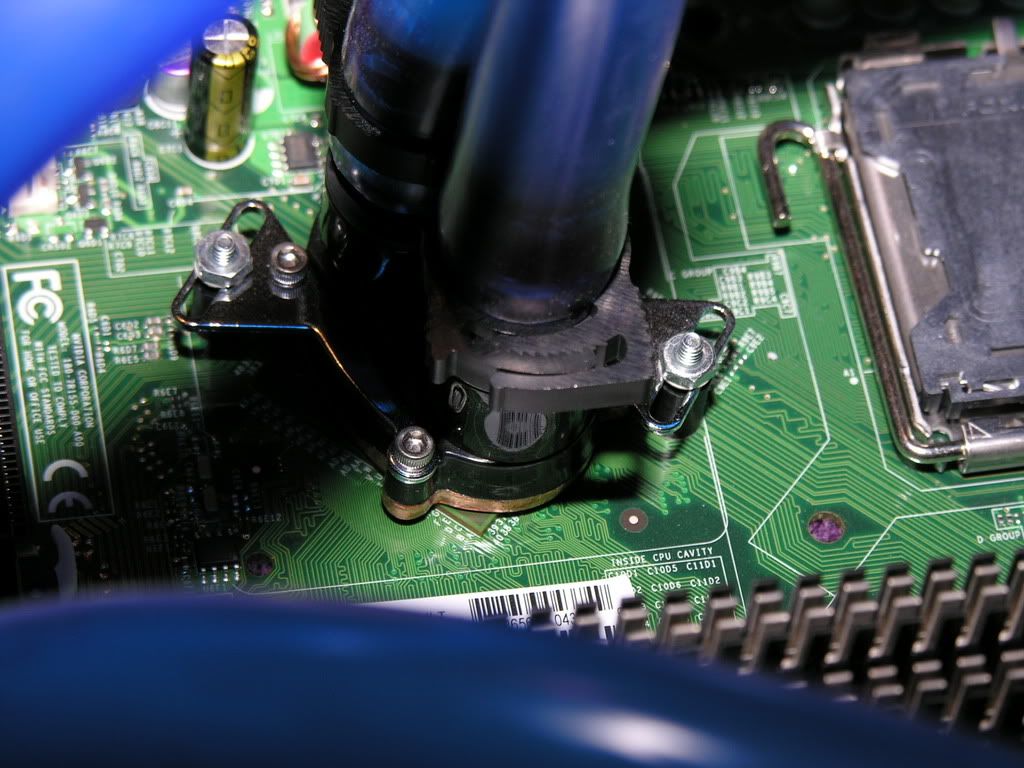
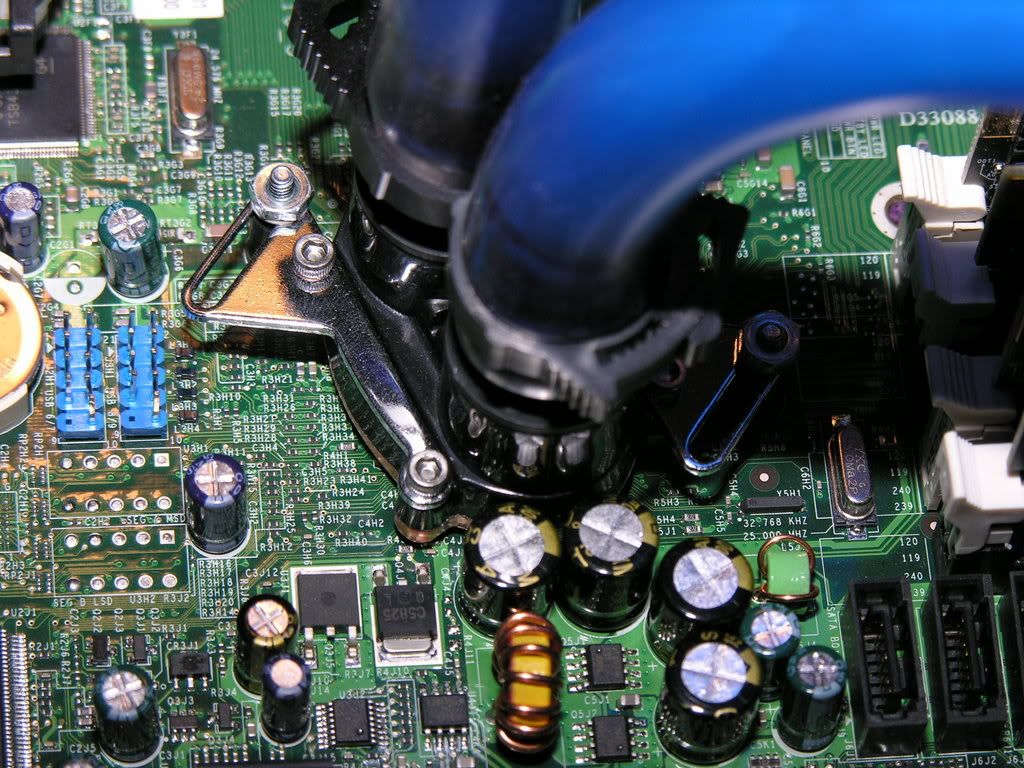
Back to the thread.. I just finished testing my triple rad and it passed like a champ (I pretty much knew it would as this radiator just came off of my rig from my last build.. LOL). Anyway, I just wanted to post a few more shots of my chipset waterblocks. I just started my leak testing on them about an hour ago...
officermartinez
[H]ard|Gawd
- Joined
- Jan 21, 2006
- Messages
- 2,012
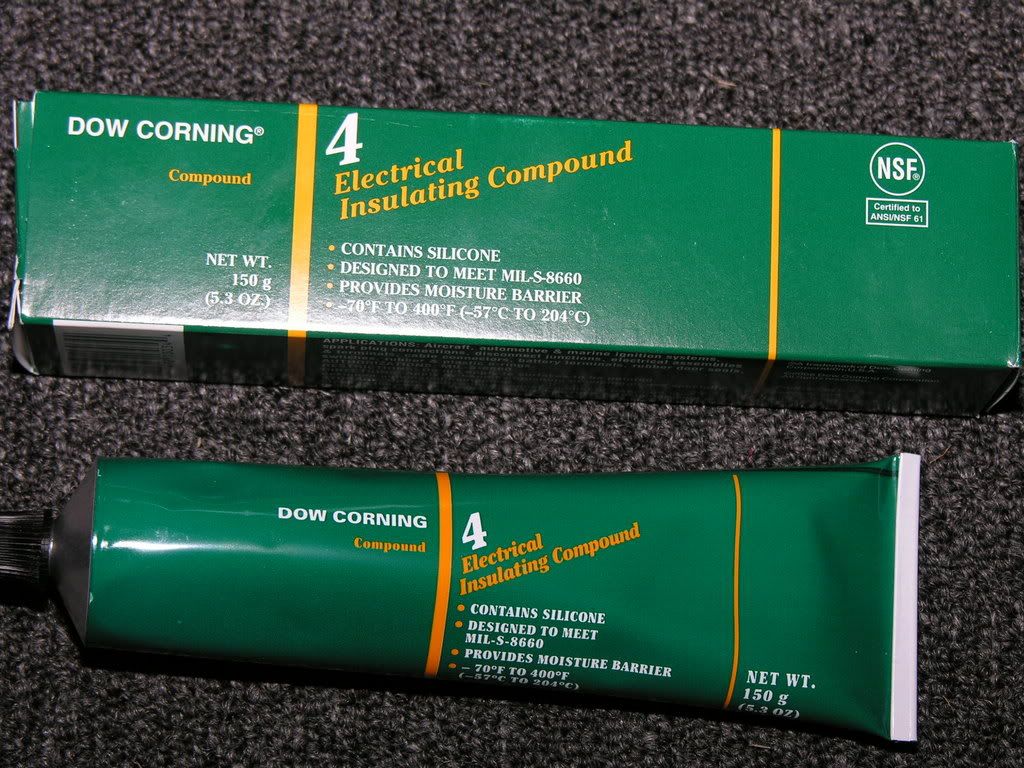
Well I F-I-N-A-L-L-Y found some Dow Corning 4 (DC4). On any given day, there are over 1.3 million people in the City of Fort Worth, Texas. Thousands upon thousands of businesses are here too. I was only able to find 1 single place in Fort Worth that carried this stuff.. OMG! What a pain, but anyways... I now have it and I will soon be using it on (and around) my processor area. This stuff will keep the moisture off of the motherboard and socket area. It's good down to -57C!
officermartinez
[H]ard|Gawd
- Joined
- Jan 21, 2006
- Messages
- 2,012
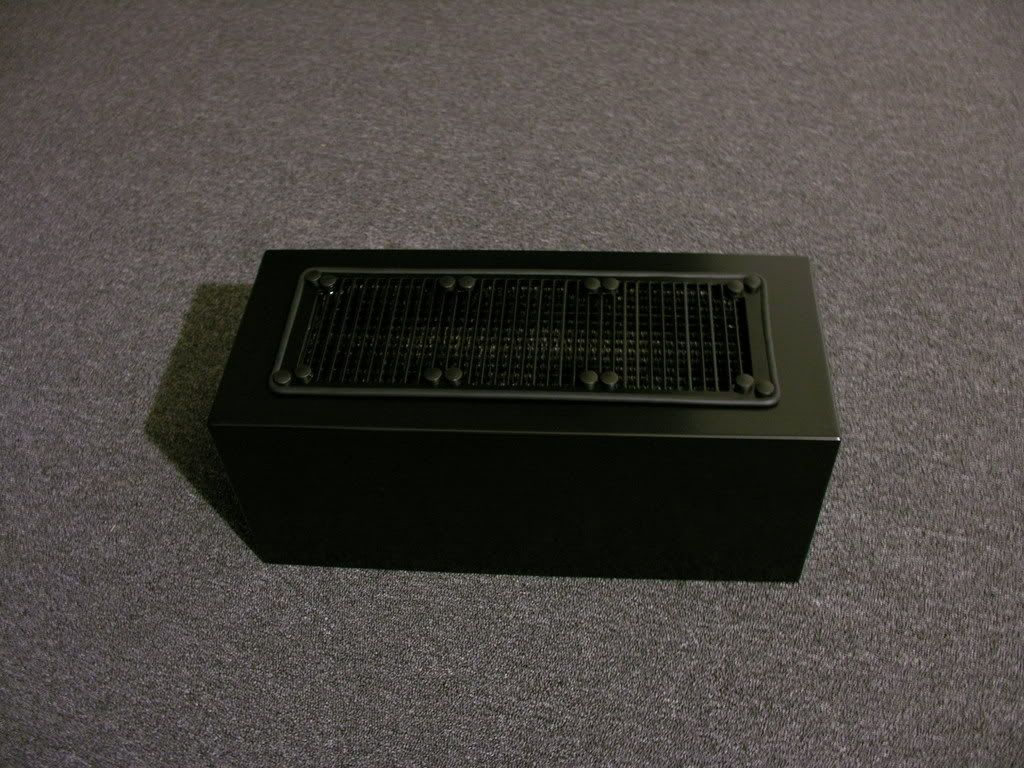
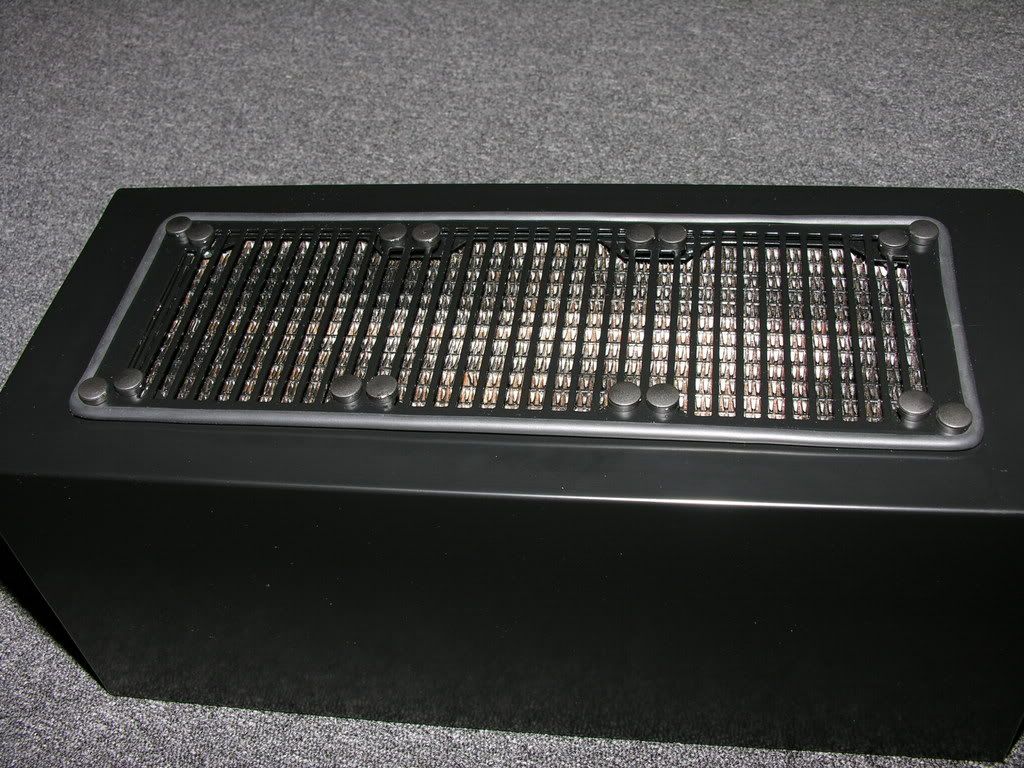
Thanks Magoo! I am starting to get ansey. I can't get much accomplished during my work week. I ordered some sleeving kits and a new A.C. Ryan UV Reactive side window (which needs to be cut to fit). After buying the sleeving kits, I realized that I need to buy a heat gun. I guess I will buy one of those locally. When I was testing my radiator, I noticed the nag'ing-ist thing.. It was the sound of a low vibration, metal on metal. I must have searched for two hours looking for the source. The only thing I could find out was my radiator grill was somehow resonating which was causing something to vibrate. I never did find the culprit. So, I tried something and it completely worked. I added some channel trim around my radiator cover and viola, NO MORE RESONATING or VIBRATING. I guess I am going to keep it like this..
Flash Off:
Flash On:
Flash Off:
Flash On:
I ordered some sleeving kits and a new A.C. Ryan UV Reactive side window (which needs to be cut to fit). After buying the sleeving kits, I realized that I need to buy a heat gun.
You're welcome!
That radiator box looks sick mounted bro. Trim looks really clean, awesome.
officermartinez
[H]ard|Gawd
- Joined
- Jan 21, 2006
- Messages
- 2,012
Thanks.. When I order those last parts, I chose Priority Mail ~ US Post Office shipping. Since the USPO delivers on Saturdays, I am keeping my fingers crossed that my order will be delivered this Saturday (or Monday at the latest). Since I have this upcoming Monday, Tuesday and Wednesday off from work, I will try to complete this project (or atleast "git-r up & goin" )...
Just interested, and too lazy to look it up........what is the highest resolution that your giant monitor can handle.....
I still havent been able to put to memory what 1080 is in computer monitor terms.
Is it 1920X1080 ????? or higher than that???
I still havent been able to put to memory what 1080 is in computer monitor terms.
Is it 1920X1080 ????? or higher than that???
Blazestorm
Supreme [H]ardness
- Joined
- Jan 17, 2007
- Messages
- 6,940
1920 x 1080 is 1080p
It's more of a TV than a Monitor, unfortunately... Atleast it's 1080p though...
Amazing work, That looks to be a "dream" setup if I had one... but I lack the money part
It's more of a TV than a Monitor, unfortunately... Atleast it's 1080p though...
Amazing work, That looks to be a "dream" setup if I had one... but I lack the money part
officermartinez
[H]ard|Gawd
- Joined
- Jan 21, 2006
- Messages
- 2,012
Early this morning, I ordered a few things just to have "on tap" in case I need it.. I bought 9 extra feet of Primoflex tubing, a fill port, some more scrap aluminum and a few extra fittings. I will be routing some tubing through, to the bottom of the case as a drain plug. Nothing fancy at the moment planned. Just practical. I still don't know where I am going to incorporate my fill port. It will have to be mounted somewhere in/on the radiator box.
officermartinez
[H]ard|Gawd
- Joined
- Jan 21, 2006
- Messages
- 2,012
I have hit a virtual wall. I have sucessfully water tested all of my parts. The only part that failed was the first EK waterblock. I ordered the part from www.performance-pcs.com. I thought that the crew over there would honor my warranty and send me a new gasket / rubber seal. I guess that's where I was wrong. I got an email this morning (several in fact) from the company EK. In talking with Edvard Konig, an EK rep, the little gasket would be replaced at no charge but the shipping would be coming from overseas. It could take up to a few weeks (or even longer if customs holds the item).
Ugh! I am just very frustrated at the moment. I wanted this build to be completed before this upcoming Wednesday (09-26-2007). After a few rounds of exchanging emails with EK, I inquired about overnight shipping. The fastest shipping that they have available is Skypak Express. Edvard said that they would be willing to ship it, at the fastest possible option available, but the cost would be pretty high. I agreed to pay half of the shipping costs if they would ship it that route. So, I Paypal'd the money over (I had to do the US Dollar to Euros conversion). 14 Euros later (approximately $20.28 US Dollars), he said it was going to be shipped immediately. I did ask him if he would include a second gasket / rubber seal in the event that the "new" seal is faulty. All I can do now, is wait.
Ugh! I am just very frustrated at the moment. I wanted this build to be completed before this upcoming Wednesday (09-26-2007). After a few rounds of exchanging emails with EK, I inquired about overnight shipping. The fastest shipping that they have available is Skypak Express. Edvard said that they would be willing to ship it, at the fastest possible option available, but the cost would be pretty high. I agreed to pay half of the shipping costs if they would ship it that route. So, I Paypal'd the money over (I had to do the US Dollar to Euros conversion). 14 Euros later (approximately $20.28 US Dollars), he said it was going to be shipped immediately. I did ask him if he would include a second gasket / rubber seal in the event that the "new" seal is faulty. All I can do now, is wait.
Willsonman
[H]ard|Gawd
- Joined
- Jun 11, 2005
- Messages
- 1,195
Well, I guess you could try to make a silicone gasket and test it for leaks but it would be a messy clean up to install the new gasket. It should work though.
officermartinez
[H]ard|Gawd
- Joined
- Jan 21, 2006
- Messages
- 2,012
I wondered about that too. I don't have alot of experience with altering gaskets. I understand the factory seal is usually best on watercooling parts but if I were to "mend" the weak part of the factory rubber seal, what would be a good product to buy? I have a local Home Depot and Lowes Home Improvement within driving distance from my house. I would also want something that dries QUICKLY, right? Wating for the silicon seal to cure, for 48-72 hours would defeat my goal. Any suggestions from you experienced water cooling guys?
Disappointing that Performance couldnt just send you a gasket and then get the replacement from EK, their time frame is not as critical as yours. Bummer on that.
Performance is usually better than that.
I would wonder if you made some silicone seal and it turned out the block itself was bad, what would happen to the warranty? Best to wait on the real deal.
Performance is usually better than that.
I would wonder if you made some silicone seal and it turned out the block itself was bad, what would happen to the warranty? Best to wait on the real deal.
officermartinez
[H]ard|Gawd
- Joined
- Jan 21, 2006
- Messages
- 2,012
Yep.. that's how my week has been. I hate being kicked while I am down.. Ugh.
Willsonman
[H]ard|Gawd
- Joined
- Jun 11, 2005
- Messages
- 1,195
I had a leak on my res where the fittings screw in and the teflon tape would not cut it. I got some clear silicone gasket maker from an auto parts shop. put it on the threads and let it sit for an hour or two and it was good to go. If you were to use the old gasket and put some of this stuff overtop of those spots and let it dry assembled it should be good to go in no more than 6 hours. silicone cleans up pretty easy on metal but I dunno about acetyl or any other polycarbonate. If you are just twiddling your thumbs I would certainly give it a try.
officermartinez
[H]ard|Gawd
- Joined
- Jan 21, 2006
- Messages
- 2,012
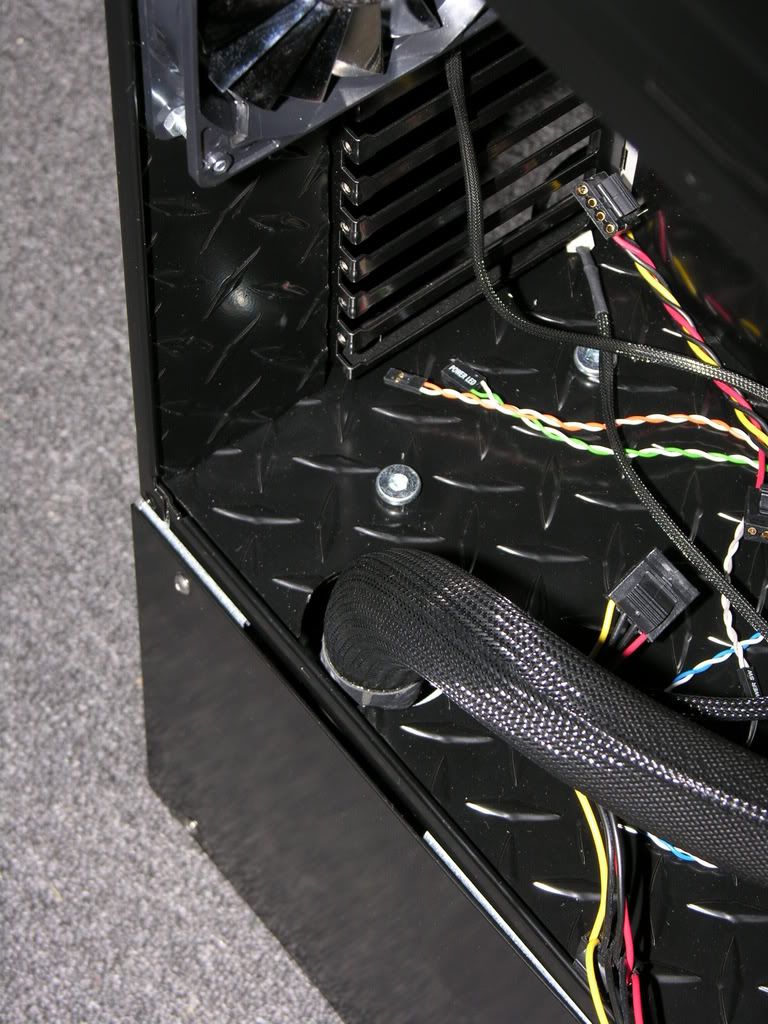
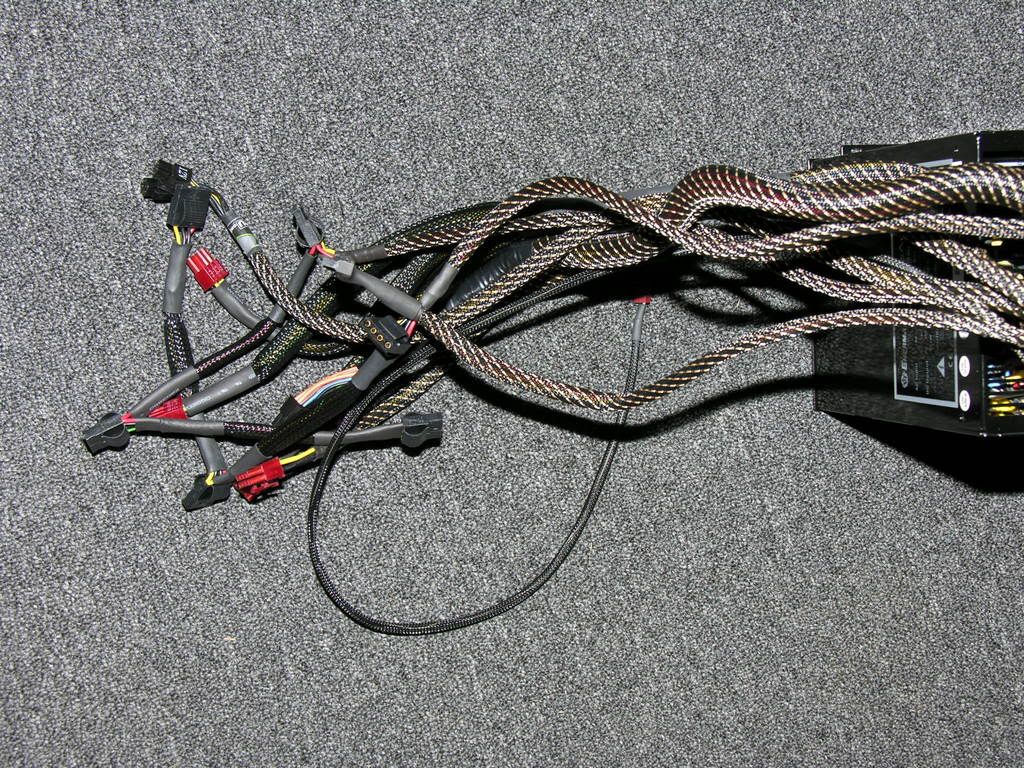
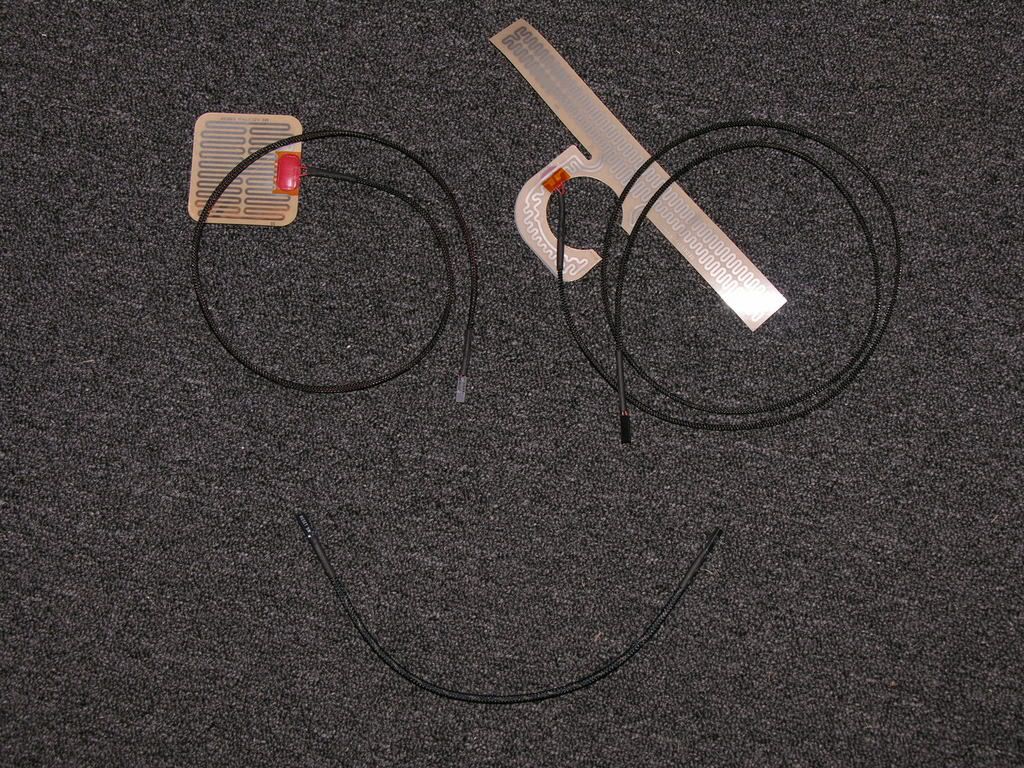
Hmmmmmmm.. I am still without a solution for the EK waterblock seal. My black sleeving and shrink wrap came in today. So, I made a trip down to my local Harbor Freight tool store and bought a little "nothing to brag about" heat gun. For $14.99, I can't complain! I have since sleeved ALL of my exposed wires. I started on sleeving the exposed wires on the power supply and man, what a P.I.T.A !
I will be sure to snap a few shots of the newly sleeved wires.. Nothing special. Just did em all in black to keep with the theme.
I will be sure to snap a few shots of the newly sleeved wires.. Nothing special. Just did em all in black to keep with the theme.
I started on sleeving the exposed wires on the power supply and man, what a P.I.T.A !
You got that right.
officermartinez
[H]ard|Gawd
- Joined
- Jan 21, 2006
- Messages
- 2,012
A small update.. But, this small update took me pretty much ALL day to do..
First, I had to go buy the heat gun...

Next, my sleeving kits came in from Performance-pcs.com. It is unfortunate but as of right now, I will no longer be doing business with them. Its sad because I like their site and the things they offer but I refuse to do business with a site that has lied to me on (3) different occassions. I may not be perfect, but I am honest. Anything less than an honest sale or honest customer service will not be tolerated. "That's all I have to say about that" - Forest Gump.
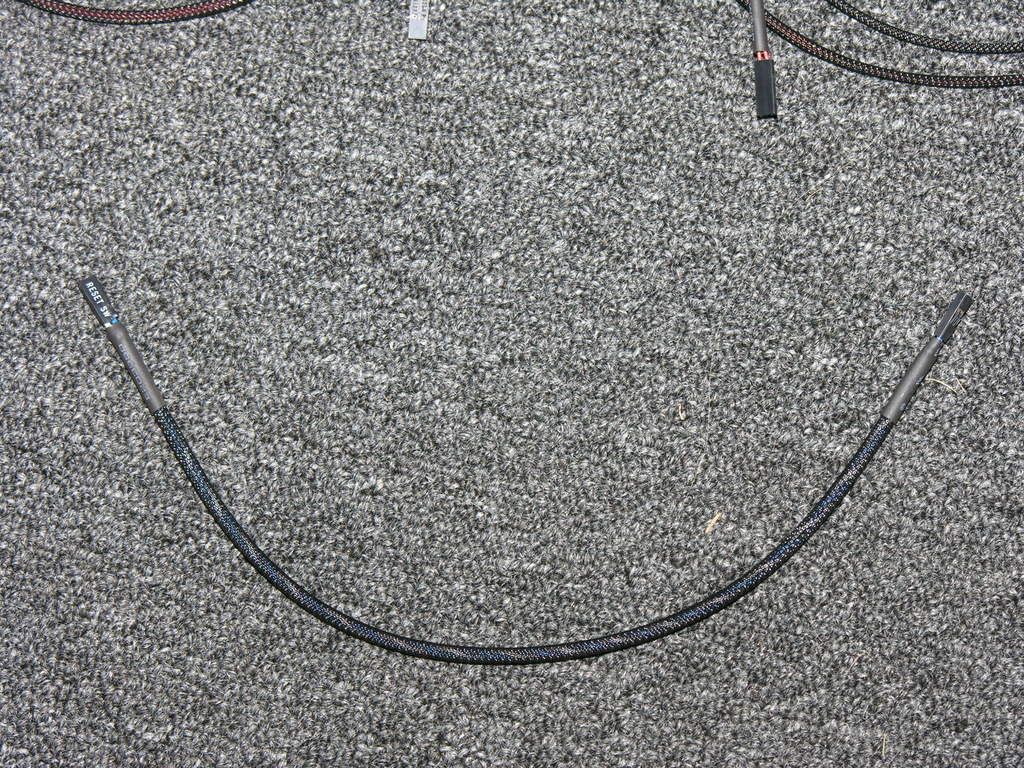
Moving on.. Here are some shots of my sleeving work.. Atleast I didn't melt and mangle everything (yet).
First, I had to go buy the heat gun...
Next, my sleeving kits came in from Performance-pcs.com. It is unfortunate but as of right now, I will no longer be doing business with them. Its sad because I like their site and the things they offer but I refuse to do business with a site that has lied to me on (3) different occassions. I may not be perfect, but I am honest. Anything less than an honest sale or honest customer service will not be tolerated. "That's all I have to say about that" - Forest Gump.
Moving on.. Here are some shots of my sleeving work.. Atleast I didn't melt and mangle everything (yet).
officermartinez
[H]ard|Gawd
- Joined
- Jan 21, 2006
- Messages
- 2,012
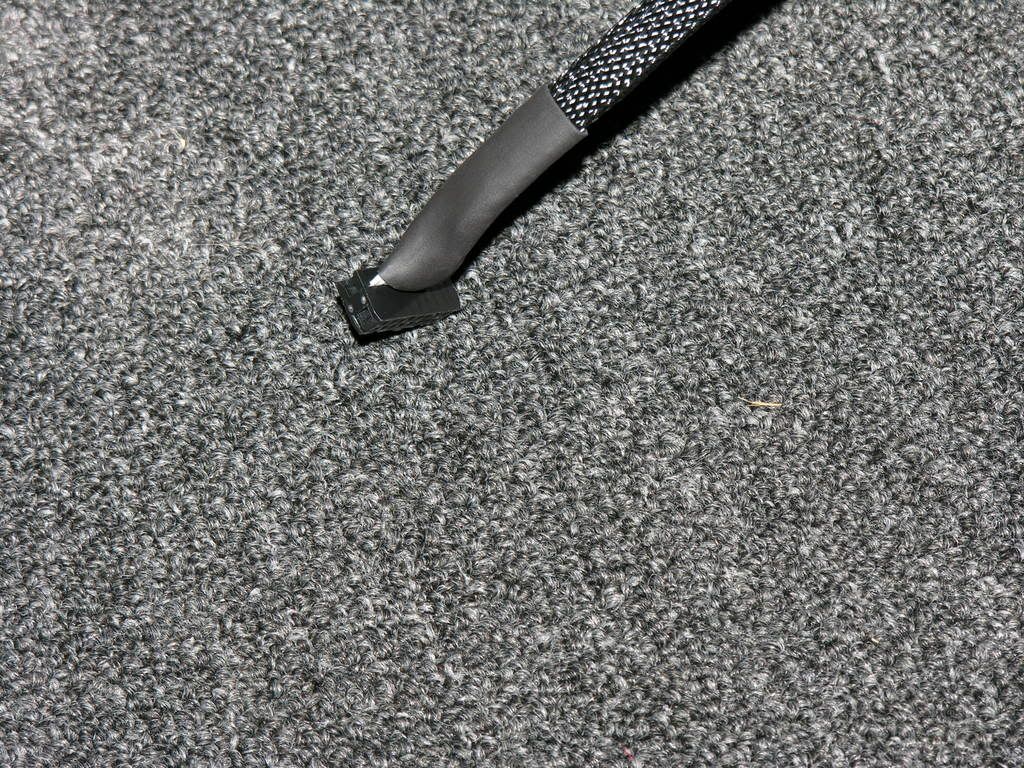
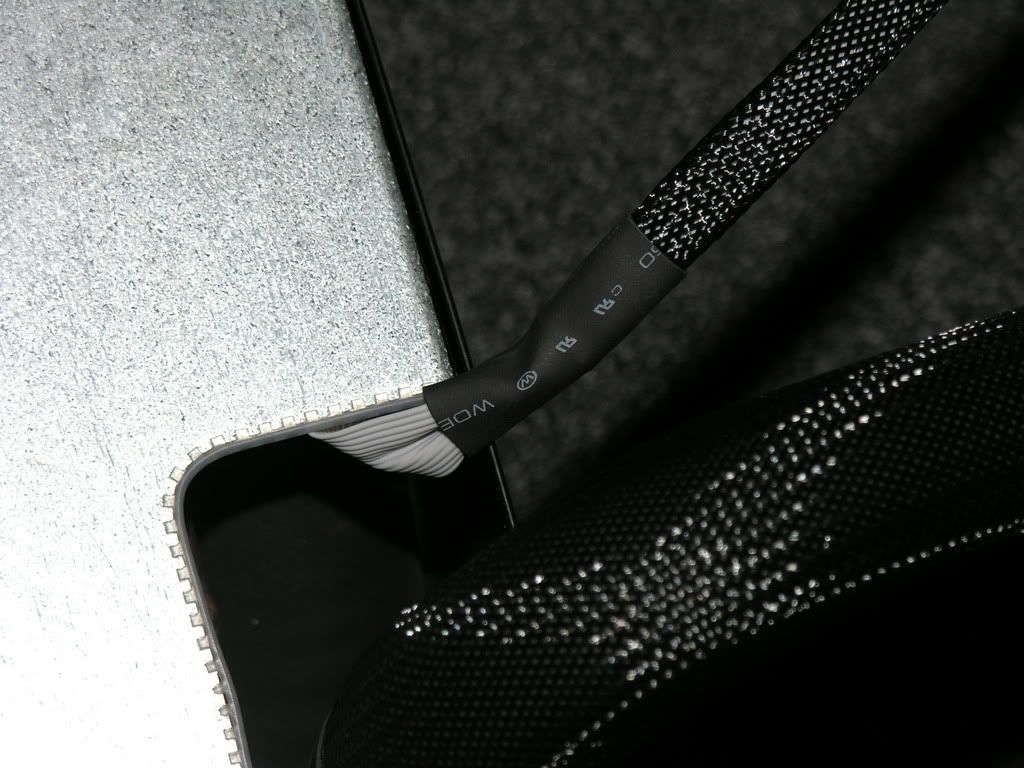
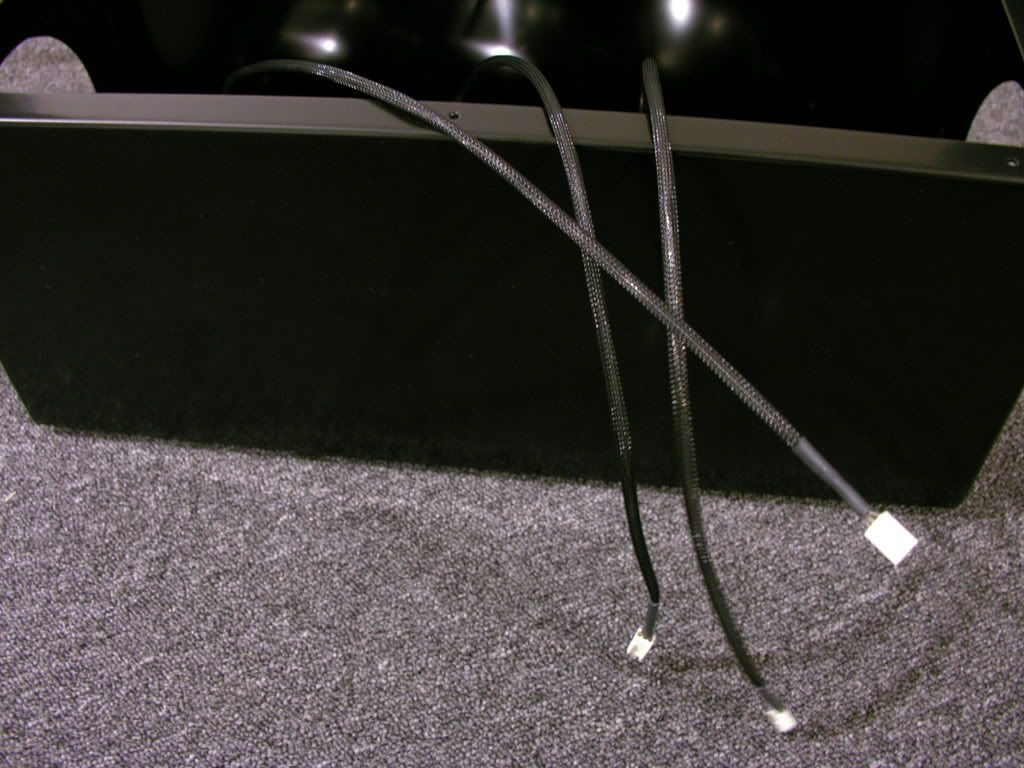
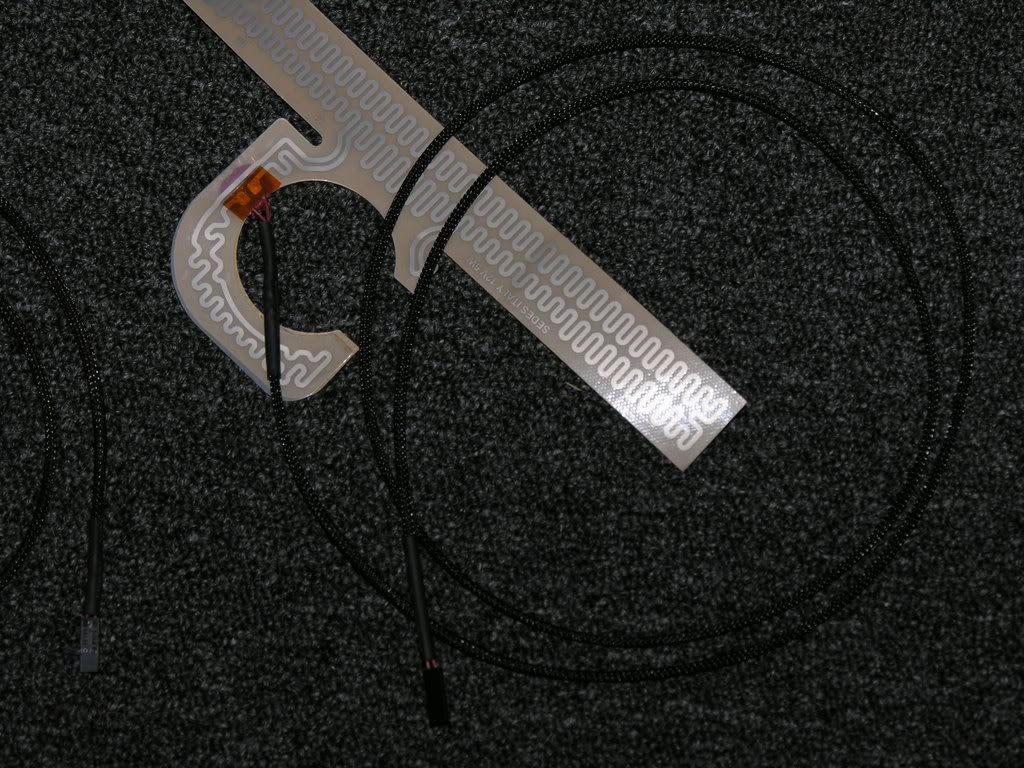
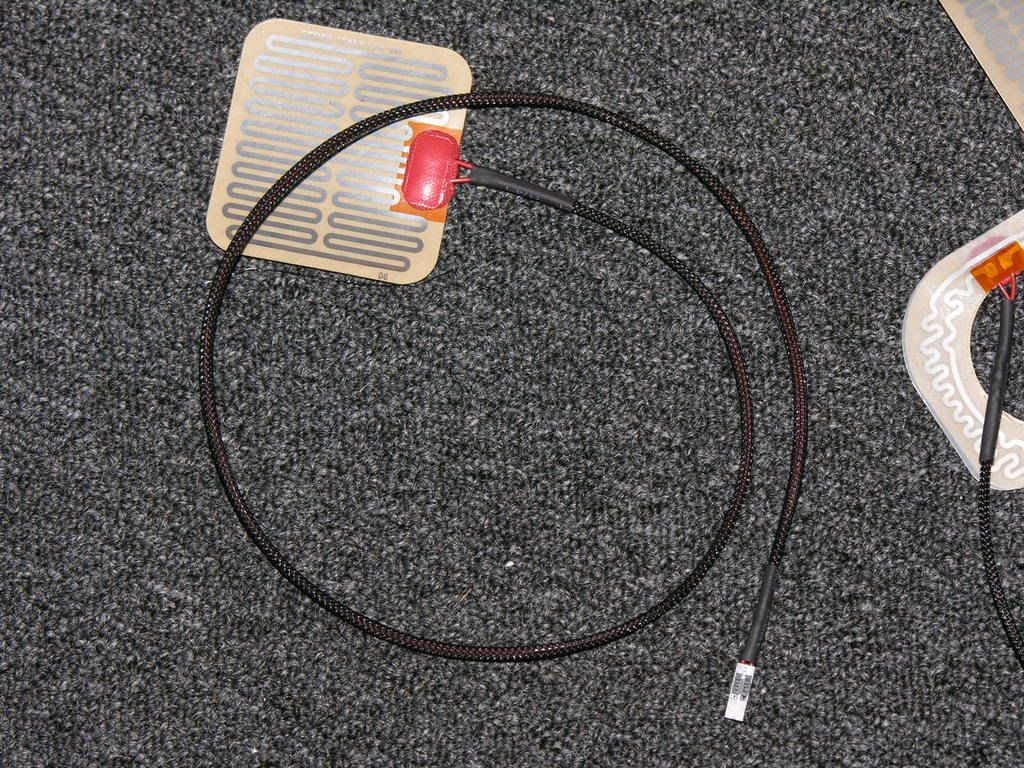
I decided to sleeve the Vapochill wires..
I sleeve everything except my cat and my wife.......I just use my daughter's hair dryer, works like a charm. Just a thought if the heat gun ever takes a powder.
I'm really still bummed about performance. If you sell a product, you should back it,which they usually do. Especially a company in Europe for Christ's sake.
I'm really still bummed about performance. If you sell a product, you should back it,which they usually do. Especially a company in Europe for Christ's sake.
officermartinez
[H]ard|Gawd
- Joined
- Jan 21, 2006
- Messages
- 2,012
Hahaha.. That sounds alot like me right now.. After ALL OF THAT SLEEVING, I forgot to sleeve the ribbon cable that comes out of the Vapochill and plugs into the Chill control module. You know what that means? .................................I had to completely disassemble my Vapochill, from the Lian Li case which meant that I had to undo ALL of the flooring, front fan, motherboard screws and any misc wiring that I had tucked away.. Well, I got it done...... almost 2 hours later! Heaven forbid someone breaks into my house and "tries" to steal my case.. I hope they ate their Wheaties and brought a sack lunch.. They are going to be here for a while... LOL!