• Some users have recently had their accounts hijacked. It seems that the now defunct EVGA forums might have compromised your password there and seems many are using the same PW here. We would suggest you UPDATE YOUR PASSWORD and TURN ON 2FA for your account here to further secure it. None of the compromised accounts had 2FA turned on.
    Once you have enabled 2FA, your account will be updated soon to show a badge, letting other members know that you use 2FA to protect your account. This should be beneficial for everyone that uses FSFT.

Project: Savage (my first mod)

jreffy

Limp Gawd
Joined
Jul 25, 2006
Messages
300
This will be my first mod. I already bought a practice case and worked on painting and cutting it for practice.

The theme is based on the sequel to a small game produced by a small company, S2Games. They original game is called Savage: Battle for Newerth. It was the first game to combine RTS and FPS into a new genre. I highly suggest you guys check it out if you haven't, especially since you can download and play the game for free, no CD key required any more.

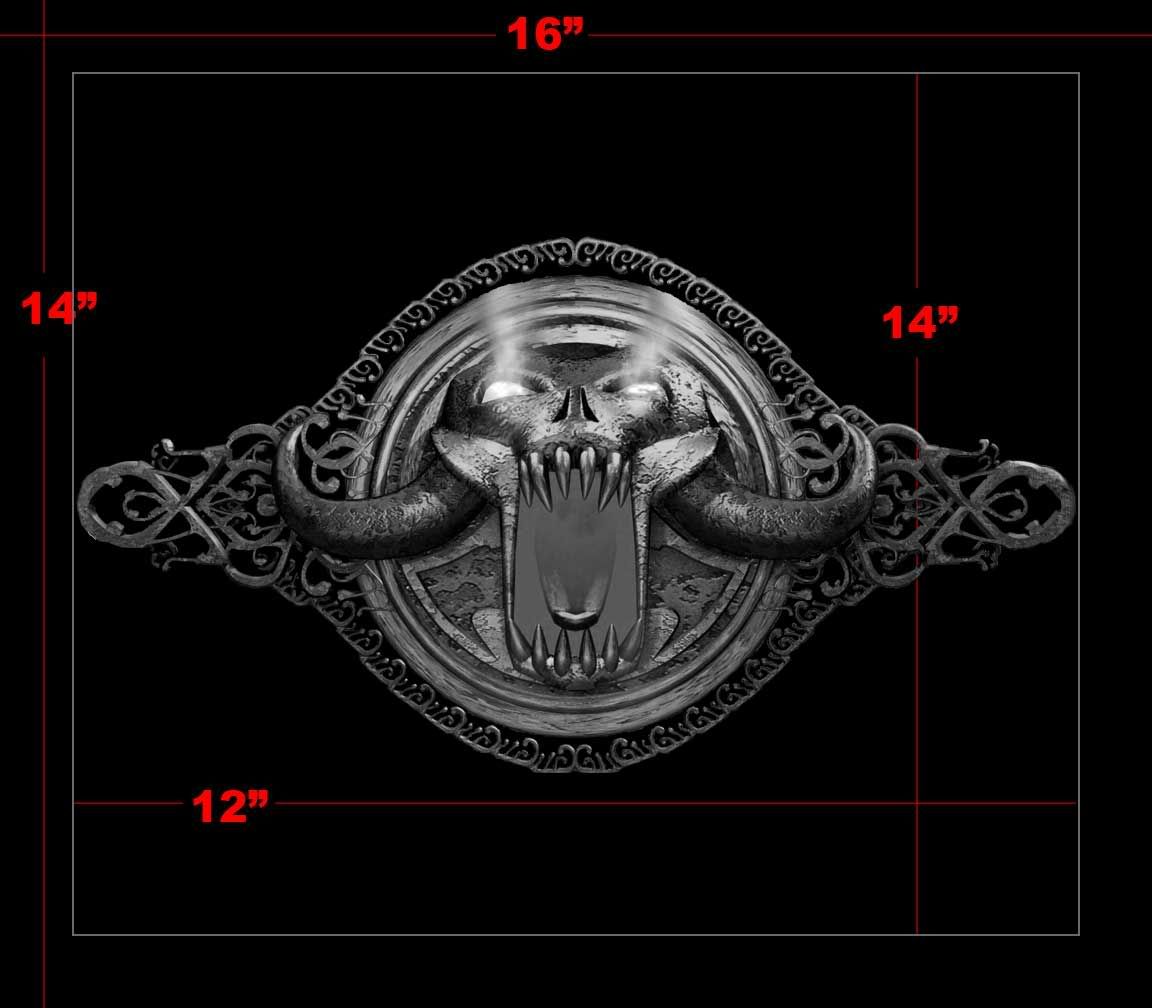
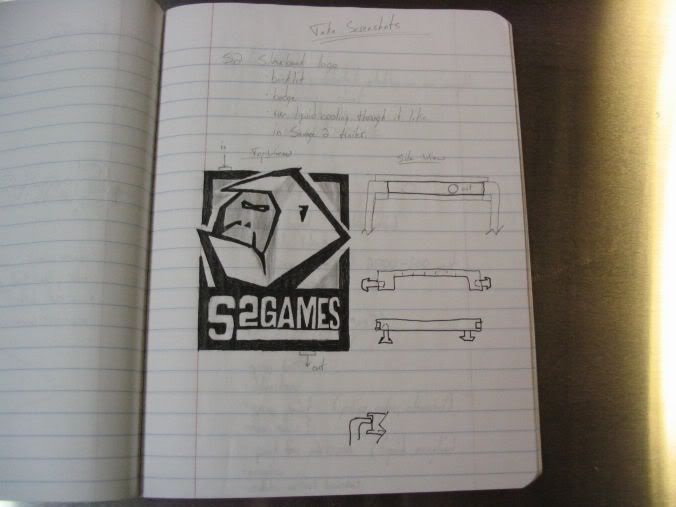
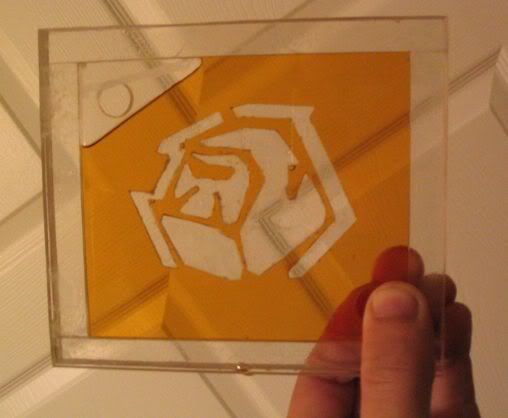
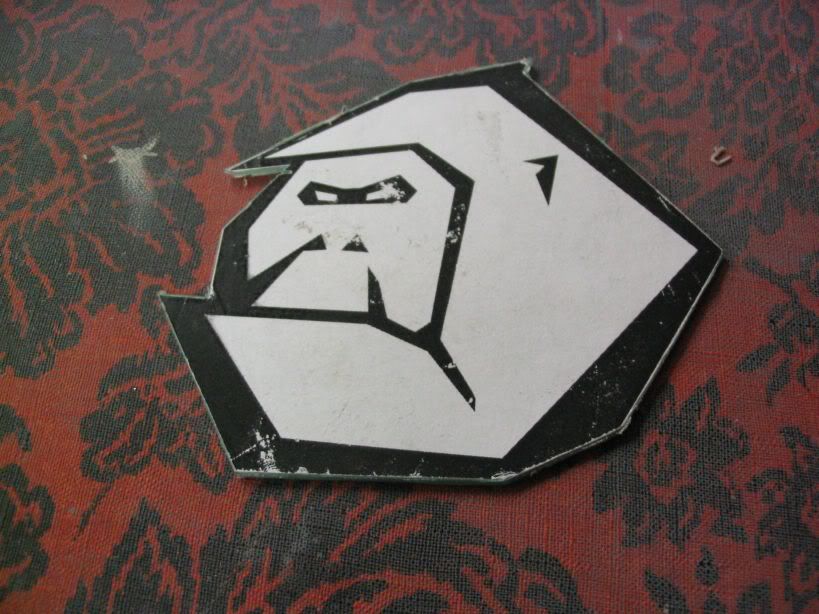
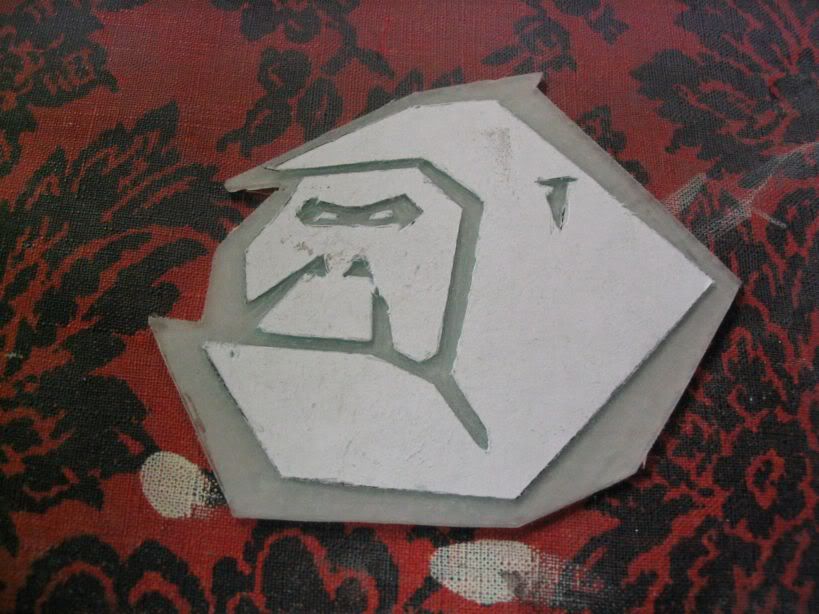
With the Beta soon to start for the sequel I wanted to get this gaming beast up and running. I want to put the game's main logo on the side of my case, first seperating the text and the skull image seen here; Savage 2 logo

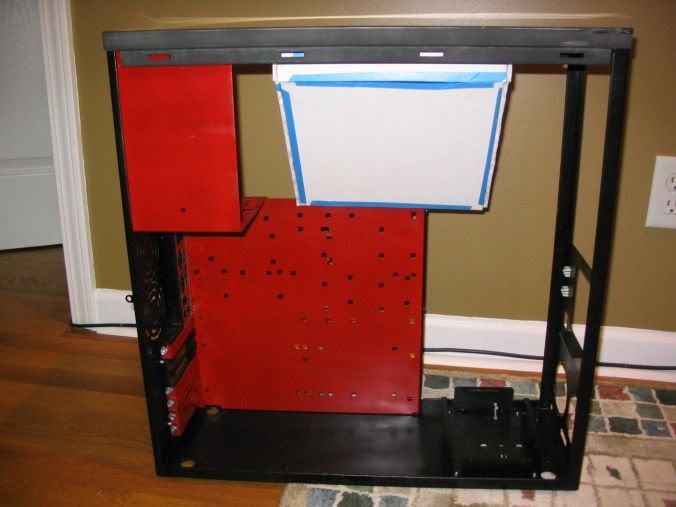
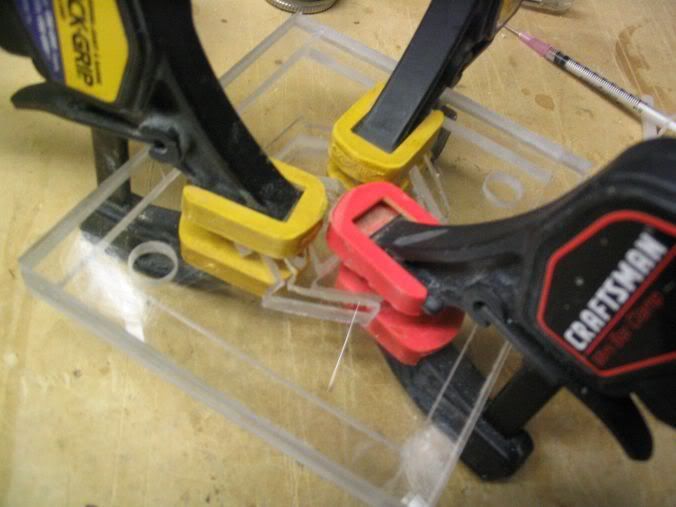
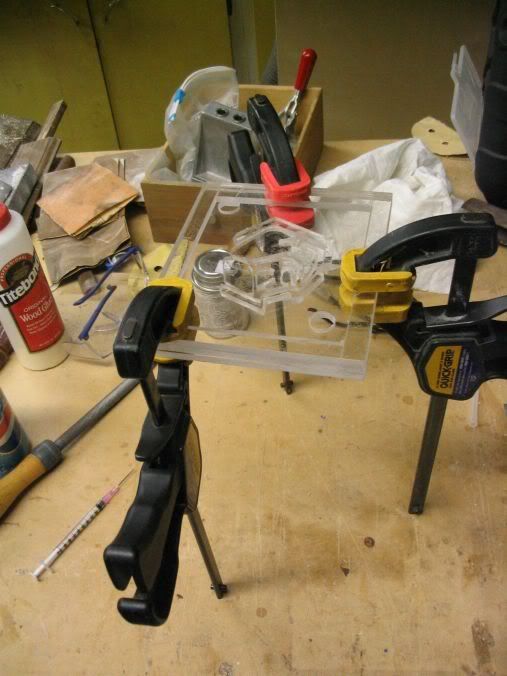
I am going to have the text created into a vinyl logo I will stick to the side of the case above a 10"x12" window. On this window I'm going to have the skull and it's mounting laser etched (www.hyperkore.com) into another piece of acrylic. I have a bunch of other ideas, but I'll save those until it's time to construct them.

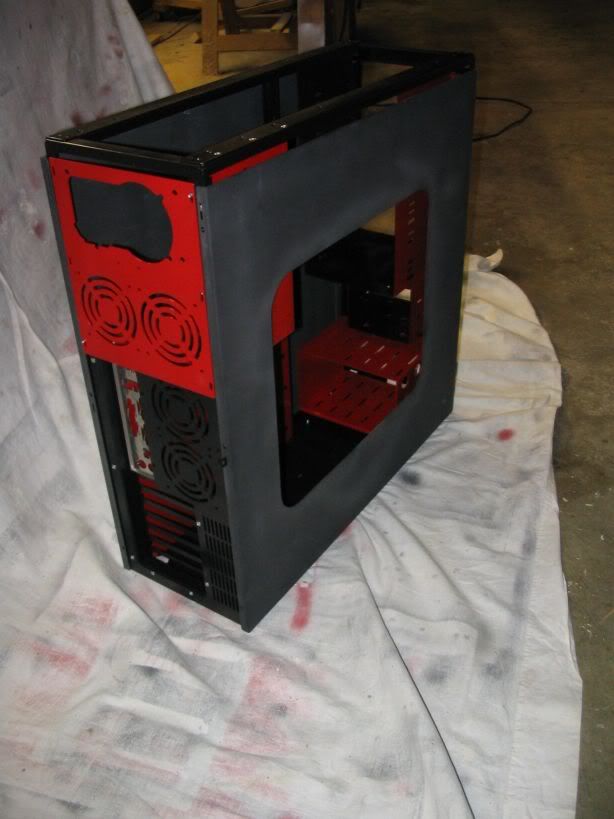
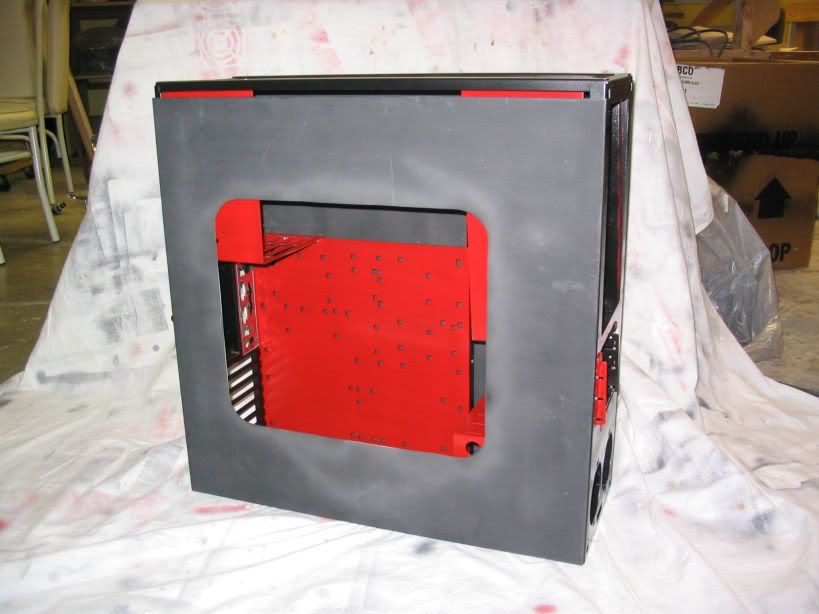
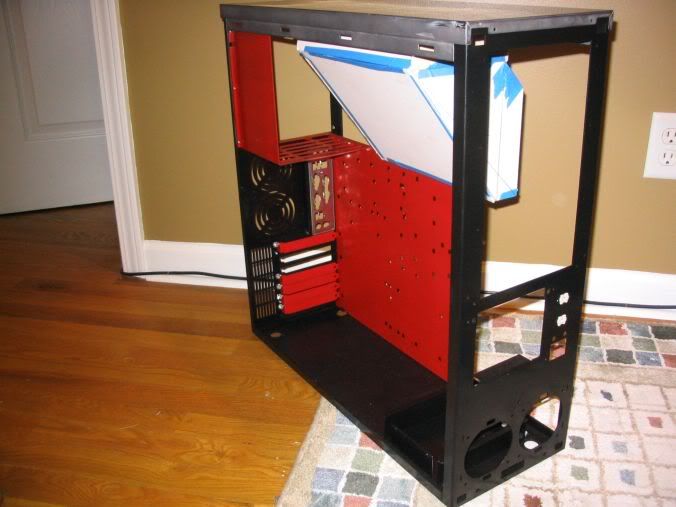
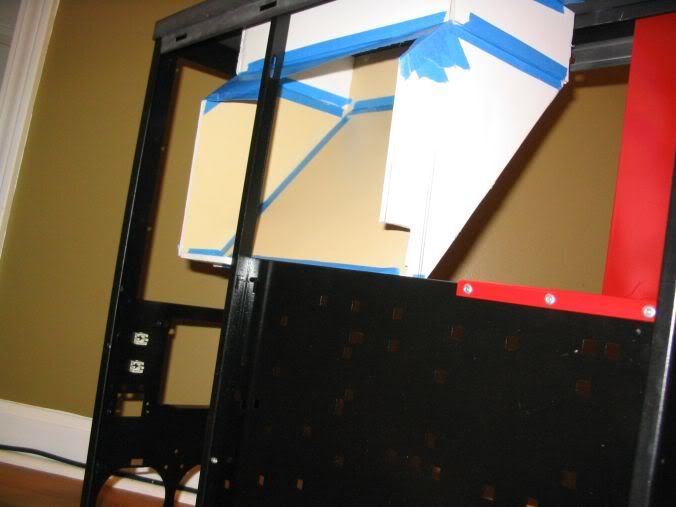
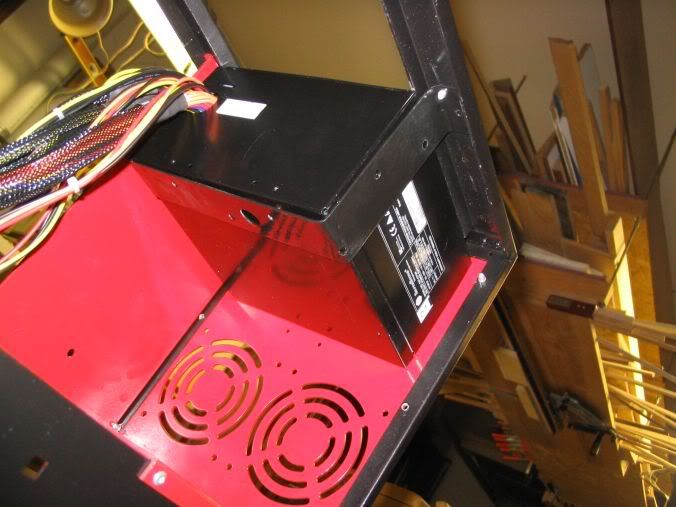
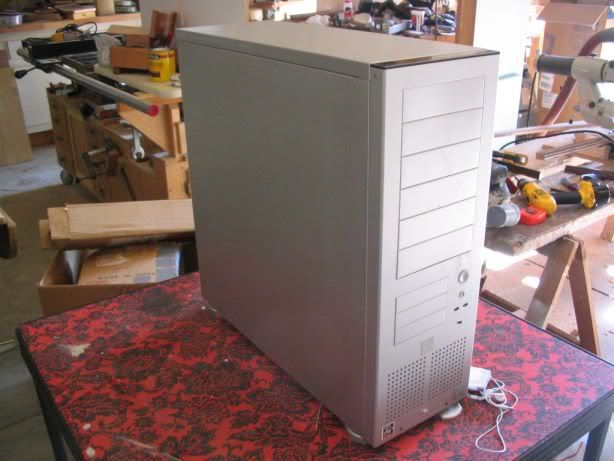
The case I have is a Lian Li PC-70, and MAN this thing is HUGE!! I can fit my current PC tower completely inside it!! Going to start the sanding and painting tomorrow. Hopefully I can get my hands on a digital camera (mine seems to be broken) and take pictures from time to time. The paint scheme will be mostly black with a red core, similar to the type of backround on the logo.
 
Allright, I spent a lot of the weekend of *8/11-8/13) dissasembling and priming the PC-70 case. I can't believe how many parts there were to it! I'll link some pictures for what it's worth.

The beast of a case;
20060811_003.jpg

Everything taken apart;
20060811_016.jpg

Priming done;
20060811_023.jpg


For the rear video/sound card bezels, I wanted to paint them red so they show up against the black case. I thought they were a bit reflective, so I just sanded them before priming.
Before;
20060811_019.jpg

After;
20060811_020.jpg


The project was on hold for a week. Due to the fact that I was in Costa Rica. I started painting some of the interior pieces with a gloss red, and also gloss black. I also cut a window into the side panel. I started the wet-sanding when I returned.
 
Allright, got back from Costa Rica, did my wet sanding all day sunday. I was a bit dissappointed because my front panel had a lot of uneven spots. I have to go and reprime the whole thing. I'll probably wet-sand it by hand to make sure none of the primer comes off this time. I also reprimed the edges of the side panels, again, resand by hand. I'm not sure how many front bezels I'll actually need, so I'm holding off painting them.

Pics;
20060821_016.jpg

20060821_003.jpg

20060821_004.jpg


I also was able to cut out the S2Games logo from a thin piece of acrylic. this was more for a practice run. Eventually I'm going to get a thicker piece, do the same cut and "frost" effect, then sandwich that logo between to bigger pieces of acrylic, seal the whole thing up and run water through it. Basically the logo will be surrounded by my water-cooling fluid. I then am going to mount this in the front of my PC, taking the place of roughly 3 of my 6 front 5 1/2" bezels.

Step 1; used adhesive spray to mount the printed logo to the acrylic (kept the acrylic coating sheets on)
20060821_006.jpg

Step 2; used a razor to cut out the dark areas of the log and peeled them away, including the protective coating
20060821_009.jpg

Step 3; Sanded the exposed acrylic area with a dremel as best I could, peeled off the remaining logo and protective coat, came out better than I had anticipated.
20060821_010.jpg


That's it for now. Plans this week include more assembling of the case. Constructing the watercooling acrylic logo case, and figuring out how to mount it in the front of the computer.

Oh, and my C2D E6600 arrived today. I'll be buying the powersupply and radiator this weekend so I can mount them in the PC as well. Probably cut a blow-hole for the power supply in the top of the case as well.
 
bah, I can't get at the photobucket account from work


Tagged to be fixed when I get home.
 
To be honest, something looks wrong with the wet sanding. Maybe I'm not use to something on the statute of a Lian Li, but my wetsanding and what I see around here doesn't look like that. Are you wiping off the surface enough? High enough grit? I like 400 to 600 between coats. Make sure your primer's going on evenly: soak it in hot water, shake for 2 minutes, and use a spray gun adaptor.

Are you using self-etching primer? Spending the extra money on dupli-color stuff from Autozone will turn out much better than Rust-oleum stuff, which is much better for woods and other materials that you likely won't wet sand.
 
MrMaxwell said:
To be honest, something looks wrong with the wet sanding. Maybe I'm not use to something on the statute of a Lian Li, but my wetsanding and what I see around here doesn't look like that. Are you wiping off the surface enough? High enough grit? I like 400 to 600 between coats. Make sure your primer's going on evenly: soak it in hot water, shake for 2 minutes, and use a spray gun adaptor.

Are you using self-etching primer? Spending the extra money on dupli-color stuff from Autozone will turn out much better than Rust-oleum stuff, which is much better for woods and other materials that you likely won't wet sand.

Sanded it before priming, several layers of primer, then wet-sanding from 600-800-1000-1500-2000 grit
 
Didn't get much work done today, but I DID come up with some pretty wicked ideas for what else to do for my mod. It won't be too complicated, I just hope it doesn't clutter the interior of my case.

I'll be buying a 240mm radiator this week along with a powersupply and the fans to go with the rad. This will allow me to put a blowhole in the top of the case, and start mounting my rad to the top of the case as well.

My idea is to add a duct that goes from the right side of the case, up to the top of the case covering my rad. This ensures that my rad is pulling in fresh cool air from the outside of my case to cool the water, instead of blowing the already warm air over the rad. Should be fairly easy to do with some sheet metal, now I just want to figure out how to mod that duct :).

I'm also going to cut out an "S2Games" in the bottom corner of the left panel and put a mirror behind it, just for good looks.


Anyways, I increased the size of my window for kicks and did a mock assembly for a picture.

20060823_031-1.jpg

20060823_034-1.jpg

20060823_033-1.jpg


I also glued together a mock up of my watercooling acrylic window, just to see how glue would work to seal it. Results weren't too good, putting this together and ensuring a good seal without ruining the transparency is going to be tough.

http://img.photobucket.com/albums/v381/jreffy/Project Savage/20060823_025-1.jpg


That's it for now, probably won't update until I get the rad and power supply in.
 
use weldon. prolly #4. If you use superglue the vapors will interact with any oils left by your handeling and finger prints. that is why all the white haze showed up.

superglue is alright for projects your not going to see, or if you make sure to take special extream care to not touch the acrylic with your hands of fingers. using a laytex glove or something instead. but weldon is much better.
 
Conano said:
use weldon. prolly #4. If you use superglue the vapors will interact with any oils left by your handeling and finger prints. that is why all the white haze showed up.

superglue is alright for projects your not going to see, or if you make sure to take special extream care to not touch the acrylic with your hands of fingers. using a laytex glove or something instead. but weldon is much better.

I've done a bit of research on Weld-On. Couple questions; Is it going to cure clear? It seems like it is the right stuff for me if it does. Can I pick it up at a hardware store, or do I need to order it special?
 
There are many different kinds of weld on. Yes it does dry clear, and without the vapor issues. I highly reccomend ding some reserch on using it, how to geth teh seams perfect ect. A Great site for actualy learning a lot about acrylic and how it works and making your own stuff with it are sites like www.reefcentral.com. Look over a lot of the Do it Yourself forums. It should be weldon #4 if i remember correctly, but do check those sites. They ahve great do it yourself rescorces for dealing with acrylics as a lot of Reefing Enthusiests Build their own tanks using Acrylic. Superglue is fine for gluing down your live corals, but its unacceptable for a neat and clean acrylic project.

Dont be afraid to ask questions about the process of using acrylic, and such. Alot of reefers are more than willing to answer your questions.

but general rule, is keep your edges smooth, The smoother the edge, the better your seam will seal. Cause weldon actually bonds the molecular structure of two acrylic pieces esentually making them one piece.

Ohh one otherthing. Glue two pieces of acrylic together using superglue, Ten in a few days look at the joints. You'll notice small stress fractures which isnt a good thing.
 
UPDATE 8/29/06


Got some new parts today. Building had been non-existant while I waited for these parts, because I needed some exact measurements before proceeding (you'll see why). Power supply and 2 LED fans came in.

20060829_007.jpg


I was a little concerned with the wires on the PSU. They stuck out and were less flexible than I wanted, but I had anticipated that this would be a problem
20060829_009.jpg
.

Anyways, I pressed on.


I had already posted a thread about a custom duct system for my radiator that I am going to mount on the top of the case. Unfortunately the radiator that I want (GTS Stealth 240) has been out of stock, so I didn't have it to physically measure with, althought I did have the specs from the website.

Anyway, here is the rough (and I emphasize the word "rough") mock-up I did with foam board. The idea of this duct is to carry "fresh" (and therfore cooler) air through the radiator that will be hooked into the watercooling system, which will in turn cool the water more effectively as it passes through the radiator.

20060829_014.jpg

20060829_015.jpg

20060829_016.jpg

20060829_017.jpg

20060829_018.jpg


For measurements sake I put it at a 45 degree angle, just to keep it simple. As you can see I had to cut a bit out for the support bar and the motherboard tray. Now I BARELY hit the tray, so a simple fix of putting the duct on a sharper angle will fix that no problem. The other thing that will fix is the interference with the power cables, as you can see here. The PC is upside down so the PSU would stay in place :) you can also see the fans will fit just fine.

20060829_010.jpg

20060829_013.jpg


The only question left is the length. I plan on mounting 2 slot-load DVD/CD drives into one 5 1/2" bay, however I'm concerned my duct interferes with that, but I think I have a solution. Only time will tell for sure though.

Still trying to decide if I want to put a window on my duct and mod that out as well :) Any ideas?

Anyways, that's the update. My car is in the shop and it's going to cost me some money, so I don't plan on having many new parts and therefore not many updates for a while. I'll probably be cutting the holes in the top of the case for the PSU fan and the radiator fans, along with mounting them in the case until then. Going to have to rig up a custom mounting anyway for the PSU since I flipped the back panel so it would have a blowhole directly out of hte case.
 
Here's the mock-up that hyperkore.com sent me for the laser-etching of my case window. Was great doing business with them, quick responses to my emails and lots of help.

FinalEtchLarge.jpg
 
UPDATE 9/3/06


Worked primarily on my acrylic water-window today. Also mounted the power-supply and cut the blow-hole.

Bent-bracket for the power-supply, it's a little off, but it does the job and looks fine. Probably wouldn't notice that it's off unless you were looking for flaws.
20060903_019.jpg


Painted and mounted
20060903_032.jpg


Started with the acrylic window. Now, I know in the final assembly the logo is mounted backwards, but this is so I didn't confused it with anything I'd make later. Yes, I'm stupid, I'd do something like that.

20060903_024.jpg

20060903_025.jpg


the time came to use the Weld-on #4 solvent, and working as a biomedical engineer came in handy. It was just odd asking the lab for syringes and needles, they looked at me kinda funny.

20060903_027.jpg

20060903_028.jpg

20060903_030.jpg


When I started putting it all together, I encountered my first problem. The solvent moves between the two pieces of acrylic and fills in all the scratching and surface etching I did, essentially "erasing" all the etching. Needless to say, this needs to be solved, if anyone has ideas, lemme know. I have an idea or two, but it needs some testing.

Anyway, finished result!

20060903_035.jpg

20060903_036.jpg


no leaks

20060903_040.jpg


and a movie too (to show that I actually used water) with soundtrack. And if you look hard you can see my reflection in the acrylic.

http://smg.photobucket.com/albums/v381/jreffy/?action=view&current=20060903_037.flv


Next issue will be solving the acrylic/etching thing, mounting the radiator. And probably purchasing the pump and tubing.

I'm looking for some ideas for the back of the case. Now that I moved the PSU, I have room for more exhaust fans, but I want to keep the noise down, anyone have some ideas? you can reference past pictures for an idea of what it looks like.
 
UPDATE 9/12/06

To be honest, I'm starting to get frustrated with the case. There's so much more I want to do, and I keep running into roadblocks, lol. I like the problem solving and all, but now I'm just getting impatient. Anyway, here we go.

Started creating a new acrylic water-cooling window with the S2 logo. After consulting with Oris and reviewing the first Savage 2 preview movie (http://savage2.s2games.com/movies/2_small_9.wmv) I decided to make some changes. You can see what they are below.

20060908_000.jpg

20060908_002.jpg

20060908_004.jpg


Not the best pictures, but basically I made the logo look more like the movie logo. I broke it up into very small pieces. I did the best I could cutting them all out with a dremel, it was a bitch, but I think it came out allright. As soon as I can drill holes to fit my NPT hose barbs I'll fill it with fluid again and take some pics.

Here's what I did tonight. Worked on cutting out the blow holes for the radiator and assembled them to the fans. The holes don't look so great, but I didn't take as much time as I should have. Again, a little impatient and frustrated, but I planned on covering it all up with a some kind of grill or border anyway, in addition to the grating I have.

20060908_003.jpg

20060911_006.jpg

20060911_011.jpg

20060911_005.jpg


I found 4mm bolts that were only 10mm long so I could screw them down fully without worrying about them damaging the radiator.
20060911_007.jpg


Yes, I know I'm tightening metric bolts with an english units wrench. I couldn't find a 4mm one :(
20060911_010.jpg


There were some tiny zip ties on the wires on the fan, and it kept me from getting them flush together in order ot screw the 2nd one in, so I eventually just cut them off.
20060911_013.jpg


20060911_015.jpg

20060911_014.jpg


shitty blow hole work
20060911_016.jpg


grate
20060911_017.jpg


vanity shot. Eventually this will be what they look like in operation behind the border/grate
20060911_018.jpg
 
I know what you mean about wanting to hurry up and finish ... but i think you'll be much happier if you take your time so that you're happy with your work :). The duct idea is a great idea! Is that mesh stuff gutter leaf gaurd? If so, I've used that stuff before too lol. Cheap as hell and doesn't look that bad
 
Geo Fry said:
I know what you mean about wanting to hurry up and finish ... but i think you'll be much happier if you take your time so that you're happy with your work :). The duct idea is a great idea! Is that mesh stuff gutter leaf gaurd? If so, I've used that stuff before too lol. Cheap as hell and doesn't look that bad

haha yeah, that's exactly what it is. Good call.

I plan on swinging by Home Depot tonight to get the right drill and tap for my custom water-cooling window, hopefully will have pics tonight.
 
This is the lucky piece of sheet aluminum that gets to be my fan duct. Should be pretty simple, provided I do my math right. More on that in a bit.

20060912_037.jpg


Remember what I said about math? Well I thought I'd share my little book of ideas. I've been keeping this notebook since early July. Taking notes on parts to buy, ideas, rough sketches, measurements. Pretty much a general any-idea book.

20060912_038.jpg


yeah, i know, I do freaking sweet artwork...or freehand
20060912_040.jpg


Remember I mentioned math? here's the page I'm gonna be following to figure out how to bend my duct. Geometry is my friend.

20060912_039.jpg


Oh, and now I've pretty much finished up my water-cooling window. Here's what it ended up to be. I'm pretty happy with the results, can't wait to see what it looks like with lighting and red coolant inside it.

20060912_036.jpg

20060912_035.jpg

20060912_041.jpg


ta-da!
20060912_047.jpg
 
good job on the acrylic work man. used weldon right? even so, give it a few days and use a magnifying glass along the seams to watch for possible stress fractures and what not, especially where you decide to add to add your intake and out take fittings.
 
Conano said:
good job on the acrylic work man. used weldon right? even so, give it a few days and use a magnifying glass along the seams to watch for possible stress fractures and what not, especially where you decide to add to add your intake and out take fittings.


Yes, I used Weld-On #4, worked like a charm. I'll keep that in mind to go over the seams, I was really working a bit last night to plug a few leaks that I had immediately. I think I'm going to add some small plates behind the holes I already made. That way if I do get cracks at the input and output holes it will crack the plates instead of the entire thing, and therefore a much easier fix.
 
scrawnypaleguy said:
Wow cool!

...what is it?

If you look back a few posts I believe I described it. It's basically going to fit in front of my case and take the place of 3 of the 5.5" inch drive bezels. I'll be pumping my water-cooling through it. Not a reservior but more of a "window" with the water coolant flowing through it.
 
Yea that looks awesome... I am really liking your ideas for this mod, just make your execution as good as your ideas and you'll be set :)
 
Running into a lot of problems with my custom radiator duct. I've already gone through 2 plans and scrapped both ideas. I think now I'm going to make the duct out of acrylic. I have some left over, and it was pretty easy to work with once I got the table saw out to make nice straight cuts. Plus with an acrylic duct I'll get a bit of insulation, and it won't look like my PC is being clogged up. Anyone have any ideas for what I can do with it to mod it out or spice it up a bit? Otherwise it will just look like a clear plastic box.

Next purchase will be a MCP655 pump and I can start testing my WC loop. Still need a stupid BSP tap for the acrylic window fittings (why couldn't they make them standard sized barbs?), and will also be ordering a 5.5" fan control/temp monitor, and one more slim drive. Also waiting on the custom bezel to hold both slim drives in one 5.5" bay. Stupid company said they were all on backorder.

Once all those things are purchased I'll be buying the Mobo, Vid Card and RAM all on credit from Newegg (0% interest until April baby!). Right now my project completion goal is the 3rd week in October, one month from now. Rugby on the weekends is really taking up a lot of time, so hopefully I can still make my self-imposed deadline.
 
i love the idea of that window with the water flowing through it. cant wait to see the finished product.
 
Good Job m8. I would really recommend a shroud for that radiator to increase cooling performance.
 
Back
Top