• Some users have recently had their accounts hijacked. It seems that the now defunct EVGA forums might have compromised your password there and seems many are using the same PW here. We would suggest you UPDATE YOUR PASSWORD and TURN ON 2FA for your account here to further secure it. None of the compromised accounts had 2FA turned on.
    Once you have enabled 2FA, your account will be updated soon to show a badge, letting other members know that you use 2FA to protect your account. This should be beneficial for everyone that uses FSFT.

Project : Future Schlock by AnG3L

AnG3L

Limp Gawd
Joined
Jun 8, 2010
Messages
131
future_schlock_project_angel.jpg


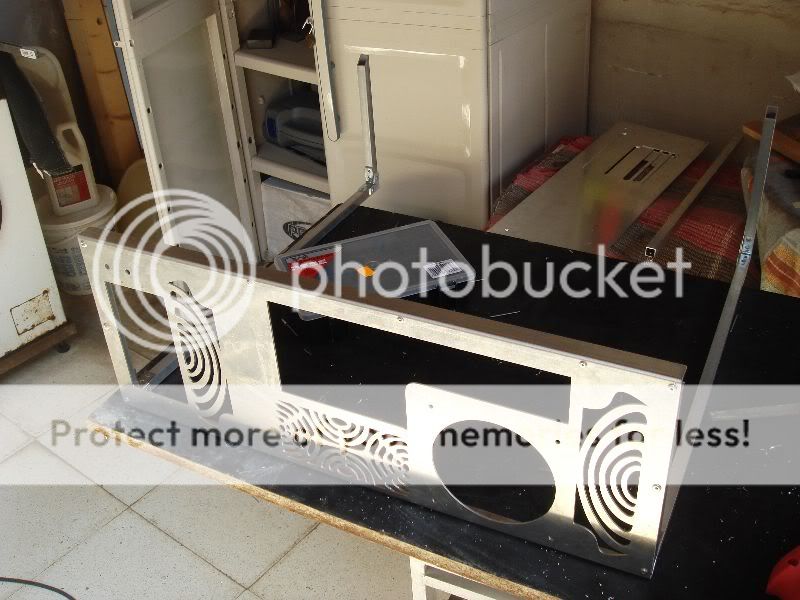
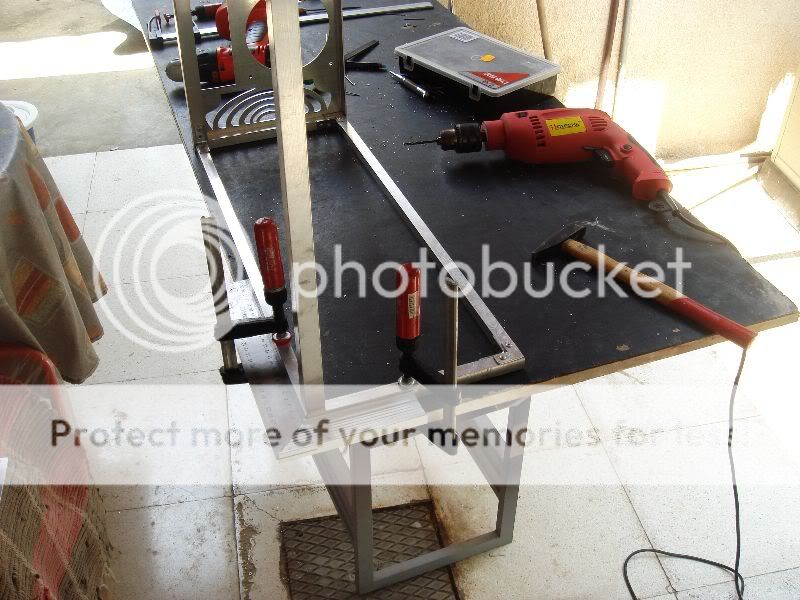
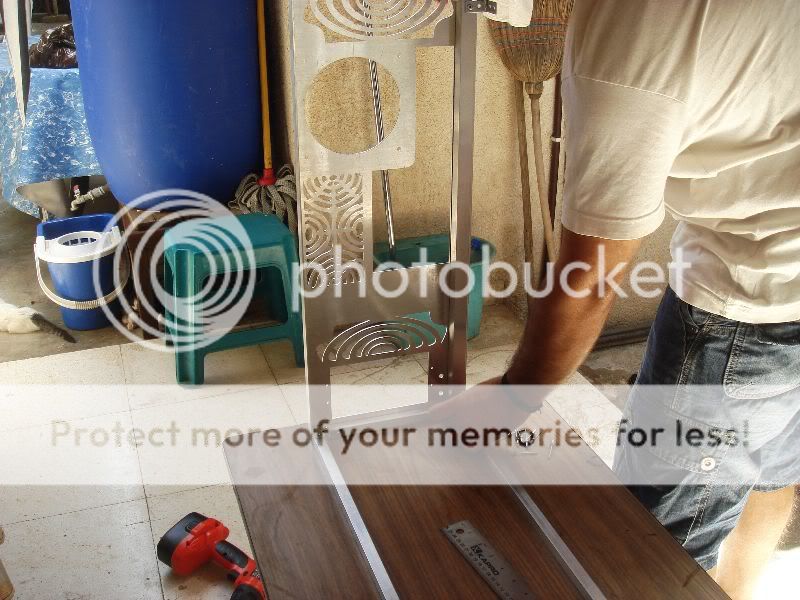
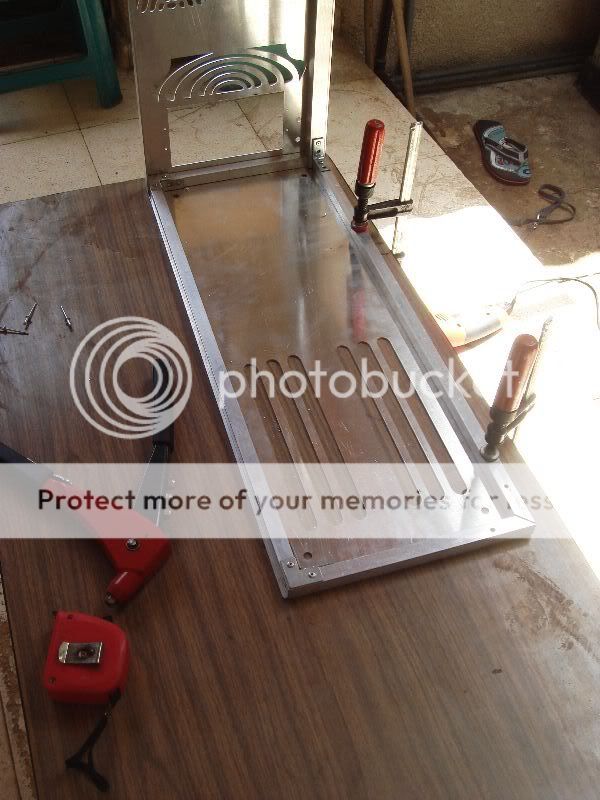
Hello my friends again, I am back for another project, the third in a row!
This time the project is based on a book by Mr.Robert Krakoff,founder and president of Razer.
The book is based on the year 2047 so expect a lot of lazer and cnc machines
and also a neat and clean look. More on the plans later on! Now some things about the
story of this book.


Intro - Presentation of book

Book synopsis:
"The story follows two Polish laborers, three nominees for President, five Naval Admirals, an ambitious Minister
of Finance for the African Union, and a beautiful Masai woman, through a much-changed world during a cutthroat
fight for the Presidency in 2047.
By the year 2047, the global landscape is ruled by world banks, Wall Street and mega-corporations. The leading
world governments have merged into massive Continental Unions. Even the USA is now the Union of Federated
Americas (UFA), incorporating the US, Canada and Mexico.
As such, the UFA finds that it's lost its foot-hold as a world leader, and fallen to forth power position behind the
Asian Union, European Union and the emerging African Union. The three candidates for the Presidency of the
UFA vie for their party’s nomination through fiercely competitive means, some honest, direct, cunning and
deceitful. All carry the banner to bring the country back to #1 position.
The leading candidates for President of the North American Continent in 2047 are a 300-pound black family
man, a bachelor exercise and computer geek with war aspirations, and an Hispanic Obama-wanna-be with a
flair for Coca Cola-like marketing.
The story portrays the world shifts in geopolitical, human and ethical reforms in the first half of the 21st century.
Cars run on pig-excrement, education is delivered by Starbucks, computers regulate everything, including
nutrition. The next battle for civil rights wages between the obese and the non-obese.
As natural resources within the UFA dwindle, for the first time in history, the African continent emerges as a
major power. To handle demands for its resources, Africa starts a massive foreign worker program. In an effort
to out-pace corporate greed learned in American graduate schools, the African ministers cut costs with their
worker program. Internet rumors circulate that white slavery is alive and thriving in Africa.
Each candidate wants to use the crisis for their own campaign advantage, but each bungle in their own way.
The characters are comical, poignant and imperfect as they strive for their personal power or peace."
 
Last edited:
My previous projects and info about me:

My name is Alex aka AnG3L and I am into case modding since
2004. I officially started posting my work at 2009, with my Project : AnG3L

angel.jpg


Recently I also finished Case Mod Project : Totechnika.
The mod was based on Native Indian's culture and its build of wood,
aluminum, steel and acrylic.

tote.jpg


Plans and designs for Project : Future Schlock


I ve been working for 2 months, 12 hours a day on those plans. I was between a very complicated and extreme mod and also a neat and clean mod.
I based my idea on the future, as the books theme. So I wonder my self. How the future is going to look like? Oh scary and also mystery. So? Gothic.
I had to combine both elements from the book and also from the future.

My theory is that each generation has its own design patterns. Remember the sixties and seventies. Flowers, many colors, peace signs etc.
Also there are design patterns from older generations that are repeated in the new ages like the tribalism. Tribal designs on tattoos, appliques, clothes etc.

So I came up with the geometrical element of the future. The Circle. I ve been studying the circle theory for many years now and that was the key for me
to begin design my mod. Building the case based on the circular theory was impossible. I would end at a huge and not functional case. So I desided
to start drawing designs for the air ventilation holes and also for the radiator grills. That wasnt an easy task at all. I had to make something new and also develop
it because I couldnt use the same pattern in all of the rad grills and ventilation points.

The case had to be as neat and functional as possible. I wanted to use 140 mm fans on the front and also on the back side of the case do I had to design the case
in a matter that I could fit those fans and also create 2 sections with enough room for 2X 240 mm radiators and 1 360 radiator. The bottom section had to be taller than
any other case because my theory with the aluminum is:
If a aluminum is next or near to heat source ( psu, rads) it accommodates the heat, making the air circulation inside the case hotter.

Also the case has been planned in order to have a lot of room for cable management, lots of ventilation strategically placed for maximum heat dissipation and also
a 5 bay rom with special department for reservoir and pump. Also I will work with Mr.Chris Kozis on the acrylic parts to create a reservoir and many other things that
I will show later on.

Plans

Design concept - Circular theory ( http://www.circular-theory.com/circle)

What is the circular theory?

The circle is the basic entity, process, and system that produces and explains all

entities, processes, and systems.

o

the circle circles

circle = relationship = opposition

= observation = movement = reproduction = dimension = gravity =

absolute = infinite = intelligence = relativity

an

abstract = concrete = hidden = showing

entity = process = system

1=2=3

a still circle produces a moving circle

which produces (is), always, a circle of circles

which reduces (expands) to (is), always, one circle

circle is entity and process (noun and verb) producing subject and object,


singular and plural

there is a circle between noun and verb (subject and object, singular and plural)

this is the circular theory (circularity is reality)


We see the circle (at least) twice every day: it is the outline, or form, of both

sun and moon. We are standing on a circle that is traveling in a circle, around a

circle that is traveling in another circle. We live in a circle (even though it

looks like a square), we drive on four circles, we eat trillions of circles to

survive, and we wrap ourselves in various circles for protection. Reproduction, sex

and the family are all based on the circle. We see the circle in weather, seasons,

DNA, molecules and atoms. We see it in the jiggling Brownian motion of particles,

and in the rotation and revolution of planets and stars.
 
Now lets take a sneak peek on the project plans and designs:

First of all the case simple first plans:

I am going to use 15mm x 15mm aluminum bar to create 2 frames. One for the bottom and one for the top.
I will attach them using 2 pcs of 20mm x 20mm aluminum bars and also the back plate of the case.
2 aluminum angles 20mm x 20mm on the front also will be used and at the end the top and bottom aluminum sheet
will be added:

chassis1.jpg


chassis2.jpg


chassis3.jpg


chassis4.jpg


chassis5.jpg


Here are the designs I ve been talking about:

The radgrills:

Top 360:

b1.jpg


b2.jpg


b3.jpg


b4.jpg


Front air vent:

c1.jpg


c2.jpg


c3.jpg


c4.jpg


240 side:

d1.jpg


d2.jpg


d3.jpg


d4.jpg


Reservoir cover for front:

e1.jpg


e2.jpg


e3.jpg


Power and restart button and usb housing:

a1.jpg


a2.jpg


a3.jpg


a4.jpg


The main color theme of the case will be black and silver. The radiator grills etc will be from 2mm stainless steel.

Stay tuned for more, nice to be back again, wish me good luck guys! :)
 
Looks interesting! Will be glad to follow along and watch your progress.
 
Looking at your prior work, you have some skillz. I'm going to hate waiting for updates as this is going to be an awesome case.
 
LoL thanks buddy, I will try to update as soon as possible, if have some patience you will see :) ;)
 
Now lets take a sneak peek in some of the many 2d plans .
These are just a portion of what is meant to come.
Many parts will be cut with laser(aluminum, stainless steel), some others (acrylic) with CNC machines.

The dotted lines are the bending points. I will use press bending machines to achieve the
best as I currently dont have a press brake capable of such accuracy.

So lets move on with some of the main case parts.
This is the front panel. It will be composed by an aluminum piece and
attached to that a black glossy acrylic. Mind that the case will be painted
black matte. At the right is the acrylic piece.
On the aluminum piece I will attach the stainless steel front intake by using M4 screws.
Every hole, every screw it has been planned from before. Even the sizes, the different pressure points for maximum durability and functionality.

04.jpg


Next is the bottom and top part.
At the left side its the top part. You can see the 360 radiator hole which I planned a draw in
a way that only the fins of the radiator will be visible and not any other metal part like the
fan connections. Also there is a hole for the fillport which it will be connected directly to the 3bay reservoir.
At the right side is the bottom part. You can see the ventilation holes, between them there
is a part where I will pass through some cables so I didnt want to cut a useless ventilation there. The 2 radiators will face sideways blowing air from inside the case to the outside so
the ventilation will work in a way that the fans could draw air from underneath too and also from the front of the case.

05.jpg


Here is the back part of the case or however you can call it ;) You can see that even the air ventilation are following the same pattern I created for that case mod. Every drawing is based on the circle.
This part is being designed in order to fit a 140 mm fan also with enough room between the PSU and the divider for the reasons I explained at the beginning of this worklog.

03.jpg


Next is the bay rom. Is designed in order to fit one dvd - blu-ray rom, one fan controller (hole for fan cables to pass through the side) and I left space for a 3bay reservoir and the pump which it will be behind the res.
You can see the designs again. It was so difficult to draw so many designs and make them harmonize together perfectly.

02.jpg


Here is the hdd and ssd cage. It has being designed in order to fit 2X ssd's and 3 hard drives.
In my theory in the future that would be the maximum for a pc enthusiast as the hdd's will come with huge capacity and you wont need more than 2 ssd's.
Its a futuristic design but I prefer to show you in real life how its going to look so stay tuned!

01.jpg


And the most simple thing last. The front fan holder. Designed for 2x 140 mm fans

00.jpg


There are many many more but I prefer to start working in real life and take pictures for you!
Till next time, stay tuned and peace to all of you!
 
This is my first official teaser update of things meant to come!

I did some primary work on the chassis nothing much, I will give you a clue
and also I laser cut the aluminum and stainless steel pieces. Next month I will move on to
the CNC'd acrylic parts.

"Teaser" pics on the chassis work:

chassis.jpg


DSC06694.jpg


DSC06692.jpg


Bending process using high end bend press machinery after laser cut:

DSC06695.jpg


DSC06697.jpg


DSC06698.jpg


DSC06700.jpg


DSC06701.jpg


DSC06705.jpg


DSC06707.jpg


DSC06709.jpg


DSC06711.jpg


Nesteq's latest awesome fan controller Max-Zero which it fits with my mod 100%:

DSC06721.jpg


DSC06723.jpg


DSC06726.jpg


DSC06728.jpg


DSC06730.jpg


DSC06735.jpg


Teaser pictures from the laser cut products ( raw form before sanding - polishing)

Hard drive cage (2 ssd's, 3 hard drives)

DSC06737.jpg


DSC06741.jpg


One of the stainless steel grills:

DSC06742.jpg


DSC06743.jpg


DSC06744.jpg


I will come up with a more detailed update soon enough, until then subscribe and stay tuned for more my friends! Peace! :)
 
Last edited:
First official update guys .
Unlike my other mods these updates will be more scheduled and planned in a specific order and not random as before.
First my work on the chassis. As you will see my first attempt was a failure for two reasons.
1)I didnt like it (felt somehow not sturdy)
2)I did a mistake on measurement.

So lets start this journey again!
9 o clock in the morning, nice weather, not so hot, its was a pleasure working!
Also made my self a "free" bench with a steel stand and a piece of old furniture I found somewhere! As long I can

work on it, its ok!

DSC06745.jpg


Took some measures using the top panel as a guide for the frames. Double check just to be sure! :)

DSC06746.jpg


Drawing a 45 degree on the 15mm aluminum bar:

DSC06748.jpg


The lack of power tools can sometimes be a real PITA but modding is fun too so lets enjoy it with some more extra

sweat and pain! ;P Theres nothing that you cant do with a dremel and a set of files!

DSC06751.jpg


DSC06753.jpg


DSC06754.jpg


DSC06756.jpg


And here they are the main pieces for the frames:

DSC06757.jpg


Marking the rivet holes on the smallest piece of the frame before assembling anything. I will attach the frame on

the back plate of the case.
Drilled with a 3mm drill bit for steel.

DSC06759.jpg


DSC06760.jpg


DSC06763.jpg


I used a 20mm aluminum angle to make some 15mm angles for the frame.

DSC06765.jpg


What did I tell you about the lack of power tools? I could go to a friend of mine and do
all of this and save myself some precious time, but how could I loose all this fun??? :)

DSC06766.jpg


Before filing:

DSC06767.jpg


After!!!!!

DSC06771.jpg


And this is how I did it!

DSC06772.jpg


Marked for rivet holes

DSC06774.jpg


I also sanded these corners because afterward it wont be possible to do so.

DSC06775.jpg


DSC06776.jpg


Using the corners I cut with the laser to assembly some part of the frame:

DSC06777.jpg


DSC06778.jpg


DSC06783.jpg


DSC06785.jpg


Now its time for the 20mm aluminum bars. This were I did the mistake. I cut the bars and after that I made some

changes before I send the drawings to the laser cutter and then I forgot to fix the length and it was 2,5 mm longer

that the rest...... I fixed that later though

DSC06787.jpg


DSC06788.jpg


DSC06790.jpg


DSC06791.jpg


And at the end of the first day I came up with this but I decided to take it apart and work
again , fixing the mistakes and working with a different approach.

DSC06792.jpg


DSC06793.jpg


Today and this is the mistake I ve been talking about. After I took everything apart
it was time to fix some mistakes.

Dremel and files for the win!

DSC06794.jpg


DSC06795.jpg


My route was different this time. I decided to begin by attaching some pieces of the frame on the back plate and the

move accordingly. I used my clamps to hold the pieces in place, riveted them and repeat.

DSC06796.jpg


DSC06798.jpg


DSC06799.jpg


DSC06801.jpg


DSC06802.jpg


DSC06803.jpg


DSC06804.jpg


DSC06805.jpg


So, so far everything looks ok, the frame will be finished hopefully tomorrow.
The top and bottom panel will be attached also on the main chassis. I will use no-countersunk rivets in some places

and some countersunk stainless steel screws in other places. It will be a Gothic look but not so intense, going

everything countersunk and very clean it will loose the extreme at the end.

Wish me good luck again guys cause I really need it! Peace to you all guys and respect!
 
Wow.....this has to be one of the fastest full case constructions I have seen. It looks awesome so far keep it up. Subbed.
 
Thanks man! It will take some time though due to some financial problems but i will update every 2-3 days!
 
Next update on the main chassis again!

I decided to redo the chassis cause for a reason I didnt like it, it felt clampsy and "unprofessional". I went to different aluminum factories for welding but I couldnt find any.
So my ghetto knowledge had to work again! I had to find a cheap way but also good enough.
I went and buy some steel angles, a small "degree" holder to be able to cut 45 degrees etc using a saw, a saw for steel and a corner clamp.

Because I cant afford to buy expensive tools that doesnt mean that I cant find a way to do my job, even if it would be more difficult.

Here you can see my "ghetto" cutter.

DSC06813.jpg


DSC06814.jpg


And action!!!

DSC06815.jpg


DSC06816.jpg


Better than a dremmel!! Ready to move on!

DSC06817.jpg


Here is the useless crap I bought to hold the frame in place, in order to drill the angles etc
but probably its use meant for something else.... stupid me

DSC06818.jpg


So ghetto method again!

DSC06821.jpg


DSC06823.jpg


Some parts ready

DSC06824.jpg


Assemble and photos of the work done today.
More updates will follow soon with more on the chassis work.

DSC06826.jpg


DSC06827.jpg


DSC06829.jpg


DSC06831.jpg


DSC06836.jpg


DSC06839.jpg


DSC06840.jpg


DSC06842.jpg


Till next time guys feel free to comment and share your ideas opinions etc! Peace!
 
Well you can call me crazy, perfectionist or whatever you like!
Yes I disassemble the chassis for the fourth time just because it was 1,5 mm longer somehow and when I tried to attach some panels and other stuff there wasnt aligned so lets go again!!

This time though its the last cause first I followed a totally different route for the frame making
and also triple checked everything. I suspect the ridiculously hot weather we have here for all these "problems" I had, believe me 40 degrees Celsius can do some nasty tricks, especially when you work under the sun !!

This time I used a smaller table I found in the yard which it wasnt bended like my bench and that made my life a lot easier.

DSC06844.jpg


Attached the first part of the frame on the backplate using rivets, all of the main chassis will be with rivets, the rest with countersunk screws. (sorry for the image quality)

DSC06845.jpg


DSC06846.jpg


Check and check again!

DSC06847.jpg


Attaching the 20mm bar on the back plate

DSC06848.jpg


This time I attached the bottom plate to align it with the frame just to be sure and also add some durability before I move on with the other parts of the chassis.

DSC06850.jpg


Drilling some holes and adding the rivets

DSC06851.jpg


Did the same thing for the top panel and then I attached the rest!

DSC06852.jpg


Adding a piece for the PSU. At the very end I will add some anti-vibration rubber on that.

DSC06853.jpg


Measuring for the rivet holes

DSC06854.jpg


Holding the piece in place with some clamps and ready for drilling and riveting!

DSC06855.jpg


DSC06857.jpg


And here is the main chassis finally finished!!! The sanding, filing etc will be done at the end as I dont want to scratch it again, so I will assemble everything and when I finish I will sand etc before powder coating!

DSC06858.jpg


DSC06859.jpg


DSC06860.jpg


DSC06861.jpg


DSC06862.jpg


DSC06863.jpg


Thats all for now guys, expect a lot more on this mod, many surprises, acrylic madness and many more! Thanks for reading my thread and appreciating my efforts and work!
Peace!!


A special thanks to my sponsors:


Are you considering going chrome/shiny metallic with the main color being silver

The main color will be black matte as the stainless steel will be polished to nickel - mirror look and also many parts inside will be nickel! ;)
 
Here is my latest update on the work I did today.

I removed this motherboard backplate from an old case to use it with my mod.

DSC06864.jpg


Dont like it? Modify it!

DSC06866.jpg


DSC06867.jpg


Fitting test :)

DSC06868.jpg


Drilled some holes for the rivets. Yeah I know, a lot of them!

DSC06869.jpg


DSC06870.jpg


DSC06871.jpg


Tap and die set.... lets use it! ;P

DSC06873.jpg


In my plans I ... planned to use this Lian Li PSU "thing" instead of laser cut it on the back plate. So I can remove and insert the PSU easily.

DSC06875.jpg


Now the work I did on the middle floor of the case. I measured and then I used some clamps to hold that in place. For the people who wonder what that big hole is, I am going to attach a clear acrylic with a white cold cathode underneath to illuminate the top part. Many little surprises like that going to follow!

DSC06877.jpg


Check, check 1,2 1,2 :)

DSC06879.jpg


DSC06880.jpg


Rivets to hold that in place. One tip. Most of the rivets are going to be visible but some of them are going to be hidden underneath some acrylic parts I designed but I aint going to show yet ;P

DSC06883.jpg


DSC06885.jpg


DSC06887.jpg


DSC06889.jpg


And the final picture for today!!

DSC06891.jpg


I hope you like everyday updates, if everything is going on schedule (cross your fingers) I will update every day or every other!
Till next update, peace guys! ;)


A special thanks to my sponsors:


Last edited:
Time for one more update.
Yesterday I didnt do much, I received a package from Aquatuning though
with a lot of goodies..! :)

DSC06895.jpg


3x 140mm and 7x 120mm Noiseblocker fans

DSC06897.jpg


DSC06903.jpg


Some clear liquid

DSC06910.jpg


And a lot of modding goodies, mostly PSU connectors and screws

DSC06919.jpg


Due to 1mm "bending wrong" I couldn't fir the motherboard tray on the 20mm aluminum bar.
It interfered with the mobo's i/o plate so I had to cut it.

DSC06935.jpg


DSC06936.jpg


DSC06940.jpg


Here I mark for the card bracket holes to pass through the 20 mm aluminum bar.

DSC06944.jpg


Cutting....

DSC06945.jpg


Removing the aluminum piece and filing

DSC06946.jpg


DSC06947.jpg


Countersunk process on the motherboard and its holder

DSC06950.jpg


DSC06953.jpg


Long screws? No problem!

DSC06955.jpg


DSC06957.jpg


Smaller screws!!

DSC06959.jpg


I couldnt work on the outside cause the wind was blowing (pr0n intended) really hard so I moved on the inside.... Tap and die...!

DSC06960.jpg


DSC06962.jpg


I also removed the rivets from the i/o plate and replaced them with screws.

DSC06964.jpg


So far so good.

DSC06970.jpg


DSC06974.jpg


Thats it for today guys. Some notes though. There is a tiny space between the motherboard tray and the main floor. There is a reason

though. I have experienced a lot of "July bugs" with aluminum cases (hot weather - dilation - expansion) and with my original plans I

added some small features which I believe will help.

Till next time guys, peace! :)


A special thanks to my sponsors:


Don't worry about the comments, the views make up for it haha. People love case mods no matter how big or small they are!
 
Very good work, brave to build it from scratch.

Thanks man!

Don't worry about the comments, the views make up for it haha. People love case mods no matter how big or small they are!

I like comments cause I can see what people think about the mod, listen to suggestions and its always nice to have a chit chat too! :)

Probably just awe struck like I was. I really wish I had the tools and a place to fabricate parts like this. Looking great. ;)

Thanks mate. I wish you to have the tools and the place one day man. :)
 
Time for another update guys!
Yesterday I did some more adjustments on the mobo tray. I removed 2 mm from the bottom in order to align the holes for the brackets with

the mobos i/o plate. Also changed the screws with rivers on the support plate because its not going to be removable and also its more

sturdy as the screws is not big enough.

DSC06976.jpg


Then I had to install the rad holders on the low department. First some measures and marks.

DSC06977.jpg


DSC06978.jpg


Holes for the screws. These holders will be removable.

DSC06981.jpg


Attached with countersunk screws.

DSC06982.jpg


DSC06984.jpg


Then I removed it to drill holes for the bottom screws.

DSC06989.jpg


Perfect! :)

DSC06994.jpg


DSC06997.jpg


Then the same procedure for the other rad holder. First for the bottom as the top connections will be different on that.

DSC06998.jpg


DSC06999.jpg


As I was working a guy came from DHL with a big package. Wonder what is it???

Corsair goodies!!!

Corsair F240 SSD's for the win!!!! One of the fastest ssd's out there!

DSC07001.jpg


DSC07006.jpg


DSC07008.jpg


DSC07009.jpg


DSC07011.jpg


Corsair Dominator - GT 6GB @ 2000 Mhz

DSC07015.jpg


DSC07018.jpg


DSC07019.jpg


DSC07020.jpg


DSC07024.jpg


Corsair HX1000 PSU. There is a possibility to use the new AX Professional series Gold from Corsair, I wait for their release, if they

released on the time limit of my job I will use it instead.
Check the new PSU here : http://www.corsair.com/products/ax1200/default.aspx

DSC07025.jpg


DSC07026.jpg


DSC07027.jpg


Modular cables

DSC07028.jpg


DSC07029.jpg


DSC07030.jpg


DSC07032.jpg


Back to work now. In order to attach the second rad holder I needed some spacers for the screws. I went to a couple of stores with no

luck, so I told my self, why dont you do some gothic ones by yourself? Yes gothic ones....!!!

So I used this weicon aluminum repair stick. You work with it as a plasticine, you can give it any shape you want and when it dries you

can drill it, sand it etc.

DSC07034.jpg


First cut a small piece:

DSC07035.jpg


Then you have to work with it as with plasticine for a couple of minutes so the different chemicals will blend together.

DSC07037.jpg


I used a screw to give it the primary shape and let it drie.

DSC07038.jpg


DSC07039.jpg


Cut it down to the desired length and also file it a little.

DSC07040.jpg


Now lets go outside to play with the rotary tool and some bits!

DSC07043.jpg


Aluminum engraving bit and lets rock!

DSC07044.jpg


DSC07052.jpg


I am going to paint them afterward but for now it only assembly and check time.

DSC07053.jpg


Industrial with art. Many parts of this case will have an artistic touch but the overall look will be more industrial.

DSC07055.jpg


DSC07056.jpg


DSC07060.jpg


Thats it for now guys. Till next time, keep on rollin'. :)


A special thanks to my sponsors:


Another update guys.
I didnt do much these days due to lack of time.
First of all I attached the motherboard standoffs. I used an old MSI board I had here
to perfectly align the holes and also position the motherboard in the right place for the
bracket holes.

DSC07062.jpg


DSC07063.jpg


DSC07064.jpg


DSC07065.jpg


I used nuts to secure the standoffs because if your over tight the screws on aluminum surface tends to break the threads. I wanted to buy a tool that inserts threads for screws but
I didnt have the money but I believe this does the job.

DSC07066.jpg


Time to attach one more thing on this case :p
This will hold an acrylic creation I am going to do which it will have 2 liquid pass-through channels that they will move the liquid from the radiator to the cpu and from the motherboard blocks back to the reservoir. That way I am going to avoid extra tubing from interfering with the other reservoir I am going to install.

DSC07067.jpg


DSC07068.jpg


DSC07069.jpg


DSC07070.jpg


DSC07071.jpg


Next I marked for the holes needed to attach the double front intake on the 5,25'' bay
and also made some threads for the screws.

DSC07072.jpg


DSC07073.jpg


DSC07074.jpg


DSC07075.jpg


Using anti-vibration rubber to prevent unnecessary vibration for the fans spreading through the bay and to the hard drives and also reducing extra noise. Also later on I will add more anti-vibration rubber strategically placed in many parts of this mod to prevent noise and vibrations.

DSC07133.jpg


DSC07134.jpg


Some final pictures for today. Many things to come really soon!!!

DSC07135.jpg


DSC07136.jpg


DSC07139.jpg


DSC07140.jpg


DSC07141.jpg


DSC07144.jpg


And here is what I got from Bitspower today!! Many thanks to Mr.Vincent and also thanks for
supporting the case modding community, many of us shall understand that without that support many mods wouldnt be alive today! :) Respect!

Enjoy some Bitspower Pr0n!!!!

DSC07076.jpg


DSC07077.jpg


DSC07082.jpg


DSC07083.jpg


DSC07092.jpg


DSC07095.jpg


DSC07103.jpg


DSC07105.jpg


DSC07107.jpg


DSC07108.jpg


DSC07109.jpg


DSC07110.jpg


DSC07113.jpg


DSC07115.jpg


DSC07116.jpg


DSC07117.jpg


DSC07118.jpg


DSC07119.jpg


DSC07121.jpg


DSC07122.jpg


Thats it for today folks. There will be a little delay probably due to some extra work I have to do on the acrylic and I might have to wait for a laser cutter to arrive in my friends workshop to do some work, I will keep you updated though! Peace!


A special thanks to my sponsors:


Dude, this is coming along marvelously. I cant wait to see it all buttoned up and finished.
 
Back
Top