• Some users have recently had their accounts hijacked. It seems that the now defunct EVGA forums might have compromised your password there and seems many are using the same PW here. We would suggest you UPDATE YOUR PASSWORD and TURN ON 2FA for your account here to further secure it. None of the compromised accounts had 2FA turned on.
    Once you have enabled 2FA, your account will be updated soon to show a badge, letting other members know that you use 2FA to protect your account. This should be beneficial for everyone that uses FSFT.

Project:Delorean

Willsonman

[H]ard|Gawd
Joined
Jun 11, 2005
Messages
1,195
I've obsessed over the Delorean for about 20 years now so I think it is time to combine 2 obsessions. I have seen Back to the future 150+ times and have been to meet several owners. I've never had the money to own one and hope to at some point when I am finished school. So, as a weekends only project (wife's stipulation) I plan on making something like this:
case.jpg

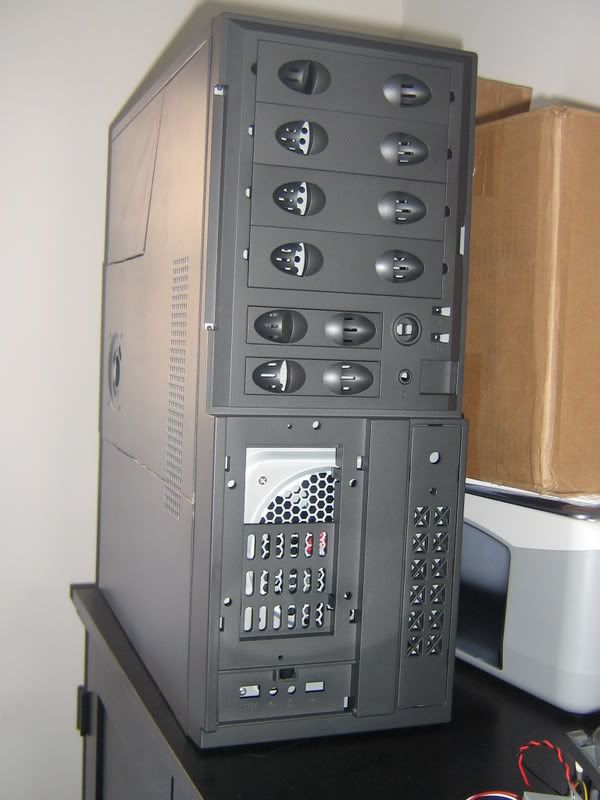
I'm a music and biology student so cut me some slack on the artwork. The internals will be from my sig just putting it in a new case. I may change out the 7600GT for some X1950PROs but this will depend on funds and R600:rolleyes: . ok, so the core case will be a Spire swordfin http://www.newegg.com/Product/Product.asp?Item=N82E16811220010 and I do plan on making motorized doors that are gullwinged. Motors will be power antenna motors. PLan on using a DD RBX block to create a flux capacitor over the motherboard. It will be lighted similar to the movie.

A Mr. Fusion will be constructed out of a zalman resorator 1... supplied by dbwillis from this forum. Fiberglass cowling around it will house a custom acrylic res and a fan to blow over the covered portion of the resorator.

The front will be styled to the look of a Delorean. An air duct will be constructed for a front fan. The DMC logo will be the cover for the optical drive and will be touch sensitive for the button. The turning signals will also be touch sensitive and function as power and reset switches.

The glowing strips on the Delorean in back to the future will be stylised for the case on the top and rear sides as well as around the front "bumper."

"buggy" style wheels from R/C cars will be mounted horizontally at the 4 corners similar to the hover conversion in back to the future part 2.

Thats pretty much all I have planned uless you suggest something I like. I do want to try and keep the simplistic look of the Delorean with some key movie elements. It is a tough balance that I will try to create.
 
Make sure you keep that brushed stainless steel look. The Delorean has also been one of my favorite cars, it has a timeless character to it that I enjoy.
 
OF COURSE!!!!! Signature of the Delorean has ALWAYS been the steel and the doors.
 
Did you do those drawings on the back of your homework while you were in class? lol :D
 
Love the project idea mean, make sure to use plenty of EL-Wire for the glowy bits!

Did you do those drawings on the back of your homework while you were in class? lol :D
Looks like a letter from the snippets I can make out.

From the last two lines:
"...this program, and I sincerely look forward to..."
"...and eagerly recognizing you..."

Photoshop + flip horizontal + brightness and contrast tool :D
 
Love the project idea mean, make sure to use plenty of EL-Wire for the glowy bits!


Looks like a letter from the snippets I can make out.

From the last two lines:
"...this program, and I sincerely look forward to..."
"...and eagerly recognizing you..."

Photoshop + flip horizontal + brightness and contrast tool :D
Did you actually go through the photoshop thing? If so, that must have been a huge waste of time, hahah :D
 
Make sure to put in a 1.21 Jiggawatt power supply!! :D

I had thought of trying to incorporate 1.21 KILOwatts... that would be possible.
The paper was a piece of scrap from a recylcling bin.... yes I did it in class;)
 
I had thought of trying to incorporate 1.21 KILOwatts... that would be possible.
The paper was a piece of scrap from a recylcling bin.... yes I did it in class;)

You can always make an overlay for the PSU that just says 1.21 Jiggawatts on it. :D
 
hehe, feel free to make quotes... I live by them. I'll be the first to post "Doc, you dont just walk into a store an, an, buy plutonium!!"... and "If you put your mind to it you can accomplish anything."
 
"Wait a minute, Doc. Ah... Are you telling me you built a time machine... out of a DeLorean? "
"The way I see it, if you're gonna build a time machine into a car, why not do it with some style?"

"Thats about as funny as a screen door on a battleship"

"Time-travel is just too dangerous. Better that I devote my life to study the other great mystery of the universe: women..."

Ok, I'm done :D
 
"make like a tree and get out of here"
::smack::
"leave you idiot, leave, make like a tree and leave. you've been saying it wrong"

i know it from the second one, but old biff cracks me up.


"you jump ship boy?"
 
Update? sort of. Well, The case came today from the egg and... missing quite a few parts. The mobo standoffs, tool-less optical installation, front door key, I/O panel... all missing. So hopefully I can get that replaced without RMAing the entire case. Just to give you an idea of how tall this monster will be:
IMG_2324.jpg

So yeah. This will be big. I'm also thinking the reserator pump will have to go. I was not sure of the speed of the flow but after cleaning this up a bit I was not impressed with the flow. So I'll prolly remove it and use my D5.
IMG_2325.jpg

From the corrosion on the threads here I'll use a small mount of teflon tape to make a better seal. Just so I do not have to worry about it at all.
IMG_2326.jpg
 
Wow, I never looked into the bottom of the res, I did have some copper blocks in the loop, sorry !
 
Wow, I never looked into the bottom of the res, I did have some copper blocks in the loop, sorry !
No sweat. It will work just fine. You should have seen it before... eeeew. I'm a clean freak so figures teh first thing I would do is clean stuff:rolleyes:
Anyways, Newegg is sending me replacement stuff so I definitely can start tomorrow. Hopefully I will get to cut. I'm pretty much doing this all as I go so you, like me must be patient with hiccups as they come. Basically I want to have cut at least one "door" and have the JBweld drying. Lots of stuff to look at and consider before I do. Have to work at 4am tomorrow so I am off to bed.
 
OK, did not get as much done as I would have liked but I had a lot of things to think about. I really thought hard about the angle on the door. I think it is just right.
IMG_2361.jpg

Then the front I completely took apart as well...
IMG_2362.jpg

and this was all the leftover junk.... some of it I may reuse but prolly most of it I will throw away.
IMG_2363.jpg

As stated in the first post this is a weekends only project. It will be slow going but I think it will force me to pay closer attention.
 
As stated in the first post this is a weekends only project. It will be slow going but I think it will force me to pay closer attention.


Do the job, big or small, do it right, or not at all!


I feel so gay for saying that :(
 
Does that pile of stuff you're throwing away include the front-panel ports? If so, I might be interested in taking that off your hands....
 
actually yeah... it does. It has a USB, firewire, headphone, and mic ports. send me a PM if interested.
 
Got a little bit done today. Spring break is next week so I should be able to get more done then.
IMG_2422.jpg

JB Weld and Mr. Dremel get the job done. New hack saw blade too. Next week I hope to get the other side cut and the front panel trimmed down.

To prevent a double post... My wife is gifted in photoshop and illustrator...
fusion.jpg
 
Hooray for Spring break!! Ok, so I got the other side panel cut and glued. Also got Some hinges for the doors almost ready to install. Put in some reinforcing bars at the top where I have hacked quite a bit. Also removed the old eheim pump from the resorator and plugged the hole for the power cable.
IMG_2423.jpg

IMG_2424.jpg

IMG_2425.jpg
 
Cut a bunch of metal today for the "skirt under the panels that do not move. Need to glue them on bu the seams need to be filed out a little more.
IMG_2441.jpg
 
I've been pondering an issue I will run into and it struck me at work at around 4:30 this morning. I want my hard drives to be at least near a fan. The problem with the one at the bottom on the front is that the motors for the doors I think will be obstructed by the drive cage. So, I figured that I would like this to be as quiet as possible, I will mount the 3 hard drives above the optical drive rubber band style. I will then place a 120mm fan in front and use the old bay covers as vents. I like the look although it is not entirely Deloreanesque. I may change it but the idea is solid in my head.
IMG_2452.jpg

So this is what the three covers are now looking like. They will be painted black if kept. The Fan is mounted by one of the old flashing pieces. I hacked it up to allow mroe flow. I did not want to make it perfect because it would be hid anyway. If I do end up having room at the bottom then I would like the drives mounted down there anyway. It was a good idea that I had to do to experiment. Let me know what you think.
IMG_2457.jpg
 
This would actually be much better for you to use its not much money only like $20. Its called an icage. Thermaltake makes it. Its 3x 5.25 bays which is converted into 3.5 bays. It has a 120mm Fan already attacked to it. It might be better and might look a little better.

heres a link to what i am talking about:

http://www.thermaltake.com/xaserCase/icage/icage.htm
 
Hey, can't wait to see how this turns out, but I love the Delorean, so if you screw this up I will never forgive you :p
 
hey, get the wife to make Docs huge speaker. ok, fake from fabric.. great sewing project and get her into your project wih ya.

Cant ya hear that HUMMMM!
 
hey, get the wife to make Docs huge speaker. ok, fake from fabric.. great sewing project and get her into your project wih ya.

Cant ya hear that HUMMMM!
hehe, I've been into car audio for YEARS. Dont think I can incorporate this into the case though!

Hey, can't wait to see how this turns out, but I love the Delorean, so if you screw this up I will never forgive you :p
No pressure:(

This would actually be much better for you to use its not much money only like $20. Its called an icage. Thermaltake makes it. Its 3x 5.25 bays which is converted into 3.5 bays. It has a 120mm Fan already attacked to it. It might be better and might look a little better.
That is freakin awesome!! I may just do that. I much rather have a more finished look to things and if it saves me work than GREAT. I never knew such a thing existed!!!

Plan on carving up the fron today and adding some bondo. Not sure if I will get it sanded. That takes forever. I was also thinking about changing the covers more. Basically I would cave out the section between the holes and use more mesh. It would look closer to the intake for the radiator under the bumper and then use the 4th one on the bottom for air intake as well. I'm basically planning a wind tunnel for the video card area to I need to have an inlet whether I place a fan there or not.
 
That is freakin awesome!! I may just do that. I much rather have a more finished look to things and if it saves me work than GREAT. I never knew such a thing existed!!!

I didn't either until i found out the 8800GTX wouldn't fit in my case lol. But anyways hope everything turns out and I'll be looking forward to updates :D
 
OK, well, I was carving out stuff from the front panel and I was thinking how I can incorporate some steel into the face. Then it dawned on me. You could save some work and make it look cool too!!!
IMG_2474.jpg

So I am laying a sheet of steel over it. I'll brush it later. I then decided that I wanted to separate the vents at the top from the one at the bottom portion. So I moved it all the way to the bottom. I also will use an artistic subtlety to this.
IMG_2475.jpg

You can see on this panel that I domed the mesh in a concave vertical way. On the others I will be cutting out the centers and doing the mesh in a horizontal convex fashion. This will add some texture and depth to the front while not making things cluttered.I will still have to do some bondo on the top half but not nearly as much sanding... whew!!

Oh, and I ordered that drive cage!!! $21 total from the egg.
 
Oh, and I ordered that drive cage!!! $21 total from the egg.

How many drives are you going to have in this system? There are 4 drive in 3 bay things that cost the same amount...

Oh, and subscribed. Looks good so far - what are you going to do to make the "wings" easy to move?
 
How many drives are you going to have in this system? There are 4 drive in 3 bay things that cost the same amount...

Oh, and subscribed. Looks good so far - what are you going to do to make the "wings" easy to move?

Just 3 Hard drives and one optical. I am using power antenna motors and mercury switches that should all be here next week.

Found this yesterday. Any guess as to what it will be used for? It is a pretty easy guess. I had been trying to find a dead or secondhand air ionizer(purifier) for plastic but just could not find something cheap or that would work. I've looked all over and even had been watching an ebay item that was BROKEN that went for $30. That is pricey plastic if you ash me. This might just work and was in the price range that I was figuring.
 
Got my antenna motors today:
IMG_2491.jpg

Played with one. Black goes to ground and red goes to 12V. Green on 12V extends and release retracts. I have some mercury switches coming to help regulate the height of the mast. The mast itself will be the actuator but I'll prolly cut it and use rubber hose to extend the mast to the right area. It should work perfectly. I could almost rest my hand on the mast when it was extended to weight will not be as much of an issue as I had supposed. Cool stuff. Drive cage should be here Wednesday.
 
Had some time today but the weather was not cooperating. Was planning on slapping some bondo on the front and sanding but it needs to be above 50 degrees for better curing. Also too cold to finish cutting the other door panel. Baah. Ok, so what I did do:

Here is that toilet paper holder in its modded form. Still to come is the Acrylic water bay. That will be fiberglassed in but this was the hard part actually.
IMG_2503.jpg

IMG_2499.jpg


I also did get the drive cage this week. Another big thank you to salvationpcs for the tip. VERY silent fan and fits like a glove.
IMG_2502.jpg


So, I also spent some time working on the motors too. Just got some rubber hose from an auto parts store and it fits the inside of the pipe and the outside of the antenna PERFECTLY. Tested and works still just fine. Only concern again is weight. I tested the weight again and It seems to have lost some... torque, i guess.. in its drive. Disappointing but it would have never fit the other way. Well, maybe not never but it would not be easy. I'm trying to leave room for a crossfire setup for R600 (think long video cards) and my audigy 4. I'm measuring everything about 5 times.
IMG_2504.jpg

Thats all for this weekend.
 
Back
Top