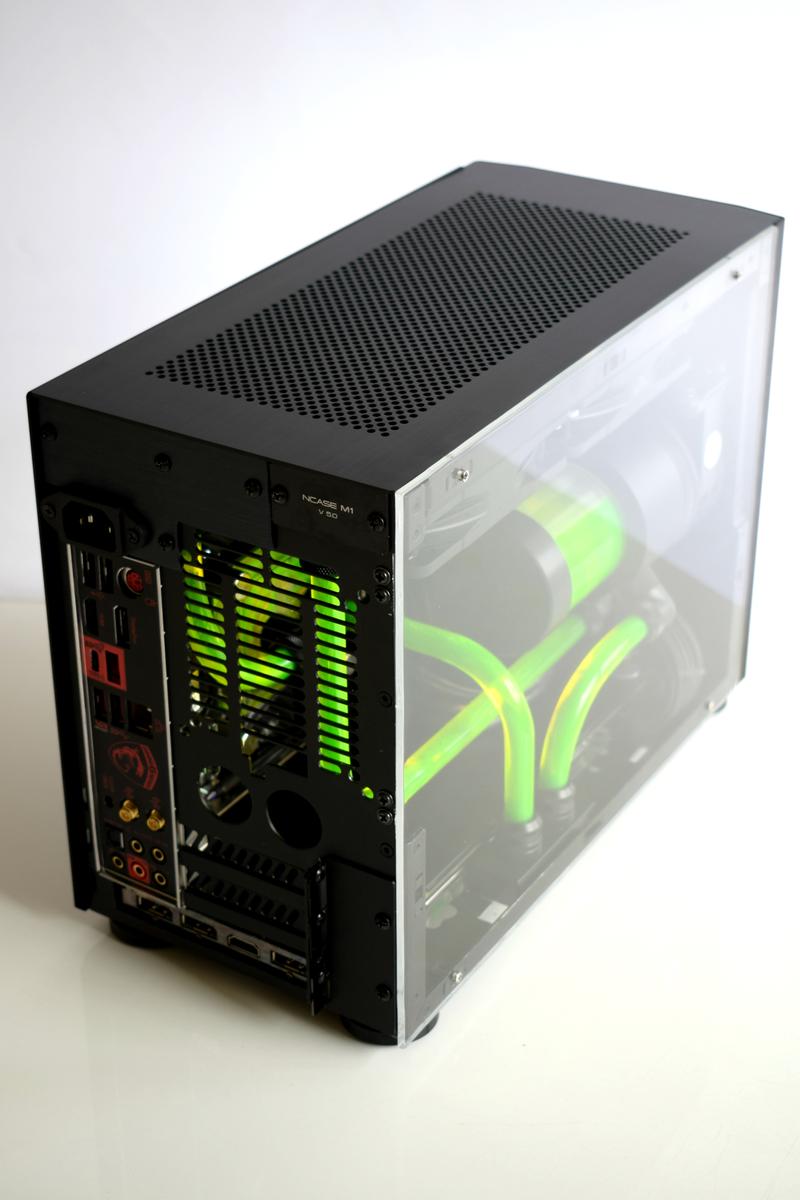
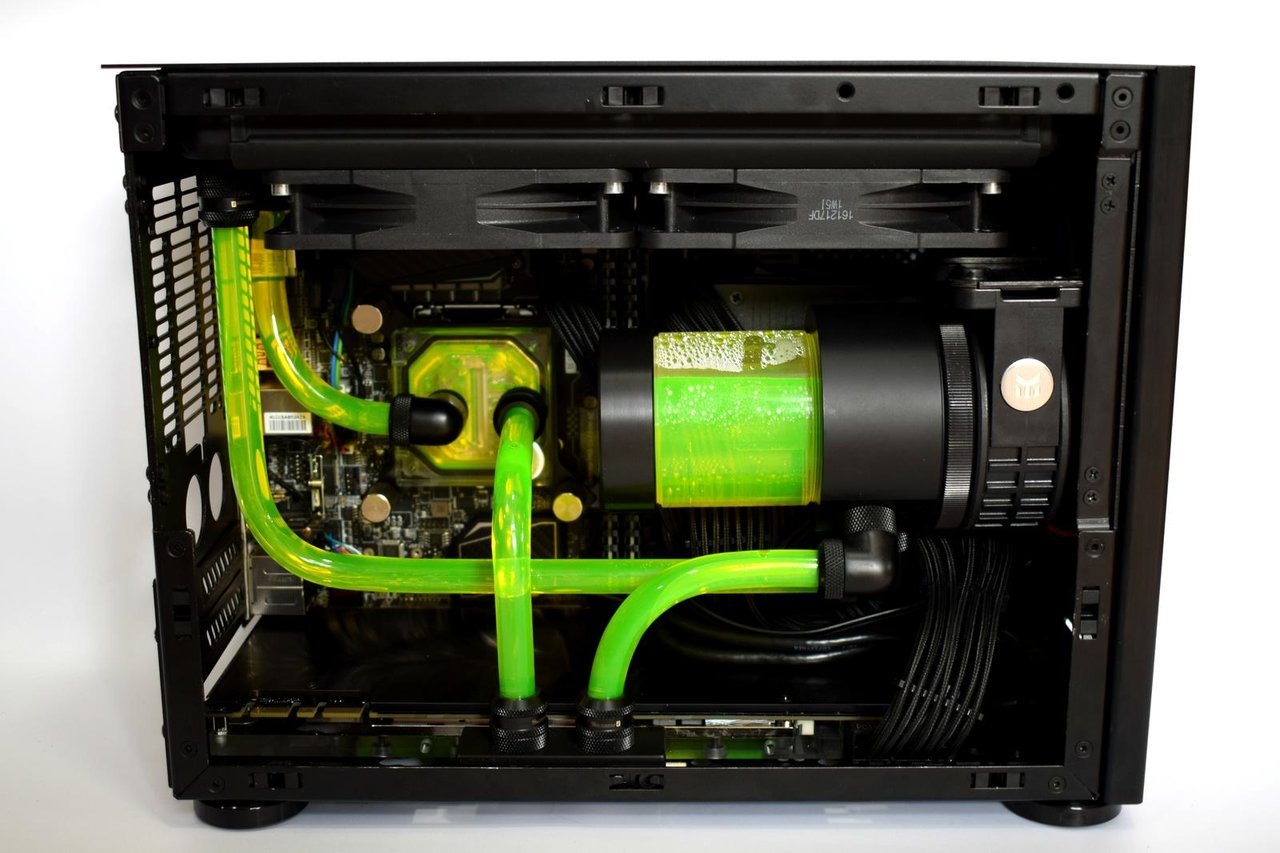
NCASE M1: a crowdfunded Mini-ITX case (updates in first post)

Silent Loop is 30mm thick so you can use 25mm fans no problem. I would try the included fans from Be Quiet before the Industrial Noctuas, Be Quiet makes really good fans and the Industrial are supposed to be pretty loud. They move a lot of air but they are 43.5 dB(A). the included Be Quiet are 36.9 at max and 23.8 at 50%.

92mm fans can be difficult to mount in the back with a 240mm radiator installed, but possible. I can tell you that the air will exit the top of the case with no problem.
Great info, thank you. I knew the specs on the Silent Loop but wasn't sure about space "in the case". I will stick with the Be Quiet fans for now, they will go with my color them any how; if not I have some NF-F12's I could use. The industrials would have been for aesthetic purposes really. Want this case to have a specific look. So I'm good with 1x3.5 hdd in the bottom(back) and a 92mm, 25mm thick in the bottom (front) under a 1070 a fe?
 
Great info, thank you. I knew the specs on the Silent Loop but wasn't sure about space "in the case". I will stick with the Be Quiet fans for now, they will go with my color them any how; if not I have some NF-F12's I could use. The industrials would have been for aesthetic purposes really. Want this case to have a specific look. So I'm good with 1x3.5 hdd in the bottom(back) and a 92mm, 25mm thick in the bottom (front) under a 1070 a fe?

Yes you can fit the 92mm under the 1070 no problem.
 
thank you very much! Last thing I need to figure out is my custom cables but I'll wait till I get the m1 for that.

I have Noctua Industrials. They go unused. The Corsair ML-120 2 pack is better for the price. But as rfarmer said, try the Be Quiet fans first, I really like the fans they use on my Dark Rock TF.
 
I have Noctua Industrials. They go unused. The Corsair ML-120 2 pack is better for the price. But as rfarmer said, try the Be Quiet fans first, I really like the fans they use on my Dark Rock TF.
Thanks for the input, this is what I'm going to do. If I don't like them for some reason I have the nf-f12s that I can use. Love those.
 
On Monday I will place an order for all the parts of my Ncase M1 build, however I wanted to ask your opinions on the best radiator/airflow configuration. My specs are:

CPU: Ryzen 1700
CPU cooler: Fractal Design Celsius S24 AIO
GPU: Asus GTX 1080Ti Strix
2x Noctua NF-A12x15 as bottom intakes for the GPU
Noctua NF-A9x14 as rear exhaust

My question is whether I should set the radiator as intake or as exhaust, I was thinking setting it as intake to create positive pressure and reduce dust build up, but I have also read that exhausting the hot air the GPU pushes to the rest of the case is also important. What do you guys think?

Look at the Fractal Design Kelvin S24 instead, that would give you the ability to add the GPU into the loop & has a fill port on the CPU pump/block combo...

I would have the side fans set to intake, that way the loop is getting cooler air from outside of the chassis, rather than exhausting hot air from the chassis (which would decrease the efficiency of the AIO)...

Positive pressure from the side intakes (and somewhat from the bottom intakes) will force everything out the top venting...

I am hoping to start getting parts together for a Ryzen / RX Vega build in the next few weeks...

ASRock AB350-ITX/ac motherboard
Ryzen 5 1600 CPU
Wraith Spire stock cooler (for starters, full custom EK / FrozenQ loop later)
16GB G.Skill Flare X Series RAM (2 @ 8GB DIMMs / DDR4 / 3200MHz / CAS 14)
500GB Samsung 960 EVO M.2 NVMe SSD
RX Vega 56 GPU
(4) Corsair ML120 fans (120mm x 25mm / 4-pin PWM / two bottom intake / two side intake)

Thanks for the advice, I am mostly interested in the Celsius S24 because of its silence, I doubt I will expand the loop in the future so that is not a concern for me. I too was waiting for Vega before committing to a build but unfortunately Vega didn't really deliver where it matters to me which is 4K gaming, though the Vega 56 is looking much better than the Vega 64.
 
Thanks for the advice, I am mostly interested in the Celsius S24 because of its silence, I doubt I will expand the loop in the future so that is not a concern for me. I too was waiting for Vega before committing to a build but unfortunately Vega didn't really deliver where it matters to me which is 4K gaming, though the Vega 56 is looking much better than the Vega 64.

- It's doubtful whether the Celsius is a quieter model. Really, it's an old Asetek manufactured model that allows Fractal Design to get around the legal limitations of their older design (Kelvin series).
- The marketing stuff about the pump having sound deadening is slightly misleading. It's common practice for all AIO designs to have sound some absorbing material in their pump/blocks already.

I'd still recommend the Kelvin if you can get it:
1) The Celsius ties pump speed to fan speed. On such a tiny little pump, it's wise to have it running slightly higher to ensure you have enough pressure
2) Varying pump speed causes noise. When your fan's kick up to a different speed on a linked system - you might hear some gurgling and vibration.
( It's not likely to be a huge issue so don't be too concerned. But really - the pump speed should remain static)
3) The Kelvin has separate pump speed and fan speed control. Even at full fan speed it's still running 800rpm so it's going to be just as quiet as the celsius. You can then control the pump speed with either a low noise adapter cable or from the motherboard directly.
Looks like the Kelvin is not available anymore so that is not an option. I base the Celsius's silence on reviews, which all seem to say it is one of the most silent AIOs. One other option I was looking at was the Alphacool Eisbaer, but that had pretty stiff looking cables and a big pump, also have read about many people having problems with the pump making noise. All things considered I think I will go with Celsius S24 and hope it really is as good as they claim.
 
Looks like the Kelvin is not available anymore so that is not an option. I base the Celsius's silence on reviews, which all seem to say it is one of the most silent AIOs. One other option I was looking at was the Alphacool Eisbaer, but that had pretty stiff looking cables and a big pump, also have read about many people having problems with the pump making noise. All things considered I think I will go with Celsius S24 and hope it really is as good as they claim.

Check ebay ;) You might find a good bargain actually. (y)
 
I found this on pcpp. It's not mine, but I thought this to be a very cool mod, and wanted to share. Everything is shifted down just enough to accommodate a top radiator and regular 25mm thick fans.

IMG_4633.JPG
IMG_4634.JPG
 
I found this on pcpp. It's not mine, but I thought this to be a very cool mod, and wanted to share. Everything is shifted down just enough to accommodate a top radiator and regular 25mm thick fans.


That is freaking sweet, I wish that I could make that. Wonder if it belongs to anyone here. I would be really intersted in how they did that build
 
Alright, finally got around to uploading some pics...

Parts list:
NCase M1 V5
ASrock Z270 Fatal1ty Gaming ITX/AC board
Intel i5 7600K 3.8 Ghz
G.Skill Ripjaws 32GB DDR4 3200
Western Digital M.2 256GB
Intel 3710 400GB SSD
Western Digital Blue 1TB SSD
EVGA 8GB GTX 1080
Corsair SF600
Swiftech Apogee Drive II Pump/CPU block combo (pump is an MCP35X)
Hardware Labs GTS 240 slim radiator
Noiseblocker E-loop B12-P 800-2000 rpm PWM fans
Watercool Heatkiller IV GPU block + backplate
Swiftech 90 degree fittings x6
Swiftech quick disconnects x2 (2 sets)
Swiftech 3/8" ID - 1/2" OD compression fittings
XSPC T fitting
XSPC male/male extenders
XSPC plugs
Swiftech ITX reservoir (for filling only)
Nonplasticized tubing 3/8" ID - 1/2" OD
Distilled water + P T Nuke
Noctua NT-H1 thermal paste

Obligatory box pic (taken after I finished the build, so not everything is pictured ie fittings, water pump, memory, etc)
LL


Finished removing the GPU air cooler and installed the GPU block and backplate:
900x900px-LL-5d9870b6_816989D7-B146-4CE0-BD49-8FD1FDACDB93_zpsojnibwx7.jpeg


Test fitting w/ CPU pump/block installed, PSU, and GPU
LL


Initial filling w/ GPU out of the case to help get bubbles out
LL


Moved GPU into case, bubbles gone, time for real fill / leak testing
LL


Leak testing looks good, buttoning up for final fill before removing the reservoir
LL


All done! (minus case panels, but they just snap on over it)
LL


Close up of the GPU - I had to switch the fittings to go under rather than on top, for both clearance issues and tubing kinking.
LL


Another side view
LL


It's alive!
900x900px-LL-e0211a19_99C51A34-F3D9-4286-9691-5875547CA1AE_zpsb4dmuh3d.jpeg


Temps after playing PUBG for a couple hours followed by some facebook, web browsing, and youtube. Note the "Max" column for GPU and CPU.
900x900px-LL-fb2f2aaf_Idle_temps_1_zpsrtsdmw7l.png
 
Last edited:
You read my mind with the Radeon logo, but without official measurements, I wasn't sure. I'm expecting it to not fit bit I hope it does. I've asked EK for the true measurement, so I'll report back once I hear from them.

Nice build btw too

So, I measured the top piece. It does indeed only screw in with two bolts. It only adds 3mm to the overall height, so likely doesn't require removal. It is pretty long though, so might interfere on some builds with tubing or something.

I had to initially remove mine on my Phanteks build because of how far forward the block sits on Vega, and where my res sits, and this is on a full ATX case! I put it back on afterwards after I figured out some spacing. I'd likely remove it though for an M1 build - just extra stuff in the case that's not needed.
 
That is a sweet build, I would like to see how he mounted the radiator and PSU.
He has a few images on Imgur. He bolted the side bracket to the top, and then bolted the radiator onto the bracket. Very clever. I'm not too sure about the PSU.
 
He has a few images on Imgur. He bolted the side bracket to the top, and then bolted the radiator onto the bracket. Very clever. I'm not too sure about the PSU.

You can see it in the first image behind the pump/res. It's just moved down, probably as much as possible.
 
Only negative is that, well, it is now a Negative Pressure system...

The majority of the air intake is thru the 92mm fan mount on the rear of the chassis, but air (and dust) will now come in thru every little nook & cranny in the chassis...
 
Alright, finally got around to uploading some pics...

Parts list:
NCase M1 V5
Intel i5 7600K 3.8 Ghz
G.Skill Ripjaws 32GB DDR4 3200
Western Digital M.2 256GB
Intel 3710 400GB SSD
Western Digital Blue 1TB SSD
EVGA 8GB GTX 1080
Corsair SF600
Swiftech Apogee Drive II Pump/CPU block combo (pump is an MCP35X)
Hardware Labs GTS 240 slim radiator
Noiseblocker E-loop B12-P 800-2000 rpm PWM fans
Watercool Heatkiller IV GPU block + backplate
Swiftech 90 degree fittings x6
Swiftech quick disconnects x2 (2 sets)
Swiftech 3/8" ID - 1/2" OD compression fittings
XSPC T fitting
XSPC male/male extenders
XSPC plugs
Swiftech ITX reservoir (for filling only)
Nonplasticized tubing 3/8" ID - 1/2" OD
Distilled water + P T Nuke
Noctua NT-H1 thermal paste

Obligatory box pic (taken after I finished the build, so not everything is pictured ie fittings, water pump, memory, etc)
LL


Finished removing the GPU air cooler and installed the GPU block and backplate:
900x900px-LL-5d9870b6_816989D7-B146-4CE0-BD49-8FD1FDACDB93_zpsojnibwx7.jpeg


Test fitting w/ CPU pump/block installed, PSU, and GPU
LL


Initial filling w/ GPU out of the case to help get bubbles out
LL


Moved GPU into case, bubbles gone, time for real fill / leak testing
LL


Leak testing looks good, buttoning up for final fill before removing the reservoir
LL


All done! (minus case panels, but they just snap on over it)
LL


Close up of the GPU - I had to switch the fittings to go under rather than on top, for both clearance issues and tubing kinking.
LL


Another side view
LL


It's alive!
900x900px-LL-e0211a19_99C51A34-F3D9-4286-9691-5875547CA1AE_zpsb4dmuh3d.jpeg


Temps after playing PUBG for a couple hours followed by some facebook, web browsing, and youtube. Note the "Max" column for GPU and CPU.
900x900px-LL-fb2f2aaf_Idle_temps_1_zpsrtsdmw7l.png

Impressive temperatures! That pump/radiator/fan combination is doing a great job. Are the fans really only running at 800 rpm and the pump at 2500 rpm? How are the noise levels?

Finally, what motherboard are you using?
 
Impressive temperatures! That pump/radiator/fan combination is doing a great job. Are the fans really only running at 800 rpm and the pump at 2500 rpm? How are the noise levels?

Finally, what motherboard are you using?

It's pretty quiet. The fans DO idle at 800 much of the time, but I can definitely hear them spin up under load while gaming IF I'm listening for it. I'm not entirely sure that part of the HWmonitor is accurate, because even right now I just finished some heavy gaming and heard them spin up but it's not registering in the "max" column. I'm also not sure how exactly it's calculating that the pump is spinning at 2500 rpm, but either way the fans are louder than the pump. I AM reasonably sure the temps are accurate, because I can deliberately bog down the system and watch the temps climb, fans kick in, and then watch things drop quickly. Temps usually drop back down to idle within 30 seconds of quitting a game if not < 10 seconds. I'm pretty impressed with it.

Looks like an ASRock Fatal1ty Z270 - pretty distinct red heatsinks and pipe.

Yup. Says it at the top of the temps pic, first component listed ;) (just realized I did indeed forget to put it into the text parts list though, so added it now thanks)
 
Last edited:
On a somewhat related note though - MAN it was a pain in the butt to get all the tubing right. The routing I'd initially envisioned did not work out thanks to the Apogee Drive II having its outlet significantly lower than a normal CPU waterblock would, which I neglected to take into account properly when planning things. Well, I took it into account but didn't think the tubing would kink so easily, and it did.

Also, I'll see if I can get a good pic of it, but there is literally 1 THIN sheet of paper's width of room between the PSU and the 90 degree fitting coming off the radiator. Similarly, the Swiftech quick-disconnects I put there, being the smallest ones I could find, BARELY fit without touching. So I wasted probably $100 or so in fittings that didn't work out. If I had to do it again, I'd use T fittings and plugs instead, and just be veeeeery careful when filling or anything to minimize bubbles.

Another problem area was the routing of the tubing from the outlet on the Apogee Drive II to the inlet on the GPU. Initially, I was going to route the tubing straight down from the CPU to the GPU like this guy did:

https://i.imgur.com/xVdl1wT.jpg

Tubing kept kinking though and the angles were too tight, so I flipped the radiator around for longer tubing and to create a gap against the back fan area where the tubing actually sneaks its way around the radiator and doesn't touch it. Also, the radiator kept hitting the 90 degree fittings on the GPU when I was trying to mount things, and while I technically was able to maneuver it in and make it fit I didn't like the fact that it would constantly hit the fittings any time I moved the case or anything. Basically it rubbed a bit. So I moved the 90 degree fittings to the bottom of the ports instead of the top since there was plenty of room under the GPU anyway.
 
My son's M1 system has a Gigabyte GTX 1070 G1 Gaming card that has 3 large fans and is not too long or tall so it fits easily into the M1. I did not put any fans on the bottom of the case. Two weeks ago his monitor started going blank during extended Total War sessions so I suspected the graphics card might be overheating. I tested the system thoroughly, including replacing the graphics card and putting his graphics card into another system. I couldn't find any problem, except that maybe his 1070 was not completely seated in the PCI-E x16 slot. Still, I decided to order 2 of the new Noctua slim (15 mm thick) 120 mm fans (NF-A12x15 PWM) to increase the airflow to the GPU cooler. The graphics card is only 2 slots thick so I could install 25 mm thick fans, but I liked the idea of having some space between the fans and the cooler. Plus, I wanted to get my hands on some of these fans!

The Noctua fans are very rigid and feel premium. They run very quietly. I like how each fan overlaps 1.5 of the graphics card's fans, but I'm not sure why. (Maybe it's because the fan motors are between the GPU cooler fans. I don't know.) I have both fans attached to one of the PWM splitters that Noctua includes and have routed the splitter to the previously unused fan header on the Asus Z170I Pro Gaming motherboard that is just above the PCI-E slot. The cables run along the bottom of the side panel (below the motherboard) and then go under the small gap in the graphics card's PCB near the card's mounting bracket. Nice and tidy.

We did some testing before and after using Furmark. Before installing the fans the GPU temperature stabilized at 74 C. After installing the fans the temperature stabilized at 64 C. I was not expecting such a difference given the experiences of others, and I've been here for over 2 years.

Nice Qrash, don't think I have seen that big a drop in temps for the GPU.
 
Nice Qrash, don't think I have seen that big a drop in temps for the GPU.

Yeah, I was surprised too. We let Furmark run for about 15 minutes both times and the temperature seemed to be stable after that amount of time. My son no longer lives at home so doing any further tests will have to wait. So far I am impressed with these fans.

The CPU temperature rose a few degrees too, but it is still acceptable. If it had gotten too high I might have considered replacing the NH-U9S with something larger, such as the NH-C14S. With that cooler I would mount one slim 120 fan to the side bracket and try to figure out how to attach a second one underneath the heatsink fins.

I had been thinking that too. If the NF-A12x15 PWM performance is that good the NH-C14S might be a viable option for the Ncase with 2 of them on the side bracket.
 
My son's M1 system has a Gigabyte GTX 1070 G1 Gaming card that has 3 large fans and is not too long or tall so it fits easily into the M1. I did not put any fans on the bottom of the case. Two weeks ago his monitor started going blank during extended Total War sessions so I suspected the graphics card might be overheating. I tested the system thoroughly, including replacing the graphics card and putting his graphics card into another system. I couldn't find any problem, except that maybe his 1070 was not completely seated in the PCI-E x16 slot. Still, I decided to order 2 of the new Noctua slim (15 mm thick) 120 mm fans (NF-A12x15 PWM) to increase the airflow to the GPU cooler. The graphics card is only 2 slots thick so I could install 25 mm thick fans, but I liked the idea of having some space between the fans and the cooler. Plus, I wanted to get my hands on some of these fans!

The Noctua fans are very rigid and feel premium. They run very quietly. I like how each fan overlaps 1.5 of the graphics card's fans, but I'm not sure why. (Maybe it's because the fan motors are between the GPU cooler fans. I don't know.) I have both fans attached to one of the PWM splitters that Noctua includes and have routed the splitter to the previously unused fan header on the Asus Z170I Pro Gaming motherboard that is just above the PCI-E slot. The cables run along the bottom of the side panel (below the motherboard) and then go under the small gap in the graphics card's PCB near the card's mounting bracket. Nice and tidy.

We did some testing before and after using Furmark. Before installing the fans the GPU temperature stabilized at 74 C. After installing the fans the temperature stabilized at 64 C. I was not expecting such a difference given the experiences of others, and I've been here for over 2 years.
I'm using one of the slim Noctuas in my power supply, it is fantastic for the size.

As for the temperatures, the bottom area of the case is almost blocked off from any airflow - with the non-blower/non-reference coolers, the hot air is dumped inside of the case, and you definitely need something to move the air in that section. Glad you got that sorted though, good drop in temps.
 
Would you think that the NF-A12x15 + C14S (no under fan) would provide a reasonable increase in performance over my current D9L setup? Given the D9L setup intakes air from inside the chassis, and my GTX 1070 is an internal exhaust style, I imagine with the fresh air coming from outside the case, during gaming loads at least I should expect a fairly reasonable drop in temps? (Currently 1x92mm fan on the D9L, 1x Noctua A15 fan on the side as intake, and one 92mm fan as exhaust).
 
Would you think that the NF-A12x15 + C14S (no under fan) would provide a reasonable increase in performance over my current D9L setup? Given the D9L setup intakes air from inside the chassis, and my GTX 1070 is an internal exhaust style, I imagine with the fresh air coming from outside the case, during gaming loads at least I should expect a fairly reasonable drop in temps? (Currently 1x92mm fan on the D9L, 1x Noctua A15 fan on the side as intake, and one 92mm fan as exhaust).

I am starting to think that it would have good results. http://www.overclockers.com/noctua-nf-a12x15-fan-review/ This review shows that it performs well even with filter and radiator restriction. Most 15mm fans just don't have the airflow, but this Noctua might be able to do it. I'd love to see temp results from someone with a bottom mounted radiator and compare the NF-A12x15 to other 15mm fans.
 
Would you think that the NF-A12x15 + C14S (no under fan) would provide a reasonable increase in performance over my current D9L setup? Given the D9L setup intakes air from inside the chassis, and my GTX 1070 is an internal exhaust style, I imagine with the fresh air coming from outside the case, during gaming loads at least I should expect a fairly reasonable drop in temps? (Currently 1x92mm fan on the D9L, 1x Noctua A15 fan on the side as intake, and one 92mm fan as exhaust).

To be honest, I don't know. Months ago someone posted their build that used the NH-C14S and a slim Silverstone fan on top or maybe on the side bracket. His results were good, so I expect they would be similar at least with the slim Noctua fan.

My son has the same airflow as you: a large intake fan on the front half of the side bracket that feeds air to the SF450 power supply and the NH-U9S CPU cooler. The NH-U9S has 2 92 mm NF-A9 PWM fans that draw air through the heatsink and out the rear of the case. Lately I have been wondering if remounting the cooler so that the airflow is in from the rear would be better.
 
I am starting to think that it would have good results. http://www.overclockers.com/noctua-nf-a12x15-fan-review/ This review shows that it performs well even with filter and radiator restriction. Most 15mm fans just don't have the airflow, but this Noctua might be able to do it. I'd love to see temp results from someone with a bottom mounted radiator and compare the NF-A12x15 to other 15mm fans.
I've used the following for bottom radiator, in the order of increasing performance (strictly temperatures)
- Silverstone 120mm 15mm fans
- Noctua 120mm 15mm fans
- Xtraflo 120mm 15mm fans

I do not have temperatures anymore, but from my memory, the Noctua slim 120s seem to be the most pleasant in terms of sound, and good performance. The Xtraflo 120s were powerful, but very loud, and seem flimsy - slight twist of the fan housing would cause fan blade interference.
 
The Xtraflo 120s were powerful, but very loud, and seem flimsy - slight twist of the fan housing would cause fan blade interference.

Not to be a Noctua fanboy (literally), but the NF-A12x15 is very rigid. I read that they are using a stiffer plastic and you can tell it's true when you handle it. If only the colour ....
 
I am starting to think that it would have good results. http://www.overclockers.com/noctua-nf-a12x15-fan-review/ This review shows that it performs well even with filter and radiator restriction. Most 15mm fans just don't have the airflow, but this Noctua might be able to do it. I'd love to see temp results from someone with a bottom mounted radiator and compare the NF-A12x15 to other 15mm fans.

Yeah, the new Noctua's are superb. I was using FW121s before, and they're definitely quieter while moving more air. And the FW121s were better in turn than the Scythes I have. Don't have solid numbers though with current build.
 
Also, keep in mind that the bottom rad is dissipating a lot less heat than the side radiator, so it's more complimentary then anything.
 
Yeah, the new Noctua's are superb. I was using FW121s before, and they're definitely quieter while moving more air. And the FW121s were better in turn than the Scythes I have. Don't have solid numbers though with current build.

I found the post from last December made by StrawKite in which he posted photos and screenshots from stress testing his overclocked 6600K. His temperatures with the NH-C14S and a mix of fans (slim 120 mm Silverstone FW121 and Noctua NF-F12) were quite good.

Note: one consequence of the NH-C14S is inability to mount an SFX power supply with the SFX bracket. StrawKite used the M1's ATX power supply bracket with an ATX-SFX adapter from Corsair. Corsair now sells version 2.0 of the adapter that has offset mounting of the SFX power supply, similar to Silverstone's PP08.
 
Back
Top