Tutorial Project: Nº2

Luciel

Limp Gawd
Joined
May 31, 2011
Messages
191
Hello,

The aim of this tutorial project is to put togueter a series of smaller tutorials/how to on individual things.
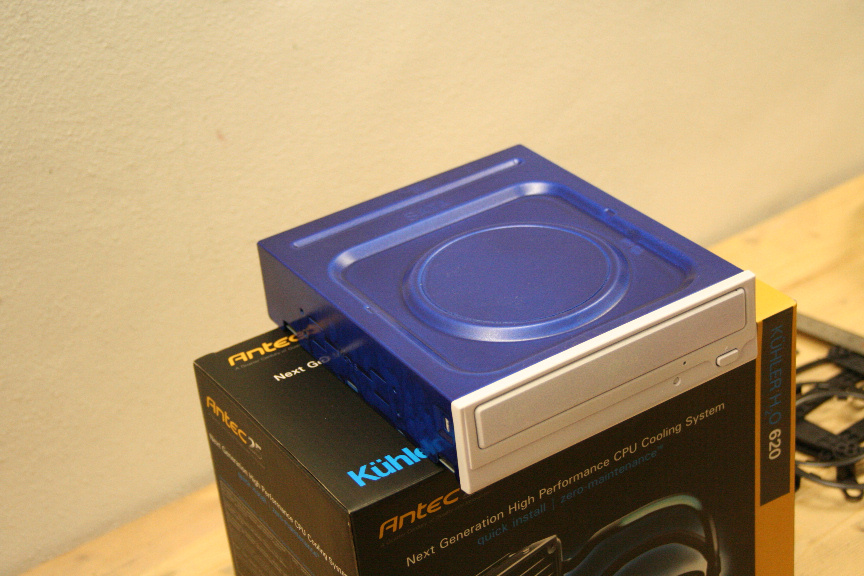
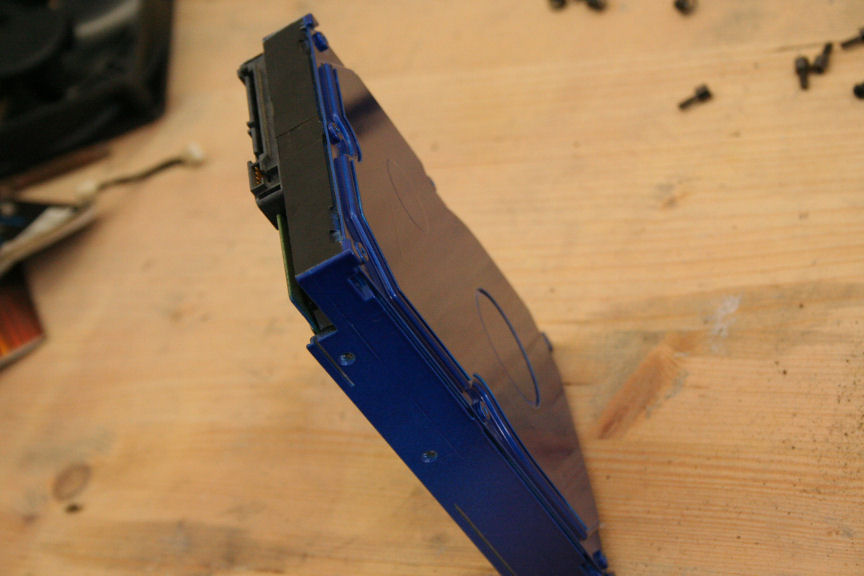
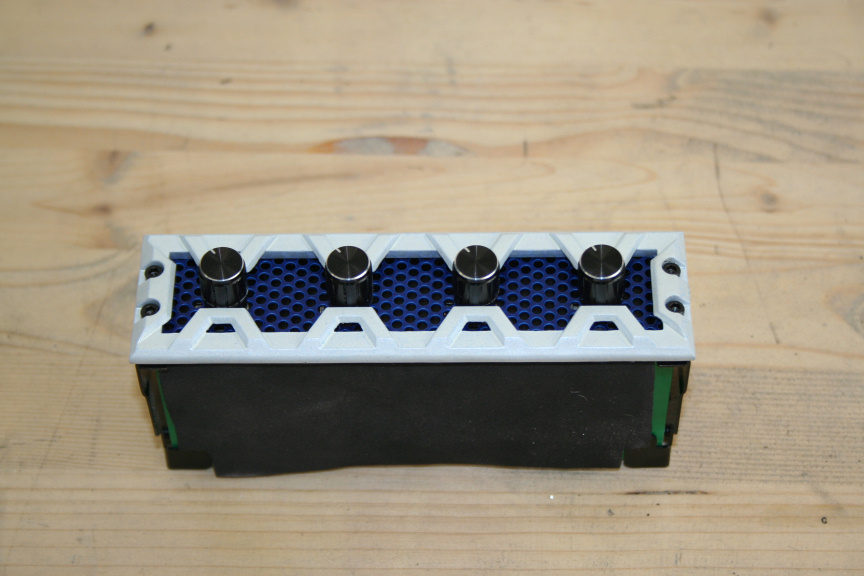
Customizing a fan controller, painting a drive, and so on an so forth. All of these mini-tutorials will be posted as seperate threads.
This thread will be the main one focusing more on the whole build.
These are an initiative of the main sponsor, Lamptron.


Other sponsors that have helped out with this project are:


Thank you all, specially Chris @ Lamptron and Teseo @ Benchmark Hardware for their never ending support.​


Right, so let´s start!

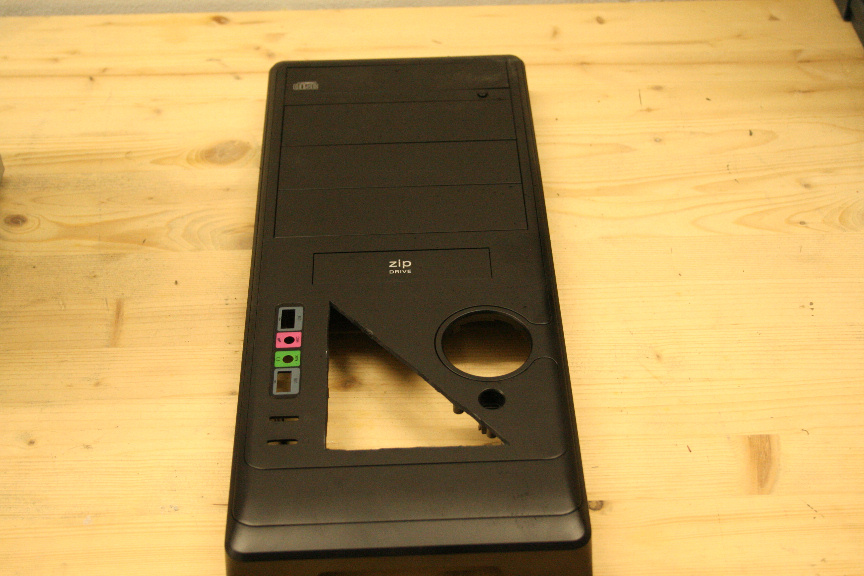
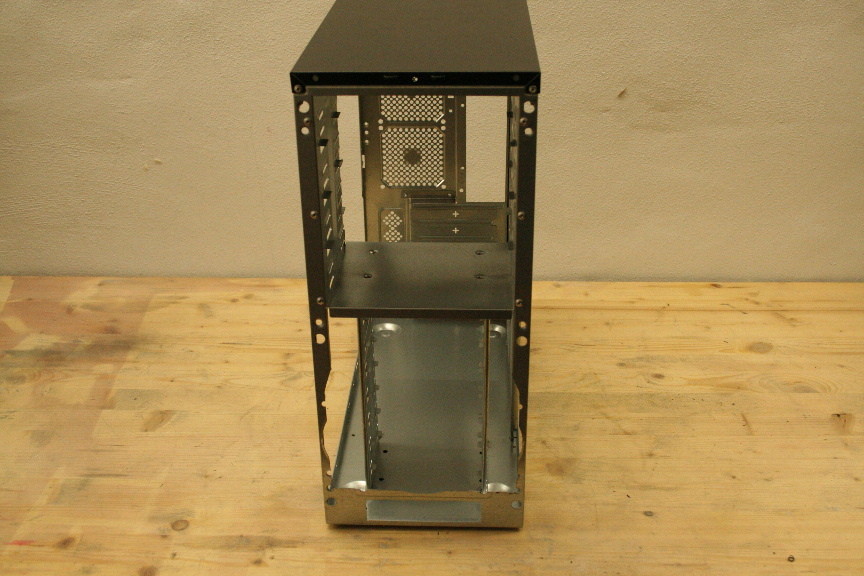
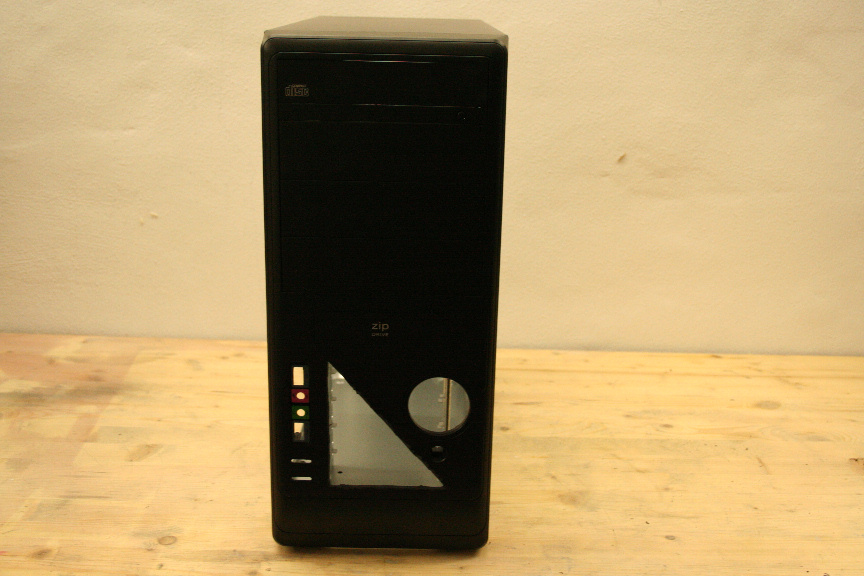
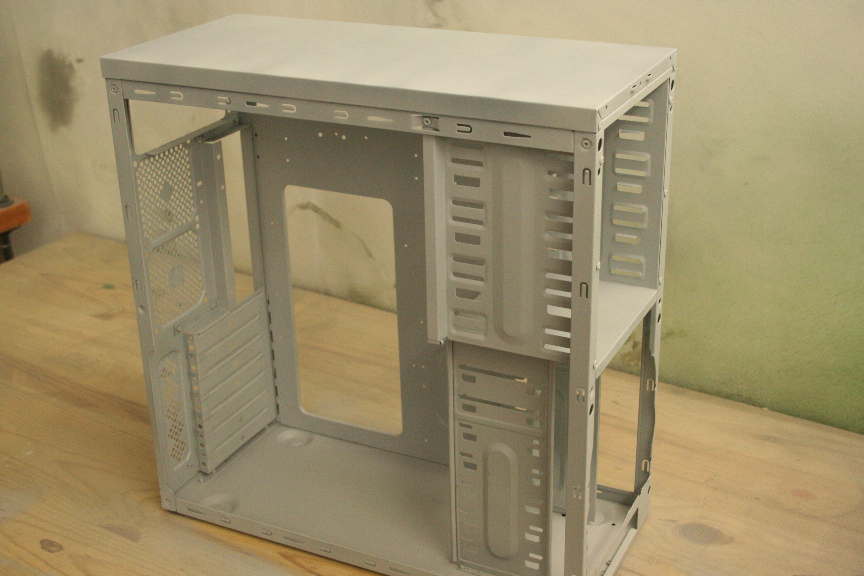
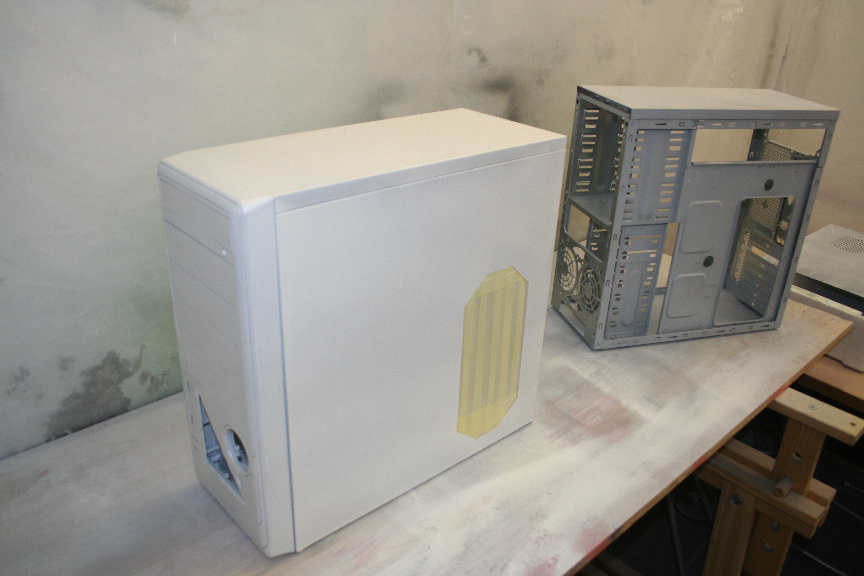
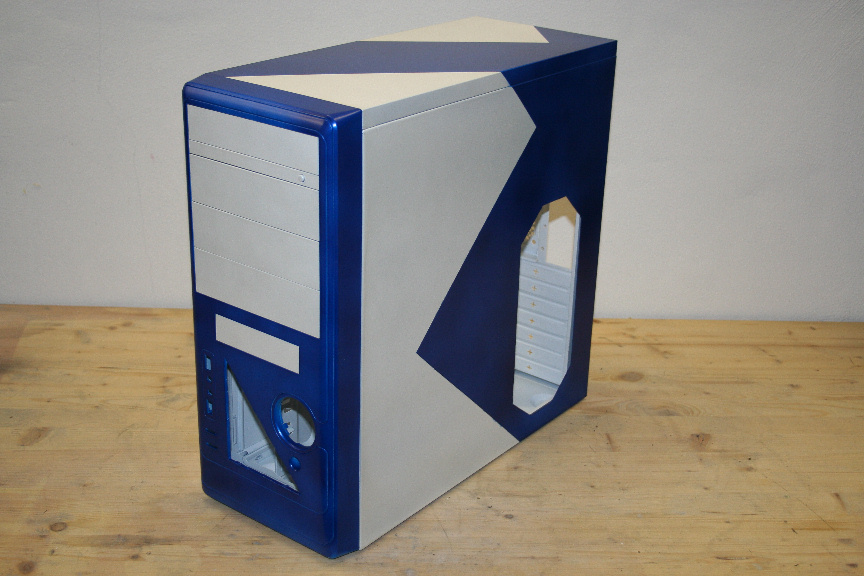
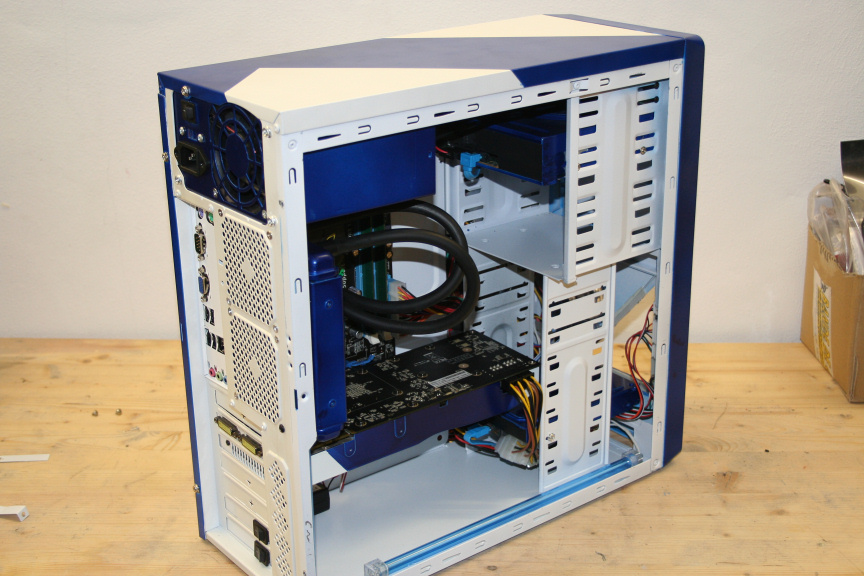
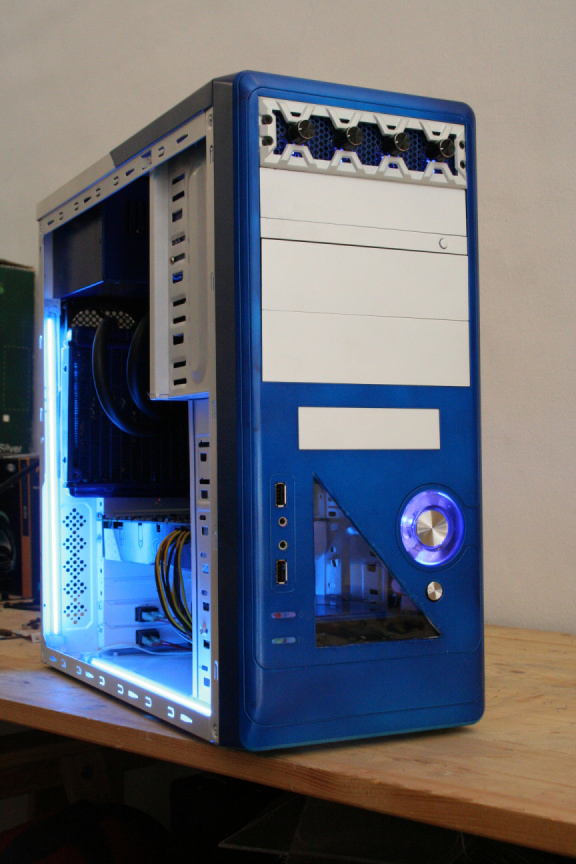
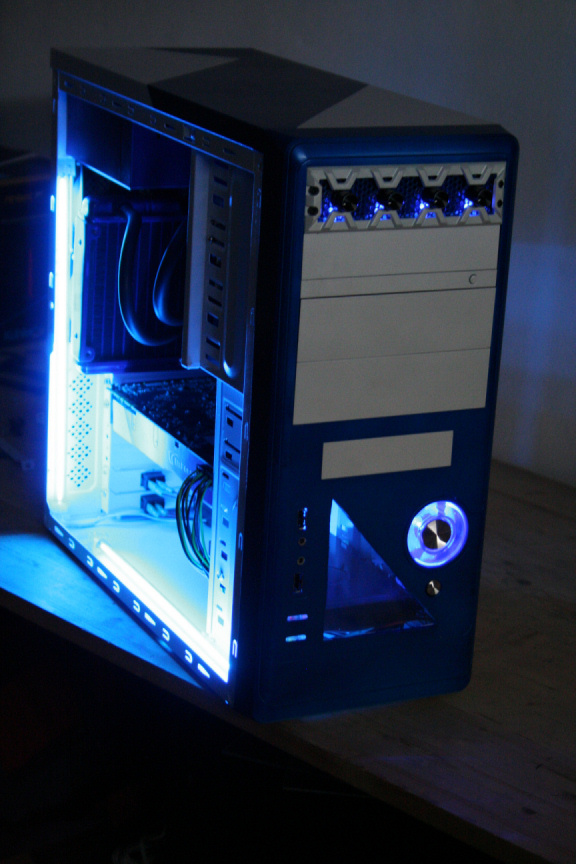
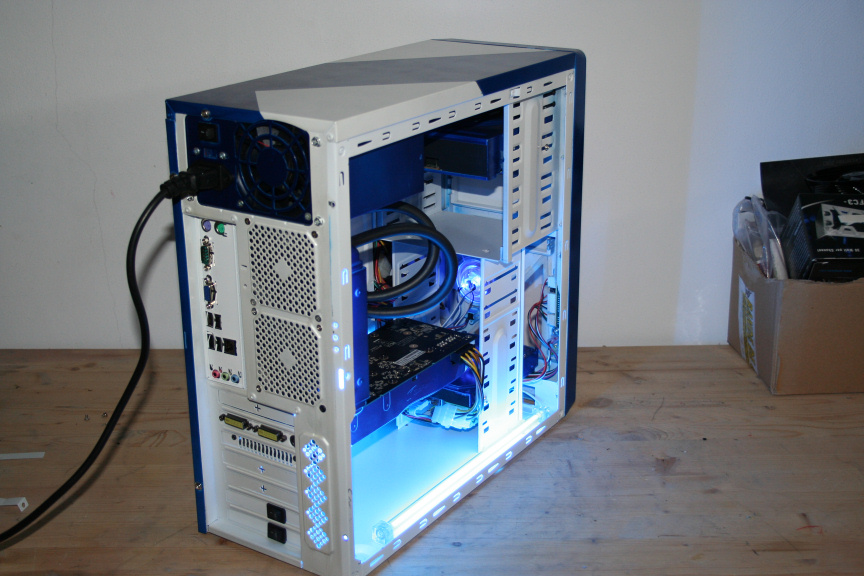
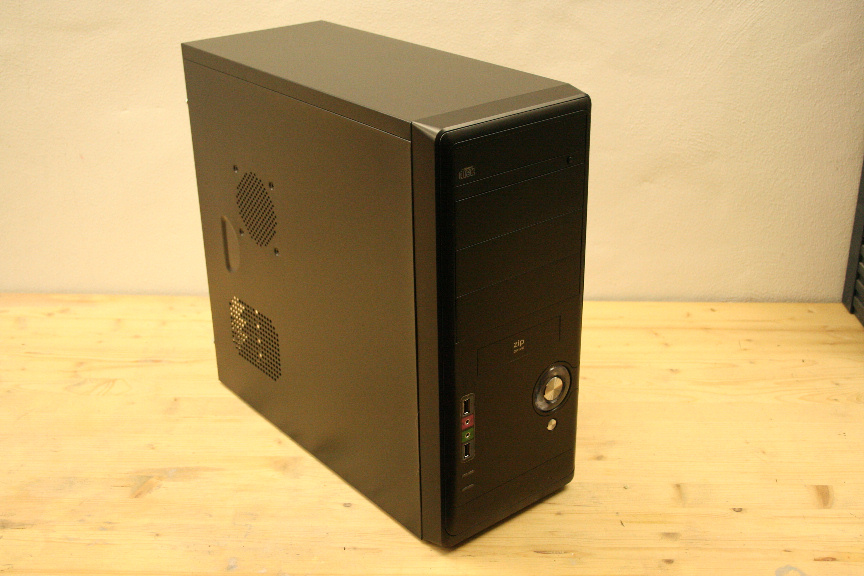
We will be using a very basic case, the entry level "Isis" by B-Move:

1.JPG


2.JPG


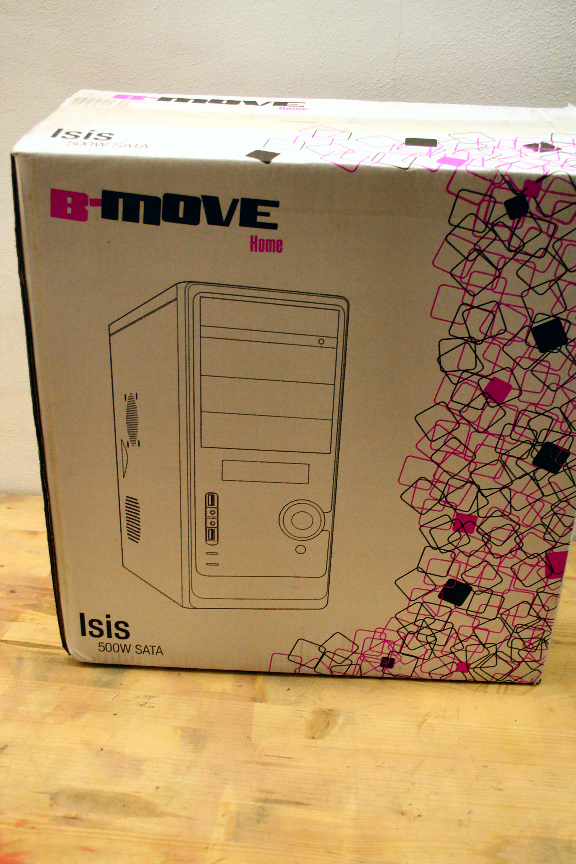
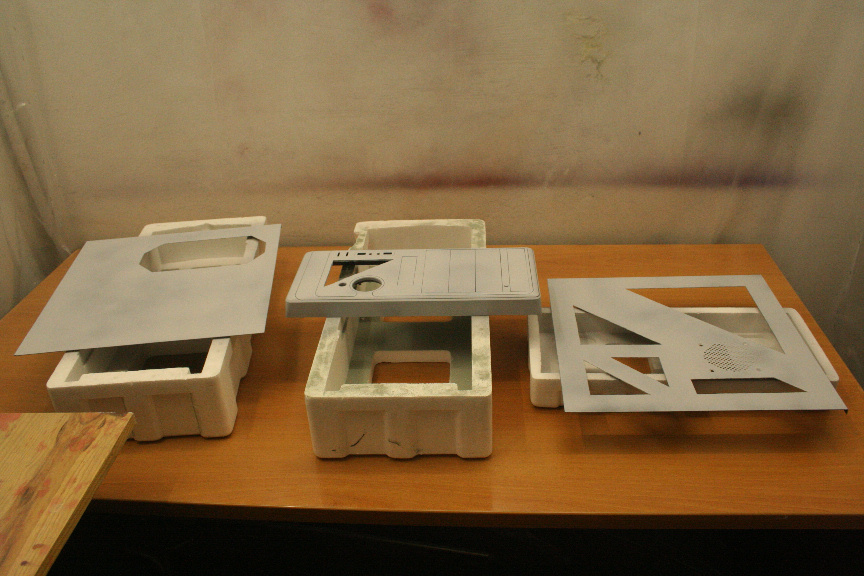
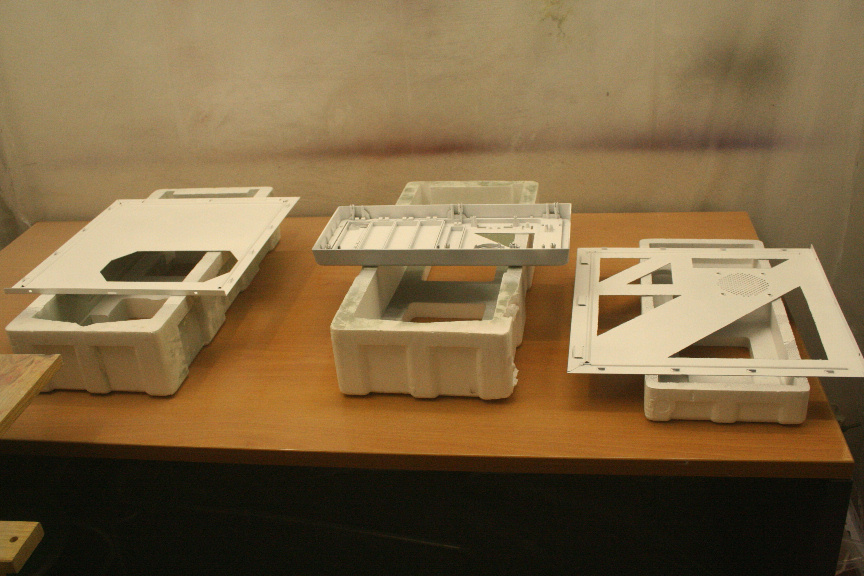
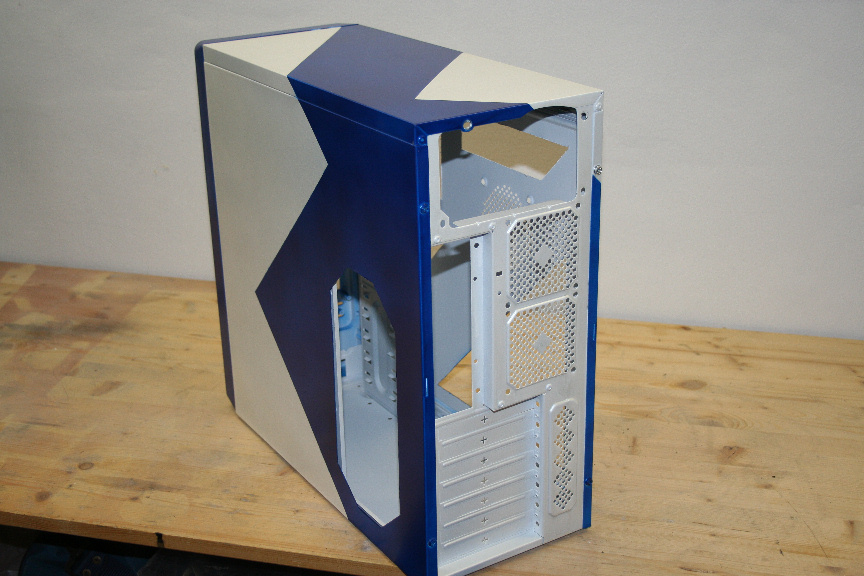
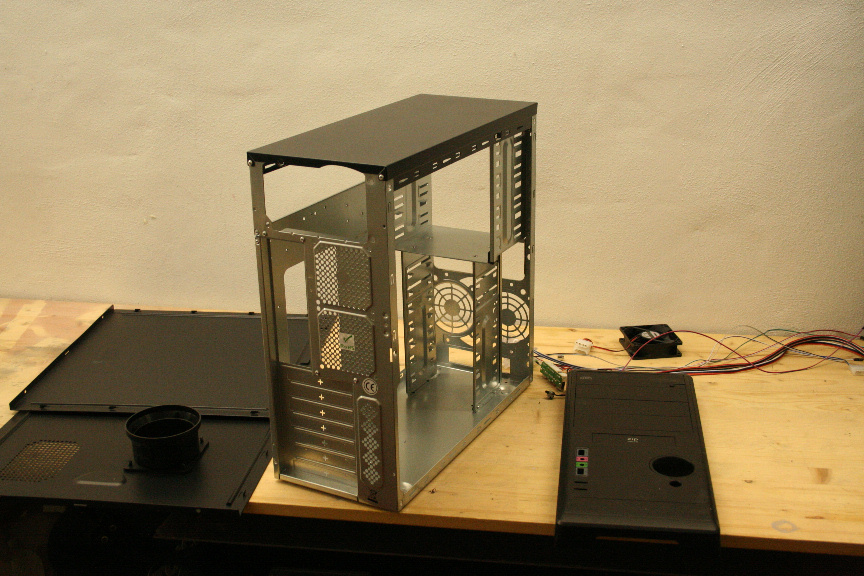
And we strip it down:

Edit (note by Burnout21 over @ Bit Tech):
A good idea is de-rivetting the top side, that way we can trully get all the panels off which will make for a better finish. I didn´t on this particular case as all areas where easily accesible, but this isn´t normally what happens with most cases)

Edit (note by nagyizom over @ Bit Tech): Another good idea is to remove those ugly fan grills at the back and replace them with our own. Obviously this a matter of your own personal taste, it´s easy enough to do and won´t cause you any major troubles). This may or may not give you better noise reduction and airflow (depending on the specific case of course).

3.JPG


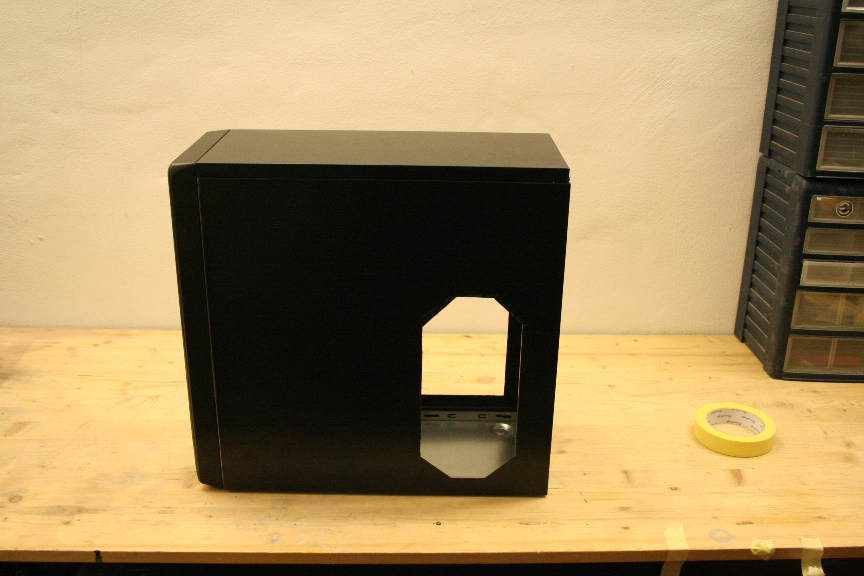
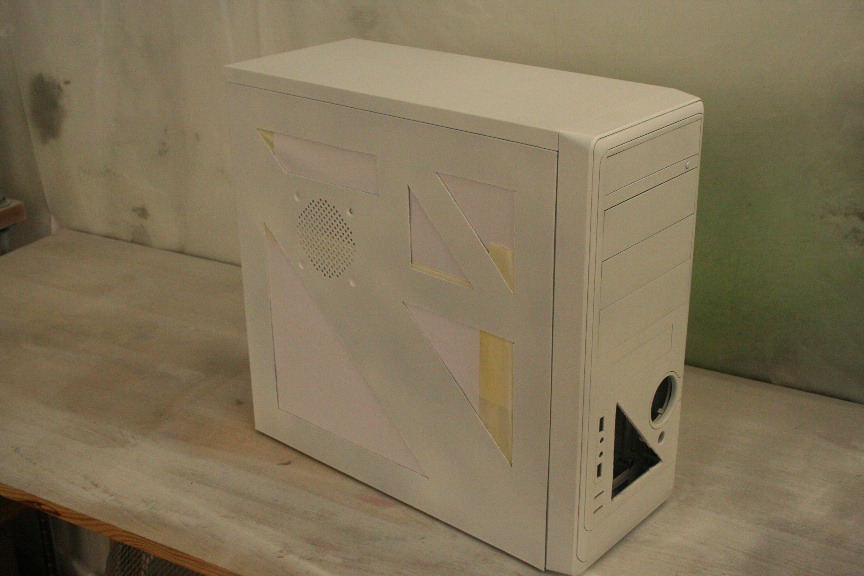
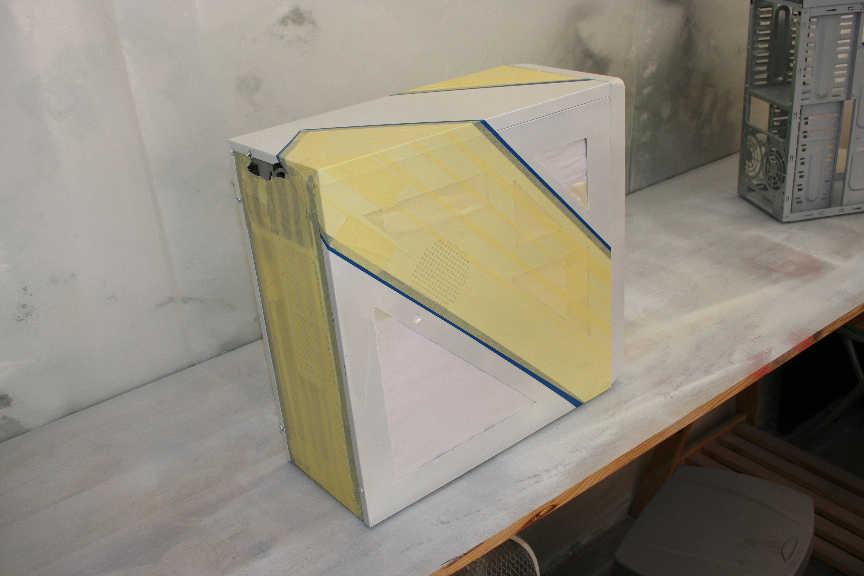
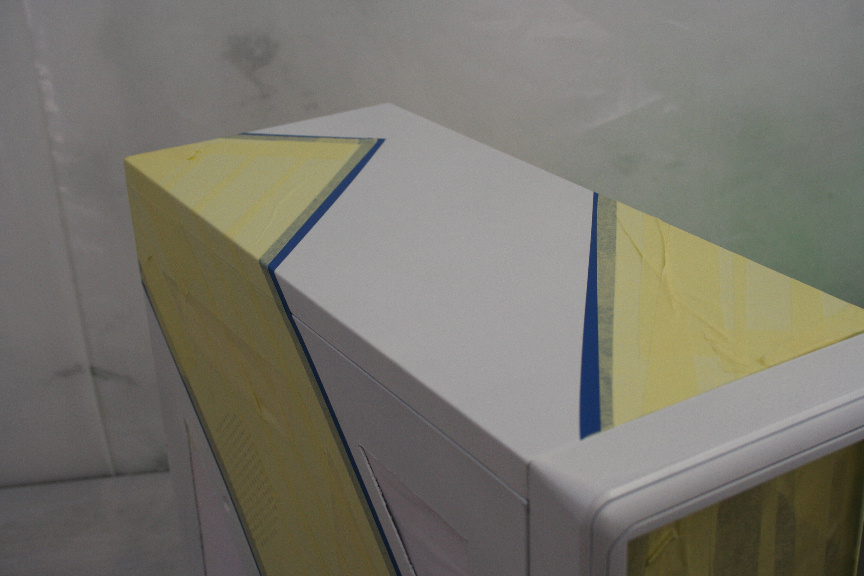
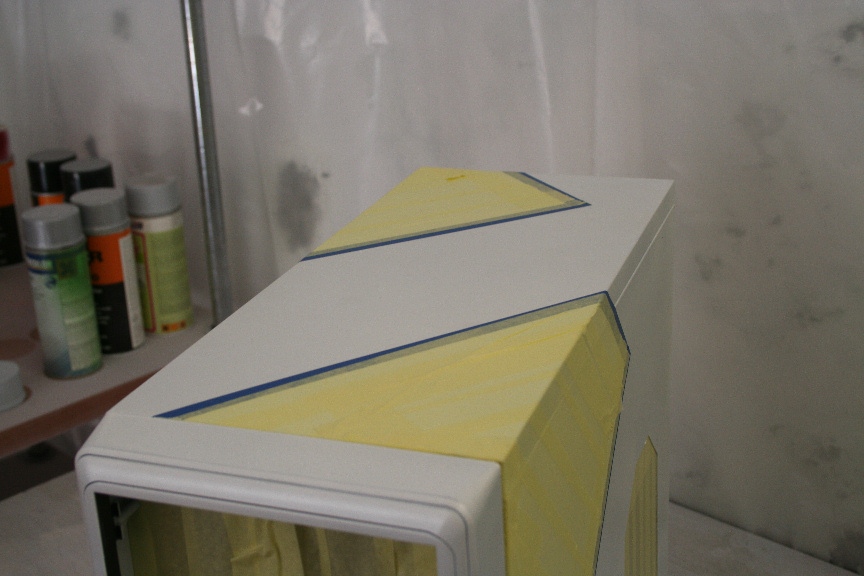
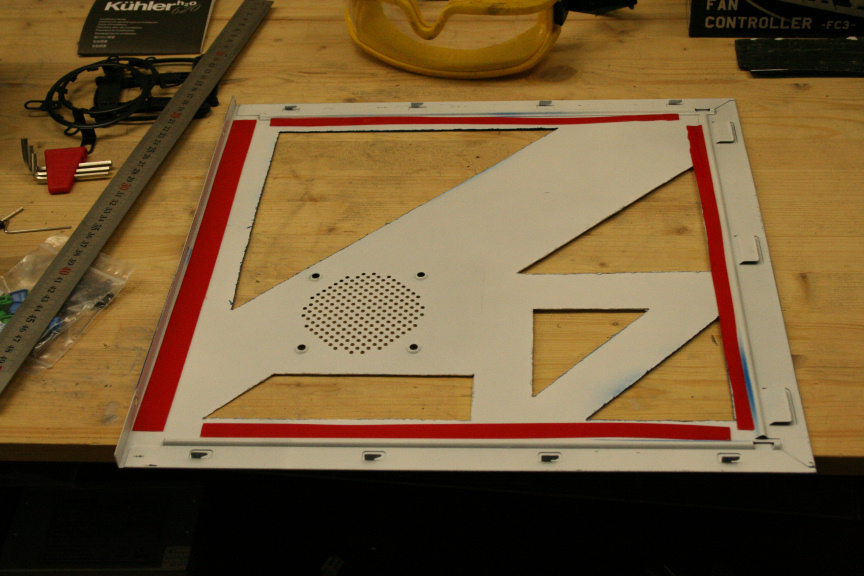
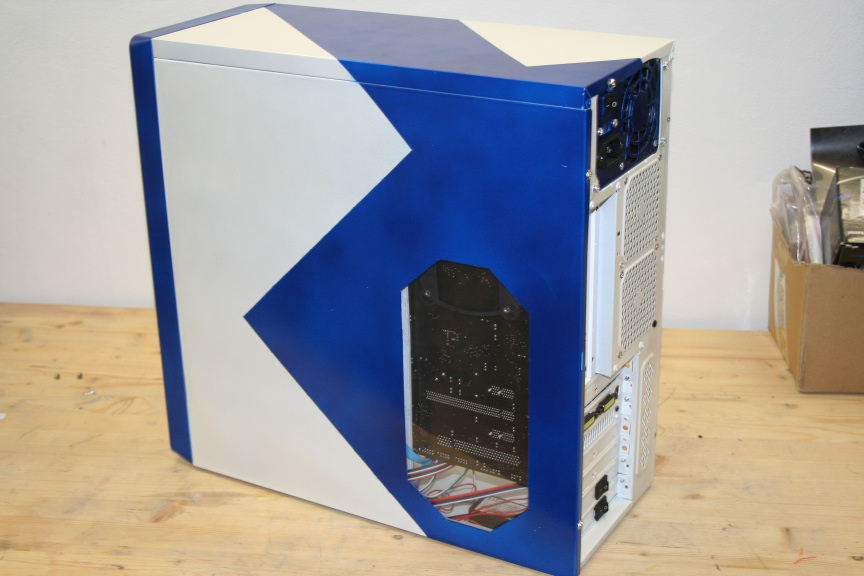
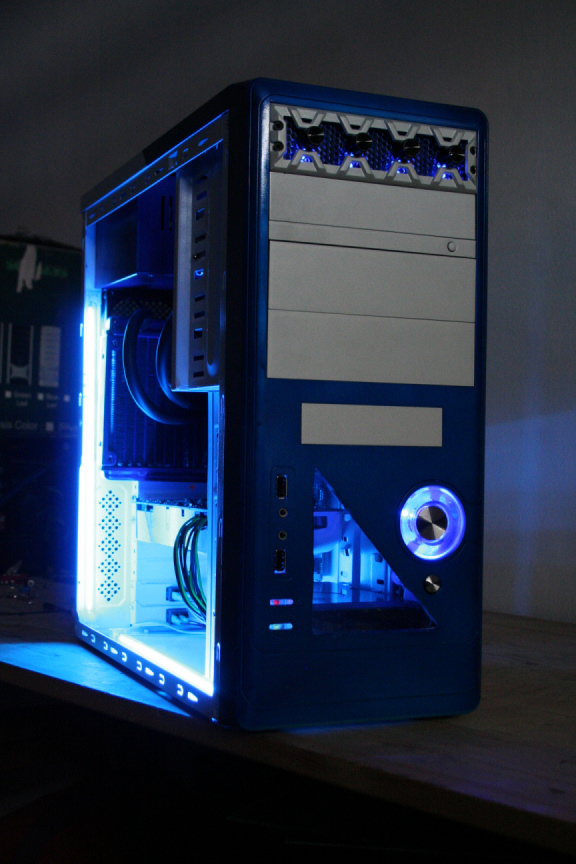
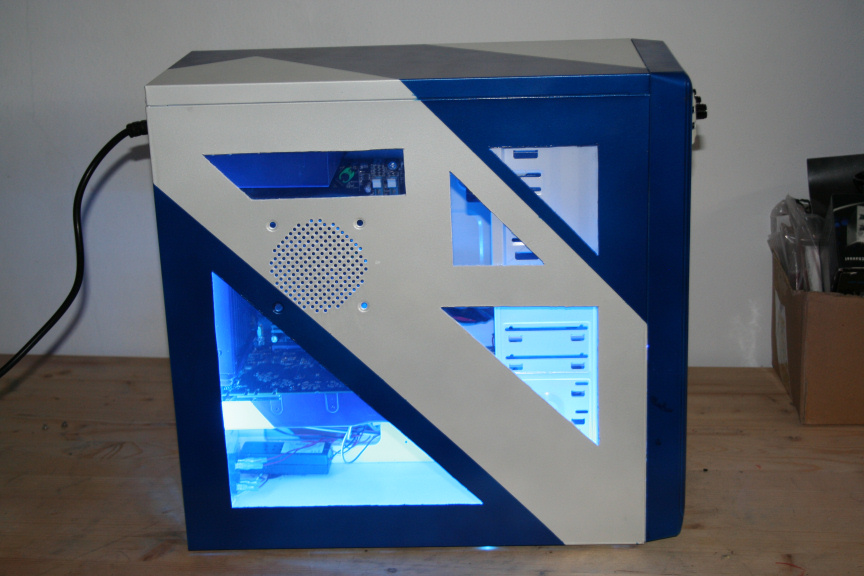
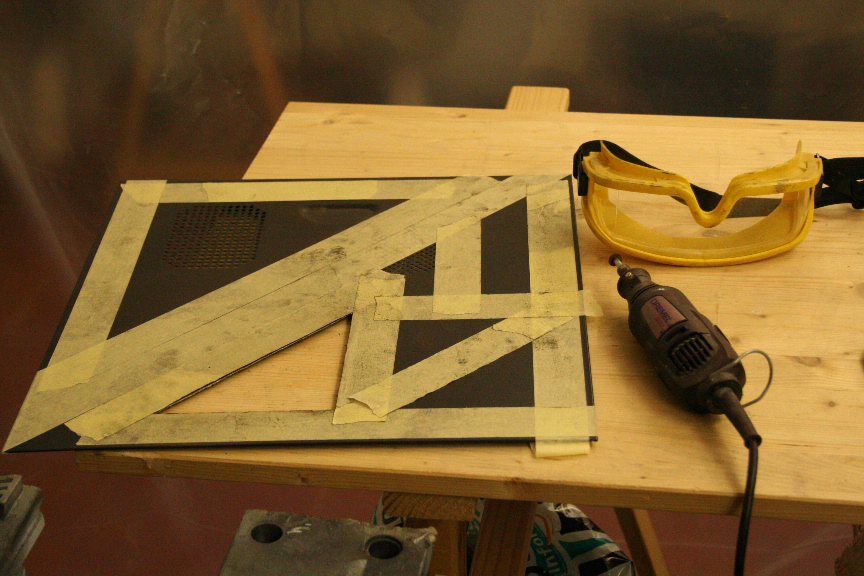
The first change I´m going to do is prepare the side for a window. If you feel you want a normal square window, there´s nothing wrong with that, go ahead, you can aply the same steps as I will be doing. Personally, I like something different, so I´m going to be doing a series of triangular shapes.

There´s many ways of doing this, but I´m going to explain the way I do it. I tape out the area to cut, in order to use the tape as a guideline, you can use drawn lines if you like, personally I preffer this way as with a normal line I end up not being able to see it due to the sparks that come when cutting.

Edit (note by nagyizom over @ Bit Tech): If you´ve never used a dremel, you will provably find it easier using a jigsaw, it should also give you a nice straight line. Personally I find tape for guiding and a steady dremel hand is good enough, again, it´s your choice.

4.JPG


Ok remember to ALWAYS use safety gogles when working with any kind of power tool. I use a dremel for this kind of modification, but really any kind of rotatory tool will do as long as it´s the right size.

Edit (note by DeathPrincess over @ [H]ard Forum): Thank you very much for reminding me of this!! I forgot about mentioning it. For this specific job I use the dremel discs line number 420 (Heavy Duty Cut Off wheel), you can get 20 of these for about 7-8€ in your local hardware store.

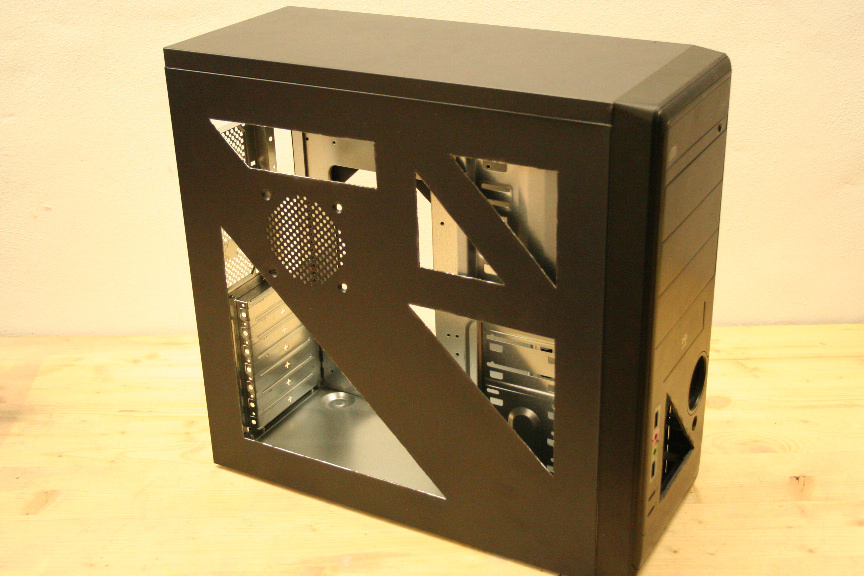
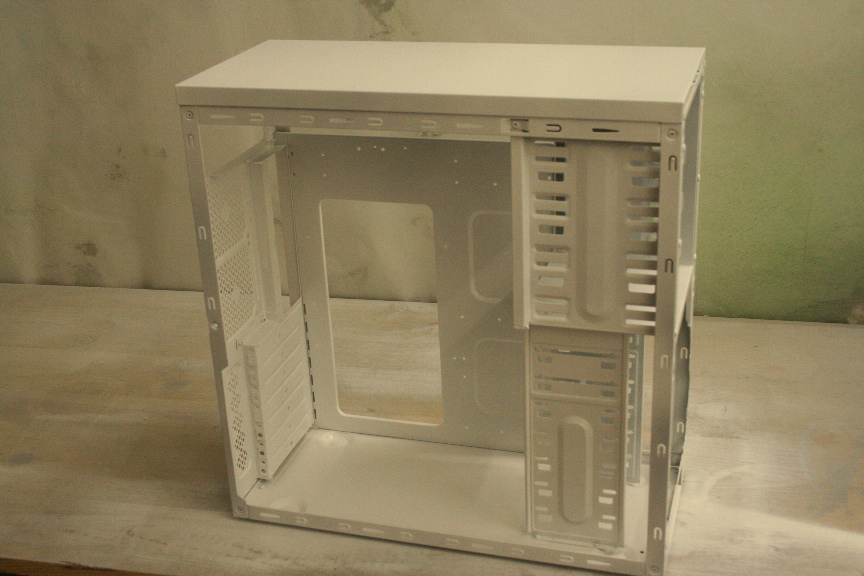
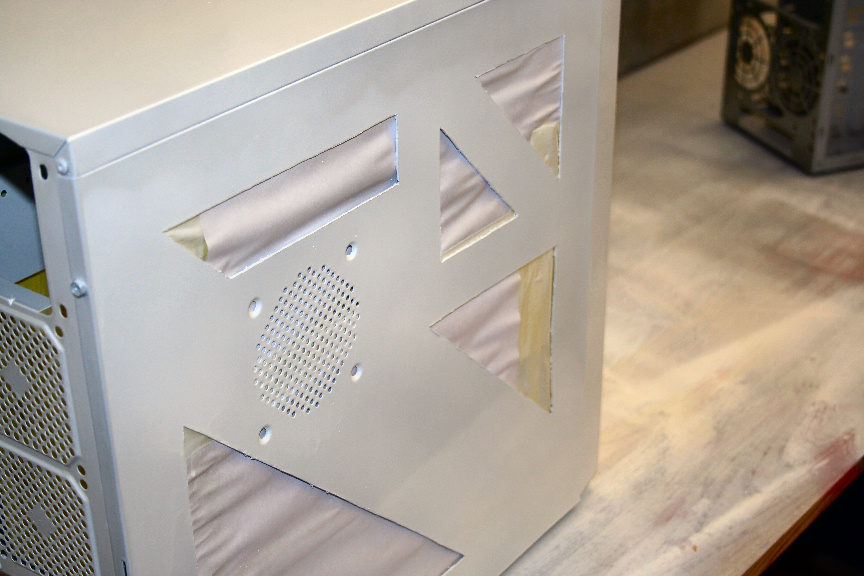
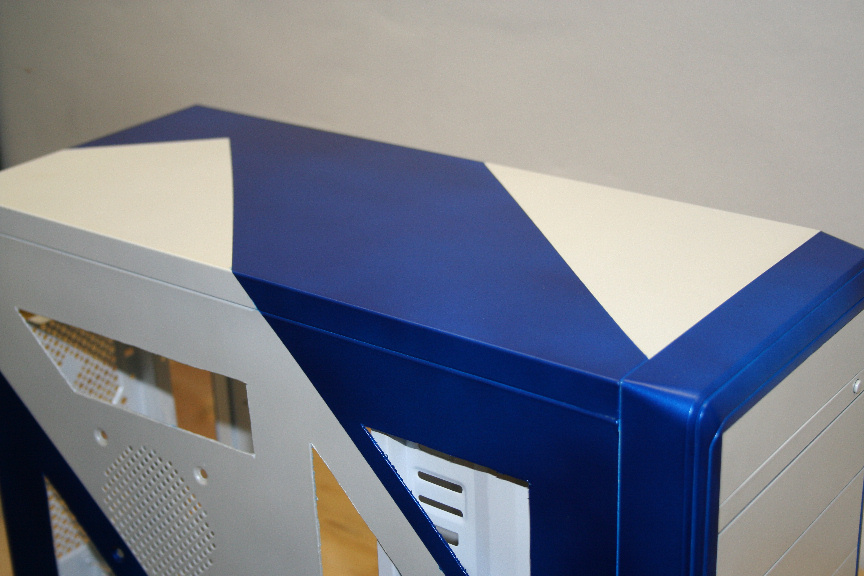
First section cut off:
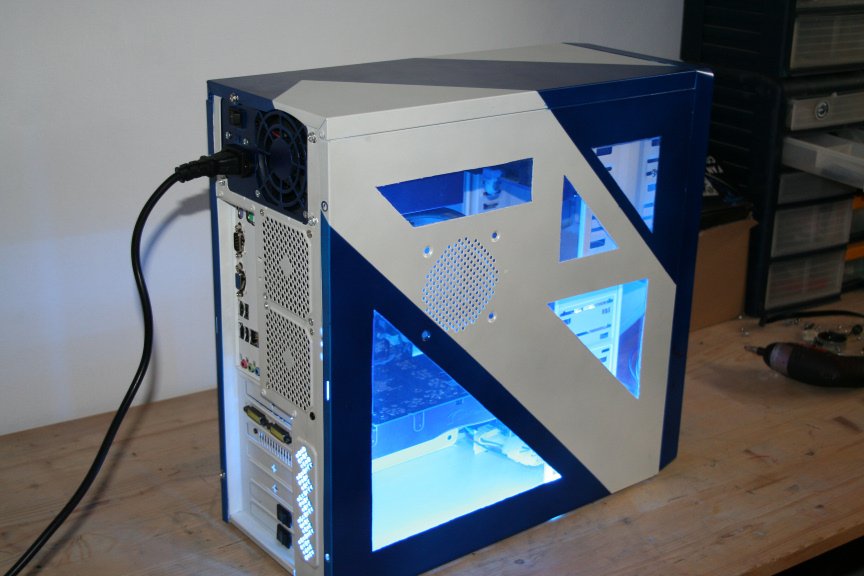
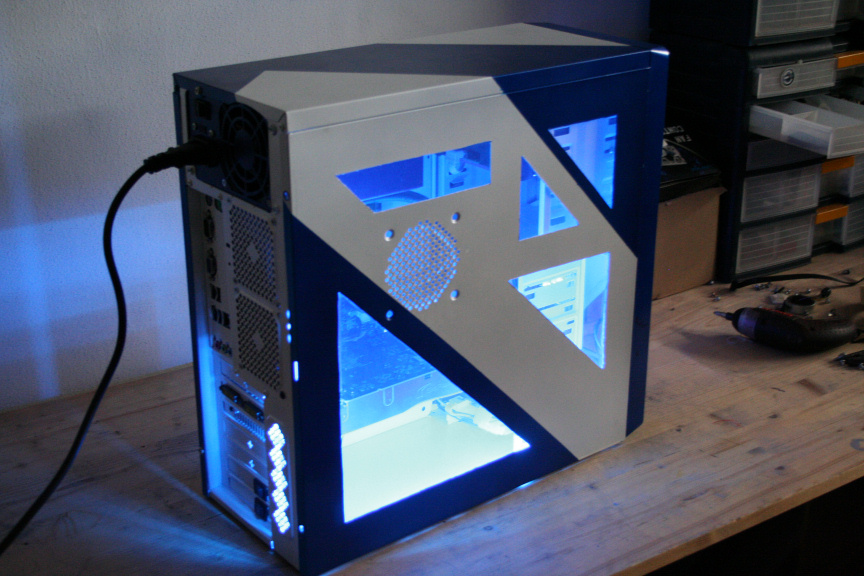
5.JPG


And the rest...

6.JPG


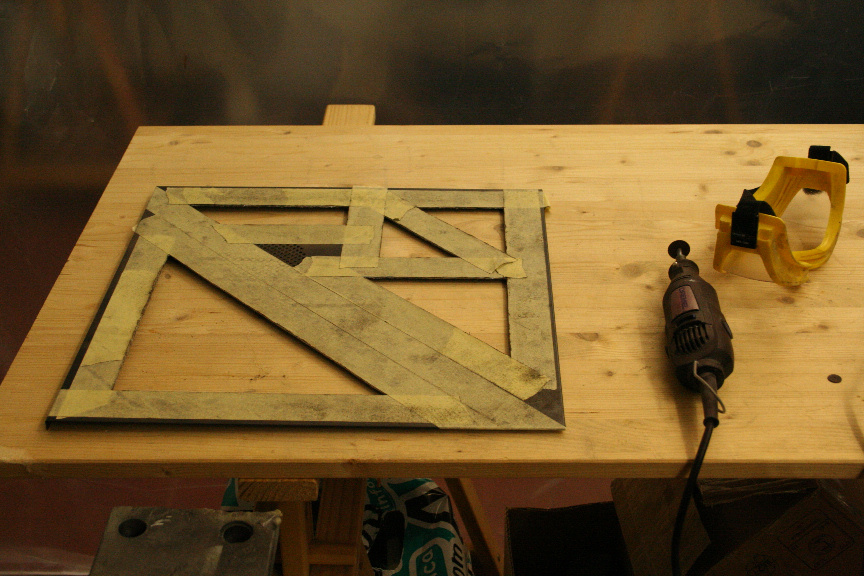
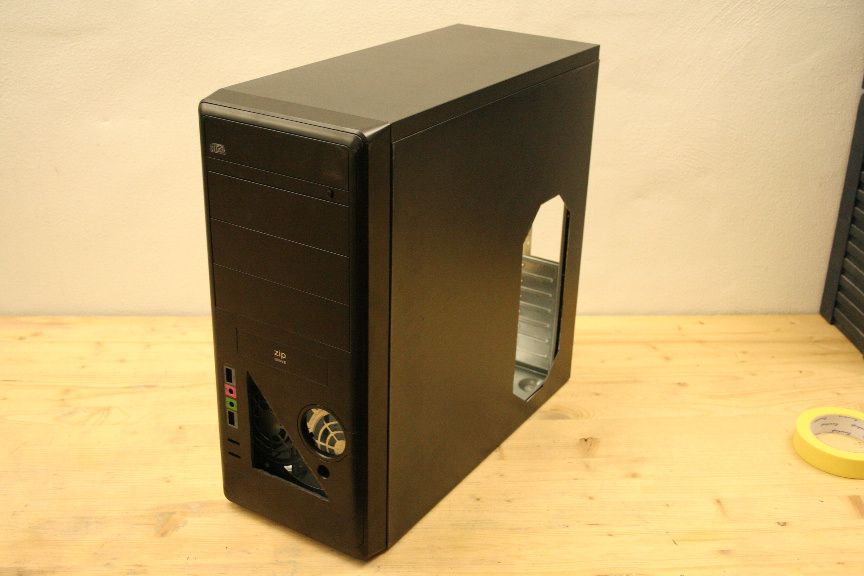
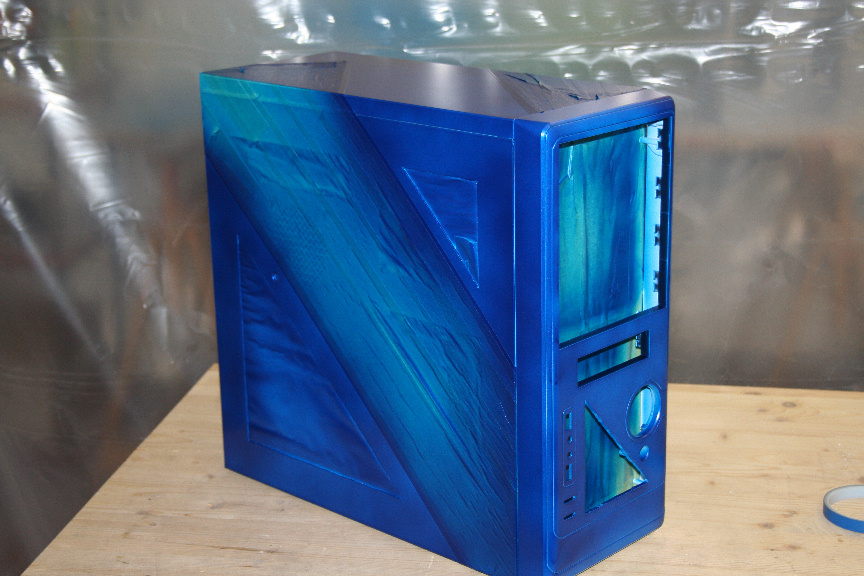
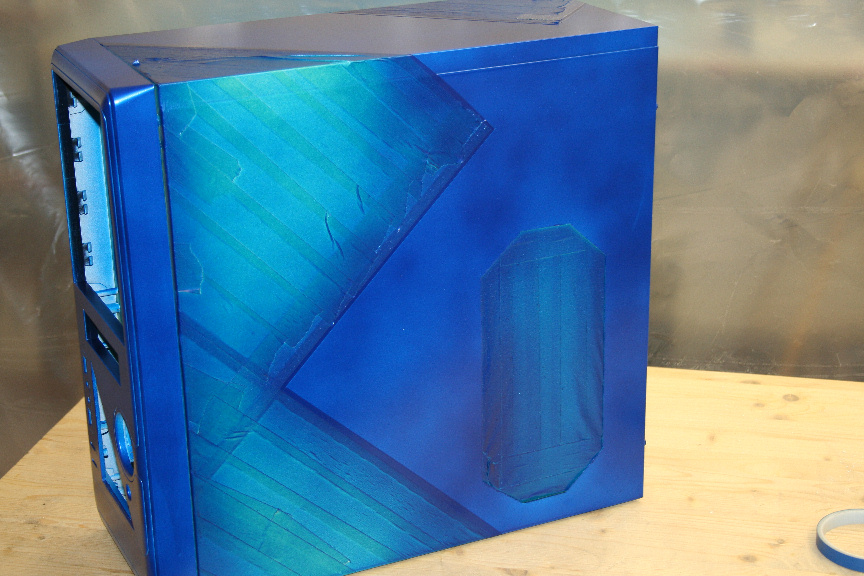
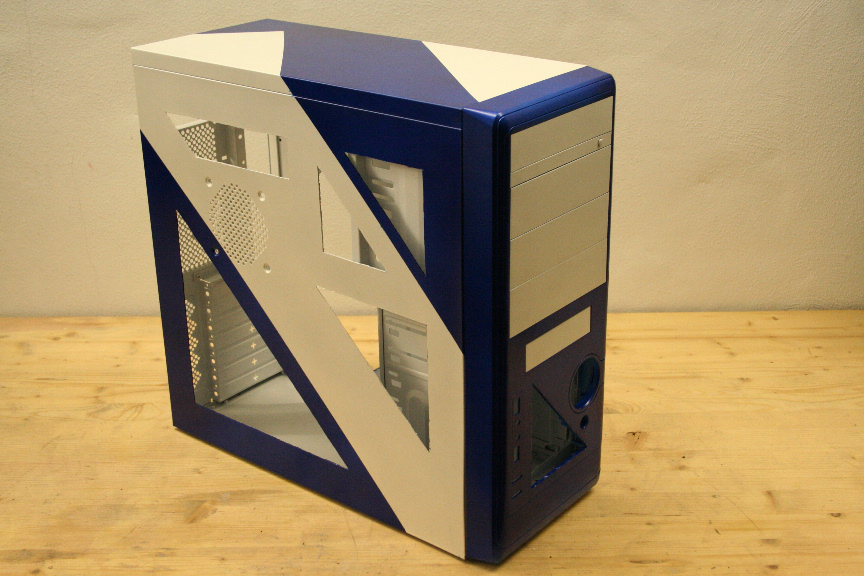
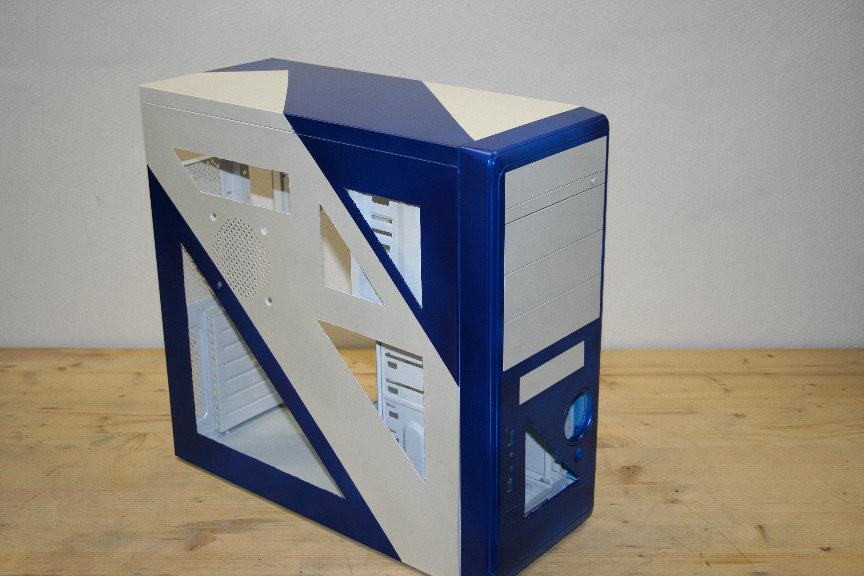
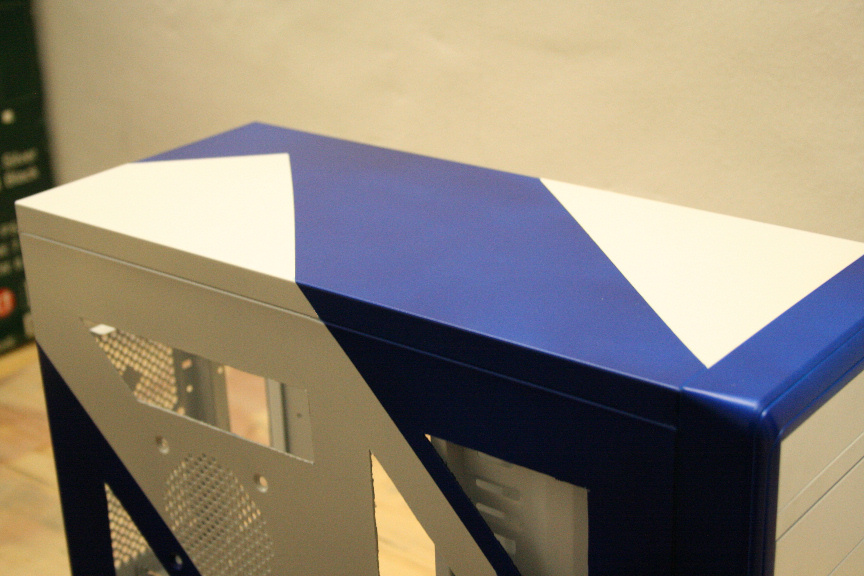
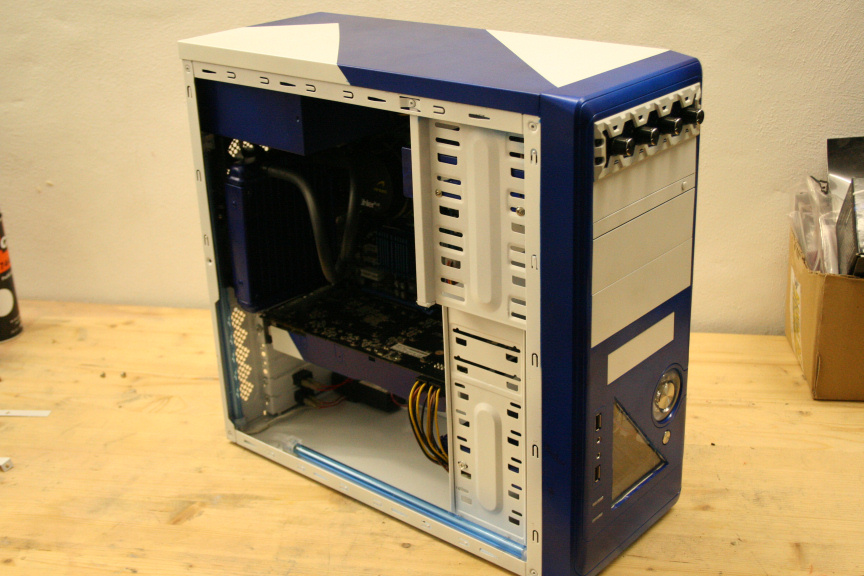
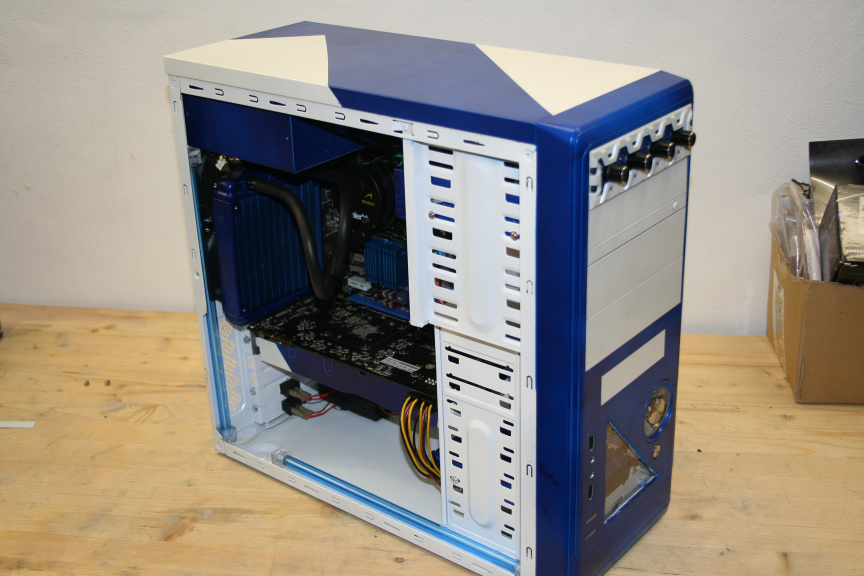
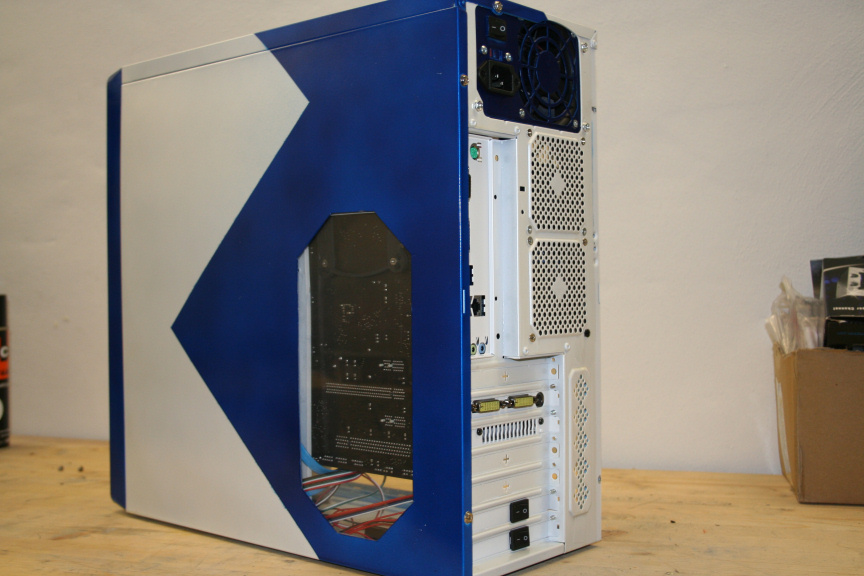
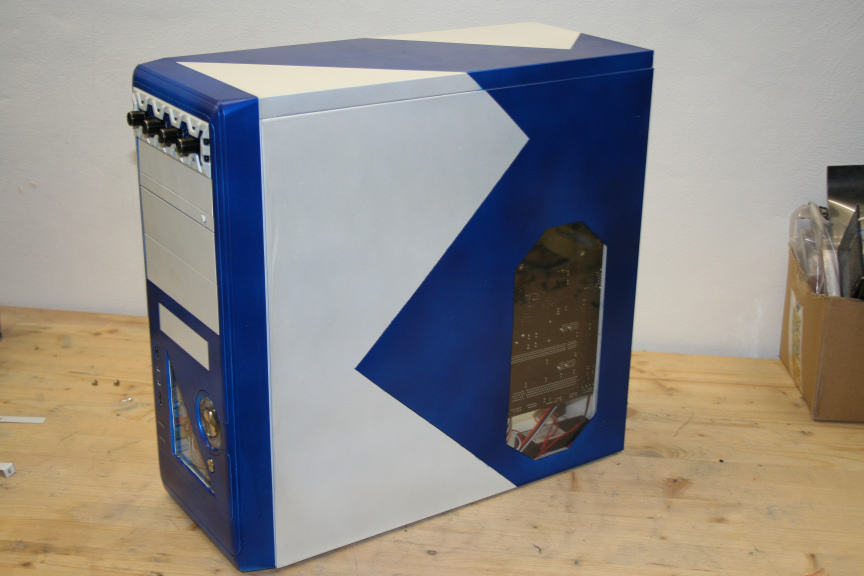
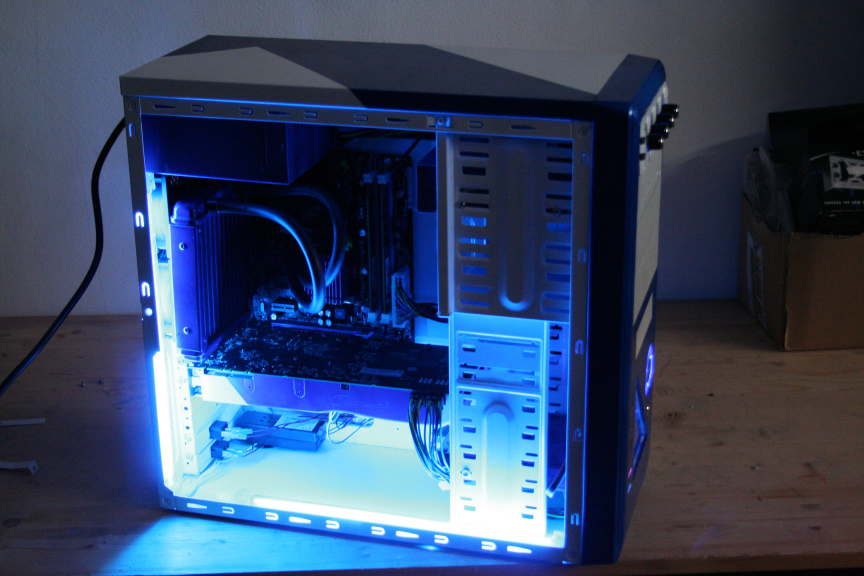
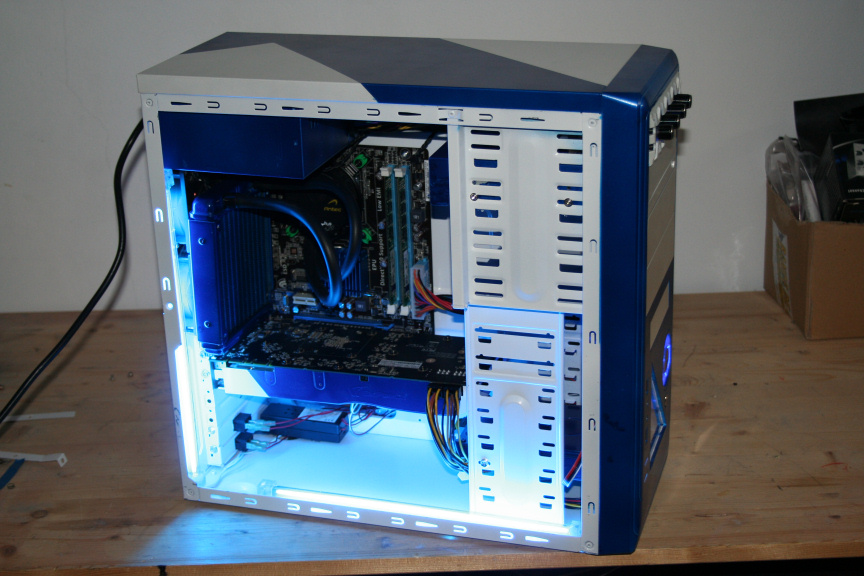
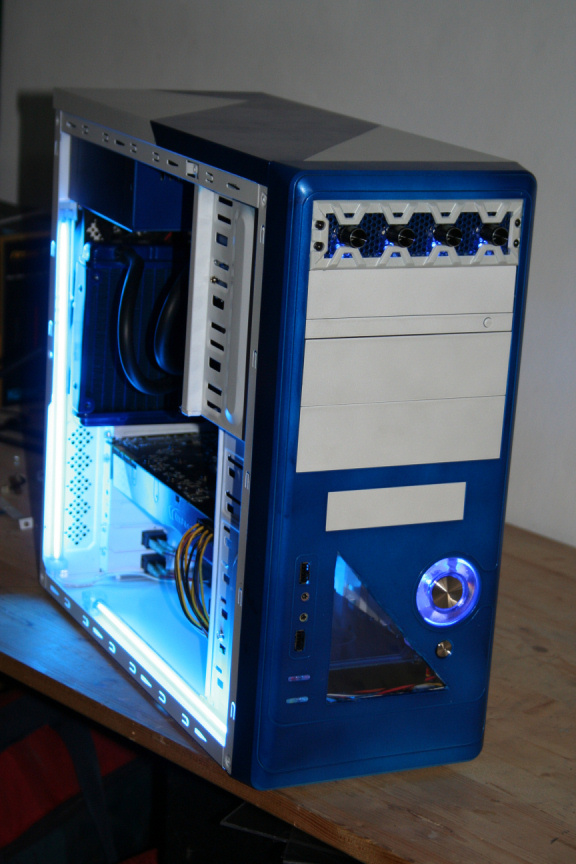
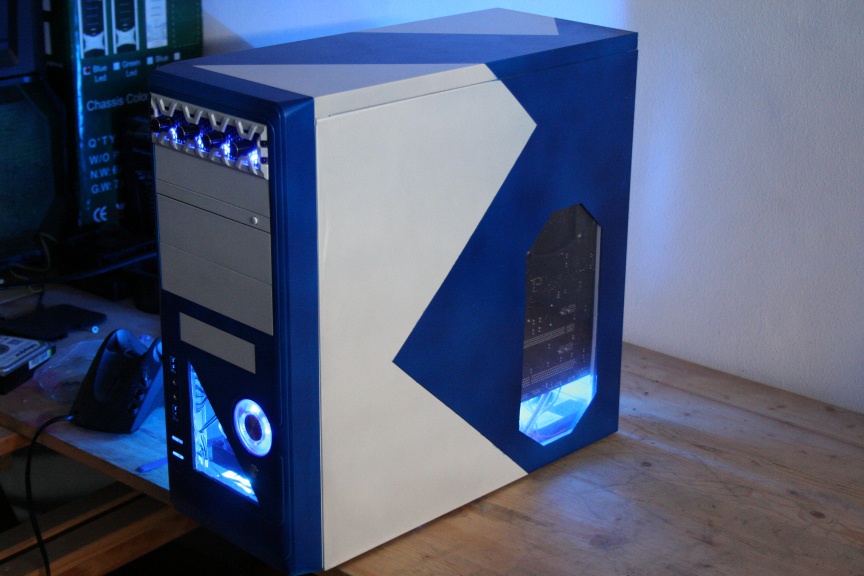
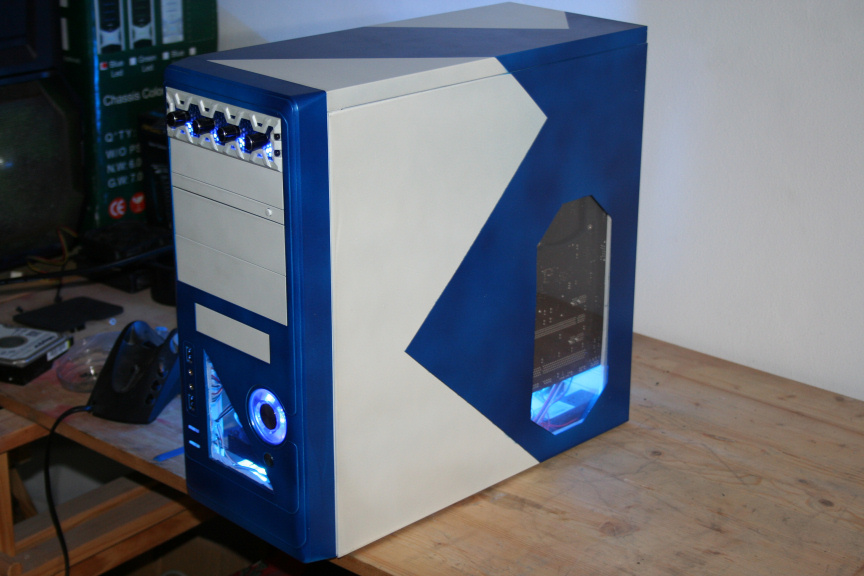
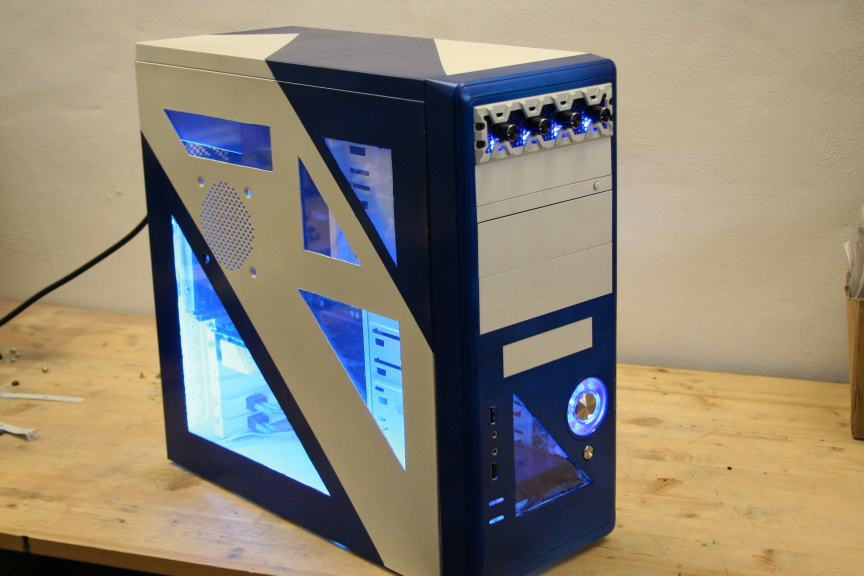
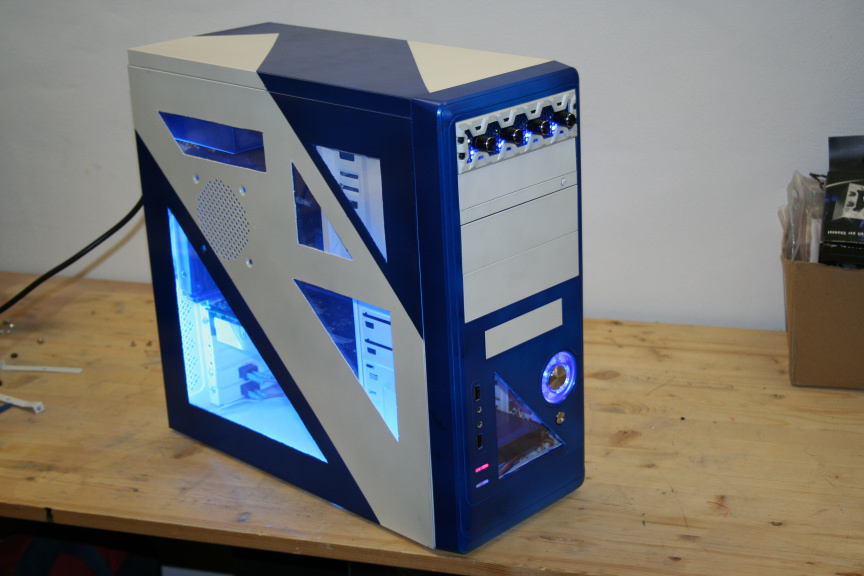
Now, it still needs to be cleaned up for smooth edges but I felt like testing it on the rest of the case to get an idea of the look:

7.JPG


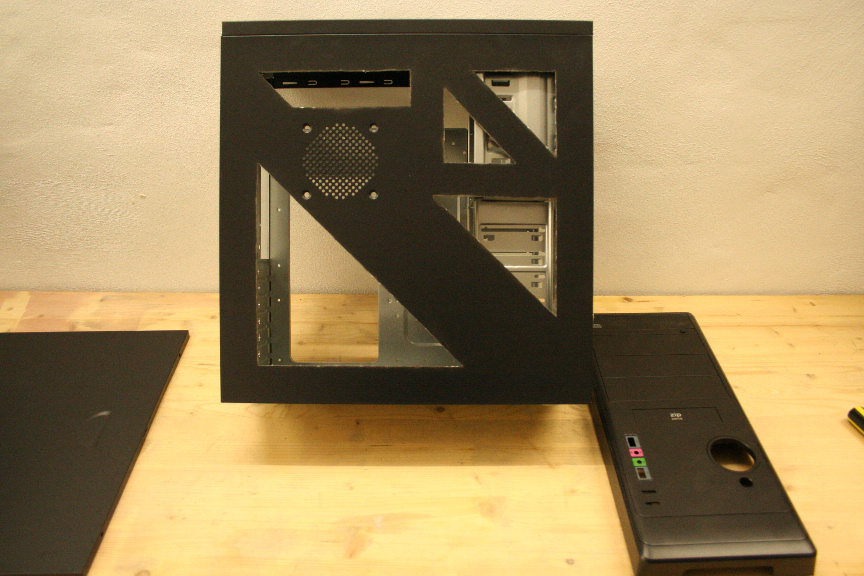
Yeah, I quite like that.

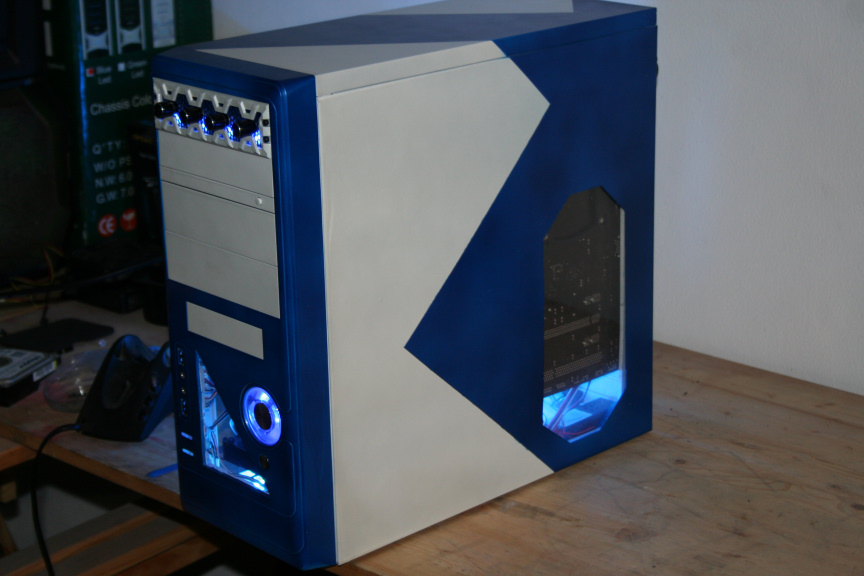
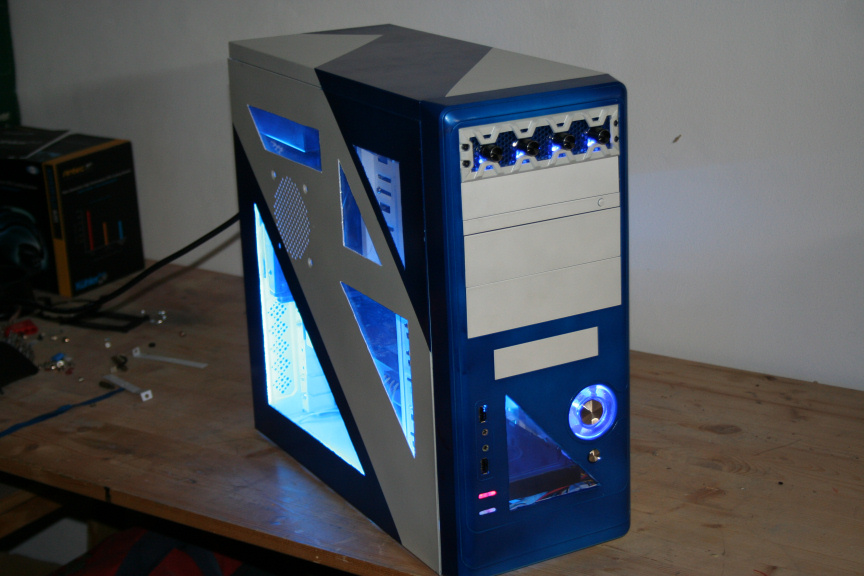
Edit (note by RustyTool over @ KustomPCs): RustyTool has a decent point here. Notice how part of the triangle windows are right on top of the bays. Depending on the case and on your intentions for interior design, you may or may not choose to do these as all you can see through them are the bays. On a personal note. If you´re using older cases, make sure that you have enough space between the window and the chasis to fit the plexy.

More soon : )
 
Last edited:
Zip drives! :D Those things were great for launching the disks out at things!

You should list the wheels you're using with the dremel! I like the metal cutting fiberglass reinforced "EZ lok" (can't remember the name!) ones...can't quite tell which ones these are for the photos, but those corners look nice!
 
Last edited:
that is an extremely good point DeathPrincess, I completely forgot to do so, I will edit the main thread later on. But the wheels I used for this job where Heavy Duty number 420 (dremel branded)
 
The front is awfully plain in this case, which really is to be expected on a low end case. I do like the start button though so I´ll leave that as it is. I won´t worry about the bays since they will be filled. But I do feel like adding some detail to it, following the rest.

Remember to set your dremel to low speed when cutting plastic, as high speed will just melt it and make a right mess of things.

8.JPG


The bad thing, in my oppinion about most simple cases is that the right side tends to be awfully plain and there´s not that much you can do with aside from a nice paintjob, which won´t be seen much in most cases since the window side is the one facing you in most cases.

Lucky then that this case has a modern chasis design and has the opening under the board, so hey, why not make a window?

9.JPG


I tend to use number 420 on the dremel line of discs (Heavy Duty Cut-Off Disc). And for this thin metal sheeting, it´s like slicing through butter with a hot knive. Regardless, remember not to push the dremel or you´ll burn through discs.

Right so let´s see it all put togueter with all cuts cleaned up (I don´t remember the specfic term in english, but it´s a sanding wheel for the dremel, that´s the way to go, personally I use the same cutting disc on it´s side to cut off all remnants and shave it down, and then I blunt the edges to prevent cutting).

10.JPG


11.JPG


12.JPG


The problem with the front mini-window is that, right behind it there´s a pseudo dual-fan mount, which makes the window look ugly and a bit pointless, so let´s cut it.

13.JPG


And now...

14.JPG


...much better!

Ok, now we´ve got to sand down everything that´s got paint in it, so in this case, all panels, as you can see the interior is bare in this case. Once done, clean it all up. I personally use distilled water, but you can use alcohol or any kind of non-corrosive cleaning product. Now wait for it to dry, specially if you´ve used any kind of chemical to clean it (i´d stay away from that option, just in case).

Now that it´s prepped, it´s painting time. Remember to always use a breather, this stuff is nasty in your lungs! Not to mention a well ventilated place, but not outside as you will get crap on your fresh paint, and you don´t want that.

15.jpg


A couple of notes about paint types. I´ve had quite a few discussions about this in several forums with all sorts of people. Some use x product and works fine for them, others say don´t use x product because of x reason.

Personally, I use acrylic paint, which is water based, it´s dries very quickly, so you don´t have to wait hours between coats, and it´s good for sanding down between coats to get an extra smooth finish. I stay away from sinthetic and plastic paints, for several reasons which I won´t go in to but regardless, if you want to take my advice, go for acrylic paints, be it in spray can or compressor & gun.

Right, down to it. First a coat of primer:

16.JPG


17.JPG


18.JPG


And now a base color as the effect I will be using (pearl) is almost transparent, so it needs a base color first, in this case, white.

19.JPG


20.JPG


And that´s it for today, more tomorrow.

As a small spoiler, no, the case won´t be all white, it´s simply easier doing it all in white and then painting on top as needed.
 
Edited the main post to add comments from several members of several forums, thanks for participating guys, I welcome more suggestive comments of the kind in order to add them further to the steps on this tutorial so that newcomers can use it, containing imput from more experience modders in order to create a decent first project.

Right so, update:

I sanded down with very fine grit and very gently the first coat of base white, this, while not entirely neccesary will give you a smoother finish on the next coat and it will make the next coat hold on tighter which in turn makes it that much resistant to scratches.

Once done, I aplied the second coat of base white:

21.JPG


I let that to dry for about 15-20 minutes (again this only aplies to acrylic paint due to it´s quick drying properties) and sanded it down again. I then proceeded to aply the third coat, this time, of pearl white effect. It´s an almost transparent coat, like lacquer if you will, but it´s not lacquer and can be aplied to any color (of the same kind of paint). This will give a glossy pearl finish (which, while the photos don´t do it justice, it´s very different to just using glossy white which I used in the AIO AL project).

22.JPG


23.JPG


24.JPG


While it´s drying time is the same, I will now leave it over night to cure as I will be using tape on top of it for the next stage of color.

PS: The case next to it, is another exactly the same model case I´m preparing for a client, but that can go in another mini thread.
 
I was just pondering about finding a thread or site that would help me turn my collection of old PC cases into something modern and useful. So far I have:

old cases
tape
dremmel
dremmel attachments
spray paint

So far so good, I might have to start my own build soon enough.
 
There´s another thread on here called "Mod in a Week" about refurbishing a 10 year old case, you might want to have a look at that one : )
 
Now that the paint has cured, it´s safe for us to use tape on it, again go ahead and sand it down if it´s not smooth. I first used decal tape to mark lines (the blue tape) and then extra thick masking tape as filler (the yellow tape).

25.JPG


26.JPG


27.JPG


28.JPG


Let´s aply the first coat, of the second color. As with the white, I´ve gone with a pearl effect blue.

29.JPG


30.JPG


31.JPG


15-20 minutes later, I aplied the second and final coat of the blue. Notice how the light reflects on the pearl efect, making it look like there´s 2 tones.

32.JPG


I let that cure for 4 hours before remove the tape. Now it´s safe for us to remove it (gently please!). I´ve taken several pictures with and without flash, on different possitions to try and show you the pearl effect, though the pictures really don´t do it justice.

33.JPG


34.JPG


35.JPG


36.JPG


37.JPG


38.JPG


And that´s it for today really. There´s not much more to do on the case other than mounting the windows. In the next few days I´ll be posting the mini tutorials on each component and then finish it all in this thread mounting it all in the case.

Thanks for reading/watching!
 
Nice mod, and I'mma let you finish, but the paint job looked better when the tape was still on.

Just sayin' :D

Great thread man, I hope you do more. Epic mods are fun to watch, but to see someone quickly turn a stock case into a showpiece actually makes folks like me think that they too can be artistic when it comes to case modding.
 
This is really great work! I am currently working on my first build, and this has me inspired to do some mods myself!
 
* RESERVED FOR PSU GUIDE TUTORIAL *

-----------------------------------------

With this we finalize the how to paint components thread and we continue here on the main thread with the build.
 
Final post before the end result : )

Today we´re going to do the windows. The material you need to use is plexyglass, it´s cheap enough to buy and you can normally find it in any building supplies or DIY store, I payed for a piece big enough to do 3 side windows on this case 12€ Have in mind there are two types, the normal one and the one prepared for exterior which is a lot more expensive and we don´t need so go for the first one.

Do not cut it with any sort of power tool as it will melt like plastic and make an awfull mess and you´ll find you will spend more time cleaning the piece up than if you cut it using a different method. A cutter for example (a decent one) will do the job. I find that to get a straight line, a metallic ruler does the job but of course feel free to use anything you feel comftable with to get a straight line.

So yeah, do a few runs with the cutter until you can see from the plexy border that you´re about at least half way there. Then you can bend it both ways (with care) until it snaps and you will have a clean cut. If need me you can sand the border down.

It goes without saying that you will have to measure the piece before you cut it so you know how big it needs to be. Have in mind to leave a decent space on each side if you´re going for as big a window as possible or you´ll find it prevents the side from closing on the case.

39.JPG


Once we have our piece ready we need to attach it from the inside side of the side panel. There´s several ways of doing this but I find the cleanest way is using decent double sided tape, for example, the 3M one is extremely strong and will do the job just find.

40.JPG


And we´re done, we can repeat the process for any and all windows on our case.

On a final note, if you decide you want to mount a fan if your sidepanel has the grill to do so, I would suggest you fit the window first (without the tape) and then measure where you need to cut to fit the fan. Personally I won´t be fitting a fan, I checked I didn´t need to temps wise and as a personal taste decision, I preffer it without one.
 
And here guys is the final post of the tutorial. I´m sure some of you will have different ways of doing certain parts of such and if they work for you then that´s really what is all about, right?

For the rest of the people I hope this helps you with any doubts you had about doing certain things and for people that have never tried, I hope this entices you to join the fun world of customizing your PC : )

Following you will see a mix of pictures, each of them has a flash and non flash version (camera flash).

I didn´t see any point on making a tutorial on how to put all the parts togueter as I assume that if you attempt pc customizing you know the basics on how to put one togueter.

Thank you for reading and I hope you´ve enjoyed it. Once again I´d like to thank this project´s sponsors; Lamptron, Antec, B-Move & Benchmarkhardware.com

41.JPG


42.JPG


43.JPG


44.JPG


45.JPG


46.JPG


47.JPG


48.JPG


49.JPG


50.JPG


51.JPG


52.JPG


53.JPG


54.JPG


55.JPG


56.JPG


57.JPG


58.JPG


59.JPG


60.JPG


61.JPG


62.JPG


63.JPG


64.JPG


65.JPG


66.JPG


67.JPG
 
I'm just curious on the paint a little bit more. Maybe the pics aren't showing it but how glossy is the finish? Are you using a single stage paint that is gloss finish? I would love to see how the case would look with a couple of coats of gloss clear and then buff it all out. You obviously have some painting skill and knowledge and i'm sure it's by choice and the pics aren't doing it justice. Either way this is a great tutorial for people to gain some knowledge about how to correctly paint a case. Nice work.
 
thanks shadow!

I´m glad you asked that bigbadgreen. In deed it´s the pictures not doing it justice, as you can see I tried doing with and without flash to some avail but not much. Ideally on a sunny day I will take some outside picks maybe that will make it glow. In deed it has 2 coats of clear coat glossy finish. The paint itself is a three stage (both the blue and white) kind, it has base color (after the primer of course), in both cases, a matt white, then the color itself, be it glossy white or blue which is a candy color, which means it isnt solid, more of a transparent color that requires several coats to form a solid color but with much nicer effect, and the third being the pearl. finished with 2 coats of clear coat glossy lacquer.

Thank you very much sir : )
 
Back
Top