Hey everyone, thanks for checking out my work log. I’m relatively new to the [H] community, but I’ve been an enthusiast and doing basic mods for years. The mod I have planned here is still somewhat basic compared to what I see in some of the other work logs on here, but it’s more advanced than anything I’ve done before. I’ve got a pretty good start on it already, but I’ve been waiting for the weather to start warming up a bit before I actually dig in and get out the dremel and paint. While I’m waiting though I thought I’d write up a bit about what I’ve got and maybe ask for some recommendations from you experienced veterans.
The Background
Prior to about 6 months ago I had been using the same computer for about 9 years. Originally it was built as a hot-rod with near top-end components. It lasted me some of high school (~3yrs), all of college (~5yrs), and a year or so after graduating. Being an enthusiast who appreciates the latest and greatest, I wanted to get my hands on Windows 7, but alas, the old machine finally was outdone by advancements in software. As a result, I built another computer on a very tight budget; something to run Windows 7 and play my old games. This was a bit of a mistake as I uncovered my inner geek and once again got the itch for upgrading and modding. This was also about the time I stumbled upon [H], which only added to the matter… Since I built that computer 6 months ago I’ve been wanting to do something more, but budget has always been a constraint.
The Plan
My birthday just passed and as a result I’ve gained a little bit of spending cash. Though I’m still on a tight budget, I think I have enough to engage in some new modding techniques and make something cool. Here’s a list of objectives for the mod:
Improve airflow and cooling with a positive pressure design
Create something more classy than classic
Because I couldn’t afford a whole new case or new components, I took a look at the two cases I own from my old hot-rod and my new budget box; the old one has much more modding potential, at least for a person of limited skill such as myself, so I decided to start by swapping my old guts into my new case and my new guts into my old case. With the new parts in the case to be modded, it was much easier to see which of my ideas would work and which would not.
For cooling, the plan is to add 3 giant fans on the bottom of the case (per the Silverstone FT-02 and RV-02, only I couldn’t physically fit the 180mm air penetrators), upgrade the 120mm front intake fan, maybe squeeze in an 80mm fan for HDD cooling, add a top 120mm blow hole fan, increase the rear fan size from 80mm to 92mm or 120mm, and swap the PSU for one with a 120mm intake fan above the CPU.
The old window is in terrible condition, and frankly, is just too small. I know I don’t have the best components, but I’m still fascinated with the way a computer works, so I’m going to do the best with what I’ve got, tidy it up, and put in a massive side window. The mounting idea I have is to dremel the window out of the case and add rubber u-channel all the way around. Then I’ll be cutting the acrylic window LARGER than the actual hole and rivet it to the outside of the side panel. I think this is going to create a clean and classy look to the case. To go with it, I was hoping to cut out a portion of the front panel and do a matching window of smaller size for the front intake fan.
Aesthetically I decided to go with an all-white look with black accents. That means white inside, white outside, black fan cases, black screws, black window rivets, and most importantly (and what I’m most excited about), black rubber u-channel. To top it all off, I’m going to be re-using my old green cold cathodes with the addition of a green LED CoolerMaster SickleFlow fan on display at the front of the case.
The Legend (a.k.a. GreenMachine)
The case I see fit for modding is an old PC Power and Cooling ATX mid-tower case. Our friends over at Ars wrote up a review that some may now call vintage… check it out here. In my opinion, and after having worked with it for years, I can tell you that it is indeed a tank. Everything is made out of relatively thick steel (except for the front panel which is plastic, but it still mounts nicely with good fasteners)and it weighs a ton. This is a good thing if I’m going to be taking a dremel to parts of it. There’s enough structural integrity to go around. It has a removable drive bay for ease of mounting and/or complete removal if it’s just in the way. Here’s a pic from the review mentioned above:

As mentioned earlier, I had performed some basic mods to it in the past. Here’s a couple shots from its hay-day:


It even comes with it's own light-up keyboard!

By hot-rod, this is what I mean:
Athlon XP 2800+ (2.1Ghz)
ASUS A7N8X-Deluxe
1GB DDR PC3200 RAM
Gainward GeForce 4 Ti 4200+ Gold Sample
Creative Sound Blaster Audigy 2 ZS
160GB 7200RPM HDD w/ 4MB buffer
This thing was great and it served me well for many, many years. It withstood anything I threw at it for the first 3 years... ran new stuff alright for the next 3, and barely hung on for the last 3, but it got me by.
The Horror
This thing makes ME feel old. I did great with cleaning it for the first few years, but all through college I struggled to find the time. Most of the time the box was on the floor with no filters on the fans, so it collected a lot of dust. Not a big deal if you clean it all the time. If you don't clean it... well, see for yourself, but be warned. *gasp*


...and with the HSF off...

This bad boy is in need of some major TLC. Though it doesn't look like it, being my first build/mod, GreenMachine has always held a special place deep down inside. Don't think I'll ever get rid of the old parts. Along with this mod I'll be cleaning everything as well.
The Replacements (a.k.a. RedDevil)
About 6 months ago I'd had it. I needed something that could run today's software, namely Windows 7. I also use Photoshop Elements 6 quite a bit, which surprisingly actually ran on GreenMachine, though not very well. Having just finished college and getting married, budget was a little slim, rather very slim. I broke down and bought parts for an extreme budget box. Enter RedDevil.


Here's the parts breakdown. Total cost: $243.01 with tax and shipping.
CPU: AMD Athlon II X2 245 Regor (2.9 GHz, 2x1MB L2 Cache, 65W, Socket AM3)
$47.99 (orig $60.99) after $13 combo discount, free shipping
http://www.newegg.com/Product/Product.aspx?Item=N82E16819103687
Motherboard: ECS A785GM-M7 (AM3, DDR3, AMD 785G chipset, MicroATX form factor)
$47.55 (orig $64.99) after $10 instant rebate, $15 mail-in rebate, and $7.56 shipping
http://www.newegg.com/Product/Product.aspx?Item=N82E16813135265
RAM: 3GB PC1333 DDR3 Crucial 2GB stick + 1GB stick (each latency 9)
2GB stick $59.98 after $2.99 shipping, no discount
1GB stick $29.98 after $0.99 shipping, no discount
http://www.newegg.com/Product/Product.aspx?Item=N82E16820145246
http://www.newegg.com/Product/Product.aspx?Item=N82E16820148196
Power Supply: OCZ Technology OCZ550FTY, 550W, dual rail
$44.99 (orig $84.99) after Shell Shocker deal, $15 inst rebate, $25 mail-in rebate, free shipping
http://www.newegg.com/Product/Product.aspx?Item=N82E16817341022&Tpk=OCZ Fatal1ty OCZ550FTY
Case: Azza Orion 202, steel, ATX, mid-tower
$14.99 (orig $49.99) after Shell Shocker deal, $15 inst rebate, $20 mail-in rebate, free shipping
http://www.newegg.com/Product/Product.aspx?Item=N82E16811517003&Tpk=Azza orion 202
The system was MUCH faster than GreenMachine, but only mediocre at gaming. A few months later (still on a tight budget) I found a deal on Newegg for an eVGA GeForce 9600GSO for $30 after rebate. I know it's a crippled version of the card, but you can't beat that price. It plays Left 4 Dead 2 maxed out, and anything more recent than that it will play at reasonable settings, so I'm happy for the time being. It came with an overclocking utility, so I cranked the heck out of it, just on the edge of stability. Hopefully with some additional cooling I might be able to tweak just a little more out of it.
I wasn't very fond of the case... I tend to prefer "classy" over what I like to think of as "tacky," however I could have done a lot worse, and for a while it was kind of fun having something a little more flashy (if anything to make fun of it saying "it's a sleeper... inside out"). Also, for the price, I'd take it any day.
That brings us to today. As an engineer, I feel as though a good background always helps with problem solving, at least knowing the motives behind the story. Sorry for babbling, but hopefully you can understand where I'm coming from with this mod. It's tough being an "enthusiast" with a limited budget, but the fact of the matter is that's life. Do the best with what you've got. Anyways, on to the mod. Drum roll please!
The Stuff
Per the previous plan, I went ahead and blew most of my budget on stuff I would need to make this mod happen. Here's what I got:

3x NZXT 140mm Performance Fan
1x CoolerMaster SickleFlow 120mm Fan
1x Arctic Cooling F9 PWM (92mm) Fan
24x black fan screws
6x case thumb screws (beige... will need to be painted)
1x 18"x24"x0.22" Acrylic sheet
1x rivet tool
1x packet of 100 1/8" white rivets
20 feet of black rubber u-channel
1x Roll of 1" masking tape
1x can white primer
1x can white semi-gloss color coat
1x can clear gloss top coat
3x sanding sponges (medium, fine, extra fine, for dry or wet sanding)
What you don't see in the above picture is that I also got a couple parts for performance as well. I got a 2GB stick of RAM for $20 (compare that to the $60 half a year ago!), and an IDE controller/RAID card. I've always wanted to try a RAID configuration so I figured I'd spend the $10 and get one and try it out. If not, I've got a bunch of old hard drives totaling just under 1TB laying around so at the very least I can add some network storage. I've yet to decide if I want to put the IDE controller card in my new box or my old one...
There will be some additional items coming in a bit later, like drive bay covers (5.25" and 3.5"), expansion slot covers, and matching case/drive screws. I'll also need some longer rivets for the acrylic window; I don't think the 1/8" ones are quite long enough to grip where I need them to. To go along with those I'll need some small washers to protect the acrylic from cracking with the force of the rivet installation. Lastly, I'll need some taller case feet... hoping to not spend much money on these, so I may need to get creative here. This is a minor detail for the time being though, I'm sure I'll think of something by the time I need them.
That's all for now, folks! Thanks for checking out my work log, and I hope I didn't bore you with all the details. Stay tuned for the next section, "The Concept!"
The Background
Prior to about 6 months ago I had been using the same computer for about 9 years. Originally it was built as a hot-rod with near top-end components. It lasted me some of high school (~3yrs), all of college (~5yrs), and a year or so after graduating. Being an enthusiast who appreciates the latest and greatest, I wanted to get my hands on Windows 7, but alas, the old machine finally was outdone by advancements in software. As a result, I built another computer on a very tight budget; something to run Windows 7 and play my old games. This was a bit of a mistake as I uncovered my inner geek and once again got the itch for upgrading and modding. This was also about the time I stumbled upon [H], which only added to the matter… Since I built that computer 6 months ago I’ve been wanting to do something more, but budget has always been a constraint.
The Plan
My birthday just passed and as a result I’ve gained a little bit of spending cash. Though I’m still on a tight budget, I think I have enough to engage in some new modding techniques and make something cool. Here’s a list of objectives for the mod:
Improve airflow and cooling with a positive pressure design
GPU
CPU
HDD
PSU
Try new modding techniquesRivet removal/replacement
Acrylic cutting/mounting
Interior painting
Enlarge window sizeSide Panel
Front
Improve cable managementCreate something more classy than classic
Because I couldn’t afford a whole new case or new components, I took a look at the two cases I own from my old hot-rod and my new budget box; the old one has much more modding potential, at least for a person of limited skill such as myself, so I decided to start by swapping my old guts into my new case and my new guts into my old case. With the new parts in the case to be modded, it was much easier to see which of my ideas would work and which would not.
For cooling, the plan is to add 3 giant fans on the bottom of the case (per the Silverstone FT-02 and RV-02, only I couldn’t physically fit the 180mm air penetrators), upgrade the 120mm front intake fan, maybe squeeze in an 80mm fan for HDD cooling, add a top 120mm blow hole fan, increase the rear fan size from 80mm to 92mm or 120mm, and swap the PSU for one with a 120mm intake fan above the CPU.
The old window is in terrible condition, and frankly, is just too small. I know I don’t have the best components, but I’m still fascinated with the way a computer works, so I’m going to do the best with what I’ve got, tidy it up, and put in a massive side window. The mounting idea I have is to dremel the window out of the case and add rubber u-channel all the way around. Then I’ll be cutting the acrylic window LARGER than the actual hole and rivet it to the outside of the side panel. I think this is going to create a clean and classy look to the case. To go with it, I was hoping to cut out a portion of the front panel and do a matching window of smaller size for the front intake fan.
Aesthetically I decided to go with an all-white look with black accents. That means white inside, white outside, black fan cases, black screws, black window rivets, and most importantly (and what I’m most excited about), black rubber u-channel. To top it all off, I’m going to be re-using my old green cold cathodes with the addition of a green LED CoolerMaster SickleFlow fan on display at the front of the case.
The Legend (a.k.a. GreenMachine)
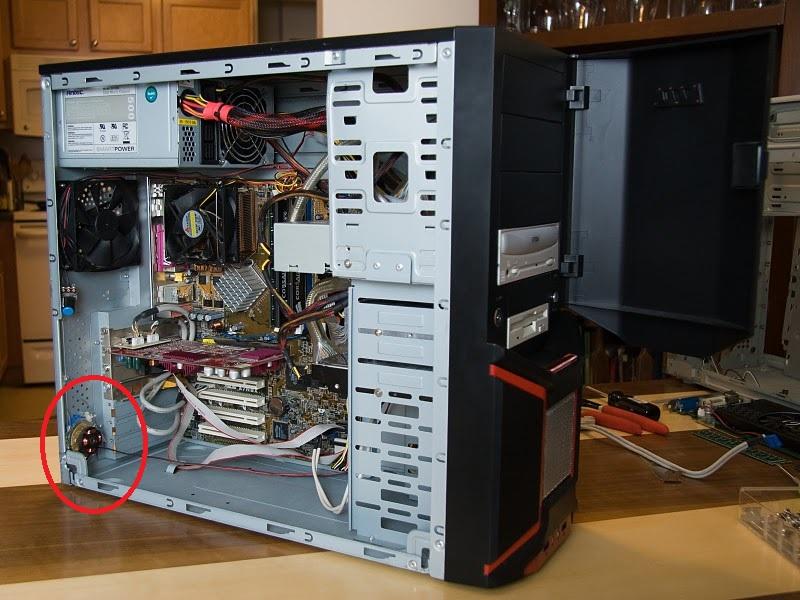
The case I see fit for modding is an old PC Power and Cooling ATX mid-tower case. Our friends over at Ars wrote up a review that some may now call vintage… check it out here. In my opinion, and after having worked with it for years, I can tell you that it is indeed a tank. Everything is made out of relatively thick steel (except for the front panel which is plastic, but it still mounts nicely with good fasteners)and it weighs a ton. This is a good thing if I’m going to be taking a dremel to parts of it. There’s enough structural integrity to go around. It has a removable drive bay for ease of mounting and/or complete removal if it’s just in the way. Here’s a pic from the review mentioned above:
As mentioned earlier, I had performed some basic mods to it in the past. Here’s a couple shots from its hay-day:
It even comes with it's own light-up keyboard!
By hot-rod, this is what I mean:
Athlon XP 2800+ (2.1Ghz)
ASUS A7N8X-Deluxe
1GB DDR PC3200 RAM
Gainward GeForce 4 Ti 4200+ Gold Sample
Creative Sound Blaster Audigy 2 ZS
160GB 7200RPM HDD w/ 4MB buffer
This thing was great and it served me well for many, many years. It withstood anything I threw at it for the first 3 years... ran new stuff alright for the next 3, and barely hung on for the last 3, but it got me by.
The Horror
This thing makes ME feel old. I did great with cleaning it for the first few years, but all through college I struggled to find the time. Most of the time the box was on the floor with no filters on the fans, so it collected a lot of dust. Not a big deal if you clean it all the time. If you don't clean it... well, see for yourself, but be warned. *gasp*
...and with the HSF off...
This bad boy is in need of some major TLC. Though it doesn't look like it, being my first build/mod, GreenMachine has always held a special place deep down inside. Don't think I'll ever get rid of the old parts. Along with this mod I'll be cleaning everything as well.
The Replacements (a.k.a. RedDevil)
About 6 months ago I'd had it. I needed something that could run today's software, namely Windows 7. I also use Photoshop Elements 6 quite a bit, which surprisingly actually ran on GreenMachine, though not very well. Having just finished college and getting married, budget was a little slim, rather very slim. I broke down and bought parts for an extreme budget box. Enter RedDevil.
Here's the parts breakdown. Total cost: $243.01 with tax and shipping.
CPU: AMD Athlon II X2 245 Regor (2.9 GHz, 2x1MB L2 Cache, 65W, Socket AM3)
$47.99 (orig $60.99) after $13 combo discount, free shipping
http://www.newegg.com/Product/Product.aspx?Item=N82E16819103687
Motherboard: ECS A785GM-M7 (AM3, DDR3, AMD 785G chipset, MicroATX form factor)
$47.55 (orig $64.99) after $10 instant rebate, $15 mail-in rebate, and $7.56 shipping
http://www.newegg.com/Product/Product.aspx?Item=N82E16813135265
RAM: 3GB PC1333 DDR3 Crucial 2GB stick + 1GB stick (each latency 9)
2GB stick $59.98 after $2.99 shipping, no discount
1GB stick $29.98 after $0.99 shipping, no discount
http://www.newegg.com/Product/Product.aspx?Item=N82E16820145246
http://www.newegg.com/Product/Product.aspx?Item=N82E16820148196
Power Supply: OCZ Technology OCZ550FTY, 550W, dual rail
$44.99 (orig $84.99) after Shell Shocker deal, $15 inst rebate, $25 mail-in rebate, free shipping
http://www.newegg.com/Product/Product.aspx?Item=N82E16817341022&Tpk=OCZ Fatal1ty OCZ550FTY
Case: Azza Orion 202, steel, ATX, mid-tower
$14.99 (orig $49.99) after Shell Shocker deal, $15 inst rebate, $20 mail-in rebate, free shipping
http://www.newegg.com/Product/Product.aspx?Item=N82E16811517003&Tpk=Azza orion 202
The system was MUCH faster than GreenMachine, but only mediocre at gaming. A few months later (still on a tight budget) I found a deal on Newegg for an eVGA GeForce 9600GSO for $30 after rebate. I know it's a crippled version of the card, but you can't beat that price. It plays Left 4 Dead 2 maxed out, and anything more recent than that it will play at reasonable settings, so I'm happy for the time being. It came with an overclocking utility, so I cranked the heck out of it, just on the edge of stability. Hopefully with some additional cooling I might be able to tweak just a little more out of it.
I wasn't very fond of the case... I tend to prefer "classy" over what I like to think of as "tacky," however I could have done a lot worse, and for a while it was kind of fun having something a little more flashy (if anything to make fun of it saying "it's a sleeper... inside out"). Also, for the price, I'd take it any day.
That brings us to today. As an engineer, I feel as though a good background always helps with problem solving, at least knowing the motives behind the story. Sorry for babbling, but hopefully you can understand where I'm coming from with this mod. It's tough being an "enthusiast" with a limited budget, but the fact of the matter is that's life. Do the best with what you've got. Anyways, on to the mod. Drum roll please!
The Stuff
Per the previous plan, I went ahead and blew most of my budget on stuff I would need to make this mod happen. Here's what I got:
3x NZXT 140mm Performance Fan
1x CoolerMaster SickleFlow 120mm Fan
1x Arctic Cooling F9 PWM (92mm) Fan
24x black fan screws
6x case thumb screws (beige... will need to be painted)
1x 18"x24"x0.22" Acrylic sheet
1x rivet tool
1x packet of 100 1/8" white rivets
20 feet of black rubber u-channel
1x Roll of 1" masking tape
1x can white primer
1x can white semi-gloss color coat
1x can clear gloss top coat
3x sanding sponges (medium, fine, extra fine, for dry or wet sanding)
What you don't see in the above picture is that I also got a couple parts for performance as well. I got a 2GB stick of RAM for $20 (compare that to the $60 half a year ago!), and an IDE controller/RAID card. I've always wanted to try a RAID configuration so I figured I'd spend the $10 and get one and try it out. If not, I've got a bunch of old hard drives totaling just under 1TB laying around so at the very least I can add some network storage. I've yet to decide if I want to put the IDE controller card in my new box or my old one...
There will be some additional items coming in a bit later, like drive bay covers (5.25" and 3.5"), expansion slot covers, and matching case/drive screws. I'll also need some longer rivets for the acrylic window; I don't think the 1/8" ones are quite long enough to grip where I need them to. To go along with those I'll need some small washers to protect the acrylic from cracking with the force of the rivet installation. Lastly, I'll need some taller case feet... hoping to not spend much money on these, so I may need to get creative here. This is a minor detail for the time being though, I'm sure I'll think of something by the time I need them.
That's all for now, folks! Thanks for checking out my work log, and I hope I didn't bore you with all the details. Stay tuned for the next section, "The Concept!"
Last edited:


 . These chips may be SOL unless I get some sort of aftermarket cooler, which would unfortunately be out of the budget. See pics of the TIM swap below -