• Some users have recently had their accounts hijacked. It seems that the now defunct EVGA forums might have compromised your password there and seems many are using the same PW here. We would suggest you UPDATE YOUR PASSWORD and TURN ON 2FA for your account here to further secure it. None of the compromised accounts had 2FA turned on.
    Once you have enabled 2FA, your account will be updated soon to show a badge, letting other members know that you use 2FA to protect your account. This should be beneficial for everyone that uses FSFT.

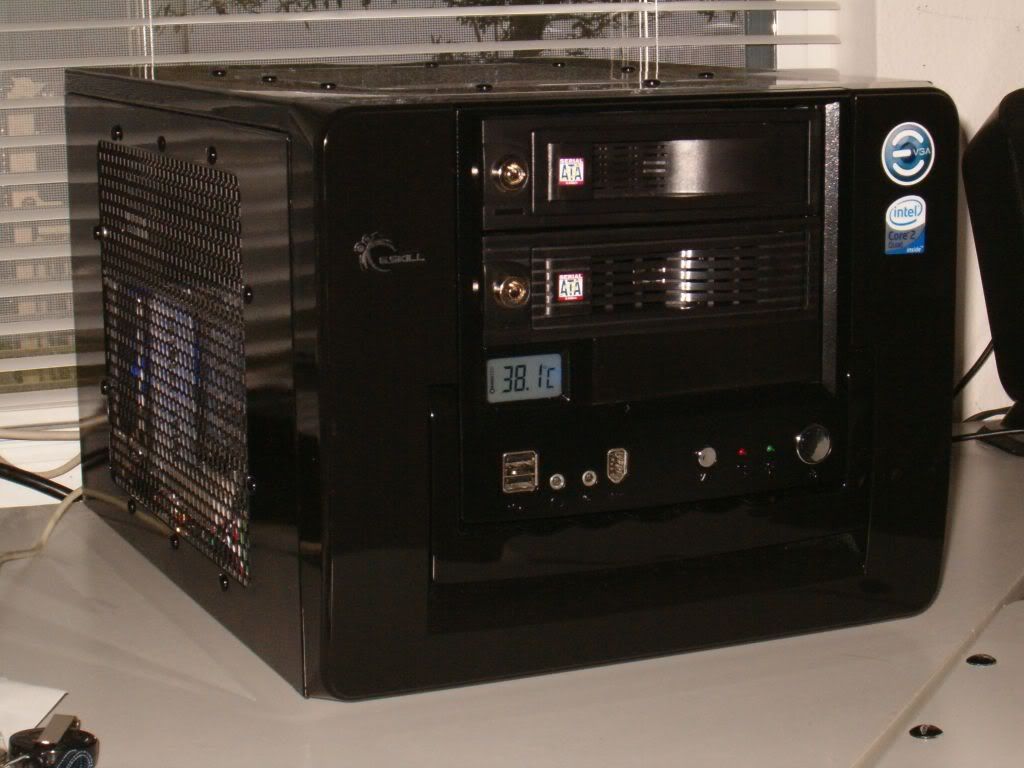
SFF Build

board2death986

[H]ard|Gawd
Joined
Aug 13, 2005
Messages
1,404
Yea more of the same, nothing unusual here. Spec'd out a pricey SFF system to migrate over to i7. This rig has only one purpose in mind, gaming. I usually attend a local LAN once or twice a month, and the larger convention style events 2-3 times a year.

Case - Apevia X-QPack 2
Motherboard - ASUS Rampage II GENE
CPU - Core i7 920 Nehalem 2.66GHz
GPU - EVGA Geforce GTX 285
RAM - Corsair XMS3 6GB (3 x 2GB) DDR3 1333

... and that's what I'm buying. Also throwing in a 74GB WD Raptor for the OS, 2x 500GB 7200rpm WD Caviar drives in Raid 0 for Game installs, and thinking of later throwing in two 2TB drives in the future to replace my current storage system of 8x 500GB drives in the file server.

Also notice I'm missing an optical drive and PSU. The optical drive is unnecessary as I image my game discs and use those backups with virtual drive apps, but I also keep an external notebook dvd-rw (USB) on hand in case with the game discs in a binder. The PSU is where I especially want some input. I currently have a 600w Silverstone ST60F I was thinking of using, but it's a bit loud and I hear an uncomfortable zap noise whenever I flip the power switch on the back of the PSU. Power calculation sites say this rig will use about ~530w, so a 600w should be enough to cover my ass (SLI is not going to happen). Just wondering if anyone can suggest a reliable ~600w PSU with modular cabling and a quiet 120mm fan.
 
Last edited:
What model cooler are going with?

I hope that it is something aftermarket that handle the heat of the i7.

Check out this thread.

The X-Qpack/Ultra Microfly/Cheifmax DV21M cube cases are highly underrated. If you want some good cooling, mod. the front to get some ariflow or replace the side windows with mesh using the factory retention devices (X pack with windows).
 
Was looking around but I haven't found anything yet, the Thermalright HR01 looks like a decent option with a few mods though, in talks to find out how to modify the chasis.
 
If you want some good cooling, mod. the front to get some ariflow or replace the side windows with mesh using the factory retention devices.

Would it make sense to replace the top window with mesh? Considering heat rises and all . . .
 
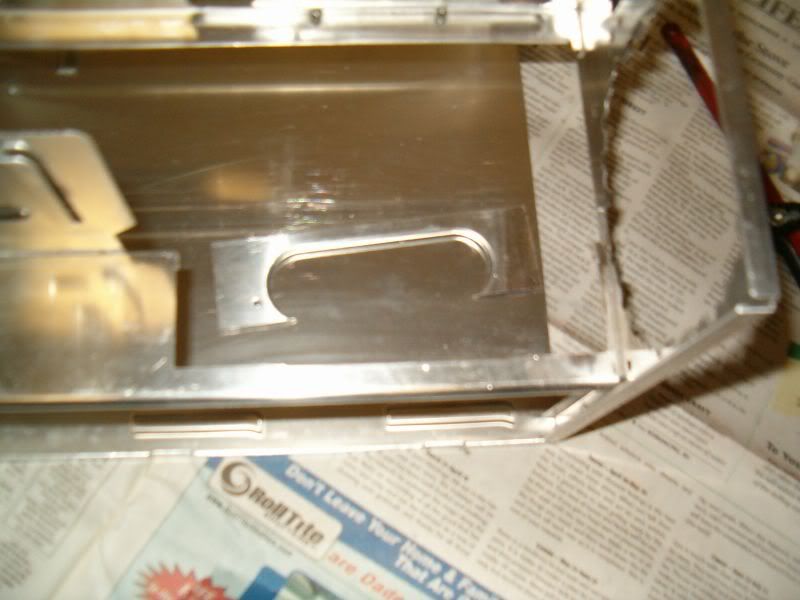
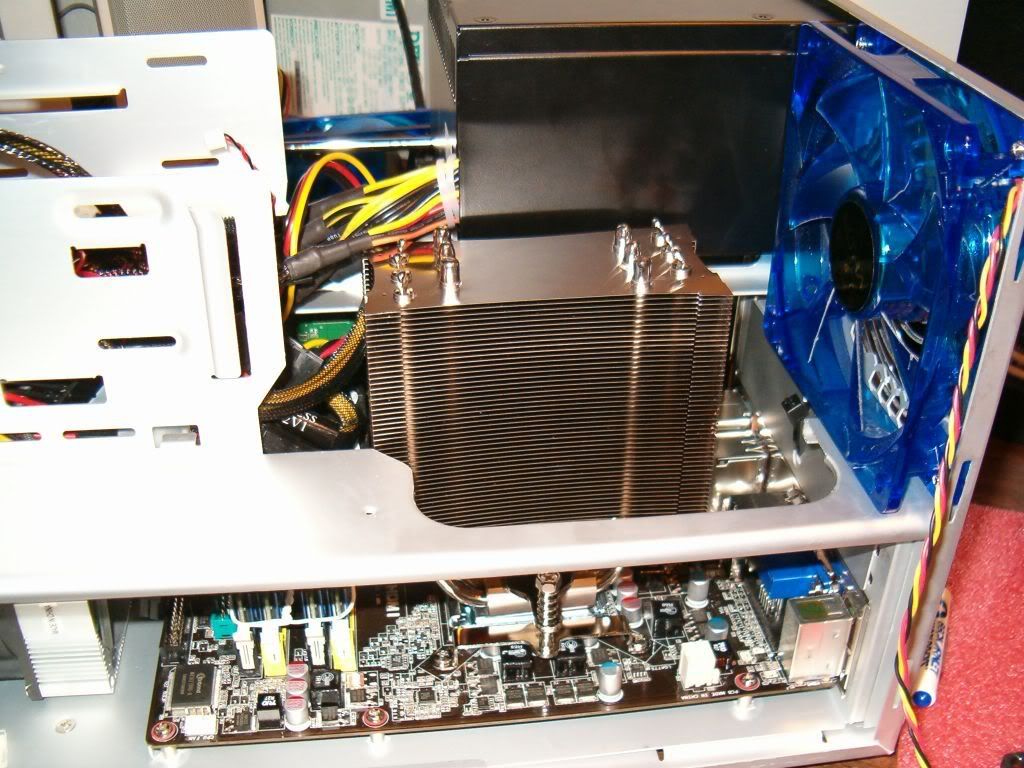
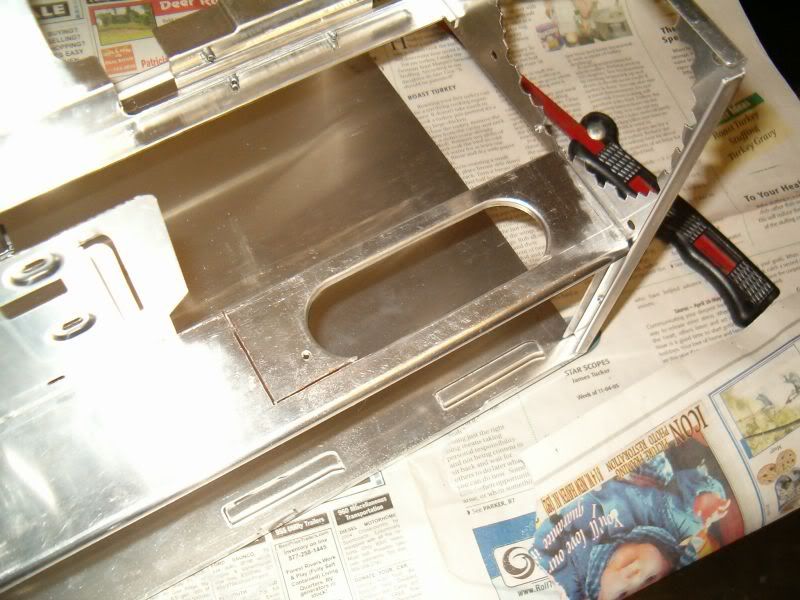
Here are pics of the hard drive rail mod:

HDSupportBrace.jpg


HDSupportBracecutout.jpg


You really don't need to cut so far on the back end near the 120mm. The picture above was done for mounting a 120mm radiator. You only have to cut as far back as the oval like in this picture:

Ultima90FrontNoFaninCase.jpg


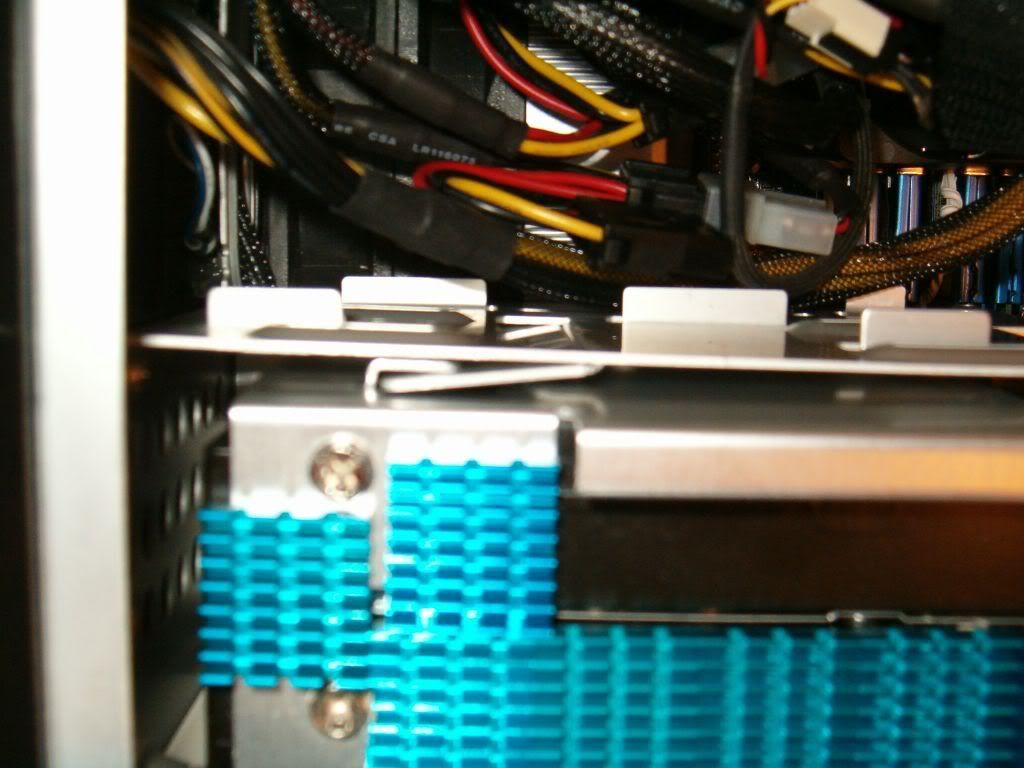
To do your front cut, remove your hard drive caddy and butt it up against the front of the case like in this picture:

HDLockinPlace.jpg


and make a pencil score using the back bottom of the bracket........this is where you'll make your second cut. You'll have to tap another screw hole to hold down the bracket as the piece you'll be cutting out contains the original one. You don't have to be fancy here, using the hard drive bracket's hole as a guide to locate your new hole, drill it slightly smaller than the screw, and then you can use a standard hard drive screw in the hole you just made, running it back and forth the create the threads (don't re-use that screw as it will now be stripped), and then just clean up the burrs afterwards.

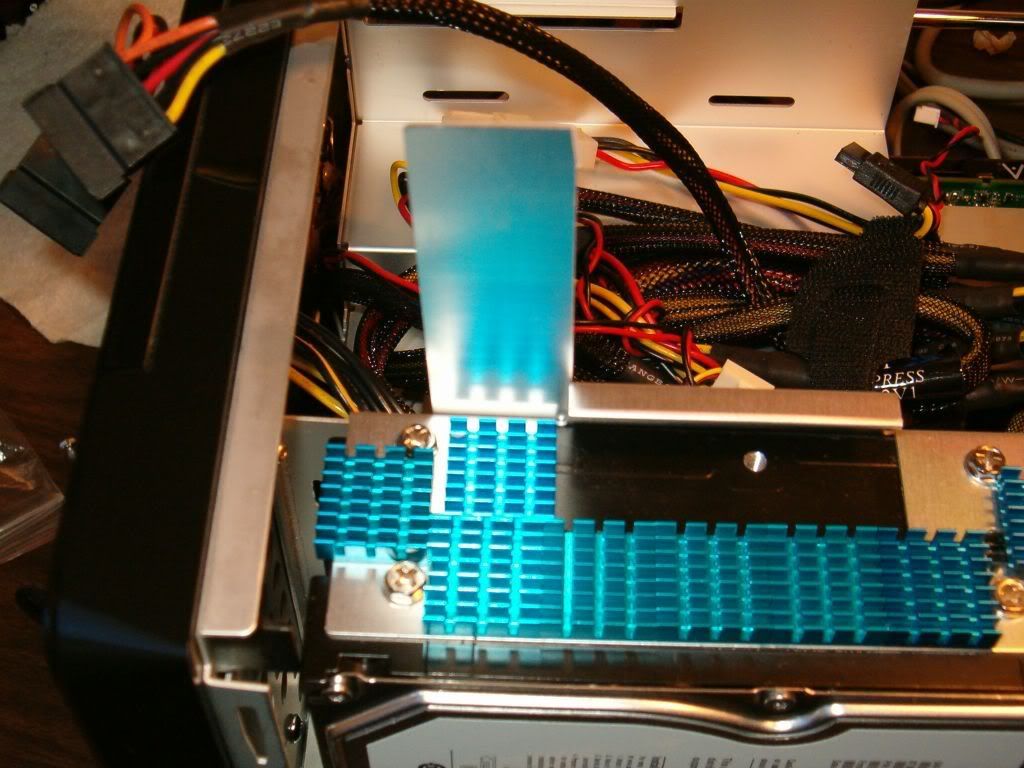
You can secure the front of the hard drive cage using the 3-1/2" blank that covers your floppy bay. You may want to put some double-sidded tape on it, but leave the plastic protection on one side so it acts as a slide. You could also use a piece of appropriately sized plastic:

HDRelocate3_25blankLock.jpg


As far as adding hard drives to the 5-1/4" bays you have a few options:

Here are two single trayless bays on top of each other:

QuarterView2.jpg


http://www.newegg.com/Product/Product.aspx?Item=N82E16817998041

I have also used one of these, a triple-bay, but it makes hiding your wires a PITA:

http://www.newegg.com/Product/Product.aspx?Item=N82E16817990003

I'm using one of these to house my Solid State Drive in the 3-1/2" bay:

http://www.newegg.com/Product/Product.aspx?Item=N82E16817998038

To answer your PM, the HR01+ comes with a socket 1336 bracket. You WILL NOT be able to use Thermalright's S775 brackets with this board as the stock 1336 backplate interferes.
 

Yeah definitely don't use that Apevia PSU for ANY kind of system. They're of extremely low quality. It's akin to letting a pedo watch your kid: Stupidest thing you'll ever do and will live to regret it:
Apevia ATX-AS500W-BL
Apevia Warlock Power 900W
XQPack's Included 420W PSU
Aspire Beast 680W Power Supply

I currently have a 600w Silverstone ST60F I was thinking of using, but it's a bit loud and I hear an uncomfortable zap noise whenever I flip the power switch on the back of the PSU. Power calculation sites say this rig will use about ~530w, so a 600w should be enough to cover my ass (SLI is not going to happen). Just wondering if anyone can suggest a reliable ~600w PSU with modular cabling and a quiet 120mm fan.

Some other PSU recommendations:
$110 - BFG Tech MX 680 680W Modular PSU
$150 - Corsair 620HX 620W Modular PSU
$160 - Enermax Modu82+ 625W Modular PSU
$160 - Antec Truepower New TP750 750W PSU
 
I'm using the Silverstone Strider SST60F and it's running my dual GTX260's and my i7 just fine. The power supply is fully modular, including the main power cable which makes it really easy to remove the power supply to add components. I was initially worried about the main power cable also being modular, but my voltages have been stable.

You can get the short cable kit for this as well:

http://www.performance-pcs.com/cata...=25261&zenid=2866e821f8cccfe61623f1962c2c33ae
 
Would it make sense to replace the top window with mesh? Considering heat rises and all . . .

Do just the sides. Doing the top leaves the chance for something dropping through and shorting something out unless you use finer mesh. My top panel is pretty cool to the touch, so there's no heat getting trapped up there.
 
I'm using the Silverstone Strider SST60F and it's running my dual GTX260's and my i7 just fine. The power supply is fully modular, including the main power cable which makes it really easy to remove the power supply to add components. I was initially worried about the main power cable also being modular, but my voltages have been stable.

You can get the short cable kit for this as well:

http://www.performance-pcs.com/cata...=25261&zenid=2866e821f8cccfe61623f1962c2c33ae

Yea i'm actually using the short cable kit in my Lanbox currently. I like the PSU and I even bought a second for a different build but my first one died on me and this one has that worrying noise when I turn it on. It seems to work fine though, I could give it a shot.
 
Thanks a lot Massive! Now i'm a complete n00b to the mod scene, but I've always wanted to get my foot in the door. I don't have access to a dremel or any serious cutting hardware, but I'm willing to invest in some tools. What do you suggest I start with?
 
I have a dremel, but barely use it believe it or not, mostly because they don't produce straight or clean cuts. You probably already have a pair of dykes for cutting (used to snip mesh as well as cut out big burs). This is what you will need:

A mini hacksaw (I have one of each below):

http://www.lowes.com/lowes/lkn?action=productDetail&productId=198280-930-324HF25N&lpage=none

http://www.lowes.com/lowes/lkn?action=productDetail&productId=19439-943-37700&lpage=none

And a file set to remove burs:

http://www.lowes.com/lowes/lkn?action=productDetail&productId=294683-86580-SFH8602266&lpage=none

You probably already have sandpaper, which is useful for cleaning up the edges after you debur with a file so that you don't cut yourself on the edges when working on the case.

Making your cuts in aluminum is pretty easy as the material is pretty soft. It should only take you 15 minutes, maybe 20 if you're squeamish at first.
 
Build is looking good, all the parts are chosen, planning on picking up the tools when I have a free afternoon, then I just have to pull the trigger and let the onslaught of UPS boxes arrive.

Going with the thermalright HR-01 (sorry I've stolen your ideas, but they work!), and still fiddling with my fan choices. Definitely replacing the stock fans in the case, not sure if I want variable speed fans like the Antec Tri-cools or just connect them to the motherboard and let the temps govern the fans.

I've heard the northbridge gets pretty toasty when overclocking but I plan on running this baby stock until I get it running and steady.

Final HDD config seems to be as follows:
74GB Raptor : OS
2x 500GB Seagate in Raid 0 : Game installs, patches, mod files (lots of them, this is a gaming LAN rig built for this single purpose, we play a variety of games and mods, and this keeps things easy to have an absurd amount of space instead of worrying about 14GB game installs for newer titles)
Then possibly throwing in 2 1.5TB drives to replace having to lug my current fileserver to events (an Antec 900 with 6x 500GB) I would love some 2TB drives but at twice the price and only a 500GB gain I can't possibly justify it
 
If Massive can run a GTX 260 SLI system off of his 600w ST60F I should be able to run this fine. The noise I was worried about is probably just that, noise. If it comes to it I'll probably get the 750w of the same PSU though.
 
If Massive can run a GTX 260 SLI system off of his 600w ST60F I should be able to run this fine. The noise I was worried about is probably just that, noise. If it comes to it I'll probably get the 750w of the same PSU though.

I was actually going to suggest the contrary: I doubt the noise comes from its struggling with the load. I'm pretty confident that 600w is more than enough if you don't care about SLI. 520w might even be enough. Bear in mind that most PSUs (at least good quality ones) are at their best in the 50 to 80% usage band.
 
I have a dremel, but barely use it believe it or not, mostly because they don't produce straight or clean cuts. You probably already have a pair of dykes for cutting (used to snip mesh as well as cut out big burs). This is what you will need:

A mini hacksaw (I have one of each below):

http://www.lowes.com/lowes/lkn?action=productDetail&productId=198280-930-324HF25N&lpage=none

http://www.lowes.com/lowes/lkn?action=productDetail&productId=19439-943-37700&lpage=none

And a file set to remove burs:

http://www.lowes.com/lowes/lkn?action=productDetail&productId=294683-86580-SFH8602266&lpage=none

You probably already have sandpaper, which is useful for cleaning up the edges after you debur with a file so that you don't cut yourself on the edges when working on the case.

Making your cuts in aluminum is pretty easy as the material is pretty soft. It should only take you 15 minutes, maybe 20 if you're squeamish at first.

Picked up the hacksaw and file set, will the provided sawblade work alright?
 
Picked up the main components, still need to get the case, HS, and various fans and details. I'm going to test the components now to check for duds, crossing my fingers!
 
Picked up the main components, still need to get the case, HS, and various fans and details. I'm going to test the components now to check for duds, crossing my fingers!

What PSU did you decide on? Hopefully not the included Apevia?
 
going to use my modular 600w silverstone, but using my 1100w tagan until I rip that out of my current system. System boots fine, motherboard is awesome! Can wait to load the OS and give his thing a spin.
 
System works amazingly well. Haven't purchased the case or aftermarket cooling as of yet, but I'm experiencing temps at the mid 40's to low 50's idle in a P180B. . . but I just forgot I've had it set at 3.2Ghz emulating the 965, so maybe those temps aren't so bad for stock cooling. I believe the 600w should hold together fine for this setup, I've had one or two hiccups with this rig but I believe it was related to software issues not hardware.

Also still debating at whether to keep the os drive split for XP 32bit and Vista 64bit, or just merge the two partitions for XP only.
 
Well I've had time to burn in the system and it's running smooth, but I finally ordered the parts I was looking for. I already got the hard drive rail mod, HSF space extension mod done and removed the rear fan grill in favor of a wire one. Considered doing the same for the front fan but maybe for another time, i've done enough cutting and filing for one day.

Now to break the system down from the P180 and install it into this baby and see how the weight feels. I bought a GearGrip micro LT harness for travel (as I don't completely trust the frontside spring handle) but the dam geargrip is 1 inch short!! There might be a way to extend the reach enough, just have to look at it.

A question to those who have added mesh to the side panels. . .How do you do it? Do you use the same brackets that hold the clear panels or do you have to use your own? HELP :(
 
I don't like the GearGrip.......I was using that before I got my Sugo bag and the damn thing broke on me in the airport..........that was fun.

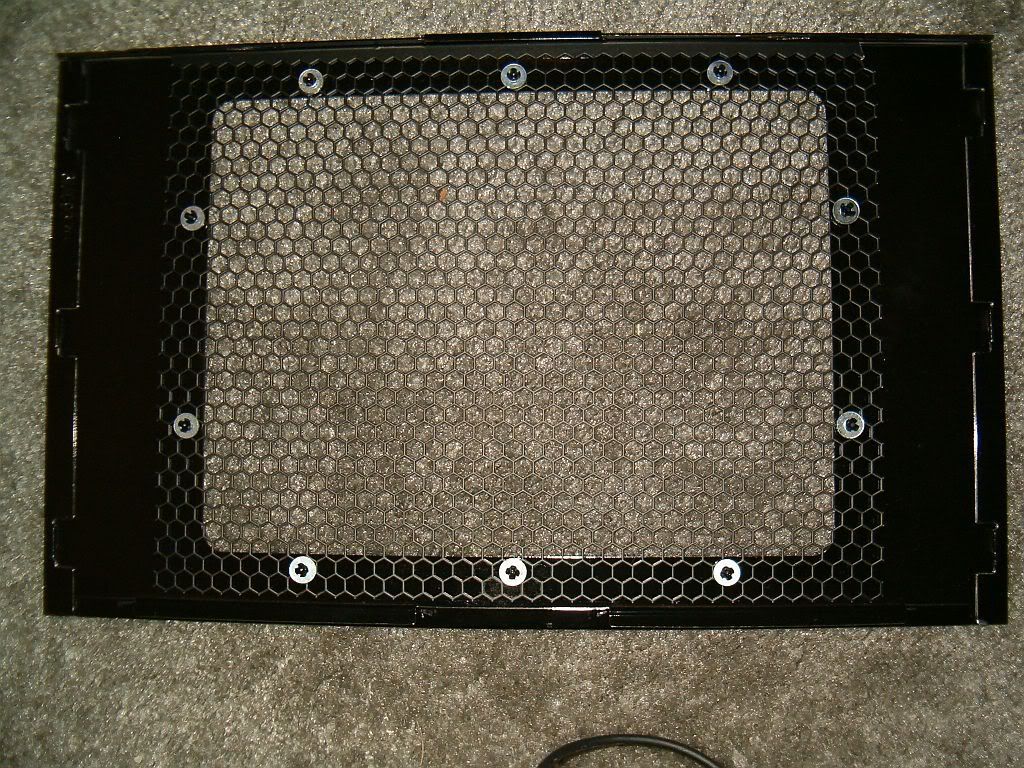
For the side panel mesh...........you'll need some washers to place on the backside of the mesh so that when you re-use your push-pins, it gives it some backing:

MeshBackSide.jpg


If you get any rattles, some hot glue does the trick for silencing it as well as keep the anything from falling off.
 
How did you get your holes to line up? I'm using AC Ryan 1.0mm Aluminum and no matter what the orientation is I can maybe get 6 of 10 holes to line up at any one angle
 
You have to use your dykes to cut the mesh on the other 4 holes (only cut just enough). The washers will ensure that the mesh is still held in place.
 
Back
Top