Navigation
Install the app
How to install the app on iOS
Follow along with the video below to see how to install our site as a web app on your home screen.
Note: This feature may not be available in some browsers.
More options
-
Some users have recently had their accounts hijacked. It seems that the now defunct EVGA forums might have compromised your password there and seems many are using the same PW here. We would suggest you UPDATE YOUR PASSWORD and TURN ON 2FA for your account here to further secure it. None of the compromised accounts had 2FA turned on.
Once you have enabled 2FA, your account will be updated soon to show a badge, letting other members know that you use 2FA to protect your account. This should be beneficial for everyone that uses FSFT.
You are using an out of date browser. It may not display this or other websites correctly.
You should upgrade or use an alternative browser.
You should upgrade or use an alternative browser.
Project: Skunkmunkey Stacker
- Thread starter skunkmunkey
- Start date
- Joined
- Sep 10, 2004
- Messages
- 790
Updates! Updates! My kingdom for an update! 
skunkmunkey
Limp Gawd
- Joined
- Aug 8, 2005
- Messages
- 152
Ok... small update... taking a while as i have to work late nights after my girlfriend and daughter are asleep, so i only get hour or so at night to make any progress.
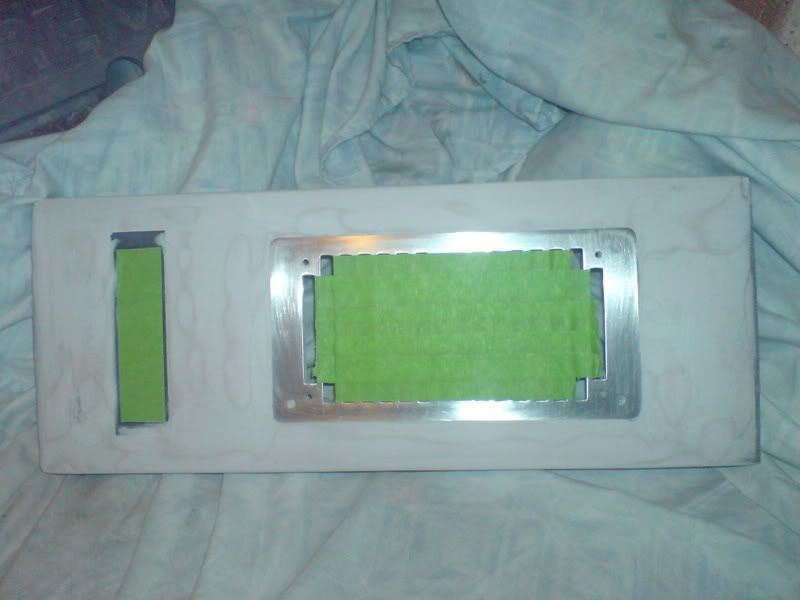
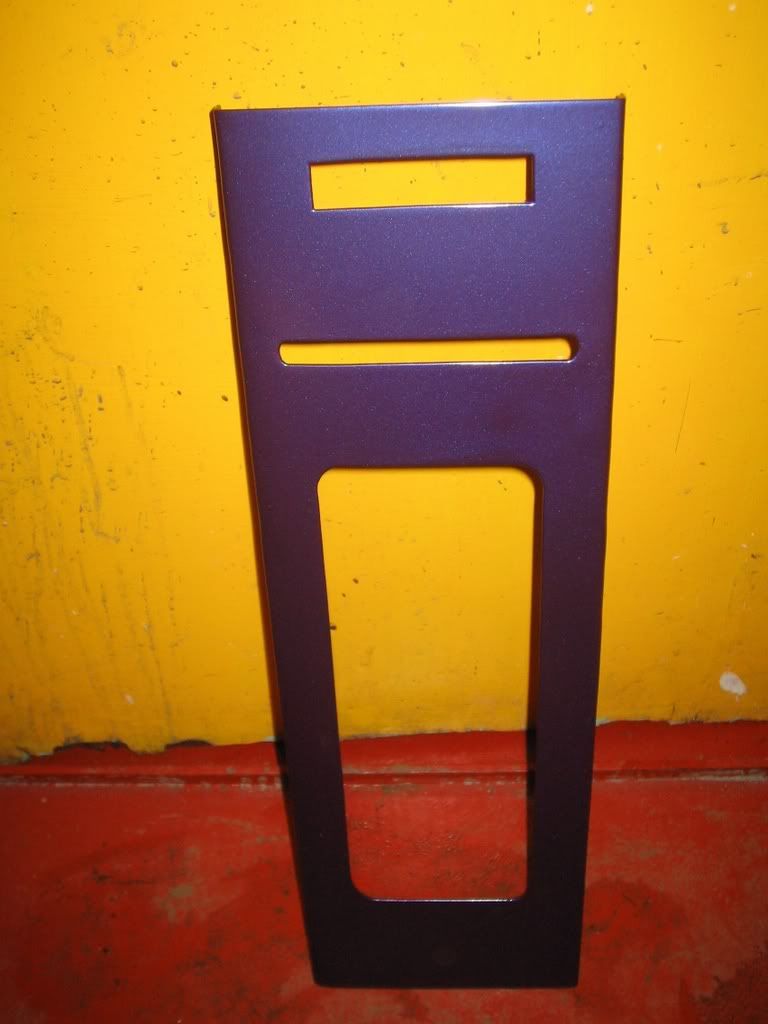
Front panel all sanded and masked off, ready to be primed.
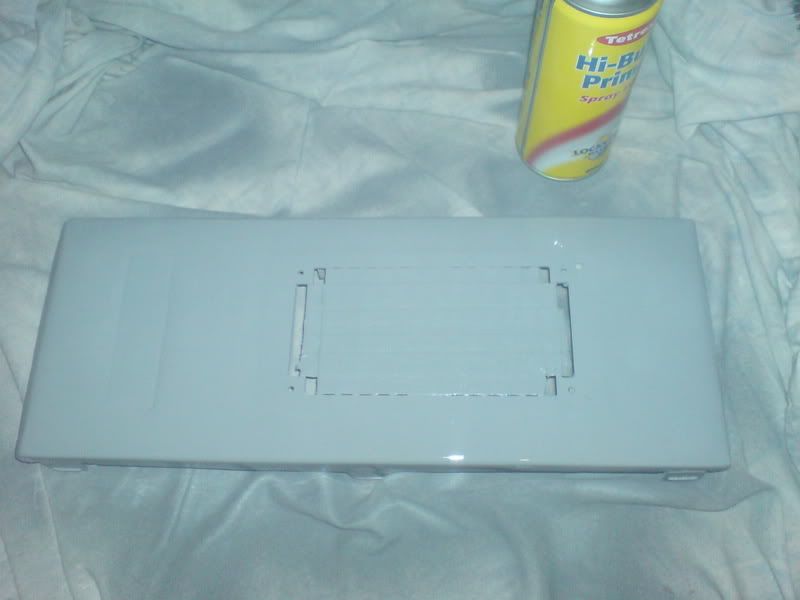
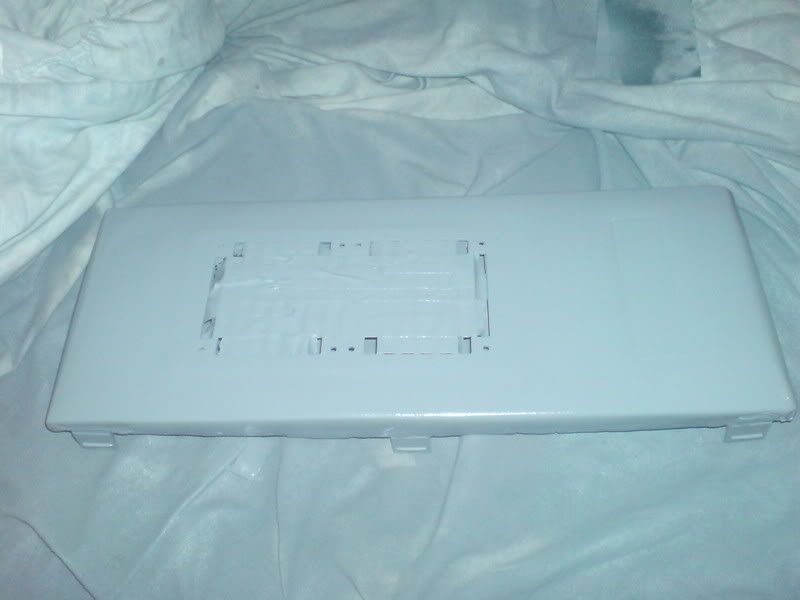
Panel now primed

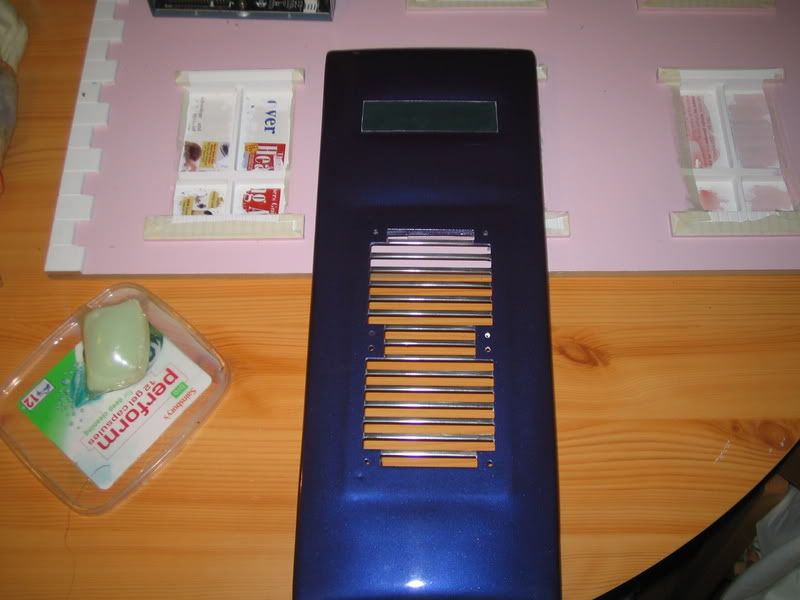
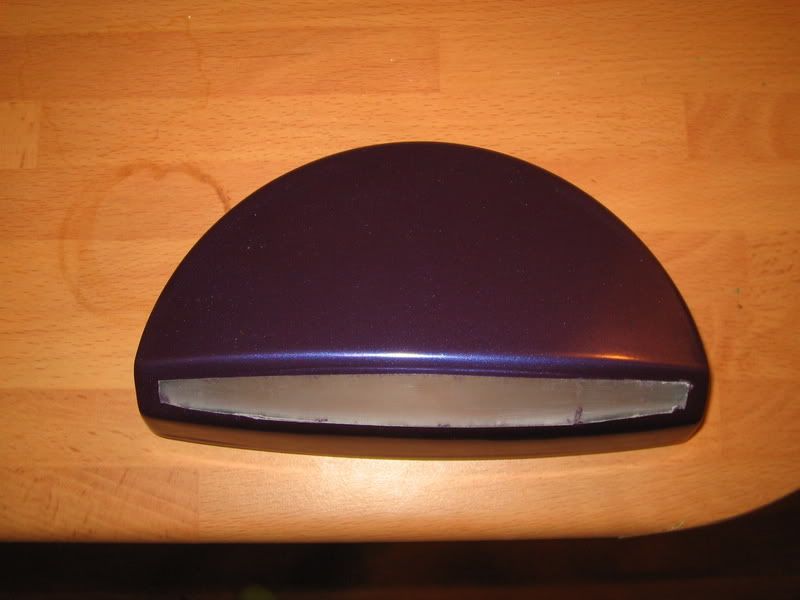
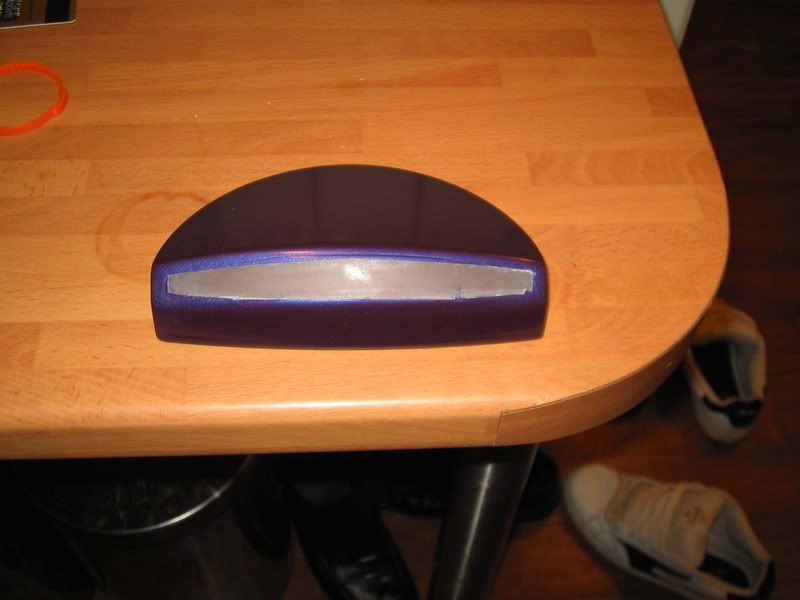
The Knight Light housing now with 1st layer of purple. The garage where i bough paint has ran out of the purple paint, am waiting for them to get sum more in now.
Front panel all sanded and masked off, ready to be primed.
Panel now primed
The Knight Light housing now with 1st layer of purple. The garage where i bough paint has ran out of the purple paint, am waiting for them to get sum more in now.
skunkmunkey
Limp Gawd
- Joined
- Aug 8, 2005
- Messages
- 152
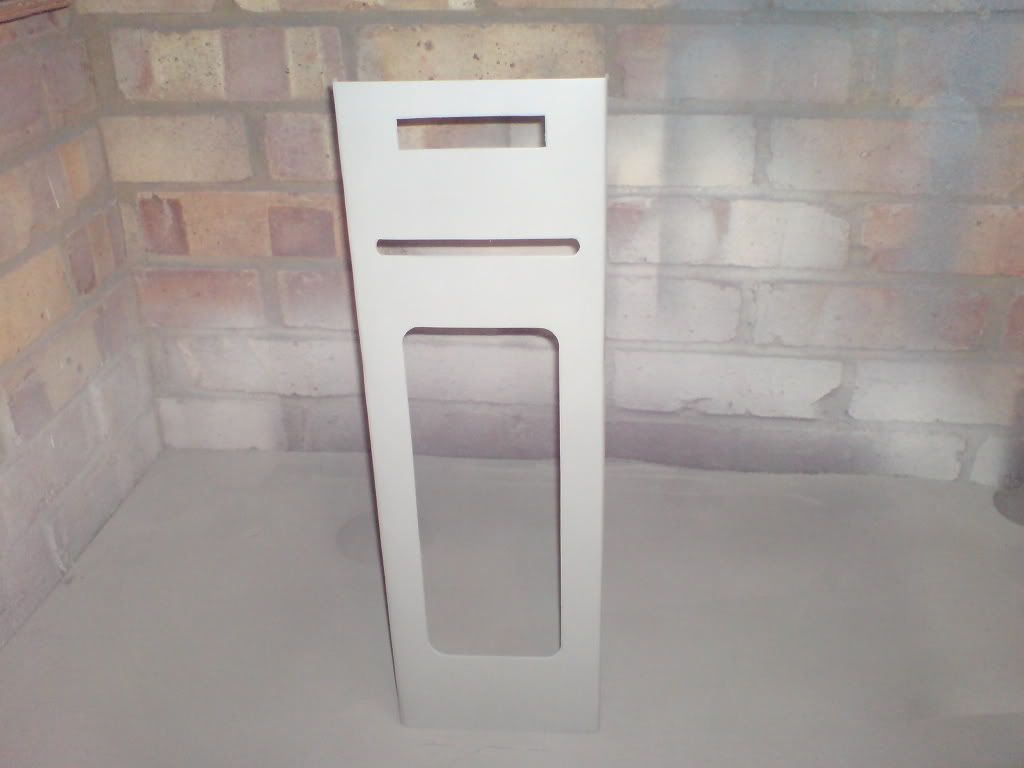
finally filled in all holes/cracks in front panel. was a real pain. Just waiting for some more paint now.
skunkmunkey
Limp Gawd
- Joined
- Aug 8, 2005
- Messages
- 152
I have now ordered 5 x 500ml cans of "Rover Amaranth pearl paint" (just to make sure i don't run out ) But it looks like its 7 days for delivery, im now starting to cut the wood frame for inside the case so updates in next 2 days
) But it looks like its 7 days for delivery, im now starting to cut the wood frame for inside the case so updates in next 2 days skunkmunkey
Limp Gawd
- Joined
- Aug 8, 2005
- Messages
- 152
Sorry guys but this project is now on hold for a week or 2, my girlfriend has just lost her baby (4 months into pregnancy) so she needs me right now. will be back soon.
omegatotal
Gawd
- Joined
- Mar 15, 2002
- Messages
- 672
wow man sorry to hear that there are many things that are important, few are as important as the love of/for another, and none more than
there are many things that are important, few are as important as the love of/for another, and none more thanskunkmunkey
Limp Gawd
- Joined
- Aug 8, 2005
- Messages
- 152
thnx guys hope to get more updates soon tho
skunkmunkey
Limp Gawd
- Joined
- Aug 8, 2005
- Messages
- 152
got some time to paint today, these need one more coat and then need rubbing down with paint renovator and clear coat applied.
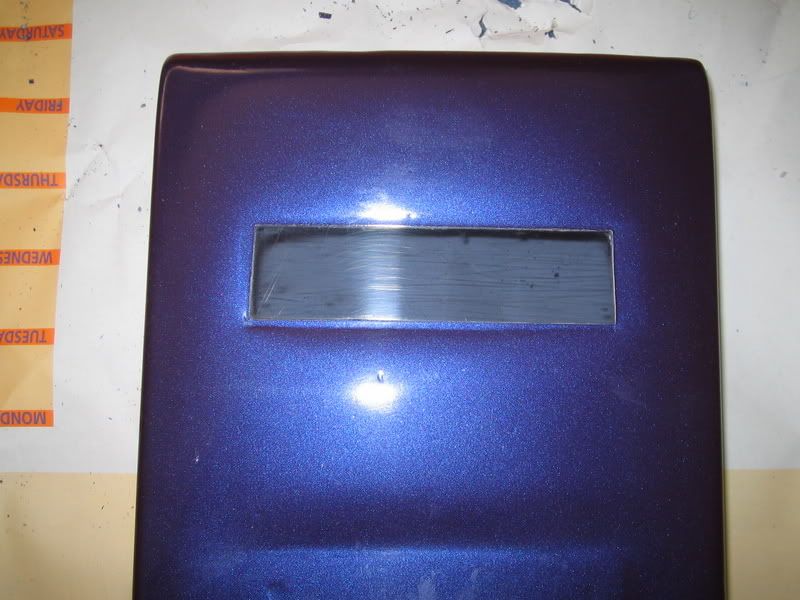
The window on this piece needs blacking out but i am undecided on how to do that at the moment

The window on this piece needs blacking out but i am undecided on how to do that at the moment
skunkmunkey
Limp Gawd
- Joined
- Aug 8, 2005
- Messages
- 152
ok, i need some advice from you guys.
The acrylic window in my front panel is looking a bit scratched so i was thinking about using limo film to black it out (i tried that spray crap and its no good at all).
Would the film stick to acrylic ok or should I spray the whole front in clear coat and then apply the film to that? Also, does anyone know if it would be possible to clear coat over the film to seal it off or would the clear coat melt the film (its cellulose based)
skunkmunkey
Limp Gawd
- Joined
- Aug 8, 2005
- Messages
- 152
ok ive now had a little time to do some more modding, here are some pics
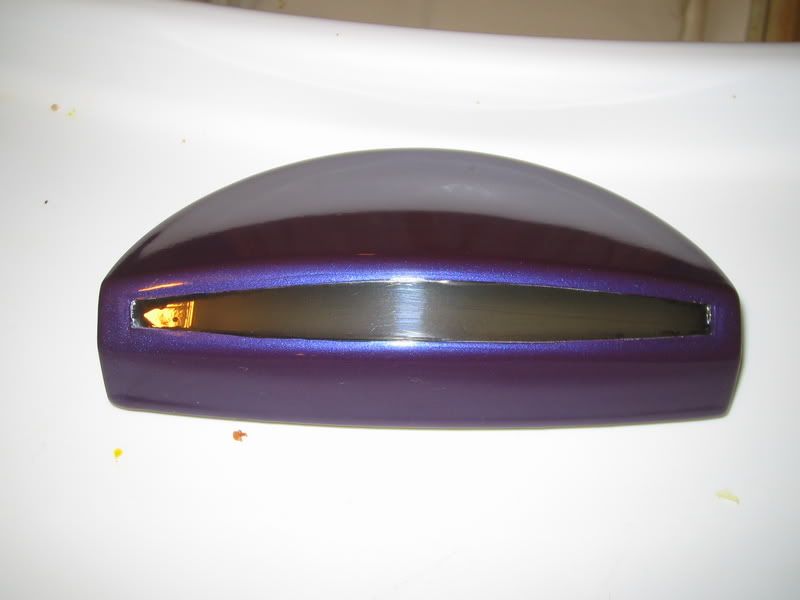
I managed to get the limo film stuck on the perspex window, it wasn't easy stuff to work with at all. just waiting for it to cure for 12 hrs then all I gotta do is trim off the excess and that part is finshed. The purple is at a mirror finish, the pics don't do it justice at all.
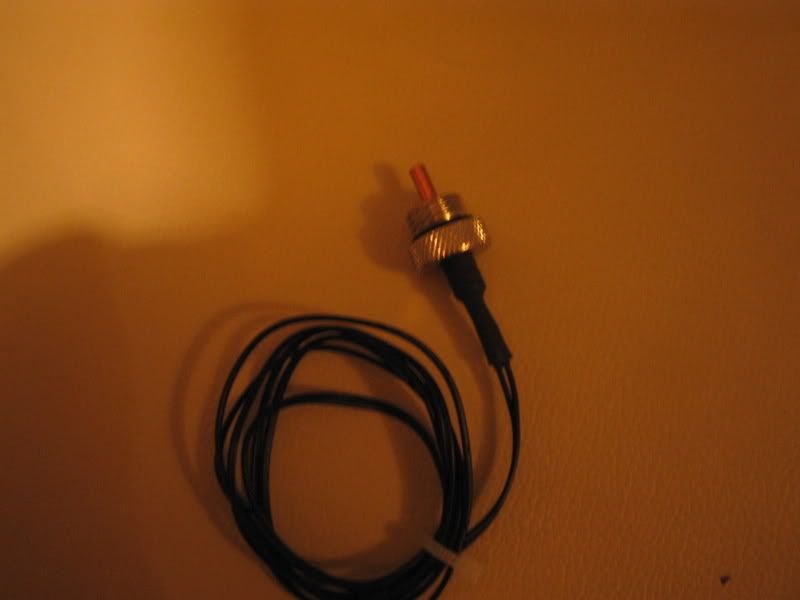
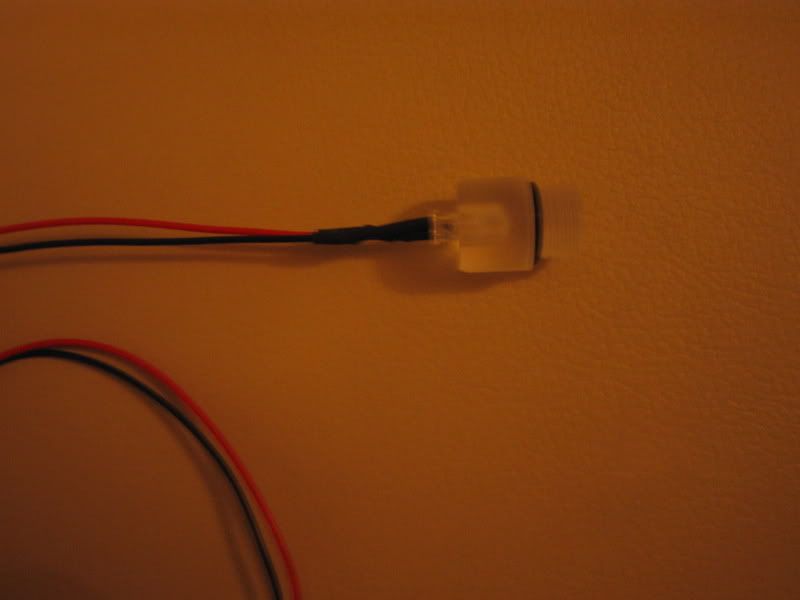
I finally found the light and thermal probe for my fass-o-matic ( a version of the aqua tube, made by innovatek) ,I had to import them from the USA though....
I managed to get the limo film stuck on the perspex window, it wasn't easy stuff to work with at all. just waiting for it to cure for 12 hrs then all I gotta do is trim off the excess and that part is finshed. The purple is at a mirror finish, the pics don't do it justice at all.
I finally found the light and thermal probe for my fass-o-matic ( a version of the aqua tube, made by innovatek) ,I had to import them from the USA though....
skunkmunkey
Limp Gawd
- Joined
- Aug 8, 2005
- Messages
- 152
Done alot of painting today, but while these pics are uploading heres a pic of my modding buddy....

gives you an idea how long this mod has been going on (just go back to begining of worklog and check out her pic there). and is it me or does she have an exceptionally large tongue?
gives you an idea how long this mod has been going on (just go back to begining of worklog and check out her pic there). and is it me or does she have an exceptionally large tongue?
skunkmunkey
Limp Gawd
- Joined
- Aug 8, 2005
- Messages
- 152
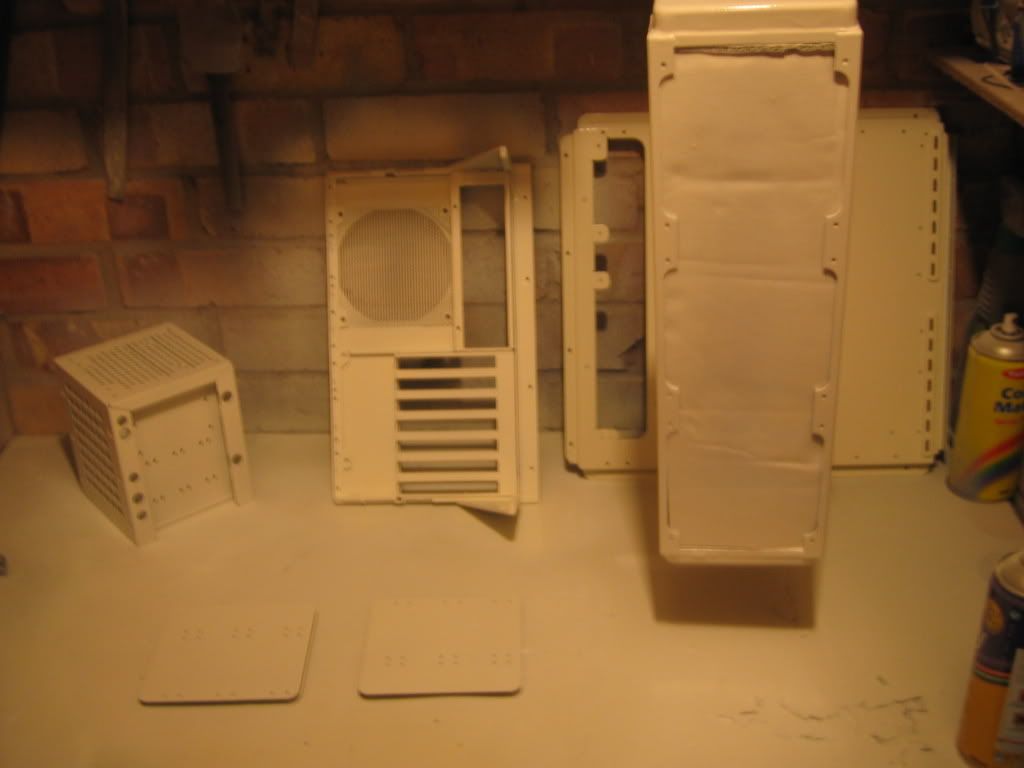
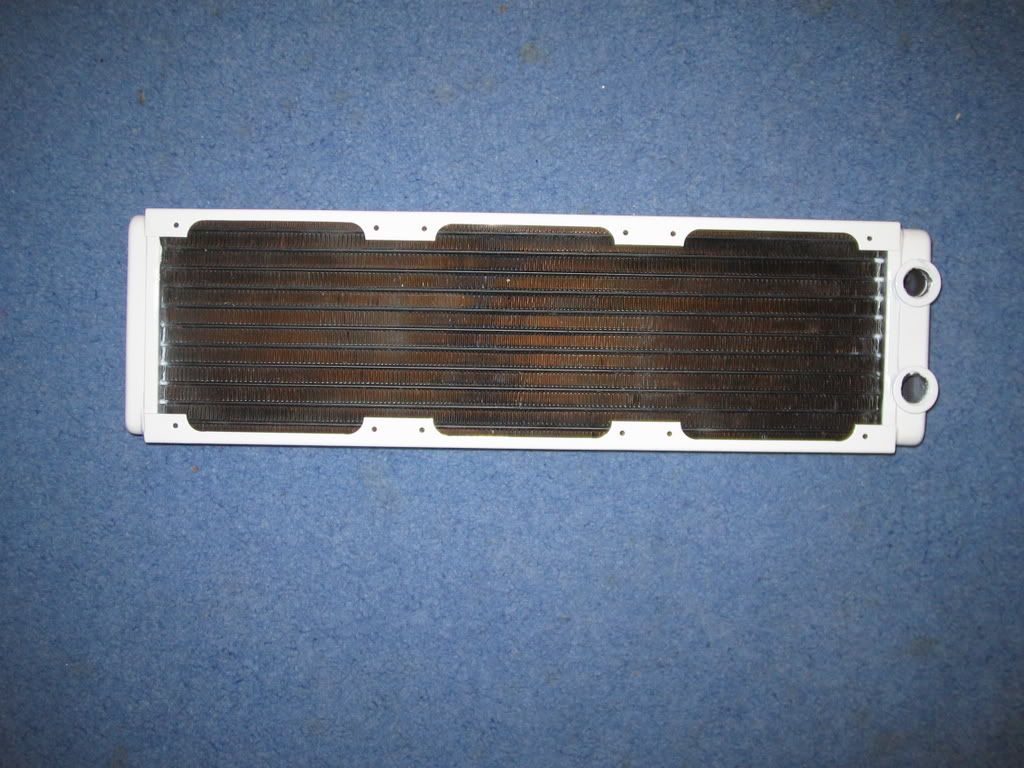
Ok so now ive manged to paint most of the internals, mobo tray, drive cage and rad. Just used a white primer and gloss white paint. Finished with a diamond laquer to protect the paint form scratches etc.

jmroberts70
2[H]4U
- Joined
- Oct 15, 2002
- Messages
- 2,953
Fantastic work! I can't wait to see the completed setup. CM Stacker rulez!!
Good jop so far, your case is conna kick ass. i really love the roof ventilation cover, it's from a car.... right.
BTW the last photo on the 3:rd page and first 3 pics on the page 4 don't work, pliis fix em. if it's not too much trouple.
keep the updates coming.
BTW the last photo on the 3:rd page and first 3 pics on the page 4 don't work, pliis fix em. if it's not too much trouple.
keep the updates coming.
skunkmunkey
Limp Gawd
- Joined
- Aug 8, 2005
- Messages
- 152
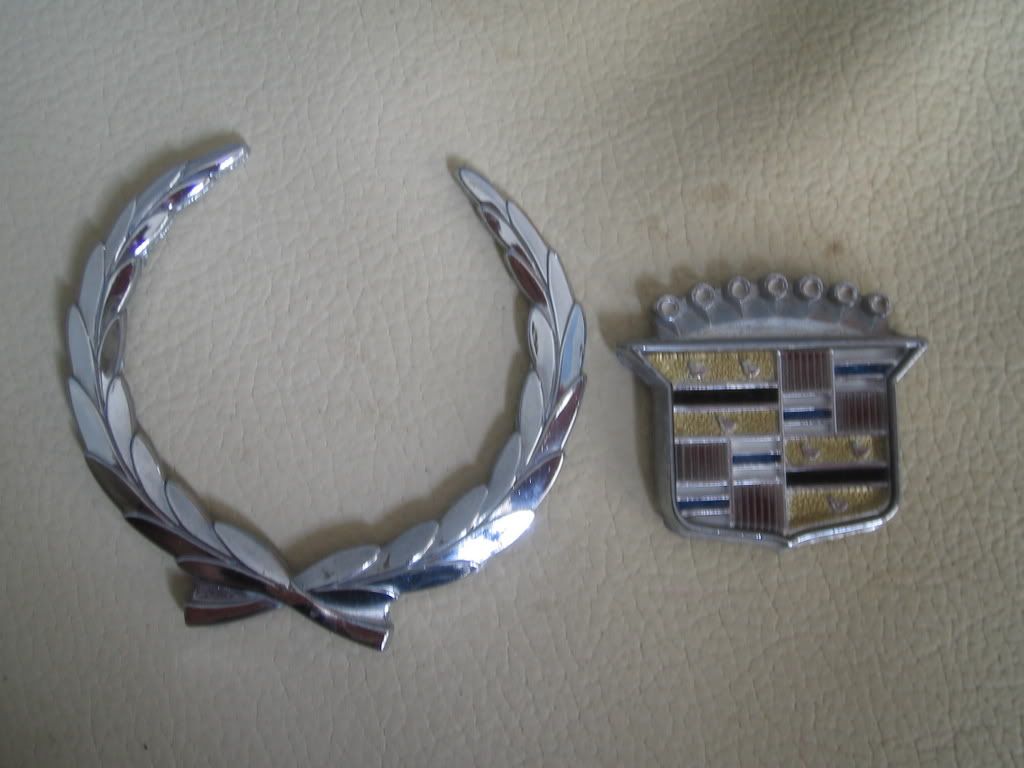
thanks for all the great feedback guys, this is my first real mod so its good to have so much interest. BTW this came in the post form USA today.....
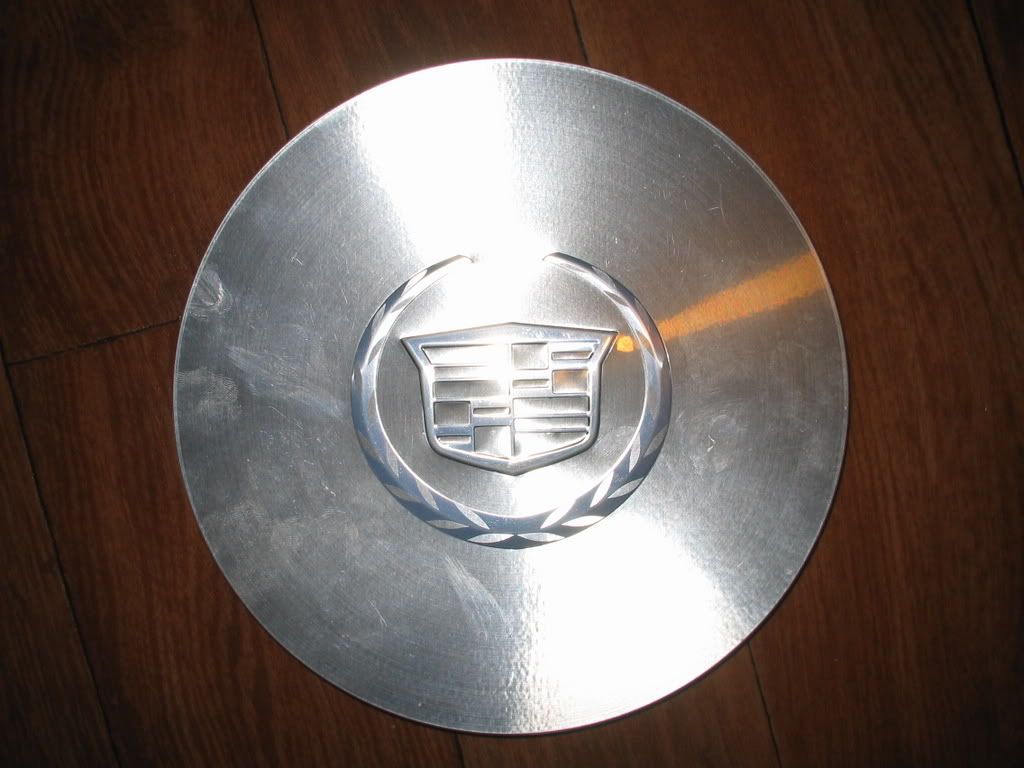
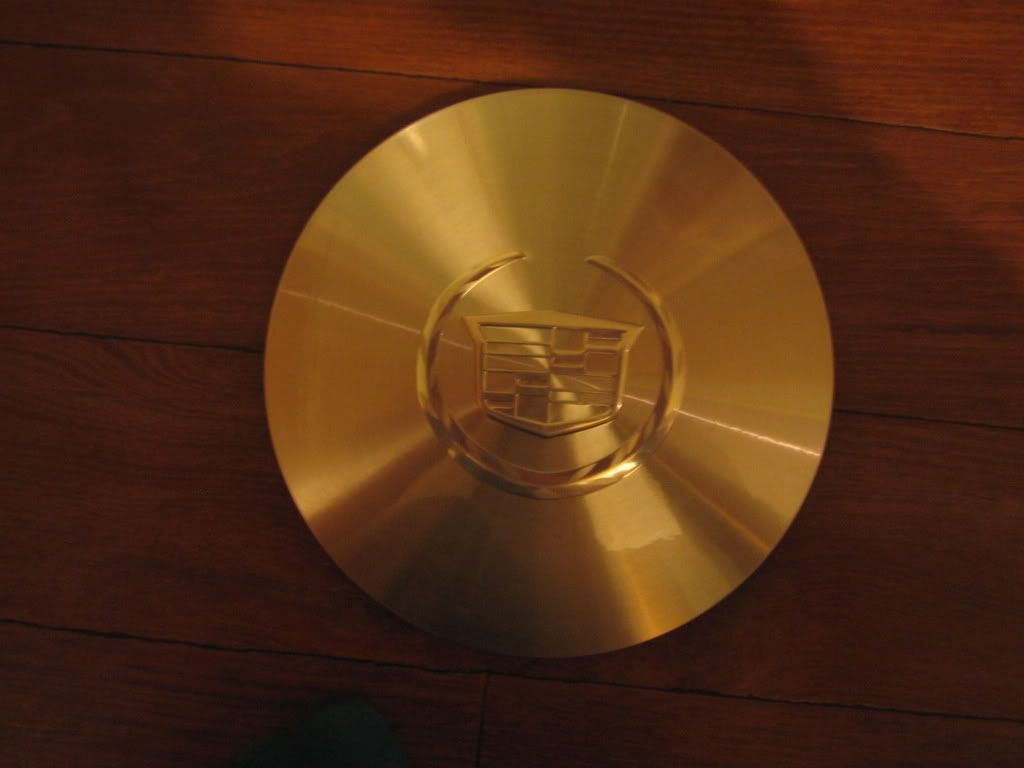
Its the centre cap from a Cadillac Escalade and is going to go on the other side panel, will look pretty cool when its done and really adds to the Cadillac styling of the mod. I also got a cadillac vinyl transfer for the window, im undecided whether to just apply to the window as the sticker or to use it as a stencil to etch the logo into the window. What do you think i should do?
Its the centre cap from a Cadillac Escalade and is going to go on the other side panel, will look pretty cool when its done and really adds to the Cadillac styling of the mod. I also got a cadillac vinyl transfer for the window, im undecided whether to just apply to the window as the sticker or to use it as a stencil to etch the logo into the window. What do you think i should do?
skunkmunkey
Limp Gawd
- Joined
- Aug 8, 2005
- Messages
- 152
thanks for all the great feedback guys, this is my first real mod so its good to have so much interest. Yea solarfall its and RS Turbo bonnet vent, nice work on your stacker too mate. BTW this came in the post form USA today.....
Its the centre cap from a Cadillac Escalade and is going to go on the other side panel, will look pretty cool when its done and really adds to the Cadillac styling of the mod. I also got a cadillac vinyl transfer for the window, im undecided whether to just apply to the window as the sticker or to use it as a stencil to etch the logo into the window. What do you think i should do?
Its the centre cap from a Cadillac Escalade and is going to go on the other side panel, will look pretty cool when its done and really adds to the Cadillac styling of the mod. I also got a cadillac vinyl transfer for the window, im undecided whether to just apply to the window as the sticker or to use it as a stencil to etch the logo into the window. What do you think i should do?
skunkmunkey
Limp Gawd
- Joined
- Aug 8, 2005
- Messages
- 152
now doin some major polishing work on the 2 front metal bars of the stacker and my res, should have some pics by tomorrow evening
skunkmunkey
Limp Gawd
- Joined
- Aug 8, 2005
- Messages
- 152
ok ive just realised that as ive changed the hardware since starting this mod i need new waterblocks.
I really like the look of the aquacomputer blocks like these:
http://www.kustompcs.co.uk/acatalog/info_7756.html
http://www.kustompcs.co.uk/acatalog/info_7833.html
however does anyone know if i can convert them to 1/2" conectors and if so will this kill the flow rate of my system? (im using a laing D5 chrome).
I also like this cpu block but does anyone know if it will fit socket 775 (its the 12" copper one in top left)
http://www.coolercases.co.uk/water_blocks_polarflo.htm
skunkmunkey
Limp Gawd
- Joined
- Aug 8, 2005
- Messages
- 152
OK have made some progress now: exuse my poor photography
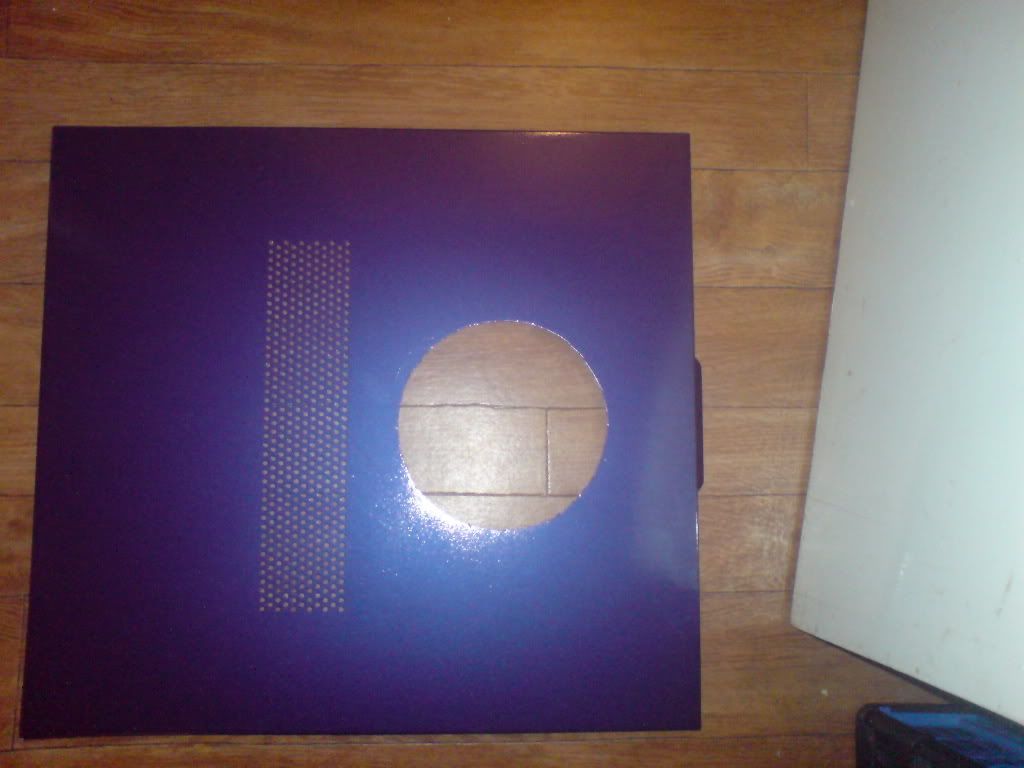
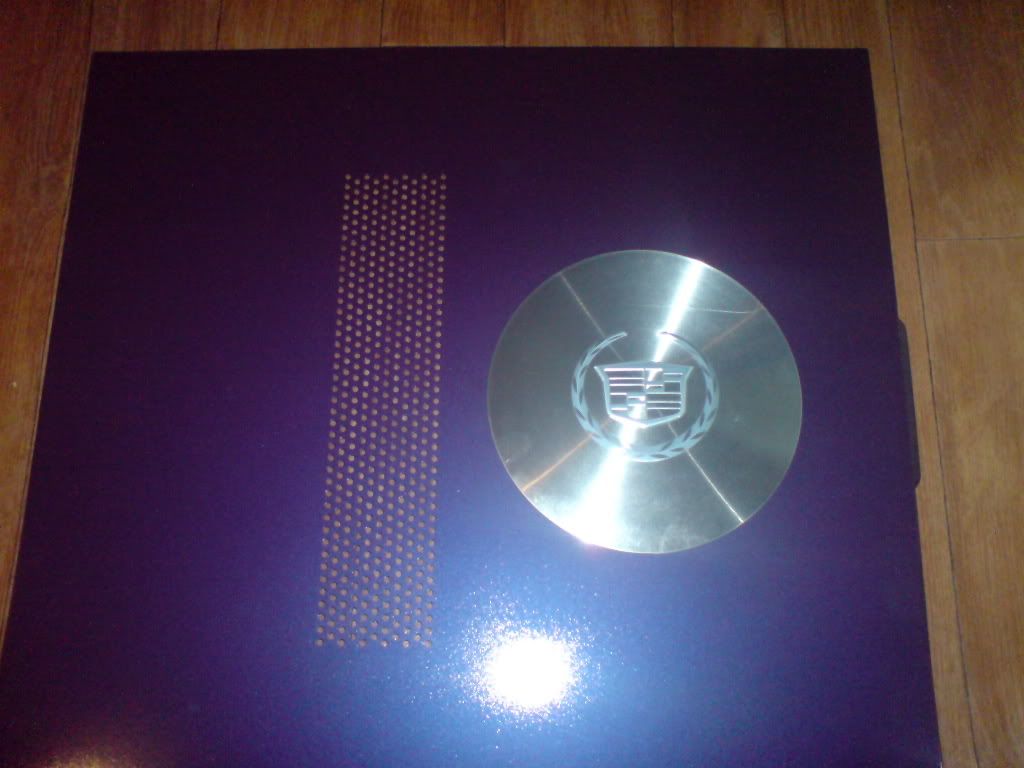
The cadillac centre cap in place, just need to get the underlighting sorted and the paint polished.
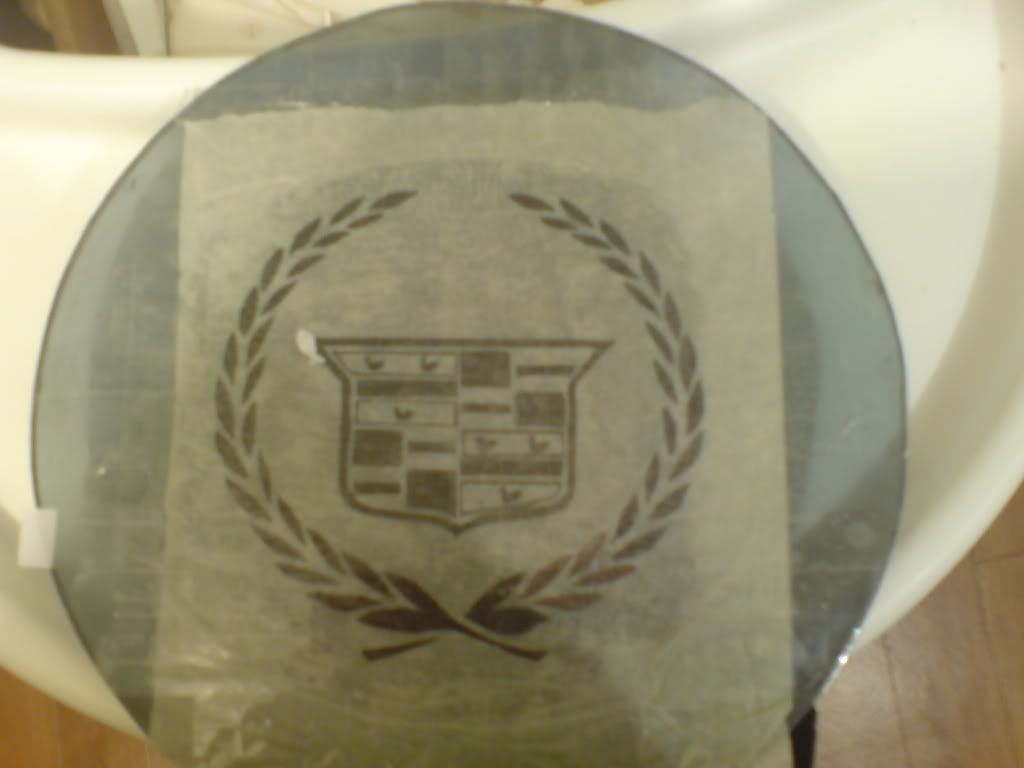
I decided to start again and make a new window, here i have drawn the cadillac logo onto some paper, then covered in tape.
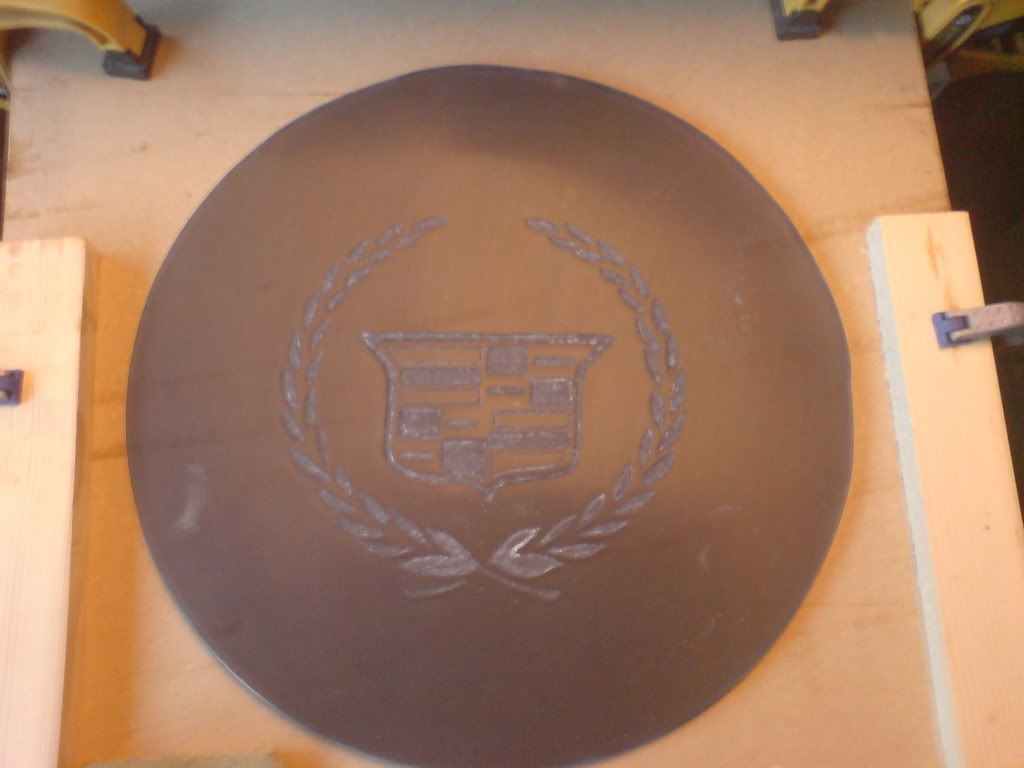
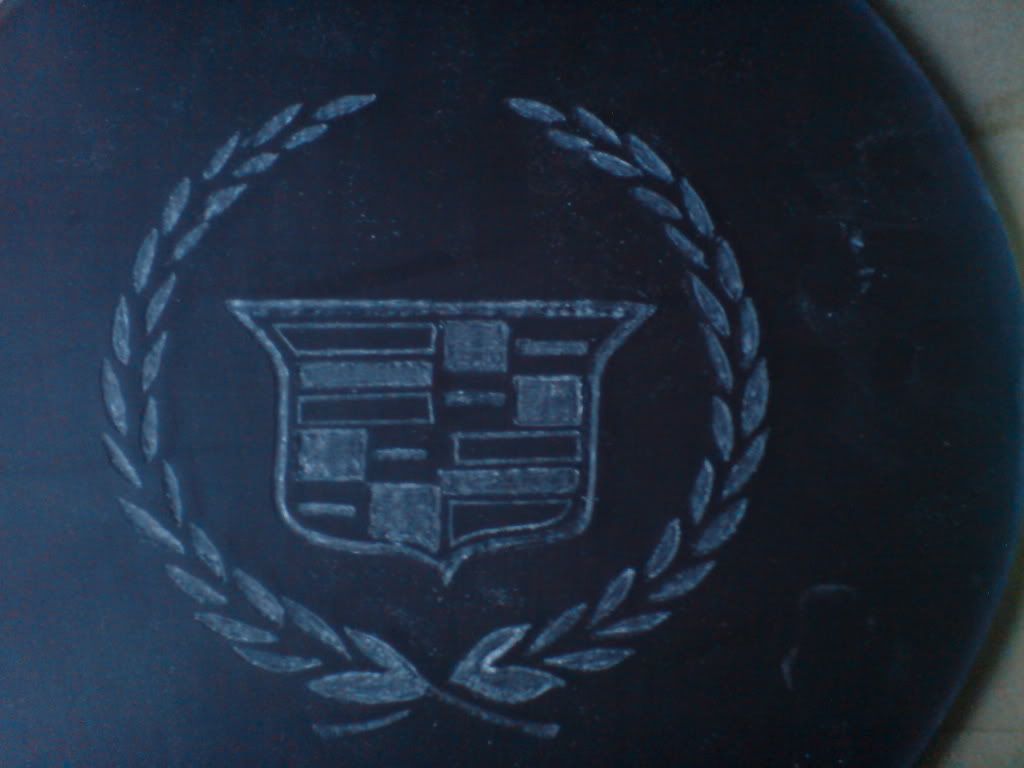
Just needs some tidying up now,not bad for my first time at etching. I will bring the window to a shine once its installed in the side panel.
Have also made a start on polishing the front bars, but still have some way to go before they are perfect.
The cadillac centre cap in place, just need to get the underlighting sorted and the paint polished.
I decided to start again and make a new window, here i have drawn the cadillac logo onto some paper, then covered in tape.
Just needs some tidying up now,not bad for my first time at etching. I will bring the window to a shine once its installed in the side panel.
Have also made a start on polishing the front bars, but still have some way to go before they are perfect.
skunkmunkey
Limp Gawd
- Joined
- Aug 8, 2005
- Messages
- 152
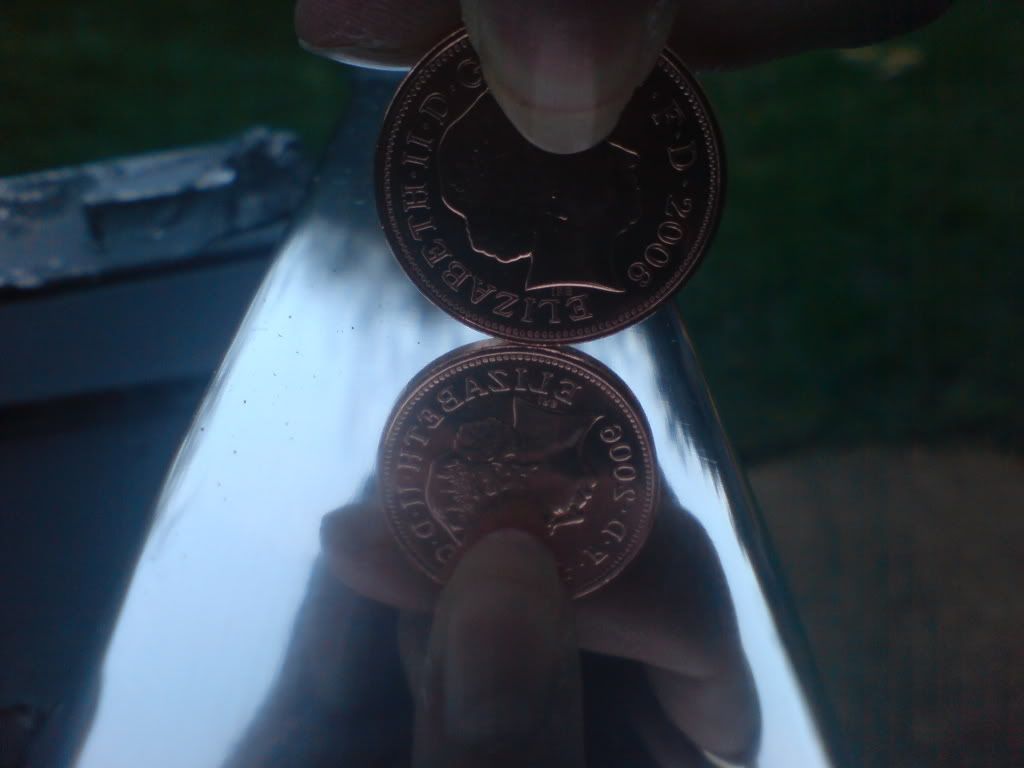
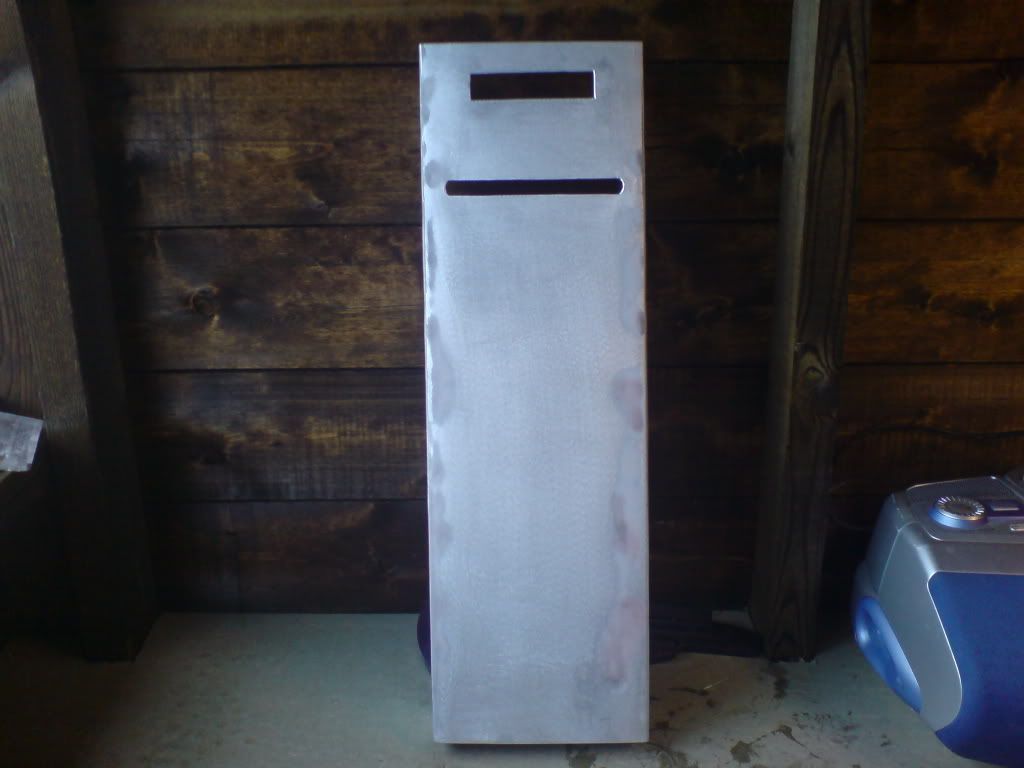
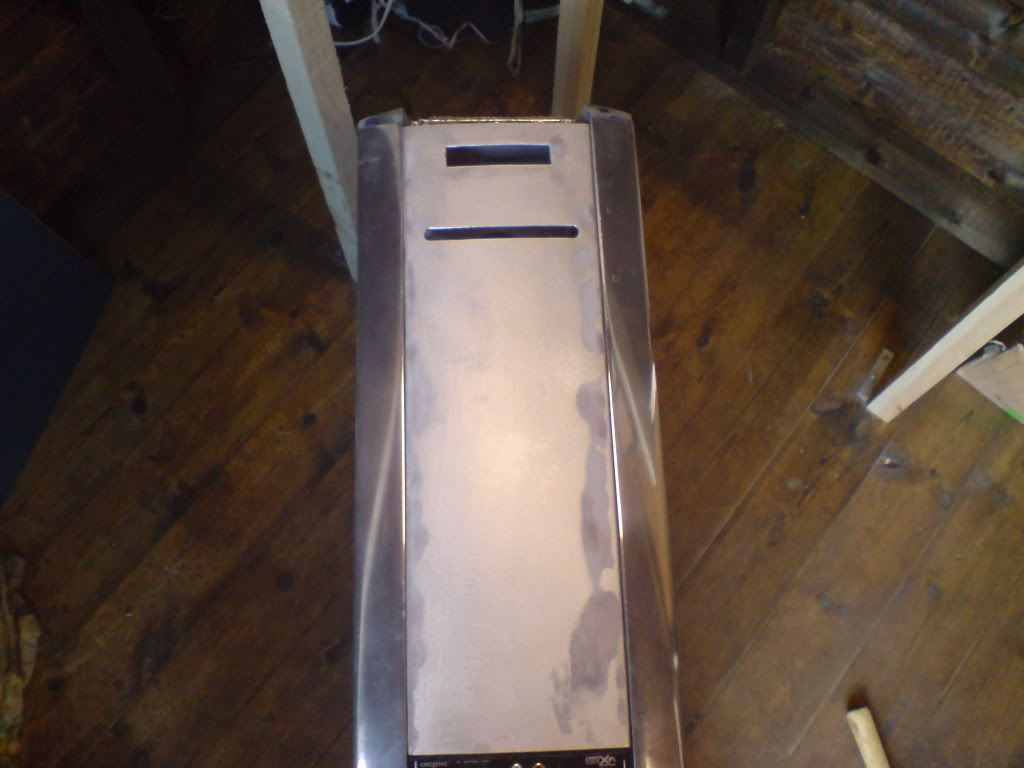
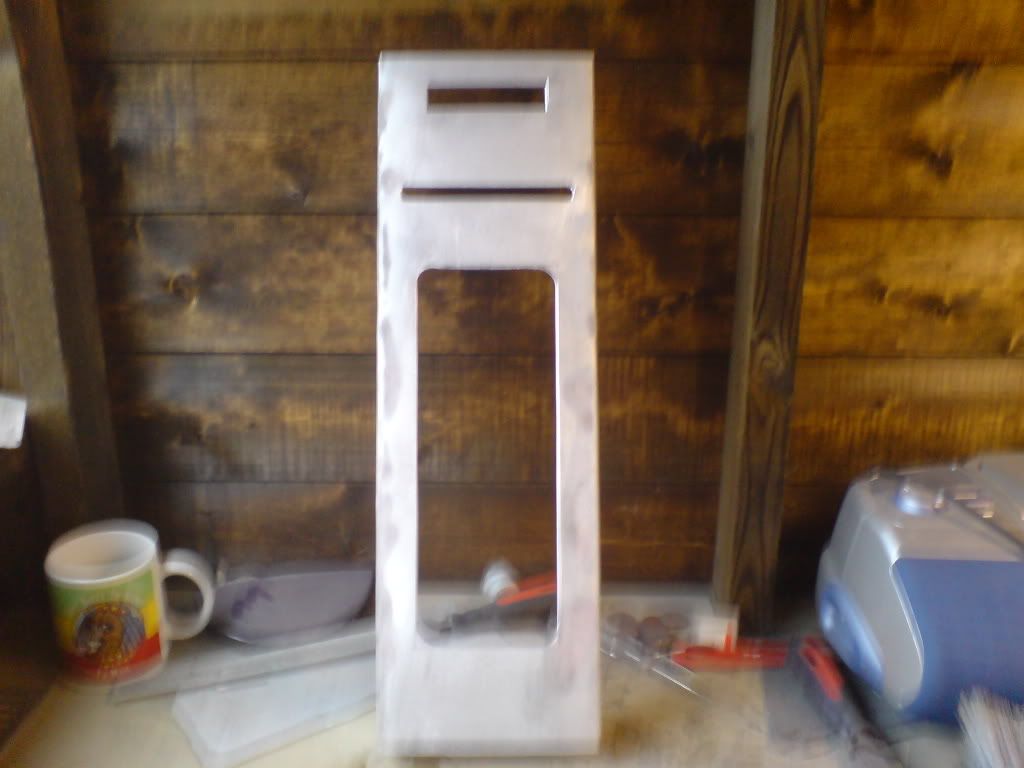
Ok i completely scrapped the original front panel and have now made one from 1.5mm aluminium, more updates to follow shortly.
WarMace
Gawd
- Joined
- Aug 25, 2004
- Messages
- 963
What did you use to polish the front bars, that looks really nice!
skunkmunkey
Limp Gawd
- Joined
- Aug 8, 2005
- Messages
- 152
Thanks, theres still a bit of work before they are finished tho. I started with p180 grade wet and dry paper and worked my way through P320/P600/P800/P1000/P1200 grades until all main scratches were out, then i used p2000 wet and dry to buff and finished with some PEEK metal polish and a lot of elbow grease. It still needs some more polishing with some of this stuff: http://www.englishcustompolishing.com/usca/antique3pack.html which will give it an almost perfect mirror shine
skunkmunkey
Limp Gawd
- Joined
- Aug 8, 2005
- Messages
- 152
few more pics today too, excuse the blurry shots, my digi cam just wouldnt focus... good excuse to buy a new one tho.
with mesh placed behind so you get the idea, needs painting before i fit it in place tho.
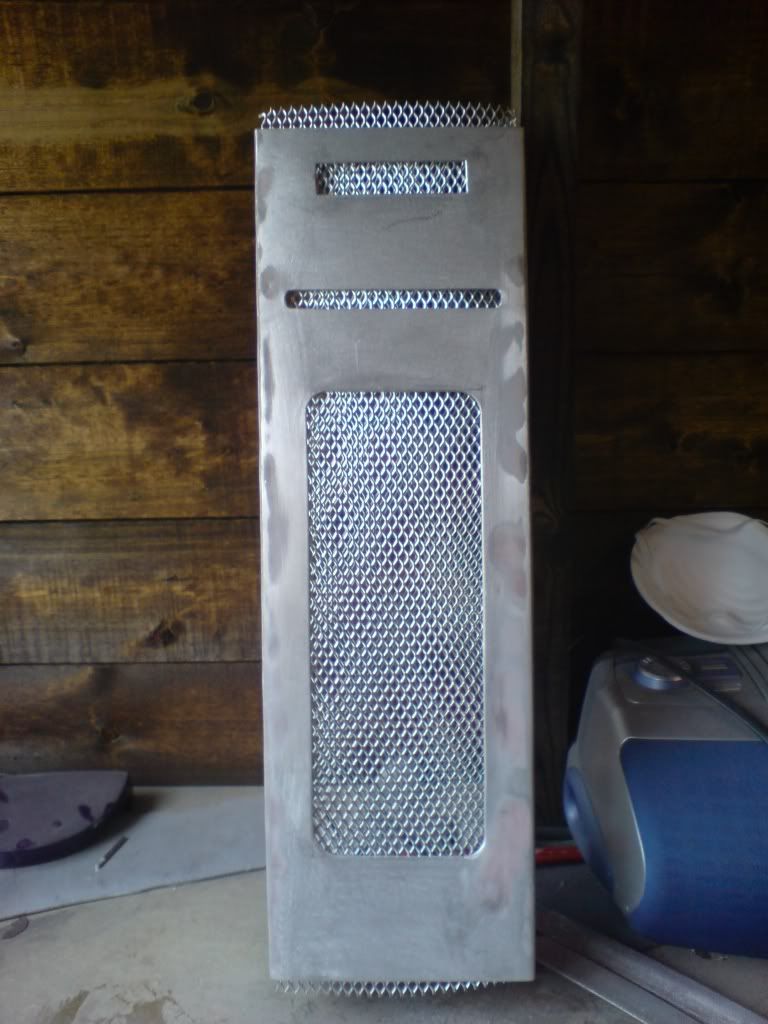
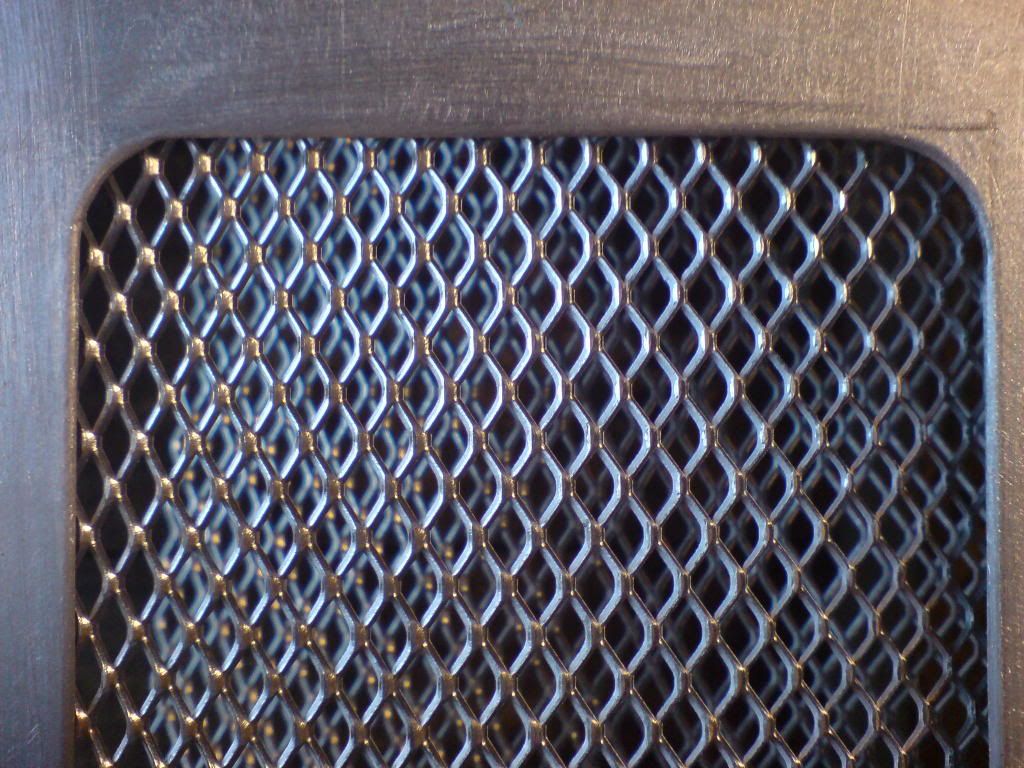
with mesh placed behind so you get the idea, needs painting before i fit it in place tho.
skunkmunkey
Limp Gawd
- Joined
- Aug 8, 2005
- Messages
- 152
pretty pleased with how it turned out, condsidering i was using a dremel, a small file and some wet n dry paper
jmroberts70
2[H]4U
- Joined
- Oct 15, 2002
- Messages
- 2,953
Lookin' good! You're inspiring me to butcher up my own CM Stacker chassis!
skunkmunkey
Limp Gawd
- Joined
- Aug 8, 2005
- Messages
- 152
Thanks, Ok so ive now updated the pics,
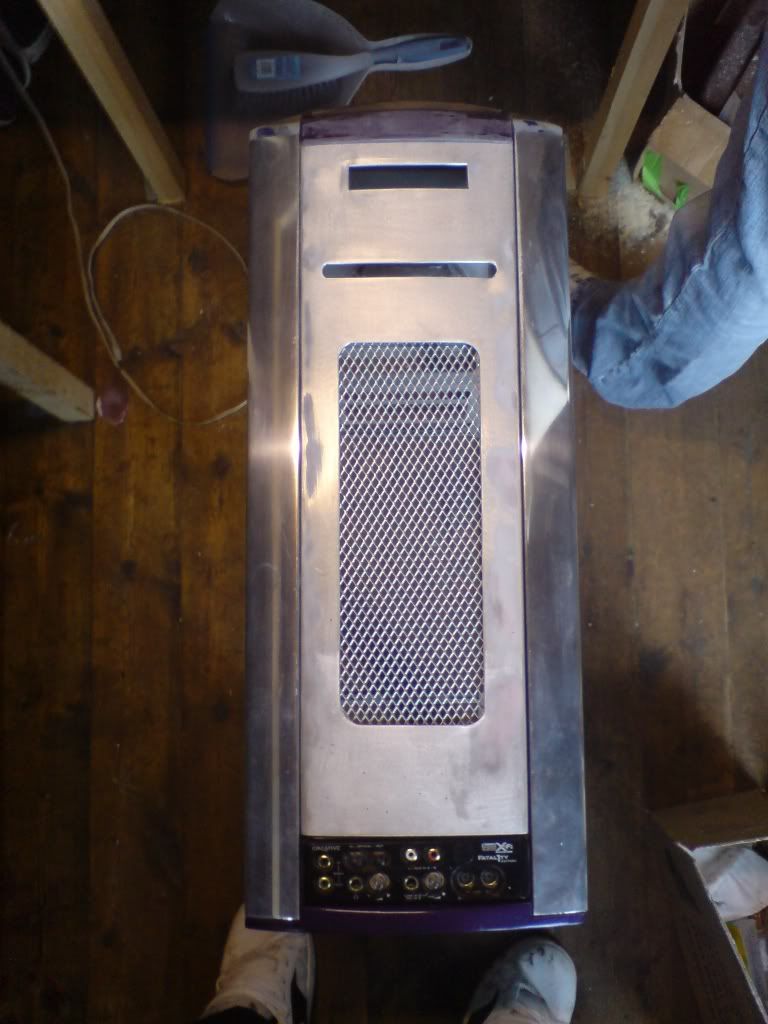
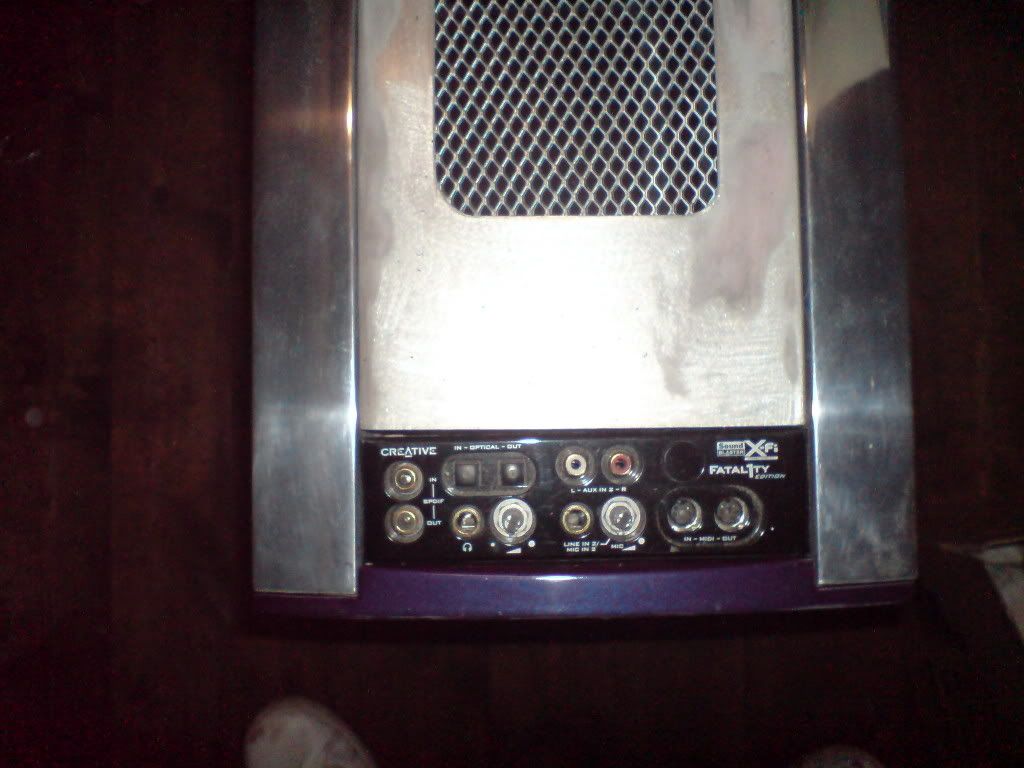
Just trying out the parts for fit and to make sure i like the look this time (dont wanna have to re-do it all again)
as u can see I have now sprayed it with a self etching primer
Just trying out the parts for fit and to make sure i like the look this time (dont wanna have to re-do it all again)
as u can see I have now sprayed it with a self etching primer
WarMace
Gawd
- Joined
- Aug 25, 2004
- Messages
- 963
Looking good (Im glad you re-did the front panel). Also im jelous you thought of the scanning LED before I did.
A tip, remove the blanks from the hard drive cage, it improves airflow.
A tip, remove the blanks from the hard drive cage, it improves airflow.
skunkmunkey
Limp Gawd
- Joined
- Aug 8, 2005
- Messages
- 152
hehe yeah, as i said i dont get much time to work on it so I guess I have to be patient.
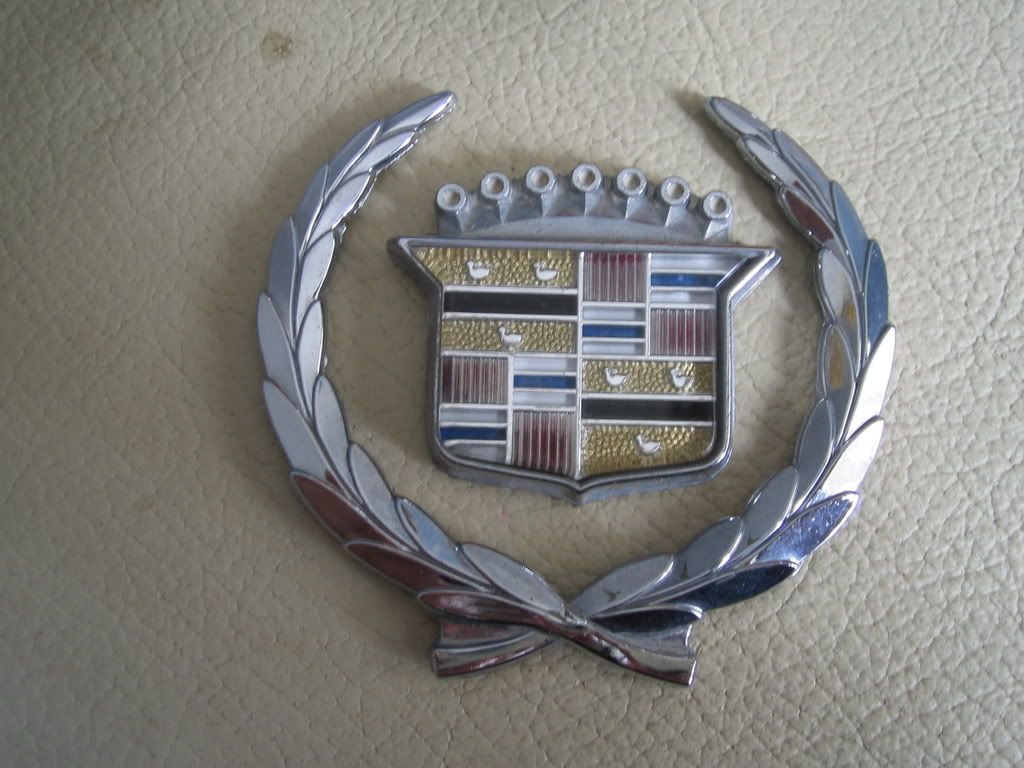
This came in the post today:
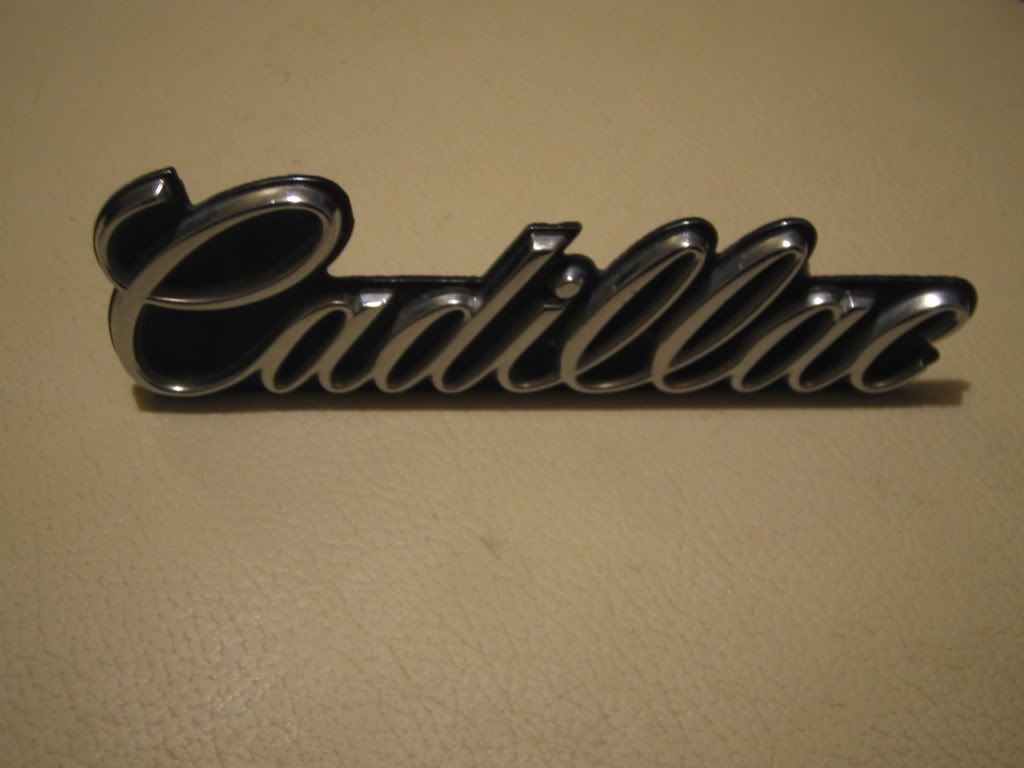
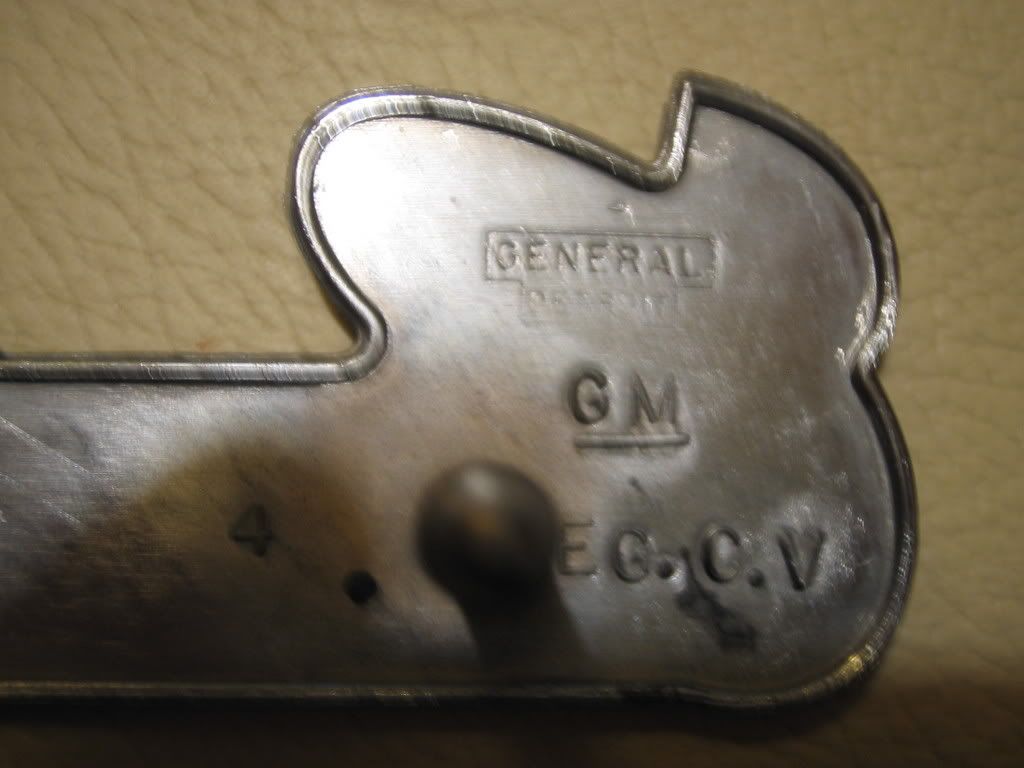
Managed to get a genuine Cadillac script from ebay.au, was searching for something else and came across it by co-incidence. Im just finishing painting my front panel and then il show you where its gonna go.
This came in the post today:
Managed to get a genuine Cadillac script from ebay.au, was searching for something else and came across it by co-incidence. Im just finishing painting my front panel and then il show you where its gonna go.
skunkmunkey
Limp Gawd
- Joined
- Aug 8, 2005
- Messages
- 152
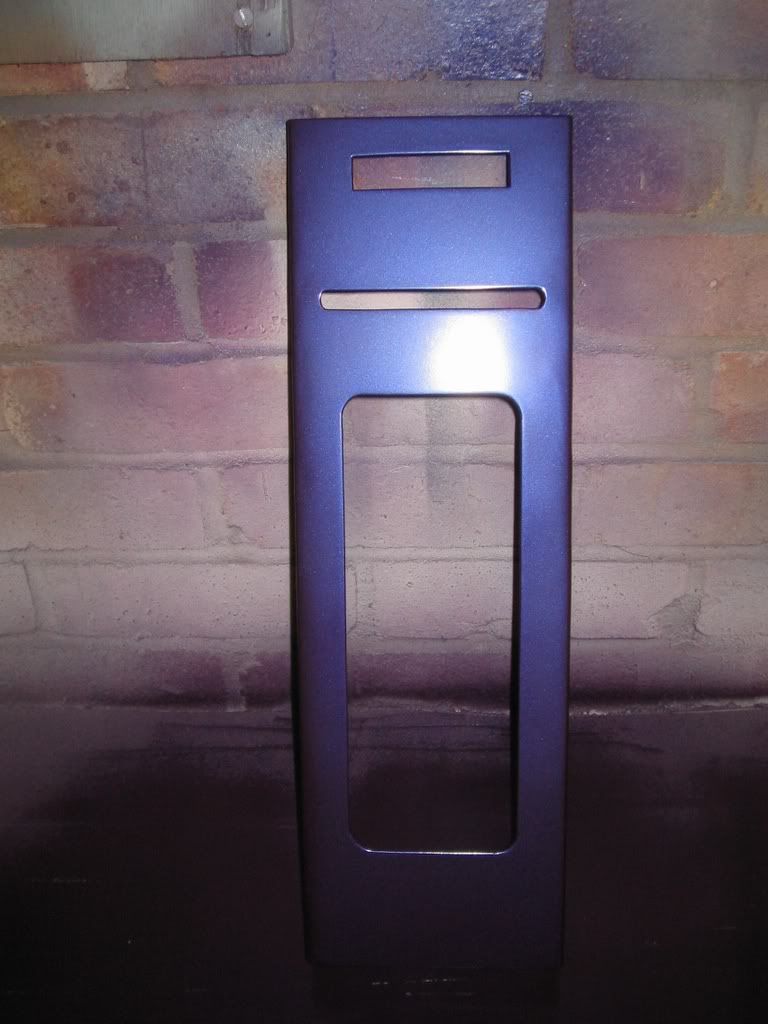
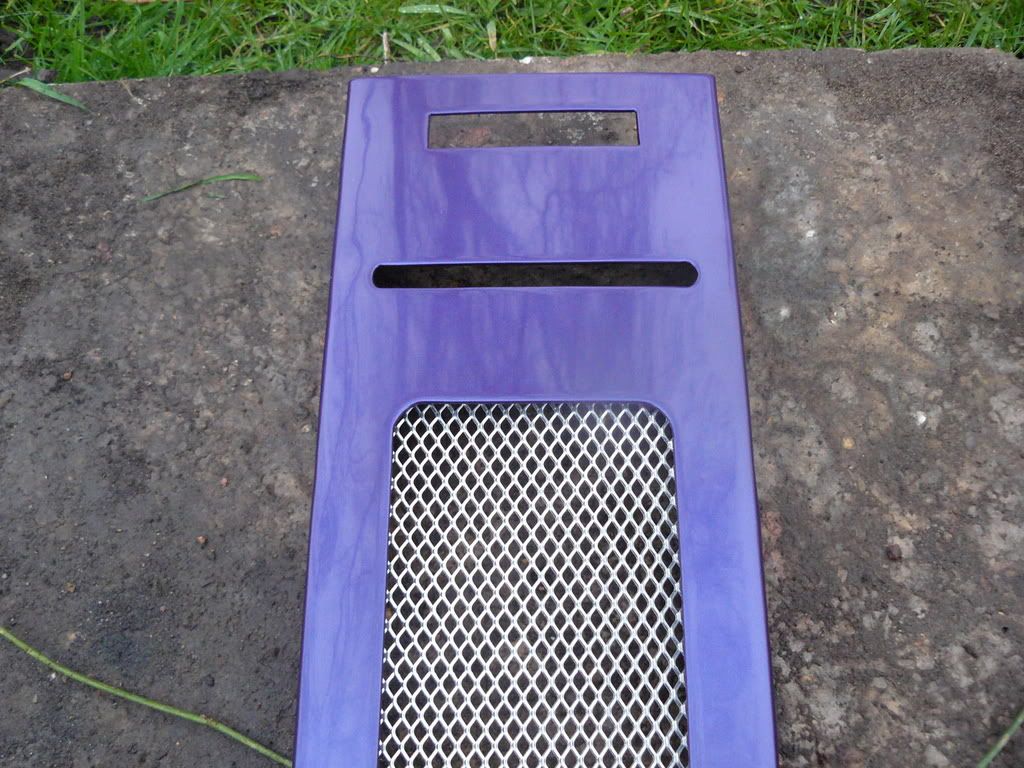
will take some better pics tomorrow or when its sunny but heres the front panel, im waiting for it to cure before adding the laquer though.
skunkmunkey said:QUOTE]
Throw Sum D's on that B....
skunkmunkey
Limp Gawd
- Joined
- Aug 8, 2005
- Messages
- 152
hehe well you will like what came in the post today too not totally sure what i want to do with it yet tho
also got the inside of the side panel painted to, am still undecided on leaving it painted or making a leather inside panel for it.

not totally sure what i want to do with it yet tho
also got the inside of the side panel painted to, am still undecided on leaving it painted or making a leather inside panel for it.
skunkmunkey
Limp Gawd
- Joined
- Aug 8, 2005
- Messages
- 152
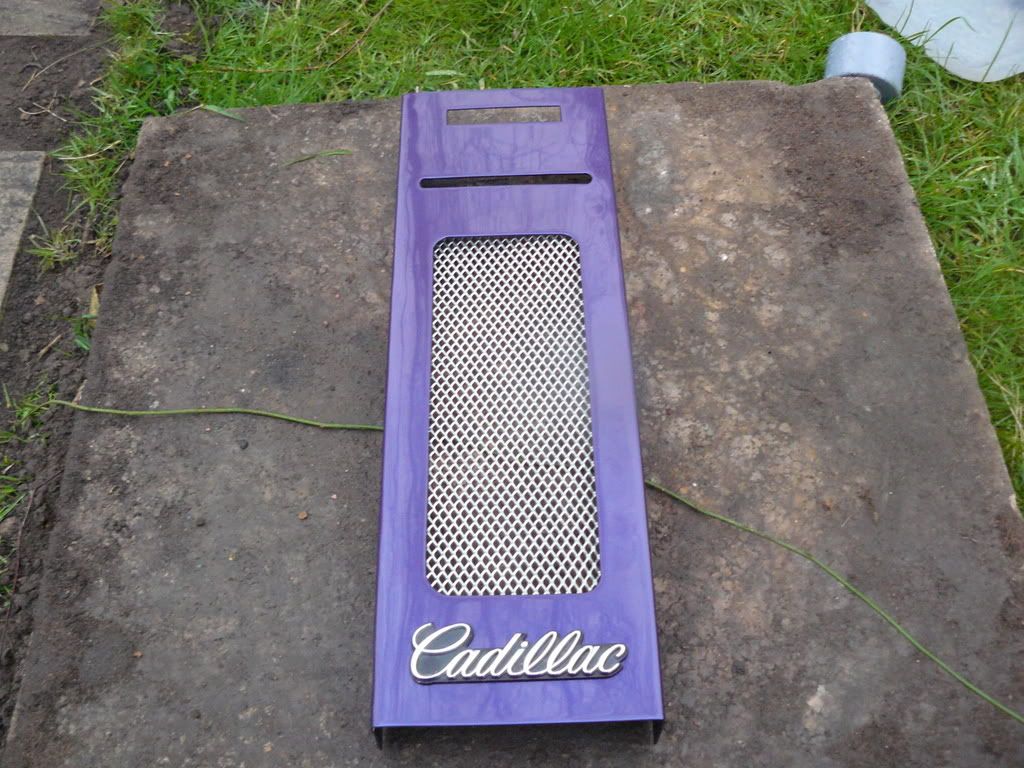
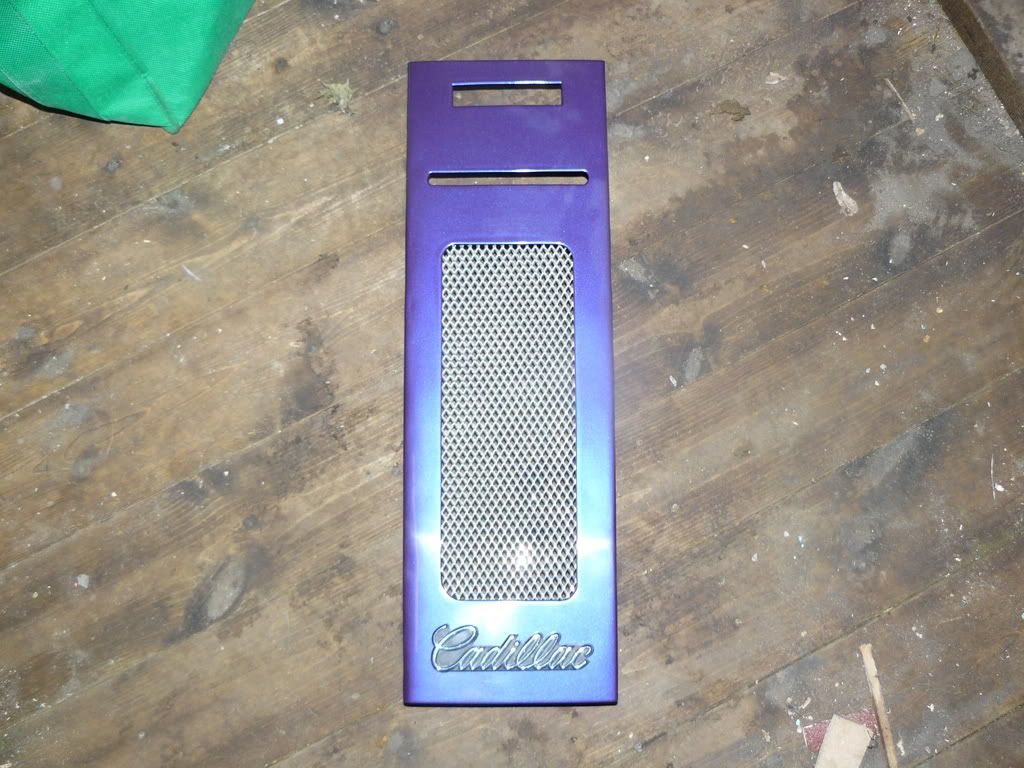
ok finished my front panel, just gotta polish it a bit more and fix the lcd to it. just waitng for some dtrong double sided tape to come in post so i can attatch the cadillac logo on properly too.
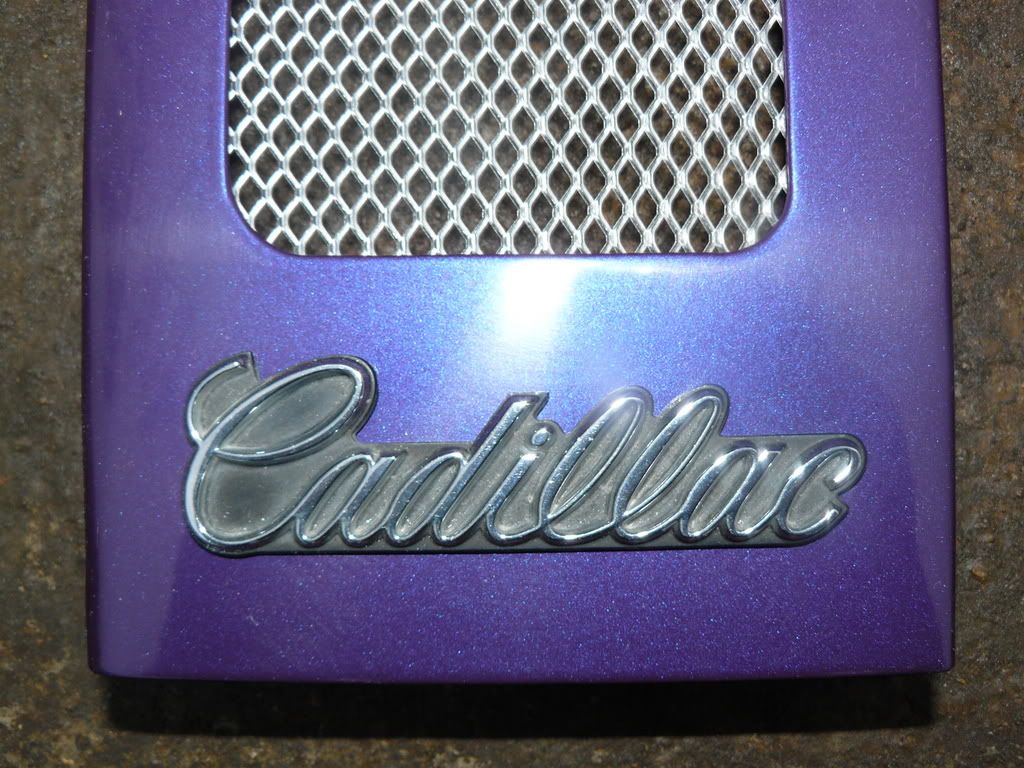
having a major problem with my paint tho, its decide, for no apparent reason to do this:
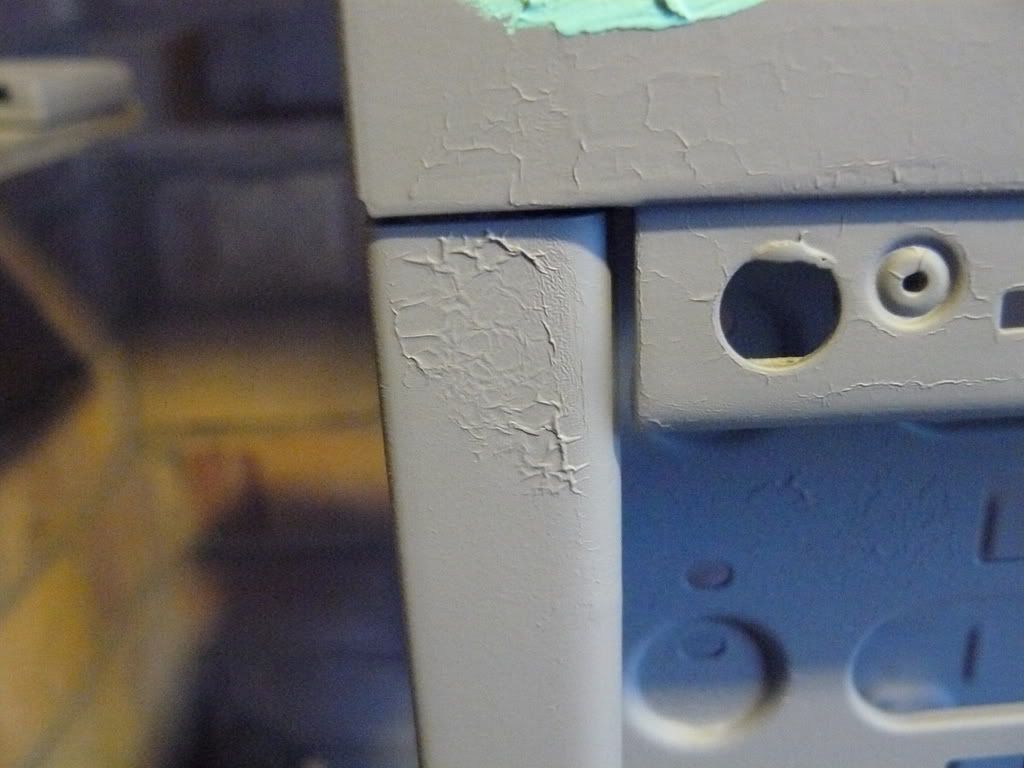
any idea why? how i can fix it? and how i can stop it from happening again?
having a major problem with my paint tho, its decide, for no apparent reason to do this:
any idea why? how i can fix it? and how i can stop it from happening again?