Hello Everyone! This is the first computer I built that I would consider a true case mod. This first post will be big, as it goes up through the first half of the project (I've been slacking on writing). Hopefully, I'll be smarter about the second half and break it up into more bite-sized bits. I will tell you now, although I have a definite set design, I'm going to try and keep it secret for as long as possible, so you can watch it transform over the next several posts. At the end of the project I'll tell you what the "S-D" stands for.
The history...
This entire adventure started... oh, I suppose around the time the video card had died in my Macintosh G5. I had been frustrated about the cost of Mac vs. PC components. I had been complaining to my friend/co-worker (ObviouslyTom) about it. A few weeks or so after getting the G5 squared away, I decided I would build a PC that could do Maya, Zpaint, and ultimately run AoC. ObviouslyTom was kind enough to donate this case to me (which he had aqcuired for free from my facist boss) and I went down to his place to pick it up. It had since been sitting around in my house for at least the last 2 or so months, while my design developed around this monstrosity of a case. You see, before the case was in my hands, I had no idea what I had planned on doing with it.

Aren't I a pretty case? Only the most sexy get held together via black duct tape...

This is the back of the monstrosity. It is pretty epically huge.
The first thing I noticed about the donated sacrificial case is how HUGE it is. I can say it here, but you just don't get it, until you see it. Plus it is made completely of thicker steel sheet than most cases you see today. It was an old Gateway server case, still with MoBo and processors. It took a good two hrs or so to strip it down to the base shell, and I tell you, I wasted no time getting right to it (who does not like to deconstruct old hardware?)

It is a very well-build case, not only do the sides come off, but the top as well, it is very easy to access the space in this case.

The old Motherboard, still in the case.

An even better picture of this old P3 Motherboard. It is fascinating to me. I still have it sitting on a shelf, not that I'll ever do anything with it...

This is one of the two old P3 processors. Yes, dual processors! woot. This thing must have cost a fortune back in the day... Also, let it be known that the way these things were attached to the MoBo, coupled with the absolutely ridiculously sharp aluminum heat sinks resulted in several small lacerations. I am very lucky I didn't cleanly slice a finger off. S H A R P

Even a nice capacity removable HDD shelf.
At this point, with the case stripped, (and weighing almost 20-25ish lbs, empty, iirc), I sat down and measured and remeasured and tripled measured all of the panels, the frame, and the locations of every mounting point. I then made views of each side, the top, and the face in Adobe Illustrator at 100% scale. Up until now, everything was straight forward and easy, now I actually needed to figure out what I was going to do with it.
Over the next, oh I would say 2 months, I designed, laid out, measured, re-laid out, remeasured, researched parts to fit, re-re-laid out and ultimately created what will be (I hope) an incredibly cool, and most certainly unique PC case. Knowing that there was no way I would ever get this beast of a case to feel delicate or compact, or light and airy, i took that into my design. Also, during this time, I laid out my budget, and researched exactly what kind of innards I wanted for my PC. (you'll get to see them by the end of this post). Amazingly, almost all of that took me right up to roughly last weekend, when the final computer parts arrived (to make it run), and I set about modifying the case to work around everything that I had purchased.
From Last Week until Present.
This brings me to the point where I get to use big, nasty power tools to cut up the case to fit certain components for my case. A Porter Cable jig-saw with a metal blade on it will cut through steel akin to a starving parahna next to a splashing kid in pool.
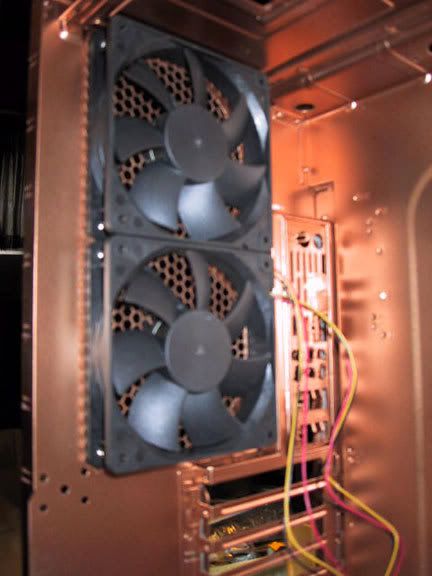
The first thing I needed to do was account for the air flow in the case. There are already places for (x2) 120mm fans, and a larger one up front (whatever might have been there was gone when I had gotten the case). This really made the placement of the fans I wanted to use a no-brainer. Unfortunately, the perf grill of the case was maybe 50% open, so not the best for allowing the case to breath. I decided to cut out the original perf (it was actually part of the stamped steel paneling), and replace it with a much more open hex mesh, that I had used on a previous computer.

Here i have cut out the front of the case to allow for my main intake fan, which is a 140mm AreoCool fan. I would have gone bigger, but the next size up was 200mm, and although it would have fit, I felt that it would have begun to interfere with other internal parts. The remains of the original perf that I removed is laying in front of the PC Case.

Here is the back of the case. In addition to removing the bumped out perf areas, I also had to cut out the old I/O port, since it was also part of the stamped back panel. That was a nervous cut, since I knew I would have to get it as dead-on as possible, so that the ports on the back of the new motherboard would line up with the supplied I/O panel. Again, the wreckage of the industrial jig-saw is seen in front of the case proper.

The circled area is where I would have had interference for the power on and reset switches. The switches I purchased are industrial vandal-proof switches, and will actually stick into the hole in the case a small bit.
Since I am completely redesigning this case, I had to come up with a new front that matched my design. The plastic front that came with the case was not only unacceptable to my design, but it was broken. Honestly, that is quite fine with me, as I would prefer to make a new front to make the case as much my own as possible. So, knowing how I would manufacture the front, I wanted to be able to bolt the front panel on from inside the case. This meant taking some of the metal out of the case around certain mounting points so that I could access the bolt, even if the case still had all of its internals inside.

Here are two locations (circled in red) where I had to remove metal to allow for the hardware (which, btw is a big meaty bolt with two standard washers and a lockwasher.)

Here is another place I needed to modify the case for a bolt. It is the top left corner of the case seen from behind. You can actually see it holding on part of the new front panel onto the case.
...which brings me to the new front of the case! (well at least a small part of it). Your actually not going to get that much from the next few pictures. I will tell you that I have made it out of 2 sheets of 1/2" thick acrylic - yes, solid acrylic. Yes it will weigh a lot. Yes, it machines very nicely.

This is the first layer of 1/2" acrylic. The acrylic is actually tapped to allow the bolts to thread right into it. I am using so many washers so that I can use a 3/4" long bolt and have the threads go right up to but not proud of the face of the first sheet of acrylic (1/2" long bolts were just too short, since I am biting into acrylic). As you can see, the DVD Burners have been placed along with the front fan, and the power / reset buttons. Additionally, you can see tons of drilled out holes. Most of them are there to straddle rivets, so that the acrylic piece sits flush to the case.

Here is the full 1" thick acrylic face, completely aligned, bolted up, tested, and straddling all of the components that interact with the face of the case. I wonder what those two large holes in the case about mid-way up could be for... Hmmmm.... The acrylic looks brown because of the protective paper that is on it from the factory. At this point, the acrylic face is just taped together. In the near future, I'll glue it up.
Now comes the time where I sand, grind, and sand some more, along with scraping off old stickers and adhesive gunk, and getting everything as polished as possible before I painted it. Sorry, no pictures of that part.
Time for the Finishing!
Wow. What an adventure. I wish I had been keeping track of hours spent, but I was more concerned with getting the case up and done... so, eh. At this point, I break out the solvents and wipe down the case to get all metal shavings, grease, grime, dirt, and last bits of sticker residue off the case, and all other parts I'll be painting.
First up, painting the case skeleton, the cut to size hex screens, all of the hardware, the HDD cage, and whatever else I needed for the internals installation.
Obviously, the first step is priming, so here are a bunch of pictures the case being primed...

I installed the I/O panel prior to priming and painting. You can see it in this picture. Yes, I did check to make sure it would line up, and guess what? It does! Yay me, I can use a ruler.

Lots of the misc sundry items in a state of primer.

The front of the case.

And now the back and side.
The nice thing about primer, it drys fast (I tend to get impatient about paint). Here comes the paint!

Here is the new and finished front of the case (that noone will ever see). It is rustoleum copper metallic spraypaint. I was surprised, it went on really nicely.

And here is the back...

The inside...

And now all of the misc doo-dads.
.
..
...
So...let me tell you now that I can be impatient, especially when I work on a project that I am stupidly excited about. To me, waiting for paint to dry is about equal to having your fingernails sheered off by bamboo stakes. Somehow, with a forced shower, a forced nap, and forced eating, I managed to get through it to where the paint was cured enough to handle gently (there was no way I could wait 48hrs - sorry just no way in hell it would have happened. Ever. Well, unless you drove me to another state and pushed me out of the car to walk home)
The history...
This entire adventure started... oh, I suppose around the time the video card had died in my Macintosh G5. I had been frustrated about the cost of Mac vs. PC components. I had been complaining to my friend/co-worker (ObviouslyTom) about it. A few weeks or so after getting the G5 squared away, I decided I would build a PC that could do Maya, Zpaint, and ultimately run AoC. ObviouslyTom was kind enough to donate this case to me (which he had aqcuired for free from my facist boss) and I went down to his place to pick it up. It had since been sitting around in my house for at least the last 2 or so months, while my design developed around this monstrosity of a case. You see, before the case was in my hands, I had no idea what I had planned on doing with it.
Aren't I a pretty case? Only the most sexy get held together via black duct tape...
This is the back of the monstrosity. It is pretty epically huge.
The first thing I noticed about the donated sacrificial case is how HUGE it is. I can say it here, but you just don't get it, until you see it. Plus it is made completely of thicker steel sheet than most cases you see today. It was an old Gateway server case, still with MoBo and processors. It took a good two hrs or so to strip it down to the base shell, and I tell you, I wasted no time getting right to it (who does not like to deconstruct old hardware?)
It is a very well-build case, not only do the sides come off, but the top as well, it is very easy to access the space in this case.
The old Motherboard, still in the case.
An even better picture of this old P3 Motherboard. It is fascinating to me. I still have it sitting on a shelf, not that I'll ever do anything with it...
This is one of the two old P3 processors. Yes, dual processors! woot. This thing must have cost a fortune back in the day... Also, let it be known that the way these things were attached to the MoBo, coupled with the absolutely ridiculously sharp aluminum heat sinks resulted in several small lacerations. I am very lucky I didn't cleanly slice a finger off. S H A R P
Even a nice capacity removable HDD shelf.
At this point, with the case stripped, (and weighing almost 20-25ish lbs, empty, iirc), I sat down and measured and remeasured and tripled measured all of the panels, the frame, and the locations of every mounting point. I then made views of each side, the top, and the face in Adobe Illustrator at 100% scale. Up until now, everything was straight forward and easy, now I actually needed to figure out what I was going to do with it.
Over the next, oh I would say 2 months, I designed, laid out, measured, re-laid out, remeasured, researched parts to fit, re-re-laid out and ultimately created what will be (I hope) an incredibly cool, and most certainly unique PC case. Knowing that there was no way I would ever get this beast of a case to feel delicate or compact, or light and airy, i took that into my design. Also, during this time, I laid out my budget, and researched exactly what kind of innards I wanted for my PC. (you'll get to see them by the end of this post). Amazingly, almost all of that took me right up to roughly last weekend, when the final computer parts arrived (to make it run), and I set about modifying the case to work around everything that I had purchased.
From Last Week until Present.
This brings me to the point where I get to use big, nasty power tools to cut up the case to fit certain components for my case. A Porter Cable jig-saw with a metal blade on it will cut through steel akin to a starving parahna next to a splashing kid in pool.
The first thing I needed to do was account for the air flow in the case. There are already places for (x2) 120mm fans, and a larger one up front (whatever might have been there was gone when I had gotten the case). This really made the placement of the fans I wanted to use a no-brainer. Unfortunately, the perf grill of the case was maybe 50% open, so not the best for allowing the case to breath. I decided to cut out the original perf (it was actually part of the stamped steel paneling), and replace it with a much more open hex mesh, that I had used on a previous computer.
Here i have cut out the front of the case to allow for my main intake fan, which is a 140mm AreoCool fan. I would have gone bigger, but the next size up was 200mm, and although it would have fit, I felt that it would have begun to interfere with other internal parts. The remains of the original perf that I removed is laying in front of the PC Case.
Here is the back of the case. In addition to removing the bumped out perf areas, I also had to cut out the old I/O port, since it was also part of the stamped back panel. That was a nervous cut, since I knew I would have to get it as dead-on as possible, so that the ports on the back of the new motherboard would line up with the supplied I/O panel. Again, the wreckage of the industrial jig-saw is seen in front of the case proper.
The circled area is where I would have had interference for the power on and reset switches. The switches I purchased are industrial vandal-proof switches, and will actually stick into the hole in the case a small bit.
Since I am completely redesigning this case, I had to come up with a new front that matched my design. The plastic front that came with the case was not only unacceptable to my design, but it was broken. Honestly, that is quite fine with me, as I would prefer to make a new front to make the case as much my own as possible. So, knowing how I would manufacture the front, I wanted to be able to bolt the front panel on from inside the case. This meant taking some of the metal out of the case around certain mounting points so that I could access the bolt, even if the case still had all of its internals inside.
Here are two locations (circled in red) where I had to remove metal to allow for the hardware (which, btw is a big meaty bolt with two standard washers and a lockwasher.)
Here is another place I needed to modify the case for a bolt. It is the top left corner of the case seen from behind. You can actually see it holding on part of the new front panel onto the case.
...which brings me to the new front of the case! (well at least a small part of it). Your actually not going to get that much from the next few pictures. I will tell you that I have made it out of 2 sheets of 1/2" thick acrylic - yes, solid acrylic. Yes it will weigh a lot. Yes, it machines very nicely.
This is the first layer of 1/2" acrylic. The acrylic is actually tapped to allow the bolts to thread right into it. I am using so many washers so that I can use a 3/4" long bolt and have the threads go right up to but not proud of the face of the first sheet of acrylic (1/2" long bolts were just too short, since I am biting into acrylic). As you can see, the DVD Burners have been placed along with the front fan, and the power / reset buttons. Additionally, you can see tons of drilled out holes. Most of them are there to straddle rivets, so that the acrylic piece sits flush to the case.
Here is the full 1" thick acrylic face, completely aligned, bolted up, tested, and straddling all of the components that interact with the face of the case. I wonder what those two large holes in the case about mid-way up could be for... Hmmmm.... The acrylic looks brown because of the protective paper that is on it from the factory. At this point, the acrylic face is just taped together. In the near future, I'll glue it up.
Now comes the time where I sand, grind, and sand some more, along with scraping off old stickers and adhesive gunk, and getting everything as polished as possible before I painted it. Sorry, no pictures of that part.
Time for the Finishing!
Wow. What an adventure. I wish I had been keeping track of hours spent, but I was more concerned with getting the case up and done... so, eh. At this point, I break out the solvents and wipe down the case to get all metal shavings, grease, grime, dirt, and last bits of sticker residue off the case, and all other parts I'll be painting.
First up, painting the case skeleton, the cut to size hex screens, all of the hardware, the HDD cage, and whatever else I needed for the internals installation.
Obviously, the first step is priming, so here are a bunch of pictures the case being primed...
I installed the I/O panel prior to priming and painting. You can see it in this picture. Yes, I did check to make sure it would line up, and guess what? It does! Yay me, I can use a ruler.
Lots of the misc sundry items in a state of primer.
The front of the case.
And now the back and side.
The nice thing about primer, it drys fast (I tend to get impatient about paint). Here comes the paint!
Here is the new and finished front of the case (that noone will ever see). It is rustoleum copper metallic spraypaint. I was surprised, it went on really nicely.
And here is the back...
The inside...
And now all of the misc doo-dads.
.
..
...
So...let me tell you now that I can be impatient, especially when I work on a project that I am stupidly excited about. To me, waiting for paint to dry is about equal to having your fingernails sheered off by bamboo stakes. Somehow, with a forced shower, a forced nap, and forced eating, I managed to get through it to where the paint was cured enough to handle gently (there was no way I could wait 48hrs - sorry just no way in hell it would have happened. Ever. Well, unless you drove me to another state and pushed me out of the car to walk home)


")


