Project Resevoir

Thanks for all the good lunk wishes!!!

I was hopeing to order the parts for the watercooling loop now at the start of the year trying to make the most of any sales, but money is to tight at the moment to do so, Im planning to move to canada for a year so I have to save for that. It looks like the project wont be completed as intended. I will however finish it as an air cooled system and transfer the parts from my main rig over into this case.

I'll be keeping an eye on ebay and the forsale sections to find a pump, so at least I will have water flowing through the reservoir. It will just be for looks but its better than nothing at all!!!!!!!!!!

Maybe I should change my new years resolution to finding sponsorship for this build??
 
I <3 this Mod!

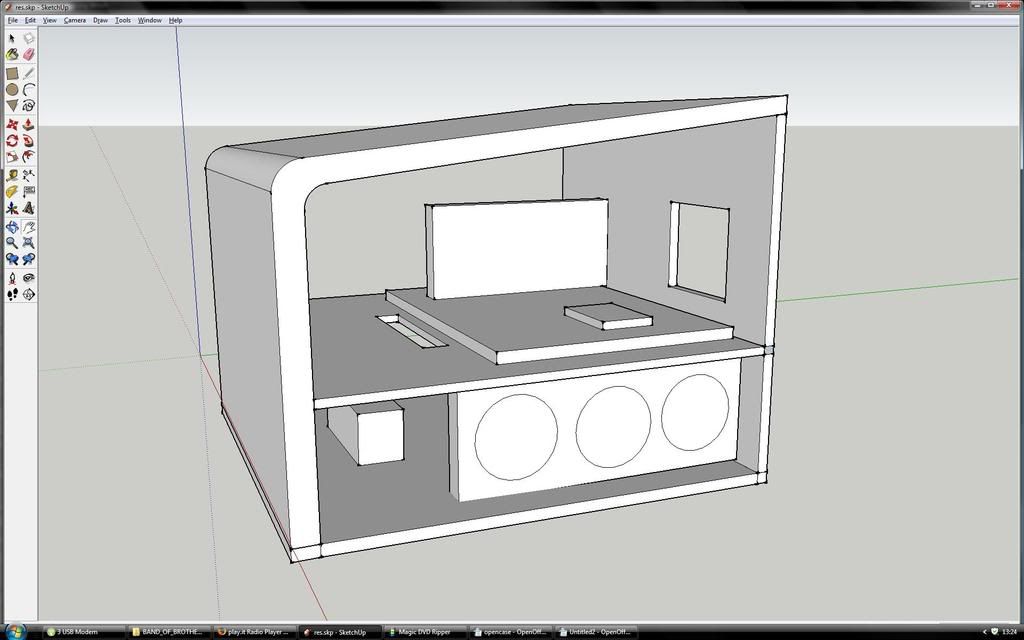
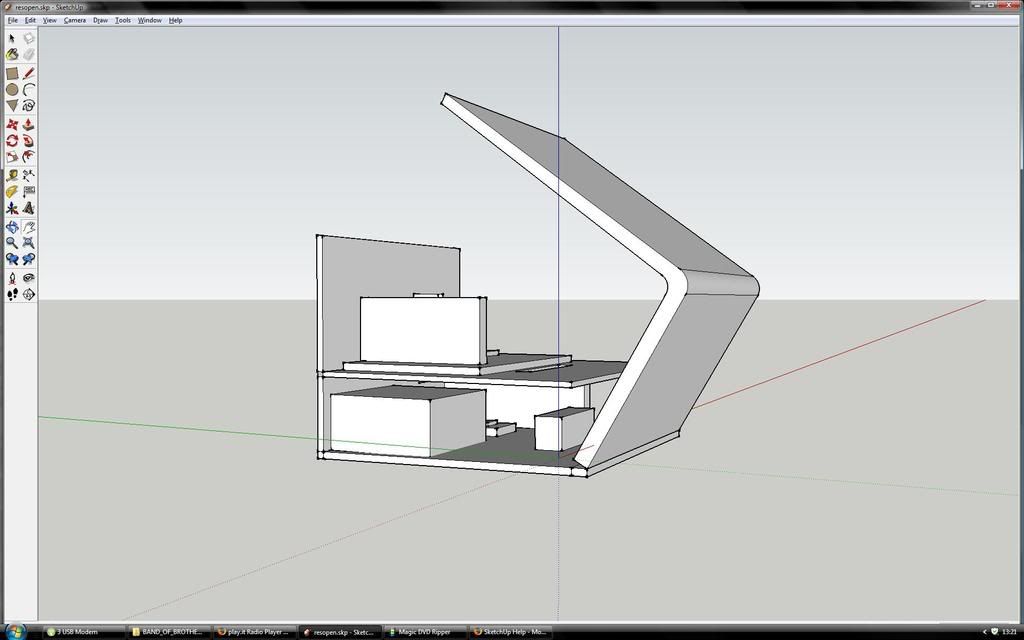
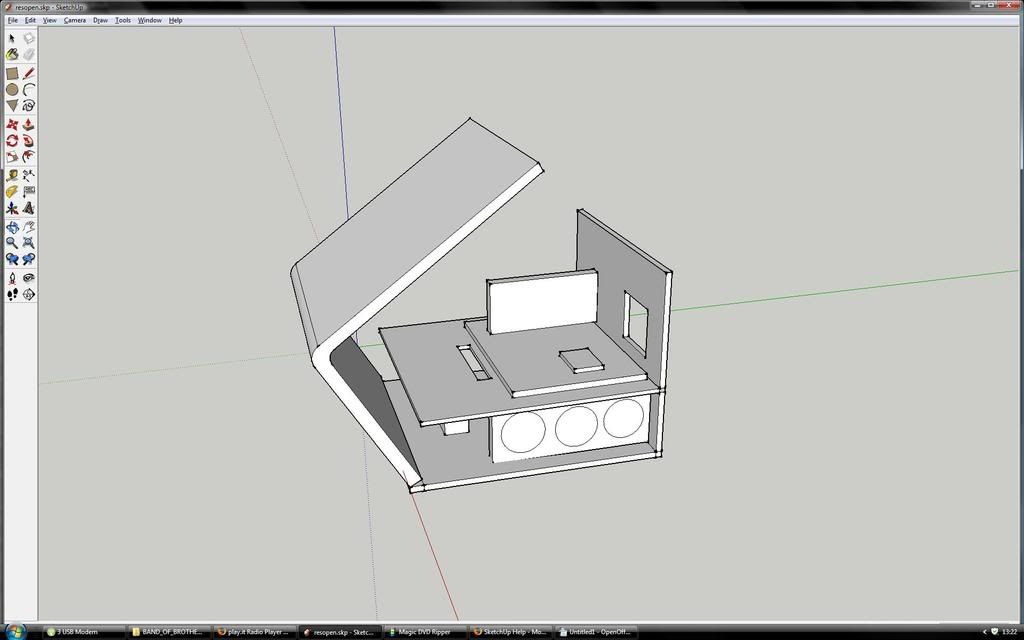
do you have any instructions on that toaster/bender mod thing?

I've been trying different ways of bending plexi, but without spending $200 on a professional bender, I always end up with massive amounts of bubbles in the plexiglass wherever I make bends.

I use a stove top burner with $2 in ceramic tiles, cheaper, possibly more dangerous. http://warmace.net/how-to-make-home-made-farkles/
 
If you got it from Home Depot, then its not cell cast or continuous cast, its extruded. I would not use it for holding water unless the parts you are using are not too important. You have already added alot of stress to the panels by bending them, and as they expand, they will likely sheer away from their bonds at the base, cracking. One thing you could try is using weldon 16 to fillet in the edges and add strength, but still... I would cross my fingers. Extruded doesnt do well with water.
 
@Warmace - Thats a crazy way to bend plexi, congrats. I hope a thread doesnt start detailing the most dangerous mods devised. Next stop A&E

@undertheradar - I've had water in the reservoir for a week so far, been adding hot water and then cold to stress test the perspex. I'll be using distilled water when I do power it up so it should reduce the chance of damage if there is a leak

The rear piece for the lower section is finished, check it out:

P1000564DesktopResolution.jpg
 
Finally assembeled the components into the case, this is just the first test of it so the cables wont be as tidy as they can be.
Lower section first:


P1000571DesktopResolution.jpg


Alot of dremel work to get back panel to look like this
P1000569DesktopResolution.jpg


Shot of the acrylic hdd mount
P1000566DesktopResolution.jpg


P1000565DesktopResolution.jpg


Showing the gap between psu and side of case for the cathode
P1000567DesktopResolution.jpg


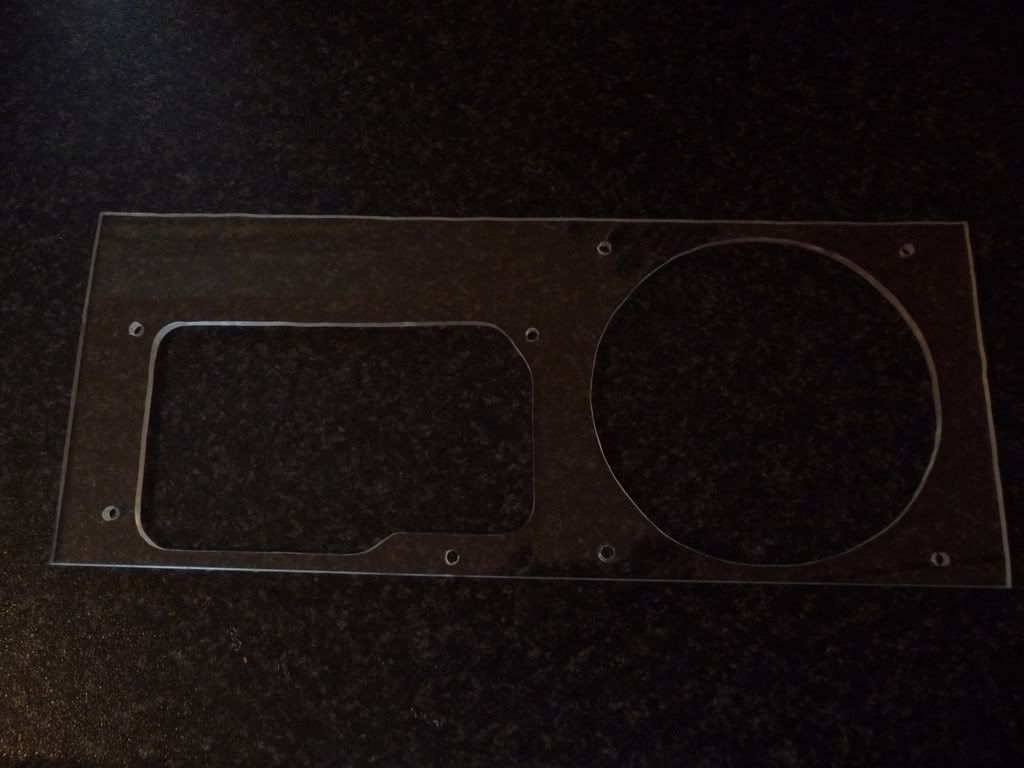
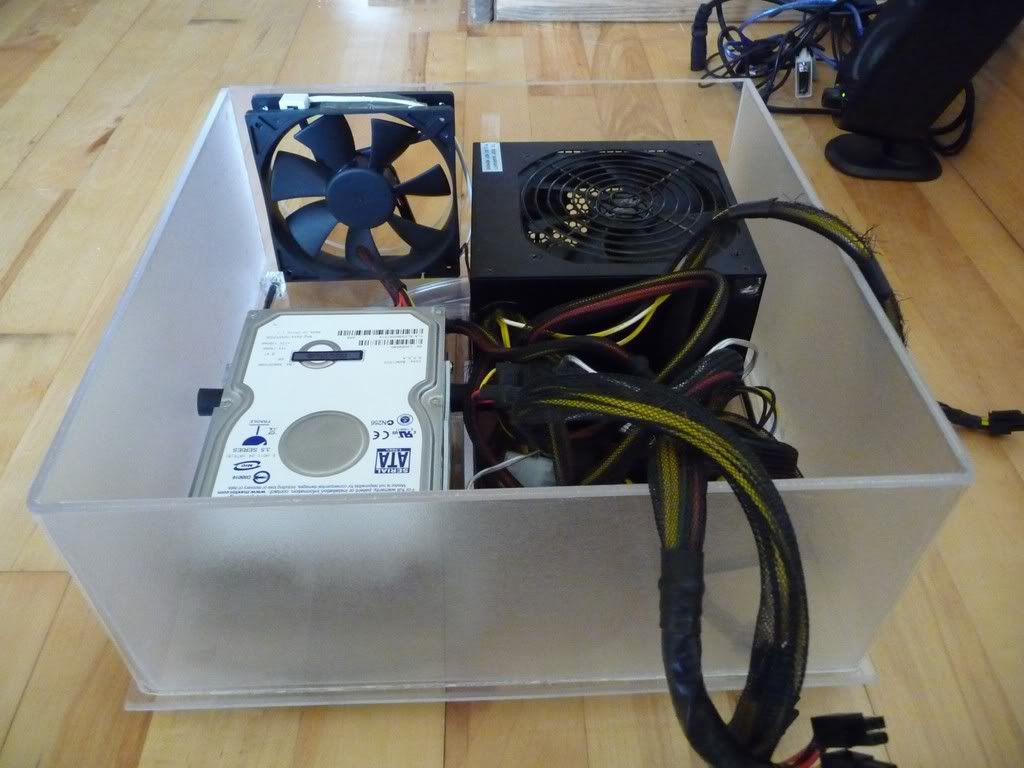
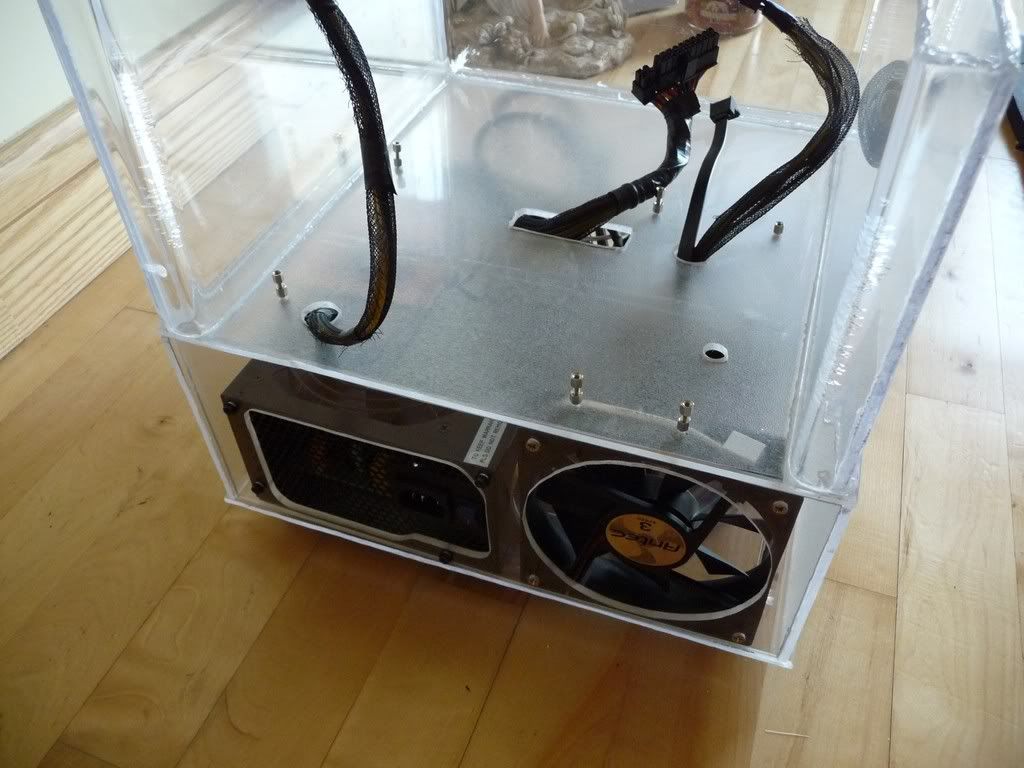
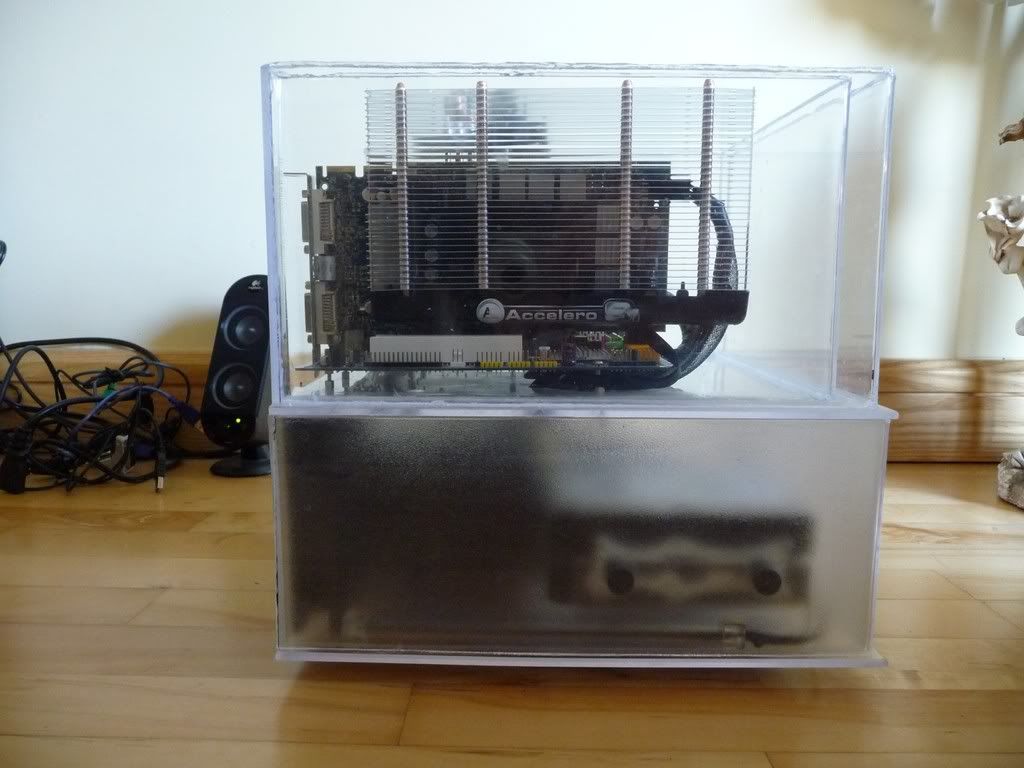
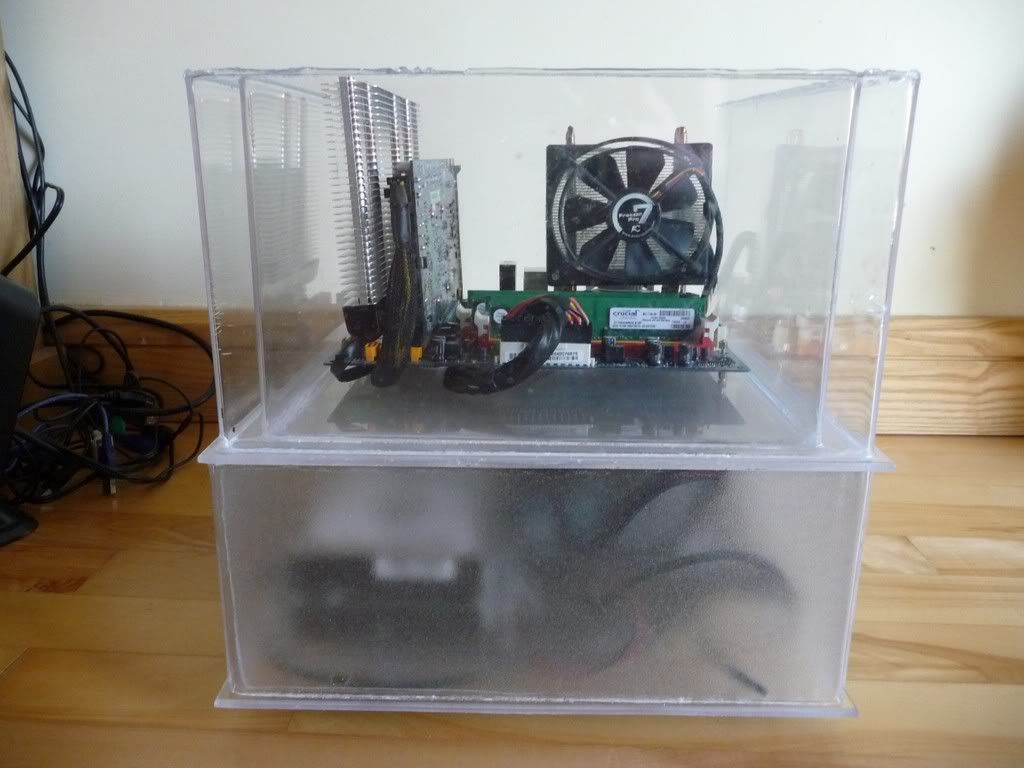
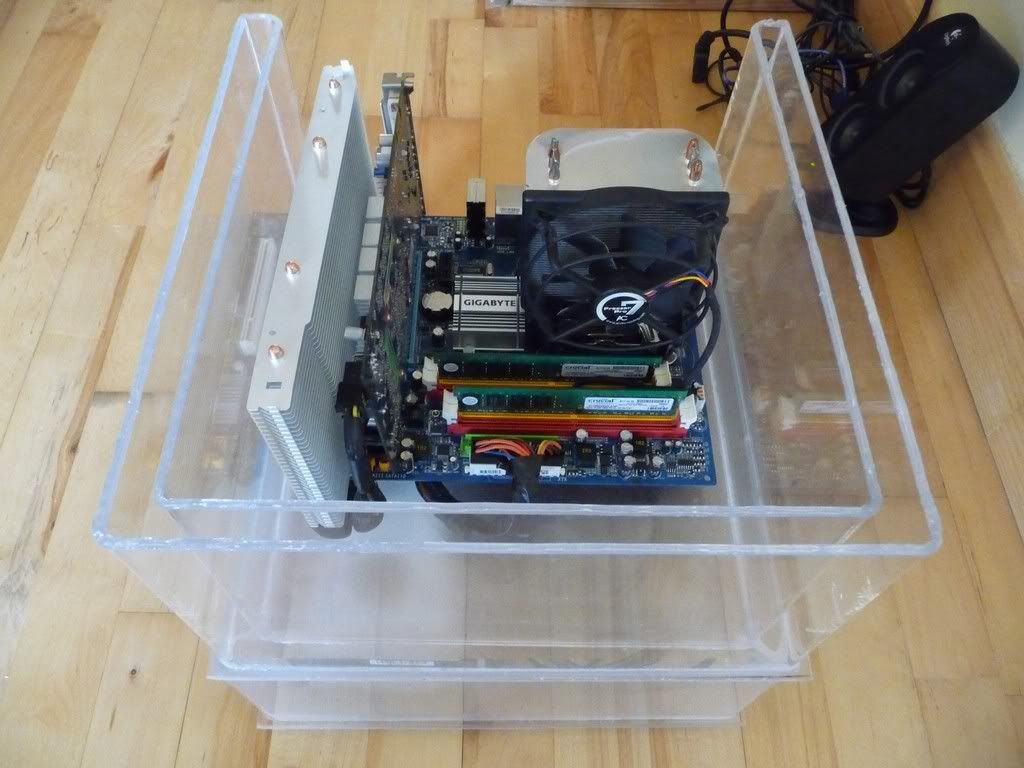
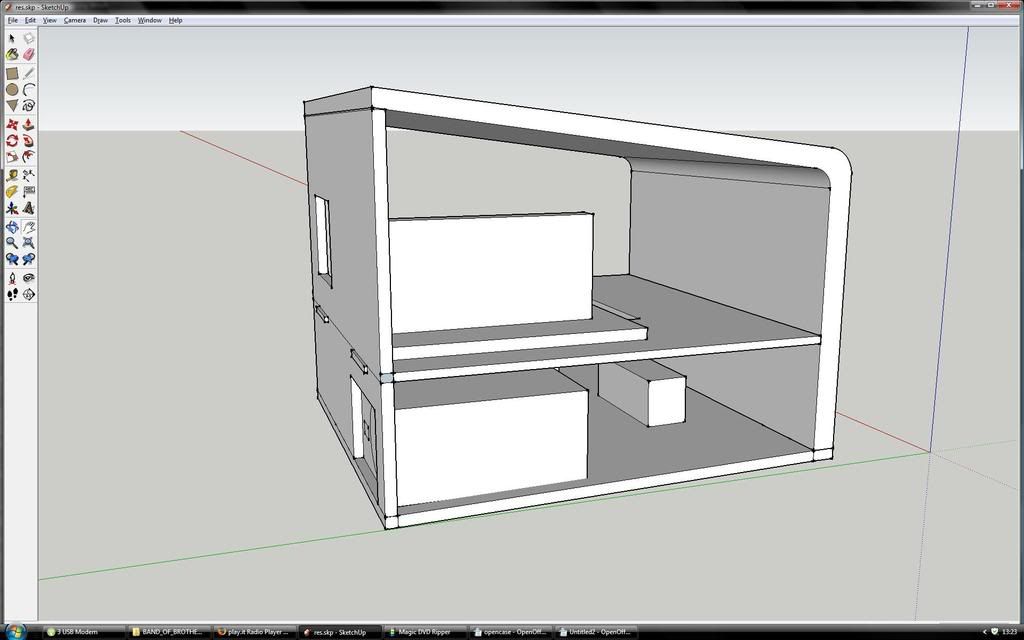
with the top section in place:
P1000572DesktopResolution.jpg


rear view
P1000574DesktopResolution.jpg


P1000576DesktopResolution.jpg


P1000577DesktopResolution.jpg


P1000575DesktopResolution.jpg


Im typing this post on the computer you see in the pics above, from the work done so far I've really learned alot about implementing ther original idea into a function pc. As stated in a post above I wont be getting the chance to watercool this system and test out the capabilities of using a case as a reservoir. Hopefully when I get settled down in Canada I'll give this idea another shot, the design will change alot to make the whole thing easier to take apart when a component needs to be replaced etc.

I've learned alot about using acrylic as a material to build cases with, its a great material and I'd definetly recommend it to anyone working on their own projects.

I'll post another shot tommorow showing the case at night and the lighting makes it look much better.

Thanks for all the helpfull and positive comments from you all during this worklog
 
That looks awesome! I love how the Acellero cooler looks on the side like that, looks pimp!

Great job. Good luck witht the Canada thing.
 
@hazexban - thanks man, at least over there I can have these parts cut to size for me.

After looking at this for a day I really like the way the wires route under the mobo, this hides them pretty well, they arent as visible as in the last case. I'd love to see a HR-03 in here with a CNPS9500, they would be much more attractive.
 
I'm getting ready to start a mod that includes cutting acrylic, i was wondering if you could let me know what you used to cut the PSU and Fan opening, It looks like it worked rather well for you.
 
@Nsillej - I cut out the center of the holes with a dremel and a cutting disc. I made the cut about 3-5mm away from the line itself(on the waste side of course). Then with a sanding drum on the dremel I just sanded away the remaining acrylic to the desired final result.

Remember when your drilling screw holes to make a mark with something pointy to act as a guide for the drill bit.

If you want pics I can pm them to you
 
I really do like the idea of this project.
The case itself looks really good for its first iteration of your idea brought to life, and getting your methods ironed out. I think you will be able to make a great looking case, maybe using tinted acrylic for the inner walls or something.
 
I really enjoy how the not so sexy components are out view and that makes up for the wiring mess in a transparent casing.
 
tuberc, hot and cold wont 'stress test' it in the way that Im talking about. Its not thermal stress that causes failure in this case. Acrylic (along with most other plastics) can absorb about 60% of its weight in water over time. This is what causes it to expand, joints to fail, etc... no matter what the temp is, you cant really speed this up. The only way to test it would be to put water in it for 3-6 months and see if it holds. I have had acrylic panels bonded across glass aquariums (opposite parappel sides) as baffles for filtration, and the pressure that the acrylic puts on the glass after 6-9 months is enough to rip the silicone apart at the glass joints, or even crack the glass panels (I have seen 1/4", and even 1/2" glass panels fail like this). Needless to say... I dont bond acrylic across opposite parallel glass panels anymore. The amazing thing is that it took a good 6 months in every case... I thought after one or two that 'if they didnt fail in the first 3 months' that I would be in the clear... not so. Heck, one even broke the glass AFTER I drained the tank and let it dry for a few days. The evaporation made the acrylic contract enough to crack the 3/8" glass panel it was siliconed to... just silicone!

If you are going to stick with extruded, I would do the weldon 16 in the edges (like a fillet of silicone on a glass aquarium around the inside edges). Might I suggest some sort of 'ducting' in case of failure? If you plug or bond additional 'buildups' around the holes around your mobo tray, and then offer a drain hole that takes the water away from the computer components underneath, this will likely save your components in case of failure. You can order acrylic pipe/tube from mcmaster or several other places... cutting this into 1/2" or 1" lengths and bonding them around the top of the holes in the mobo tray will prevent water from dripping through into the bottom. Since the mobo is up on stilts, a small leak (most likely rather than sudden catastrophic failure) isnt likely to touch it. Or, you could make little 4-sided boxes to go around those cable holes. The fact that you put the sides of the rez ON a bottom panel rather than AROUND could save you here in case of failure, might as well take advantage of it.
 
@warmace - I wont be finishing this case but the concept will live on! I already have a revised idea and will be drawing it on sketchup.

@jwill - I'd love to use different coloured acrylic but I havent found any nearby, I wont be living here much longer so when i move that option will be made available to me.

@bluesteel - thanks, Ive been thinking about putting tinted acrylic behind the clear stuff on the lower section, it sholud help with any lighting effects

@undertheradar - thanks again for passing on that info, the next version of the case will be made from cell case acrylic. Having ducting in place for any leaks was an important part of the design, especially water travelling down the holes/cables in the mobo tray.

that new Zotac iTX 9300 board looks really cool, I'd like to base a project around it
 
The 120mm fan in the picture is blowing air into the case to cool the 2 hdd's, that was just a temp setup to keep the drives alive. The final plan for air flow in the lower section was to have holes drilled into the base near the front, with some sort of filters to keep the air clean. Then that 120mm fan would be reversed to blow air out, that would have a front to back negative pressure flow. the fan would only need to be on its lowest setting to cool the hdd's.


The biggest problem I found with the design of this whole idea was gaining access to the components in the lower section, most of you reading this are probably like me and always chopping and changing parts of your systems. So even to take the psu out of the case means removing the mobo. The next evolution of this case will have hinges incorporated to open up the main parts for easier access, if only I can get used to sketchup and complete a drawing.
 
I actually find 3D Studio Max a lot easier to draw designs in than in Sketch-Up :)
 
Take a look at this design for the new revision of the case, its not to scale just a rough sketch to visualise the idea. Its still mATX, normal sized psu, radiator and pump in the lower section (no air intake drawn yet). Storage comprises one 3.5" 1Tb drive and one 2.5" SSD above it.

The water reservoir will be the a one piece top and front of the case, this will be hinged to allow easy access to the inside. The sides aren't drawn into this sketch yet. The motherboard tray will also be hinged and will open away from the lower section with the hinge on the back of the case

case1.jpg


case.jpg


opencase.jpg


opencase1.jpg
 
Back
Top