![[H]ard|Forum](/styles/hardforum/xenforo/logo_dark.png)
Navigation
Install the app
How to install the app on iOS
Follow along with the video below to see how to install our site as a web app on your home screen.
Note: This feature may not be available in some browsers.
More options
You are using an out of date browser. It may not display this or other websites correctly.
You should upgrade or use an alternative browser.
You should upgrade or use an alternative browser.
Project: PrometheusCu
- Thread starter SaibotC
- Start date
MurderCityDevil
Gawd
- Joined
- Dec 6, 2007
- Messages
- 724
This is one of the most clean, stylish, classy, professional, and overall awesome builds i've ever seen. the black and copper are totally great together man, you have fine style. love the gpu waterblocks also. Can't wait to see the finished result, particularly how you will manage wires. But a clean watercooling setup is one of the most beautiful things, especially when done well. Rock on man!
What is the max Watt per loop you're expecting? The chipset/MOSFET loop can't generate that much heat... Dunno, seems a bit overkill  The main loop could have 500+ Watt dumped into it from a quick calculation, so watercooling there seems perfectly alright, the chipset loop perhaps 100 Watt if you squint a bit?
Not that I'm complaining about overkill
The main loop could have 500+ Watt dumped into it from a quick calculation, so watercooling there seems perfectly alright, the chipset loop perhaps 100 Watt if you squint a bit?Not that I'm complaining about overkill
Markistehnamezor
Gawd
- Joined
- Jun 16, 2008
- Messages
- 808
That is sick. This case is really clean mods like tremeloe's builds.
@ZMTToxics - That's the best part. I love the military base.
@TooBooKoo - I agree, if there's space.
@MurderCityDevil - Thanks a lot man, I appreciate that.
@Elledan - I added the extra dedicated loop because I hadn't planned on cooling the NB/SB/Mosfets originally. When I got the blocks I figured it would be putting too much load on the 360, so I added a pump and a 120 rad.
@Markistehnamezor - Thanks
@TooBooKoo - I agree, if there's space.
@MurderCityDevil - Thanks a lot man, I appreciate that.
@Elledan - I added the extra dedicated loop because I hadn't planned on cooling the NB/SB/Mosfets originally. When I got the blocks I figured it would be putting too much load on the 360, so I added a pump and a 120 rad.
@Markistehnamezor - Thanks
The sun is out so I got some better pictures.
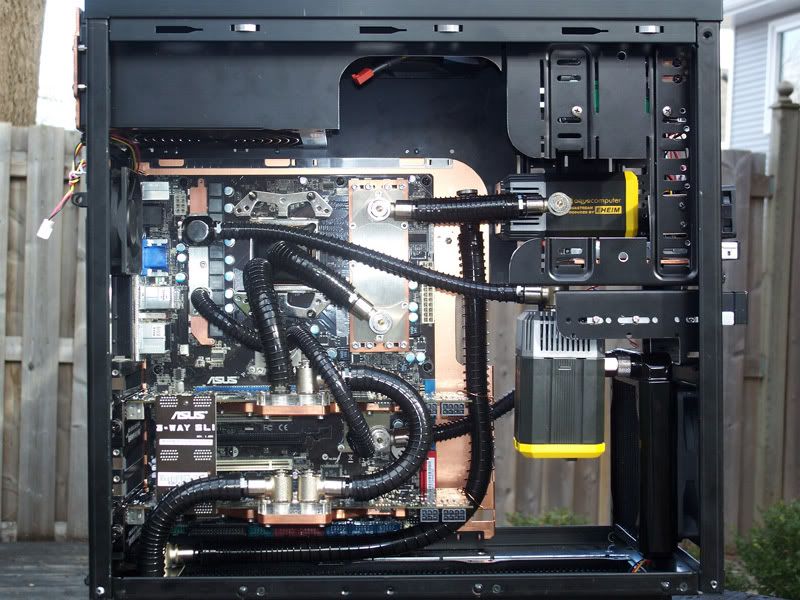
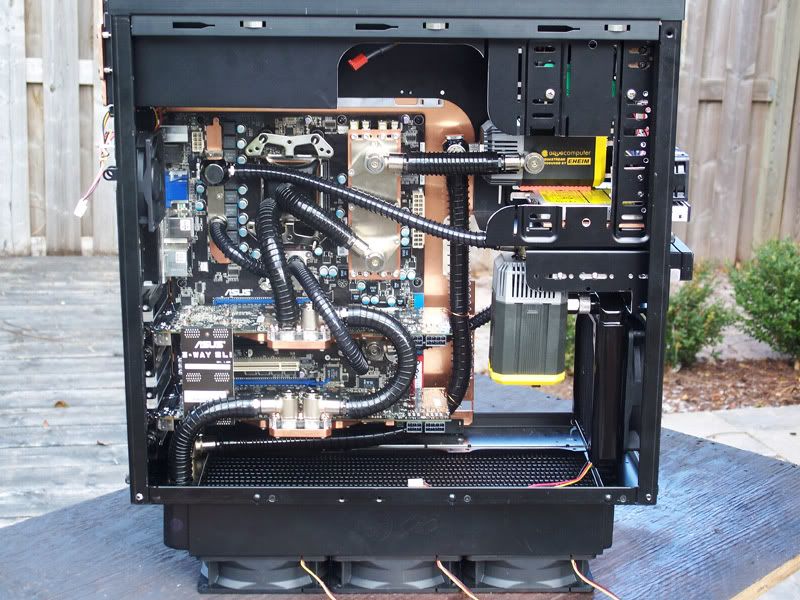
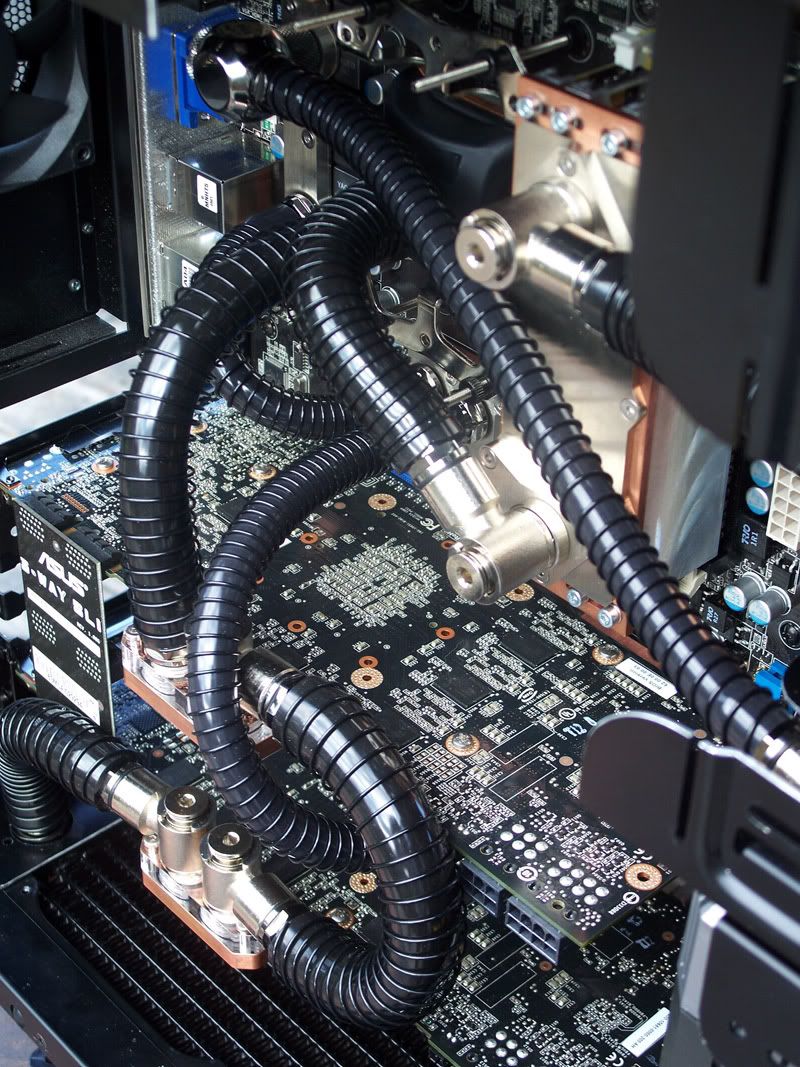
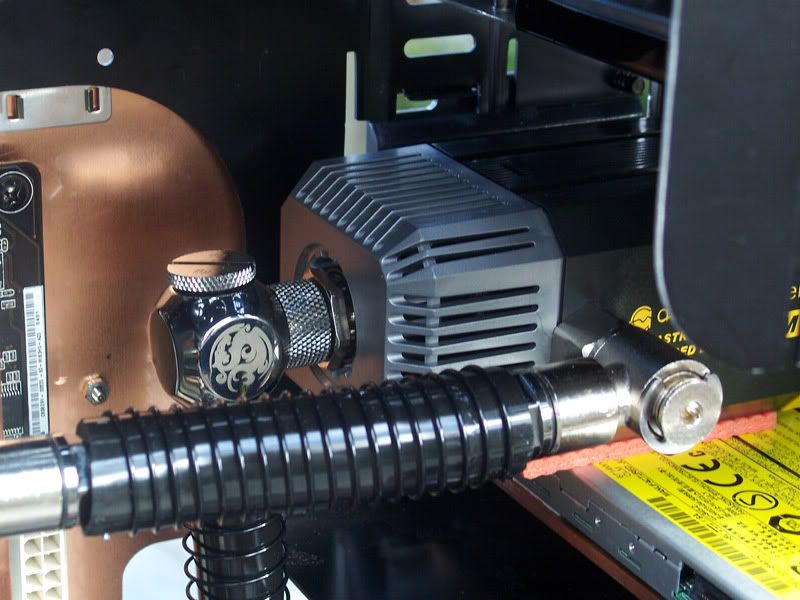
Here is the 'fillport' for the first loop - this will be a bit more complex later on.
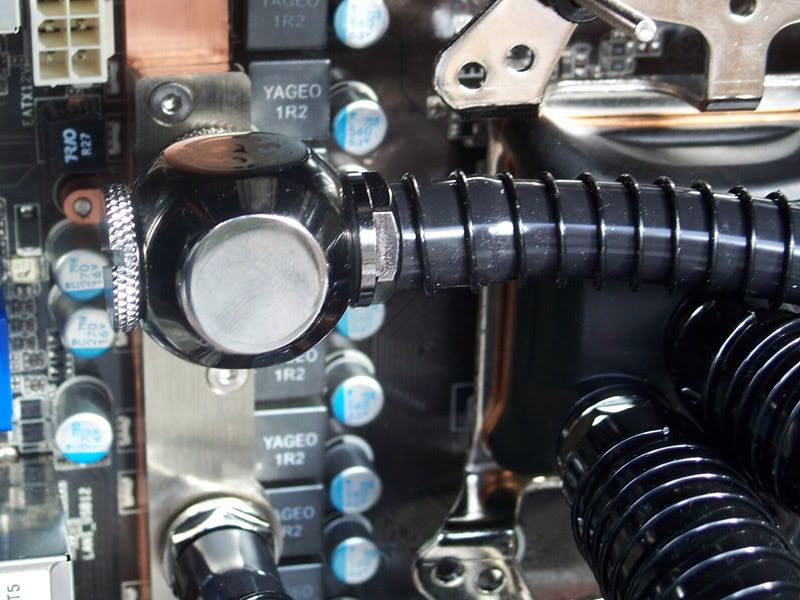
Here is the 'fillport' for the second loop, This T will be swapped for a Q and too will have a bit more added to it.
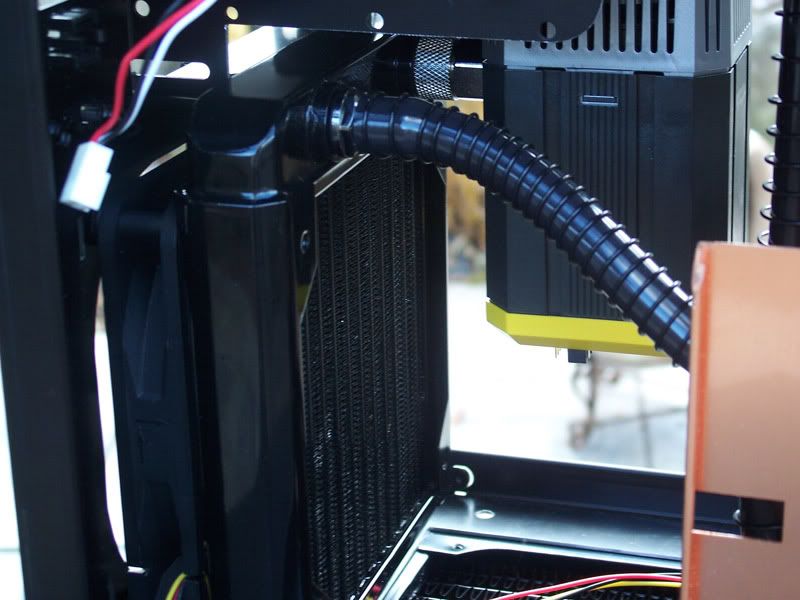
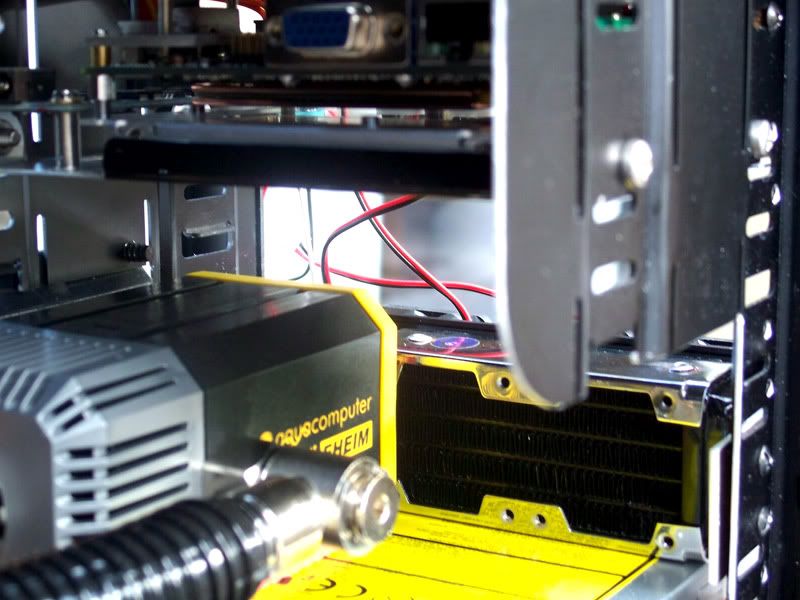
Here's where the Pico Rad will be mounted:
Here is a super simplified version of what will -sort of- be happening later.
*click for big*
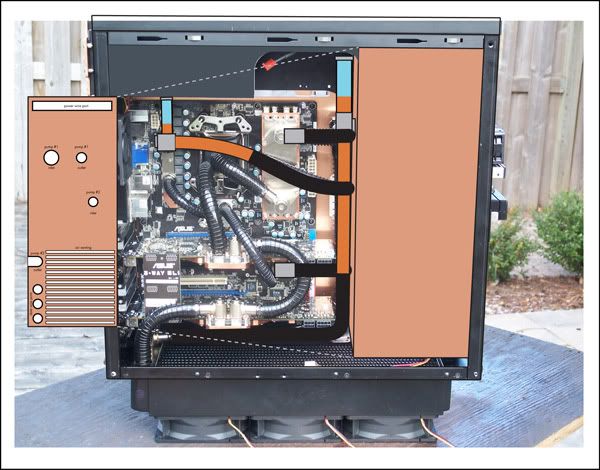
I must stress that this is just the beginning, I have quite a few surprises left for this loop.
Also I will note that because of the second loop I'll no-longer be running the blocks in parallel - like my first diagram showed. The added tubes of the second loop kind of ruined that plan.
SO much more coming.
Tune in soon.
Here is the 'fillport' for the first loop - this will be a bit more complex later on.
Here is the 'fillport' for the second loop, This T will be swapped for a Q and too will have a bit more added to it.
Here's where the Pico Rad will be mounted:
Here is a super simplified version of what will -sort of- be happening later.
*click for big*
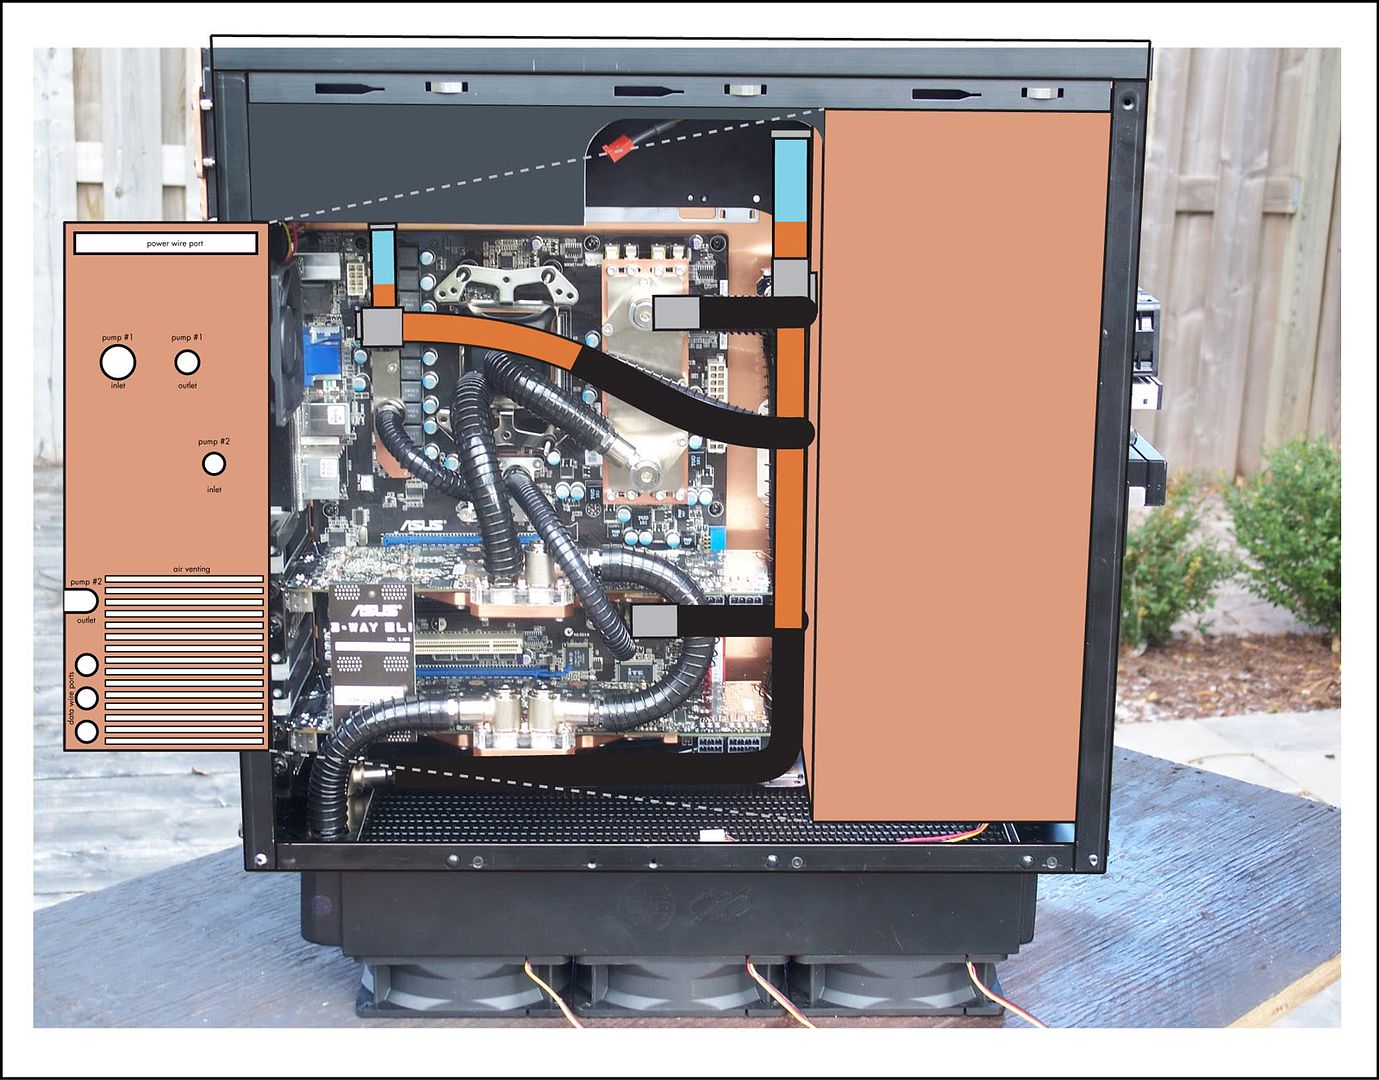
I must stress that this is just the beginning, I have quite a few surprises left for this loop.
Also I will note that because of the second loop I'll no-longer be running the blocks in parallel - like my first diagram showed. The added tubes of the second loop kind of ruined that plan.
SO much more coming.
Tune in soon.
silent-circuit
[H]F Junkie
- Joined
- Sep 18, 2005
- Messages
- 16,132
Is there going to be anything holding those fans off the ground?
He showed several CAD renders one or two pages back. Yes, they will be off the ground.
@F.E.A.R. - Thanks man.
@Vinnard - Check back on page10-12 I think that's where I posted the illustrations.
@silent-circuit - Thanks.
@edinator - I too am curious about this, but I think the pump can handle the load. I have room for two more 120mm rads and another pump wost case.
@Hilmarhd - Thanks mate.
I just made another YET ANOTHER order from Performance-PCs today. Now I'm onto the wiring stage, so I finally know what I'll need.
Power Connectors:
4 x Connectx SATA 90deg Connector Female - End Cap
4 x Connectx SATA 90deg Connector Female - Pass-through Cap
5 x Connectx 4-Pin Floppy Connector Female
8 x Connectx 6-Pin PCI Express Connector Female
8 x Connectx 8-pin PCI Express Connector Female
10 x Connectx 3-Pin Fan Connector Female
5 x Connectx 3-Pin Fan Connector Male
2 x Connectx 24-pin ATX Connector Female
7 x USB 2 X 5 Header Connector Female
Power Pins:
80 x USB Header Female Pins
200 x Connectx ATX Female Pins
100 x Connectx Molex 4pin Female Pins
100 x Connectx Molex 4pin Male Pins
60 x Connectx Floppy 4pin Female Pins
Data Cables:
4 x E-SATA II Cable w/ Metal Latch - 6'
4 x SATA II Cable w/ Metal Latch - Straight to 90deg - 18"
2 x A.C. Ryan Dual Internal SATA to eSATA PCI Bracket
Cooling:
36" x PrimoFlex Pro LRT Clear Tubing - 1/2"ID X 3/4"OD
36" x PrimoFlex Pro LRT Clear Tubing - 3/8"ID X 1/2"OD
16 x Clamps for 1/2" Tubing
10 x Clamps for 3/8" Tubing
2 x Bitspower G1/4" Stop Fitting
6 x Bitspower Premium G1/4" Fitting Spacer
1 x Bitspower Rotary "Q" - Dark Nickel Plated
Misc:
10 x Cord Clips 3/8" x 3/8"
24" x Heatshrink 3:1 - 1"ID
50 x Black Aluminum Pop Rivets 1/8" X 1/4"
Sub-Total: ~$300US
Suffice to say, there's more coming. Tune in soon.
PS:
In this picture:
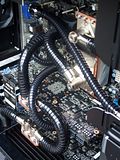
You can see the difference in colour between the two tubing sizes - the colour difference is much more apparent to the human eye... luckily I'll be sleeving the tubes.
@Vinnard - Check back on page10-12 I think that's where I posted the illustrations.
@silent-circuit - Thanks.
@edinator - I too am curious about this, but I think the pump can handle the load. I have room for two more 120mm rads and another pump wost case.
@Hilmarhd - Thanks mate.
I just made another YET ANOTHER order from Performance-PCs today. Now I'm onto the wiring stage, so I finally know what I'll need.
Power Connectors:
4 x Connectx SATA 90deg Connector Female - End Cap
4 x Connectx SATA 90deg Connector Female - Pass-through Cap
5 x Connectx 4-Pin Floppy Connector Female
8 x Connectx 6-Pin PCI Express Connector Female
8 x Connectx 8-pin PCI Express Connector Female
10 x Connectx 3-Pin Fan Connector Female
5 x Connectx 3-Pin Fan Connector Male
2 x Connectx 24-pin ATX Connector Female
7 x USB 2 X 5 Header Connector Female
Power Pins:
80 x USB Header Female Pins
200 x Connectx ATX Female Pins
100 x Connectx Molex 4pin Female Pins
100 x Connectx Molex 4pin Male Pins
60 x Connectx Floppy 4pin Female Pins
Data Cables:
4 x E-SATA II Cable w/ Metal Latch - 6'
4 x SATA II Cable w/ Metal Latch - Straight to 90deg - 18"
2 x A.C. Ryan Dual Internal SATA to eSATA PCI Bracket
Cooling:
36" x PrimoFlex Pro LRT Clear Tubing - 1/2"ID X 3/4"OD
36" x PrimoFlex Pro LRT Clear Tubing - 3/8"ID X 1/2"OD
16 x Clamps for 1/2" Tubing
10 x Clamps for 3/8" Tubing
2 x Bitspower G1/4" Stop Fitting
6 x Bitspower Premium G1/4" Fitting Spacer
1 x Bitspower Rotary "Q" - Dark Nickel Plated
Misc:
10 x Cord Clips 3/8" x 3/8"
24" x Heatshrink 3:1 - 1"ID
50 x Black Aluminum Pop Rivets 1/8" X 1/4"
Sub-Total: ~$300US
Suffice to say, there's more coming. Tune in soon.
PS:
In this picture:
You can see the difference in colour between the two tubing sizes - the colour difference is much more apparent to the human eye... luckily I'll be sleeving the tubes.
best [486]
Limp Gawd
- Joined
- Aug 28, 2005
- Messages
- 476
On the graphics card blocks, why did they make the only part out of plexiglass, the threaded part with the barbs, seems badly designed...
I just got my receipt from CableOrganizer.com (finally, damn eChecks take too long to clear!) - I got the below:
225' - 0.125" Nylon Multifilament Sleeve (MSNYMF0125)
200' - 0.1875" Nylon Multifilament Sleeve (MSNYMF01875)
200' - 0.25" Nylon Multifilament Sleeve (MSNYMF025)
100' - 0.50" Nylon Multifilament Sleeve (MSNYMF050)
75' - 0.75" Nylon Multifilament Sleeve (MSNYMF075)
25' - 2.5" DuraWrap Ballistic Nylon Side-Entry Sleeve (MSDW250)
25' - 0.25" 2:1 Heatshrink (HS2-025FT)
25' - 0.5" 2:1 Heatshrink (HS2-050FT)
5' - 0.75" 4:1 Heatshrink (HS4-075-FT)
To- be shipped on the 28th... a bit behind schedule, but hopefully not an issue.
225' - 0.125" Nylon Multifilament Sleeve (MSNYMF0125)
200' - 0.1875" Nylon Multifilament Sleeve (MSNYMF01875)
200' - 0.25" Nylon Multifilament Sleeve (MSNYMF025)
100' - 0.50" Nylon Multifilament Sleeve (MSNYMF050)
75' - 0.75" Nylon Multifilament Sleeve (MSNYMF075)
25' - 2.5" DuraWrap Ballistic Nylon Side-Entry Sleeve (MSDW250)
25' - 0.25" 2:1 Heatshrink (HS2-025FT)
25' - 0.5" 2:1 Heatshrink (HS2-050FT)
5' - 0.75" 4:1 Heatshrink (HS4-075-FT)
To- be shipped on the 28th... a bit behind schedule, but hopefully not an issue.
Markistehnamezor
Gawd
- Joined
- Jun 16, 2008
- Messages
- 808
You should make a video on how you filled your loop. It still confuses me on how your going to do it.
best [486]
Limp Gawd
- Joined
- Aug 28, 2005
- Messages
- 476
I see the complaint structurally, but it's not an issue - polycarb is plenty strong for the application.
They probably opted for the polycarbonate because the seal between plastic metal will be better than metal on metal.
I hope they put a O-ring on it to seal it, if so, then it shouldn't matter what the 2 materials are, in my experience lexan/ polycarbonate is really brittle, my maze 4 chipset's top cracked, so did the thermaltake block that earned them a line in my sig, also, my glasses have a little crack in the side of one of the lenses, from dropping them a foot...
You should make a video on how you filled your loop. It still confuses me on how your going to do it.
Here is the 'fillport' for the first loop - this will be a bit more complex later on.
Here is the 'fillport' for the second loop, This T will be swapped for a Q and too will have a bit more added to it.
These are the fillports...
Markistehnamezor
Gawd
- Joined
- Jun 16, 2008
- Messages
- 808
I know those are the fillports, just the way he would add the liquid confuses me.

Markistehnamezor
Gawd
- Joined
- Jun 16, 2008
- Messages
- 808
cool. now i get it.
.MurderCityDevil
Gawd
- Joined
- Dec 6, 2007
- Messages
- 724
it's a shame you won't be able to see the custom engraved gpu blocks. i was always disappointed that the art on video card covers was never even visible in a standard mobo mounted vertically.
@MurderCityDevil - Remember this?

Here in the early hours of the morning I came up with a method of running the ATX and 12V lines between the motherboard and the mobo-tray - only to emerge right next to the PSU.
What I have come up with will involve soldering the power lines right to the mobo.
Also I'll be making a cut though the mobo tray beneath the ethernet port - I intend to solder a second port onto the bottom of the mobo, making it easier to wire the mobo to the Alix router.
I'll post a proper illustration - my brain fart doodling is indecipherable. Methinks it'll be tomorrow evening as I'm now off to bed now.
Here in the early hours of the morning I came up with a method of running the ATX and 12V lines between the motherboard and the mobo-tray - only to emerge right next to the PSU.
What I have come up with will involve soldering the power lines right to the mobo.
Also I'll be making a cut though the mobo tray beneath the ethernet port - I intend to solder a second port onto the bottom of the mobo, making it easier to wire the mobo to the Alix router.
I'll post a proper illustration - my brain fart doodling is indecipherable. Methinks it'll be tomorrow evening as I'm now off to bed now.
Arcygenical
Fully [H]
- Joined
- Jun 10, 2005
- Messages
- 25,066
MurderCityDevil
Gawd
- Joined
- Dec 6, 2007
- Messages
- 724
haha for a split second i thought that was a pic of a lapped cpu
but yeah, that will do the job well. it seems you really have thought of everything. keep up the good work man!
but yeah, that will do the job well. it seems you really have thought of everything. keep up the good work man!
Here's a very quick and dirty diagram to roughly show my intent with soldering the ATX and 12V lines to the bottom of the mobo.
I had a short run of (1250ft, lol.. minimum manufacturing length) 24conductor 18agage 'PrometheusCU edition' ribbon cable manufactured by ITW Pancon especially for this (and alot fo the other wires) purpose.
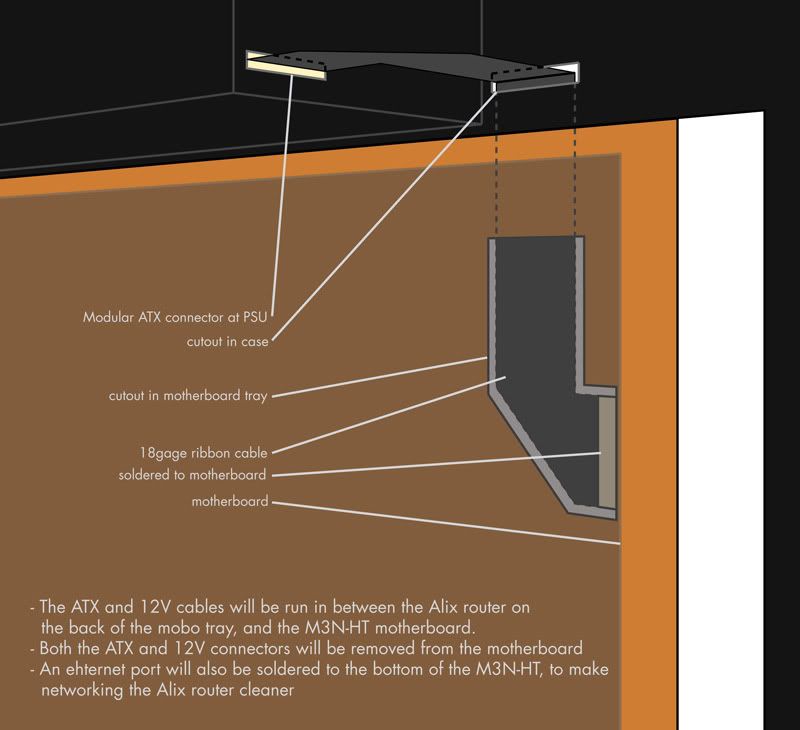
I had a short run of (1250ft, lol.. minimum manufacturing length) 24conductor 18agage 'PrometheusCU edition' ribbon cable manufactured by ITW Pancon especially for this (and alot fo the other wires) purpose.
Arcygenical
Fully [H]
- Joined
- Jun 10, 2005
- Messages
- 25,066
had a short run of (1250ft)
Dude, I could have got you 24conductor 18g ribbon cable for like, 22c a foot locally here... You had 1250 feet made for you?
That's hardcore.
This has a 0" pitch, meaning it has no spacing between wires, It's also black.
I called almost every wire manufacturer in North America, and a few in Europe - no-one made the product I wanted.
For some reason this is a very rare cable... or I'm just too damn anal.
I called almost every wire manufacturer in North America, and a few in Europe - no-one made the product I wanted.
For some reason this is a very rare cable... or I'm just too damn anal.
Arcygenical
Fully [H]
- Joined
- Jun 10, 2005
- Messages
- 25,066
Yep, I've got the same stuff, in 400m rolls in the china-town district of my home town
Might I ask you how much the roll set you back?
Might I ask you how much the roll set you back?
Spoonology
n00b
- Joined
- Nov 23, 2008
- Messages
- 34
This is going to amazing once finished, how much has it cost as yet?
OofC_S7v7N
Gawd
- Joined
- Apr 9, 2007
- Messages
- 723
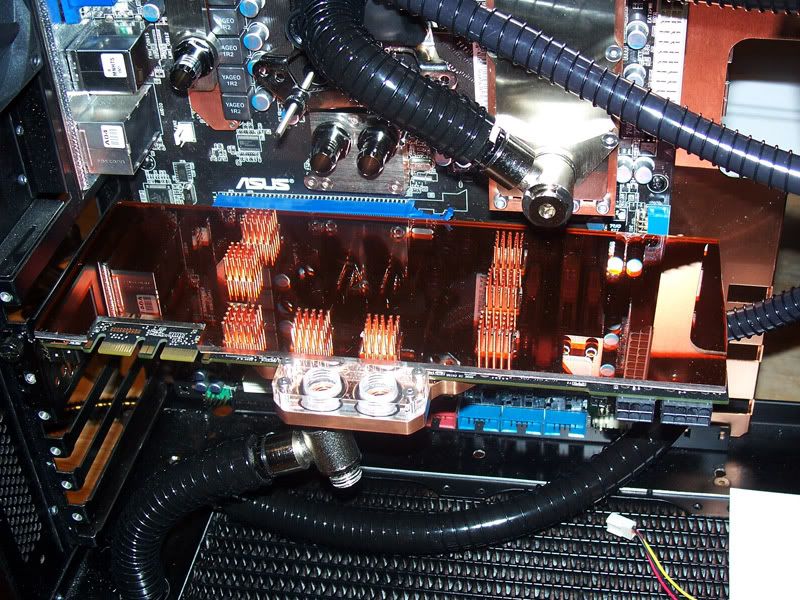
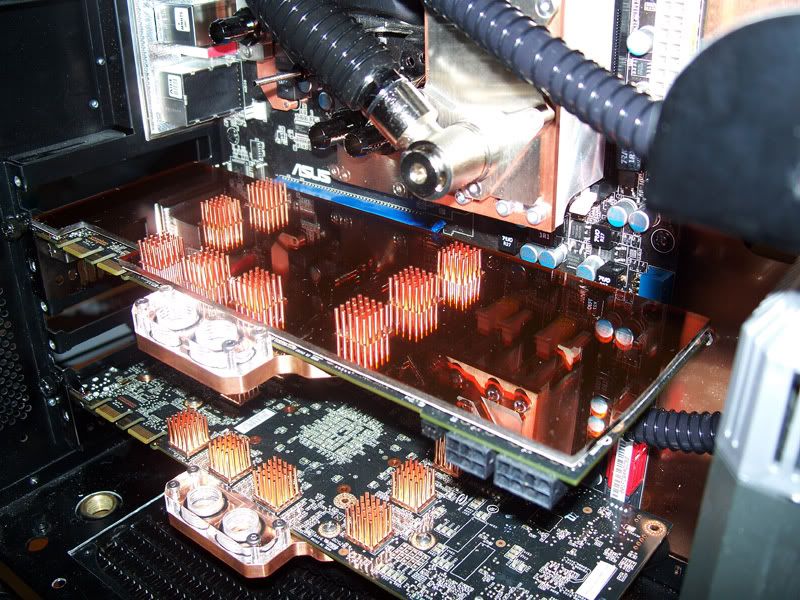
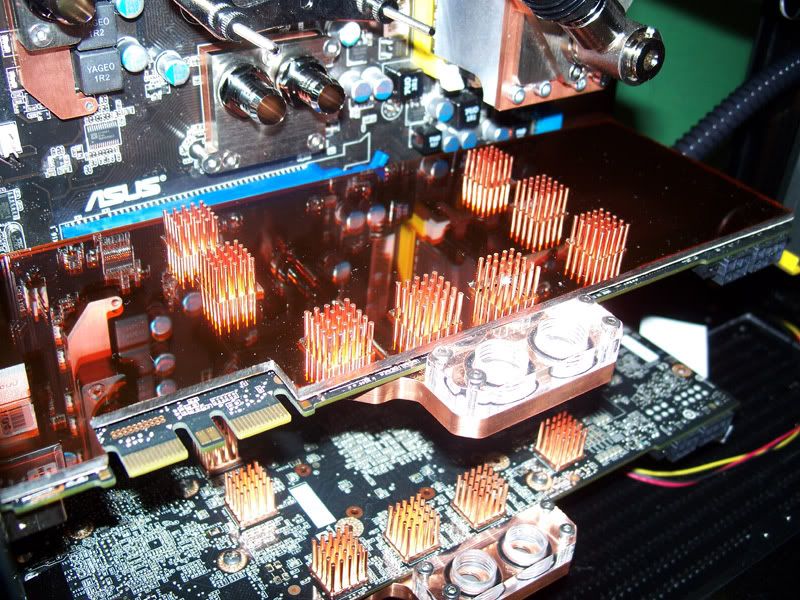
Is that copper serving no other purpose than just aesthetics? And 15gs does not impress me one bit.
Is that copper serving no other purpose than just aesthetics? And 15gs does not impress me one bit.
Damn, time to scrap the project, OofC_S7v7N isn't impressed. Looks like this was a waste of time.
-(Xyphox)-
Supreme [H]ardness
- Joined
- Sep 9, 2004
- Messages
- 6,518
looking awesome, cant wait to see more