phinix nanoTower - Smallest and most powerful mITX rig !

phinix

Gawd
Joined
Dec 13, 2005
Messages
884
Ladies and Gentlemen

for the second time, welcome to my project log!
After my first scratch - build - Phinix Cube - I decided to start new little adventure, little enough to call it NANO :)

First plan was to case-mod Lian Li A05 case, I'm sure some of you saw introduction to this project, but after some heavy thinking I decided to scratch build again:) I just didn't feel like modding case, when so many projects have been done with it already. You can find so many beautiful builds, I didn't feel like I could bring any new fresh ideas to this case. I felt I have to do something extraordinary, something better than we all have seen already, something that will open everyone's mouths and drop their jaws on the floor:)

Right now Nano Tower is in the first stage - planning and gathering materials and hardware.
I will update it every time I make a next step. Right now, short introduction...


picture.php


As you could already noticed from my previous build I'm always trying to use smallest dimensions I can get, to create great performance unit without any sacrifices on power and abilities. What I want to make is a case that its base will be smallest as possible, so it won't take a lot of space on my desk. To do that I would have to make it a bit taller, so that is why I decided to build tower-shaped case. Is it going to be tall? Tall just enough to take the longest graphic card on market. Engineering sample of dual chip ATI 5970 had ~34cm, so anything like that monster must go in my case.. just in case I win a lottery and buy one;)
Also I want to cool it with water. Baaah... not one loop, but two!:) Yep, why not! One loop for CPU, one for GPU, so these two elements won't make any influence on temps of each other, adding more heat into the loop. After reading so many good reviews of that Corsair H50 cooler I decided to get one for my new i5. What about GPU? having in mind that it's not out yet, I can predict that triple radiator will be enough for dual chip graphic card.

I built my Cube from acrylic, now its time for aluminium!

So, it will have small base, 20x20cm, it will be tall - main aluminium structure rods have 40cm. Tall, smooth tower - this kind of shape will look really good and a bit "mysterious"! :D Don't you think?:)

Now, to make it more difficult for myself, apart of longest card and i5, two loops of water cooling, internal, I will squeeze in two SSD drives in RAID0, one 2.5"HDD and one slim dvd drive. What else? Full size ATX PSU, 750W modular.
I think that will make it difficult enough to get your attention:)

So, here it is, main idea, general plans and hardware that will be used to create Nano-Tower:

Main ideas :


  • install motherboard in vertical position, so I/O panel will be on top
  • water cooling system installation, two loops, one for CPU (Corsair H50), one for GPU
  • vertical PSU installation, power cable will go outside through the bottom panel
  • laser cut window installation on the left and right panel
  • fabricate mesh-radiator grill for top of the case a'la TJ-07 (clean mesh)
  • some nice laser-cut front panel
  • lighting system installation


Hardware:

  • i5 750 watercooled
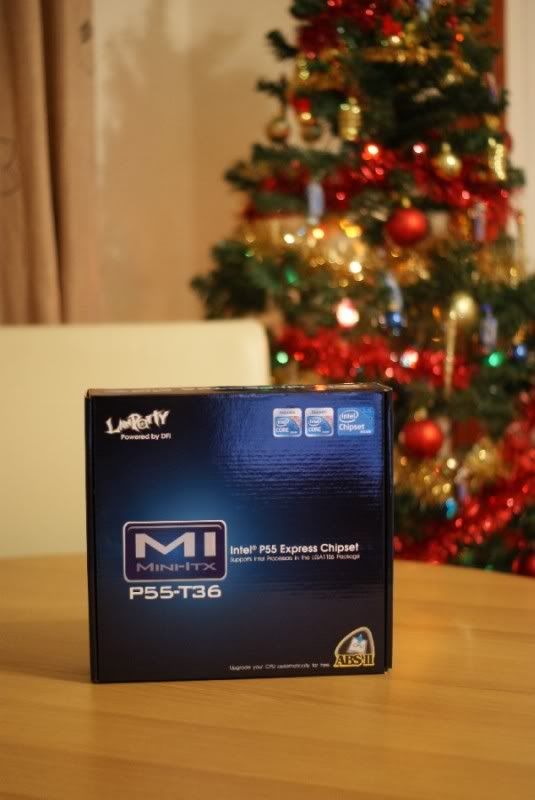
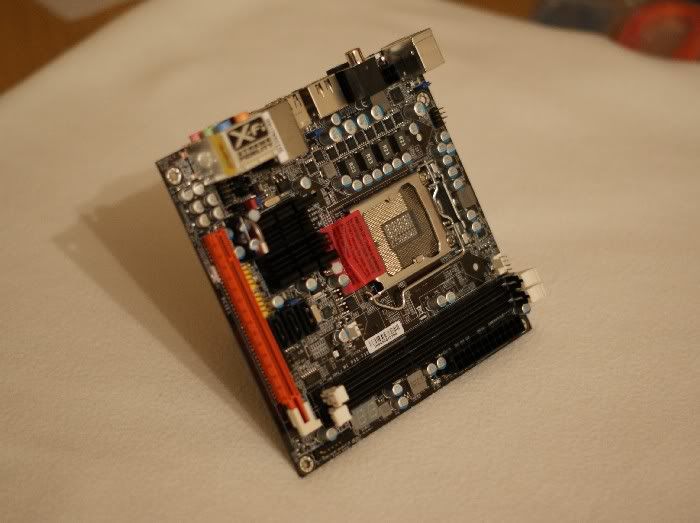
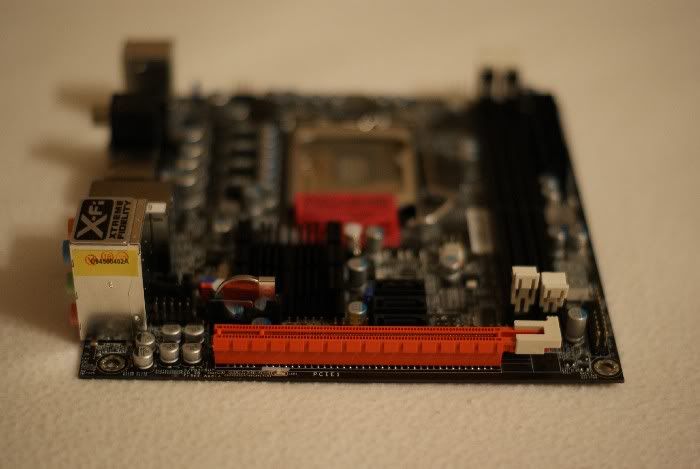
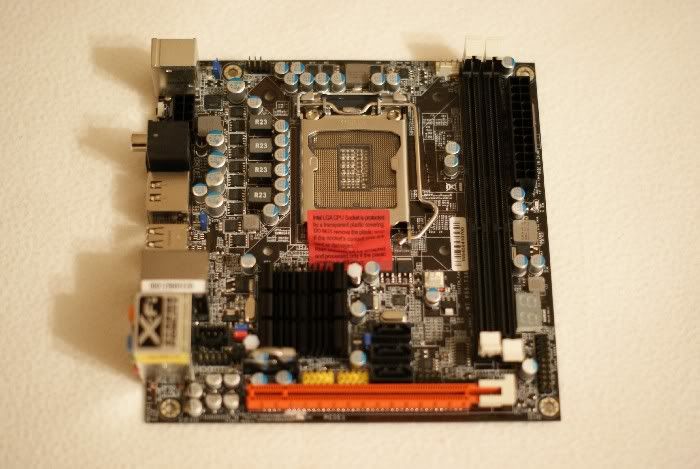
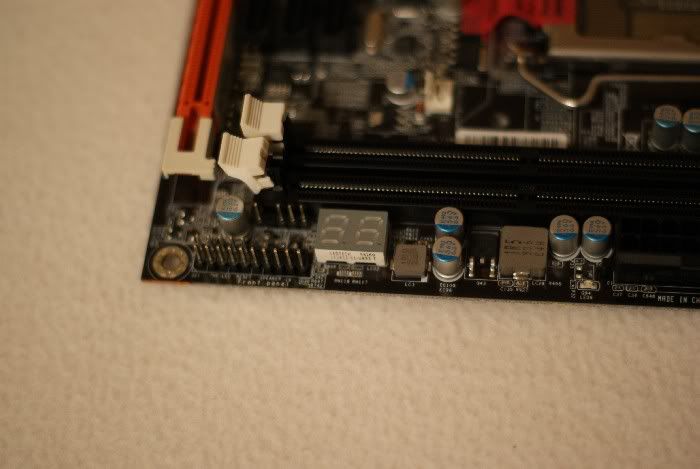
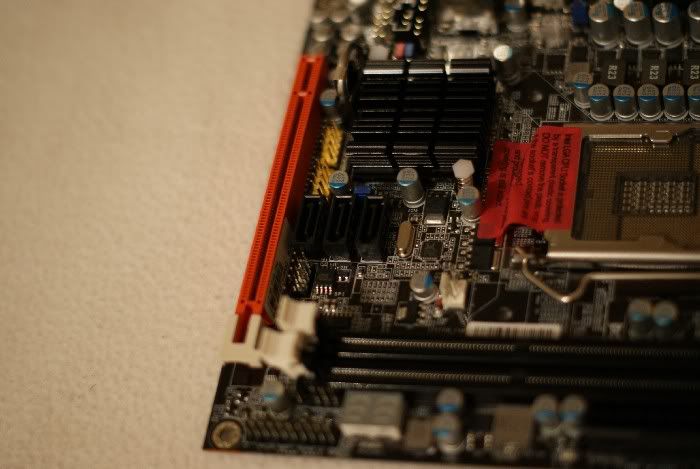
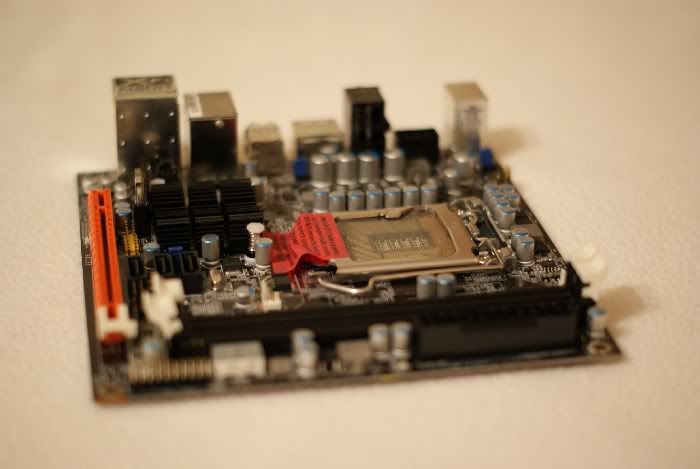
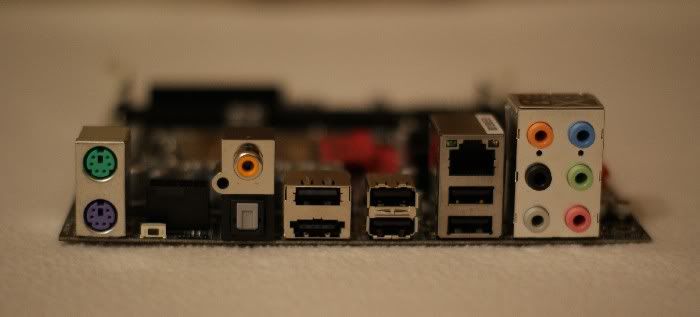
  • DFI MI P55-T36 mITX motherboard - first and most powerful mITX mobo on market !!!
  • new generation graphic card (also watercooled, right now I got GTX295, but waiting for Fermi :))
  • 4GB dual channel DDR3 CRUCIAL Ballistix Tracer memory !!!
  • 2x SSD RAID0 as OS drive
  • 1x 2.5" HDD as games drive
  • 750W Modular PSU


Water cooling system:


  • Corsair H50 watercooling kit for CPU
  • EK 4.0 pump + combo reservoir
  • triple EK-CoolStream RAD XT (360) radiator for GPU loop
  • GPU water block
  • Bitspower silver compression fittings
  • Feser tubing (yellow)
  • 3x 120mm YateLoon SL slim fans for triple radiator
  • Akasa Apache fan to use on H50


Additional - EXTRA stuff:


  • Switches and fan controller to control all lights and fans.
  • leds to light it all up:)
  • yellow acrylic.. a lot...:)


Project color scheme : black and yellow!


My NanoTower Project is sponsored by:

DFI

logo.gif

picture.php


Check this out here.


CRUCIAL

Crucial_TheMemoryExperts_REV.gif


Check this out here.


MNPCTECH

picture.php


Check this out here.


EK Water Blocks

logo.png


EK gave me huge discount on their products so I ordered these - check this out here


PHENOPTIX

store_logo.png


Ben from Phenoptix is sponsoring all lightning equipment in this project!


BITSPOWER

bitspower-logo.jpg


Vincent from Bitspower will sponsor all amazing Bitspower goodies!


*** AQUATUNING ***

picture.php


Aquatuning will sponsor quick release fittings sets for my water cooling loop !!!


*** ANTEC ***

yellow.jpg


Antec will support my project with their fantastic TruePower New TP-750W Modular PSU !!!


So.. have fun with me once again and... STAY TUNED !!!

PHINIX
 
Last edited:
Black and blue is overused IMO, so the other options are great.

Yeah, thing is I cannot find really good deep blue sleeve.
I think I could go with yellow. I mean deep yellow, like that Renault color.

I also love those yellow sleeves:
show_image_in_imgtag.php


I wonder if my idea for front panel would be possible with this color... hmm....
 
Well, I wanted to work on it this weekend, received my aluminum yesterday (7kg of it) but unfortunately they cut main bottom panel in wrong size. They said that they cut with -/+ 2mm tolerance, but I got panel 3mm less than it shoul be. Saw I'm sending it back today, and will get it next week. But I will do some work anyway, rest of the panels dont look that bad. Anyway, update coming up on Sunday I think:)

EDIT:

OK. I picked up my first package. It was heavy! And I thought aluminium is a light metal...:8
Before I add photos this first update will contain first sketchups.
So here it is...


FIRST UPDATE

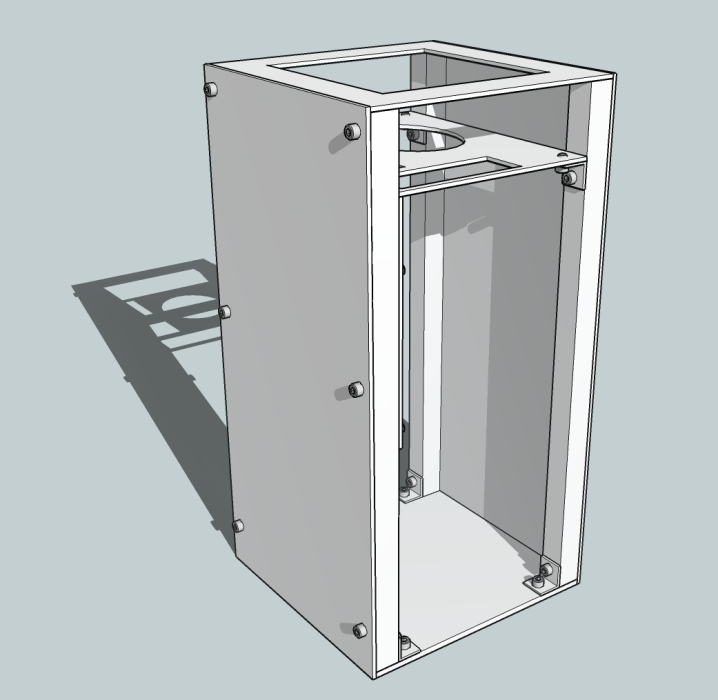
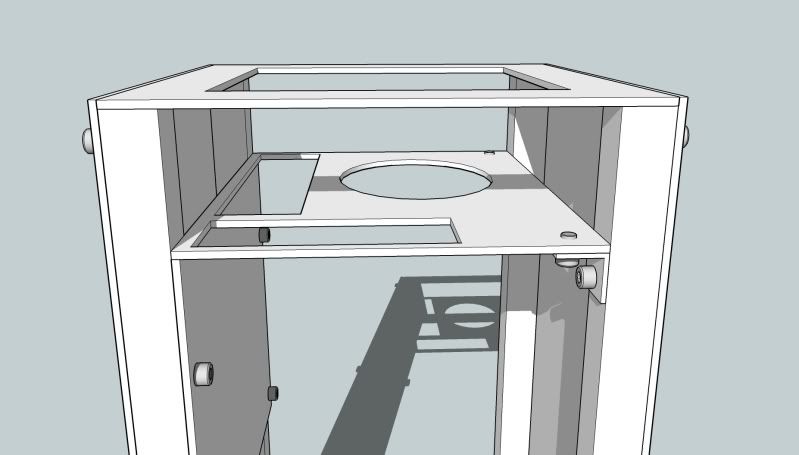
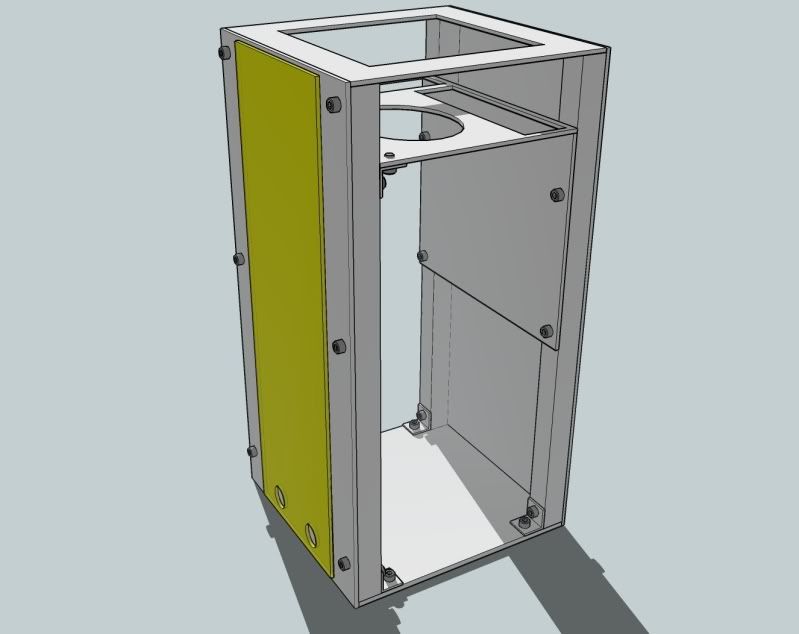
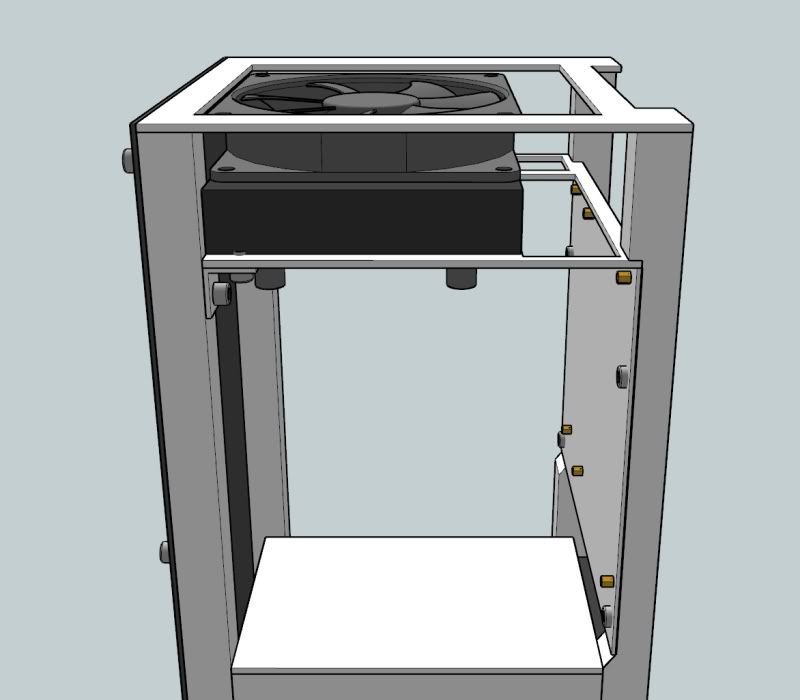
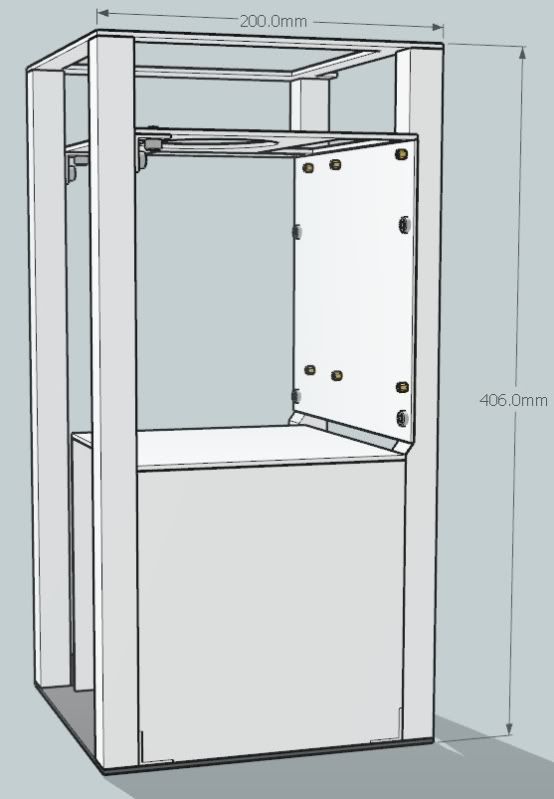
These are the first sketchups of the main frame. As I said before (wrote) main frame of my nanoTOWER has 400mm of height (well, main rods actually). With bottom panel which is 5mm and top one, 3mm, it has 408mm of height. Base of the case has dimension of 200x200mm.
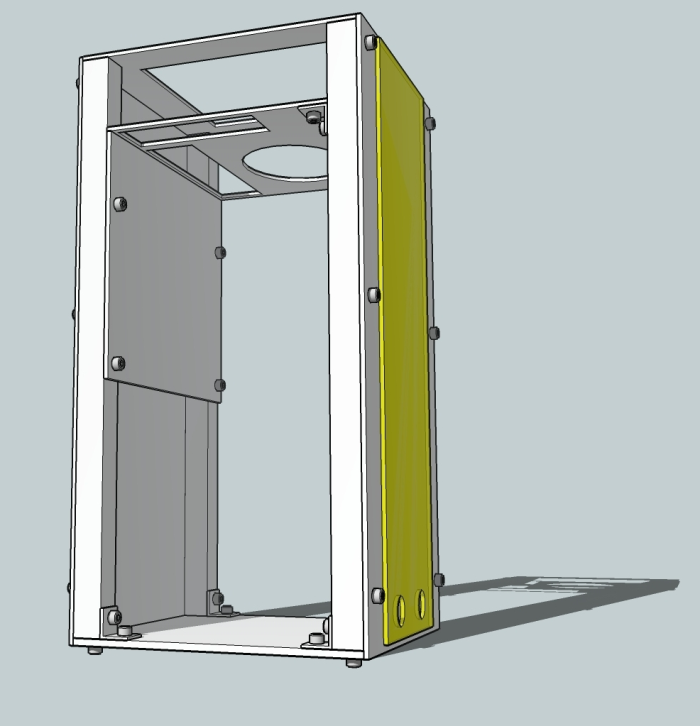
Here it is - main aluminium structure of The nanoTOWER !!! :eeek:

PHINIXNANO-TOWER-20x20x40-alumin-6.png


PHINIXNANO-TOWER-20x20x40-alumin-7.png


OK, I'm gonna comment on few of them.
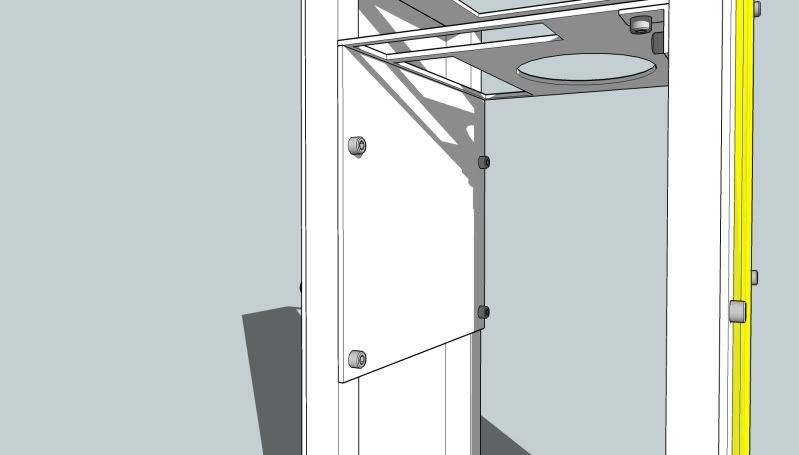
Here you can see the most important part.. The mobo tray. It is made of 2mm aluminium sheets, size 20x17cm.

PHINIXNANO-TOWER-20x20x40-aluminium.jpg


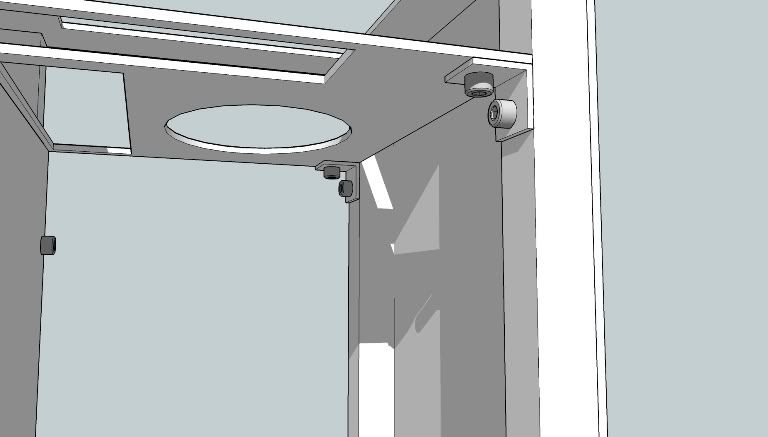
Here you can see L shape aluminium support for middle-top panel.
It will be installed just above the mobo and will keep CPU cooler on top of it. That is why there is and big 120mm round hole for fan.

PHINIXNANO-TOWER-20x20x40-alumin-5.jpg


...and this is that middle-top panel...

PHINIXNANO-TOWER-20x20x40-alumin-4.jpg


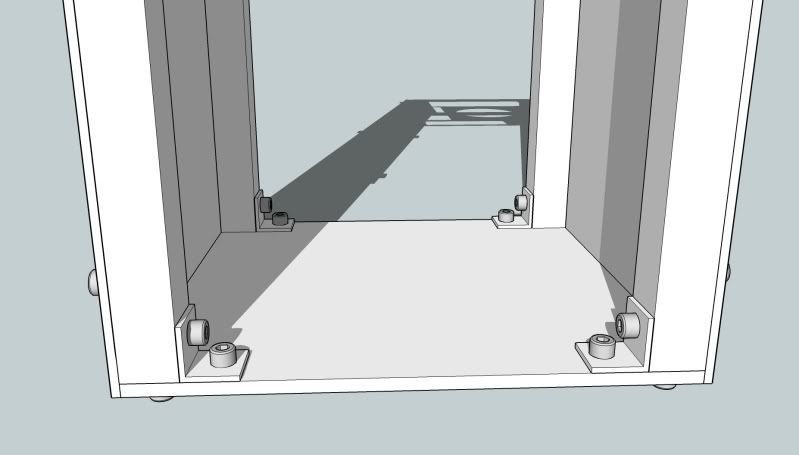
Here's the support for bottom panel. Of course it will be also screwed in from the bottom. To make it look more light, I may use some low profile head screws...

PHINIXNANO-TOWER-20x20x40-alumin-3.jpg


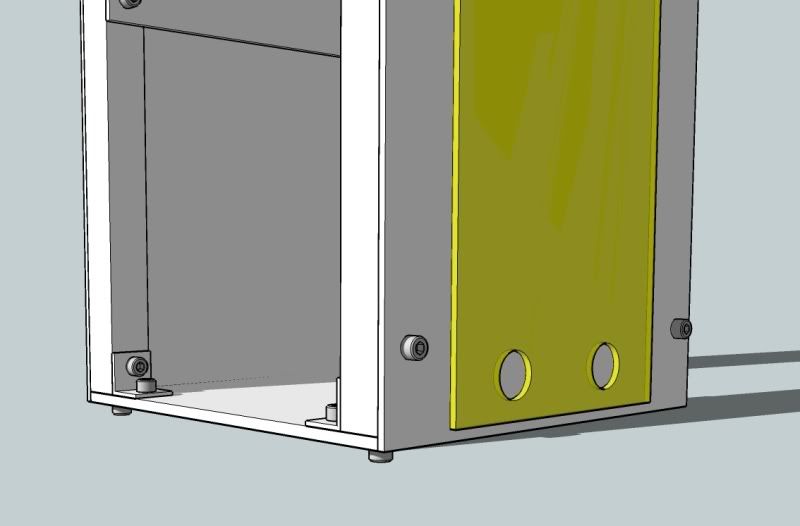
Here's a rear of the structure. Right now it shows the rear 2mm panel and 3mm acrylic "under-radiator" sheet - it will be a small decoration touch for radiator mount.

PHINIXNANO-TOWER-20x20x40-alumin-1.jpg


...that is why we have those holes here - that's the holes where the tubing will go through the rear panel to the inside. Yes, triple radiator will be installed on rear of the case. More details about it will be presented later...

PHINIXNANO-TOWER-20x20x40-alumin-2.jpg


So, that's the whole thing for right now... Looks nice. Right now I can only say that this aluminium structure is tough as hell, I didn't imagine it will be so stable and strong! When took that 3mm panel in my hands I was a little shocked! Not even mentioning that 5mm bottom one... ...and those square rods! WOW!.... It will be hell of a case!!!

I hope you like it! :eek:
 
Last edited:
bad luck on the pannel thing, but the rest of the build looks like it will be great. Digging those yellow sleeves man. Subscribed!
 
bad luck on the pannel thing, but the rest of the build looks like it will be great. Digging those yellow sleeves man. Subscribed!

Thanks!

Just a small heads-up for upcoming update - I worked a bit on main frame structure last weekend. That was actually my first time working with aluminium and have to say - cutting and shaping 3mm aluminium sheet is hell:)
Bottom 5mm alu panel is coming to me, company I ordered from sent me a replacement, so this weekend I will be drilling rods and screwing all together, hopefuly we will see main frame this Sunday...
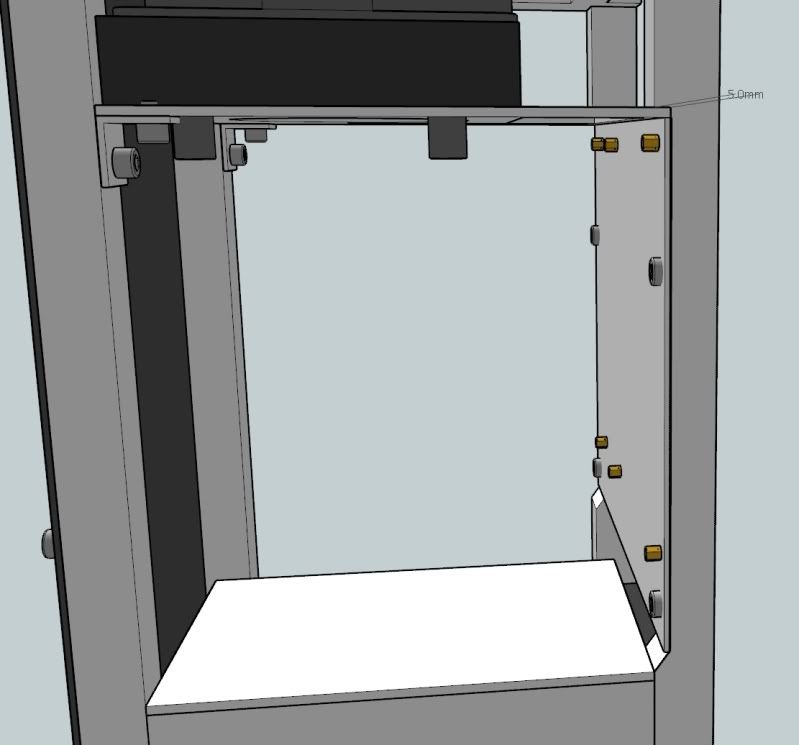
Also I made some small modifications to mobo tray placement - to make some more space for top cpu cooling radiator I had to push mobo a bit "deeper". That move ended up cutting 5mm of front rods thickness. Well, sketchup will show it better then words...

nanoTOWER-mobotraymove.jpg


Here you can see how the mobo tray went 5mm deeper with the middle panel. That change gave me some more space for mobo I/O panel "upstairs" between H50 radiator.

nanoTOWER-mobotraymove2.jpg
 
I'm sorry, but do you have a scale for those renders so I can compare?


The case seems to be about:
7x15x7, which is rather large...
(IMO, probably just me, though)

Thank you!
 
I'm sorry, but do you have a scale for those renders so I can compare?


The case seems to be about:
7x15x7, which is rather large...
(IMO, probably just me, though)

Thank you!

What do you mean by 7x15x7?

The main base (bottom 5mm thick panel) has 20x20cm. Structure rods are 40cm tall.
 
A guesstimate, based off of the motherboard tray size.

Thanks!

If you want I will add sketchup with measures added to it, will do it tonight.
I cut them out just to show the layout, but will also show measurement sketches later on.
Don't forget - this is not another boring mITX case - it is case with mITX motherboard AND the new upcoming graphic card - longest ever (over 30cm) + i5 cpu + regular size ATX 850W PSU + SSD drives in RAID + two watercooling loops !!! It is the smallest ever case with this kind of hardware!
 
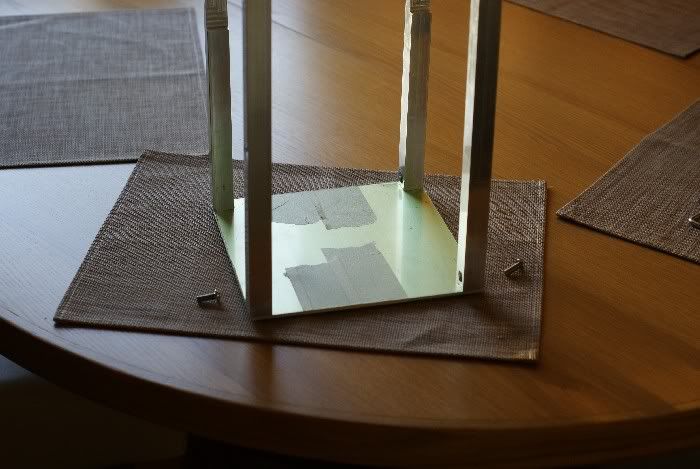
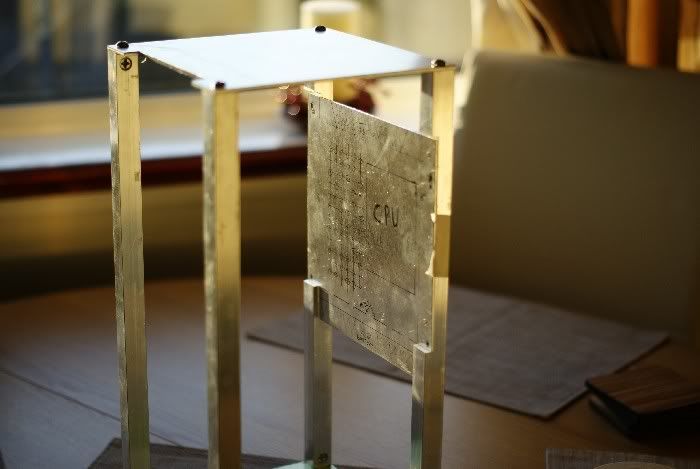
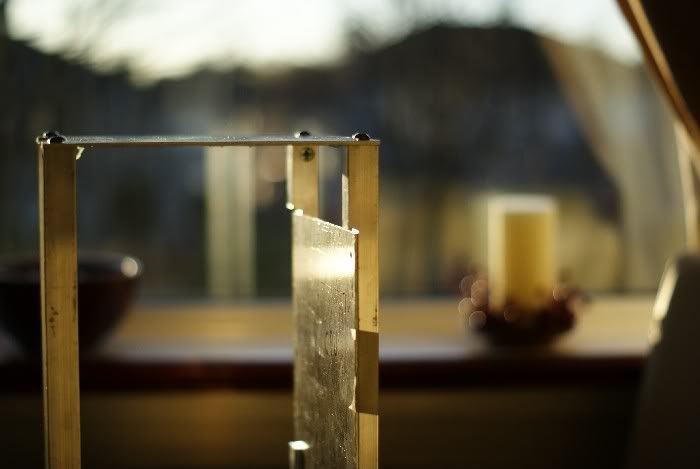
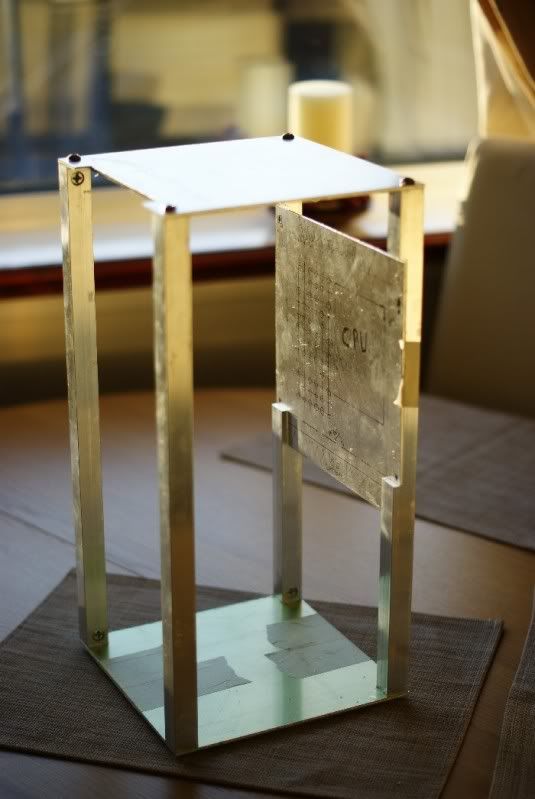
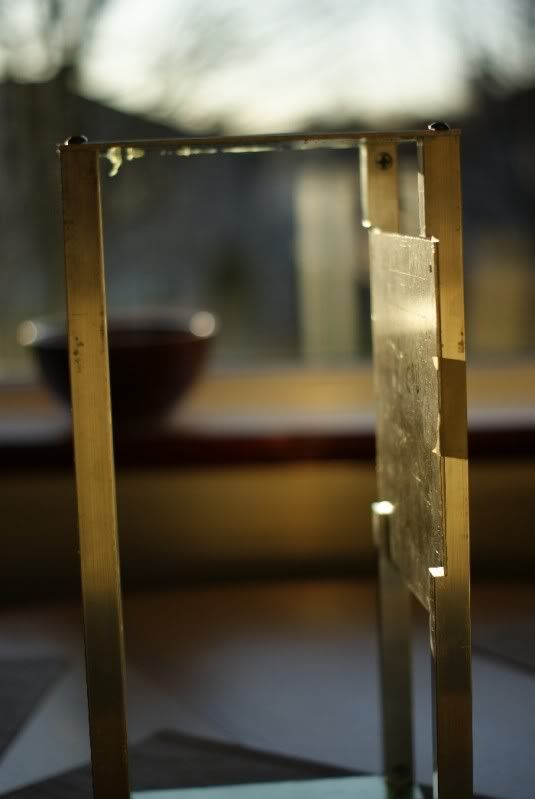
I got some first photos!!! Its only aluminium pieces, but still! :)

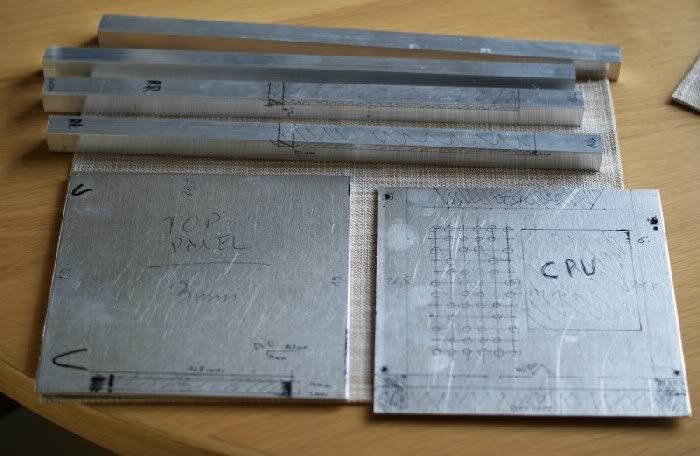
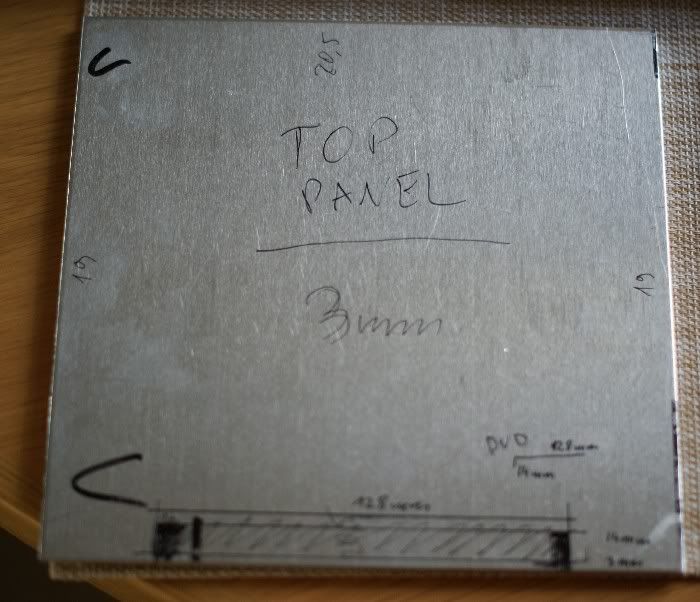
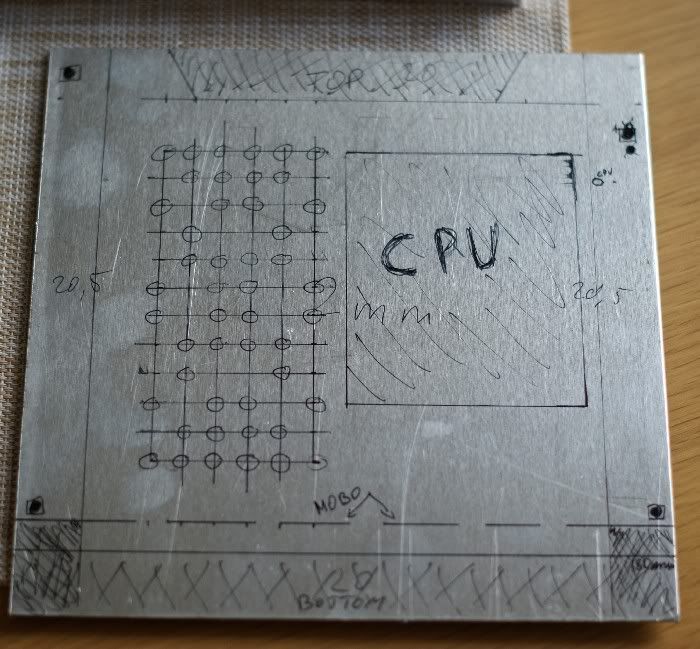
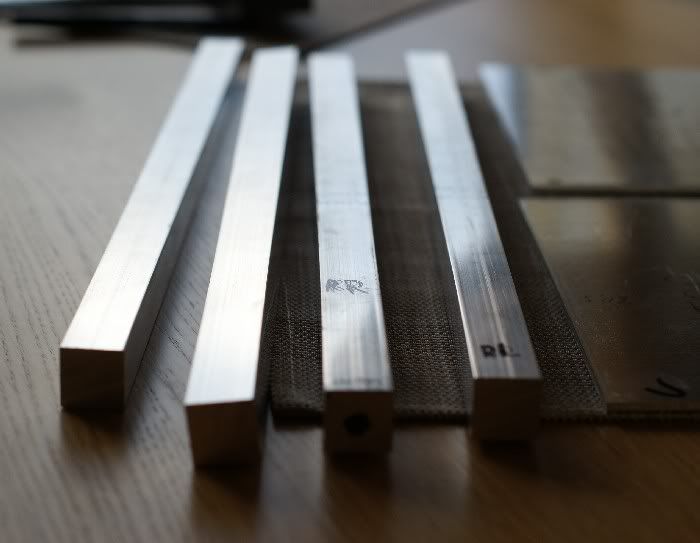
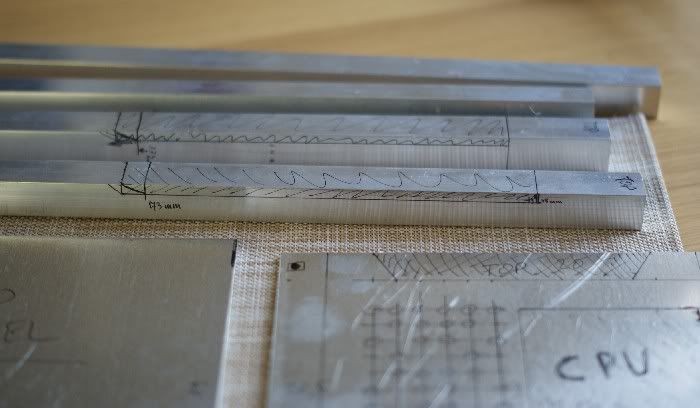
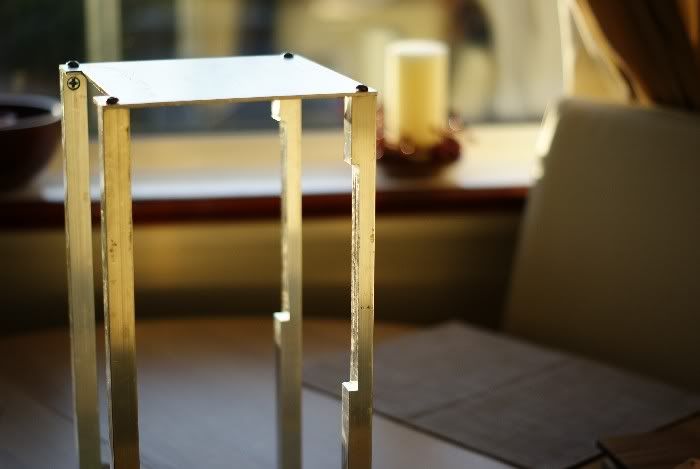
These are main elements for frame structure (except bottom and middle panel).
You can see 4 rods, top panel and mobo tray....

DSC05933.jpg


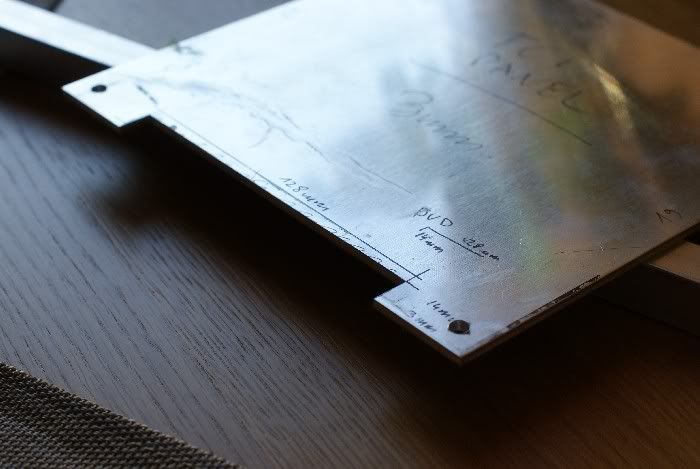
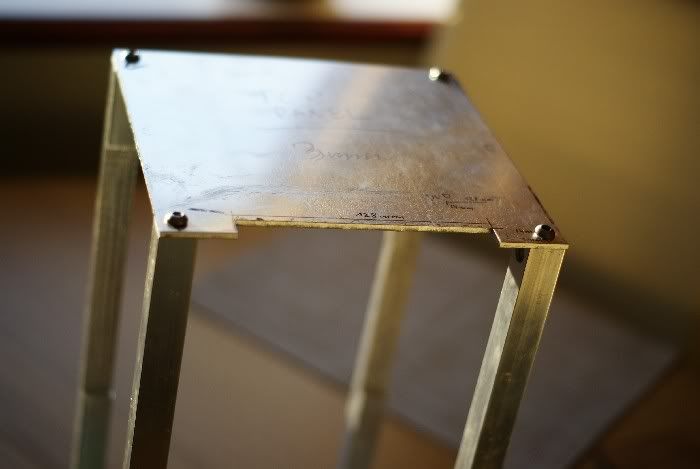
Top panel has marked front space for dvd. Now you can see and get the idea how the slim dvd-rw will be mounted: on the front and vertically! I know.. crazy!:) But I have tested my slim dvd and it works perfectly in this position, so no worries.. If I didn't mention - it will be slim slot-in dvd, no tray.

DSC05936.jpg


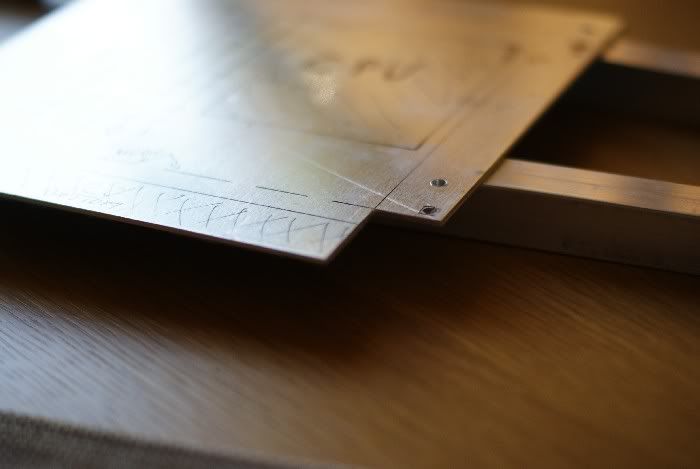
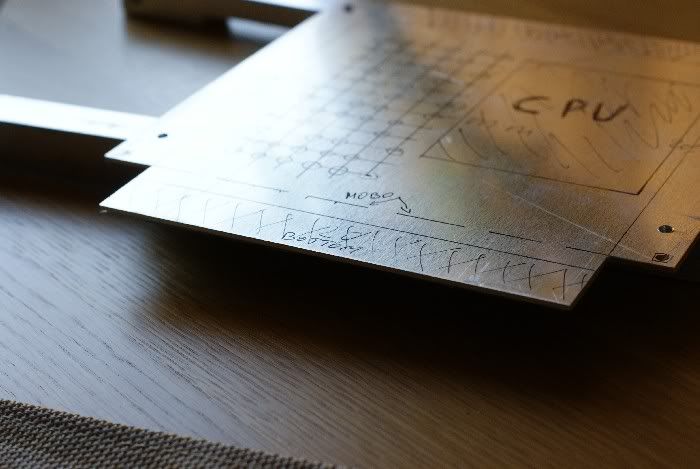
Here's the mobo tray. Right now it has marked few elements, like CPU back hole matrix of small holes on the left and the position of mobo mount stand-offs. I took them from photo of DFI MI P55-T36 mobo:D
You can also see what parts I need to cut off on both sides at the bottom - this will make space for that 45 degree "cut-in rod spacer" I did to get mobo a bit deeper, as I showed previously on sketches...

DSC05935.jpg


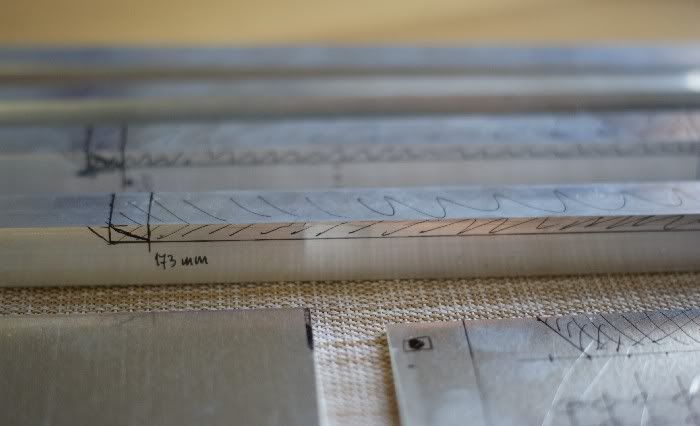
Here are main rods... 20mm nice looking fellas.. two of them - "mobo holders" - will receive liposuction this weekend:)
DSC05937.jpg


Here you can see where Doctor Phinix will make first cut:)

DSC05938.jpg


DSC05939.jpg


That is for now.. it has been raining last few days.. I cannot go out to do some work and every time I go back home its dark already so cannot make nice photos...
This weekend I'm going to work a bit so will show some more progress.
 
Thanks. For a living - IT. This is just my hobby and actually this is my first aluminium project. You see, previous one - Phinix Cube - was all acrylic. I have to say, aluminium, if really thick, is pretty hard to work with:)
 
Well, during this weekend it was raining all the time, so couldn't work outside. Worked in the attic a bit. I prepared and cut mobo tray and bottom panel, also sanded them nicely to have clean shiny edges.
After that I started with that two rods that keep mobo tray. As I mentioned above I wanted to thinner them a bit to push mobo tray a bid deeper, 5mm into those rods. So I took my trusty dremel to try it out.. During half an hour I managed to brake 2 reinforced cutting wheels and get 3mm deep cut... So I took my badass jigsaw with special metal cutting blades.. After another 10 minutes I get another 2-3mm deeper... Of course my special blade was worn to the frame;) So decided to drill holes along that cut line I drew on the side of that rod, so it will take some material off so jigsaw cutting would be easier. I drilled about 10 3mm holes and my drill press stopped when drill bit was in about half way down...
So I went to B&Q and bought 5 new mega-special thick-metal cutting blades... After another 2 hours I managed to get 2 of new blades totally worn.. and got 2cm cut... So after whole afternoon trying to cut this rod I decided these rods are going to cnc place:) Now I'm really convinced that I bought some kind of super-hard grade aluminium rods:)

I think I'm gonna have to add one more detail in description of my new build - it will be bulletproof ;)

I hope I'll get those rods back till Firday and then all good stuff gonna start.

What I need to do this weekend is:

  • drill and tap all 4 rods at the bottom and top
  • create main frame - measure against rod holes and drill bottom and top panel and screw them together
  • drill and tap hole in "flattened" parts fo rear rods for mobo tray
  • drill and fit in mobo tray to rear rods
  • cut the middle sqaure hole in top panel
  • measure and cut 6 support L-shape corners for bottom and middle panels then mount them
  • fit in middle panel

Looks lie a lot of work, but it will be much easier when rear rods will be ready. That sounds fun for me this weekend!:blush: I hope you guys gonna like it as well...
 
Guys, I feel it in my bones that this weekend will be huge! Upcoming update will overwhelm you all! :D Well.. I hope;) I may receive back my rods, also some goodies coming up, have few packages to pick up in post office - cannot do it now cause Royal Mail gave silly hours to pick packages by yourself - 8-12 in the morning, so I will be picking them all up on Saturday. I will work my ass off to finish main frame and show it on log of course!

However before that update I will show you some sketches of few parts I've planned.

I have also received support from major companies, but that has to stay a secret for a while:yawn: Don't worry - I will tell and show everything in right time! :thumb:

(oooh, I love to tease you !!! :D)

So guys, this weekend will bring major update in this project and will put some more light on my project. You will learn how I'm going to mount things in this little monster and will see how this magic happens:) I know it is long time to wait, believe me - I cant stand waiting for weekends too.. It is sooo hard for me, but right now weekends are the only time I can work on my sweet rig.

As always... STAY TUNED !!!
 
Guys, hardware update today!

I went to post office and picked up two packages.
So guess what I have received?????

Bill from MNPCTECH sent me modding items, which will add special look to my Tower:

1) BILLET MACHINED ALUMINUM CASE FEET

Machined.Billet.Case.Feet.jpg


2) Modder's round-hole mesh

mesh5.32.jpg


3) Black anodised M4 Thread x 30mm Length (1-3/16") Stainless Socket Cap Screw Sets for rear radiator fans

M4_30mm_silver_screws_radiator_grills_watercooling_mnpctech.jpg


4) Black anodised M4 Thread x 16mm Length (5/8") Stainless Socket Cap Screw Sets for fastening outside panels

M4_16mm_silver_screws_radiator_grills_watercooling_mnpctech.jpg


5) Fan grommets

GrommetWb1.jpg


Bill, again - huuuuuuge thanks for your help !!!!!!!!!!!
 
Second package came from Joan from CRUCIAL !!!

When opened the envelope I saw these!

BallistixTracer240-pinDIMM(withLEDs)DDR3_lights.jpg
ballistix-tracer_powered-by-crucial_logo_REV.gif


These memory sticks will be PERFECT for my Tower! Imagine when they gonna light up inside, giving nice shine on all internal parts with those leds!
These are DDR3 - my previous Tracers were DDR2, which had shorter rows of those leds. These new DDR3 have leds on whole length of the sticks!
Now I need to wait for mobo and will show you guys how those Tracers look like when I test hardware!

Again, huuuuge thanks come to Joan from CRUCIAL UK !!!!
 
Thanks Bill! Hey, looks like you reading all my logs on every forum! ;)
Joan in Crucial UK PR office was great that she sent me those ram sticks. They gonna look brilliant in this build.
 
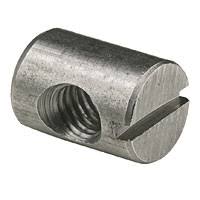
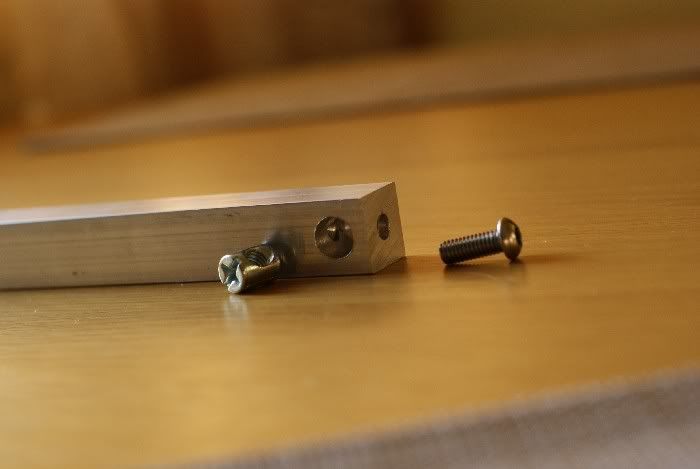
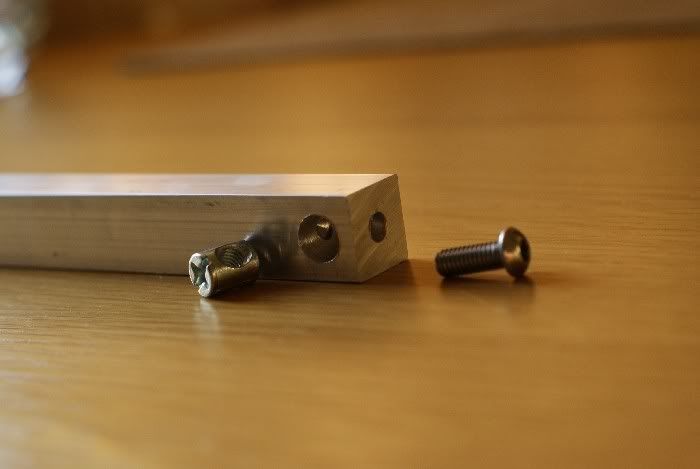
After few threading (tapping) attempts I decided to use something stronger - right angle (cross) dowels.
images


I couldn't easily tap those holes in aluminium rods, so I went to B&Q and bought these dowels.
They are perfect for this job - so strong, holding bottom panel firmly and securely.
I will also use them to mount top panel. I just love them! :) Truth is, it takes amount of time to install them - because they are 10mm thick and 12mm long (M6 holes), first I had to drill long hole in bottom of the rod for screw (6mm bit), then across that hole another one for dowel - there had to drill twice, once with small 6mm to make drilling with big drill a bit easier; then last drill with 10mm thick bit. Its easy to count - 4 rods, 2 holes each, 3 drills per side - gives 24 drills :eek:
Changing drill bits all the time, clamping rods... now I feel like putting my hands in pile of ice wouldn't be a bad idea...

After my previous build - the Cube - now I can say - aluminium is a PAIN!!!! :(

Photos tomorrow, I'm so tired my hands are full of pain after few hours of trying to tap those rods and then all the drilling...:(
However - weekends mission accomplished ! I'm looking on standing frame!!! You guys need to wait for photos til tomorrow :D

Let the Dremel be with you !!! :cool:
 
NEW UPDATE (30/11/09)

This time - real thing! :) I worked on main frame this weekend and today.
Having some problems with tapping those rods on Saturday, I decided to go with some more powerful stuff - those dowels I mentioned in previous post. It took a lot of drilling, with hand drill and drill press. Biggest drill I used, 10mm one, made a lot of noise!:)
My attic looks like it has aluminium carpet now:D Seriously! I have to hover before my wife's gonna see it...

Here are all the photos, please have in mind this is rough aluminium, still needs some sanding on edges and polishing. After all it will be powder coated so it will look like fabric made!:thumb:

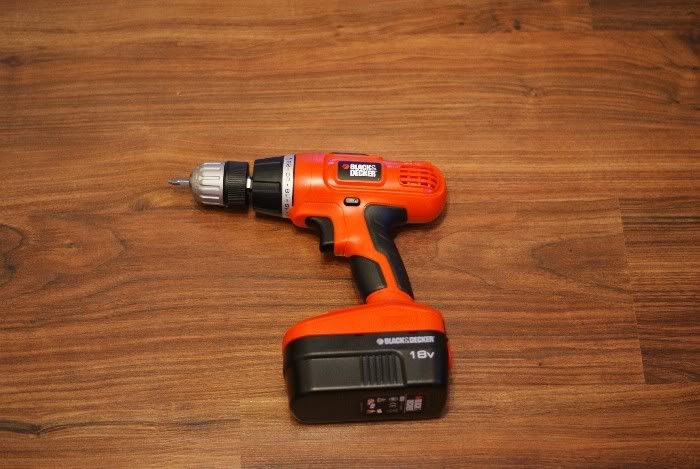
Just a quick show off - I bought some nice piece of equipment yesterday. Was going for 14.4V Bosch, but I found great deal on 18V Hammer Black&Decker:D

DSC05987.jpg


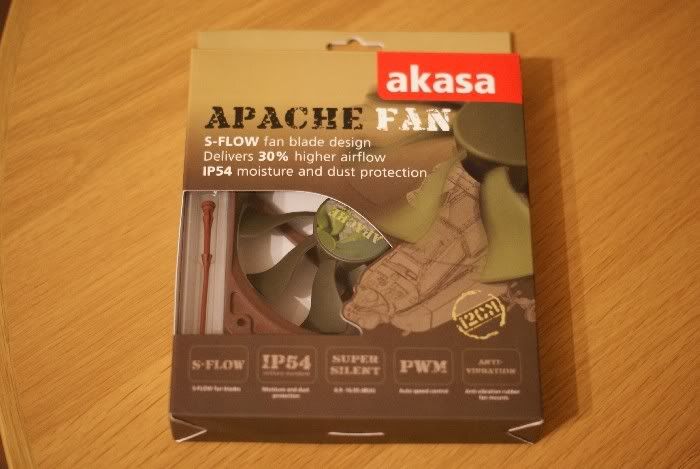
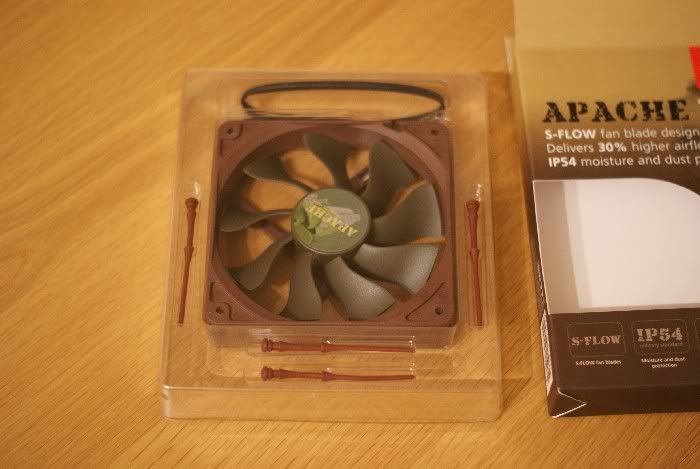
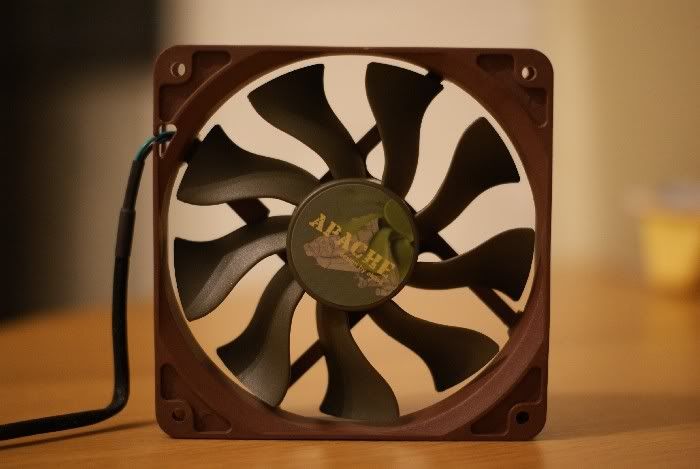
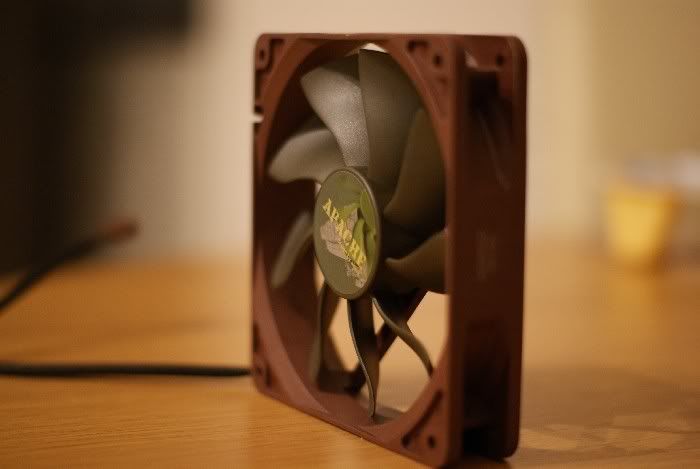
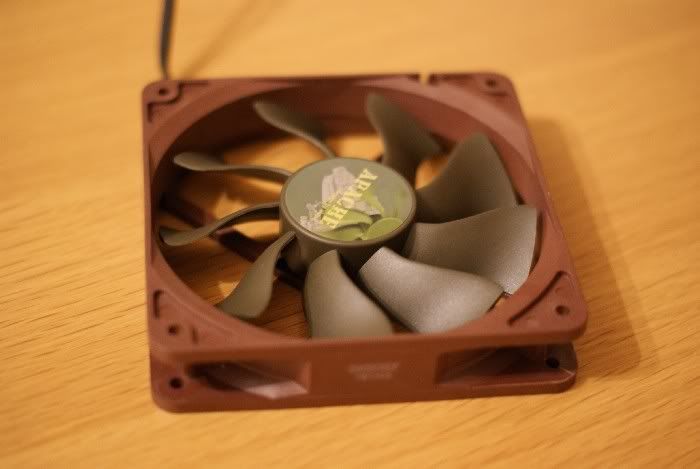
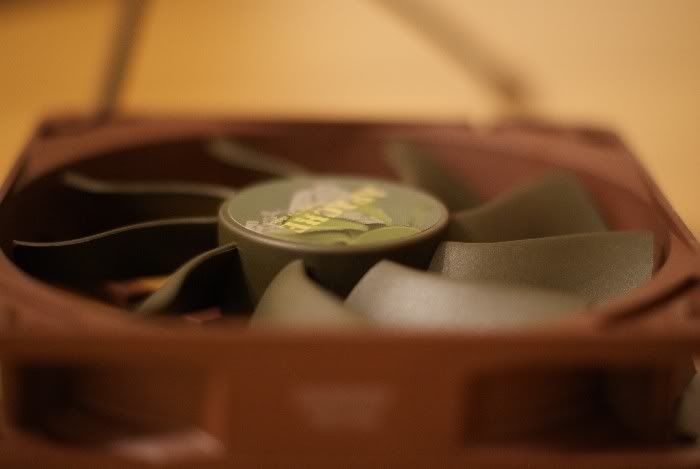
As mentioned in build description in first post, I'm going to use new Akasa Apache 120mm fan, which supposed to be the best with H50 cooler. So I bought it when found nice weekend deal and price went down from £15 to £9 last weekend:)

DSC05957.jpg


DSC05958.jpg


DSC05959.jpg


DSC05960.jpg


DSC05961.jpg


DSC05962.jpg


Looks ugly as hell! :) I believe the person who designed the colors for it will be working late this Christmas! :hehe: Apart of that it isn't silent, like I read on some forums, but it is very very quiet. AND it blows... blows loads of air! When turned it on my face it felt like hair-dryer! I mean it! Pretty powerful stuff.

Now, lets get back to business, shall we?

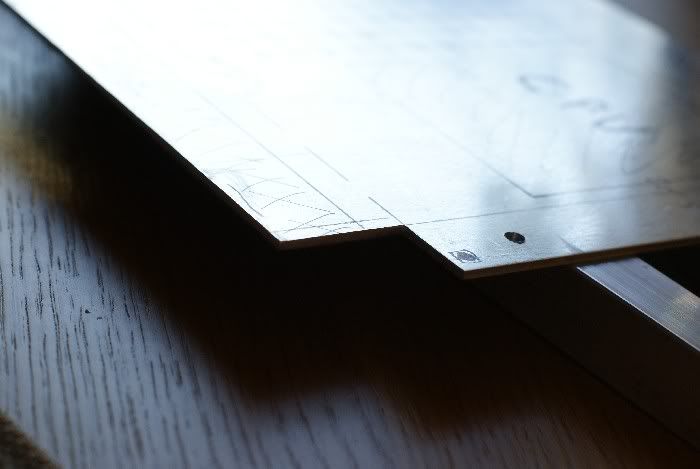
Here it is: these are cut off corners on mobo tray. All filled as you can see, will need some sanding and polishing at the end..

DSC05988.jpg


DSC05990.jpg


Also drilled holes for mounting screws. It will be screwed to the rear rods with short M4 bolts.

DSC05991.jpg


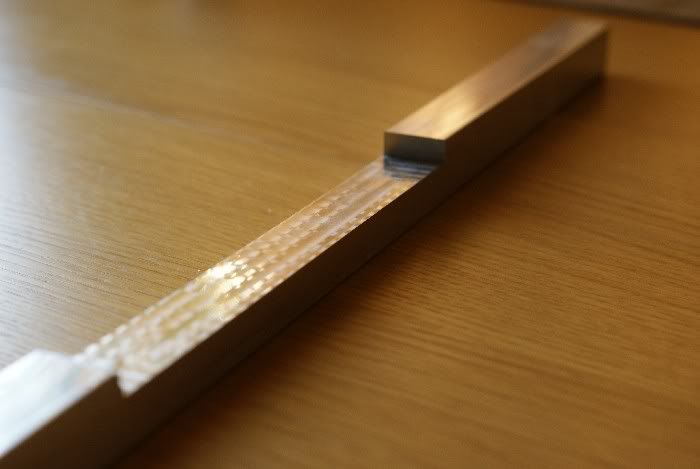
Here's a quick shot of flattened rod:

DSC05995.jpg


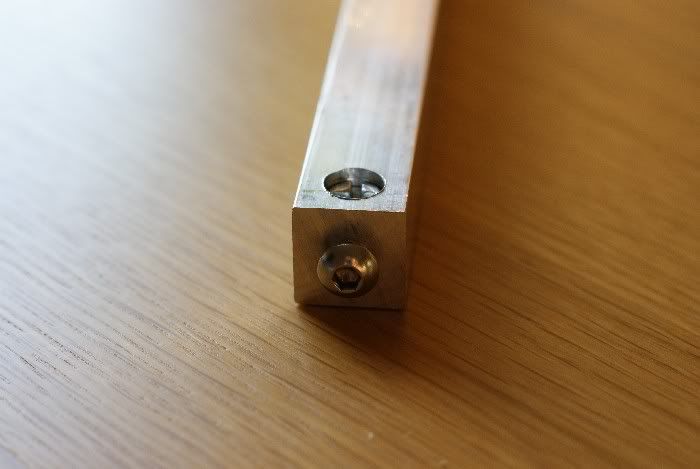
Here is how I worked out mounting rear and top panels to rods. Cross dowels Ladies and Gentlemen.. Cross dowels...

DSC05997.jpg


DSC05999.jpg


So we have smaller, 6mm hole for screw at the bottom of the rod, second one is bigger 10mm hole for dowel. All lined up and drilled.. pretty cool, professional looking thingy, also VERY strong!

DSC06000.jpg


Here is bottom panel screwed with those dowels:

DSC06001.jpg


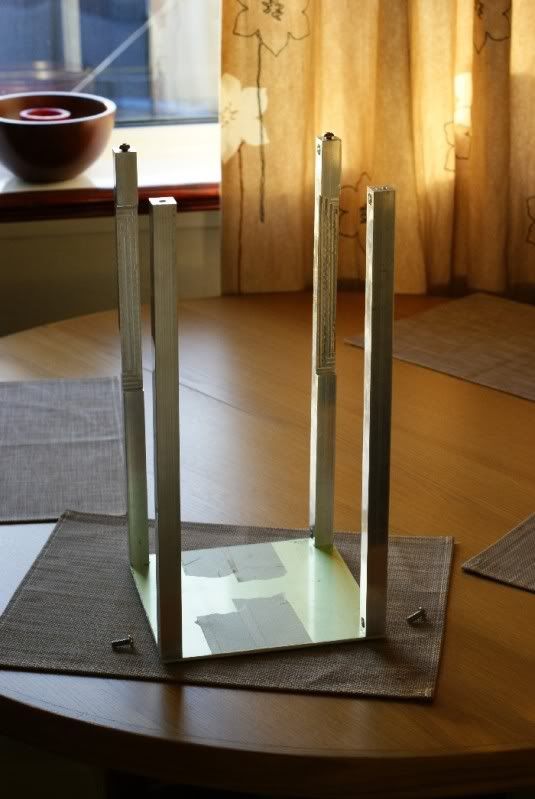
...aaaand all four rods, sticking out like a.... like sticking out rods..... :blush:

DSC06005.jpg


Then top panel, with cut off long rectangle for front mounting slim dvd. It will be done later, when the mobo will be mounted. Before that I cannot line up the drive-tray.

DSC05992.jpg


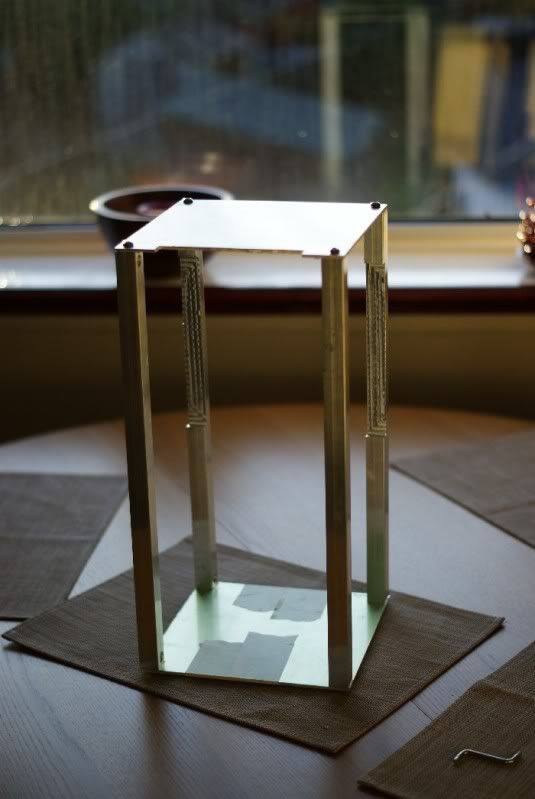
Top panel screwed to the rods. Some holes still need to be lined up a bit and their egdes a bit polishes. Some screws didnt get to the panel surface easily, some rough aluminium bits are still there...

DSC06011.jpg


Looks cool...

DSC06012.jpg


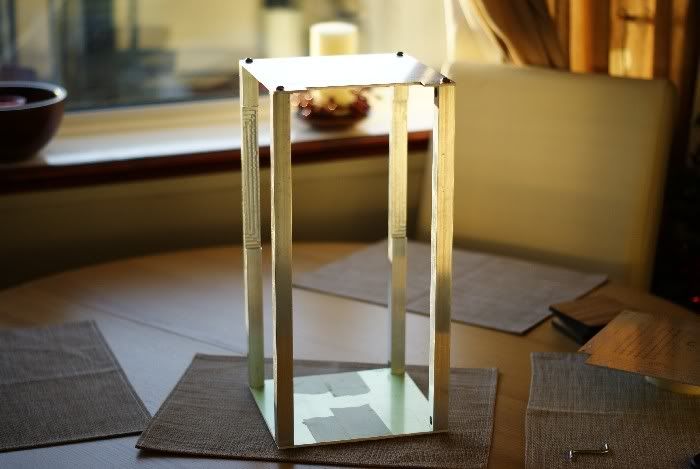
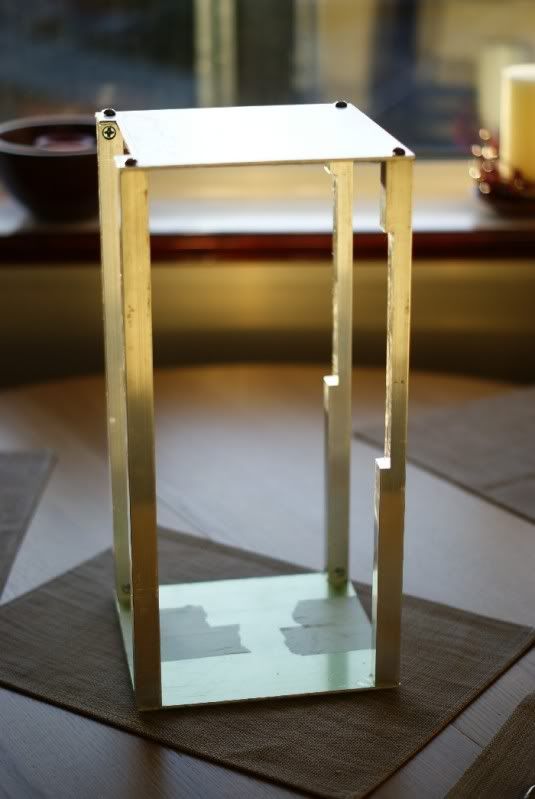
...AND the whole thing!!!

DSC06009.jpg


DSC06008.jpg


DSC06013.jpg


Now.. I used some duct tape to hold mobo-tray... forgive me that cheap move, but I haven't drill those screw holes in rods yet to mount that tray properly.. It will be done during the week...

DSC06014.jpg


You can see that small 3mm gap above mobo-tray - that is the place where middle panel will be pushed in...

DSC06016.jpg


Tower itself...

DSC06015.jpg


DSC06017.jpg


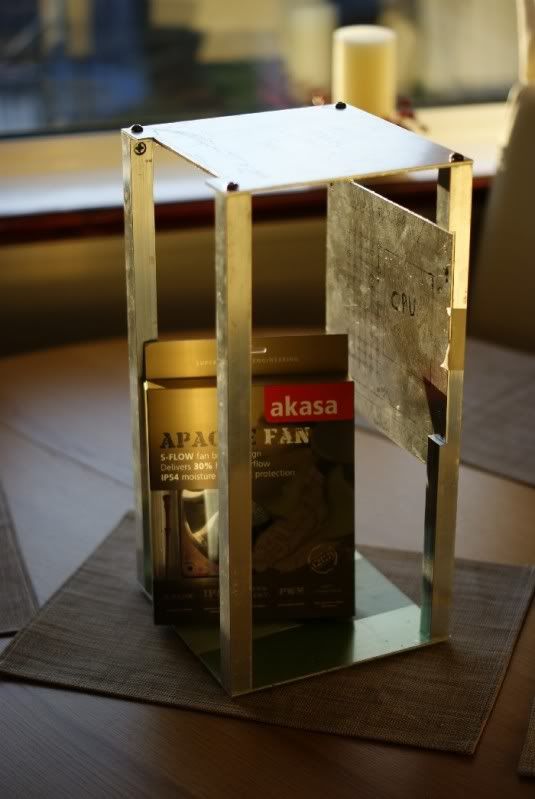
For size comparison - Akasa 120mm fan box sticked inside ...

DSC06019.jpg


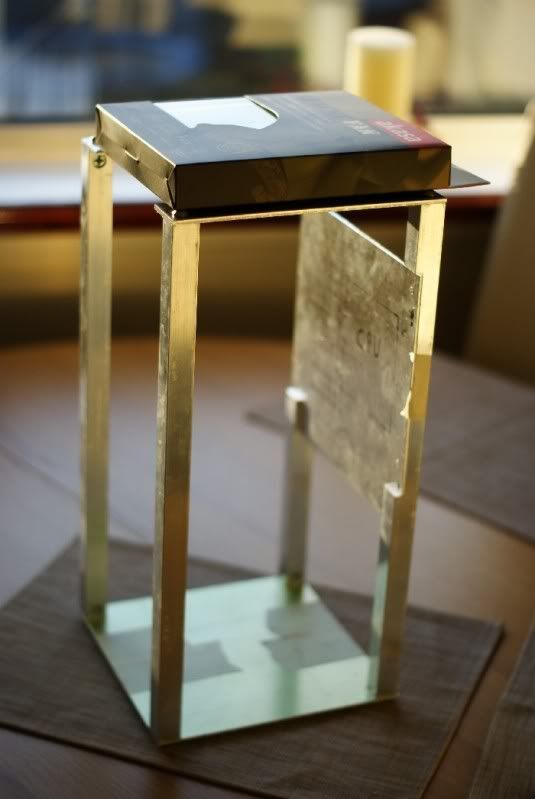
...and on top...

DSC06020.jpg


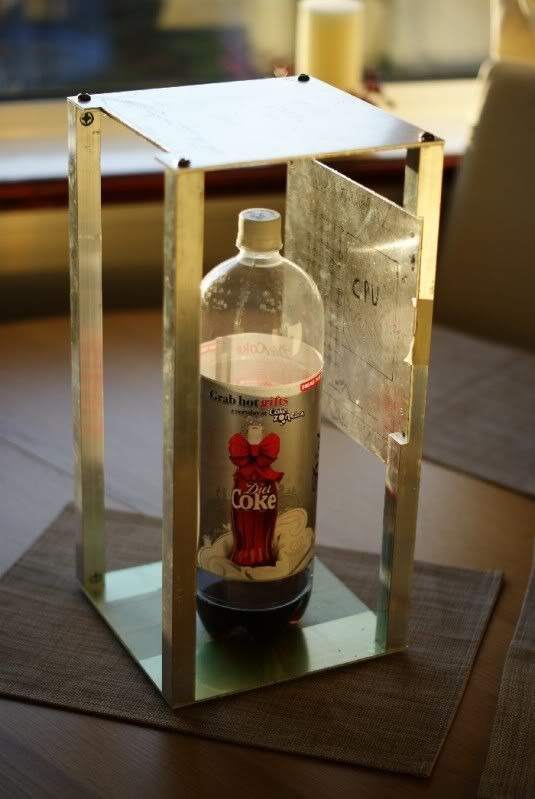
...and 2L Coke bottle inside the Tower... I told you it will be water-cooled after all! :D


DSC06021.jpg


OK. So this is the big update from last weekend. I hope you liked it. See, even sun was out today! :)
Now I'm going to spend some time on polishing edges finishing holes and mounting mobo-tray. After that will mount middle panel with those right angle support alu shapes.

So...

STAY TUNED !!!!
 
OK. Time for small hardware update.

Small, because the item is very small, however it is the most important in the whole build!!!
Without this little thing Tower wouldn't be that small!
What is it then?

Well... I picked up a parcel tonight... Take a look what was inside:D

DSC06024.jpg


Merry Christmas for me!!!!!!!!!!!!!!!!!!!!!!!!!!!!!! :D:blush::clap::clap:

DSC06026.jpg


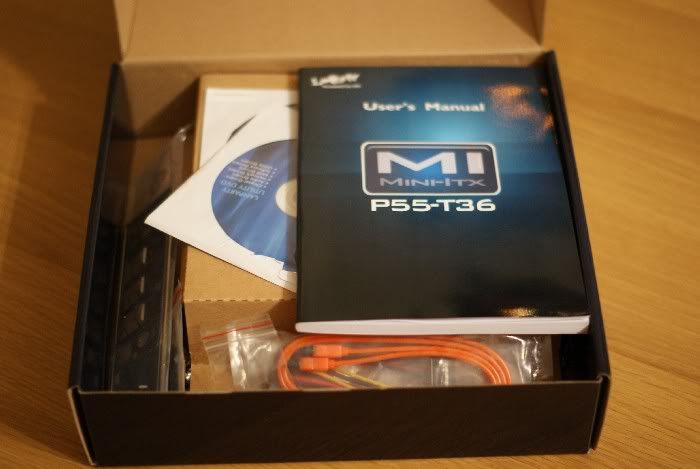
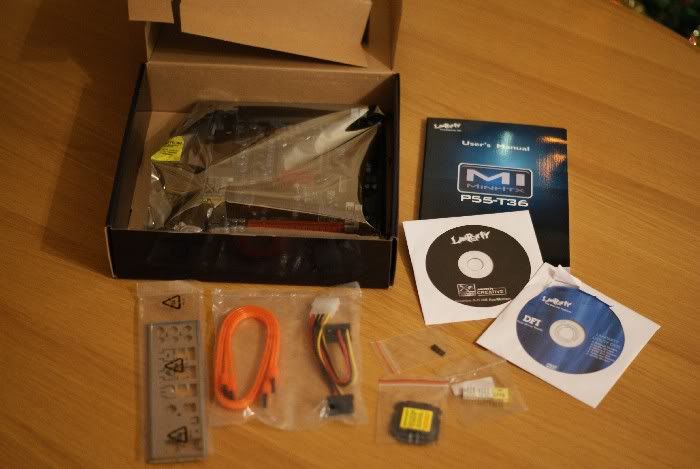
...now lets see what's in the box!

DSC06027.jpg


DSC06028.jpg


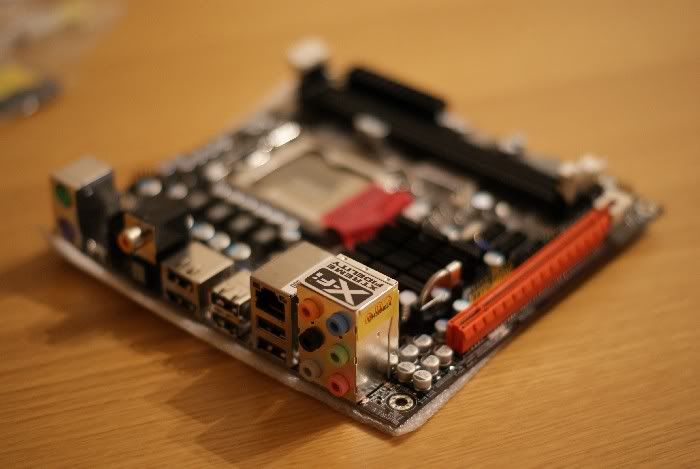
Isn't that beautiful?????!!!!

DSC06031.jpg


DSC06032.jpg


DSC06035.jpg


DSC06039.jpg


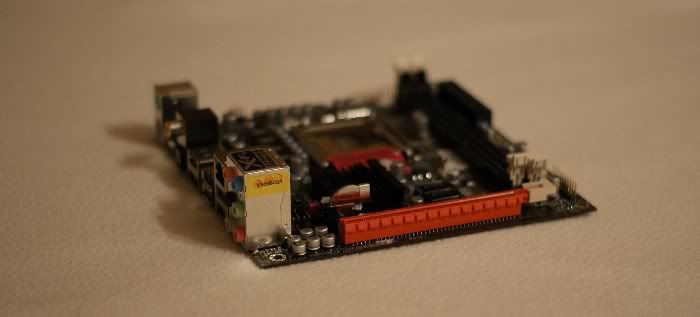
DSC06043.jpg


This PCIe will power some really heavy card:)

DSC06050.jpg


DSC06052.jpg


BIOS Led error indicator.. sweet:clap:

DSC06054.jpg


...and these 3 SATA will be working 24/7 for my SSD Raid:blush:

DSC06055.jpg


Again, I would like to thank two coolest people in DFI Marketing Department - Eric and Patricia -THANK YOU GUYS !!!

Lot of guys asked me where this mobo can be purchased - In UK you can buy it in SCAN.
 
Last edited:
mah GOD, sweet BABY JESUS and the holy ghost!
 
mah GOD, sweet BABY JESUS and the holy ghost!

..naaah, just call me Mike ;)
But seriously - they all know its cool mobo :D

looks geat. what SSDs?
X25-M 80gb drives?

Thanks. Don't know Crucial, OCZ or Intel.. Let's see which one will contribute!:)


Yeah, I know! :)

Very very nice. Can't wait for more updates. :)

Me too! ;) I hope I will find some time this weekend to work on it. I actually mounted the mobo tray last weekend, but didn't make photos cause it was like 3 am and wanted to go to sleep:)

Looking great! Good luck and congrats on the sponsors.

I love that dfi board. This project is gonna be sweet! Hurry.

Thanks guys!
 
Can't wait to see the finished product.

Will the case be painted at all or will you stick with the bare aluminum?
 
it will be powder coated matt black and will have solar yellow acrylic elements on it:)
 
is it just me or what? most of the photoes cant be seen, exceeded bandwidth it says
 
Photobucket FAIL!!!


Shackspace account $6.95 for 2gb and unlimited bandwidth. Also gets you a fileshack account for Highspeed downloads of game related files.
 
Back
Top