Phanteks Enthoo Evolv is Evolving!

SPARTAN VI

[H]F Junkie
Joined
Jun 12, 2004
Messages
8,760
About 2 weeks ago I did some thermal tests to see how badly the front panel on my Phanteks Enthoo Evolv TG ITX case was choking the 200mm intake fan. TL;DR it's really bad. In long gaming sessions, I was able to drop GPU temperatures from 77C to 57C just by removing the front panel.
Well, the case is hideous without the panel (exposed dust filter and LED wiring) so I've devised a case mod plan:
  1. Order spare front panel from Phanteks.
  2. Use hole saw to cut 5-6" hole in existing front panel. Sand the cut edges.
  3. Use metal sheers to cut black stainless steel wire mesh and glue to 5-6" hole in panel.
  4. Attach ~6" speaker grill to front panel to dress up the hole. Potentially paint it with metallic finish to match front panel finish.

Should look something like this when it's done. And if I don't like it, I could use virtually any 6" speaker grill/bezel.
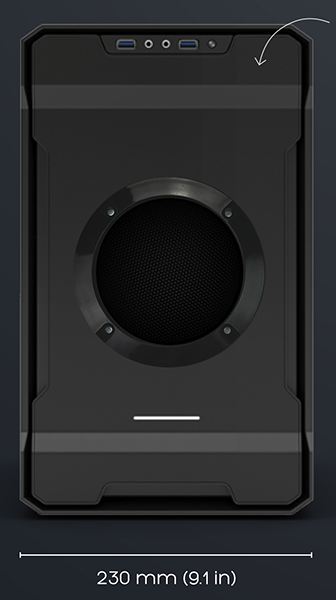
1601169233153.png
 
Purchased and received the Phanteks front panel a few days ago, just waited for the weekend (today) to get to work!
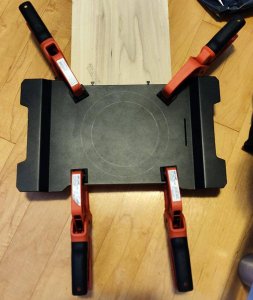
  1. Started off by popping out the steel panel insert, then used calipers to ensure the grill bezel was centered. Positioned and taped the bezel in place, then traced the bezel with pencil. Clamped the steel to some wood I had nearby to give me a sturdy surface and a buffer just in case I punched through the steel.
    mod1.jpg.1b034f52eccc1fcec9f38c9aab4befa5.jpg

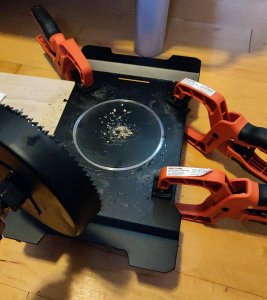
  2. Took out the hole saw and applied some oil to the steel panel. The blade is advertised as "carbon steel," but it didn't cut it (literally).
    mod2.jpg.c16348073282d6c6f8f9b729380cbe3f.jpg

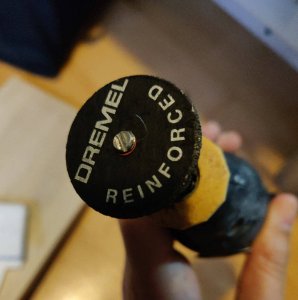
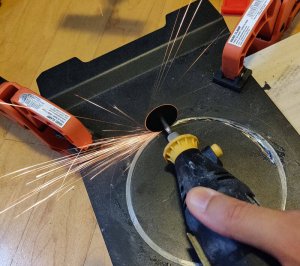
  3. Back-up plan was to use the tried and true rotary tool with a Dremel metal cutting blade. No surprise that it made short work of the steel:
    mod3.jpg.f75415385a434469e4ce77c99c2b33b7.jpg
    mod4.jpg.a78bdf71f1b7cac769ae54deb2aeed0e.jpg

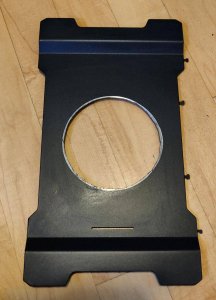
  4. Took about 5 minutes to finish the cut. The hole saw fail actually helped. It created channels which the dremel blade could easily follow, the thing naturally wanted to walk on me and almost walked across the bezel lines once (see the gash on the left). Next I popped the steel insert back into the plastic panel, then used a knife to trace and score the circle I just cut in the steel so I can create the same cut in the plastic panel. Hole saw gave me no problems cutting the plastic other than it spit bits of plastic EVERYWHERE.
    mod6.jpg.3fed2d57f088cbe36faa40ac08b98f80.jpg

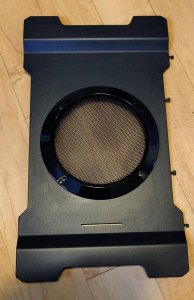
  5. Sanded the cut a bit on the steel and the plastic, but wasn't too worried since it would be covered by the bezel anyway. Test fitment of the bezel:
    mod7.jpg.da81c24fe04ed19c7ddf75db57668cde.jpg

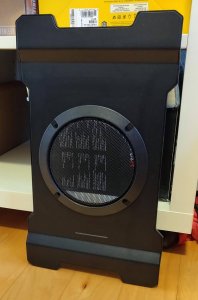
  6. Bezel was way too glossy black, so I took it outside and hit it with a coat of black Plastidip, then 30 min later I gave it a coat of metalizer Plastidip.
    mod8.jpg.123a1604619d4aab1187406883019a08.jpg

  7. Used some silicone adhesive to attach the grill to the bezel, then automotive 3M tape to attach the bezel to the panel.
    mod9.jpg.951777fbd5412532639b130c0f78ffa5.jpg


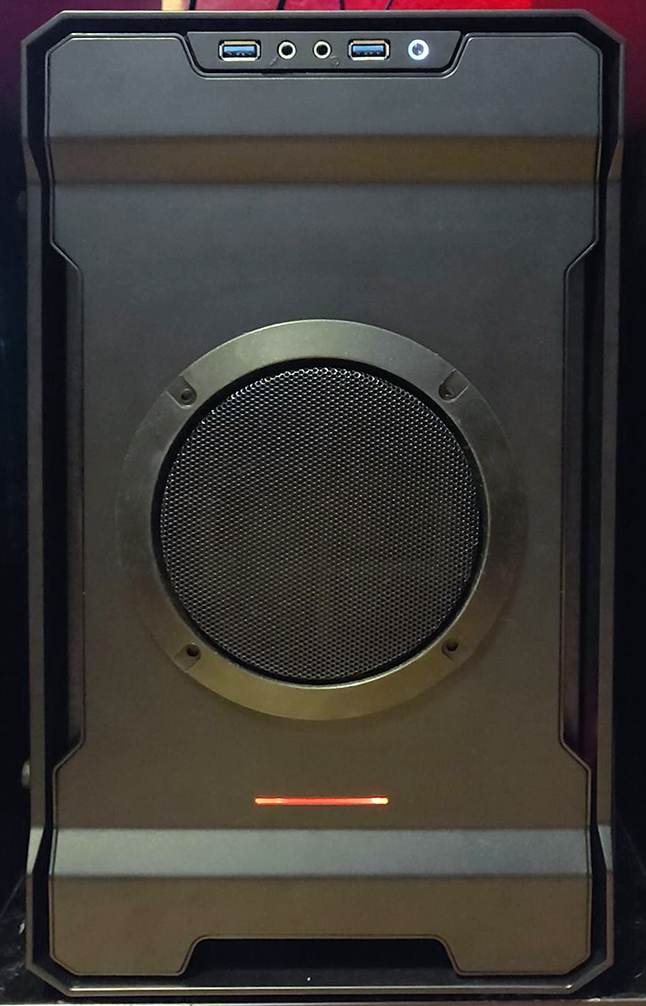
So that was an eventful Saturday morning/afternoon... But how are the thermals?!

I ran OCCT for 10 minutes and measured the GPU temperature, cooldown for 2 minutes, then ran OCCT again for 10 minutes in the next configuration.

Original Panel = 73C
Original Panel w/ 3D printed stand-offs = 71C
Original Panel Removed = 62C
Panel Modded = 63C

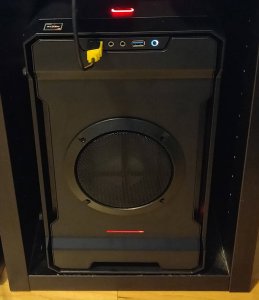
Very pleased with the thermal results! Just 1C higher than no panel is better than I expected. Next step is to swap the 200mm fan with a Phanteks black 200mm fan so it doesn't show through the grill and dust filter. Also need to fill the screw holes with faux screws. I do not want to drill the steel again. Then I'll probably explore some alternate grill/bezel designs.

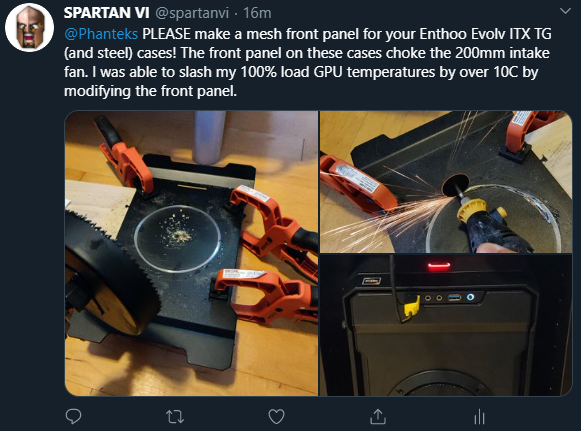
I've never done anything like this before, which just goes to show that Phanteks' engineers can and should do better. Of course, I had to let them know too:

1601169367759.png
 
Last edited:
Did you try exhaust out front? Some cases are terrible with front intake, but do okay if it's exhaust.

Regardless, end result is what matters. Looks great, and keeps everything cool. Good job! ;)
 
Did you try exhaust out front? Some cases are terrible with front intake, but do okay if it's exhaust.

Regardless, end result is what matters. Looks great, and keeps everything cool. Good job! ;)

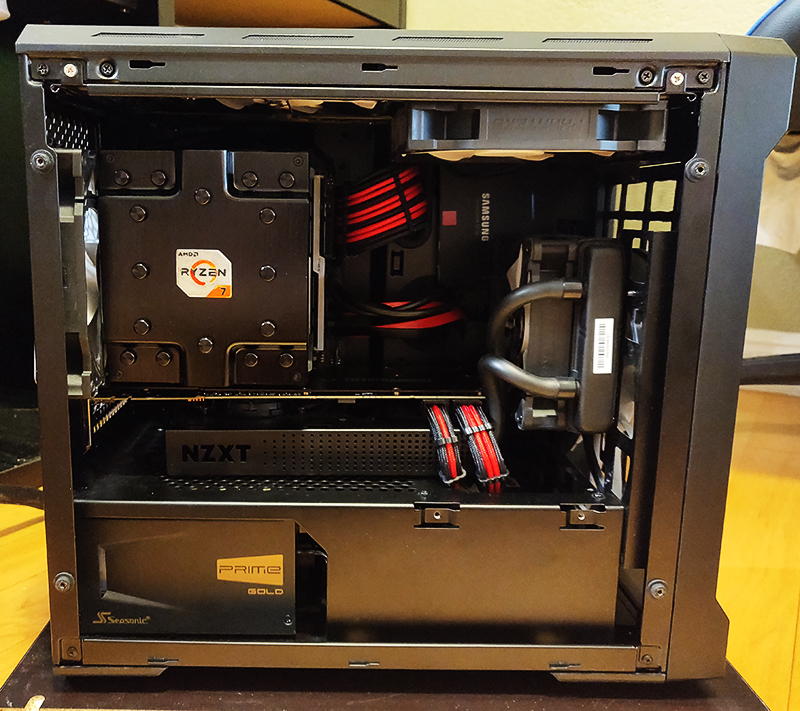
I haven't tried that. The RTX 2070 Super has an AIO attached (by way of the NZXT G12 bracket), so I had to front mount the 120mm radiator. Figured I'd want to suck cool air right into the radiator.

Also flipped the rear 140mm exhaust to be intake because it's right up against a Dark Rock Pro 4. My case only exhausts out of 2x 140mm fans out of the top. I'm guessing there's still a negative pressure bias because of all the junk in the way of the intake fans.
BoxesRyzenInteriorSept2020.jpg
 
Nice job! Looks clean and slick.
For future hole sawing, try reversing your drill once you get your pilot hole punched. I had the same problem with mine when cutting a 4in/120mm hole in a aluminum side panel and found that reversing the hole saw and cutting at really slow rpms was perfect.
 
I haven't tried that. The RTX 2070 Super has an AIO attached (by way of the NZXT G12 bracket), so I had to front mount the 120mm radiator. Figured I'd want to suck cool air right into the radiator.

Also flipped the rear 140mm exhaust to be intake because it's right up against a Dark Rock Pro 4. My case only exhausts out of 2x 140mm fans out of the top. I'm guessing there's still a negative pressure bias because of all the junk in the way of the intake fans.
View attachment 283208
I ran my 2 previous builds in a chimney config.
Try 1 fan rearmost spot, play around with diff temp targets & curves.
You might see gains, you might not.

Highly dependant on setup and use.
 
Back
Top