Little Heavy.

DeFex

[H]ard|DCer of the Month - June 2011
Joined
Feb 13, 2001
Messages
5,248
I havent done one of these for a while.
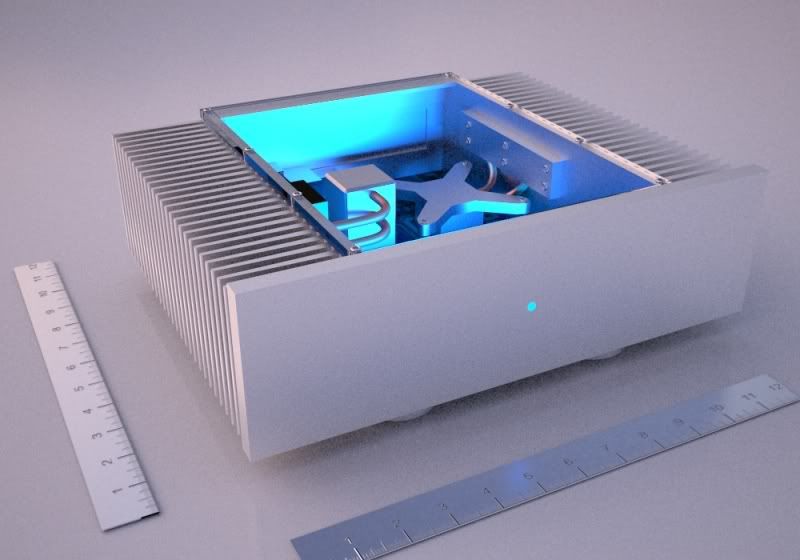
anyways here is "artists concept" of my minimal HTPC build.
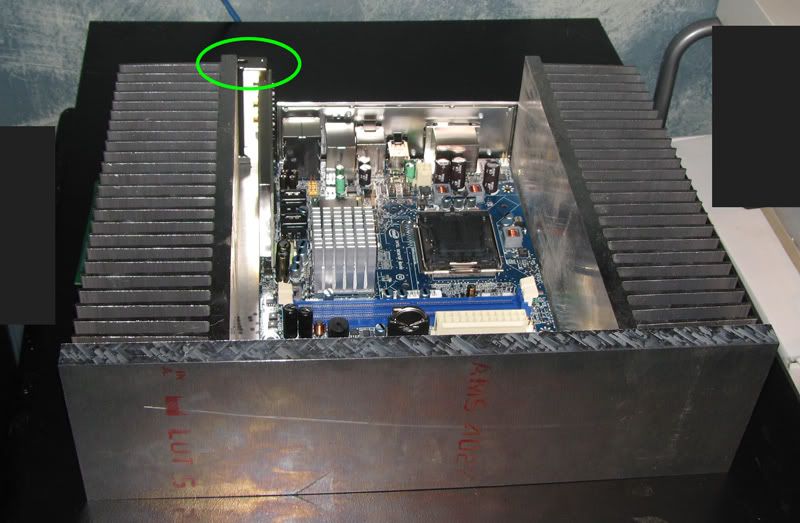
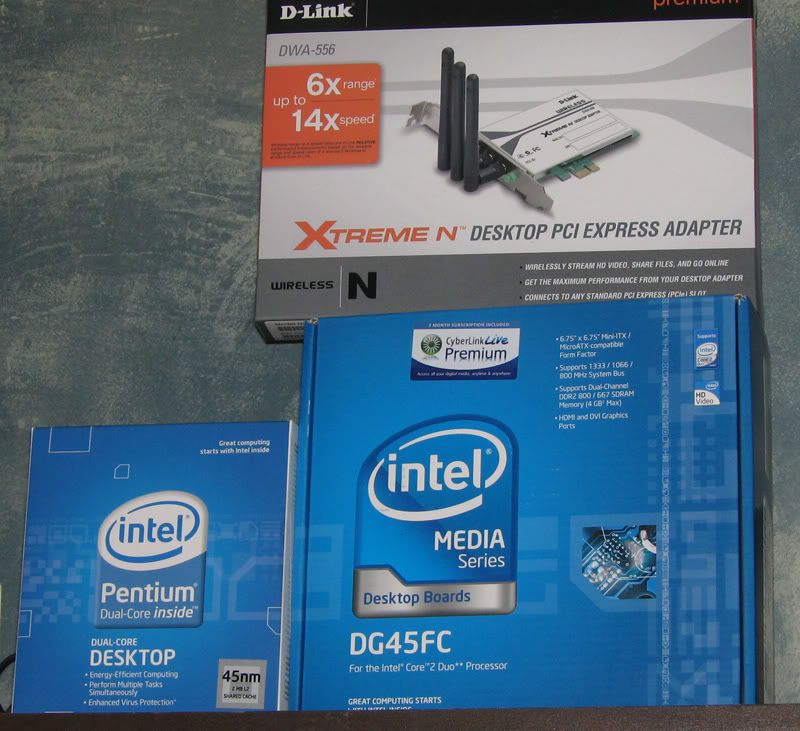
all it will contain is the motherboard CPU, RAM, Wireless N and a SSD, even the power supply is an external brick.

htpc2.jpg


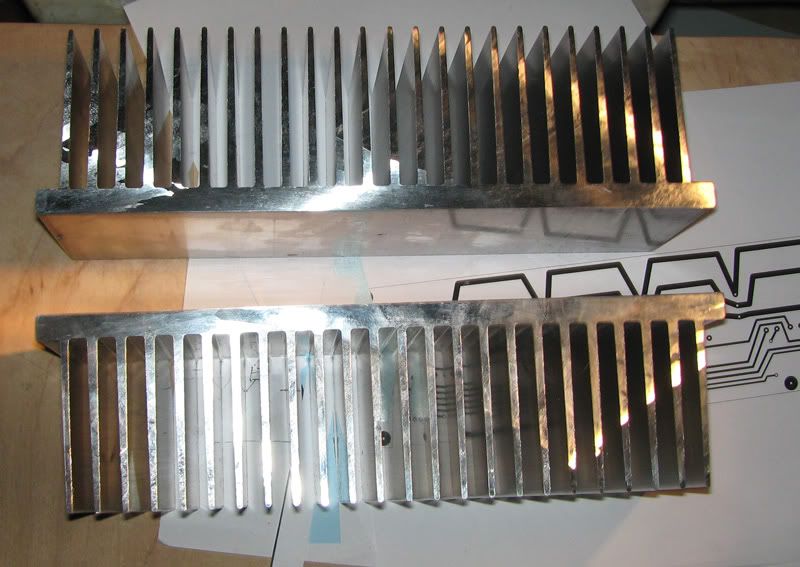
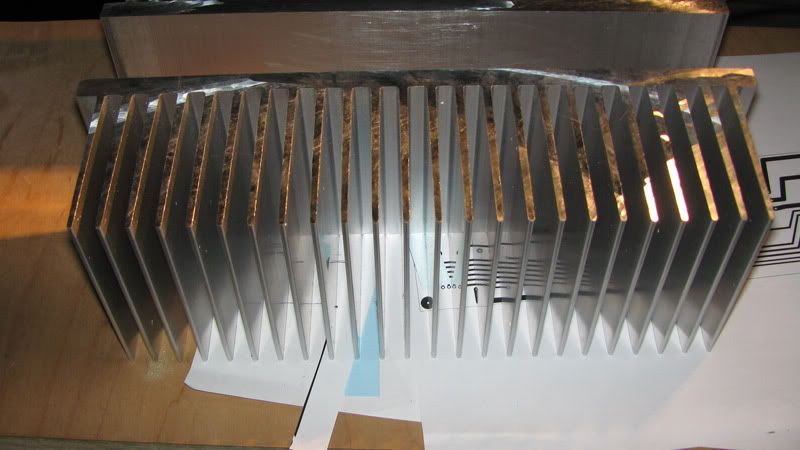
I have bought most of the metals and heatsink has arrived, just waiting for the panels..


BOM
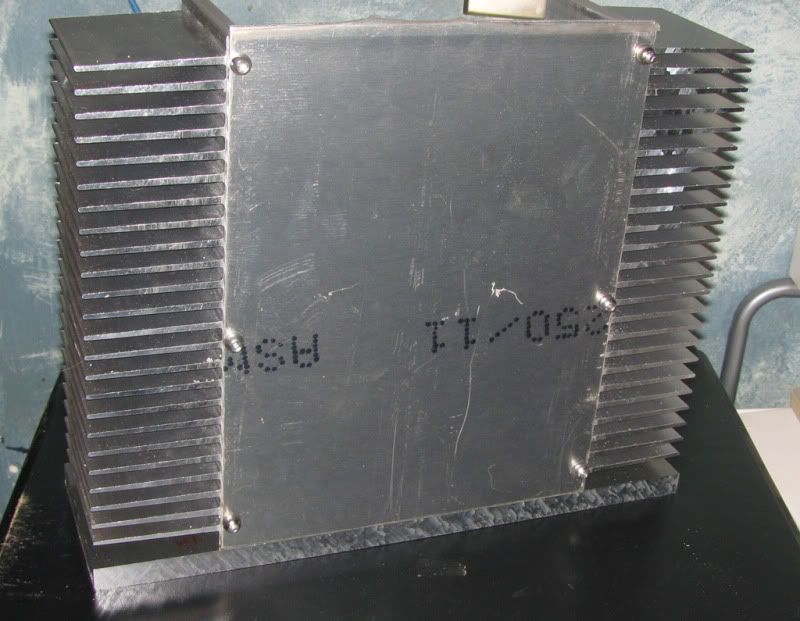
Heatsinks 2@ 3.6" 10.05 x 2.8 from heatsinkUSA $40

Onlinemetals 6061 Aluminum
Metal (front plate) $22 1/2"
metal (base) $13 1/8"
Metal (back) $6 1/8"

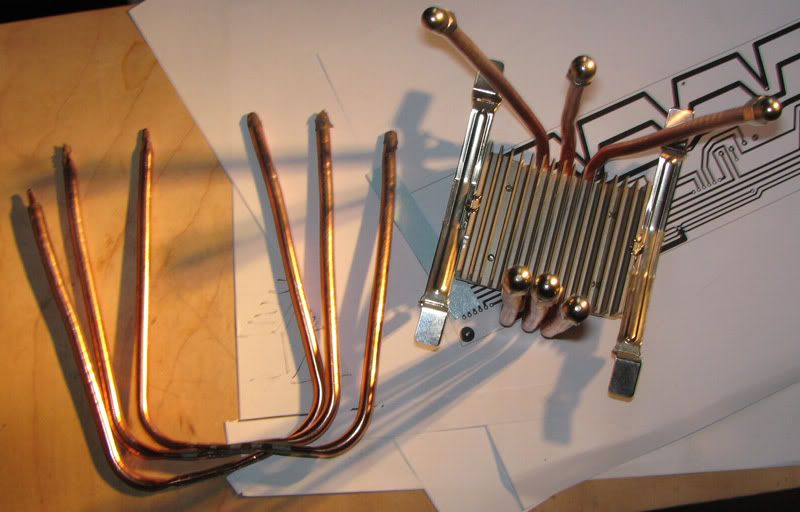
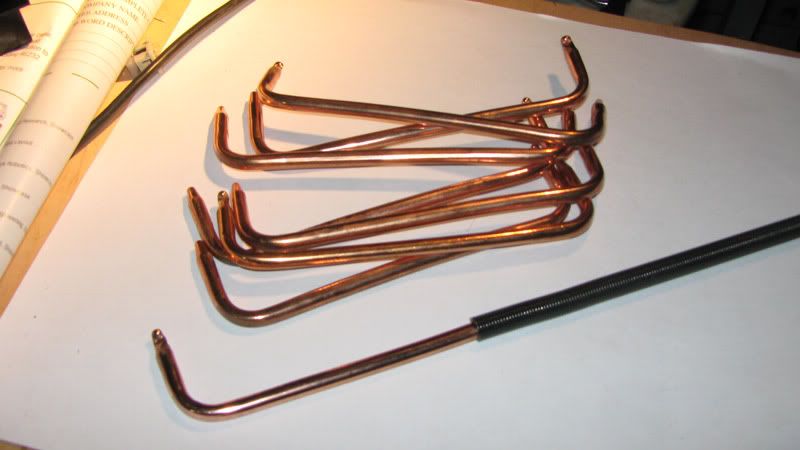
Heatpipes scrounged from old cooler, or solid aluminum heat transfer.

various L extrusion. $3 (homedepot)

Lexan (top) approx $10

Motherboard $130 intel DG45FC
CPU E5200, or E7300 ~$80
pico psu + brick $80
RAM (scrounged)

Hard drive $100 for laptop HHD (500GB)
or
$250 for SSD (60GB)

bolts
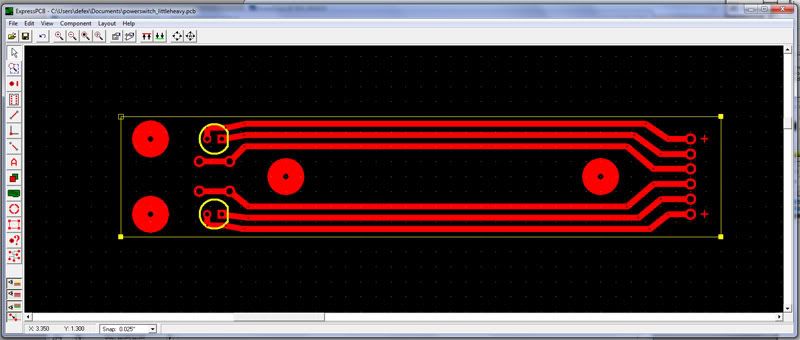
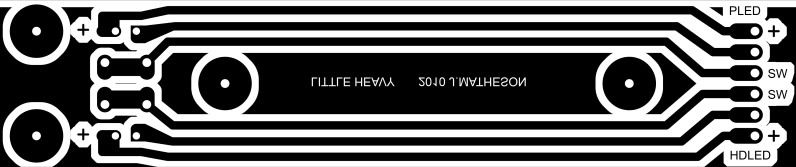
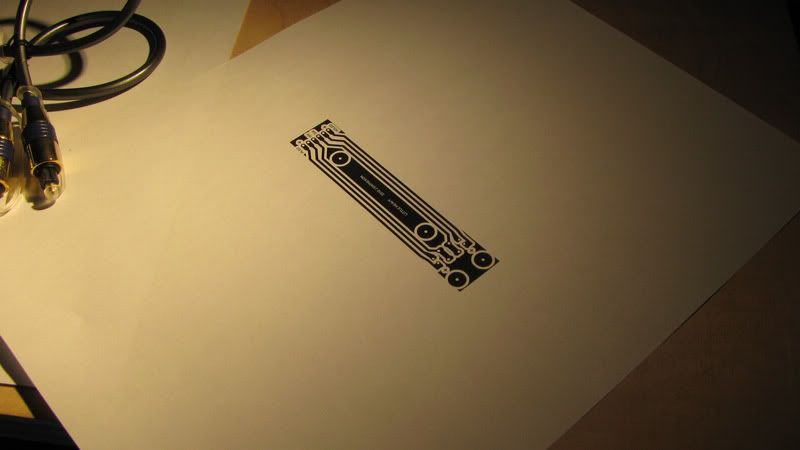
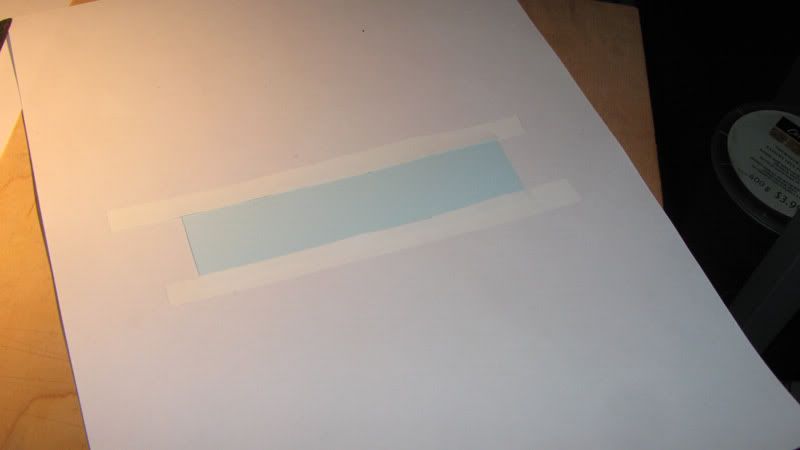
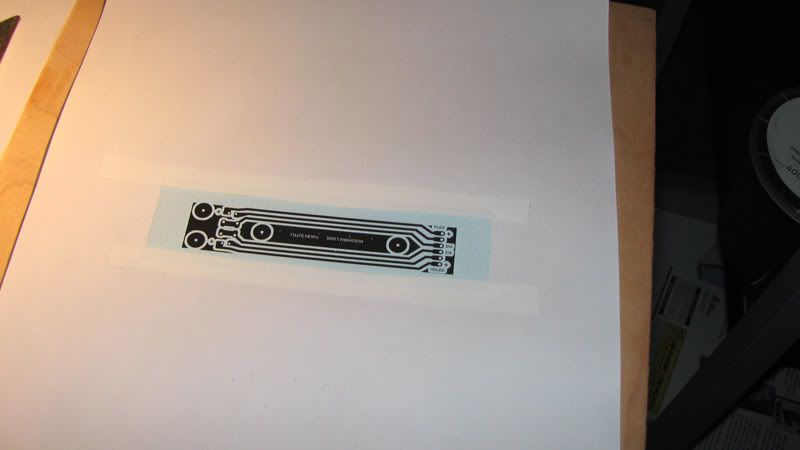
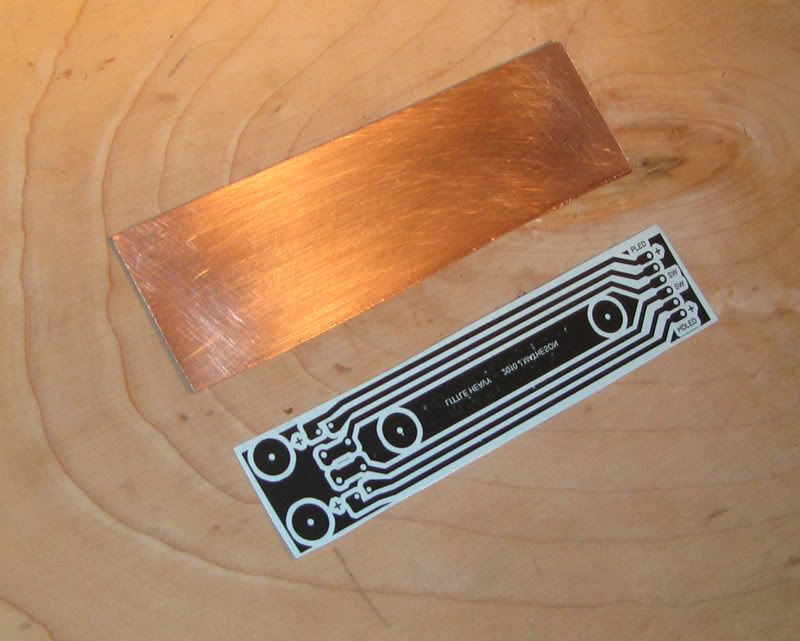
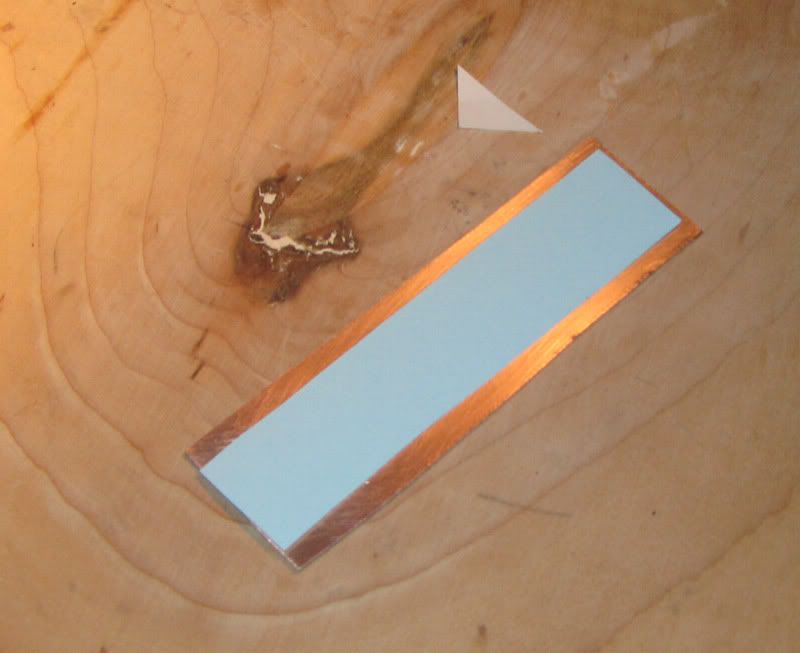
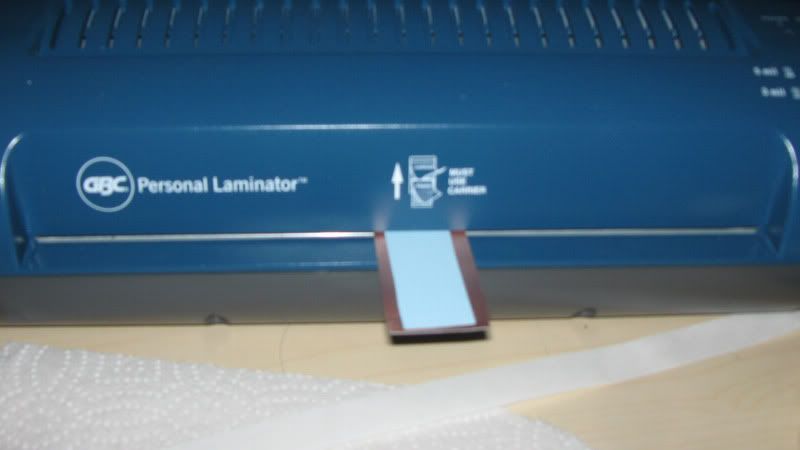
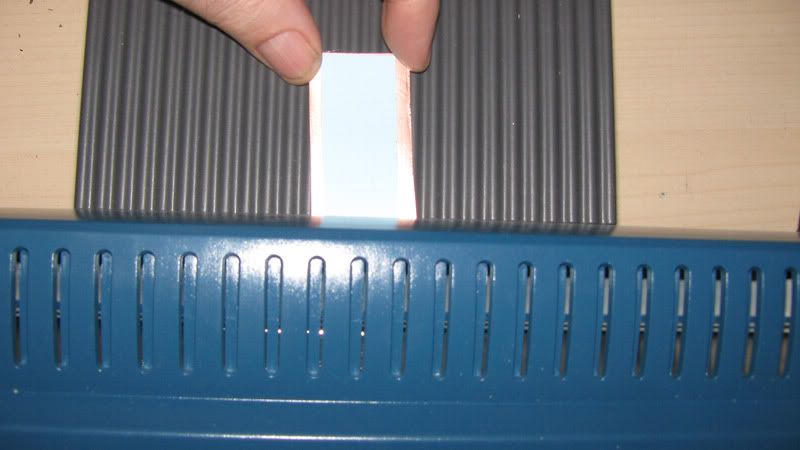
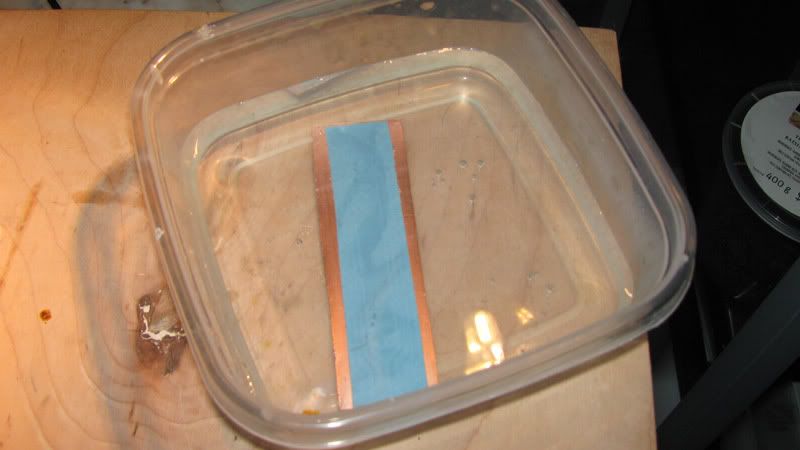
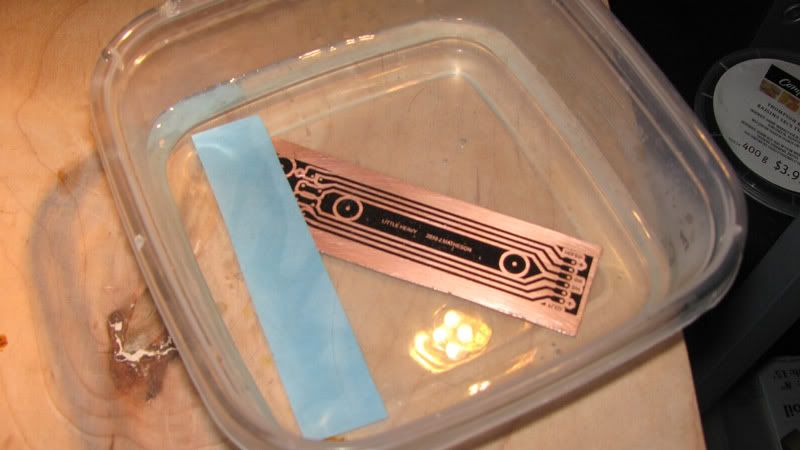
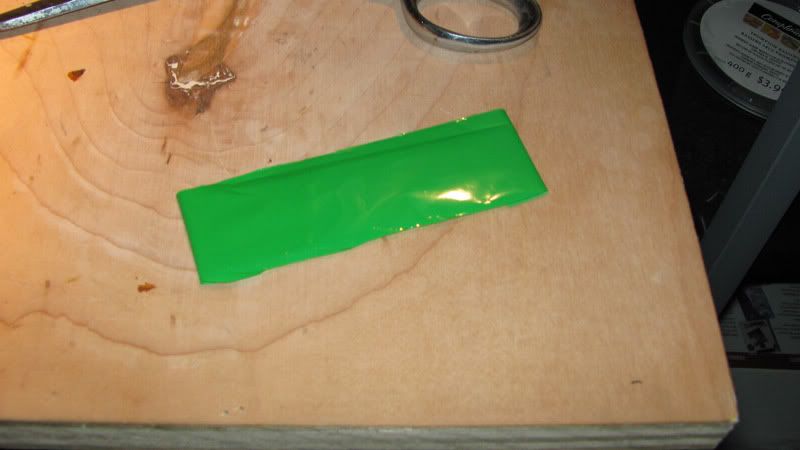
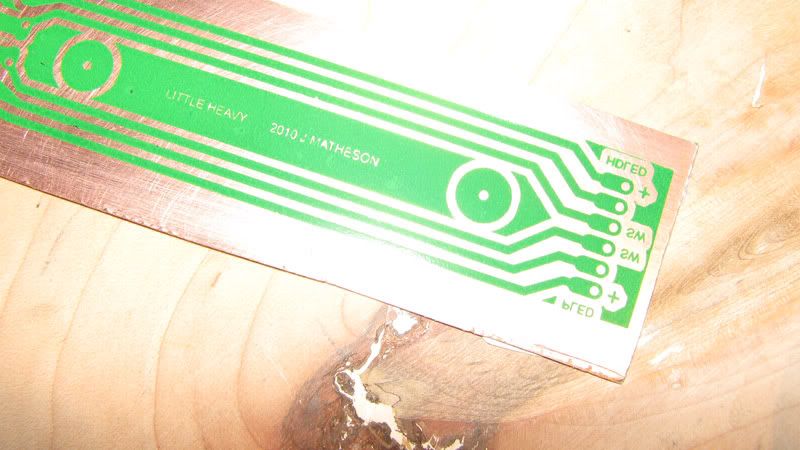
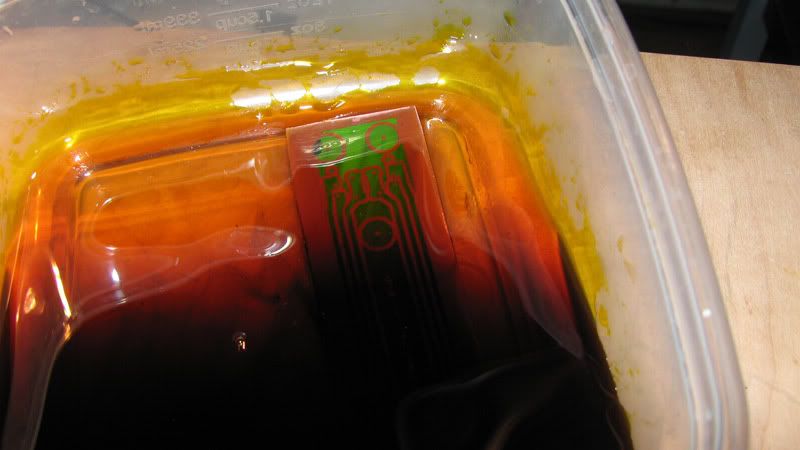
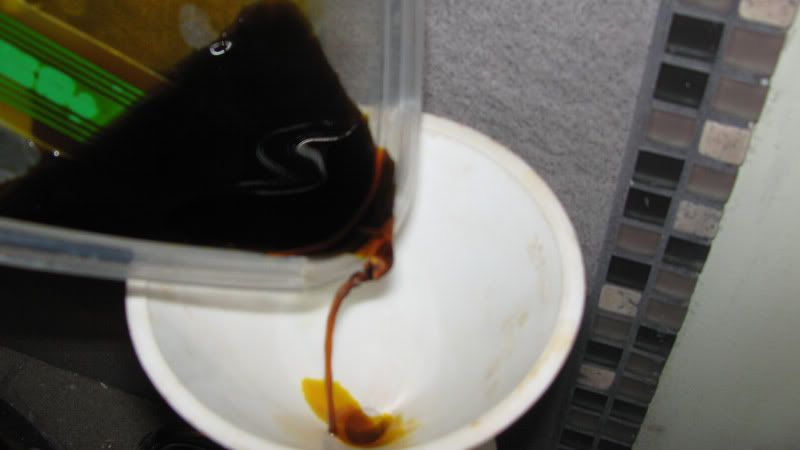
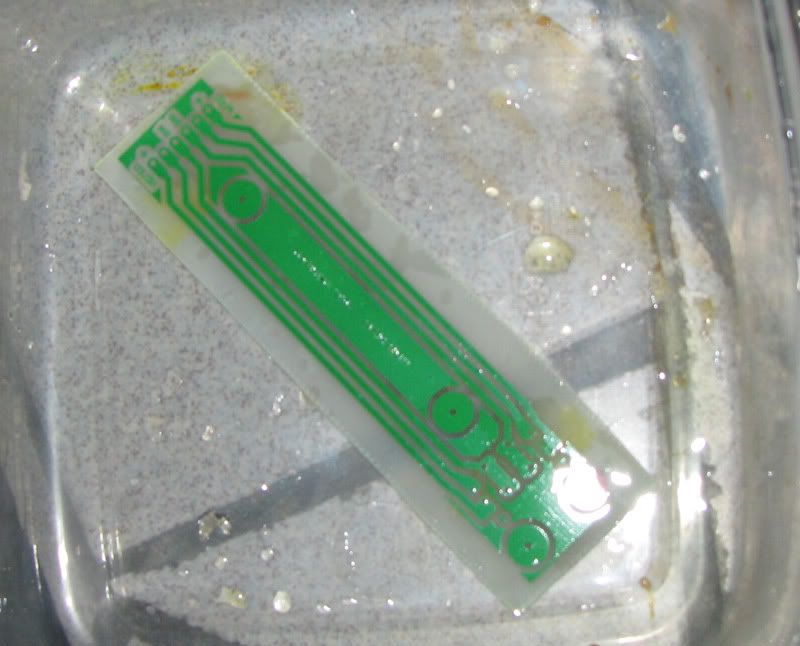
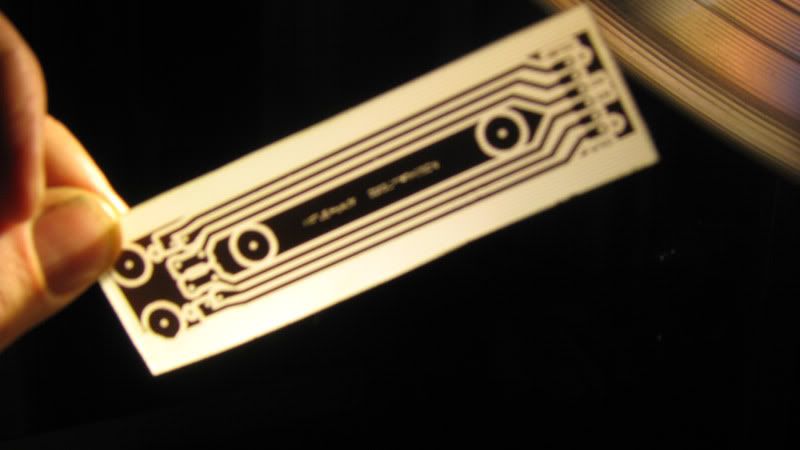
PCB for front switch and LEDs (home made) PCB with pulsar pro + laminator

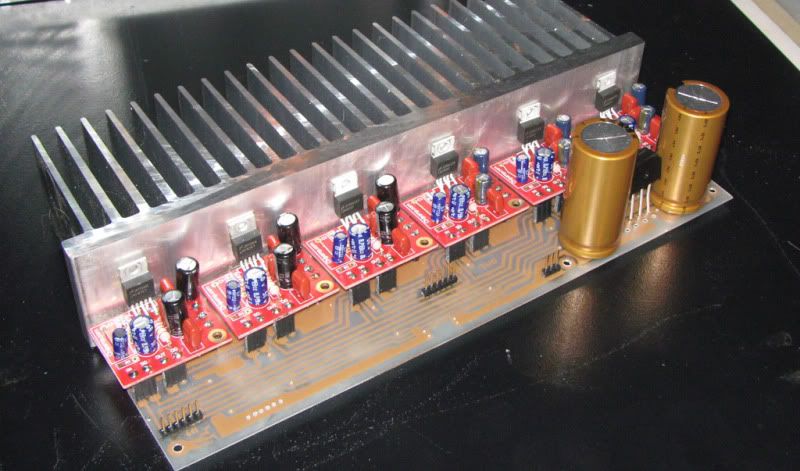
Pics of some of the parts tonight.
 
IMG_0072.jpg

IMG_0073.jpg

IMG_0074.jpg


some of the PC parts and the heatsinks.
they are quite reasonable from heatsinkusa.com if you need some for something.

The heatpipe setup in the render is not set in stone, it depends what i can scrounge up.

I actually got 4 of the heatsinks, and the other 2 will be on a matching amplifier.
 
Subscribed.

I can't wait to see how you manage the connection to the heatsinks for the CPU. I would love to build a HTPC using this kind of design with the passive cooling.
 
I'm subscribed and in for 1.

Nice, simple. Great design... I can't wait to see the end result.
 
Thanks for the interest!

I have been messing around with heatpipes today while waiting for materials.

IMG_0075.jpg


I removed the fins from a scythe heatsink (forget what model, ninja maybe?) anyways it was a big pain in the ass. fortunately it is rather cheaply made, and the fins were just press fit on to the heatpipes, and the "nuts" on the top are just hot glued on (try heating up hot glue on a heatpipe, lol)

I will keep the base with 3 of the heatpipes for the CPU, but bend the heatpipes to suit the case. this will require a pipe bender, which i will knock up on the lathe this afternoon. [edit, i guess i dont have to do that, i just need a spring the right diameter]

for the chipset i will replace the intel heatsink with a block of copper or aluminum, and then have heatpipes running from that to the case.

If there is an imbalance rmember the front panel is 1/2 aluminum as are the bottom and back, which will even it out.

I was doing some experiments with a heat gun and a glass of water, and have discovered the heatpipes almost work independantly from the middle to an end. if you heat up the middle and put one end in cold water, the other end just gets a little warm. as soon as when you take the heat off it gets cold as well.

This will help me with the design.
 
Last edited:
The front panel and bottom have arrived,

metsl_arived.jpg


Just fitting everything together to see how it works out, have discovered i did not take the sidewards pointing bit at the top of the card plate in to account, its only 1/8 of an inch or so.

what i will have to do is mill a small cutout in the back of the heatsink where the attachment screw mount will fit.

The front panel cut at onlinematals was supposed to be 3.8" and it is in fact 3.833, which gives me just enough room to clean up the cutting marks and have the fit perfectly flush to the top window. the accuracy of the cut is good as well, it is 3.833 at both ends and 3.834 in the middle, which might just be my calipers hitting a high bit of the cutting marks. I am very happy with this because it would be time consuming to mill down up to 1/8 which they say they might cut over your measurement
 
Last edited:
As for bending the heatpipes, i ended up ordering a proper bending spring off ebay, so it probably wont come till after the holidays.
 
you local to onlinemetals? theyre great, i use them a lot. and they guarantee every cut to +1/8" and -0", fyi. looks like a fun build! the heat pipes are gonna be interesting for sure.
 
Actually I order from canada to onlinemetals, but they have a deal with UPS to send all Canadian orders at once 2 times a week so i dont have the usual UPS brokerage BS (and they leave it at the door rather than making me be at home or redirect it to work). i bought metel locally and it was a pain to have to get there, and they charged more anyways (for made in canada aluminum like onlinematals has :p )
 
Some careful measuring, drilling, Milling, and tapping done today. the main metal chassis is together.
Everything went together very nicely.

Bottom bolts are temporary m5 bicycle watter bottle bolts to be replaced with countersunk ones.
inside bolts are M5 and M4 allen head.

IMG_0088.jpg

IMG_0086.jpg

IMG_0085.jpg


next is to cut the acrylic for the top and then the hardest part which will be the rear plate which has to accommodate the ATX shield plate and the mounting for the card.
 
Wow I'd never heard of HeatSinkUSA but that is a great resource for DIY work. Looking forward to the rest of your build, it makes me miss having a mill and lathe!
 
How much does the construction weigh so far? That frontpanel and heatsinks look absolutely massive :)
 
@brent_anderson Everything is run from a server in a different room but i have the option to put a slim slot load optical drive in there if i change my mind.
I gave my dvd player away. it was just sitting there wasting space and never being used.

@Elledan I will weigh the parts next time i disassemble it, its too heavy for my scale!
 
Wow, very nice design. Is that front part going to be painted white or is it going to be bare metal? Can't wait to see how it turns out.
 
I was thinking of bead blasting to give that frosted macbook like finish and then clear anodizing, if i can find a place that will do it for a reasonable price.
 
Wow he went all out with a full system:eek: i am glad i only have to cool the CPU and chipset :D
 
I was thinking of bead blasting to give that frosted macbook like finish and then clear anodizing, if i can find a place that will do it for a reasonable price.

I'd suggest anodizing yourself - if you're going clear... A small setup typically costs half of what a local place would charge for the entire job - and you can anodize things for years to come with the same supplies!

PS, this is looking fantastic.
 
A lot of photos!

I made a little circuitboard to carry the power switch and the power and HDD LEDS. the reason it is long like that is so it will bring the connector to the side of the case and make the wiring a bit neater.

To do this i have used the "toner transfer method" with a hp laserjet and a laminator and some supplies from Pulsar pro. I have made a few boards now and thought i would show how i do it.

First i make a rough version of the board in ExpressPCB Free software.

xpresspcb.jpg


now they dont like you to export with accurate size because they want you to use their service. so what i did was get a "fake printer driver" called doPDF (its free) which just prints a PDF of what would normally go to the printer. this way the component holes are dead on accurate, and you do not get jaggies like you would by taking a screen shot and resizing it.

doPDF.jpg


Then i import the PDF in to photoshop, making sure not to touch the image size, but just change the DPI to 1200

import.jpg


Then mess around with it as you like in photoshop. i use it to make oval solder pads and so on that expresspcb wont do.

photoshop.jpg


Once i am ready to start producing the board, the very first thing i do is turn the laminator on.It need to be running for half an hour to get really even heat on the roller.

I print on to plain paper.(this is to save on the expensive pulsar pro special toner transfer paper)

print.jpg


Then cut out a piece of the Pulsar pro blue paper and stick it to the page i just printed, (shiny side up) covering the original board. The paper is taped down with stripes of avery laser safe labels. they must be laser safe or it could gum up your printer.

tapeover.jpg


Then put that paper back in the printer tray and print again.

secondprint.jpg


I get the board ready (no pics) i use 1/2 oz board for this because it runs through the laminator nicely, and single sided because it is a simple circuit.

the board is scrubbed with detergent on a bit of green scotchbrite, then cleaned off with tarn-x it is very important not to touch the copper surface after this

tarnx.jpg


then i cut out the blue paper i printed

cutout.jpg


the paper is put face down on the board.

paprdown.jpg


And run through the laminator. although the laminator says "always use carrier" you do not need to because the carrier is to stop flexible paper getting caught in the rollers, and the board is stiffer than the carrier anyways.

lam1.jpg

lam2.jpg


Now this is where the Pulsar pro paper is better than all the other kinds of paper you might read about people using with toner transfer, photo paper, glossy magazines etc. thats because you just drop it in some water.

dropinwater.jpg


And after a minute or 2 the paper just slides off!

paperslide.jpg


Now you could etch this board now, but the toner is somewhat porus, so I use the pulsar pro green TRF foil, which puts more material in the gaps that the toner leaves.

The pulsar pro instructions suggest a method which does not work very well for me, which is folding the foil over the end, and then just grabbing it by hand to keep out any wrinkles when you put it through the laminator. What i did for this board (as an experiment actually) was fold the foil over on end and stick it with avery laser label, then pull iut taut so there are no wrinkles and then fold it over the other end and use another bit of label to hold it down.

TRF.jpg


then it is run through the laminator again once in each direction i did not take a photo [imagine the other laminator photo but its green]

I let it cool down a bit and remove the green foil.

Dont forget to turn the Laminater OFF! it is very quiet and has a heating element in it, you do not want a fire or something to happen.

trf_applied.jpg


Now I chuck it in some ferric chloride and let it etch, it took about 10 minutes but i have used this etchant a few times and it gradually gets slower. i just use it as long as i can then when its useless i give it to the home depot hazardous materials disposal.

etching.jpg


Recycling :) DO NOT LET ANY FERRIC CHLORIDE GET ON ANY METAL! even stainless steel sink can be etched. after you have removed as much as you can to use again or hazardous waste, when you clean out the container throw it in the toilet or a porcelain sink, not stainless steel, and use lots of water to dilute it.

recycle.jpg


now the board is etched but there is toner and TRF all over it.

etched2.jpg


I clean it off with a paper towel and another lovely chemical

acetone.jpg


And the board is ready to be drilled and populated.
(doh that pic came out a bit fuzzy)

done.jpg


I have made a few boards this way such as this rather large one, from a different project and the more i do it the better the results are.

ampcarrier1.jpg
 
Last edited:
I'd suggest anodizing yourself - if you're going clear... A small setup typically costs half of what a local place would charge for the entire job - and you can anodize things for years to come with the same supplies!

PS, this is looking fantastic.
I have been dithering about home anodizing for ages maybe now is the time to give it a shot!
 
hahaha yeah they are really crap. no where near as good as that one that hasnt been made yet.

hey i know your that troll from planetz . all that being awesome and stuff you should be ashamed.
 
I am glad you are doing so well with the project, it looks most gratifying.
FWIW I have been following Kyle Bennets reviews since Anand Shimpli and him had their little 1 page columns in the ancient CPU magazine.....:p
I deceded to go w/ the MINI-ITX and the XITE-1 a while back so watching your project has been very, very helpful.............ankyu.
 
Haha J! 8 bits rule!! :) :)

This is great stuff DeFex. The guitar project is coming along nicely. Thanks for being on the bleeding edge for us all.
 
Yes Brotha' Man CPctr............Good to see you chillin like a villan..
DeFex has always blazed a trail and should be proud of his work.
I just hope my little H57's in a 1U work out alright.
It's a killer 16" deep 1U for dual MINI-ITX's each w/ 8GB's of CAS 7 1600,and 4 x SSD's.
From watching the Scope card and the Intel G project above I can faithfully buy in confidence now.
I wish you streamed audio samples from K4 though, then I could bust your balls on the GFX and if it draws too many resources or RAM....

Hats Off DeFex......:cool:
 
Holy fuck man, thats fucking amazing pcb work, jesus fucking christ man that is awesome.
 
Wow dude, didnt need that many expletives in once sentance! :)
 
Well I have already tried the card, and it worked fine with 1080p, (i have something called the bird test, which is from life on earth when there are about 2 million birds on the screen at the same time and it always gives a stutter if there is going to be one)
the acces point is practically "right next" to where the machine is going to be, just upstairs through one wooden floor/ceiling
if it does become a problem, i will just use a network cable or as you say, copy the movie first (but that would kind of suck)
 
A little more on heatpipes

While waiting for the "bending spring" for the heatpipes on the heatsink i took apart, i remembered i had saved theses from the cool looking but rather useless zalman hard drive cooler.

and i happened to have this spring, and managed to bend the heatpipe straight. it is a bit distorted where i straightened it, but i will make a jig to force em back in to a round shape
that means i can make custom bends for the chipset side. at least, and maybe even use them for both sides, since i have plenty of them and they are cleaner than the other ones.

I made sure they were not thermaltake style fake heatpipes by heating up one end and almost burning my fingers :)

zalmanpipes.jpg
 
Yea, the "bird scene" has become a well known stress test for playback of 1080p h264 material. It peaks at 60Mbps in some places.

If you can play that over WiFi then you are very lucky.
 
Yea, the "bird scene" has become a well known stress test for playback of 1080p h264 material. It peaks at 60Mbps in some places.

If you can play that over WiFi then you are very lucky.

Thats pretty funny i randomly picked something that chugged on wireless "g" as a benchmark that is used by others :) The Dlink "extreme n" with its associated router can supposedly do up to 300 Mbs but when i tested it it was about 180, still not too shabby.
 
I've never taken apart a heat sink with heat pipes, but are they empty tubes or are they filled with a liquid?
If empty, could you use copper plumbing tubing?
 
Back
Top