HP Blackbird 002

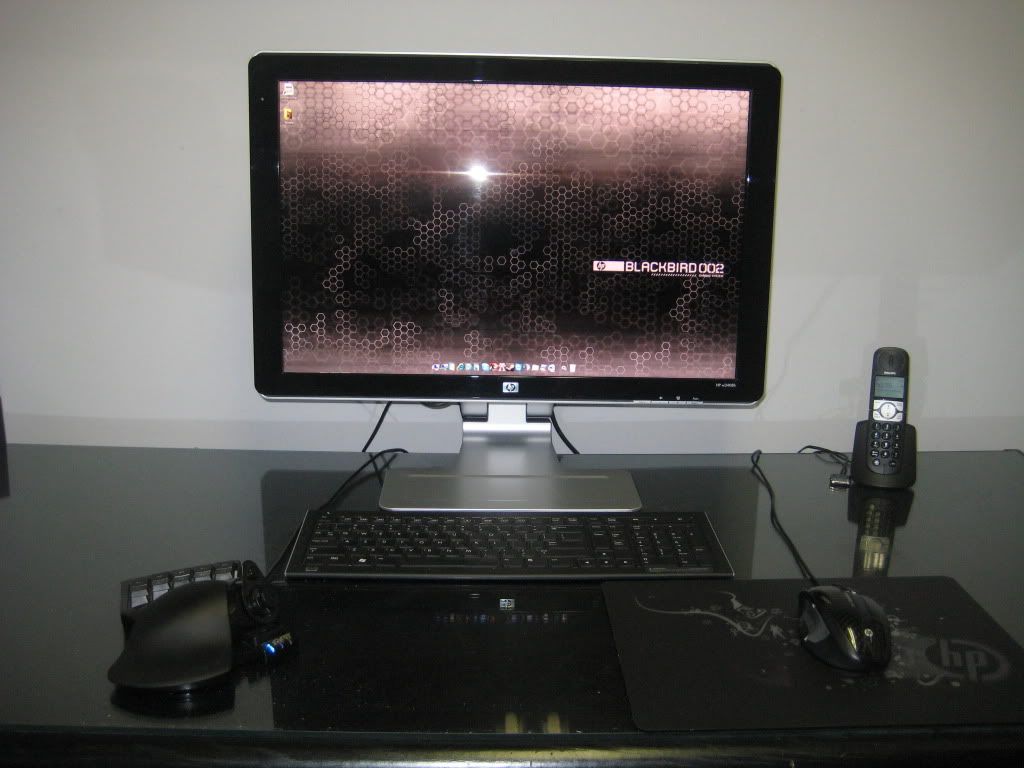
Nice setup, Ken, what specs are you running?

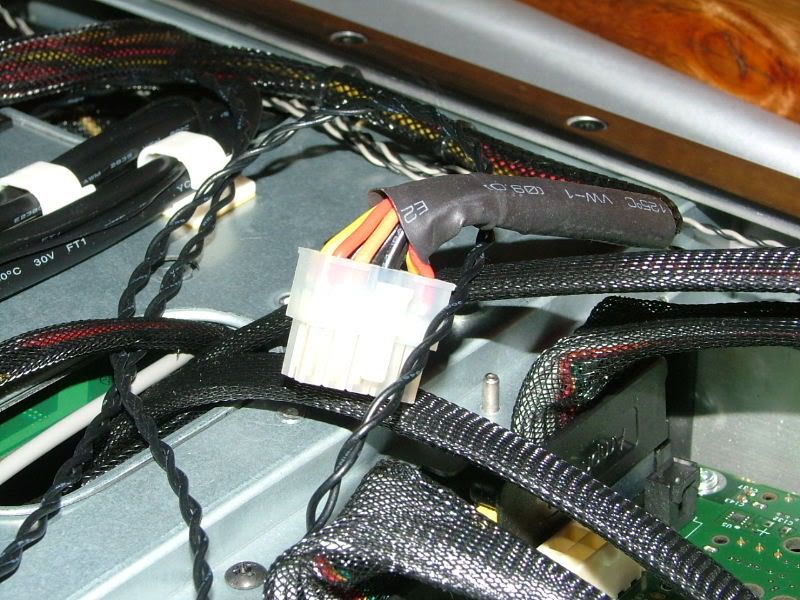
I just wish I could've gotten another empty BB case, so many ideas, and would luv to do a mod for the Wife too - she has one powerful gaming system too, all watercooled of course, and pretty close in specs to mine. Single CPU only......even running a HP SAS cage with 4x 72GB SAS drives as the OS array for her setup....

I would like to see more on your system :) And thanx for replying here!
 
here are some pics I took for another forum. It has a I5 750 cpu and a ati 5850 video card.
IMG_4108.jpg

IMG_4125.jpg

IMG_4127.jpg

42Ghzi5750EVGAp55FTW.png

Untitled.jpg
 
Really nice :) Thanx for the shots!

I luv your sidepanels, but unfortunately, the only ones I managed to buy (new) of someone over at TheNextBench Forums about 18 months ago, were the Dedication Edition panels.

They look pretty nice too, but I like yours better.

Another weak point of this case, is the PCI retention clips, I need to find a good substitute - maybe off something like the G5 Servers, retrofitting them might work.

Last thing I still need/want is a second Slimline-drive caddy for this case, I have only one.

At least I have the original Blackbird Wallpaper on mine, it looks georgious running at 2560x1600 on the 30" LCD :)
 
Last edited:
Another update -> Several people have asked for the wiring code on the power-plug used on the SAS cage - please note I have used ATX color-coding:

Orange=3.3V
Red=5V
Yellow=12V
Black=Gnd/Negative

Plug was salvaged of an old Server with a SAS cage, but you can find the Molex connector from Molex I would guess.

DSCF5203.jpg


SASPWR1.jpg


SASPWR3.jpg


SASPWR5.jpg


SASPRW2.jpg


SASPWR7.jpg


SASPWR6.jpg


Fear my MS Paint skilzzz...this should make it real simple:
SASPowerConnector.png


edit: Yes, I know the plug is not fully inserted, this is just for the sake of these photos..... :)
 
Last edited:
Ok, awaiting my new watercool components, so decided to post a few miscellaneous pics of the internals and exterior.....

As always, the wiring will be super-tidy once I am done with this setup, so ignore this for now!

Below a shot showing where I am measuring the temperature on the FB-Dimms, these boys get toasty, nominal operating temp for them around 80 deg C, but, automatically controlling a 120mm fan, via the mCube bigNG, that is mounted (temporarily) close to the memory and NB, the temps are consistently around 58-63 deg C.

All these temp probes will be connected to the Koolance TMS-200 once it arrives, which will be mounted in an empty PCI slot - will simplify wiring et al.

MemoryTemp1.jpg


Here a shot showing dual CPU coolers, and motherboard in general

Mobo1.jpg


The currently untidy card area, which is isolated from the rest of the case by a baffleplate imediately above the GFX card - this baffle is a standard Blackbird item, creating an airflow zone in the card area - there is a similar zone for the PSU area in the bottom of the case.

Anyway, the bottom-most card, a SCSI controller, connecting to an external Tape-drive, wil be removed. Same goes for the PCI cooler-fan mounted directly beow the SAS P800 controller. These 2x slots is where the new TMS-200 controller with Daughterboard will be located.

Cards3.jpg


A picture of the 'new' 5990 Ati GFX card, I have long ago discarded the ATi 4870X2. The new card is fitted with EK full-cover block (nickel unfortunately) and a nickel ram cover-plate on the other side....

GFX1.jpg


A close-up of the cavity above the SAS drive-cage where I squeezed the dual DDC 3.2 pumps in - nice utilization of space.....

Pump1.jpg


and this is where the reservoir, mounted in the vertical 5.25" drive-slot, output goes to the dual pumps imediately below it....
Res1.jpg
 
Just a shot from tha radiator-area, showing how tight things are with the motherboard power-connectors et al - I will replace all this cabling with individually sleeved wiring/plugs......

Rad1.jpg


A more clear shot of the new rear bulkhead connector plate, with BP bulkhead connectors

RearBracket1.jpg


And a close-up of the same - I have used spring-mounted screws to allow some flexing if required....

RearBracket2.jpg


A few shots of the baffles/doors fitted, showcasing therather neat design

Inside2.jpg


Another one

Inside1.jpg
 
This looks absolutely fantastic. I kind of wanted just the case too a couple months back now I see that it's definitely not as practical as, say, a 600T but it looks seriously cool. Nice job with the mods so far.
 
One neat feature I luv of the BB is the integrated Flash-media adapter - very neat, and just push on it to stow it away - nice....

Top1.jpg


A last few, of the exterior-> now you can finally see how nice she looks with the Dedication Edition side-panels - I got these new of a member at TheNextBench forums about 18 months ago, a real pity it is not the standard default side-panels, which I like more, but, these will have to do.

More updates to follow next weekend, once I start fitting the new watercooling components, and controller unit.

Enjoy.

Side1.jpg


Side2.jpg


Side3.jpg
 
Last edited:
Thanx Guys, appreciate your feedback :)

@ Camph: Yeah, it is certainly not that easy to do a custom WC setup in one of these, and, using an E-ATX motherboard, well, let's just say, it doesn't make it any easier...but, certainly doable - I would say that this is not the case for first-timers in watercooling arena, but, if you've done a bit of case-modding, the end result can be very gratifying.

I know this case will be with me for the next 10 years at least - so a fair bit to do to get it to a 'timeless' state, but we will get there :)
 
Its really a shame HP stopped making the blackbird. I would have loved to see the next evolution. Here is my setup with a few mods.
setup.jpg

mouse.jpg


Mods:
fancontrol.jpg

touch screen fan control.

light.jpg

Internal Light
side.jpg
 
Last edited:
this is just freaken awesome
completely blows away most of the mods ive seen this year :)
could use a better paintjob/camera hehe
 
Good morning from NSW, Australia everyone :)

You know what the worst part about modding is - those times you cannot get to it if you want to! My Wife has just informed me UPS has delivered my new Koolance dual-DDC reservoir, and a few other goodies, and of course, I will only be back home tomorrow night :( Blegh....

Oh well, at least I have lots to do on Saturday, I hope my tubing from GAMMODS will arrive in time. Should have enough left over to finish off things though, so check back for an exciting watercooling-redo update!

I have also ordered a bunch of goodies from our friends over at MDPC-X in the EU, and this parcel too have been posted, but this will take a little longer to arrive. Should have it by next wekeend though, then I can finalise the sleeving and few remaining items.

Will keep you posted.
 
Hello Everyone,
A small update -> Some of my goodies was delivered on Thursday, so I am posting a few pics of this. I am still awaiting my tubing, and this will most likely only be delivered on Monday :(

I have also decided to pick up 2x new V3.2 DDC's from PC Case Gear in Melbourne, so hopefully those I will have on Tuesday.

I will then remove and keep the dual V3.2's, mounted to the Dual Watercool Top, and doing duty in my PC currently. I will also get a few new fans from this supplier - so, hoping my MDPC-X package will also arrive end of this coming week (Nils did a great effort of shipping this very speedily, thanx Mate!), I will have a very good modding weekend, as I would like to sleeve pump-cables, new Fan-cables, PSU et al.

Easier to do this all at once, so please check big update during the week, and next weekend.

I am also awaiting 2x of the SmartGLCD boards, they were delayed for over 6 weeks, but DHL should deliver them either tomorrow of Tuesday - andat least 1 will find it's way into this mod......pending it's physical size.

But, enough babble, herewith a few pics of the goodies that came in this past Tuesday.....

My new Koolance RP-401X2 reservoir, from all possible angles - please note that this will be fitted with 2x new DDC 3.25 pumps - in the photos, a blanking plate is visible where one pump must go. Once I have the new pumps, hopefully tomorrow night, I will post a few pics of it assembled.

This setup will, however, work really well with this mod, and thanx to Koolance for the beautiful, yet very functional, design :)

Res7.jpg


Res8.jpg


Res1.jpg


Res4.jpg


Res2.jpg


Res3.jpg


and a last one

Res5.jpg


Herewith the pretty nice bit of tubing that will allow running both pumps in series, as well as the bit that goes in the fron to 'link' the 2x reservoirs together - by default this reservoir comes setup in dual-loop, i.e. parallel configuration, I will be running single-loop serial-mode though.

Also visible is a nice Koolance TMS-18 flowmeter that will be connected to the TMS-200 controller board....

Res10.jpg


and

Res9.jpg
 
and a quick few of the Koolance TMS-200 controller and optional daughterboard, which will allow automatic control of both pumps, various temperatures, and in my case, due to serial-mode operation of 2x DDC pumps, a single flowmeter.

This should give some protection to the system in case of pump-failure, althouh I am running punmps in series for redundancy anyway. Overkill, most likely, but nice and fancy.

TMS200_1.jpg


and back-side PCB's

TMS200_2.jpg


and the bits and pieces that came with the main controller - mine will be mounted in a PCI slot, as the 5.25" drive-bay will be accommodating the Koolance Reservoir.....there are more sensors and cables that came with the optional daughterboard, but no need to post a pic of them, hehe - we all know what cables and sensors look like....

TMS200_3.jpg
 
Hello Everyone,
Just picked up 2x new Laing DDC 3.25's, as well as 4x NB-Multiframe M12-P's this afternoon.

Had a lot to do for my real job, already 23h00 and not yet finished with everything, so I will start with fitting pumps to the Koolance-res tomorrow evening, when I will post pics of the new toys to.

Check back then, and ideas/feedback/critisism et al, as always, appreciated.

Best regards,
mrbean
 
Hello Guys,
A few progress pics of the new Reservoir, and fitting the dual-pumps. Pretty boring, really, but, may come in handy for someone out there.

One thing I must say, this is a real neat single 5.25" bay solution with dual-pumps. Nice, compact, powerful.

First pic is showing the cover you need to remove if you have dual pumps, behind which is located a plug which needs to come out.....

Reservoir1.jpg


Said plug, which needs removal, so the two 'reservoirs' can be joined as a single bigger reservoir.

Reservoir2.jpg


Plug removed, told you it was boring.....hehe

Reservoir3.jpg


Custom plug fitted to the inside of the left-hand reservoir, as you view it here - this is part of the conversion if you need to run the dual DDC's in series...

Reservoir4.jpg


Another part of the dual-series mod, a nice bit of tubing that is optional, but cleans things up nicely -this 180deg pipe comes with above plug....

Reservoir6.jpg


Another angle, and showing two areas where pumps will be located....

Reservoir7.jpg


Now, some mods had to be done to the pumps, that will allow you to fit them to the receiver-bays.....

there are two victims, the first one.....

Pump1.jpg


then, chopping here and there.....

Pump2.jpg


and the final result, ready to be mounted to the reservoir....

Pump3.jpg


Two shots showing the reservoir with pumps mounted after above chopping/snip-snip action - real compact....

Reservoir8.jpg


and a last one....don't mind the cables, they will be sleeved - goodies on it's way from MDPC-X shop :) I will also clean up the pump housings, where I used a Stanley carpenter's knife to remove the original mounting lugs....be careful with your fingers here, I know we're chopping, but NOT your fingers, please!

Reservoir9.jpg
 
Ok, some more rantings and ravings - typically that of a lunatic, but anyway.....here goes:

I will do a few small mods to the pumps, i.e desoldering the original wires, and extending with new ones - I will mount the Koolance TMS-200 in the bottom-most PCI slot in my case, and it will take significantly longer runs to route the cables proper, and I don't want to solder/join them somewhere in the middle...

So, this will also allow me to mount a small 10k NTC thermal probe to each of the pump's pcb's, so I can monitor both pump's temps via Software. This will also allow me to run the cables together, and exit through the same grommet on the side of the pump....

So, at this point in time, awaiting the sleeving from Nils at MDPC-X.....should be here by weekend, I hope :)

Will update then.....
 
Ah, some good news.

My package from Nils at MDPC-X has arrived, thanx for the nice sketch on the envelope, Nils :flowers:

Luv the Molex-crimper too, I have a similar one, but for slightly larger Molex pins, now I can do the job proper. Just popped off to Jaycar, got a nice new wire-stripper too, and 100M of blue (no black, other choice was brown) 17AWG stranded copper-core cable.

So, I will completely rewire my trusty old PC Power&Cooling 1KW TurboCool PSU - less than 1% variation on the rails under full-load, and I just absolutely luv it. It's already 5 years old, but as stable and rock-solid as the day I first got it. With a peak of 1100W, no need to replace it with an inferior old Corsair/Enermax or Thermaltake - most of these have between 2-3% variance on the rails, and yes, the Corsair AX1200 is modular, looks nice, but.....if I compare the inside of it to my PC P&C, wow, wonder how those tiny heatsinks keep it cool......

:(

So, PC P&C will be retained, and, admittedly, possibly the best PSU out there - at least the old, real PC P&C's......

So, I will instead rip all the cables out of my unit, and rewire - at least now, I can route all the cables exactly where/how I want to, and can really clean up my system. Nice, I will provide pics on the weekend. First things first, will be the water-loop, revamped (for the final time), fitment of new Koolance RP-401X2, pumps et al.

Kee you Guyz posted.
 
Last edited:
A small update: cleaned up the rough edges on the pump-housings, where I removed the original mounting lugs.

Also used the opportunity to fit the temperature sensors, as well as creating a few ventilation holes on the rear. Will consider mounting 2x 80mm fans on top of the housings, and control them via the TMS-200 too, but probably not necessary anyway.

A few pictures tomorrow I will sleeve the cables, and fit the reservoir to the case, as well as tidy up the water-loop.

Enjoy - and sorry for the fuzziness of a few of the shots, the Fujifilm 5000 not taking as consistent clear pics as it used to....

Fitting the modified pump-housings...

Pumps5.jpg


Nekkid pump action...

Pumps1.jpg


Temperature sensor fitted, and secured by double-sided thermal tape .....both punps have the sensors in exactly the same location....

Pumps2.jpg


Fnished product, bear in mind the sleeving wil happen tomorrow.

Pumps3.jpg


and

Pumps4.jpg
 
Thanx Mate, appreciated, but even more to come.....->

I've decided to order 2x Koolance PMP-400 Heatsinks - hopefully they arrive end next week, as I've done some USPS Express shipping from the webshop.

So, I will most likely continue to sleeve cables etc, and prep these for the new heatsinks once they arrive next week. This setup is all about reliability, and, on-top of the redundant pumps, I would like to give them a fair shot at maximum life-expectancy, hence the heatsinks - and the Koolance-kit is by far the best solution currently available.

More to follow.
 
Ok, donwloaded some images from Koolance's website (Tim, I hope this is ok, Mate?) to show what I've ordered - I really like the Koolance pump-kits, as they do away with the old plastic housing/heatsink on-top effort, and expose the pcb rather nicely to the heatsink.

This will lead to more effective cooling -> if memory serves, you can also bolt a 60mm fan directly to the heatsink, as the holes line up 100%. I will confirm this though, but the general idea is that I will have slimline (and quiet) 60mm fans controlled from the TMS-200.

This control will be automatic, as I will retain the temperature-sensors that I've mounted to the pcb's.

Should make for a nice, quiet and reliable pump-solution.

Please take note that this approach will not work for those of you that have a single 5.25" bay restriction - yes, the BB case have only one, but, there is space both sides of this vertical bay - I will take pics once this is installed to how what I mean.

For now, a few pics:

What you'll receive in the kit

hts-pmp400_p3.jpg


showing the exposed pcb, and the area where the heatsink will bolt to - yes, there will be some rather thick TIM in between...

hts-pmp400_p2.jpg


and then 2 shots of the fully assembled unit - again default pics downloaded from Koolance's website - not direct linked, I'm hosting via photobucket......

hts-pmp400_p1.jpg


and

hts-pmp400_p0.jpg


ps: I will need to perform minor surgery to the intermediate bracket before I am able to fit this to the RP-401X2 reservoir, but I'll make it work :) This is going to look pretty good, I would reckon :)

Feedback welcome.

ps: I know this is probably overkill, but the main aim for this (simulator) is stability and reliability - I can see me using this for the next 5 years - yes, I am serious.....
 
I love your attention to detail! When I saw the first few pictures I was thinking "Eeek, what is this man doing?!" But then I saw the SAS enclosure and all my worries faded away. Anywho, the mod looks great, keep up the good work.
 
Hello,

Just wanted to let you know that I checked your computer out and I think it's very impressive.
Even though we both have two cpu's it is not my purpose to make a sexy looking animal like you did ;). My computer will end up between my desk and my cupboard and the radiator will be positioned behind the cupboard. I'm going for performance (combined with perfect silence :p). Anyway thx for your responses to my thread and I'll definitely look into that last reservoir that you used because I would like to have two out's.
Good luck with the rest of your modifications ;).

Regards,

Usui
 
Thanx for your feedback, Usui, much appreciated :)

Let me know if I can help you wrt testing of Koolance TMS-200 vs mCubed bigNG, I have both, and even though the software support for both ain't that good, I have been running the mCubed for the last year, it works really well on auto-control - and once yun have setup the parameters, it is stored onboard the device, and no software is needed to run.

So, you can connect your laptop to it, configure it, and let it control your server running linux :)

Neat, hey!
 
Hello Guys,
Slightly annoyed with postal services, as my PMP-400 heatsinks have not been delivered, so a second weekend I cannot finnish my watercooling. Oh well, as they say in Finnish, paska säkä.

But, a small update none the less: Decided to redo the fittings/tubing passing through the mid-plate, onto the gfx card. As things were, I could not remove the SAS Raid Controller, as a part of the fittings were in the way - SAs card is mounted directly below the gfx card:

oldtubing1.jpg


and

oldtubing2.jpg


Decided on a different approach, by fitting an additional spacer to the pass-through adapters, and then using some BP fittings on the gfx card, rmoving the BP temp sensor, and have both inlet- and outlet connectors on the top side of the gfx waterblock....

Busy here with the first one

newtubing1.jpg


and a few more....

newtubing2.jpg


and

newtubing3.jpg


and

newtubing4.jpg


Oh well, came pretty decent, bit more work to do on the tubing-lengths, and decided to do the old water-run.

Damn BP fittings, both the 90-deg rotating fittings leaked (albeit very, very slowly) right on the o-ring where it is swivelling - jeesh, I was annoyed. Very poor quality control BP-boyz.....

So, had some BP silver-shining 90-deg (non-rotaries), and decided to go with them - ok, they're not black, but they will not be visible here anyway, and they will do just fine.....- please note the drain-line, connected to a 90-deg rotary fitting, if I need to drain the loop, I simply rotate the tubing out and let it drain into a small beaker or something.....will make a holding-mechanism for the tubing, but not to shabby :)

finaltubing1.jpg


and (please ignore the PSU cabling, will be tidying it up)

finaltubing2.jpg


and a final one for now

finaltubing3.jpg


Well, currently testing the loop again, and much better, 3 hours +, and no more leaks. Much better. At least now, I can remove the SA-Controller if I want to, tubing is a lot cleaner, more practical, and not I can focus on the pumps and associated tubing when these damn PMP-400 heatsinks show up.

Definitely this week, but frustrating, I tell ya.

Feedback appreciated.
 
Last edited:
For those wondering where I am going with the water temp sensor, I have ordered 2x Aquacomputer in-line temp sensors from The Kool Room, one for res-out and one for res-return lines.

Should have them mid-week too, so all in time to fit the new pumps and Koolance res :)
 
Last edited:
Hello Guyz,
Need a bit of help on this one - I am rewiring my PC Power&Cooling 1KW computer psu, but do not want to use el-cheapo PVC wire.....

Instead, I want something highly flexible, soft, and good quality, like Turniqy 18AWG pure-silicone cable -or, even better, 16AWG would do.

I am looking for something like 50-100M of it, and not willing to pay the exorbitant pricing the Hobbyshops are asking.

Anyone point me in the right direction? Much obliged, thanx guys

amazon
http://www.amazon.com/Coleman-Cable...ZU/ref=sr_1_19?ie=UTF8&qid=1309680872&sr=8-19

i know its PVC, but if you're sleeving, who gives a shit.
ordered a few reels of this myself last week, haven't got it yet so i don't know if it's any good. i'm no sparky but standard 18 gauge for your PSU cables should be fine. it's what they use. also many of the modders crimpers (mdcp-x) don't work properly with wire diameter larger than 2.3mm (which is the size of the coleman stuff listed above), so 16 gauge wire may be an issue with both the connectors and modder's crimpers.
the reels are only 30M (100feet) but i believe they also have 152M (500feet) there as well.

alternatively there are these brands as well, not sure what insulation is used however.
http://www.amazon.com/Metra-pwbk18-...QK/ref=sr_1_12?ie=UTF8&qid=1309681039&sr=8-12
http://www.amazon.com/LINK-RW18BK500Z-PRIMARY-WIRE-BLACK/dp/B000OQ8B4W/ref=dp_cp_ob_e_title_1
 
Last edited:
As an Amazon Associate, HardForum may earn from qualifying purchases.
Hello Mate,
If you've used silicone wire once, you'll never want to use std PVC for modding ever again, trust me on that one.

I need the silicone-sheathed wire specifically to route it in some tight areas in this case.....but thanx for your replies anyway ;)
 
Hello Mate,
If you've used silicone wire once, you'll never want to use std PVC for modding ever again, trust me on that one.

I need the silicone-sheathed wire specifically to route it in some tight areas in this case.....but thanx for your replies anyway ;)

fair enough. unless you speak to an electrician and ask where they buy their stuff bulk, you could check out 'mcmaster'
http://www.mcmaster.com/#

they did have some there but it isn't cheap. also i dunno what their shipping policy is for international customers.
 
Back
Top