I'm always really impressed when I see the great mods on this forum and over on bit-tech.net; the lighting, the cooling setups, the paint jobs, and the attention to details make all those project logs a ton of fun to follow.
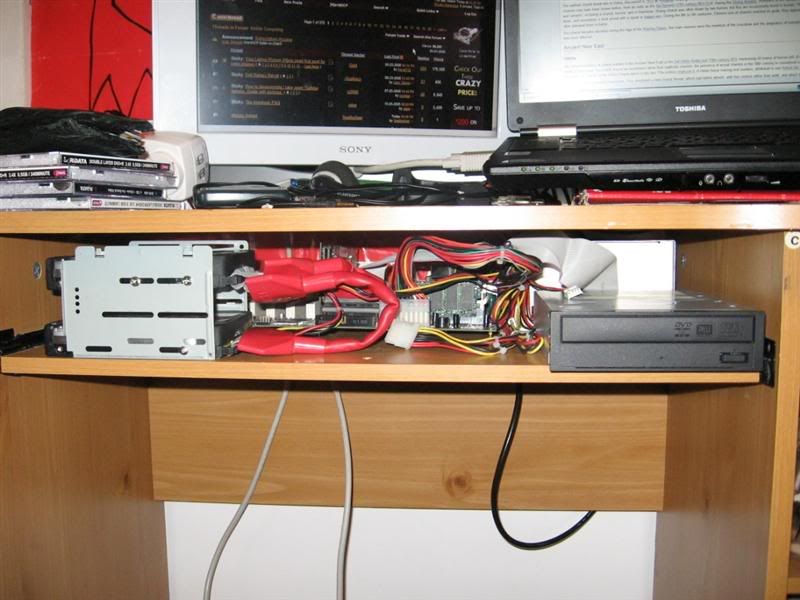
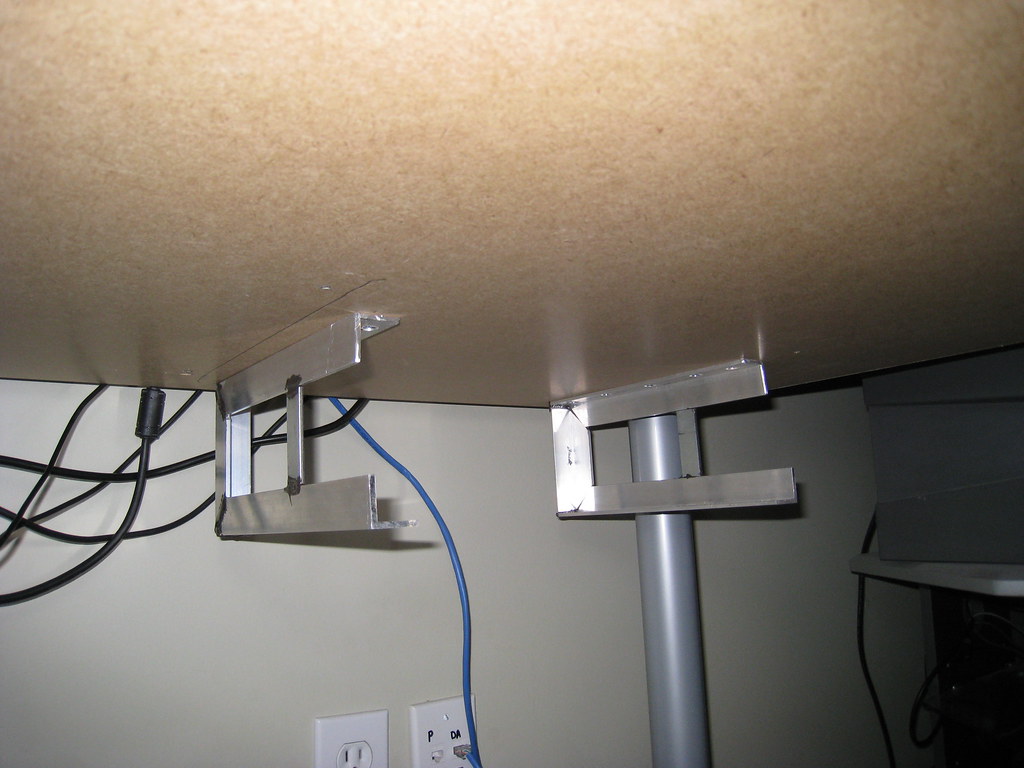
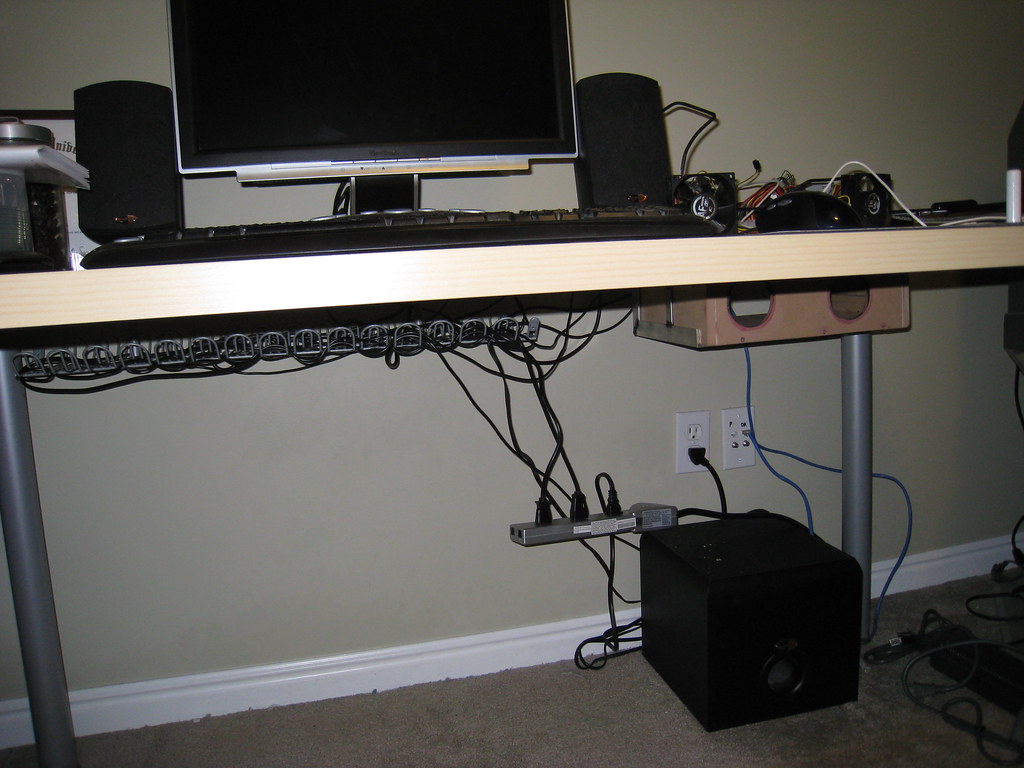
That being said I've wanted to build a small, but decently powerful, system that I could hide up under my desk for a while now. I really like the idea of having as much desk space and floor space free as possible and just having the monitor the only thing people really see. I thought about buying one of those HP iMac knock offs but I don't like having to give up control of the components, the price, and having to forgo the fun of building it myself") .
.
I also didn't want to spend too much on this build. The parts I used are:
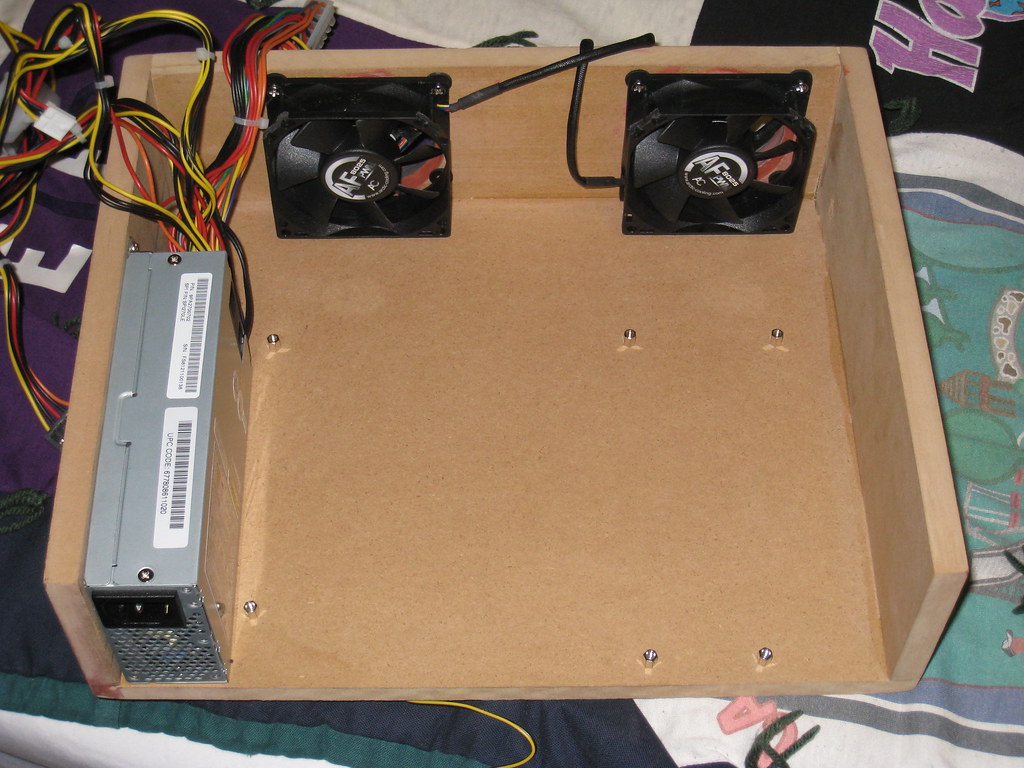
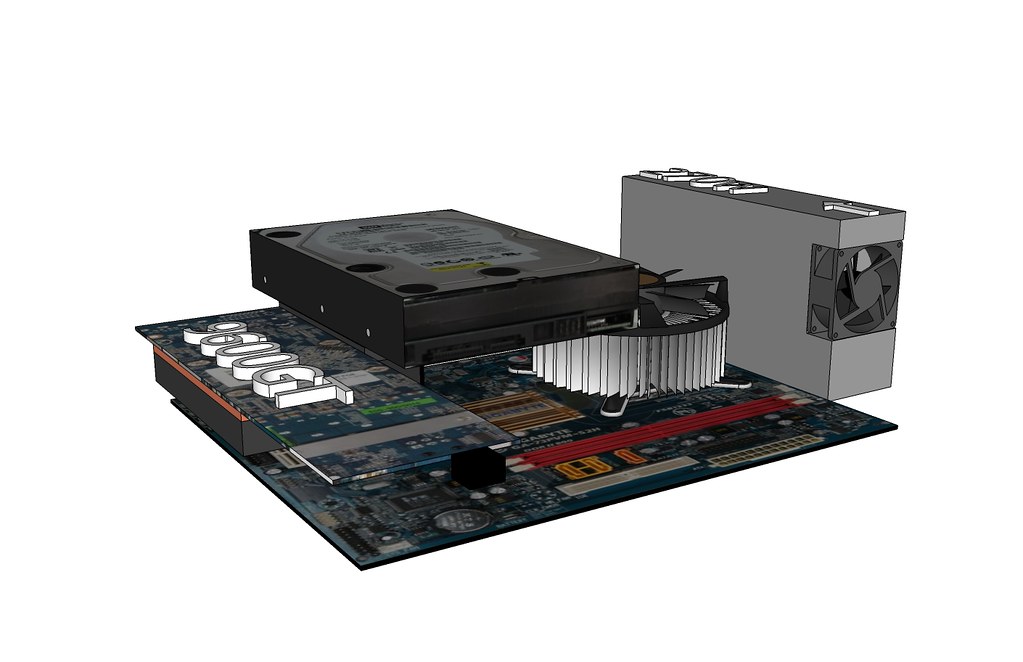
I also wanted the system to be as small as possible so I wouldn't be smashing my knees on it every 10 seconds while sitting at my desk. The "tallest" two items in my system are the video card and the power supply, both measuring about 3 1/4 inches which is acceptable for what I want in the form factor. However the hard drive, mounted on its side was about 4 inches or so; that was too tall, especially since this case is going to be made out of half inch HDF. And I didn't want to mount it in a normal horizontal position would make the case too wide for what I want.
I got around this by ordering a PCIe riser card off of ebay; now the video card only goes up about 1.6 inches. Since the hard drive is only about an inch tall I'd have enough room to mount it above the video card without increasing the height of the case itself.
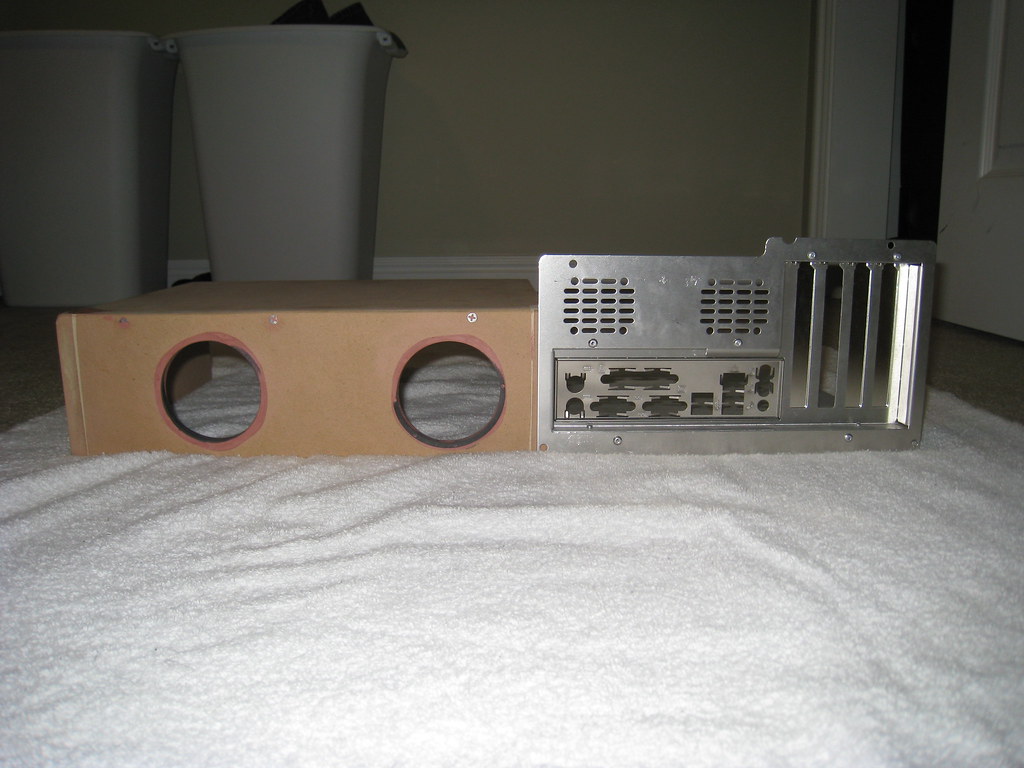
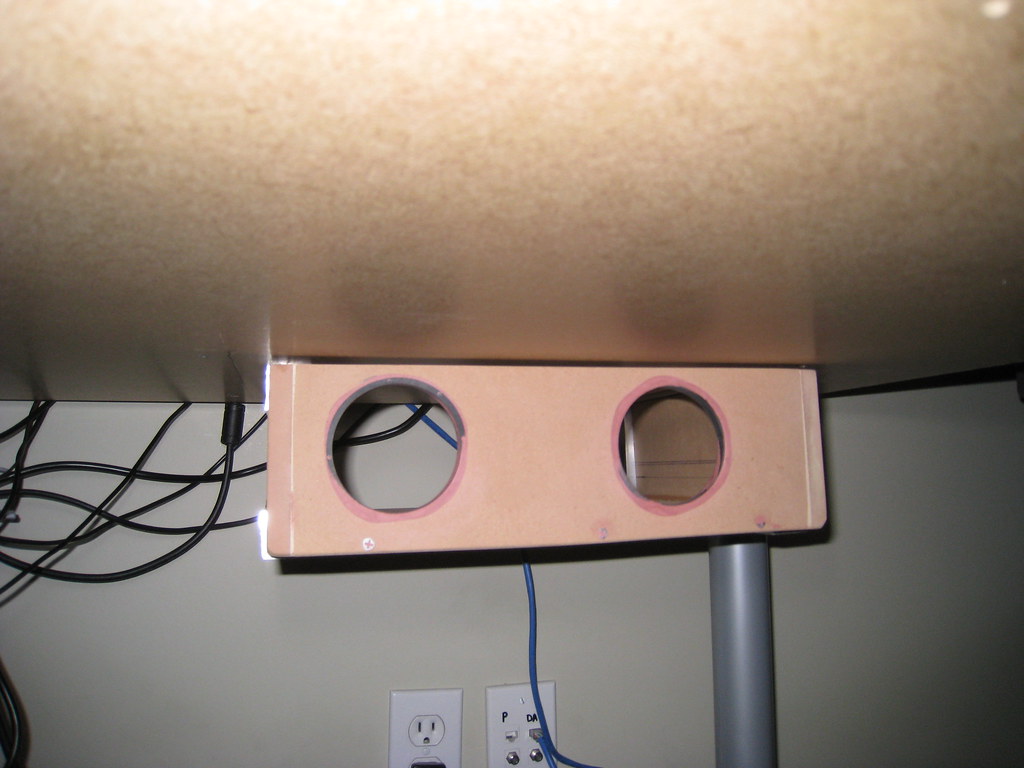
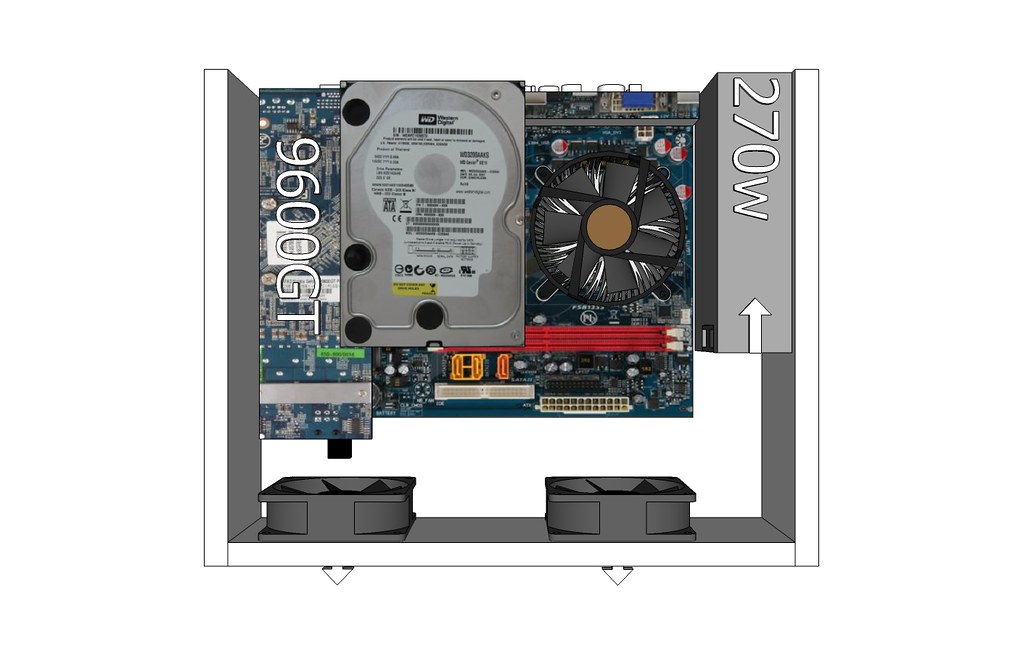
In the end the dimensions of the enclosure are about 13"x10.5"x3.75". That's small enough that I can mount it in the back of my desk in the corner and not have to worry about bumping into it.
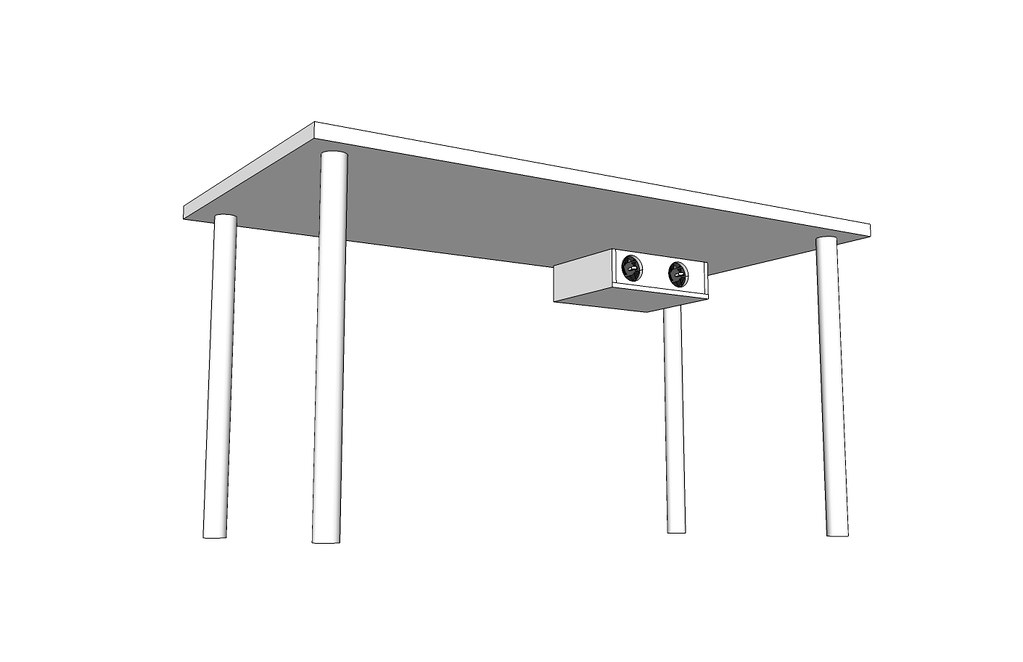
Below are some sketches of the basics of how the components will fit together and how the case will look:
Components only:
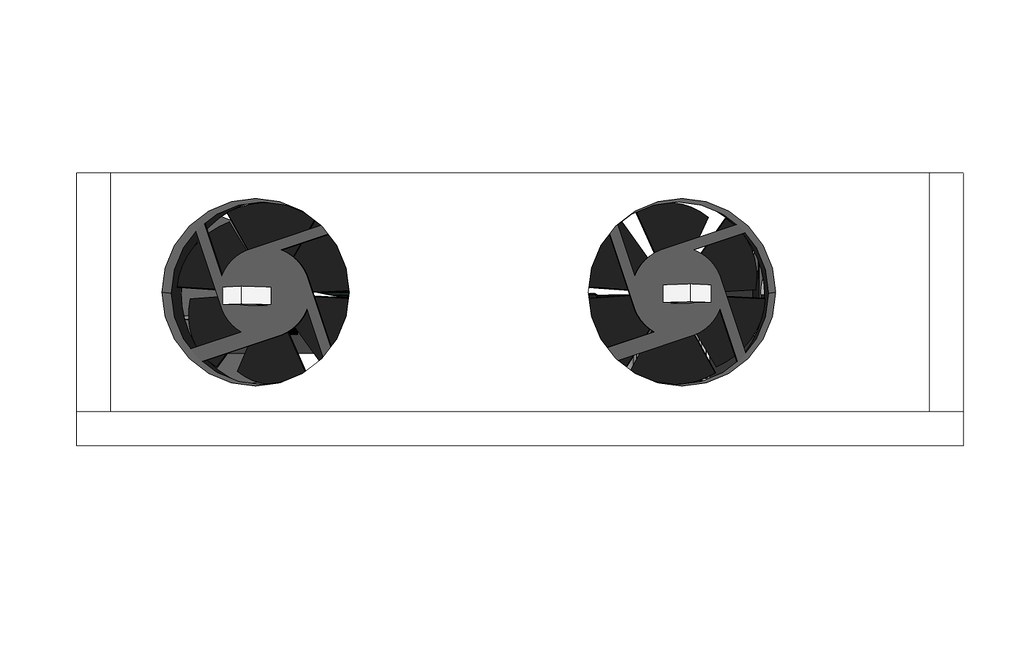
Case top view:
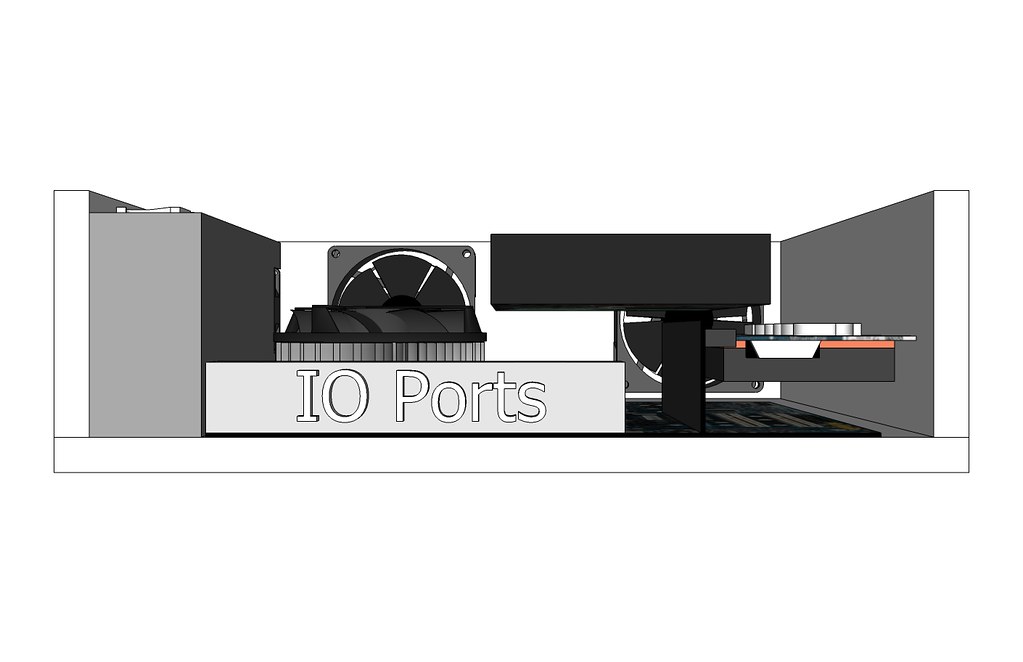
Case front view:
Case back view:
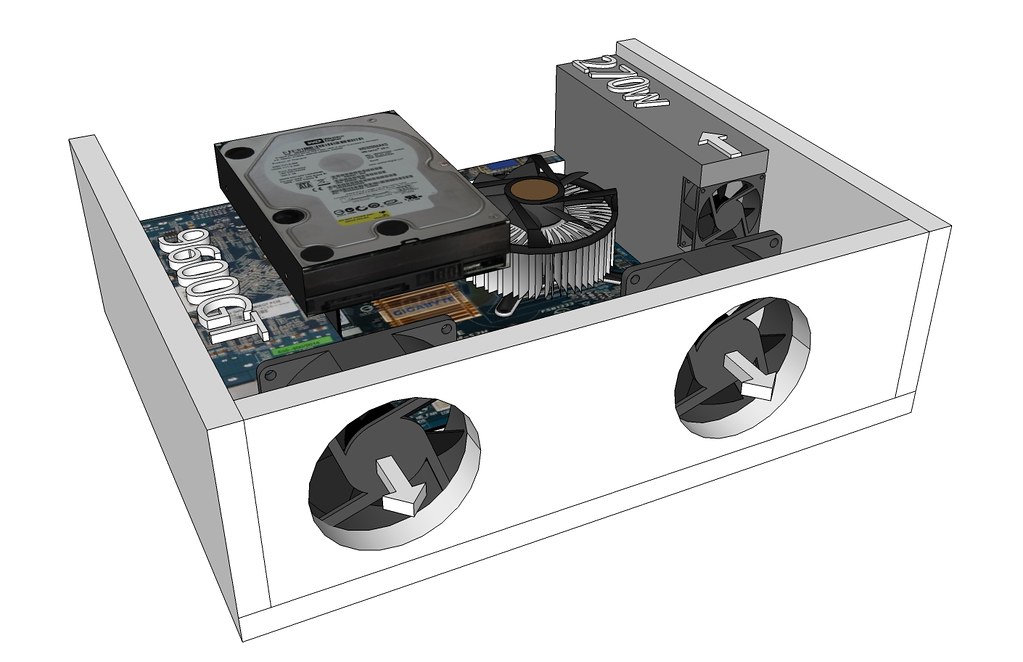
Case angled view:
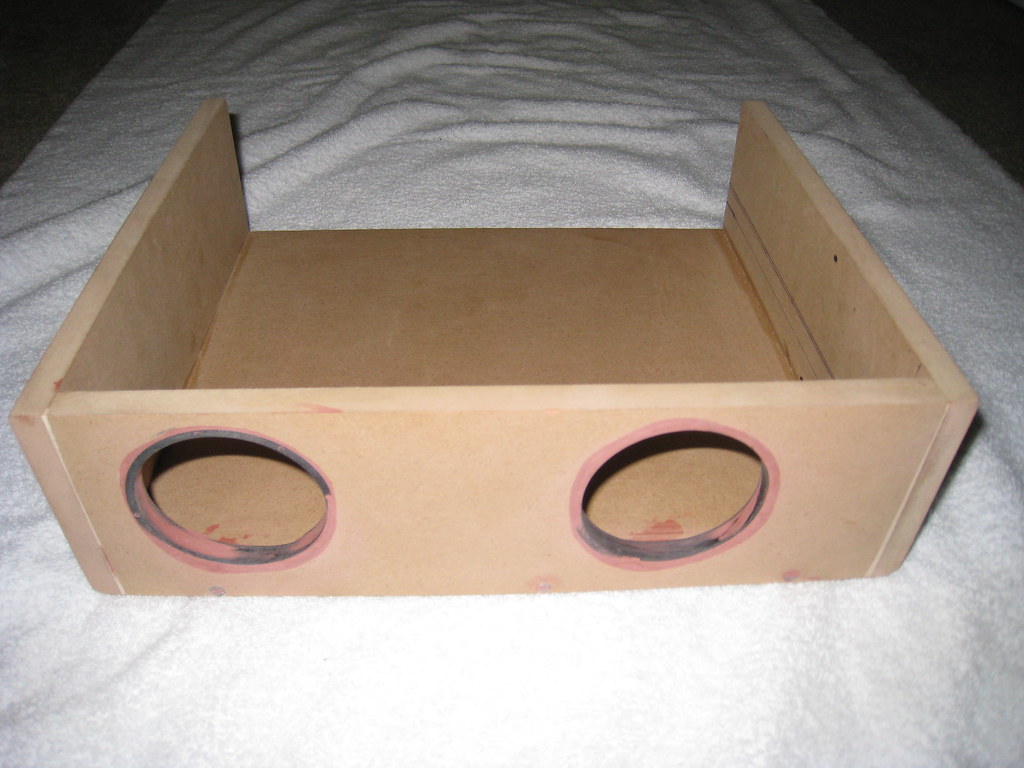
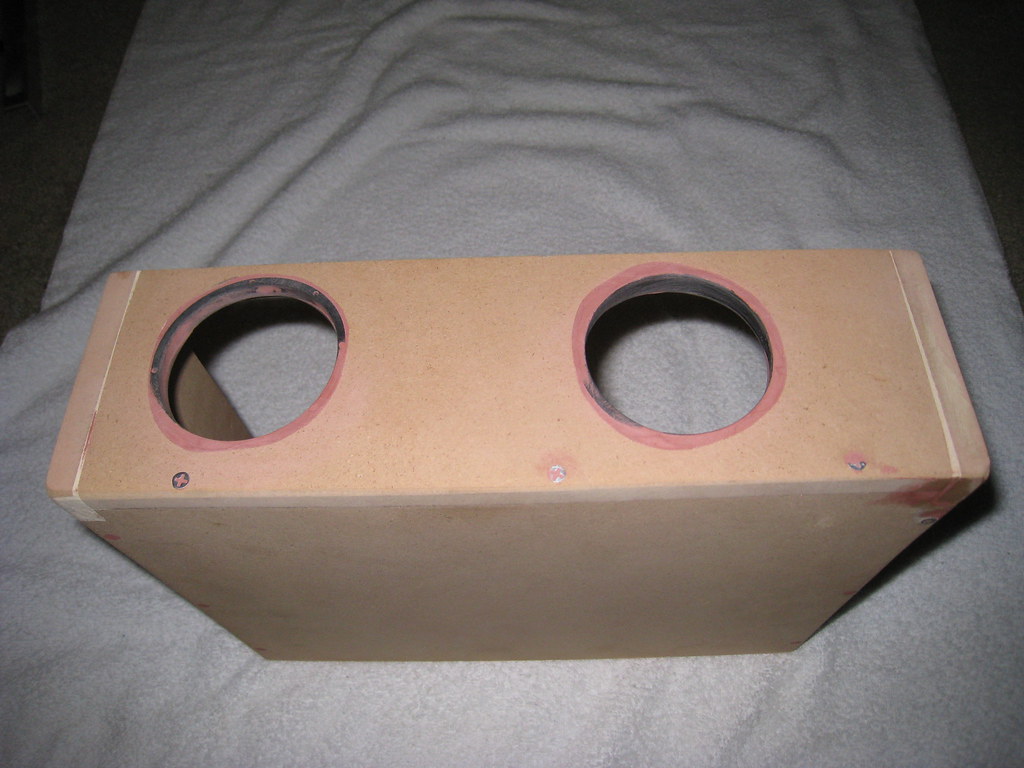
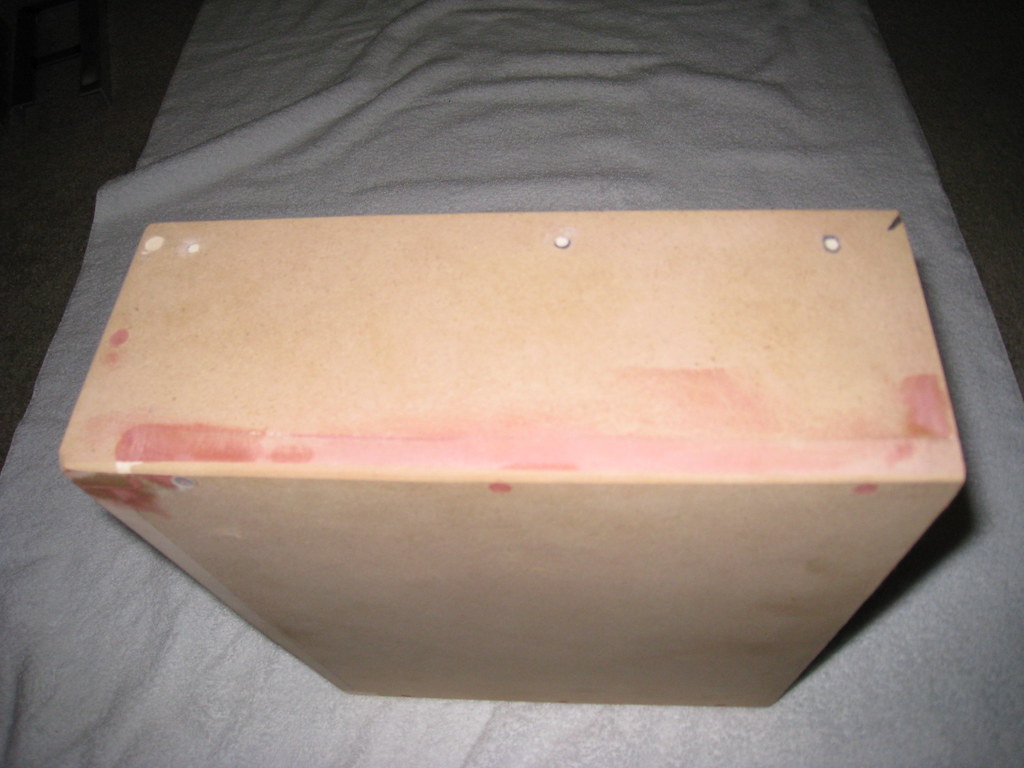
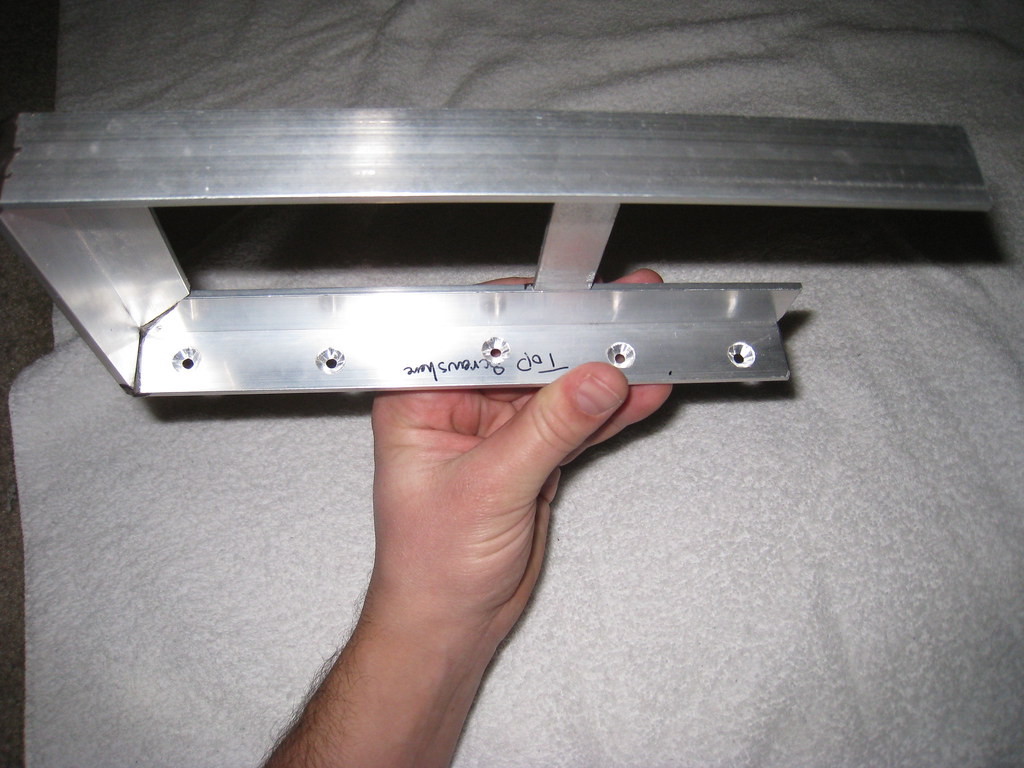
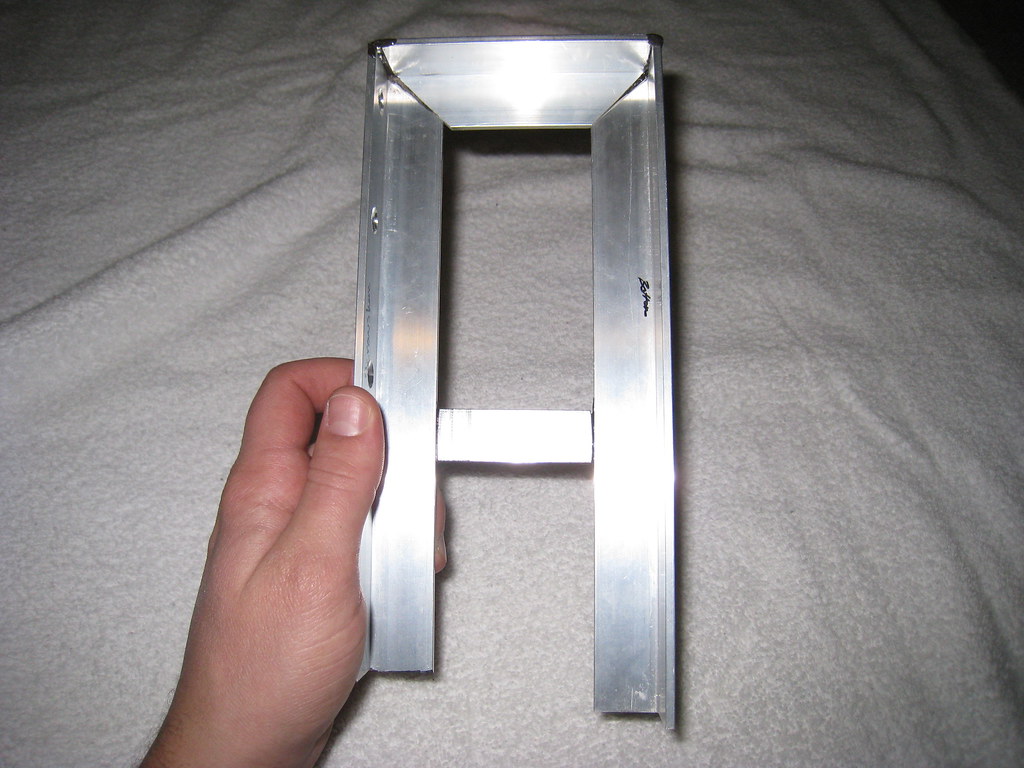
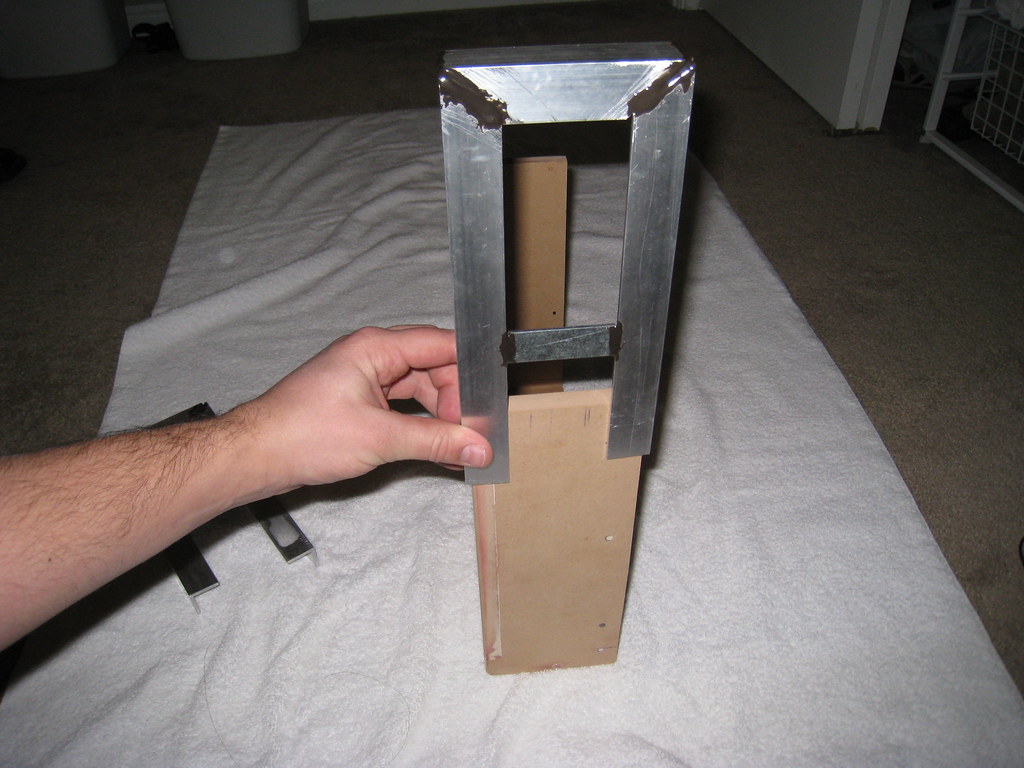
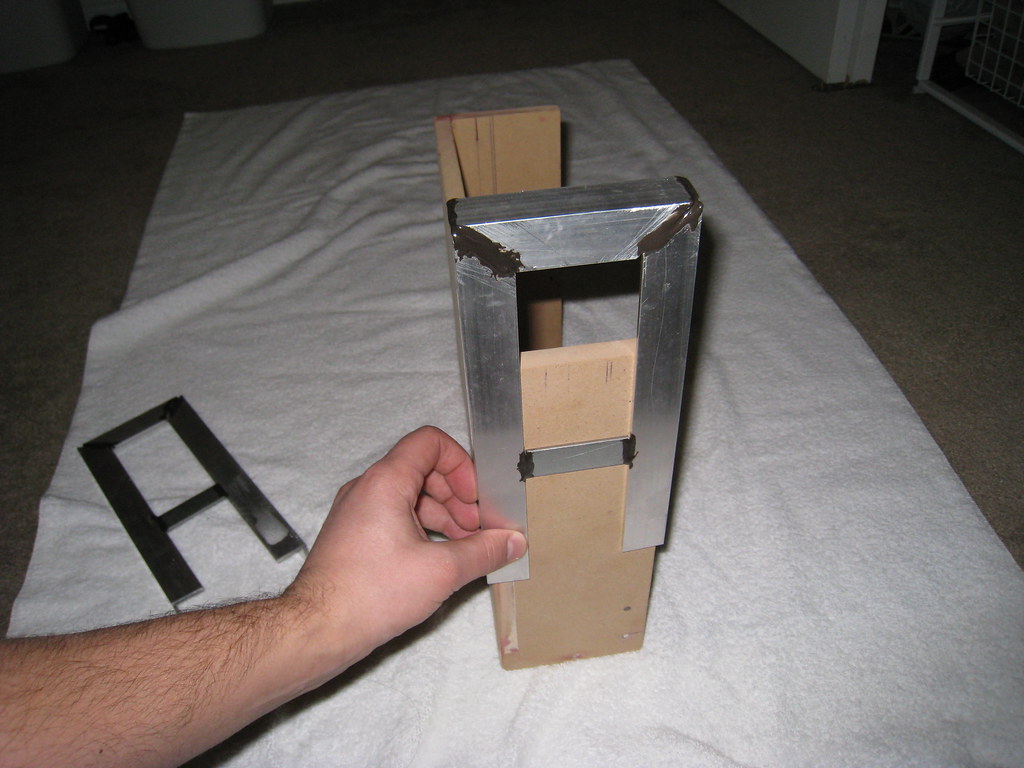
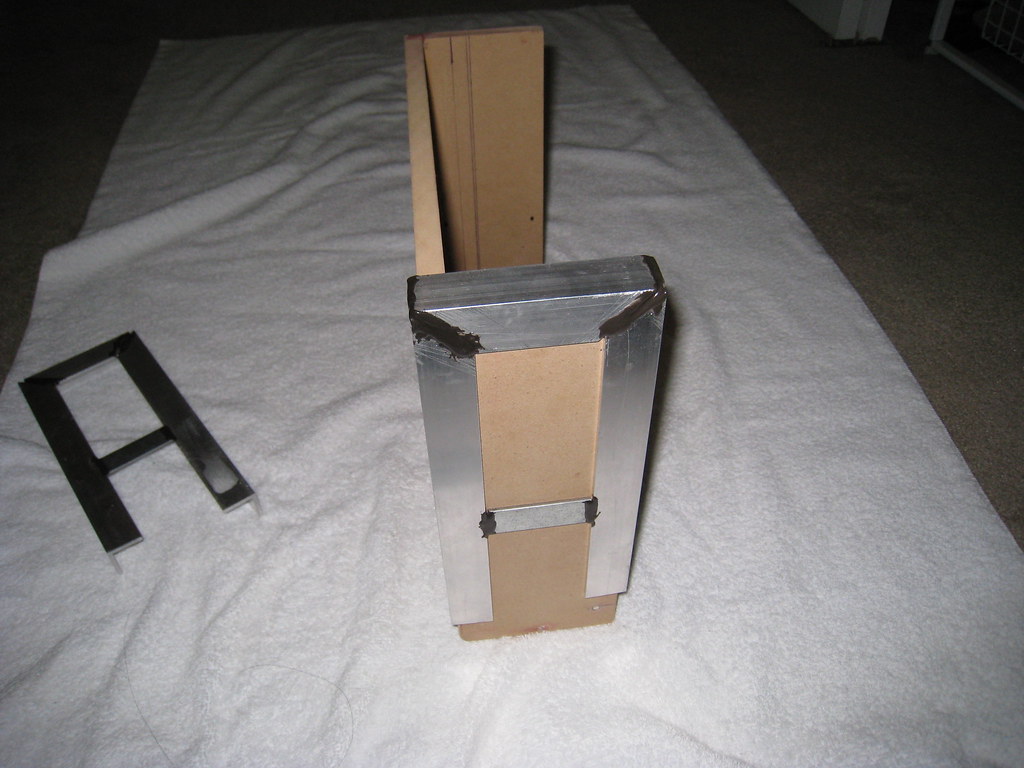
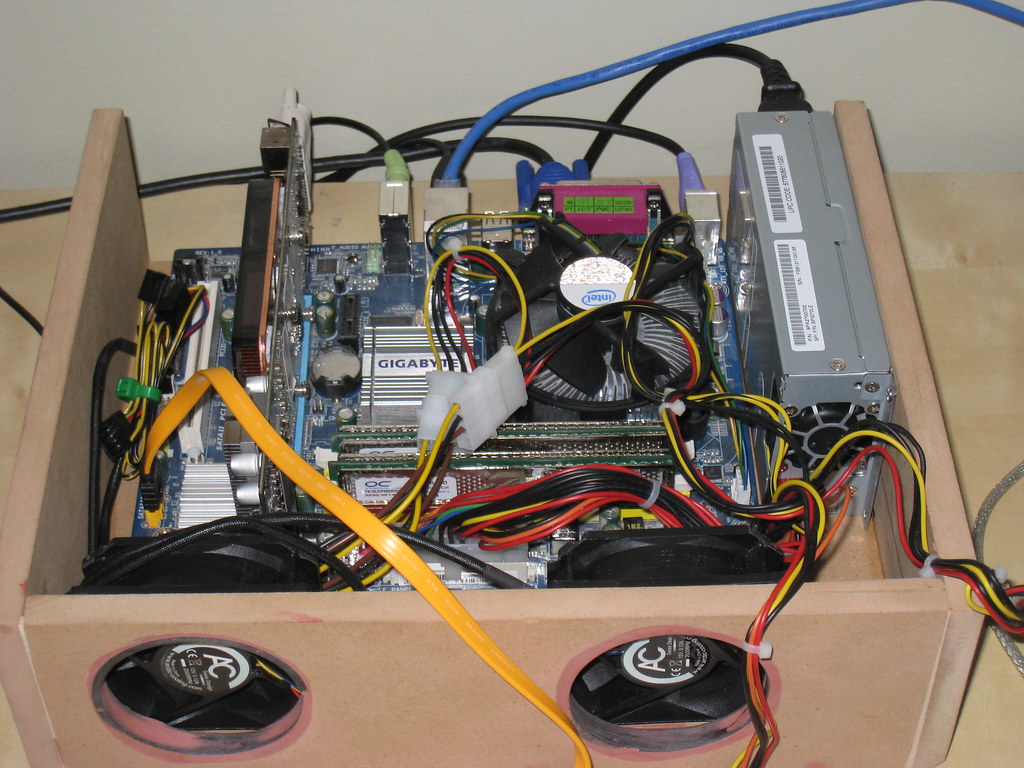
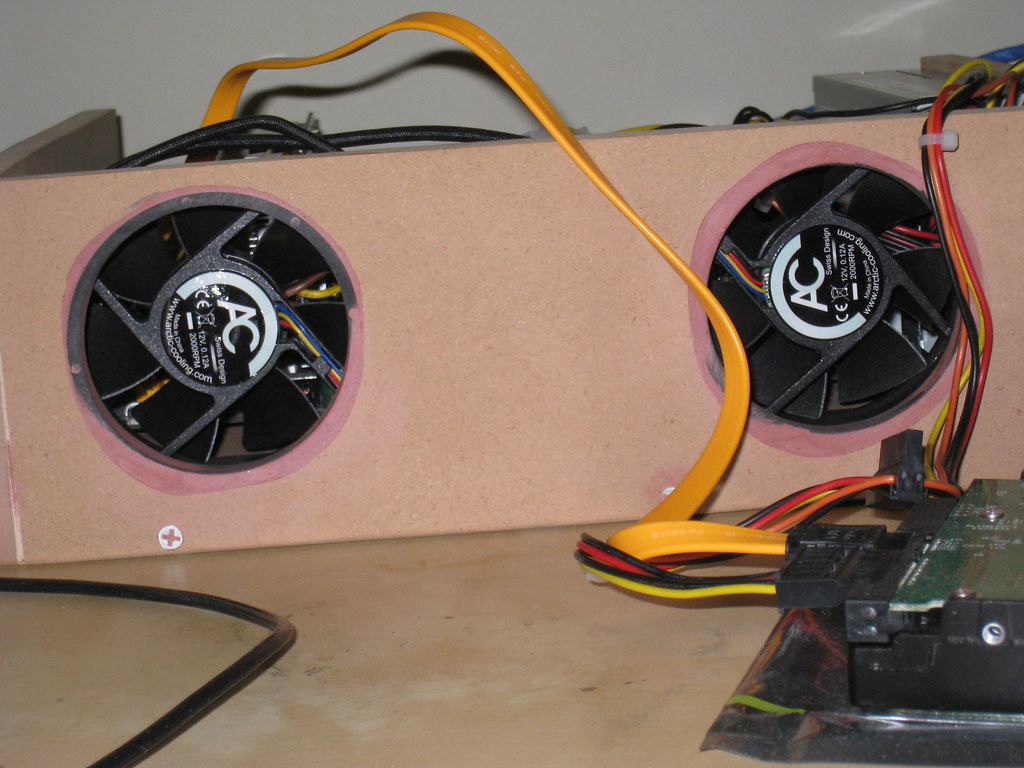
I've already started on the case itself. The main structure is put together, but I still need to drill some air intakes in the side, cut a back plate out (not sure what to use, metal or plexi, thoughts?), and come up with a hard drive holder I can attach to the inside of the case.
Also, I am planning on painting this case (even though it will be hidden) as kind of a practice run for when I create a small case to house a DVD and maybe a card reader. So that means I have a bunch of sanding still to do to get the box ready for priming and painting. I'll post pics of the box tomorrow.
That being said I've wanted to build a small, but decently powerful, system that I could hide up under my desk for a while now. I really like the idea of having as much desk space and floor space free as possible and just having the monitor the only thing people really see. I thought about buying one of those HP iMac knock offs but I don't like having to give up control of the components, the price, and having to forgo the fun of building it myself
.I also didn't want to spend too much on this build. The parts I used are:
- Intel Core 2 Duo E7200 Wolfdale 2.53GHz LGA 775 65W Dual-Core
- Western Digital Caviar SE16 WD2500AAKS 250GB
- Sparkle 270W ATX12V V2.2/ EPS12V Power Supply
- GIGABYTE GA-G31M-S2L LGA 775 Intel G31 Micro ATX
- Galaxy nVidia 9600 GT 512MB Low Profile Video Card
I also wanted the system to be as small as possible so I wouldn't be smashing my knees on it every 10 seconds while sitting at my desk. The "tallest" two items in my system are the video card and the power supply, both measuring about 3 1/4 inches which is acceptable for what I want in the form factor. However the hard drive, mounted on its side was about 4 inches or so; that was too tall, especially since this case is going to be made out of half inch HDF. And I didn't want to mount it in a normal horizontal position would make the case too wide for what I want.
I got around this by ordering a PCIe riser card off of ebay; now the video card only goes up about 1.6 inches. Since the hard drive is only about an inch tall I'd have enough room to mount it above the video card without increasing the height of the case itself.
In the end the dimensions of the enclosure are about 13"x10.5"x3.75". That's small enough that I can mount it in the back of my desk in the corner and not have to worry about bumping into it.
Below are some sketches of the basics of how the components will fit together and how the case will look:
Components only:
Case top view:
Case front view:
Case back view:
Case angled view:
I've already started on the case itself. The main structure is put together, but I still need to drill some air intakes in the side, cut a back plate out (not sure what to use, metal or plexi, thoughts?), and come up with a hard drive holder I can attach to the inside of the case.
Also, I am planning on painting this case (even though it will be hidden) as kind of a practice run for when I create a small case to house a DVD and maybe a card reader. So that means I have a bunch of sanding still to do to get the box ready for priming and painting. I'll post pics of the box tomorrow.