Custom Dell Case (Completed!)

Geo Fry

Limp Gawd
Joined
Feb 27, 2006
Messages
483
QUICK UPDATES

New Dell Configuration
*Pentium 4 3.0 ghz (skt 478)
*1GB OCZ ValueRAM DDR400
*ATi Radeon 9550
40GB 7200rpm HD
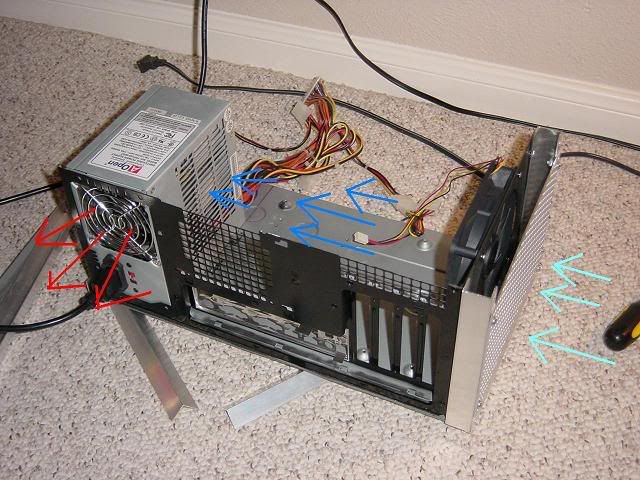
*Silverstone 360W ST365 PSU
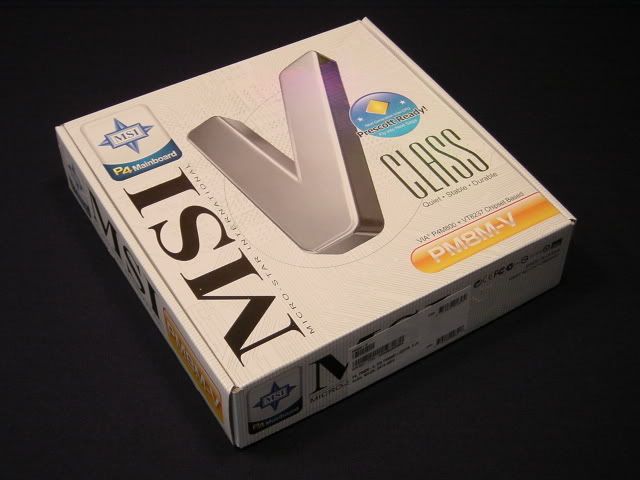
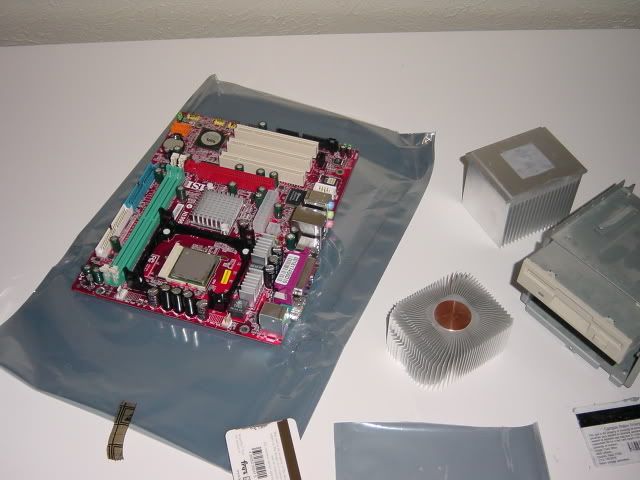
*MSI PM8M-V motherboard
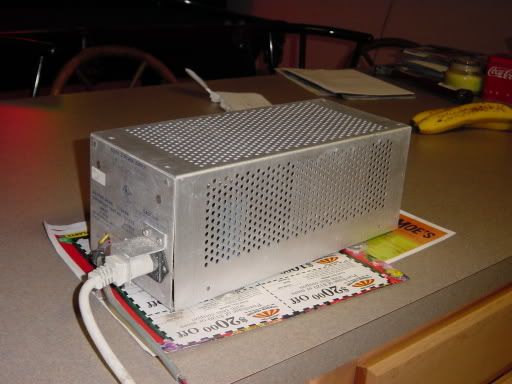
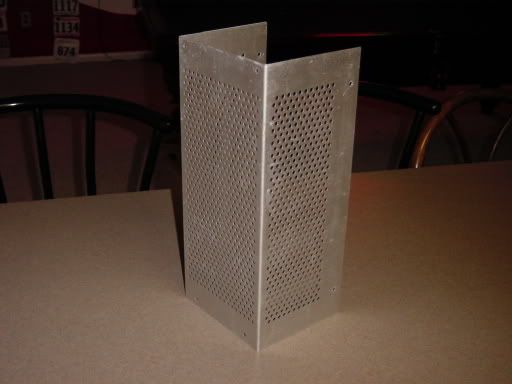
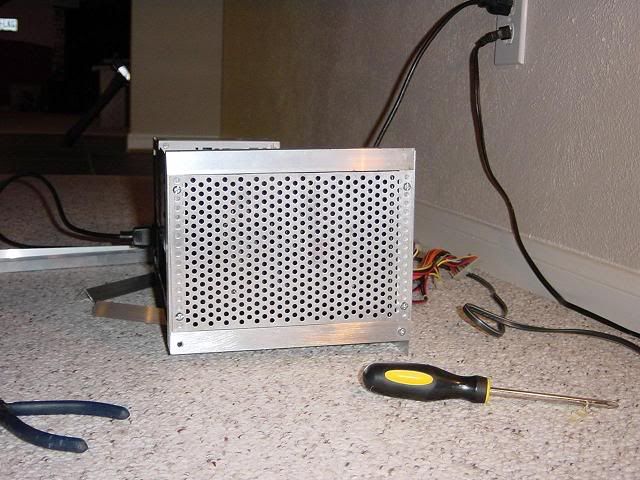
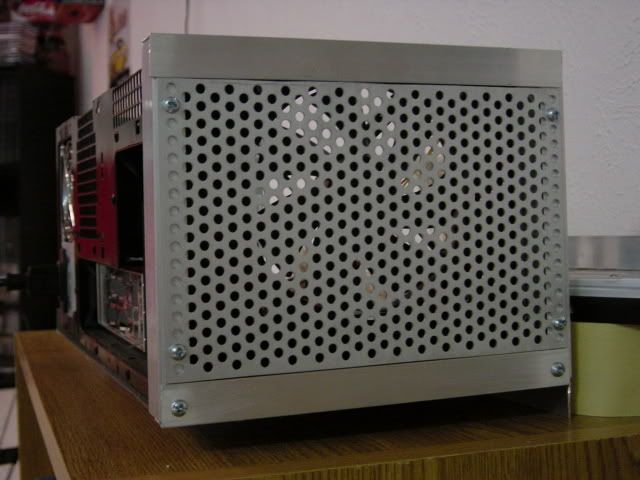
Case in Progress
*Sony DVD drive
(As of 9-9-06)
* constitutes upgraded hardware

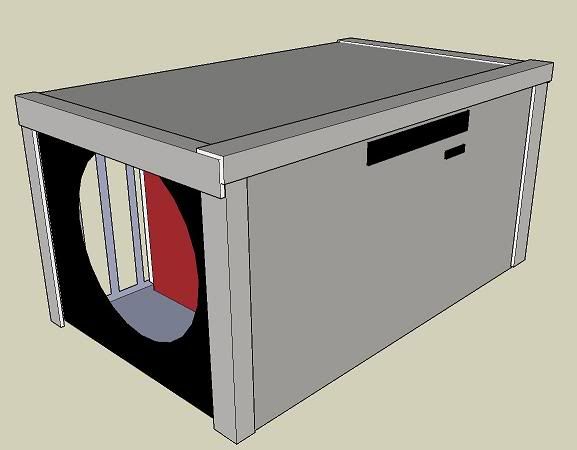
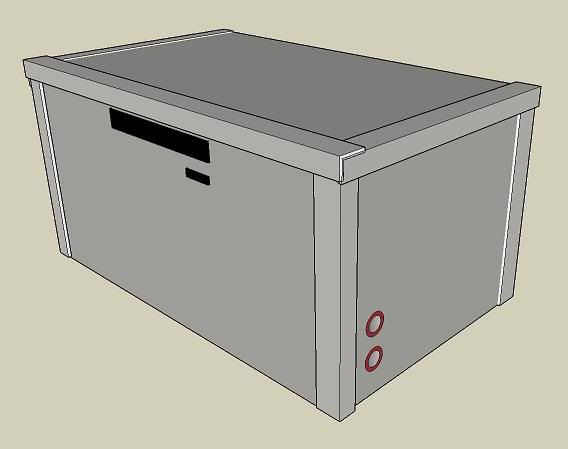
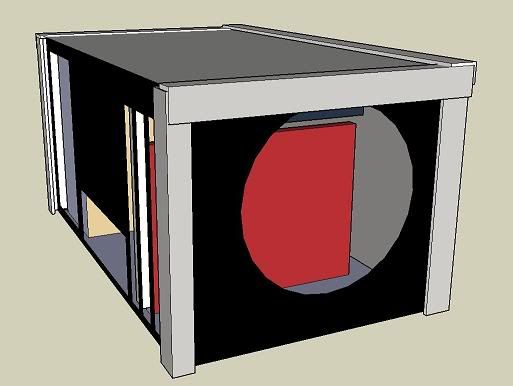
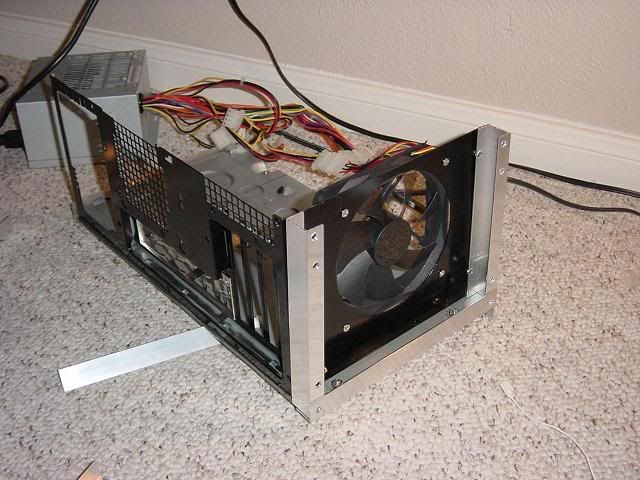
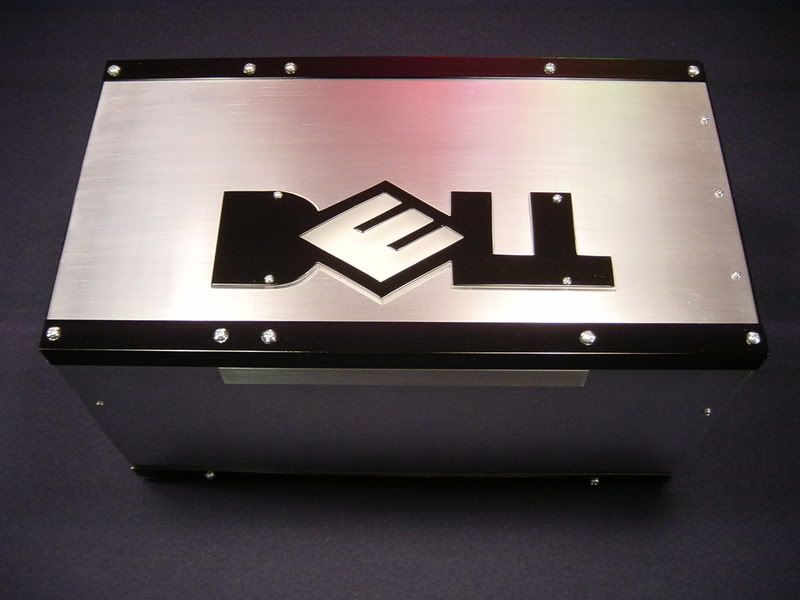
Latest Pic of New Case
FF2.jpg


Total $$$ Spent
$45 - Motherboard
$50 - P4
$40 - PSU
$15 - Switches/LEDs
$50 - Stock Aluminum
$05 - Screws/Bolts
-------
$205 - Total

INTRODUCTION

PROJECT PURPOSE

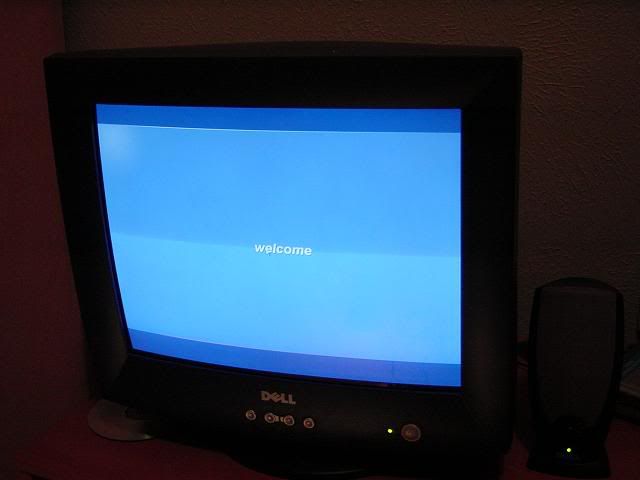
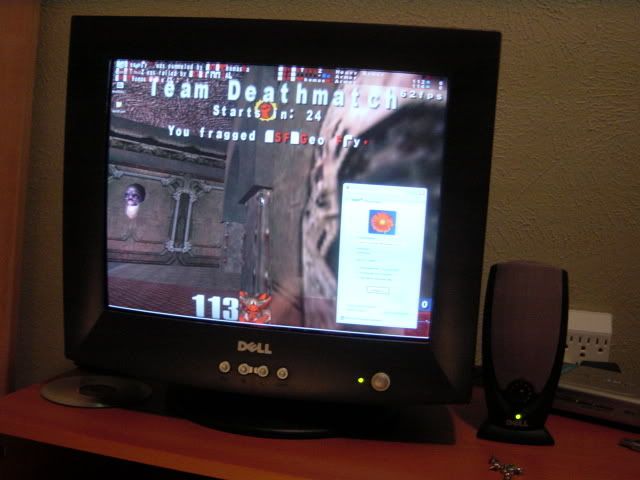
My 16 year old brother has no PC, just his moms, which is a 7 year old Dell that can pretty much only play Quake 3, Starcraft, Minesweeper, and WoW at like 3 frames per second. He just turned 16 so he has no job and almost no money (he's actually a member on these forums but is very rarely on).

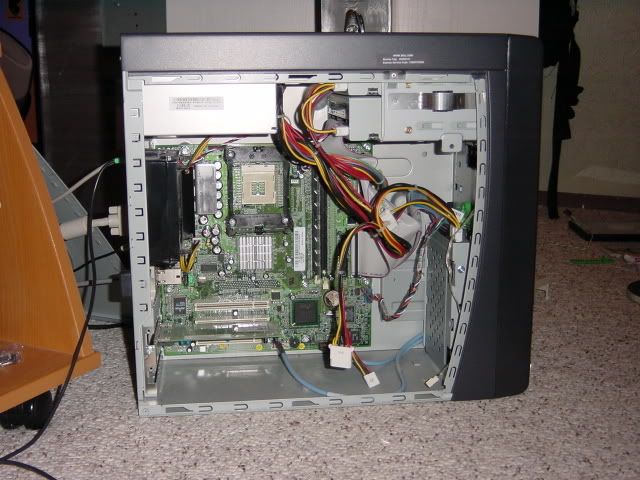
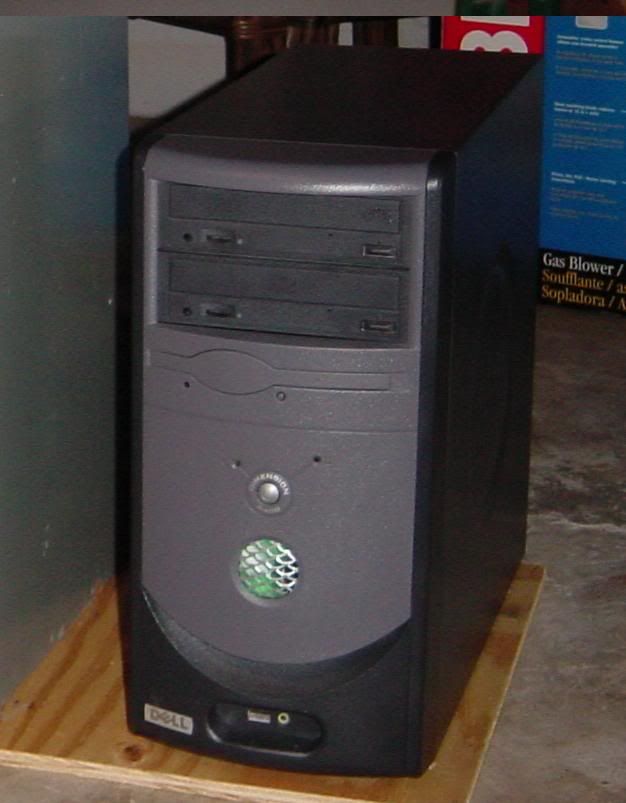
So... I have this leftover Dell Dimension 2400 that I used as my first PC. The ONLY time it is ever used anymore is when my brother would come over to my house. I knew that he wants his own PC but cannot buy one and my mom would definitely not buy him one. I for sure am not buying him one lol. BUT... I do have this old Dell and some random PC parts laying around...


dell.jpg


PROJECT GOALS

First of all, to keep your interest, this isnt going to be a worklog about a story where a guy gives his younger brother his old Dell :p. There will be modding in this... eventually. We just have to get a decent system up and running before I build anything... i.e. I'm not giving him stock Dell 2400 hardware.

Stock Dell Hardware
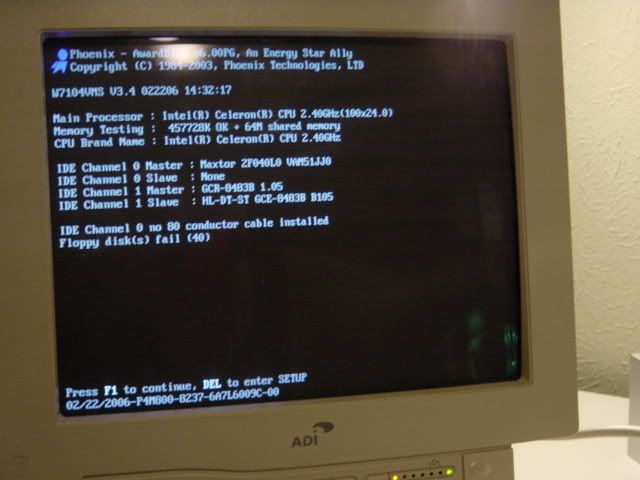
Celeron 2.4 ghz (skt 478)
128MB RAM DDR266 (ugh slow)
Intel onboard graphics
40GB 7200rpm HD
200W PSU
completely useless motherboard
crappy/ugly case
plain old CD-ROM drive​


If you know anything about low-end Dell machines it is that you can do virtually nothing to them besides add more ram, and maybe a PCI GPU (there was no AGP slot). So as far as hardware goes I will need to buy a few things:

--- 1. New mobo
--- 2. New PSU

And here is what I've got laying around that I can throw together:

--- 1. ATi Raedon 9550 GPU (AGP 8x)- 256MB - 250mhz core - 400mhz ramdac - 4 pixpipes
--- 2. OCZ 1GB DDR400 RAM (even though the celly can only allow it to run at DDR333 I might be able to get some nicer timings)
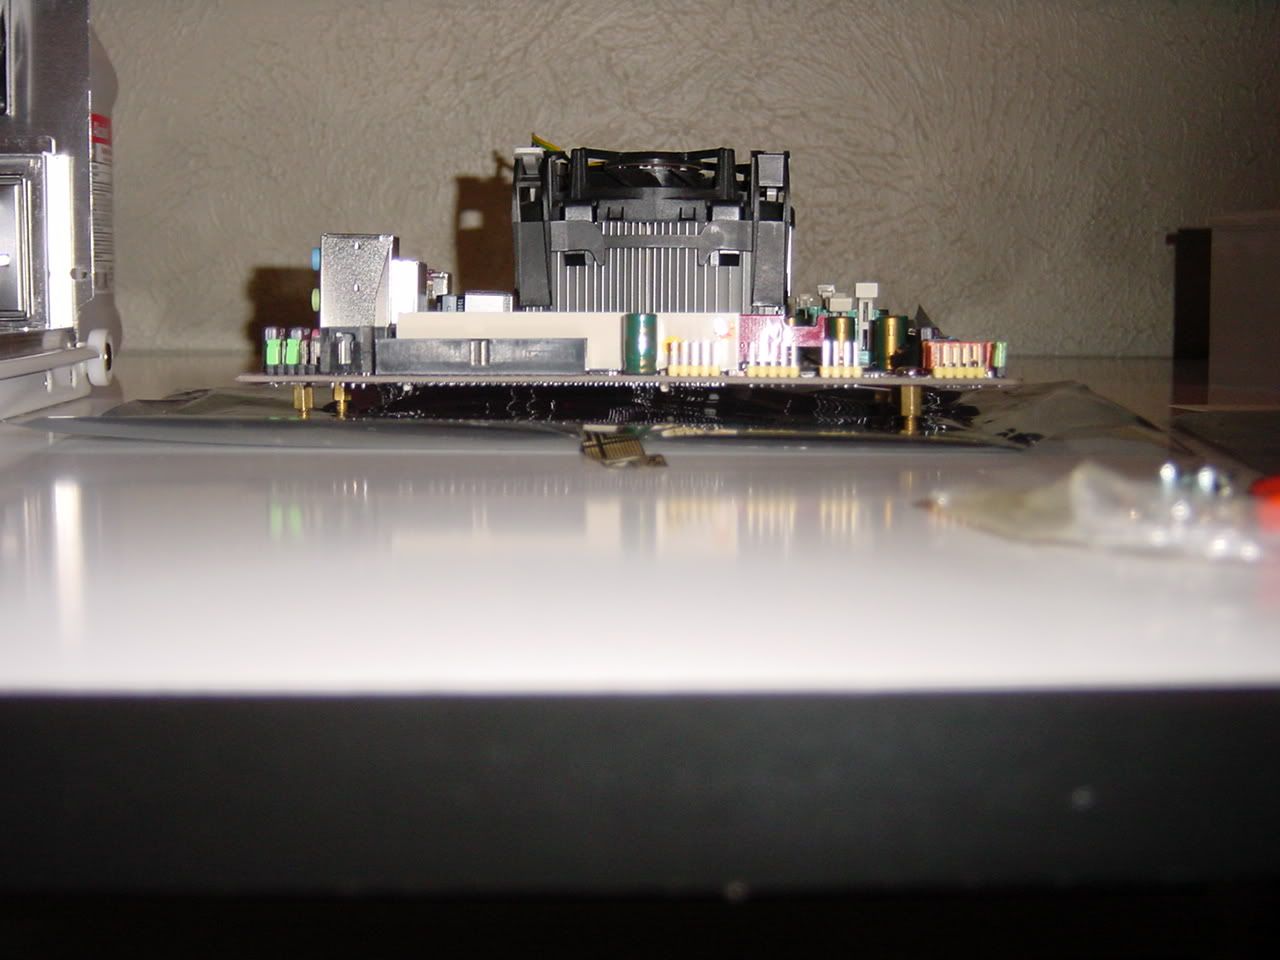
--- 3. Pentium 4 skt 478 stock heatsink/fan (if you would of seen the stock Dell heatsink you would of lol'ed)
--- 4. A Sony DVD drive to replace the old CD drive
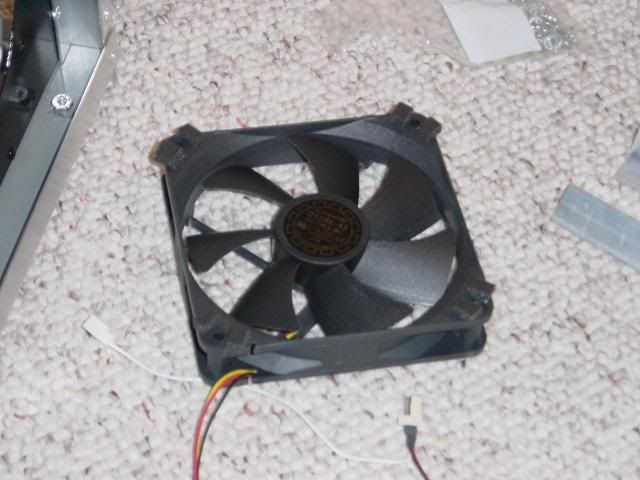
--- 5. Plenty of spare 120mm fans...

All in all it will still be an old but decent system... but mainly a huge leap from the stock Dell hardware!
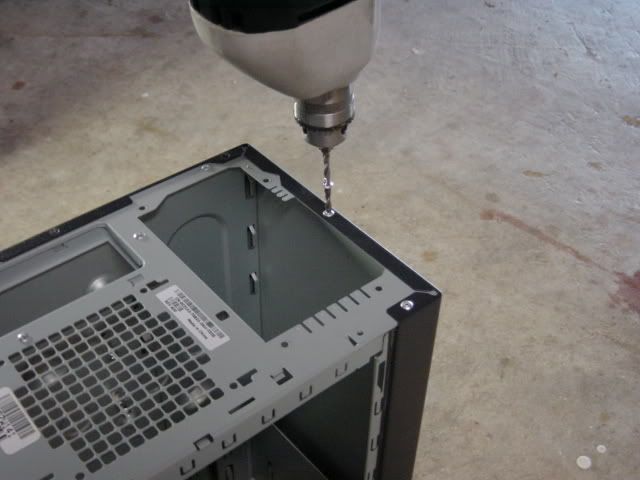
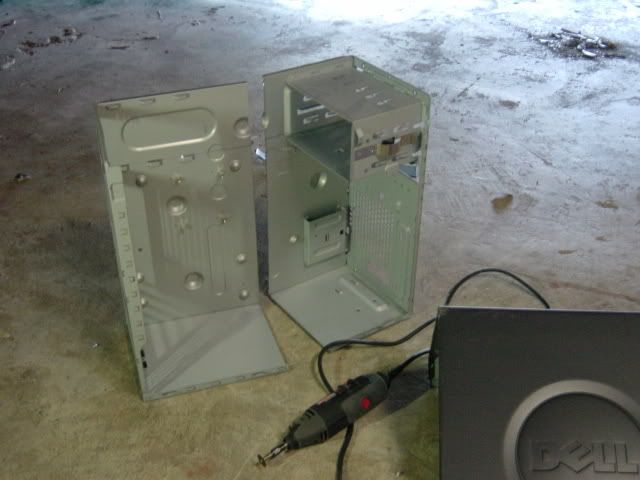
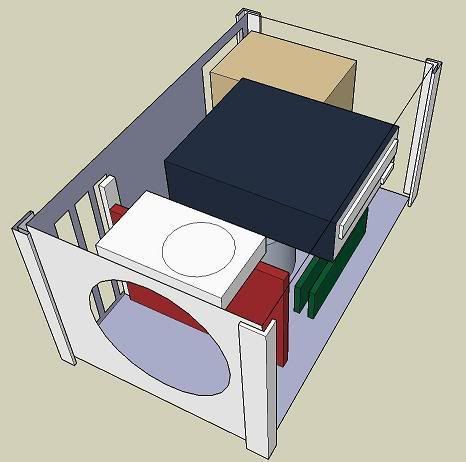
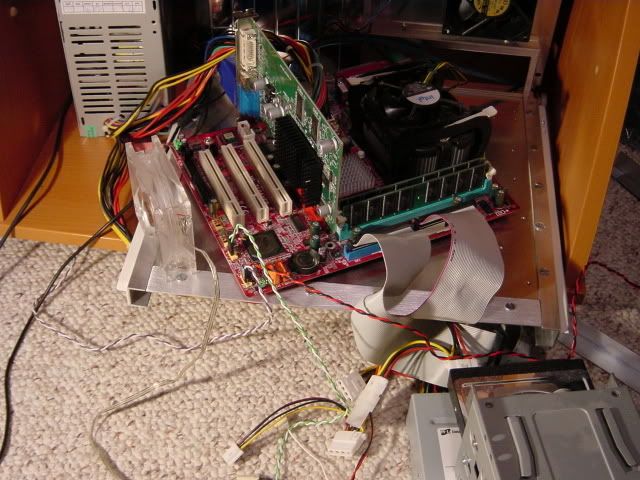
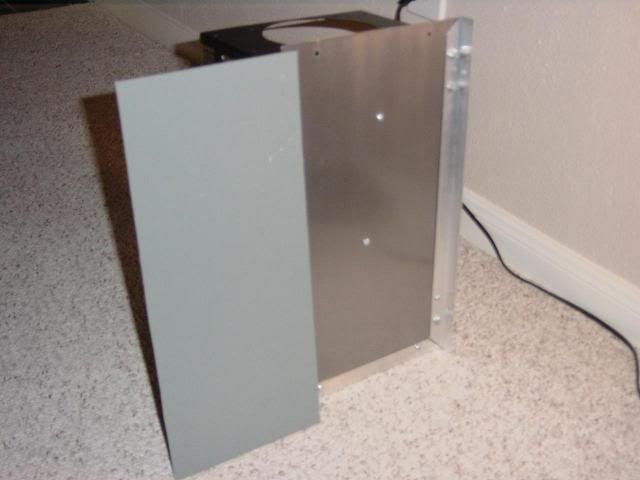
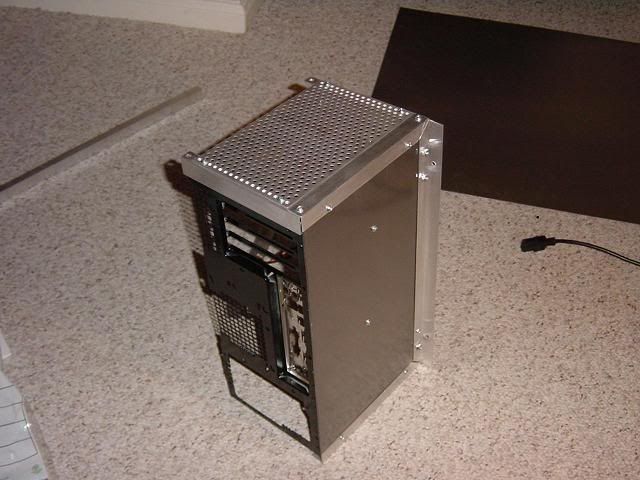

THE CASE

Ok so the modding is what your hear for so I will get to that now. Just to let you know, I have never done a full mod and definitely never posted any mods in the form of a worklog... but I have had decent experience with the dremel, jigsaw, painting etc... so my work wont be perfect but hopefully it impresses none-the-less.

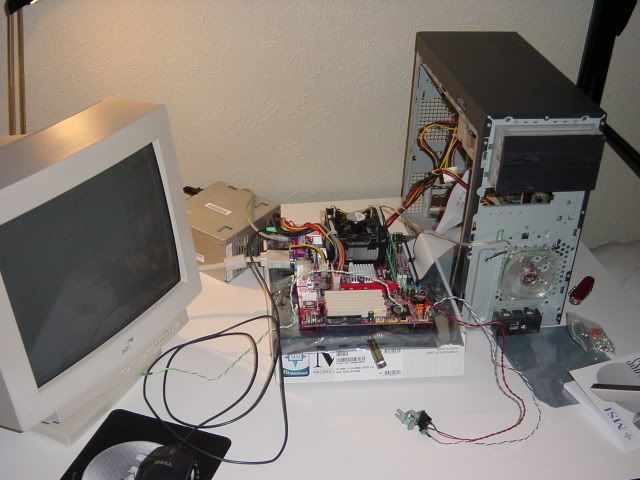
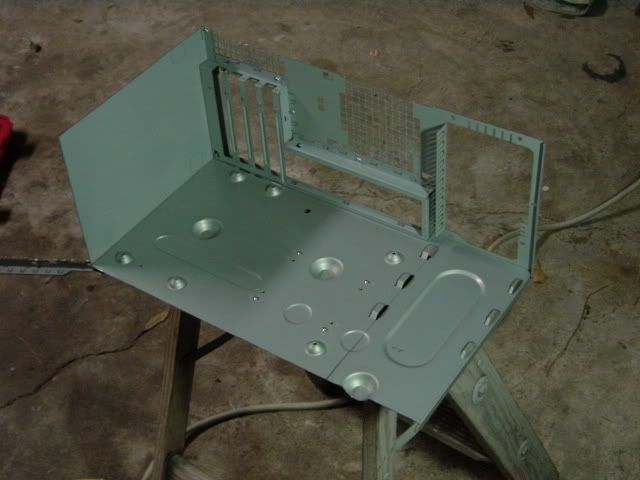
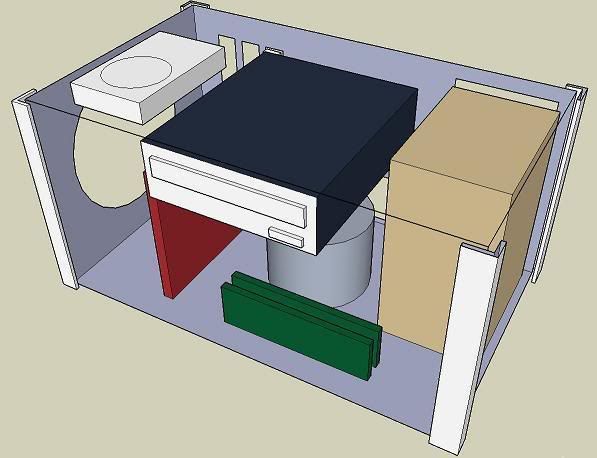
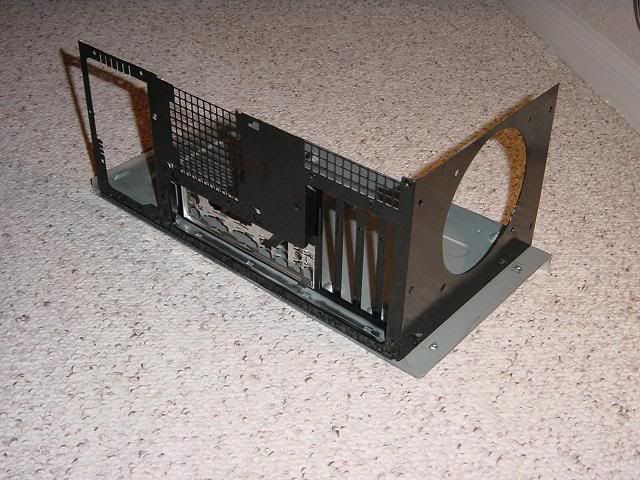
If the last thing you want me to do is mod the Dell case then you're in luck. I'm pretty much going to scrap the entire Dell case and just use it for it's parts. I will only be using the mobo tray and the drive cages. Once the case is scrapped I'm going to build an entire new case around the mobo tray using some steel scrap I have and aluminum (I will purchase this)

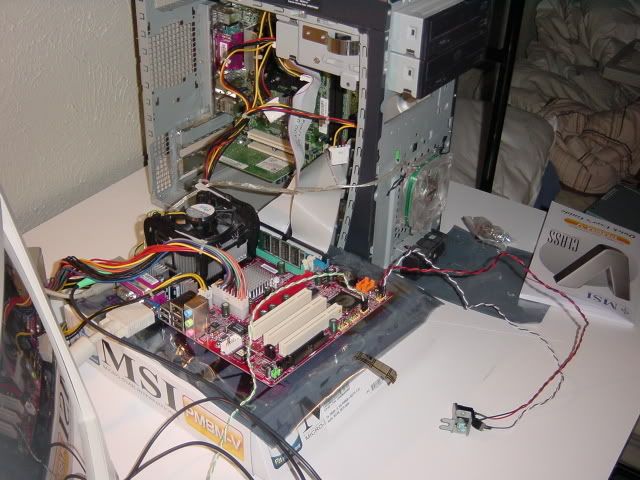
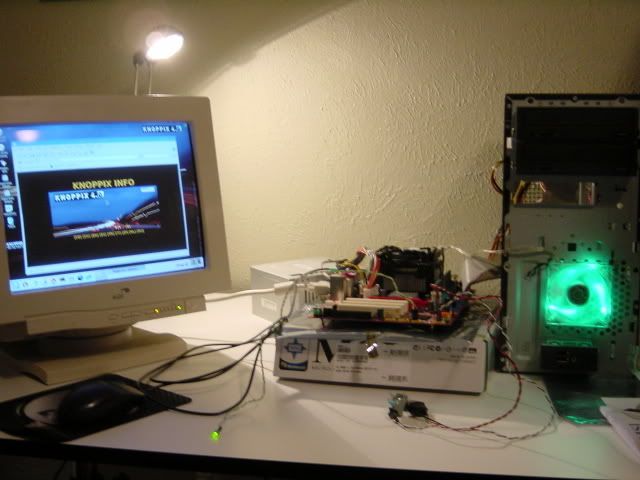
OK more to come on the custom case later... Next up will be the rebuilding of the system

Geo
 
what what PSU is in there?
Dell usually throw's in some beefy PSU's that i've seen in the past, you might get away with just a new mobo
Only thing your going to run into, and this happened to me alot of times working for a dell repair center.
The stand off's for the mobo's are specific for deal motherboard's and its very hard to get a motherboard to match up, just a little FYI, if you need a new motherboard, you might want go threw dell and get a replacement, other wise try using the one that's in there now and just upgrading it.
 
why not just pick up an el'cheapo case and a mobo for him and throw something together?
 
oneil said:
This should be in a 'Ghetto Mod' forum :)

I know it might seem ghetto right now because it's an old Dell and old parts, but the hardware shouldn't determine if the mod will be ghetto. And I repeat... I will not just be modding the Dell case. I will be pretty much making an entire new one.

Give me a chance please :)
 
-(Xyphox)- said:
what what PSU is in there?
Dell usually throw's in some beefy PSU's that i've seen in the past, you might get away with just a new mobo
Only thing your going to run into, and this happened to me alot of times working for a dell repair center.
The stand off's for the mobo's are specific for deal motherboard's and its very hard to get a motherboard to match up, just a little FYI, if you need a new motherboard, you might want go threw dell and get a replacement, other wise try using the one that's in there now and just upgrading it.

OK I went back and checked the PSU again and on the label it says the max power output is 200W... thats quite small especially since I will be adding a radeon 9550. Oh and its a Dell branded PSU.

As for the motherboard I think I'm gunna pick this one up.

http://www.newegg.com/Product/Product.asp?Item=N82E16813130519 I know for a fact that the standoffs fit those of the Dell mobo tray.

Xyphox and R3d getting another case would defeat the whole purpose of my desire to build a new case but thanks tho ;)
 
Geo Fry said:
OK I went back and checked the PSU again and on the label it says the max power output is 200W... thats quite small especially since I will be adding a radeon 9550. Oh and its a Dell branded PSU.

As for the motherboard I think I'm gunna pick this one up.

http://www.newegg.com/Product/Product.asp?Item=N82E16813130519 I know for a fact that the standoffs fit those of the Dell mobo tray.

Xyphox and R3d getting another case would defeat the whole purpose of my desire to build a new case but thanks tho ;)

mobo looks decent. good luck getting this all together. You should look in the freebies thread to see if you can get some stuff for it for cheap($ of shipping)
 
Alright well this isn't an update but just wanted to say that I went to Fry's electronic store and they had this exact motherboard... so I went ahead and bought it.

MSImobo.jpg


I took this picture on my pool table and with the blue felt and the direct above lighting it made a nice picture dont ya think :p (I have a very old and crappy digital camera btw). So I guess I will take my forum pics in this setting :D

So yeah I will try to rebuild the system tonight, or atleast switch over the CPU and put in the new RAM etc... I may post back later on tonight

Geo

--an afterthought-- man I wish I had a spare P4 laying around... those are so much more powerful than the celerons but ah well
 
Changing Motherboards

Doing the Swap

Alright so tonight I have successfully moved my Celeron over to my new mobo... and even though this is pretty standard stuff for us [H]'s it is part of the process for this worklog. Plus how many people get to see a Dell forgiven, saved, born again, and givin a new life :p

I didn't take too many pictures, plus they are crappy pictures anyways, but ah well.

First thing first... Take out the Celeron. Here is the lifeless Dell

EmptyDell.jpg


Notice the lack of the AGP slot, the complete lack of fan headers and USB headers, and the plain ugliness of the board. Man I'm glad I got a new one.

Here is the Celeron in place on the MSI board with thermal grease applied

CelyinPlace.jpg


A few things to notice here. The top right heatsink was the stock Dell heatsink (wide thick fins and all aluminum) and the lower one is just a spare P4 heatsink I have (thinner fins with a solid copper core). What an improvement over the stock heatsink. This should hopefully yeild some decent temps and maybe some good overclocks... that is if the board can do the job :)

Oh and when I was pulling the old heatsink off the celly it pulled the proc out without me unlocking the pins... luckily though no pins were pulled out.

Powering Up

Like I said everything else is very standard stuff and not worth any pics... basically a bunch of plugging in IDE cables, molex connectors, headers, etc... I just kept the drives in the Dell for now and just put in a random 512MB stick of RAM. I just wanted to see if the board worked and if my transfer was successful.

Here are a few pics of the sprawled out system before I even turn it on for the first time.

BeforePOST.jpg


The board is sitting on standoffs and not just on the antistatic bag

Standoffs.jpg


BeforePOST2.jpg


It Lives!!!

ItLives.jpg


ItLives2.jpg


Sorry for the last 2 pics being so blurry

If you notice I'm just running Knoppix (it's a CD-bootable OS for those who dont know) since it wont boot up the original Windows XP. I will have to put in the Dell resource cd and do a repair of XP and have to call in to get it reregistered and what-not. I will wait to do that tomorrow or some time when I have a few hours to spare (since thats what I'm guessing it will take)

Ok, so this is a big-step in my project for my brother. Now I have a fresh new mobo to play on and can no longer worry about having a decent system for him anymore. Next up will be the tearing down of the Dell case and starting a new one. I already have some good design ideas and am anxious to tell you all... but that will have to wait till later. Now I need some sleep.

Geo
 
MMmm MSI :)

Nice looking system so far man, mod the hell out of it! :D
 
Here here! to modding less than stellar OEM systems! lol Seriously though, thats a nice thing to do for your bro, man. :)
 
Good luck geting Dell's Windows to work on the new mobo, I won't be surprised at all if you have problems.

Cool worklog, keep us posted
 
It's OEM, you have a limited number of points for hardware changes you are 'allowed', changing the monther board constitutes a huge number... But when you aredoing the activation and it denies you, you can call the MS activation line and bitch a little... only took me about 10 minutes when i changed around my gateway
 
SCRAPING THE CASE

Goodbye Dell

Alright so now onto some dirty work. Like I said before, I've only had plans to use the motherboard tray from the actual Dell case. I might use the drive cages but I might not use any cages what-so-ever... not sure yet.

So first thing to do is drill out all the rivits...

drillrivits.jpg


The case is simply made up of 4 parts. The front panel, the inside cage, the outer shell, and the side panel. The outer shell and the inside cage is what's rivited together, and I'm only interested in the inner cage so once I got the 2 apart it was just a matter of cutting up what I needed...

one simple cut gets me the mobo tray

DellCutUp.jpg


now to all you Dell-haters out there, aint that a pretty sight to see :D

Yay... a mobo tray

mobotray.jpg


Alright... I've been loosely working with some sketchup models, and I will post those later tonight. Basically the case will be as big as the mobo tray... Yes it will be that small. I will cram the DVD-drive, hard drive, complete motherboard with the video card, and the PSU in that tiny space that you see in the picture above. I did some test fitting earlier today and it is completely possible to fit all that stuff in there. The problem will be finding a way to mount the drives.

I have a little bit more to post but I gotta go and dont have time... will post the rest tonight. Stay tuned!

Geo
 
NEW CASE PLANS

SketchUp

These next pics are very roughly the idea I am going for. They just give you the idea of the drive placement and how big the case will be (er... I mean small). I am wanting this to be a small case since it is for my brother and he goes back and forth to my mom and my dad's house. It needs to be small and easy to take with him for that reason. Plus it would be nice for the occasional lan party :)

So I said I would post these like 3 days ago but have been too busy. Here they are.

sketchup1s.jpg


You can see here that I will cut a 120mm hole for a fan as the intake.
sketchup2s.jpg


And this is roughly what it would look like with the cover on...
cover1.jpg


buttons will most likely be here.
cover2.jpg


In this pic you can see the intake will blow directly on the ATi video card heatsink... this is great because the card only has a passive heatsink and when gaming the heatsink is waayyyy to hot... like cant even touch it for a few seconds. I placed an 80mm fan next to it and it cooled down immediately. So all it needs is a little air movement. This may aid in getting a decent overclock from the aged card :)
cover3.jpg


Requirements

--- 1. Quiet (I have an obsession with quiet computing)
--- 2. Portable
--- 3. Cover must be somewhat easy to remove


Ok thats pretty much it for the plans I have... again these are just very rough models of what I want. One question though... I'm not exactly sure how to mount the drives up there... any ideas?

If you could give your opinions/suggestions on this design, that would be appriciated, as I am not sure if this is what I want to do and want to start soon. Thx

Geo
 
Simple "L" brackets work great for mounting drives and can be found super cheap at a hardware store/home depot or wherevers. I like your design, but maybe a handle(s) would make the transportation easier?
 
JinxyBoi said:
Here here! to modding less than stellar OEM systems! lol Seriously though, thats a nice thing to do for your bro, man. :)

Hehe yea, I've seen your old Compaq Presario that you've overhauled :). There's just something about taking an old OEM system and giving it new life. Although I think I've come to realize that only a few parts from my old Dell will be left once I'm done lol. :D

-after thought- I noticed you live in Houston from ur FS thread. What part?
 
Geo Fry said:
-after thought- I noticed you live in Houston from ur FS thread. What part?

Currently staying up in Huntsville for school at Sam Houston State, but I hail from a little town called Pearland. Since noone's heard of it, I just say Houston and make things easier on everyone, lol.

Anyway, what kind of sides are you gonna have on that case? sheet metal? acrylic? Some black bent acryllic looks really killer on these small cases.

But I digress, an idea on how to suspend the optical drive like you sketched up, could be to build some brackets onto the inside of top panel for it to slide and rest on. Not necesarilly be attached to, but just to keep it in place with the whole thing together.
 
cometcyclonemk said:
I like your design, but maybe a handle(s) would make the transportation easier?

I thought about handles but anytime I've ever seen a case with handles they always seem to stick out so bad. They seem so out of place. I was wanting this case to look sleek but we'll see.

JinxyBoi said:
Anyway, what kind of sides are you gonna have on that case? sheet metal? acrylic? Some black bent acryllic looks really killer on these small cases.

But I digress, an idea on how to suspend the optical drive like you sketched up, could be to build some brackets onto the inside of top panel for it to slide and rest on. Not necesarilly be attached to, but just to keep it in place with the whole thing together.

I'm planing the sides to be made up of sheet aluminum. It's a little expensive (i think like $25 for a 24'x18' size) but I dont want to use steel as it acts like an insulator... and I'm planing on only 2 fans. I have absolutely no experiance with acryllic so I'm not gunna try it.

About the drives; I was trying to avoid any mounting of them from the top. I want it to be easy to take the top off if I needed to get inside and work on stuff, and with 2 drives mounted to the top they would be somewhat of a pain. But I guess I dont have much of a choice

--- yea I know where Pearland is. I live in Spring... been here all 22 years of my life :)
 
Ok this isn't really an update so I won't treat it as one. I just wanted to say that I got the Dell's version of Windows XP reactivated. After puting in the Dell resource cd and doing a repair of the OS, it eventually asks for the key. Once that is in you must call and get a conformation number. After answering a few standard questions the conformation number is given and I've got my OS running again.

xprecover.jpg


And since it was just a repair and not a reformat/reinstall, everything is still on the PC. All the music, games, downlaods, etc. Even the original wallpaper of a Quake 3 screenshot that my bro took of him pummeling me :eek: (notice the 'You fragged Geo Fry') :p

xprecover2.jpg


Yes we still play lots of Q3 :)

And since the radeon 9550 wasnt there before, I had to download the newest Catalyst drivers and .NET framework to install the Cat Control Center.

Here is an updated pic of the system, which now has the 9550 and the 1GB RAM. This will pretty much be the system handed over to my brother, except for probably the PSU

systemupdate1.jpg


OK if I can get enough done, more will come tonight

Geo
 
CASE PART 1

Foundation

OK I'm almost positive you guys are tired of seeing updates of the system and random pics of me cutting up an old Dell case... but I promise the boring stuff is over :)


First off let me repost a pic of the mobo tray

mobotray.jpg


Now to build an entire case around this thing I will need to have a strong foundation to build off of, and just screwing things to this mobo tray aint gunna cut it. I wanted this case to be built out of aluminum but since steel is alot stronger the base will be steel.


My steel will come from this old fuse cabinet I have

fusedell.jpg


I cut of a piece from the fuse cabinet, cut it to size, sanded it, and coated it with clear lacquer. I didnt take any photos showing this but here is the final product (oh and I painted the back of the mobo tray black, but I think I am going to repaint it because I'm not happy with it at all)

base1.jpg


This picture (although it is terribly blurry) shows a comparison between the original state and the final state of the metal

compare1.jpg


The tray is attatched directly to the steel in 3 places as shown here

angle3.jpg


it will also be indirectly attatched to the tray with all the angle aluminum you see laying around it

Also in the back and on the side is weather-stripping to cushion the contact between the tray and the steel so as to not vibrate. You can sort of see it here

black1.jpg


you can see how badly I painted the back black... I will definitely need to redo that


Intake

I think I'm really going to like this part of the case... originally I just wanted to stick a 120mm fan on the side where the whole is and put a standard grill on it. But the more I thought about it, the more boring i figured it would be.

I always admired how when you looked straight at a Mac G5 case and you looked through the front grill, you could see those 2 120mm fans slowly spinning. Well I kind of ripped my idea from that... but of course only 1 120mm fan will fit :rolleyes:

So first lets install the fan.

yateloon1.jpg


I opted the Yate Loon because it is etremely quiet at 12v and will provide ample airflow for a case this small (notice the weather-stripping on it to stop vibrations)

Here it is installed

yateinstall.jpg


The grill will be made out of more aluminum... I though about modders mesh but decided against it when I realized I could make one without purchasing anything... last summer I worked at a construction site to make some extra money and pulled an old PSU from a building before it got trashed.

oldpsu.jpg


This will be perfect for the grill

Thats it for tonight. I will post pics of the grill tomorrow :p

Comments/Crits welcome :D Thanks Geo
 
CASE PART 2

Intake Continued

So since this is a continuation from where I left off lets get right into it. I took the cover off the old PSU which left me with some decent hole punched aluminum

psualu.jpg


This will be perfect for the air from my Yate Loon to come through. All that need to be done is to cut a piece that is the correct size, file all the edges till smooth, and sand until a decent brushed look is achieved

And vuala!!

grill.jpg


actually I used a 80grit flap wheel to sand the aluminum to get it as even as I could.

So the airflow design will be quite simple but I believe quite effective. The space is so small that a 120mm fan is actually overkill but the noise is so minimal that it really doesn't matter

airflow.jpg


The side-to-back airflow design will allow the GPU and CPU to get complete fresh air... look at how crappy that PSU looks. I am definitely going to need to do something with the PSU situation

Here's a couple more pics

overall.jpg


sideview2.jpg


reminiscent of a G5 maybe? :D

more to come soon.... I'm workin like a mad man on this project

Geo
 
Thats really cool... Case and what your doing for the little bro! I like the bare aluminum look, maybe some back acents would be cool.

The top of the case should have the Fuse Cabinet Sticker on it! A cool reminder, mask it and paint or sand the rest! Kinda of a cool vintage look.
 
thomas_markle said:
hooray!!!! i cant wait till i get it. It looks soooo good. :D

Haha, there he is... guys let me introduce you to my brother lol. This is the guy thats gunna get this PC when I'm finished, which hopefully be soon. I'm hurrying man :D

filthysanchez said:
nice job so far.
are you going for a gloss black?

well I guess I am... its not necessarily the glossiness or even the quality of the paint job i'm that worried about; it's the coverage. If you look again you will see that there are many spots not even touched by the paint. :rolleyes:

What you see now is just 2 layers of black paint. What I think I'm going to do is give it a few more layers of paint, and then like 3 layers of semi-gloss clear lacquer, mainly to protect against scratches

tenpinsniper said:
The top of the case should have the Fuse Cabinet Sticker on it! A cool reminder, mask it and paint or sand the rest! Kinda of a cool vintage look.

Haha well I was thinking I might do something with the sticker and I tried to salvage it by taking it off the cabinet. Big mistake lol! It's pretty much ruined but ah well.


And thanks for all the kind words! I was getting tired of the 'post this in the "ghetto mod" gallery' comments lol. But i guess it did look ghetto to begin with. More to come soon I hope :)

Geo
 
Oh and I realize this isn't a high-performing PC. You have to remember that right now he has no PC and ATM just uses his mom's to have access to the internet, play Quake 3 and Wow, and for media... which this will do fine with.
 
Damn, my little brother has that Dell too (except his had a 2.8 Prescott in it).

He had came home for the summer and saw that I was building a new system (s939 3200+, A8N-VM CSM, 6600 GT) and promptly stole it from me when he went back to college. Damn bastard left me with his crappy Dell so I bought this board and set her up. Nice build man, looking forward to see more of that case.

Oh, just so you know that Dell fits standard MATX mobos. Theres no special layout or anything. I'm thinking of reusing the case and throwning a Core2Duo setup in there. Just cause. :cool:
 
It will be cool to him either way!

Haha well I was thinking I might do something with the sticker and I tried to salvage it by taking it off the cabinet. Big mistake lol! It's pretty much ruined but ah well.
 
woah, that is coming together really NICE! The mesh looks reaaally clean.

Have you come up with an idea to mount the hard drive and optical drive yet?
 
JinxyBoi said:
woah, that is coming together really NICE! The mesh looks reaaally clean.

Have you come up with an idea to mount the hard drive and optical drive yet?

Thanks man :D was hoping you'd like, I'm quite surprised at how well its coming along myself lol... and no i'm not too sure about the drives yet. After a little test fitting thus far, it will be very tight to get the two drives to even fit let alone mount them. So I'm thinking I might have to raise the top a little so I can get the hard drive to go over part of the fan/intake to make room for them both. Those sketchup drawings were obviously not to scale.

I'm only a little concerned with it though, I'll figure something out
 
Geo Fry said:
Oh and I realize this isn't a high-performing PC. You have to remember that right now he has no PC and ATM just uses his mom's to have access to the internet, play Quake 3 and Wow, and for media... which this will do fine with.

Dude this computer his way too high-preformance than what i even need lol. Its looking awesome though man. Keep up the good work(but could you hurry up please lol j/k).
 
Back
Top