Nightsword
n00b
- Joined
- Oct 24, 2016
- Messages
- 5
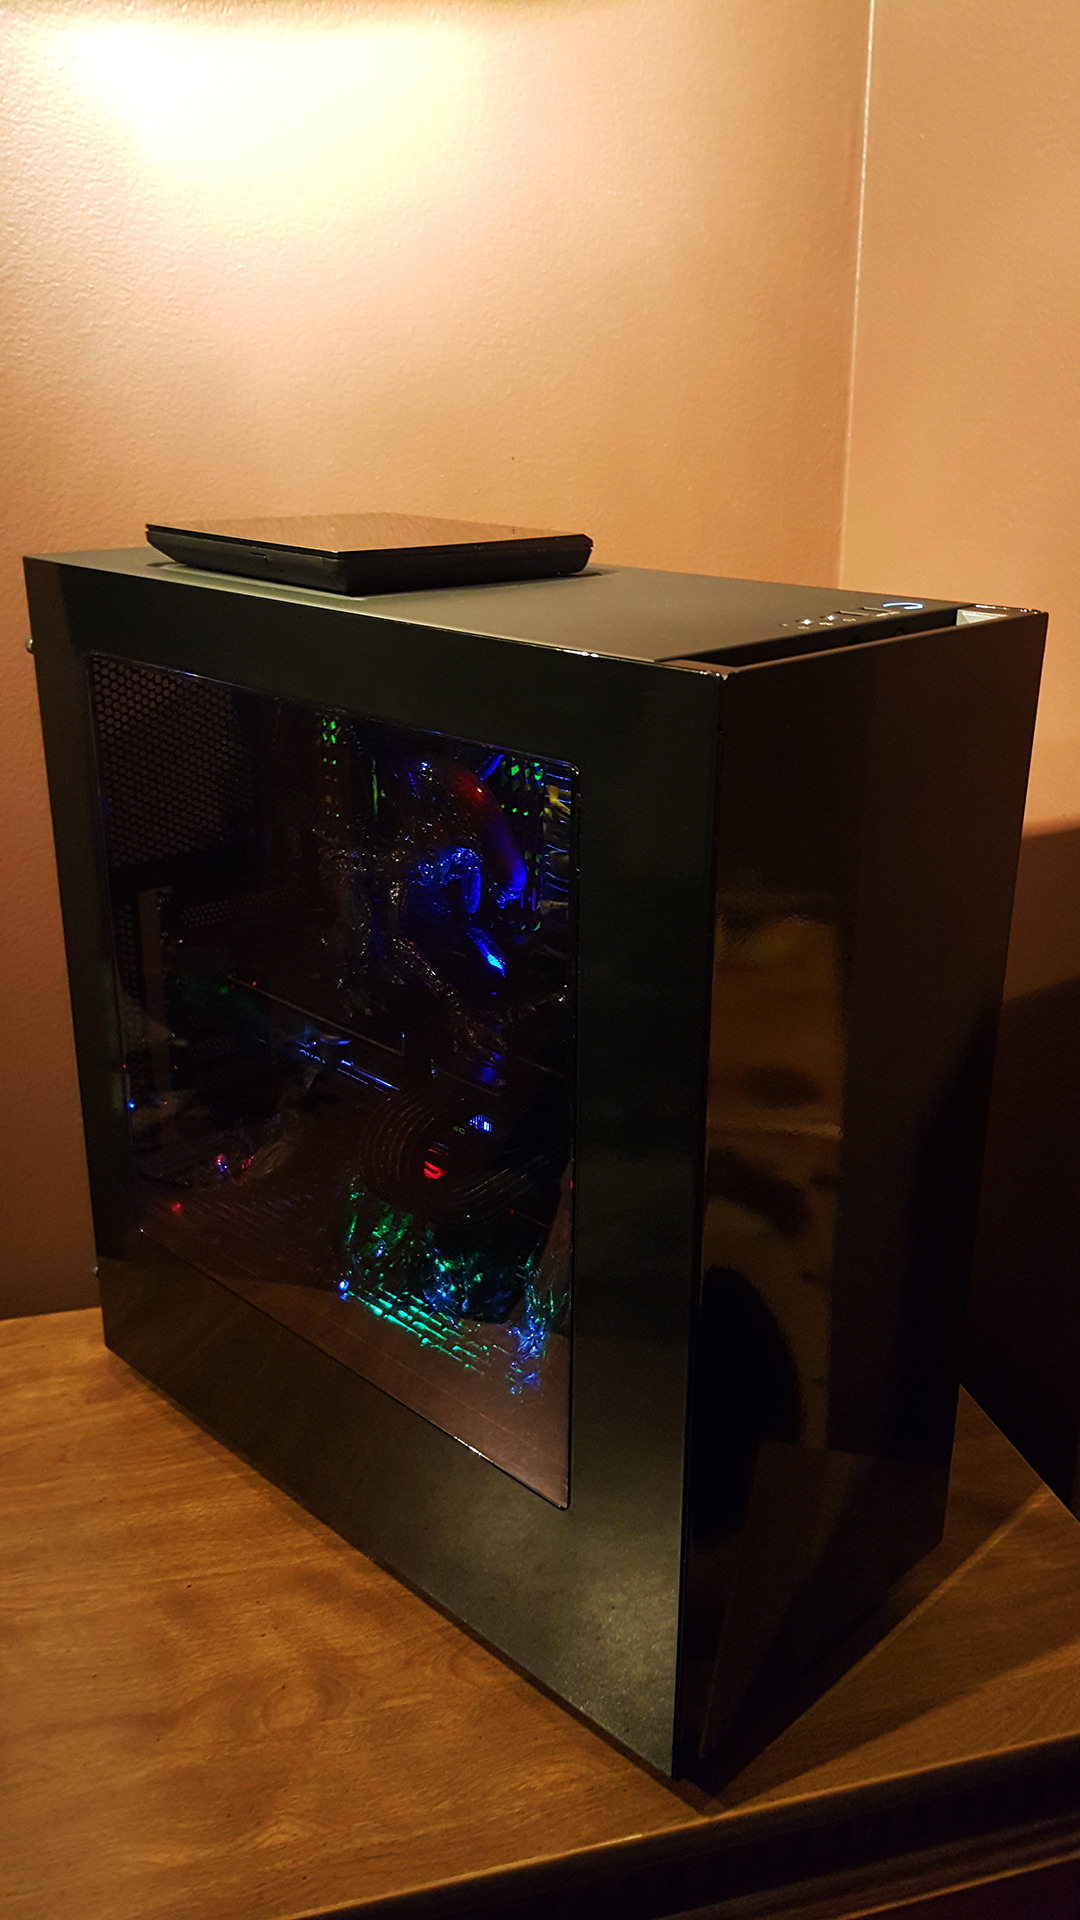
Hi all, this is my first custom fabrication build. My goal was a smaller, unobtrusive PC with a clean and simple no-frills exterior and with a weathered industrial interior that reflects the atmosphere of the Alien movies. For this, I started with the NZXT s340 case in black, gutted it, and fabricated replacement internals.
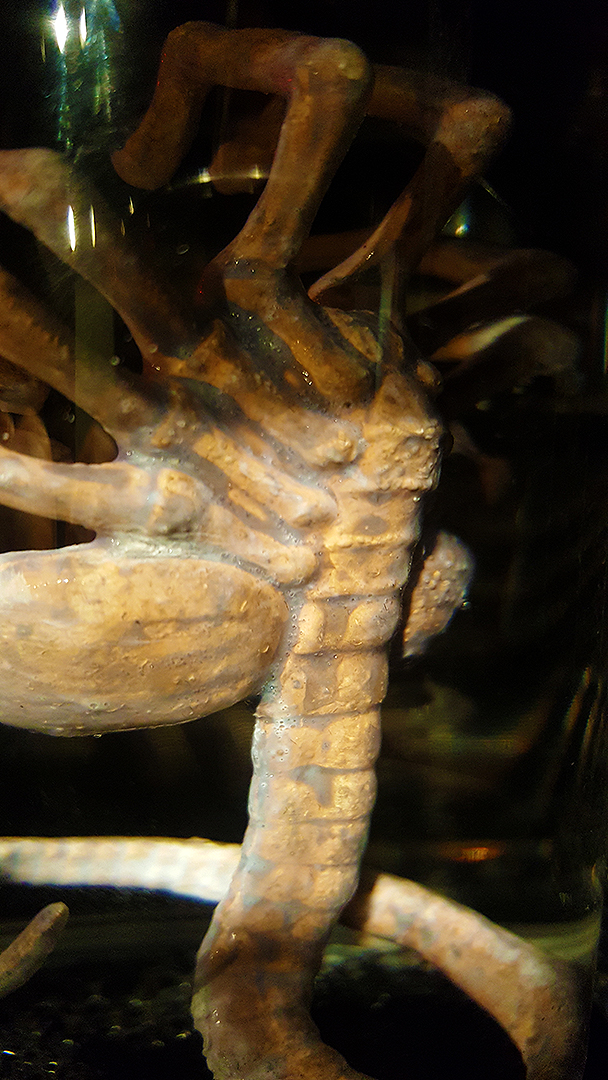
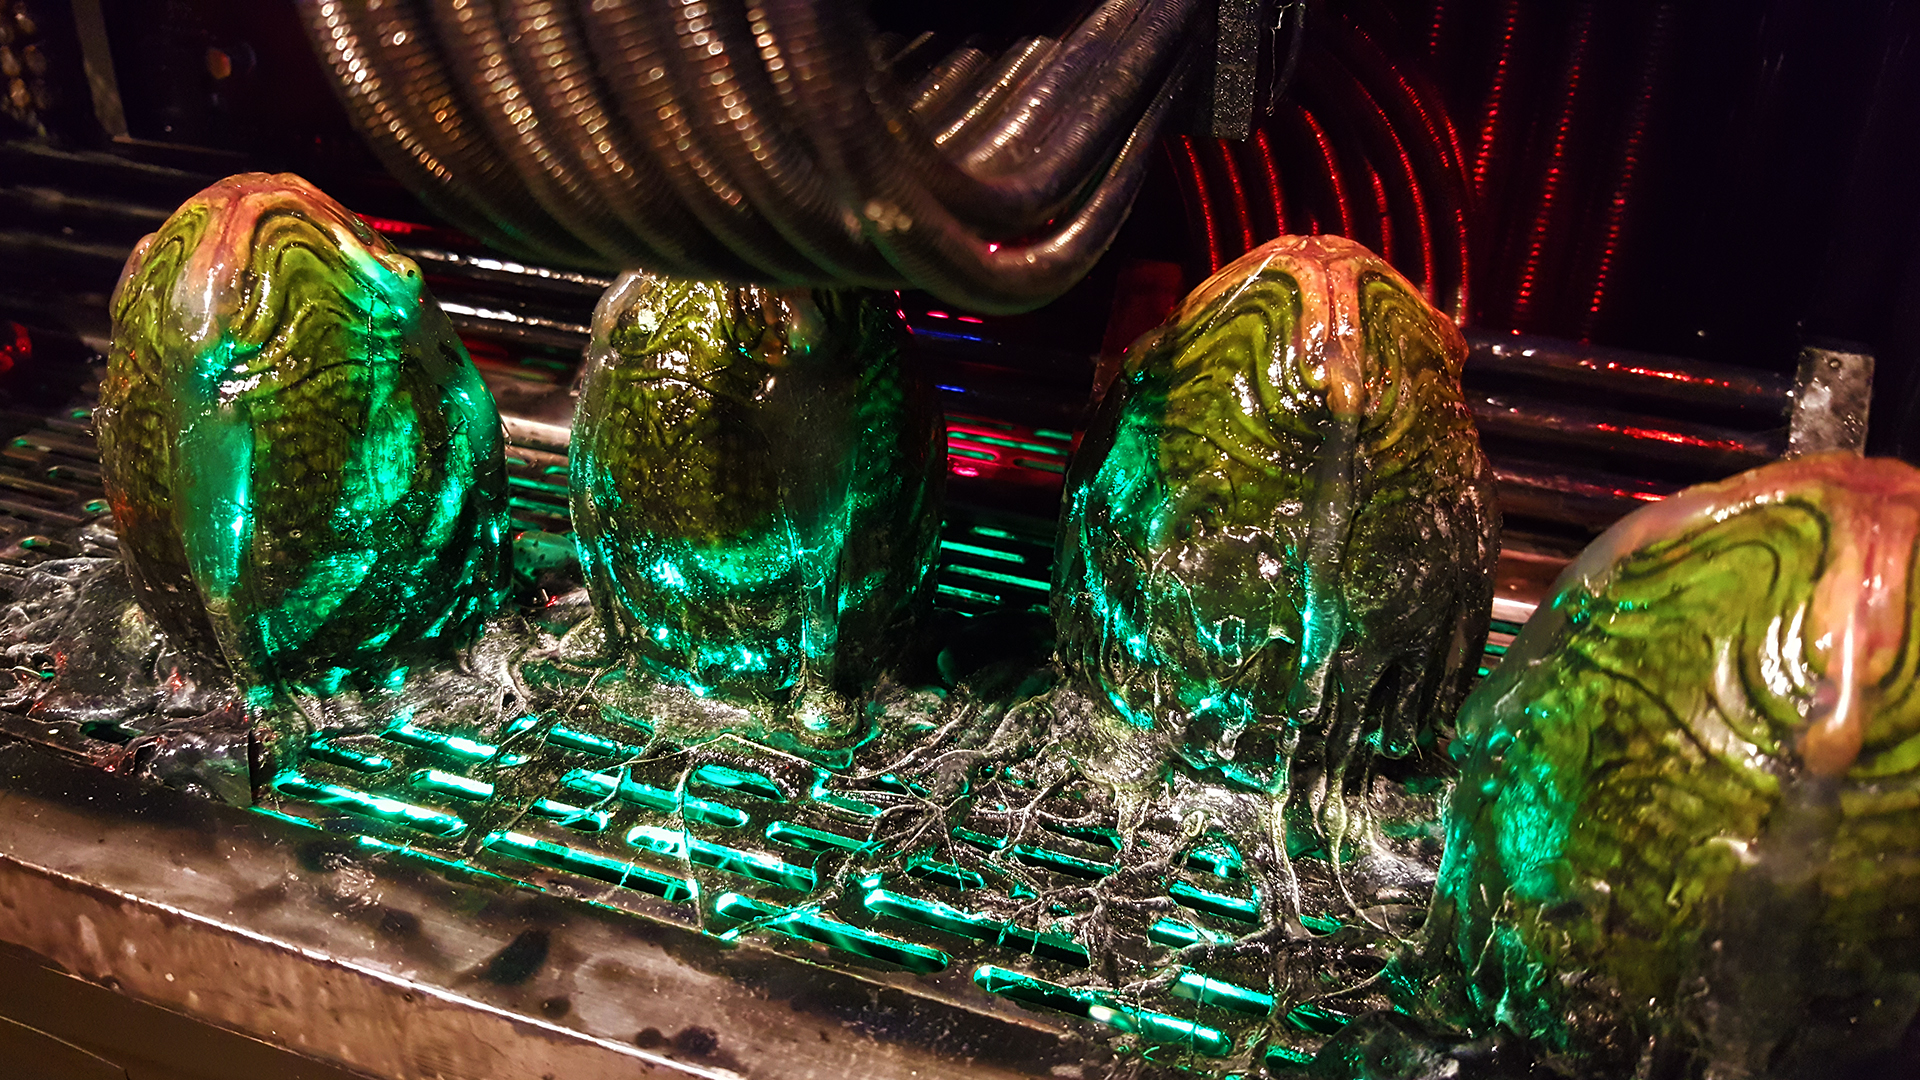
The alien facehugger and eggs were from a toy collection which come in just a bland solid color. The treatments I used for most of the components are acrylic base paint, ink washing, dry brushing, and then gloss varnish.
I soon found that the acrylic paint on the facehugger begins to break down in the water even when fully cured, so I used Silicone Conformal Coating to water seal it. I also used the Silicone Conformal Coating for a very wet appearance in some areas of the other components. This makes an amazing wet look, but I came to find that it also appears as a completely dry powder under UV light, so in the end I had to minimize the use of UV light to only the RAM, within which I applied UV reactive paint to insert strips.
There are several stages of LEDs, each stage powered by an LED controller. Because individually wired 12v LEDs waste most of the energy through the resistors, I instead made each stage a series of LEDs with a low resistor value. With so many LEDs in this application, this somewhat reduces the energy use and heat, as well as permits the use of low power Bourns linear potentiometers to adjust the brightness of groups of LEDs.
There are two LED switches, one switch for a subtle glowing effect and one switch for the beacon effect and strobe effect to simulate the self-destruct countown scenes in the Alien movies. For the amber beacons used in those scenes, I used an LED controller wired to 8 LEDs spread over roughly 120 degrees, and the LEDs are runs in a sequence pattern. Then there are two separate stages of strobe LEDs, each somewhat randomly cycled.
For the illuminated CPU waterblock, I provided Performance PCs the Weyland Yutani logo with which they used to make the face plate. I then used a yellow gel filter for the yellow areas.
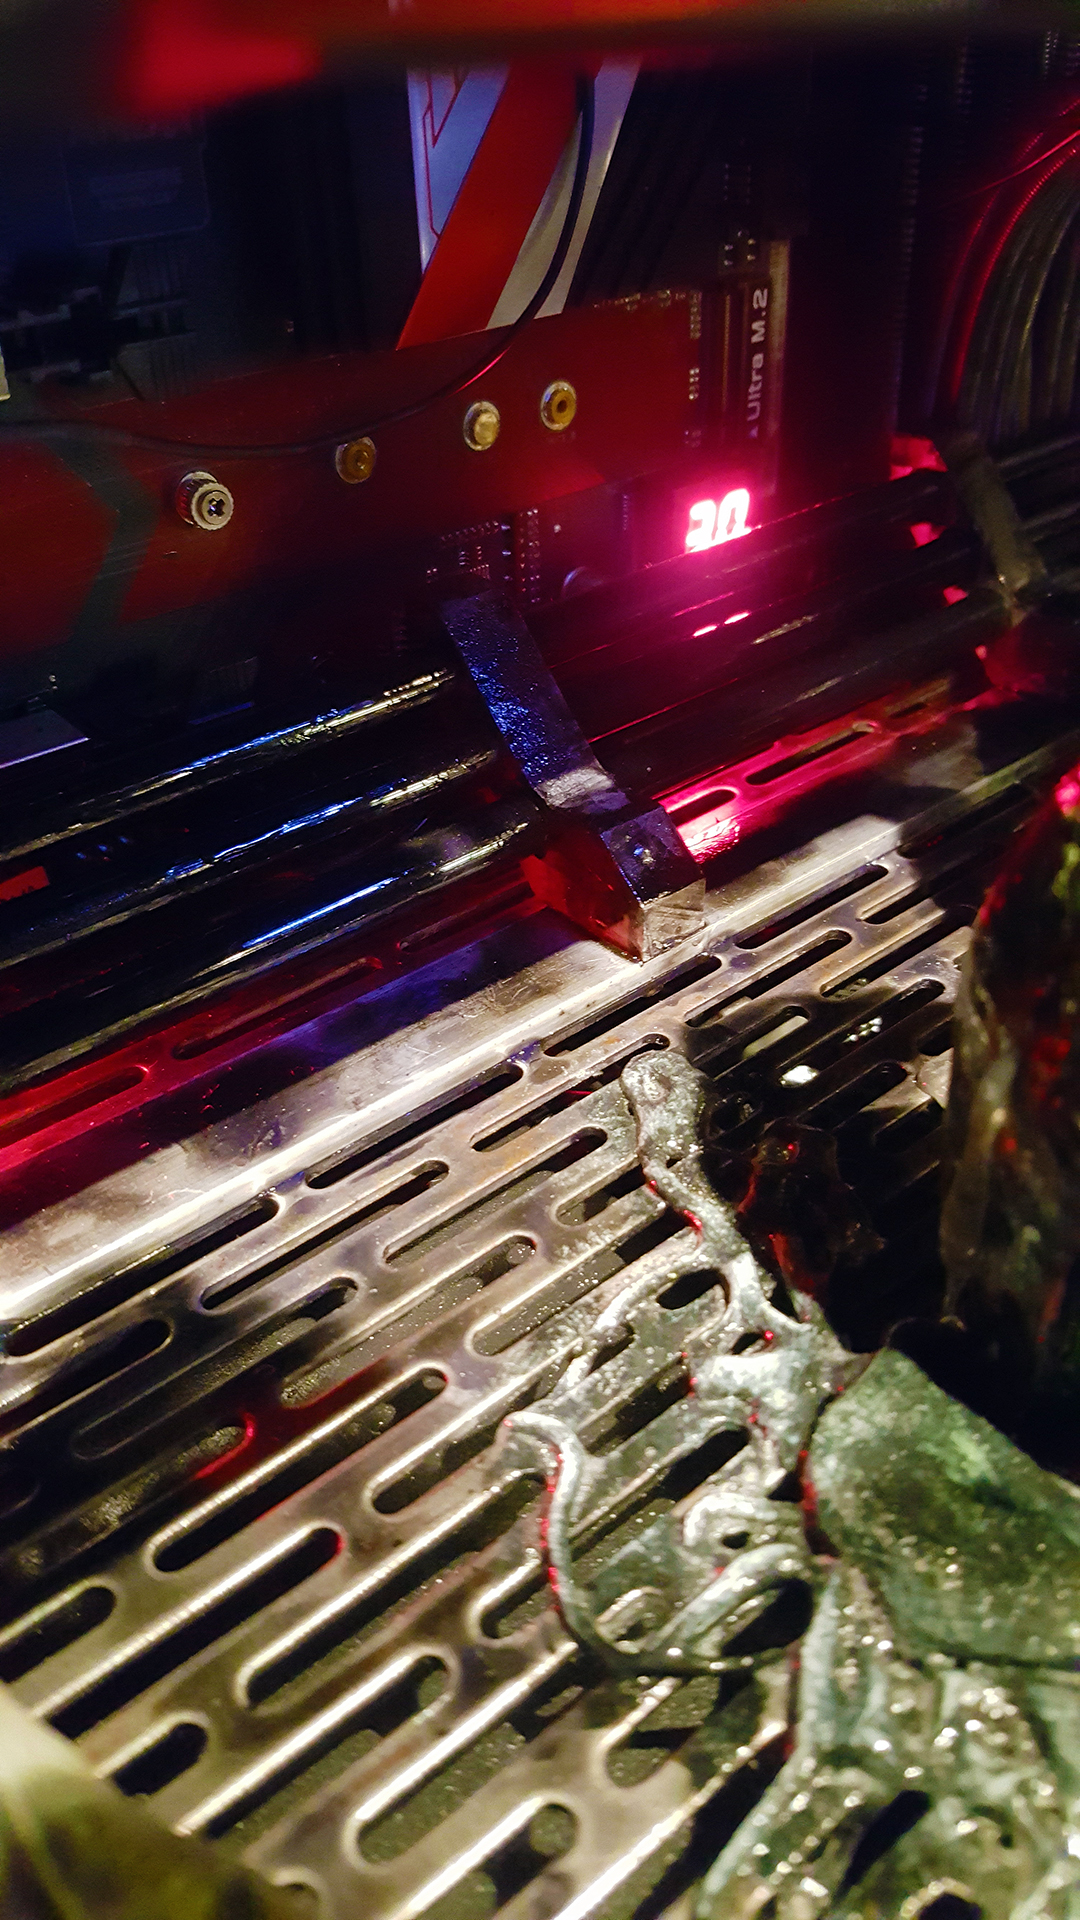
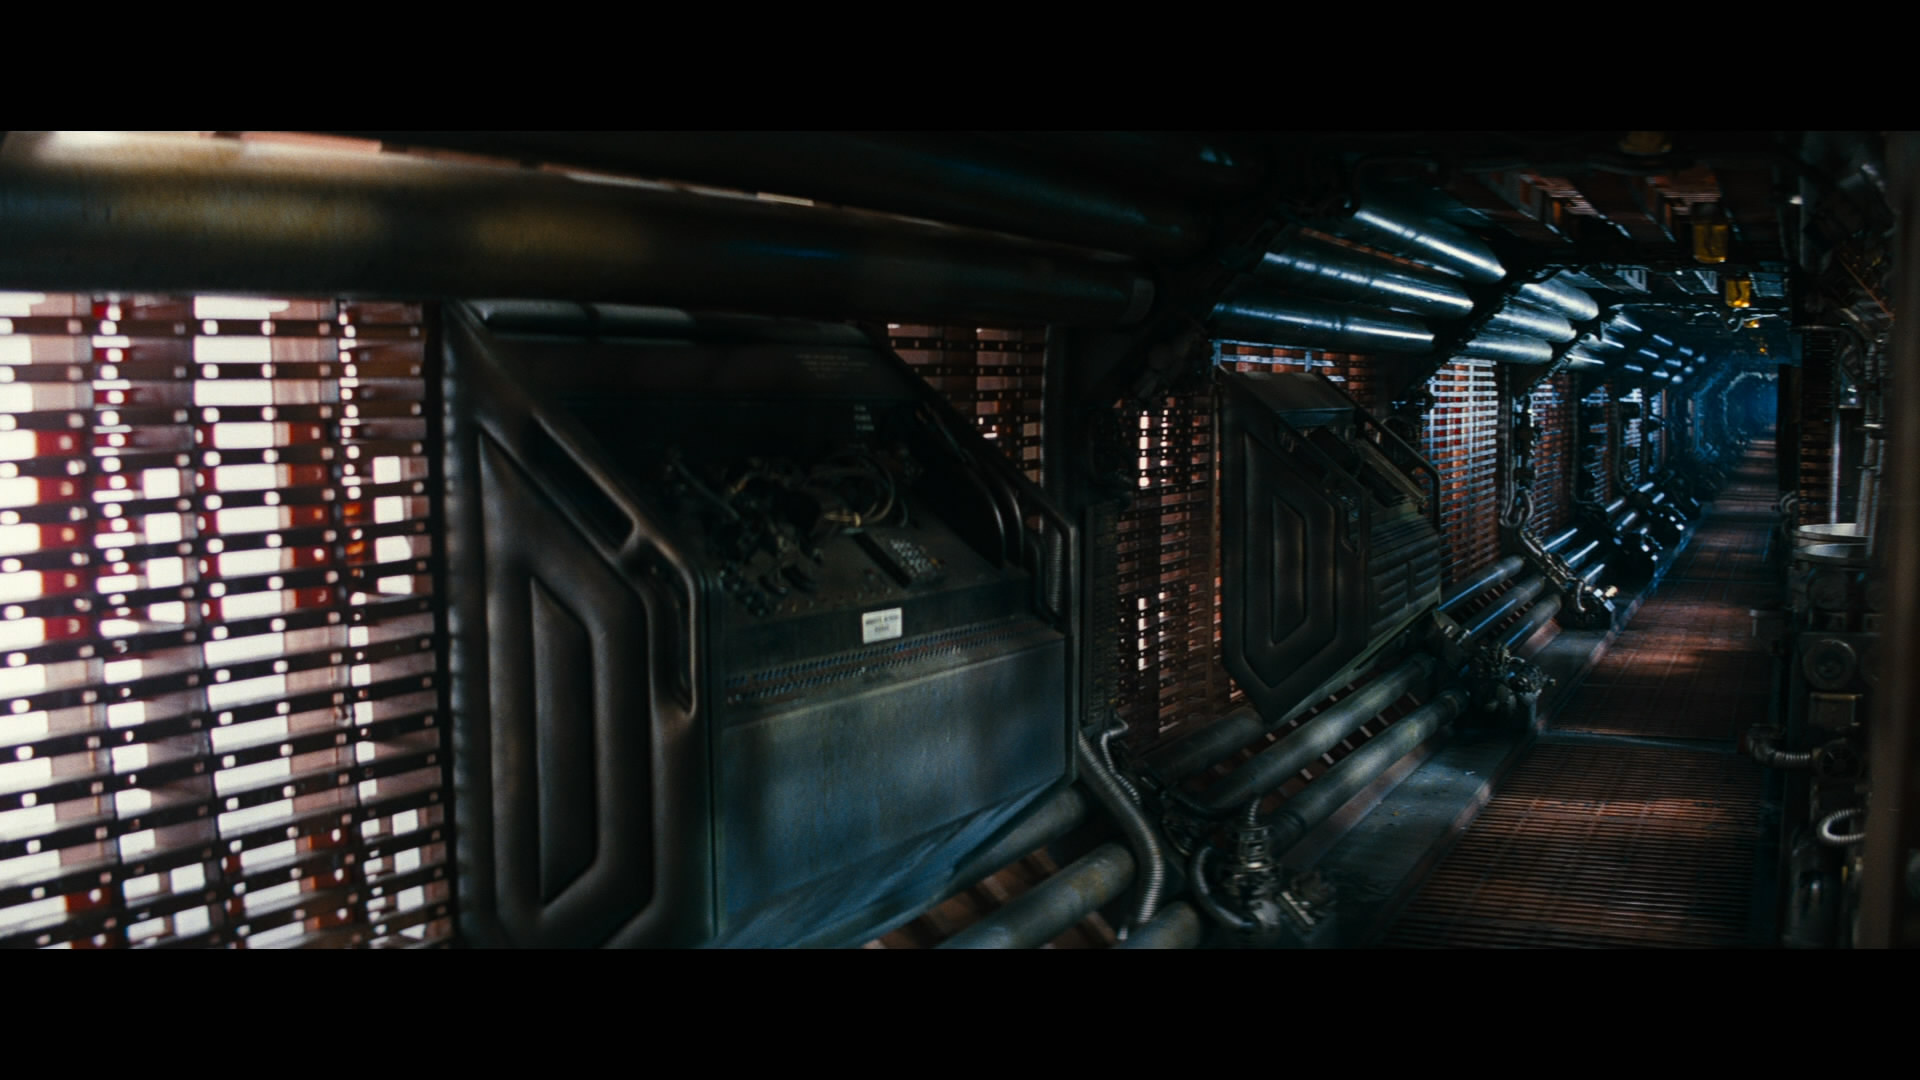
The floor of the lower level is stainless steel grating. The horizontal tube structure running along the back of the floor are scaled based on the Nostromo corridors.
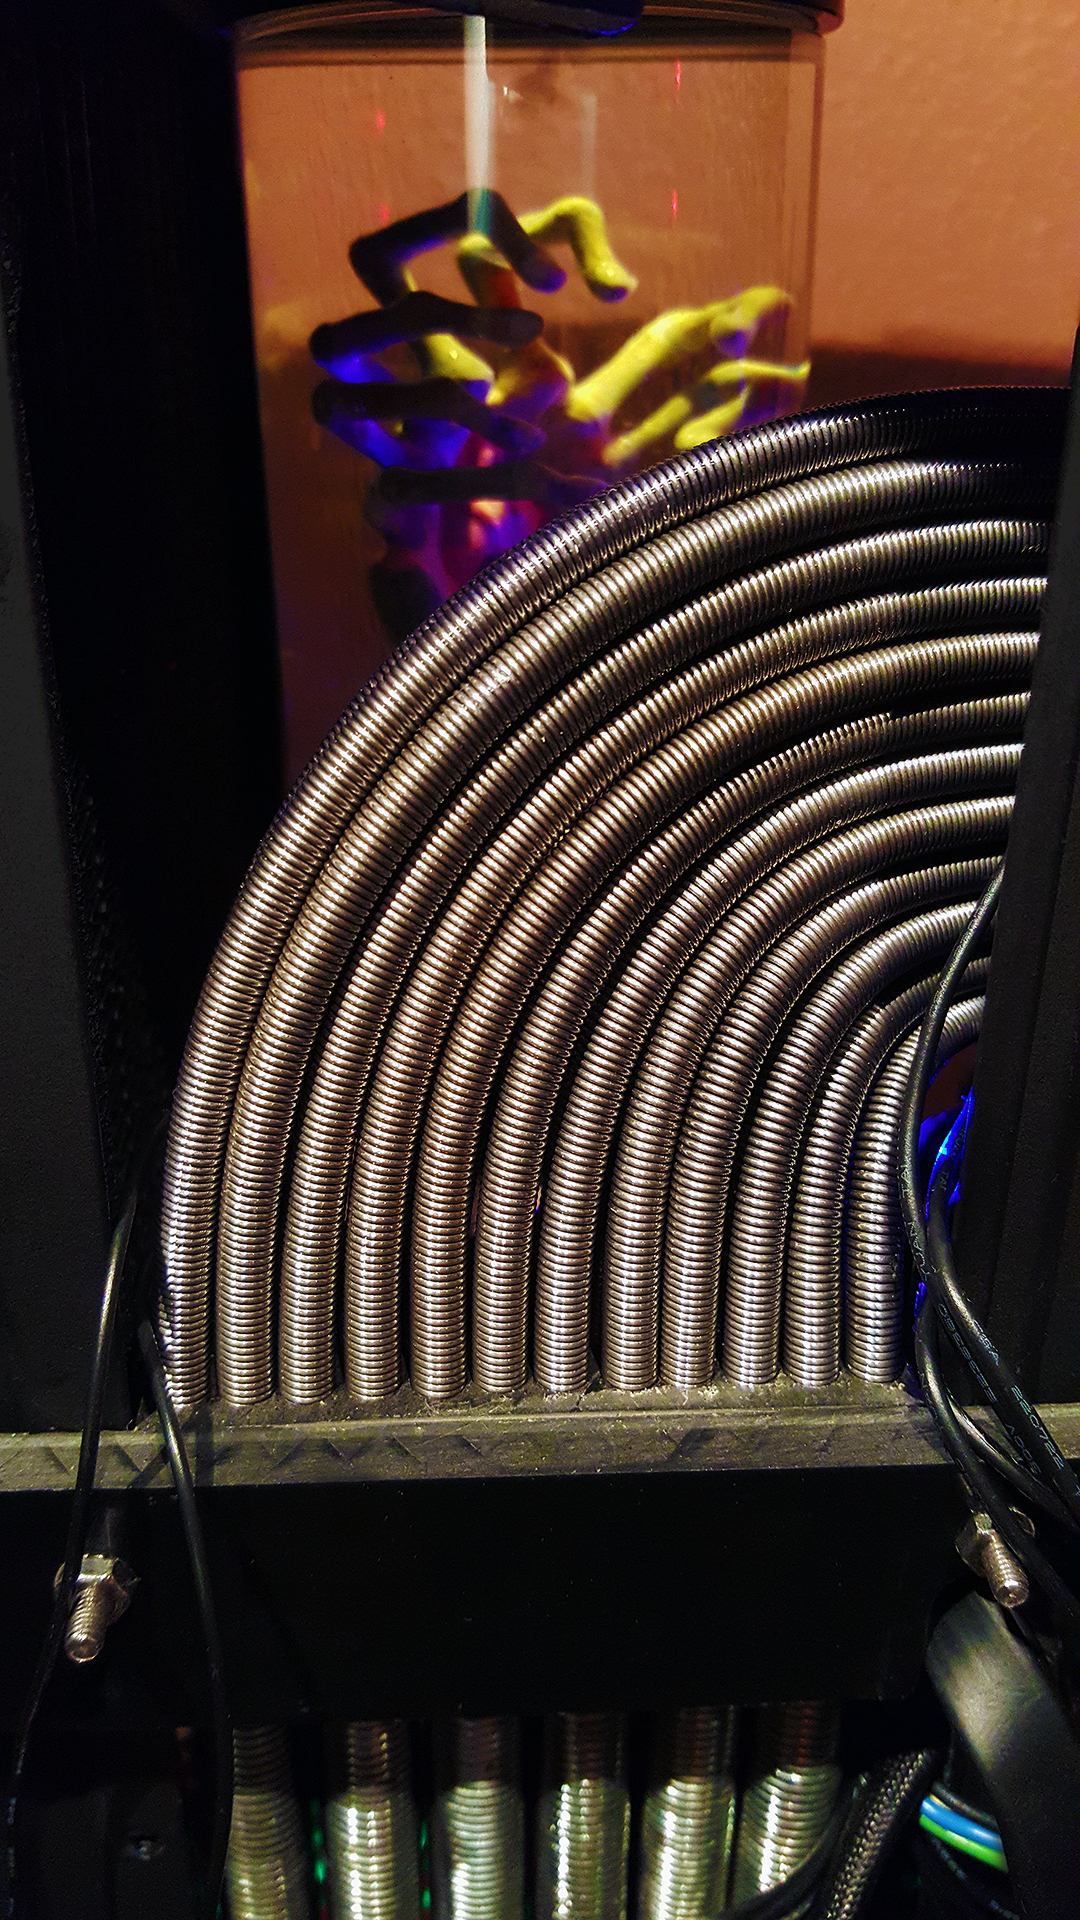
All wires are individually sleeved in stainless steel. For the ATX main power wires, each is sleeved in small diameter stainless steel, and then fed into a fabricated manifold behind the reservoir which routes the wires into pairs of four into larger diameter stainless steel. These are then fed into another lower manifold. The lower manifold also routes four sets of 6+2 PCIE groups. Currently in use are just one 6 pin and one 6+2 pin for the single GTX 980ti video card. The stainless steel was then heavily ink washed for the weathered effect and then silicone conformal coated for the wet/oily look.
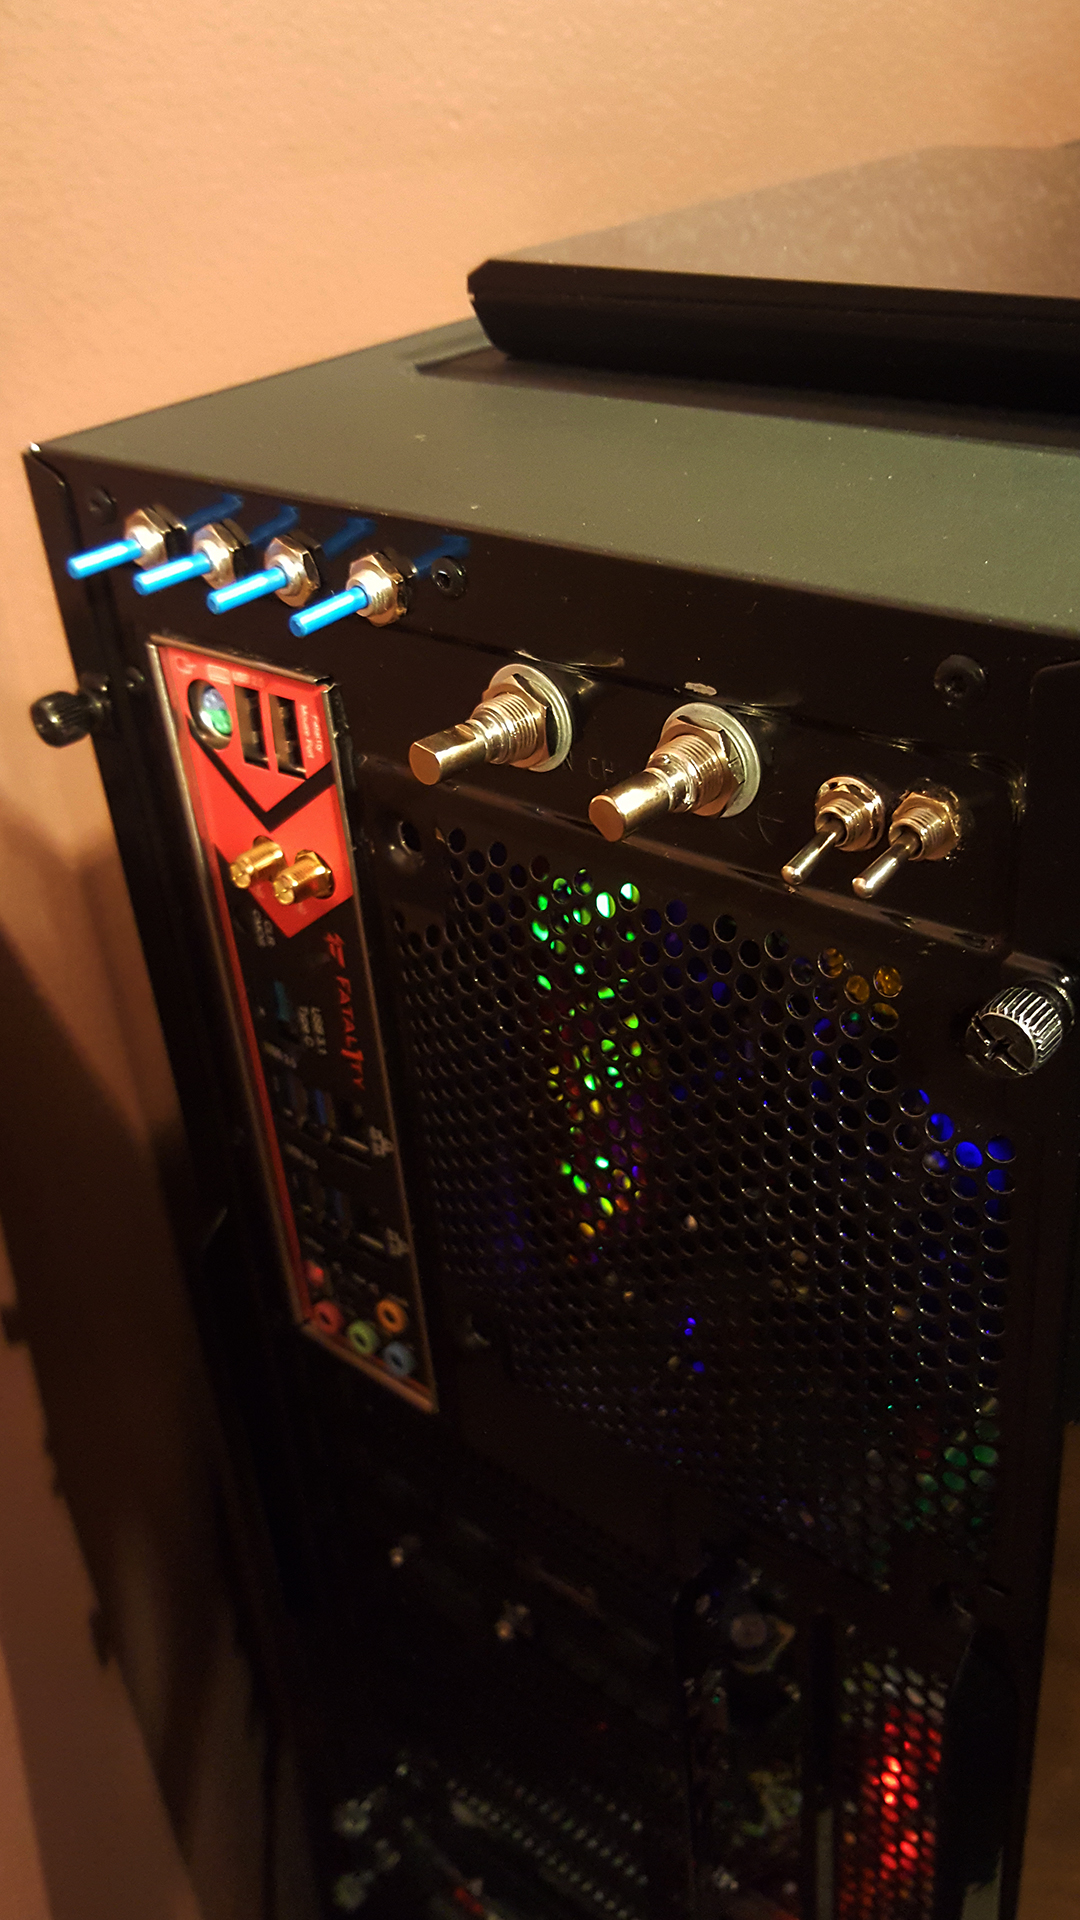
Case: NZXT s340 (Gutted)
System Components...
Drives...
Fans...
Water Cooling...
Peripherals...
OS: UEFI/GPT + Windows 10 Pro
(Note you'll see in the pics I hadn't yet rid the motherboard of the "Intel Inside" logo)
.jpg")

.jpg")


.jpg")


The alien facehugger and eggs were from a toy collection which come in just a bland solid color. The treatments I used for most of the components are acrylic base paint, ink washing, dry brushing, and then gloss varnish.
I soon found that the acrylic paint on the facehugger begins to break down in the water even when fully cured, so I used Silicone Conformal Coating to water seal it. I also used the Silicone Conformal Coating for a very wet appearance in some areas of the other components. This makes an amazing wet look, but I came to find that it also appears as a completely dry powder under UV light, so in the end I had to minimize the use of UV light to only the RAM, within which I applied UV reactive paint to insert strips.
There are several stages of LEDs, each stage powered by an LED controller. Because individually wired 12v LEDs waste most of the energy through the resistors, I instead made each stage a series of LEDs with a low resistor value. With so many LEDs in this application, this somewhat reduces the energy use and heat, as well as permits the use of low power Bourns linear potentiometers to adjust the brightness of groups of LEDs.
There are two LED switches, one switch for a subtle glowing effect and one switch for the beacon effect and strobe effect to simulate the self-destruct countown scenes in the Alien movies. For the amber beacons used in those scenes, I used an LED controller wired to 8 LEDs spread over roughly 120 degrees, and the LEDs are runs in a sequence pattern. Then there are two separate stages of strobe LEDs, each somewhat randomly cycled.
For the illuminated CPU waterblock, I provided Performance PCs the Weyland Yutani logo with which they used to make the face plate. I then used a yellow gel filter for the yellow areas.
The floor of the lower level is stainless steel grating. The horizontal tube structure running along the back of the floor are scaled based on the Nostromo corridors.
All wires are individually sleeved in stainless steel. For the ATX main power wires, each is sleeved in small diameter stainless steel, and then fed into a fabricated manifold behind the reservoir which routes the wires into pairs of four into larger diameter stainless steel. These are then fed into another lower manifold. The lower manifold also routes four sets of 6+2 PCIE groups. Currently in use are just one 6 pin and one 6+2 pin for the single GTX 980ti video card. The stainless steel was then heavily ink washed for the weathered effect and then silicone conformal coated for the wet/oily look.
Case: NZXT s340 (Gutted)
System Components...
- Motherboard: ASRock Fatal1ty X99 Professional Gaming i7 2011-v3 Intel X99
- CPU: Intel Xeon E5 2689 V4 10 Core
- Memory: 8x16GB G.SKILL Ripjaws 4 Series DDR4 3000 (PC4 24000) SDRAM
- Video Card: EVGA GeForce GTX 980 Ti SC+ ACX 2.0+
- Power Supply: Corsair AX760
Drives...
- Primary Drive: Samsung 950 PRO 512GB M.2 NVM PCI-E 3.0 x4 SSD MZ-V5P512BW
- Auxiliary Drive 1: SAMSUNG 850 PRO SERIES 1TB SSD SATA III 1TB
- Auxiliary Drive 2: Seagate Hybrid STCL2000400 2TB MLC/8GB SATA 6.0Gb/s NCQ SSHD
- Disc Drive: SAMSUNG Slim Portable Blu-ray Writer SE-506CB/RSBD
- Portables: SanDisk Extreme Pro 128GB USB Flash
Fans...
- CPU Fan: Noctua NF-A14 iPPC-3000 PWM 140mm PWM AAO Frame SSO2 Bearing
- Case Fan: Noctua NF-A14 iPPC-3000 PWM 140mm PWM AAO Frame SSO2 Bearing
Water Cooling...
- Reservoir: EK-XRES 140 DDC 3.2 PWM w/Pump + Multiport TOP
- Radiator: Black Ice Nemesis 140GTS XFLOW Ultra Stealth Cross-Flow Low Profile
- CPU Mounting Block: Swiftech APOGEE XL PPCS (Custom CNC Machined W/Y Logo)
- Tubing: Monsoon Hardline Tube 1/2 x 5/8
- Compression Fittings: Monsoon Free Center Hardline Compression (w/Fabricated copper inserts)
- Angle Fittings: Monsoon 90° Rotary Angle
- Fill/Drain Fittings: Koolance QD2 Male Quick Disconnect No-Spill Couplings
Peripherals...
- Monitor: Samsung 4K 48" Curved 9000-Series SUHD
- Mouse: Logitech MX Master Wireless
- Keyboard: Logitech K800 Illumintated Wireless
- CAD Device: 3DConnexion SpaceMouse Pro 3DX-700049 Wireless
OS: UEFI/GPT + Windows 10 Pro
(Note you'll see in the pics I hadn't yet rid the motherboard of the "Intel Inside" logo)
")