theGryphon
[H]ard|Gawd
- Joined
- Nov 21, 2011
- Messages
- 1,293
So, I've been brainstorming about a mITX case for ITX size GPUs and SFX PSUs.
I posted one such idea here: http://hardforum.com/showthread.php?t=1848632, but I've had many more that I didn't post.
All of them had, what you might call a drawback of requiring a PCI-E riser. Now it seems risers are becoming more and more reliable but still I figure when it comes to mass production, reliability can be more of a problem, and the case designer/producer may have to deal with a ton of headache and backlash. Significant cost increases are also of concern.
So, I decided to look into what can be done to design the smallest possible case that can keep an ITX mobo, an ITX sized GPU and an SFX PSU at reasonable long-term operating temperatures. The layout I came up with is no surprise, but a few design decisions can set it apart from cases with similar layouts.
The philosophy and motivation behind the design is:
1) Minimalism
2) K.I.S.S.
3) Handsome looks
Not resorting to a PCI-E riser and power cord extension is the first step towards this philosophy, and other design decisions (will) follow the same.
I'll keep updating this post with changes to the design, and resulting model.
Links to Sketchfab:
Case with SSDs: https://skfb.ly/CEMO
Case with HDD: https://skfb.ly/CI99
Case with the cover on: https://skfb.ly/CEMQ
Pics for completeness:
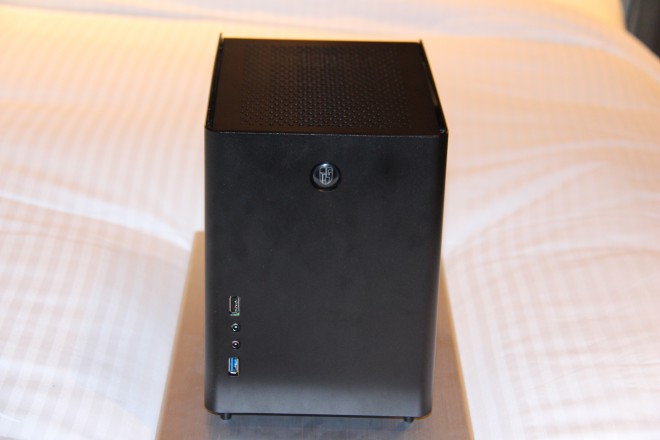
Angled front:

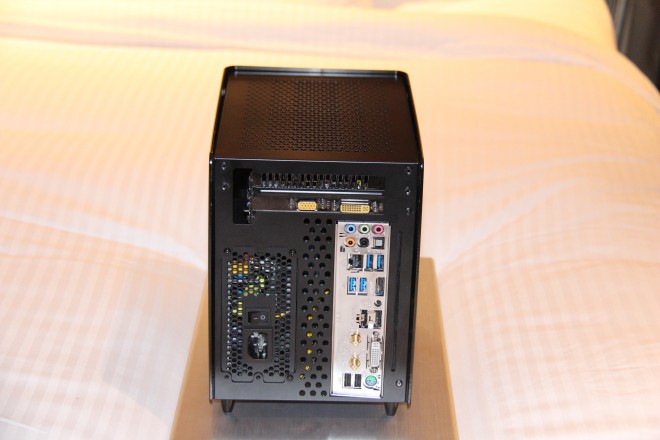
Angled back:

Back angled:

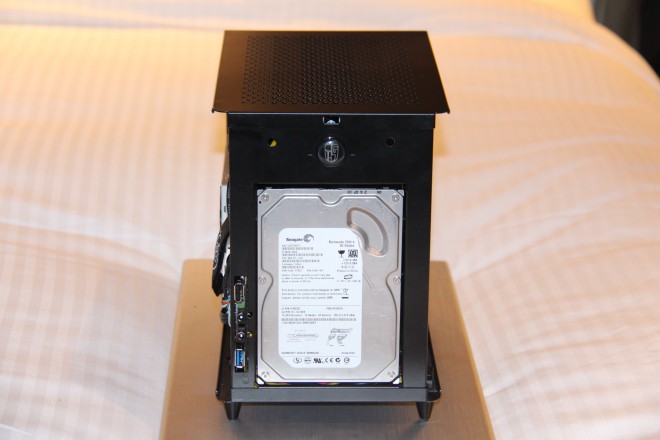
With HDD:

Covered:

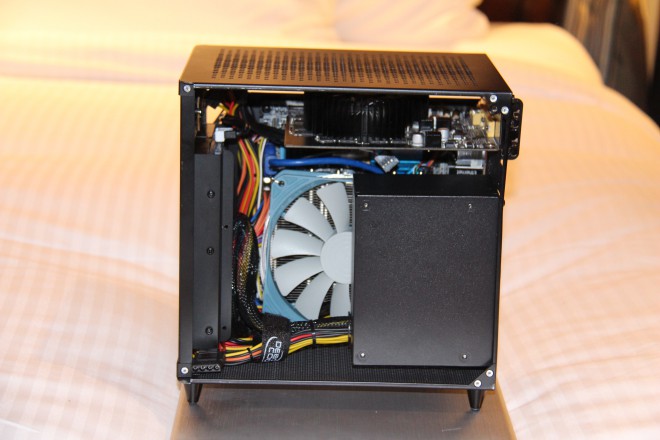
Some more detail:
Depending on the response here, I will put more effort/time in this project. I have no funds for a prototype to be built, so I definitely rely on crowd support to get anything done. I really want to this project to succeed, so any offer for help is appreciated.
So, shoot, what do you think?")
I posted one such idea here: http://hardforum.com/showthread.php?t=1848632, but I've had many more that I didn't post.
All of them had, what you might call a drawback of requiring a PCI-E riser. Now it seems risers are becoming more and more reliable but still I figure when it comes to mass production, reliability can be more of a problem, and the case designer/producer may have to deal with a ton of headache and backlash. Significant cost increases are also of concern.
So, I decided to look into what can be done to design the smallest possible case that can keep an ITX mobo, an ITX sized GPU and an SFX PSU at reasonable long-term operating temperatures. The layout I came up with is no surprise, but a few design decisions can set it apart from cases with similar layouts.
The philosophy and motivation behind the design is:
1) Minimalism
2) K.I.S.S.
3) Handsome looks
Not resorting to a PCI-E riser and power cord extension is the first step towards this philosophy, and other design decisions (will) follow the same.
I'll keep updating this post with changes to the design, and resulting model.
Links to Sketchfab:
Case with SSDs: https://skfb.ly/CEMO
Case with HDD: https://skfb.ly/CI99
Case with the cover on: https://skfb.ly/CEMQ
Pics for completeness:
Angled front:
Angled back:
Back angled:
With HDD:
Covered:
Some more detail:
- Case dimensions are 210(H) x 157(W) x 197(D) = 6.50 lts.
- The case has two main components, made of 2mm thick brushed aluminum; the U-shaped top-side-bottom piece, and the L-shaped side-front piece.
- On the front, there is a 1mm thick steel panel reaching top to bottom, attaching the U-shaped piece via screws.
- On the back, there is another 1mm thick steel panel for rigidity of the case and to properly support the PSU and GPU.
- The L-shaped panel is to attach to the U-shaped piece using two Lian-Li style push pins on the front, and two thumbscrews on the back.
- There are no motherboard cut-outs. Motherboard sits on the built-in 8.3 mm-tall stand-offs. Great clearance for behind-the-mobo storage units and overall airflow!
- The L-shaped panel has a 135x135mm vented area on the front, and about 135x155mm vented area on the side (for the PSU).
- The top side of the U-Shaped piece is to have a 135x155mm vented area for GPU to breathe in.
- The bottom of the case is to be un-vented, solid.
- No case feet, only very thin non-slip stick-on rubber.
- The 140mm fan shown in the model is 15mm thick. It should be more than adequate to supply fresh air for the system. Fan won't be included with case.
- I'm thinking Lian-Li style vents all around (except for the back): https://plus.google.com/photos/1065...6028331707095139090&oid=106531253135633425031
- No front audio or USB (sorry to disappoint, if at all). There is only a power button / activity led combo on the top, as shown.
- The total clearance for the CPU cooler is 70mm. Up to 60mm cooler height (including fan) should be quite healthy for airflow.
- The total clearance for the GPU length is 189.5mm. Up to 189mm should fit, thanks to completely open GPU access.
- In case anyone's wondering, using 122mm-tall GPU (and assuming the power connector is flush with the PCB), there is 17.73mm clearance for PCI-E power cable(s).
- Up to three 7mm-thick 2.5" drives as shown are to be installed on a bracket that attaches on the bottom of the case.
- Optionally, a single 1" thick 3.5" HDD can be installed on the bottom of the case, as shown. HDD leaves 41mm clearance (from motherboard PCB) for daughter cards (ASUS Impact and previous Deluxe series would fit). Intended for those who may want to couple a large HDD with m2 / mSATA.
- There is clearance for thin, magnetic fan filters that users can install on the front, on the side, and on the top (on the top, a magnetic tape is required).
- The PSU shown is SFX-L sized, although the model is not accurate. I believe SFX-L should be the PSU of choice in this case.
- If it wasn't yet clear, I'm thinking Lian-Li as the manufacturer.
Depending on the response here, I will put more effort/time in this project. I have no funds for a prototype to be built, so I definitely rely on crowd support to get anything done. I really want to this project to succeed, so any offer for help is appreciated.
So, shoot, what do you think?
Last edited:
![ImgPrd-2544-Cb[b4c5725b38f1448bbaca297bd0b1283c].jpg](http://www.rosewill.com/Mgnt/Uploads/ImagesForProduct/ImgPrd-2544-Cb[b4c5725b38f1448bbaca297bd0b1283c].jpg)
