• Some users have recently had their accounts hijacked. It seems that the now defunct EVGA forums might have compromised your password there and seems many are using the same PW here. We would suggest you UPDATE YOUR PASSWORD and TURN ON 2FA for your account here to further secure it. None of the compromised accounts had 2FA turned on.
    Once you have enabled 2FA, your account will be updated soon to show a badge, letting other members know that you use 2FA to protect your account. This should be beneficial for everyone that uses FSFT.

Worklog: Macho Mini

Ok, found my cables, great:)

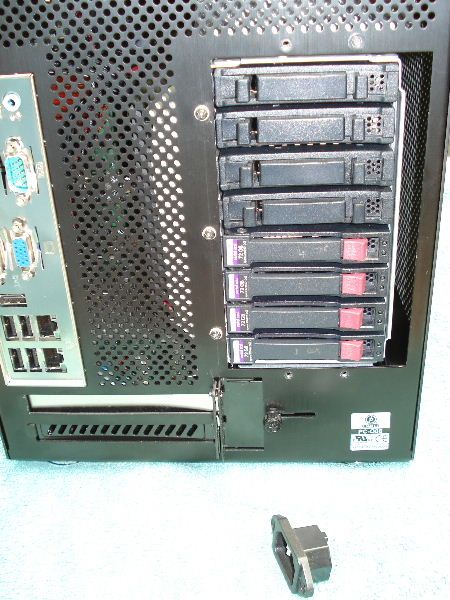
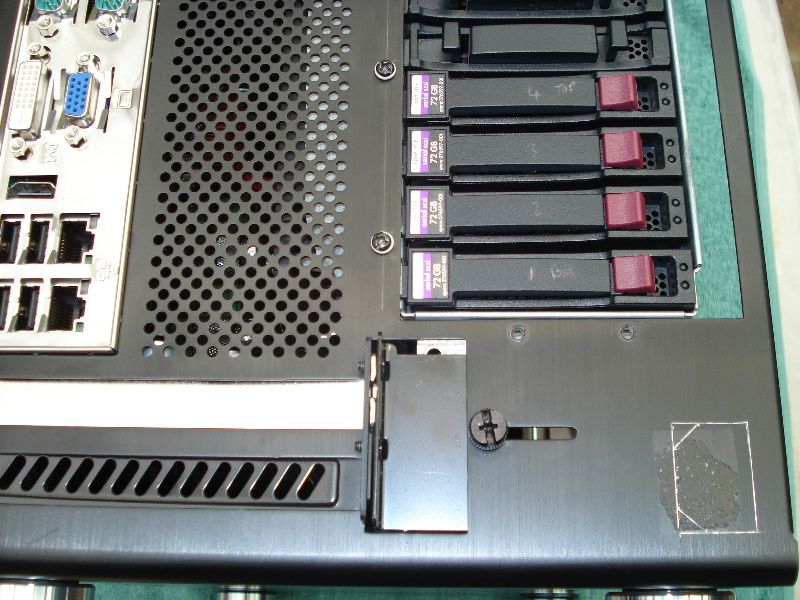
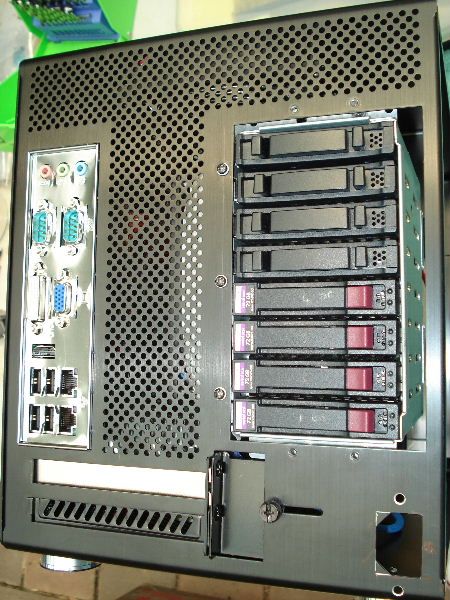
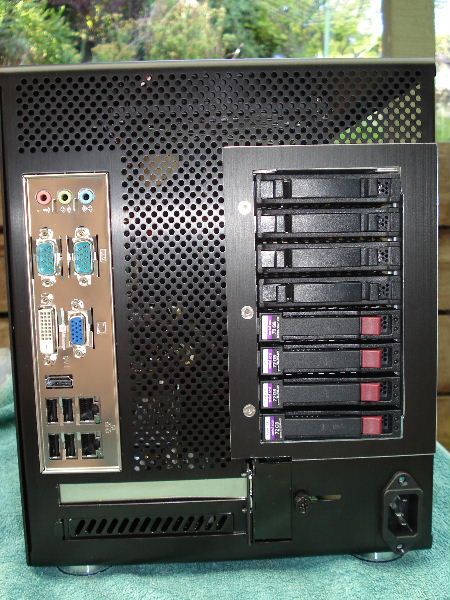
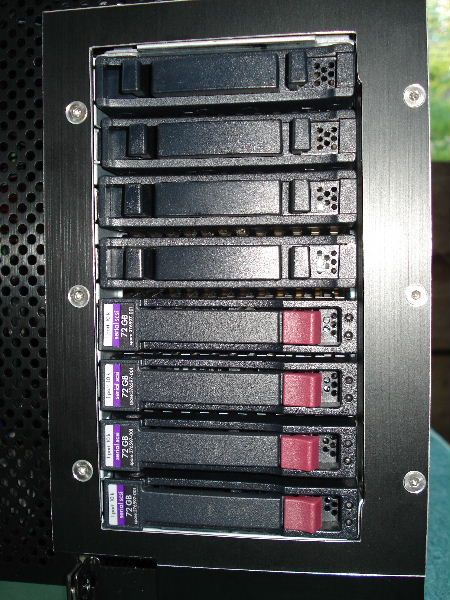
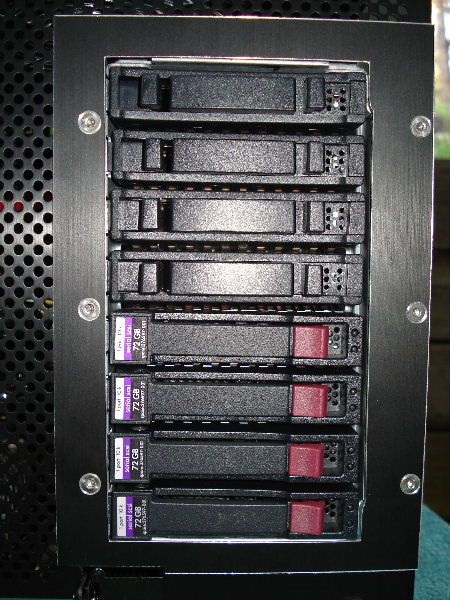
Below a few steps on my way creating a simple RAID5 array - I have only 4x 74GB SAS drives for now, and a further 8x 146GB SAS drives located in Project Blackbird. So, these will have to do for now, I will hawk-eye Ebay and pick up a few 146GB drives in the near future.

Here are the options the S8iR offers, not bad for a pretty old card - this car, by the way, seems to be an Adaptec 5805....

S8iRRAIDOptions.png


The next step, having opted for Raid5:

S8iRRAID5.png


and the system starting to build the array:

S8iRRAID5beingcreated.png


and here, done, showing up in the Adaptec Storage Manager - nice, and a big step towards realising this project as a nifty little file-server.


S8iRRAID5done.png
 
Ok, as promised, a few pics of the SAS controller and mods done to have it work in this setup.

As mentioned earlier, the components on these are soldered on the opposite side to normal PCB layout found in computers, this is some SuperMicro thing.

Here is the board before any changes made, in all its glory - pardon the crappy picture quality though, please....

2_beforechanges.jpg


and here is one indicating the 2 capacitors in need of relocation, as wel as the part of the heatsink I have to modify, as it interferes with the one mounting-bracket on the CPU waterblock...

1_changestobemade.jpg


One indicating those 2 caps moved over to the other side (no pun intended)

3_capsmovedover.jpg


and a more clear shot from the backside (or is it frontside) of the pcb...

4_showingcapsrelocated.jpg


and here are a few showing 3 of the 6 fins removed - I did not take a photo of al 6 removed, will do so when it's out of the case again - need to make a pci-bracket for it still, will take a pic then, but you get the idea.

Enjoy :)

5_3finsremoved.jpg


and

6_closeupoffinsremoved.jpg


and a last one....

7_lastone.jpg
 
Heya Gents,
Between house-inspections (rental being sold, and soon moving into our own place) life is hectic.

I will continue with this mod in the afternoon, after another house-inspection finishes - I hate these open-door view-days we have, damn.

Anyway, next on the agenda:

1) Finalise the 240VAC power-socket, mod it into the back of the case, and do the cable-run to the front of the PSU.

2) Fit new chipset coolers to the Wade 8011 chipset, and the SAS-controller IOP controller. Rewire the fans on these to be controlled by the bigNG

Years ago, I got 2x Microcool Norhpole XE's, as well as 2x MCX-159-cu's, and any 2 will come in very handy with this step. The other 2 will be used on my HP Blackbird P800 SAS controller chips. NIce, I always knew there had to be a good reason to stockpile these :)

3) Fit the NTC thermistors to the chipset and IOP controller heatsinks, and wire them to the bigNG

4) Route both 4-lane SAS controller-cables to the S8iR - clean up the wiring in general

5) Wire roof exhaust fan to the bigNG

6) If the weather clears up, spray-paint the SAS-cage to match with the rest of the case/watercooling components

7) Use AutoCAD and design cover-plate for the rear of the SAS-cage

8) Fabricate a PCI-bracket for the SAS-controller

Should post up a few progress-pics by tomorrow afternoon, please check back.
 
Wow, this is such a sweet build! Can't wait to see the finished product! wish I have as much talent as you Mrbean! /subbed!
 
Thanx Mate, appreciate your feedback.

Probably a case of to much time on my hands, rather than talent :)

Good progress this afternoon, will update tomorrow.
 
Hello Everyone,
Between this mod and the HP Blackbird Project, I'm being kept pretty busy.

About time I finish this mod off though, and got a fair bit done today. I will post progress-pics tomorrow, need to mount the fan to the SAS drive-cage, and then I am about done.

Fitted the new 220Vac power-plug to the case, and completed the SAS drive-cage cover plate, looking pretty snazzy.

Check back tomorrow this time, and I will have a couple new pics up for ya :)
 
Anyway, let's go....

I decided to replace the original stock aluminium chipset cooler with something more beefy, seeing this system will be my NAS/File-server, and reliability and uptime is important.

Some years ago, I bought 2x Microcool Northpole, as well as 2x Swiftech MCX159-CU chipset coolers. For those that know them, they are very decent units, and both would work equally well here.

I decided on the MCX159-CU here, as it allows for a slightly better/more compatible mount for this motherboard - I had to do a bit of trickery on the back-side, and use some custom plastic spacers, as there are a few smd-components around the mounting holes.

Nothing to serious though, and the end result is exactly what I have hoped for:

1_NB_Cooler.jpg


Ok, next up was to mount an AC socket in the rear of the case, and do a custom cable with 90-Deg connector to plug into the PSU, with it's plug facing towards the front of the case - the area where the case-sticker is, will be ideal...

2_ACPlug.jpg


all marked up and ready to cut - the Dremel works wonders with these smaller cuts....

3_ACMarkout.jpg


do a bit of cleanup with some fine-tooth files, and looking good, all ready for the AC socket...

4_ACCutout.jpg
 
Next up was a cover-plate for the SAS cage - the original PSU cut-out is slightly bigger than the SAS cage, as can be seen to the right of the cage in this photo, and it is looking pretty fugly - need to do something with this:

4_ACCutout.jpg


So, out with the Dremel and hacksaw, files, etc, and here's the (unfinished) plate:

5_SASPlate.jpg


After a bit of cleanup work with the files, and taking shape - prelim fit to see how it looks, and I like- much better than without it, what do you reckon?

6_SASPlate1.jpg


and a few more, different angles:

7_SASPlate2.jpg


and

8_SASPlate3.jpg


and test-fitting the harddrives, see if they insert smoothly - all good :)

9_SASPlate4.jpg


and

10_SASPlate5.jpg


and a shot from the rear:

11_SASPlate6.jpg


In the photos above, you can also observe the AC socket fitted, still have to mount it with screws though.....this was actually done after I made up the 'fly-lead' and soldered it to the socket...will post a phot of this later, but looking very good and pro.

Of course, wrt the SAS cover-plate, I had to drill another 3 holes through the plate and the Li-Li case, to properly mount it to the case, here you can see what I'm on about:

12_SASPlateScrews1.jpg


and

13_SASPlateScrews2.jpg


and

14_SASPlateScrews3.jpg


What do you guys reckon, like, no.... Feedback?
 
The last part before mounting the SAS cage, was to fit a nice Delta 120mm Fan - as mentioned, uptime/reliability was one of my main goals, thus proper airflow through the drives is essential, and, from expereince with the HP Blackbird case, where I have the same SAS-cage installed, and populated with 8x SAS drives, well, they get toasty without airflow.

Incidentally, the Fan I'm using here was donated by the Blackbird project, which now sports a nice NB Fan to provide airflow through the SAS cage.

Anyway, sleeved, and mounted:

15_Fan1.jpg


I have to mount the fan in a pull-configuration, as I cannot fit a 25mm fan between the SAS-cage and the side of the case in push-mode. To assist in having good airflow, I mounted the fan +/- 15mm above the SAS-cage, and used high density foam with (with pre-glue applied to one side) to create a nice vacuum-chamber between the SAS-cage and the fan - this also cuts down on the choppy noise with the fan-blades spaced further away from the cage:

16_Fan2.jpg


the foam is slightly compressed to form a near air-tight seal - quick, easy, and works like a dream....

17_Fan3.jpg


with the end-result, airflow through the cage as indicated by the arrows:

18_Fan4.jpg


Ok, I will update once again in the next few days, I have evrything fitted, cabling done, and the system power-up and running PRime95 to test stability.

Looking real good, and the E3-1245 chip is pretty quick.

Let me have your feedback and critisism, about 99% complete, just a few final touches remaining.

ps: As a side-note, with the fan located in pull-configuration, it also provides good cooling to the motherboards chipset and surrounding components, hence no fan on the chipset cooler - system runs extremely cool, even when loaded to 100% under Prime95. It is pretty important to make sure that you have some airflow across a motherboard, as normally, a CPU fan will perform at least some of this, but, with watercooling, well, no fans.....so this worked out well :)
 
Last edited:
As posted a couple of weeks ago, let's see where we are at, and what's left :)

mrbean_phillip said:
[DEL]1) Finalise the 240VAC power-socket, mod it into the back of the case, and do the cable-run to the front of the PSU.[/DEL]

[DEL]2) Fit new chipset coolers to the Wade 8011 chipset, and the SAS-controller IOP controller. Rewire the fans on these to be controlled by the bigNG[/DEL]

[DEL]3) Fit the NTC thermistors to the chipset and IOP controller heatsinks, and wire them to the bigNG[/DEL] - decided not to wire a thermistor to the chipset cooler, as the SAS-cage fan will provide ample cooling for the chipset, even at low RPM.

[DEL]4) Route both 4-lane SAS controller-cables to the S8iR - clean up the wiring in general[/DEL]

[DEL]5) Wire roof exhaust fan to the bigNG[/DEL]

6) If the weather clears up, spray-paint the SAS-cage to match with the rest of the case/watercooling components

[DEL]7) Use AutoCAD and design cover-plate for the rear of the SAS-cage[/DEL] Did not use AutoCAD, instead relied on the Vernier Caliper and my trusty old ruler.

[DEL]8) Fabricate a PCI-bracket for the SAS-controller[/DEL] - got a standard SAS-controller bracket for this of an OCAU member.

Seems that the only item outstanding from that list is the painting of the SAS-cage. Still considering if I should actually do this - yes, it will certainly enhance the looks slightly, but, I might actually have it powdercoated, a better option I think.

a Few new ones to add:

1) Mount a new front 5.25" perforated bay cover - fab some brackets to accomplish this

2) Relocate water temp sensor from rad outlet to rad inlet

3)Make a permanent mount for the M4 Crucial SSD, and fit short SATA cable

As you can see, only a few minor items remaining, then I can post final pics. Let's see if I can get this all done during this week (except the SAS-cage powdercoating) and post fresh pics of the completed setup :)
 
Heya Guys, busy moving house, packing, sorting a few things - will continue this in the next few weeks, life is just pretty crazy right now, still have to fit in a trip to Shanghai too.....

Jeesh, time flies....

Will post updates relatively soon though, thanx for checking!
 
Love it man, awesome little file server.

I like the plate for the SAS bay, but I think painting/coloring the edges would make it blend with the case a lot more
 
Thanx Mate,
Once I am in the new house, I will finish this mod, and update the thread :)

Appreciate your input!
 
Any progress?

Finally moved into our new house, and after 6 years in Australia, pretty happy I finally got my own place. Lots to do still, like landscaping et al, but at least the computer-room is about done, and a nice 900mm wide x 3.4m desk made out of 30mm thick pine, and stained.

Ah, bliss.

Onto this project, and what is in store for Macho Mini.

1) I was never really happy with the Lian--Li PC-Q08's internal layout - with the motherboard and pump/reservoir mounted on the side-panel, generally not conducive to creating a nice, clean, practical and easily serviceable setup.

With that in mind, I picked up a Fractal Design Array R2 from PcCasegear yesterday, at an almighty cost of $259 AUD - wow, pretty expensive, but this is the case I first wanted for this project, but, as I already had the Lian-Li, decided to give that a try first.

2)Next, I am waiting for the release of the new Swiftech ApogeeDrive II, due out and available next week.

Before I rip the MachoMini setup apart, and relocate the very nice bit of hardware to the Array R2, I will await the delivery of the ApogeeDrive II then.

3)Now, we all know airflow is a problem in the Array R2, and to alleviate that problem, I will most likely mount my (new spare) Feser 240mm rad on the side-panel. This won't be done by using (in my opinion) pretty fugly external rad-grills, but rather laser-cut the side-panel to be the grill. Thus, out with the existing 140mm Rad, in with the 240 - not that it's needed at all, will just suit the mod pretty well.

4)The SAS drive-cage in the existing MachoMini, will be relocated to the front of the new setup, something I wanted to do on the existing case, but due to the internal layout, was not really do-able, at least not without totally butchering the case.

5)Seeing as this will be doing duties (mainly) as a file-server, uptime and reliability is of utmost importance, hence the Xeon chip, ECC Ram, Industrial motherboard, blah-blah, ad infinitum...I decided to have redundant power. Something unique to the nomal modders out there, but pretty commonly used in carputers, is the good old DC-DC converter. This is what I would use to achieve this goal -> M4-ATX-HV 250W controller x2 -> they will be supplied from 2x 24V 10A Industrial power-supplies. This will remove a lot of cable-clutter from the case, provide a nice clean, and fresh-look PSU-wise, and give me the level of redundancy I am after.

In any case, I need 24V power for an Industrial Process Control node I am designing, so this is essentially killing two flies with one smack....or however that saying goes...

For those of you doubting the ability of the M4-ATX-HV in this application, I've been running a few of them, as well as the venerable 150W PicoPSU, for the past 18 months in a very hostile environment, pretty high humidity, as well as around 44+ Deg C ambients, and they are performing very well.

So, just a brief update, and I am hoping to have 3x ApogeeDrive II's in my hands in 2 weeks time (the other 2 will be modified to do service in the HP Blackbird setup)

As always, looking forward to your comments and replies/critisism.

Kind regards,
mrbean
 
Last edited:
This has been a very unique and interesting log so far. Looking forward to seeing your new plans come together!
 
Back
Top