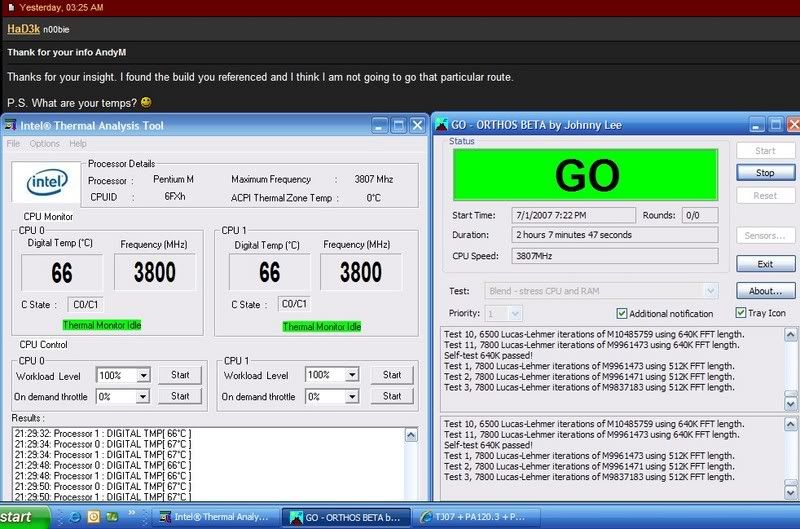
Here's a little build log of my new TJ07 with Thermochill PA120.3 and PA120.2 radiators stuffed in the bottom. It was time to move onto an overkill cooling solution as my 3x BIP.1 P180 was showing its limitations, especially with my desire to leave the fans at 7 volts, and my turning up the speed of my computer. Basically as that machine was, 3.6 GHz was the limit with the fans at 7 Volts, it could do 3.8 GHz, but the fans would need to be at 12 Volts, and the side panel off for Orthos stable running. And it was running kinda hot that way too. The water temperature was quite warm. So, what to do when needing more cooling to eek out that last few couple hundred Mhz for better internet surfing? Drop around $800 or so worth of new case and cooling to replace a perfectly functional case and cooling solution! 
And on to the build:
Stripping down the case, I randomly drilled 4 holes in the bottom of the case. They are the bigger white spots...
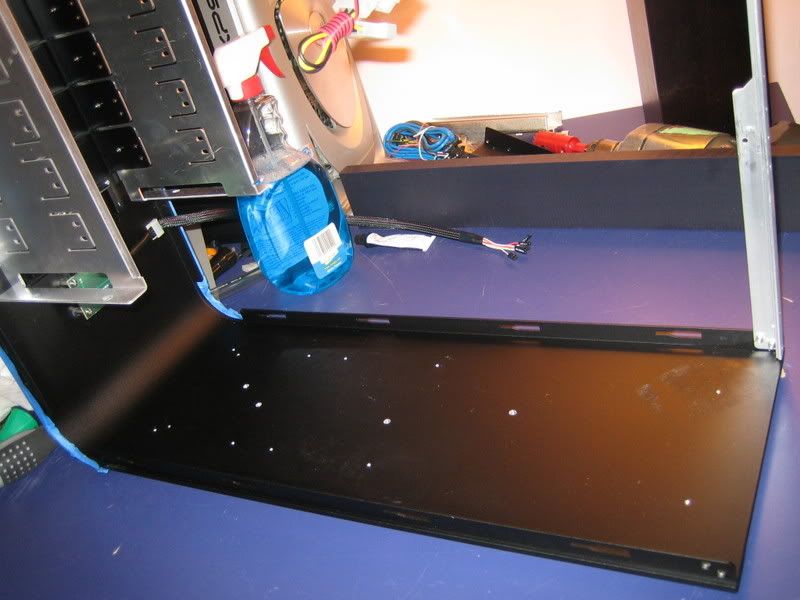
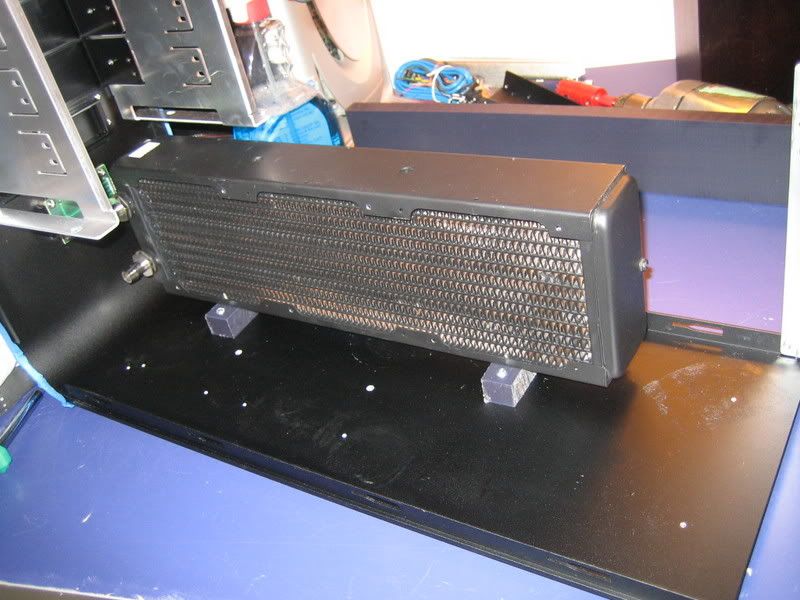
I then used some 3/4" Nylon barstock to make some footings for the radiators. This way in the end the fans will align perfectly with the vented side panel openings of the case. Nice and solid footings, but a pain to cut as your average jigsaw has a habit of melting the material when cutting it, so you have to go slow.
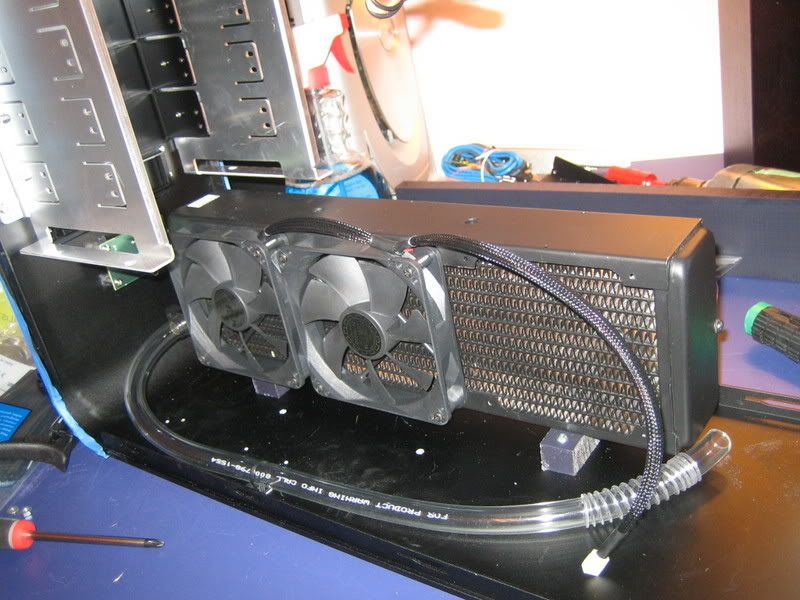
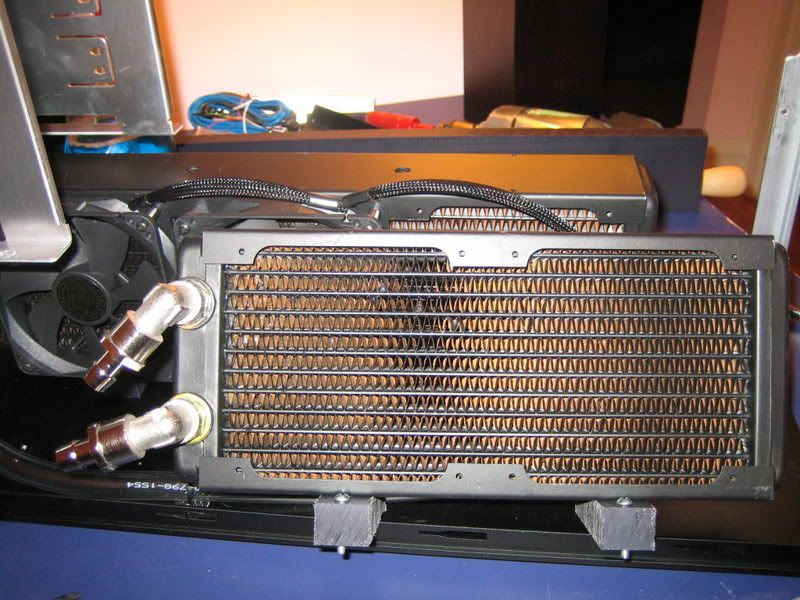
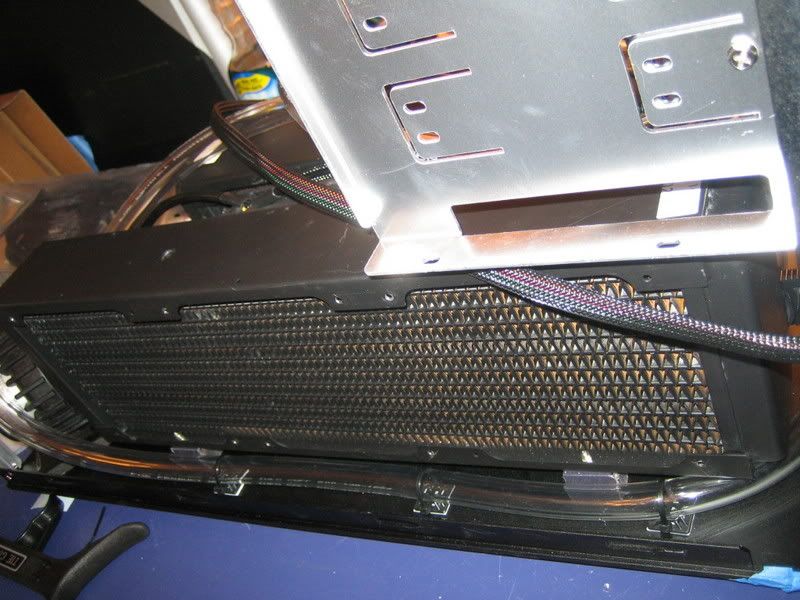
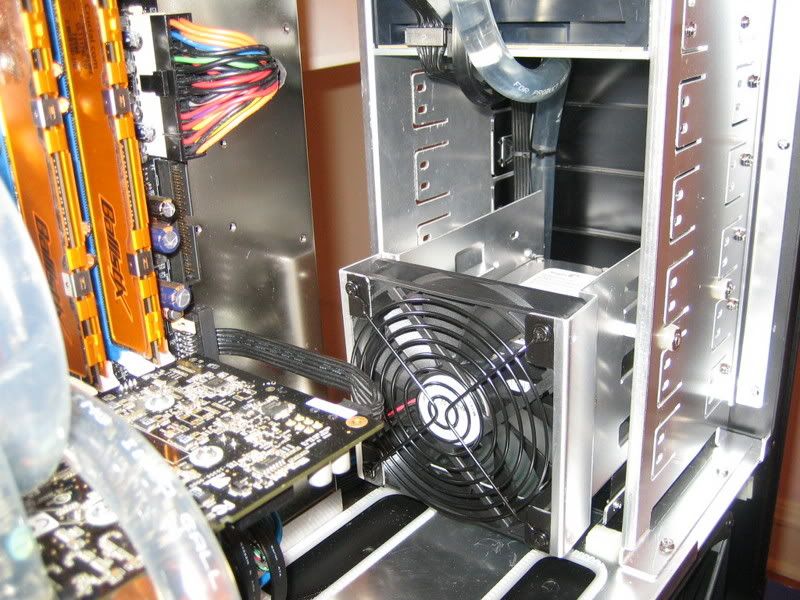
Add a couple fans and a hunk of hose... Note the ziptie anchor on the hose. I figure it will keep the hose away from the side panel tabs on the odd chance they become razor sharp and decide to do some slashing.
The next part to toss in the case is the PA120.2. Note the seemingly random timing of the BSPP 90 degree elbows I got from McMaster Carr. There is more to that than meets the eye.
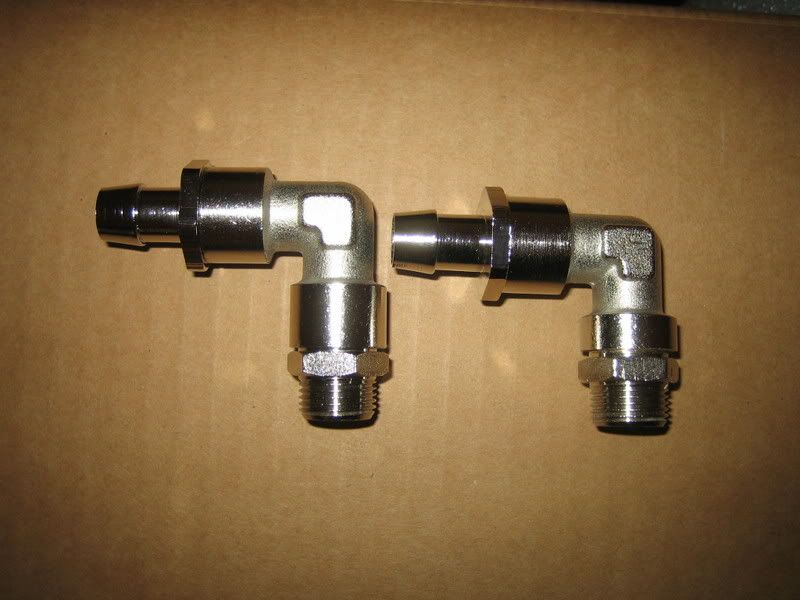
Here we have an elbow and barb fitting as delivered on the left, and a shortened version on the right. On my PA120.2, I shortened both of them for 2 reasons. 1st was to get more clearance between the radiators for easier assembly. The 2nd was so that I could time the position of the fittings on the radiator and be able to apply sufficient torque on them so they didnt get loose for whatever reason. Instead of using o rings, Permatex Ultra Black RTV Silicone was used for thread sealing.
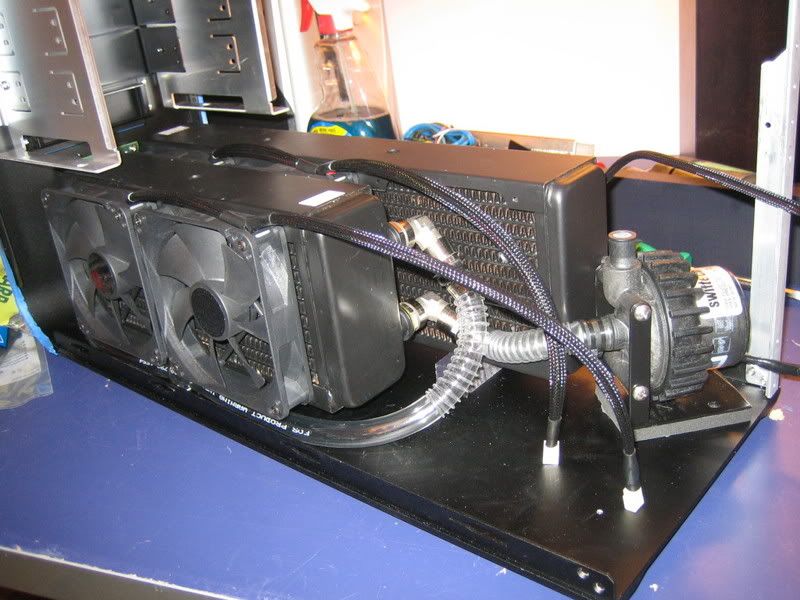
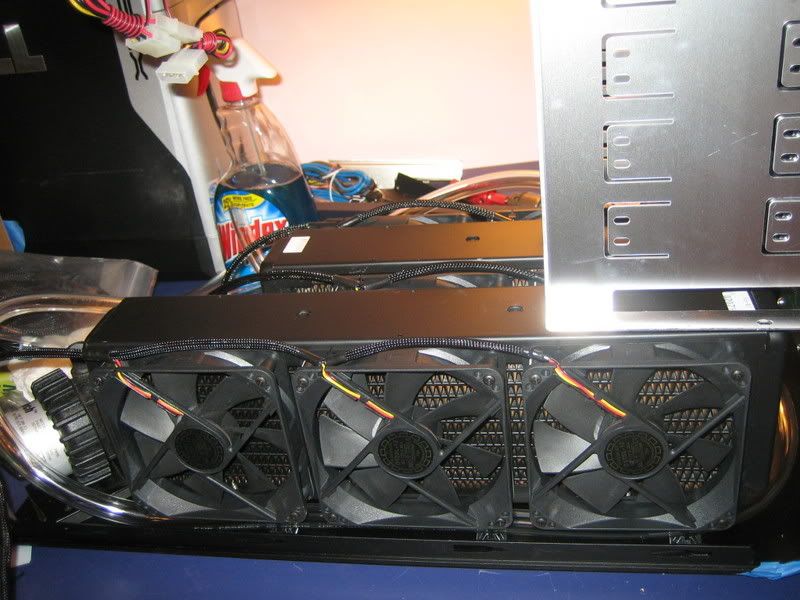
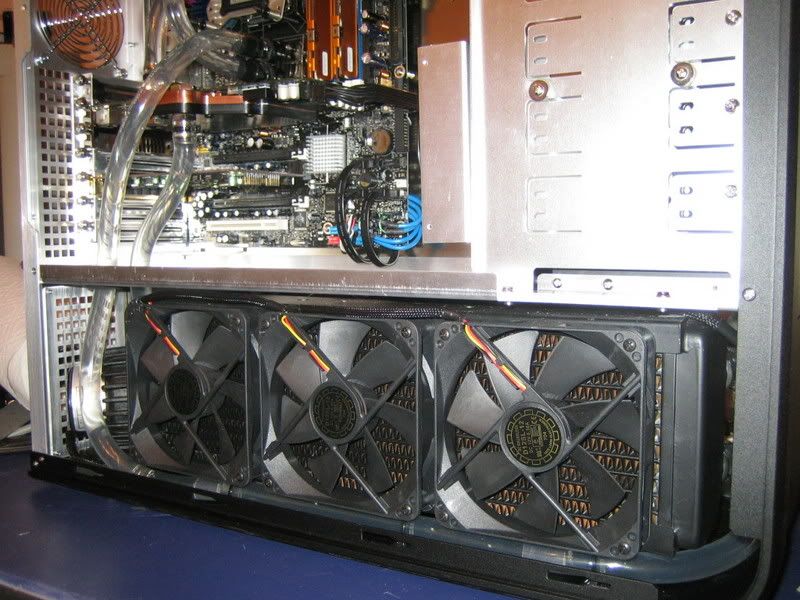
Bolt down another radiator, stick some more fans on, a bit more tubing and a D5 pump and you get this:
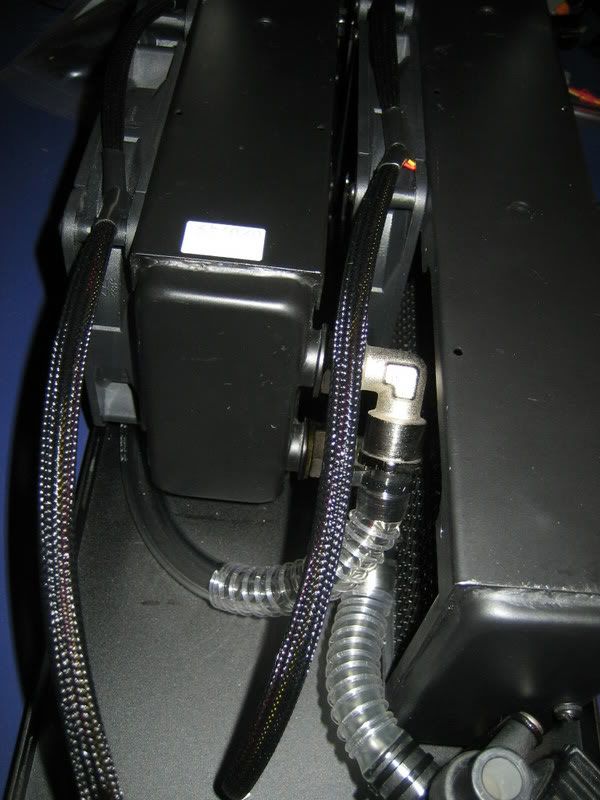
Pretty good clearance now!
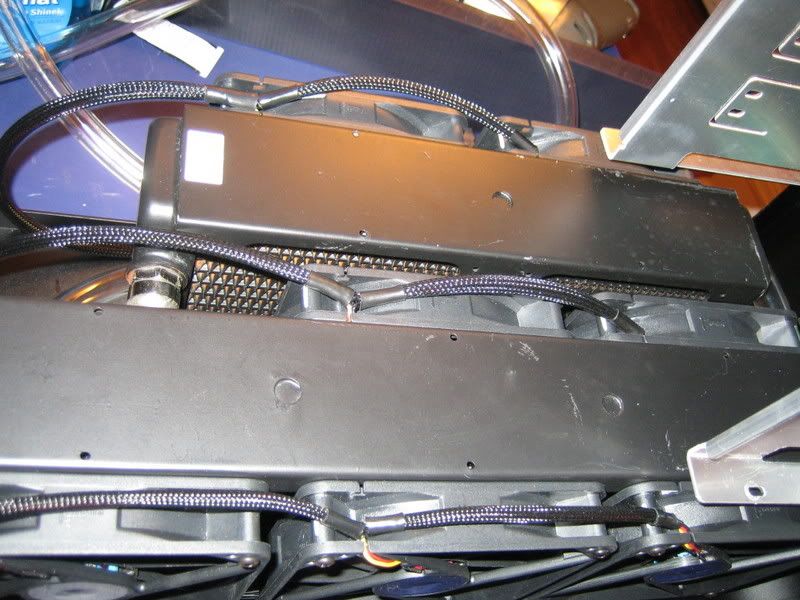
Add some more ziptie anchors to another hunk of hose on the other side...
And cover with some more fans.
And there you have it, nearly full utilization of that roomy TJ07 bottom section for some really good cooling capacity.
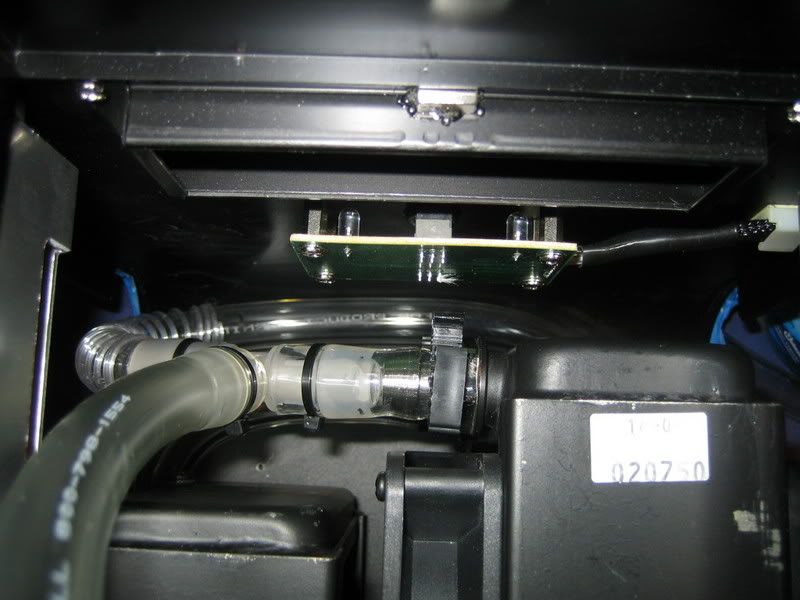
Oh yeah, while in there, put a T fitting on that hunk of hose, might come in handy to fill this contraption. Coolsleeves are useful too for preventing kinks.
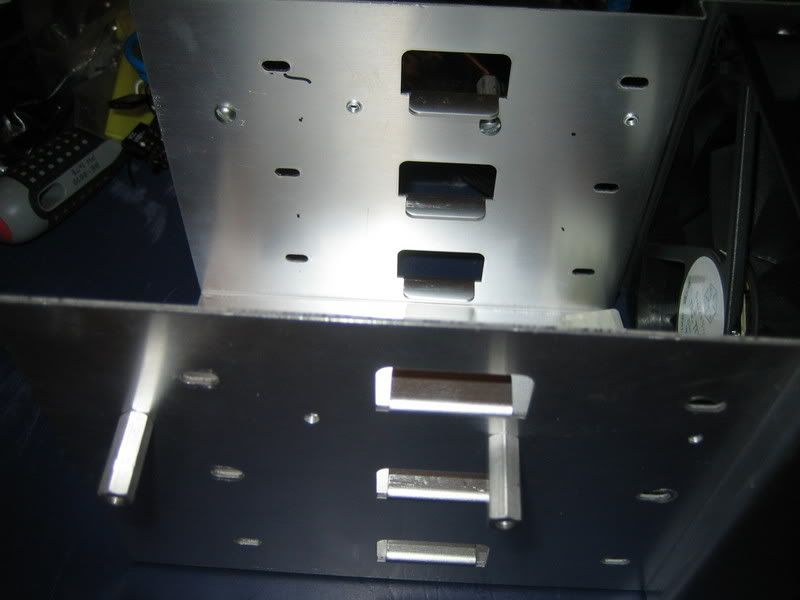
Youre probably asking..."so where does the hard drive go now?" Uhhh, well, I'll get back to you on that. Just kidding, it goes upstairs now. You could buy a fancy Silverstone 5.25 bay device, or you can use a hard drive casing that comes with the case. I chose the latter route as I wanted the front of the case as clean as possible. First, I borrowed some parts from my P180. These are some silicone bushings from that case's hard drive mounting solution installed in the 5.25 panels of the TJ07...

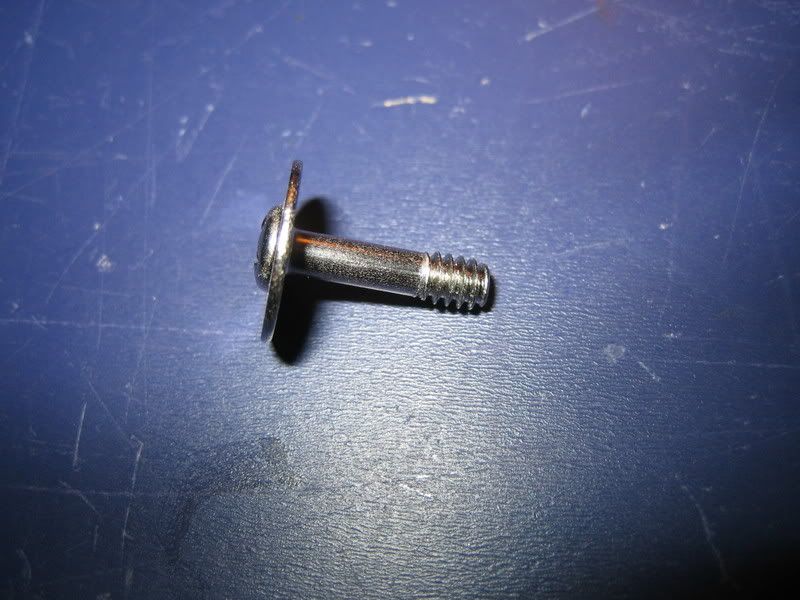
And this is a screw that is used with those bushings...
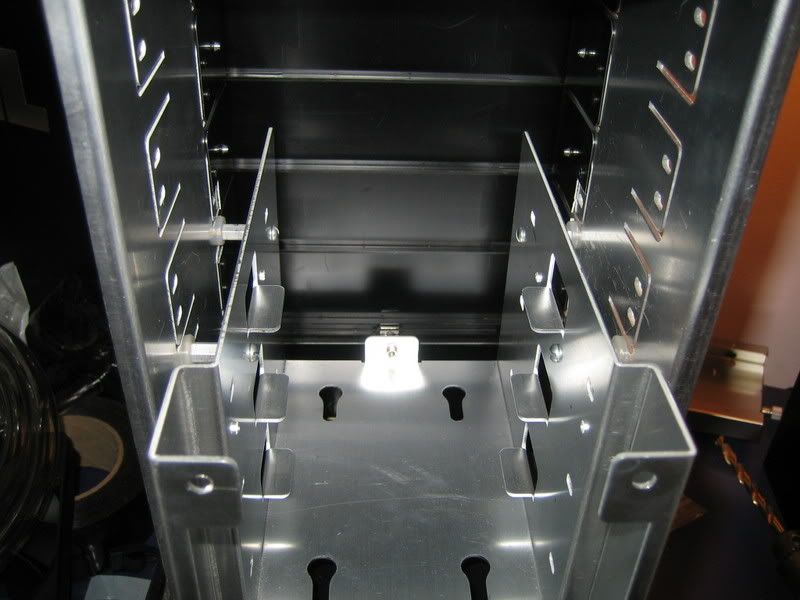
I then put some 3/4" long standoffs on the hard drive casing.
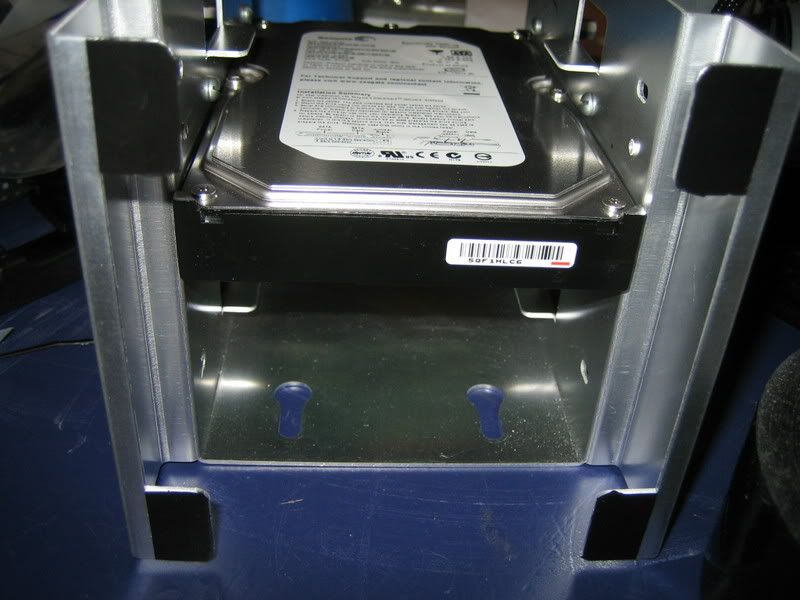
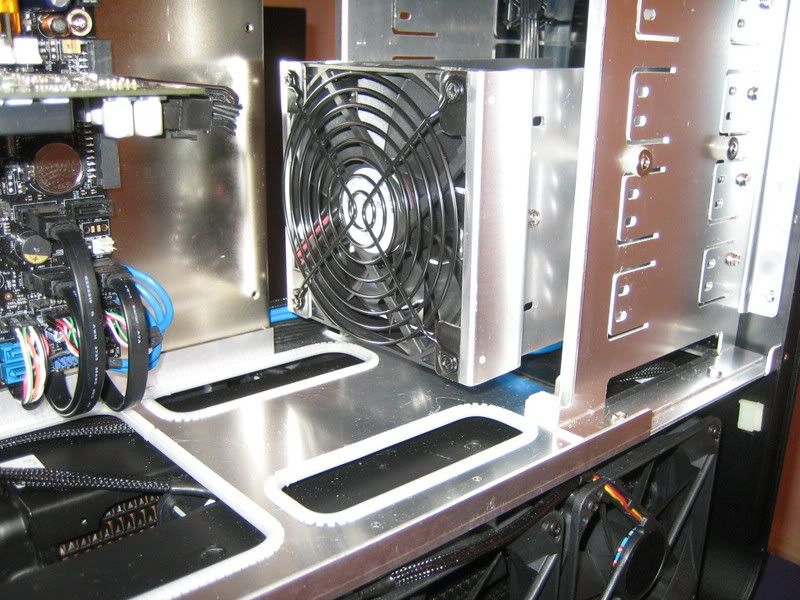
Ta Da...a nice floating hard drive mounting area. Should keep hard drive noise and vibes down.
To doll that part up some, I added some black tape to the mounting ears for the fan that goes there.
I figure black fan, black grill, and that black tape makes it look a little more integrated.
While on the black fan grill kick, I also changed the top case fan grills to black ones as well, while reversing the fans so they blow downward. I figure my memory could use a shot of cool outside air for 'active cooling'.
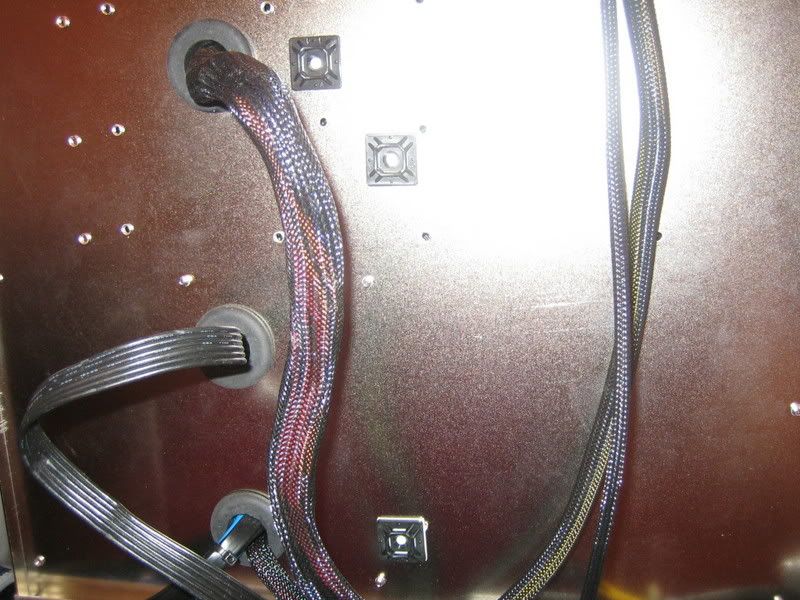
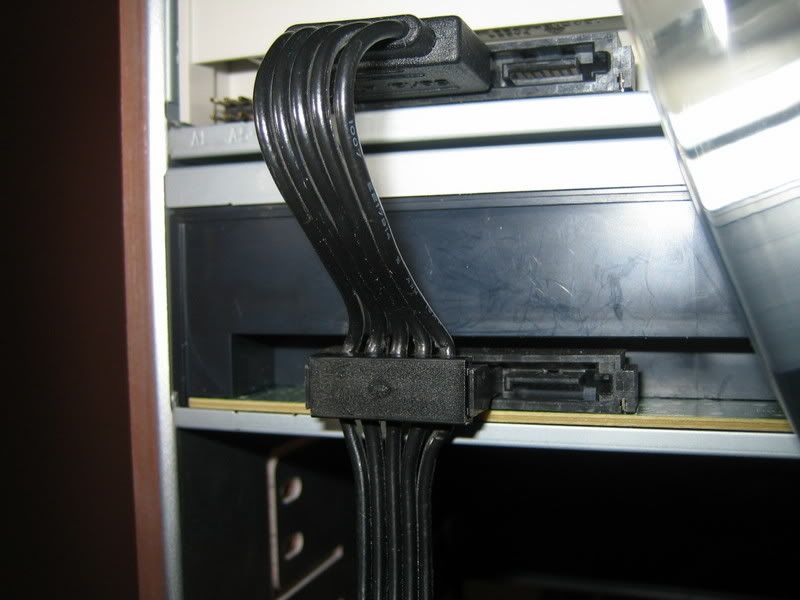
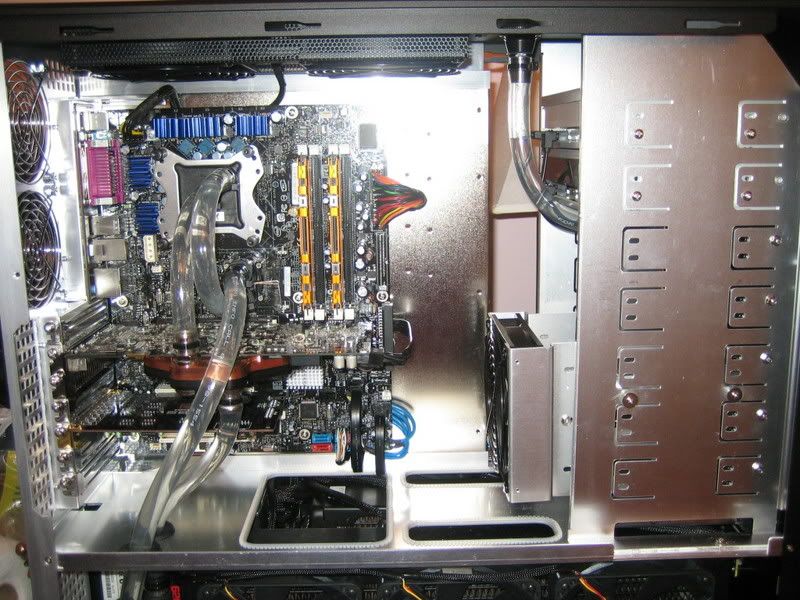
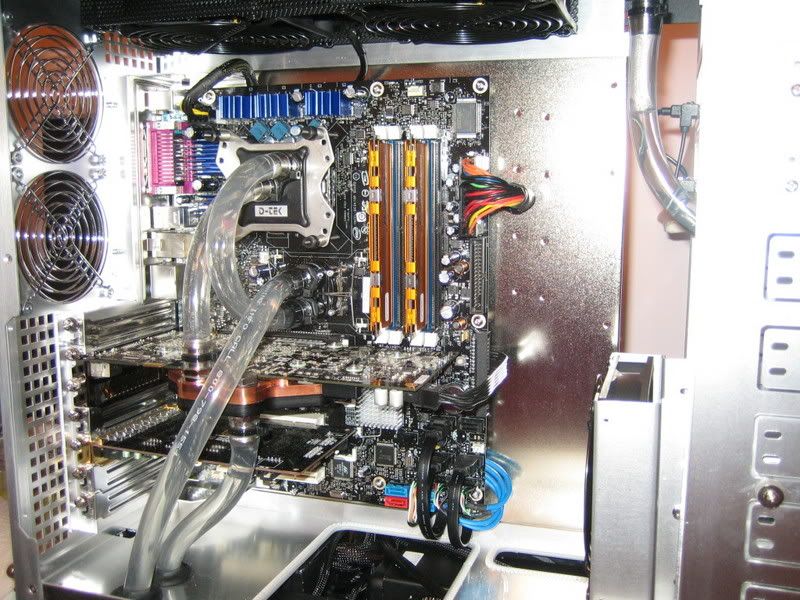
After making sure my fire extinguisher was close at hand, I proceeded to do some wiring. A few highlights include hidden MB wiring and some more of the famous ziptie anchors to route the wires.
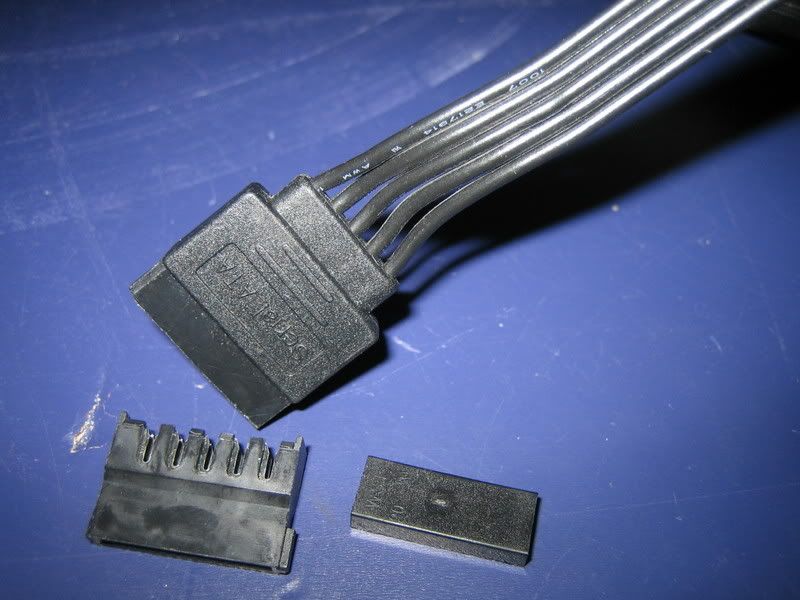
And custom length SATA power cable connectors
So things look like this:
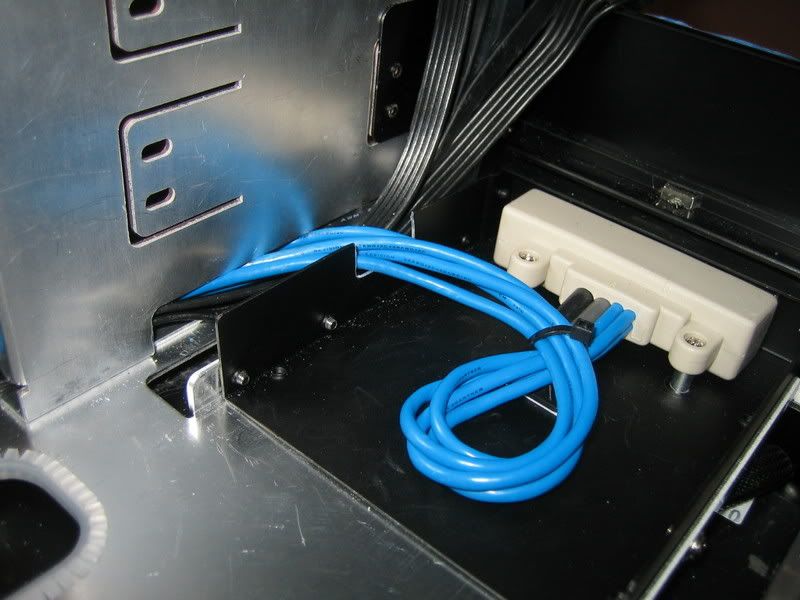
And some cables run through nooks and crannies so they dont show. Here I cut the front panel audio and firewire cables off as I dont use onboard audio + my sound card doesnt use those connections, along with I have no idea what uses firewire anymore. Only USB cables here.
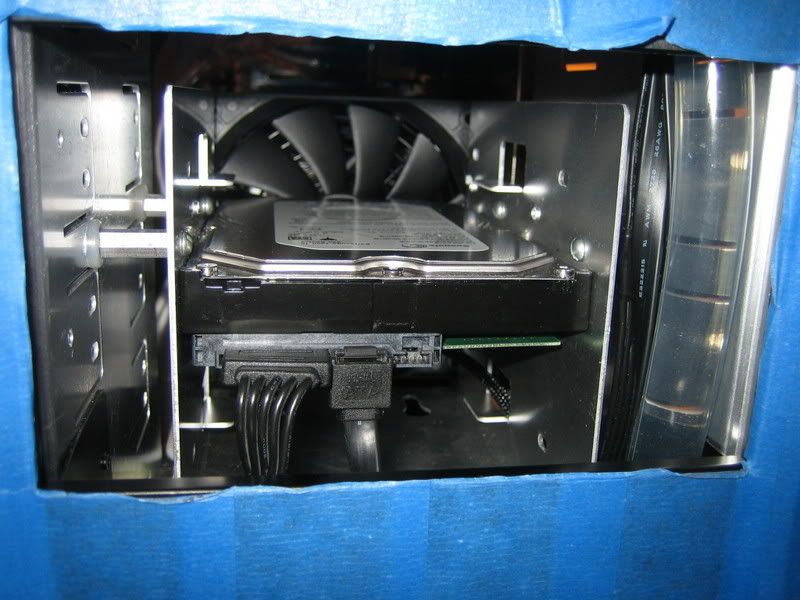
The custom hard drive mount wiring looks a 'lil like this:
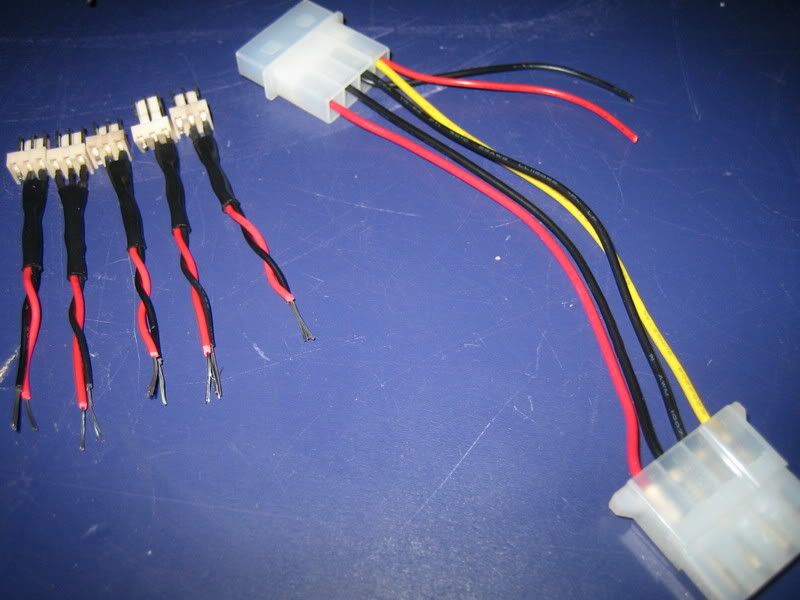
Speaking of silent computing, it was time to make a fan speed controller. Since I want a nice solid 7.0 volts going to my fans...I made this little jem. First some wires with some connectors:
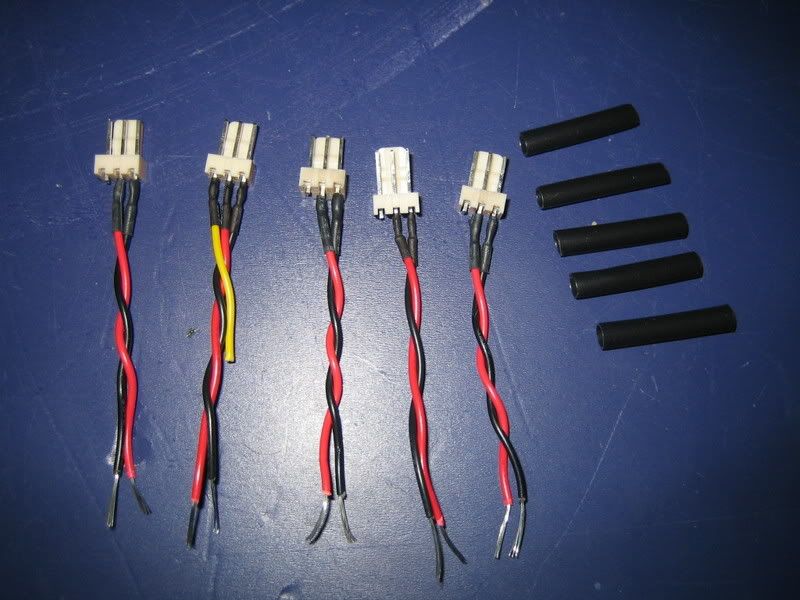
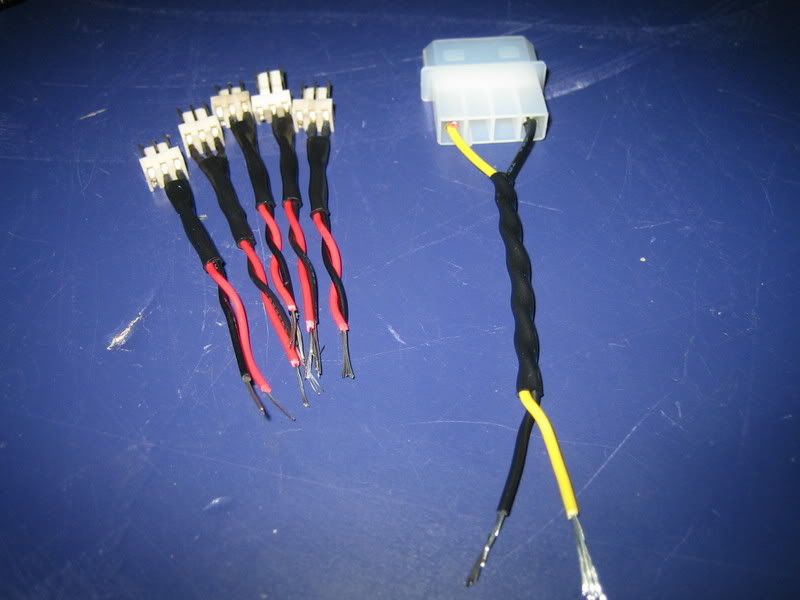
Those same wires with heatshrink on them, along with another 'doner' wire and connector combo...
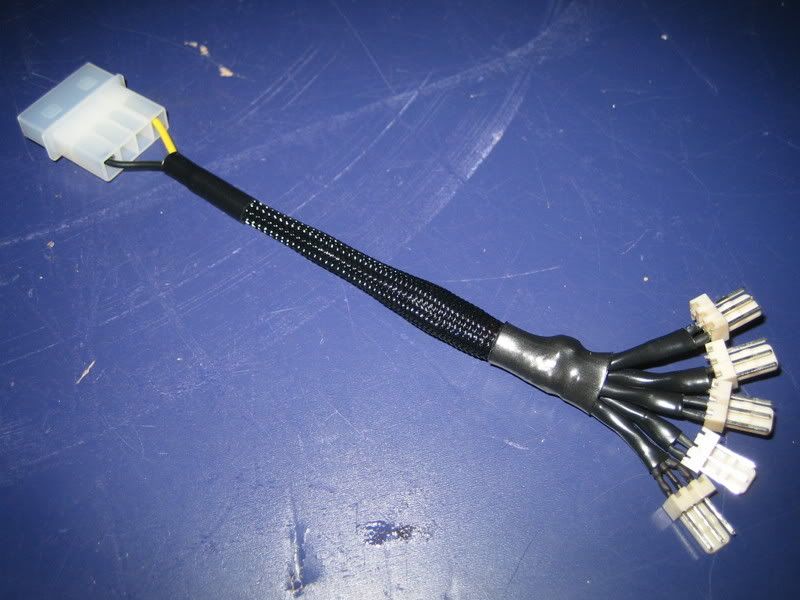
Which was used to make this:
And then it was magically transformed into this:
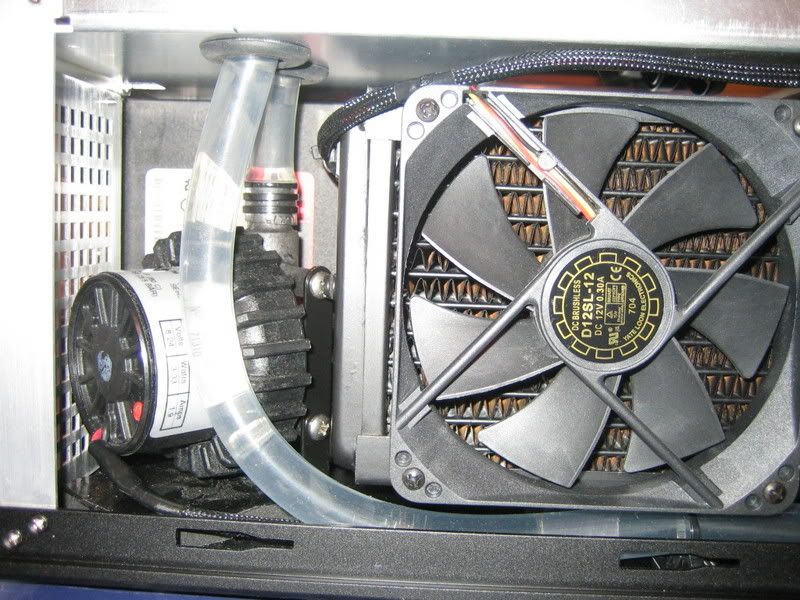
Still awake? You might be able to find my new fan controller stuck onto the back of the computer somewhere. I kept as much wiring out of the radiator area as possible for air flow consideration.
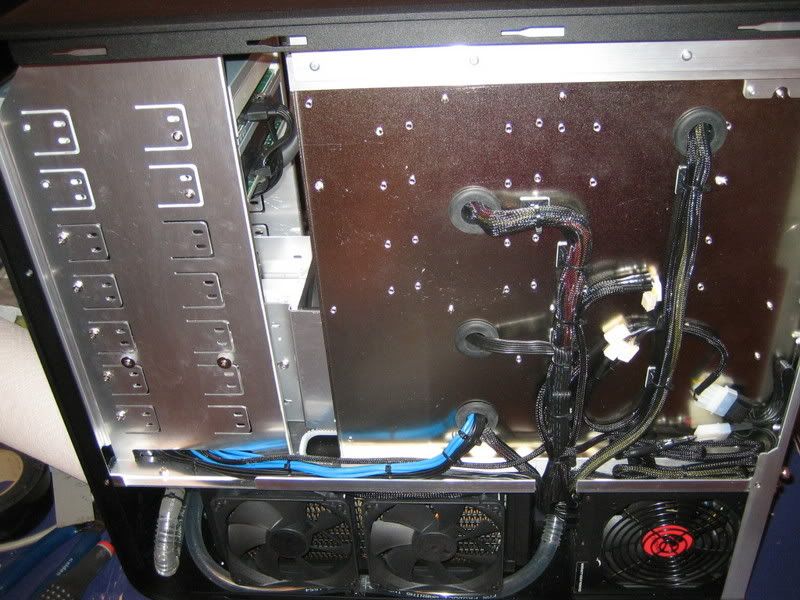
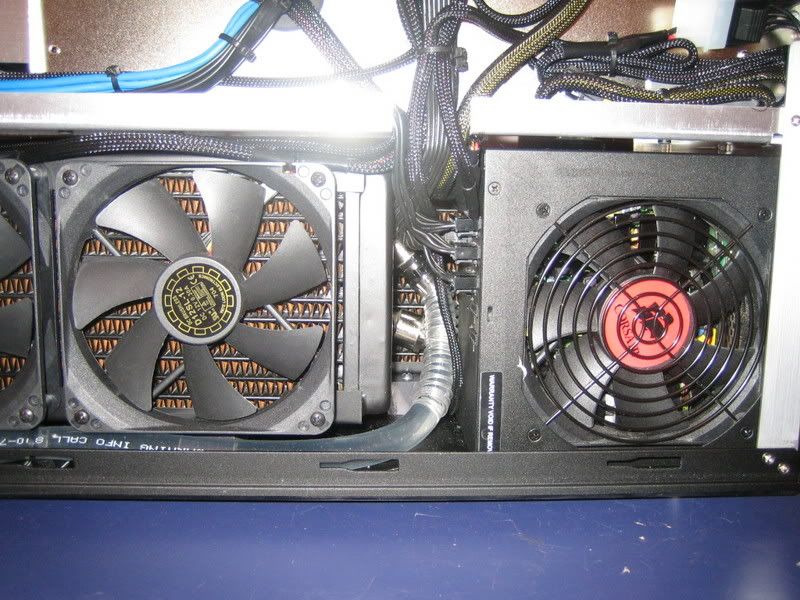
Kind of a tight squeeze, but it seems to have decent enough airflow through here for the end of the PA120.3 on the other side. Also, with the offset between the two radiators, there is not that much radiator back there behind the power supply.
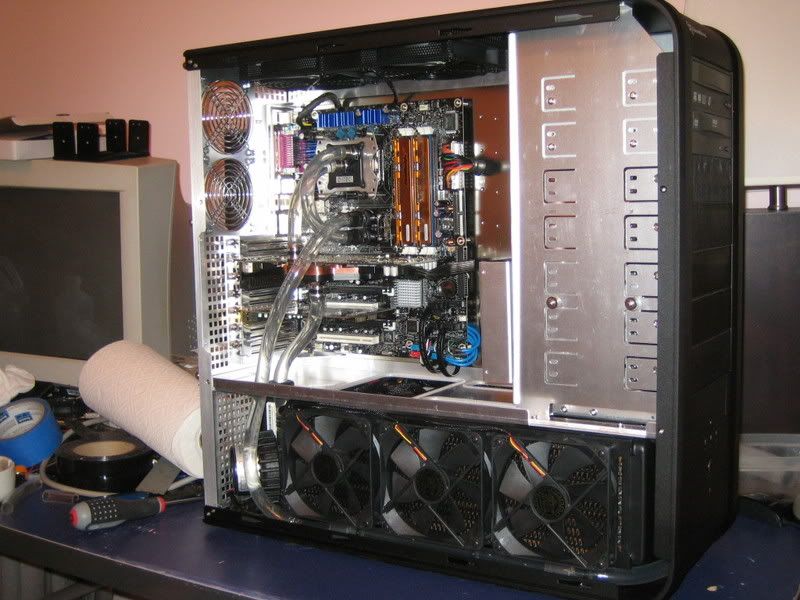
And now a batch of photos of the finished product:
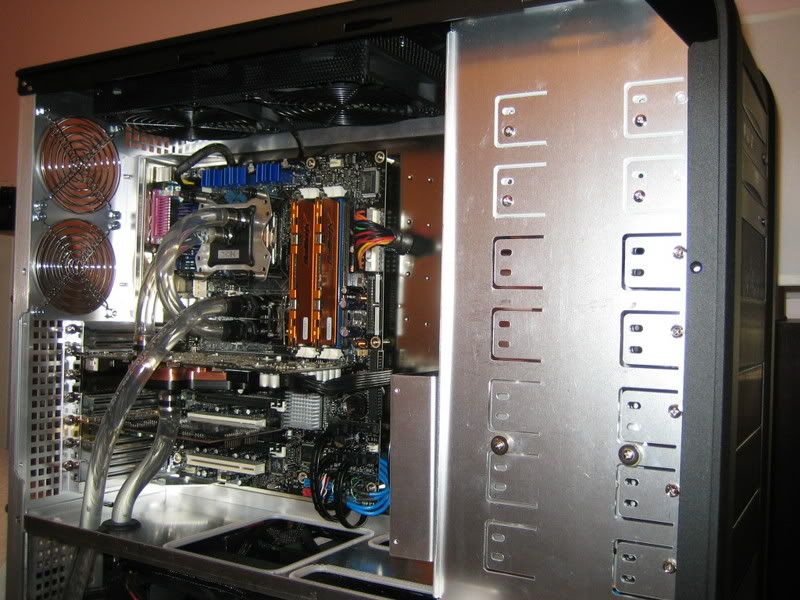
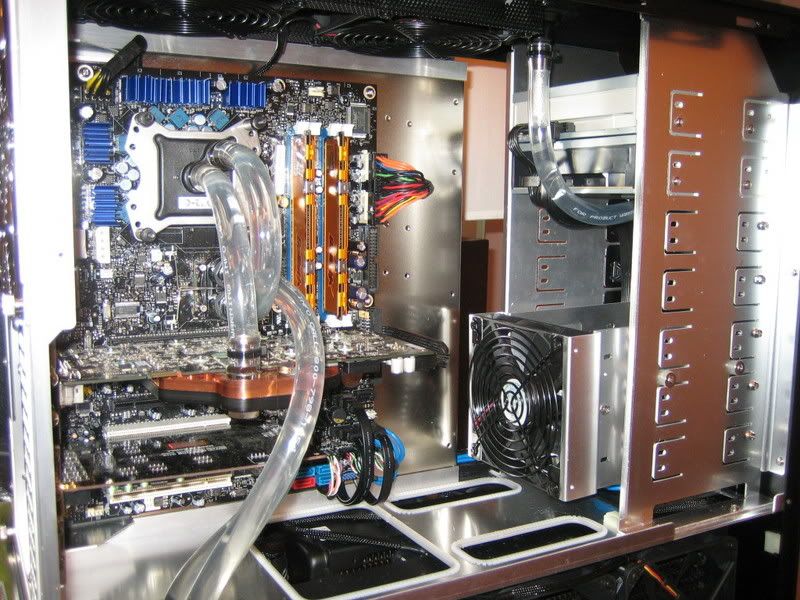
TJ07's are nice when too much cooling is just right, eh?
And on to the build:
Stripping down the case, I randomly drilled 4 holes in the bottom of the case. They are the bigger white spots...
I then used some 3/4" Nylon barstock to make some footings for the radiators. This way in the end the fans will align perfectly with the vented side panel openings of the case. Nice and solid footings, but a pain to cut as your average jigsaw has a habit of melting the material when cutting it, so you have to go slow.
Add a couple fans and a hunk of hose... Note the ziptie anchor on the hose. I figure it will keep the hose away from the side panel tabs on the odd chance they become razor sharp and decide to do some slashing.
The next part to toss in the case is the PA120.2. Note the seemingly random timing of the BSPP 90 degree elbows I got from McMaster Carr. There is more to that than meets the eye.
Here we have an elbow and barb fitting as delivered on the left, and a shortened version on the right. On my PA120.2, I shortened both of them for 2 reasons. 1st was to get more clearance between the radiators for easier assembly. The 2nd was so that I could time the position of the fittings on the radiator and be able to apply sufficient torque on them so they didnt get loose for whatever reason. Instead of using o rings, Permatex Ultra Black RTV Silicone was used for thread sealing.
Bolt down another radiator, stick some more fans on, a bit more tubing and a D5 pump and you get this:
Pretty good clearance now!
Add some more ziptie anchors to another hunk of hose on the other side...
And cover with some more fans.
And there you have it, nearly full utilization of that roomy TJ07 bottom section for some really good cooling capacity.
Oh yeah, while in there, put a T fitting on that hunk of hose, might come in handy to fill this contraption. Coolsleeves are useful too for preventing kinks.
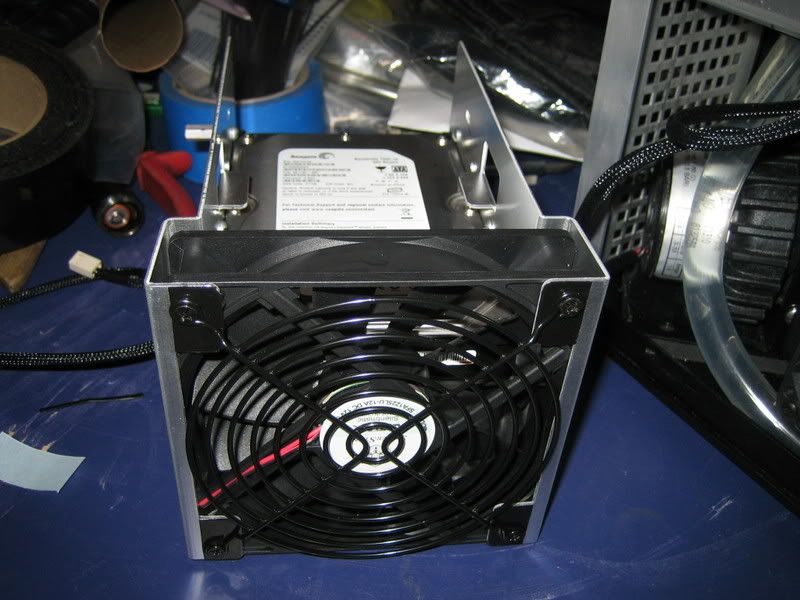
Youre probably asking..."so where does the hard drive go now?" Uhhh, well, I'll get back to you on that. Just kidding, it goes upstairs now. You could buy a fancy Silverstone 5.25 bay device, or you can use a hard drive casing that comes with the case. I chose the latter route as I wanted the front of the case as clean as possible. First, I borrowed some parts from my P180. These are some silicone bushings from that case's hard drive mounting solution installed in the 5.25 panels of the TJ07...
And this is a screw that is used with those bushings...
I then put some 3/4" long standoffs on the hard drive casing.
Ta Da...a nice floating hard drive mounting area. Should keep hard drive noise and vibes down.
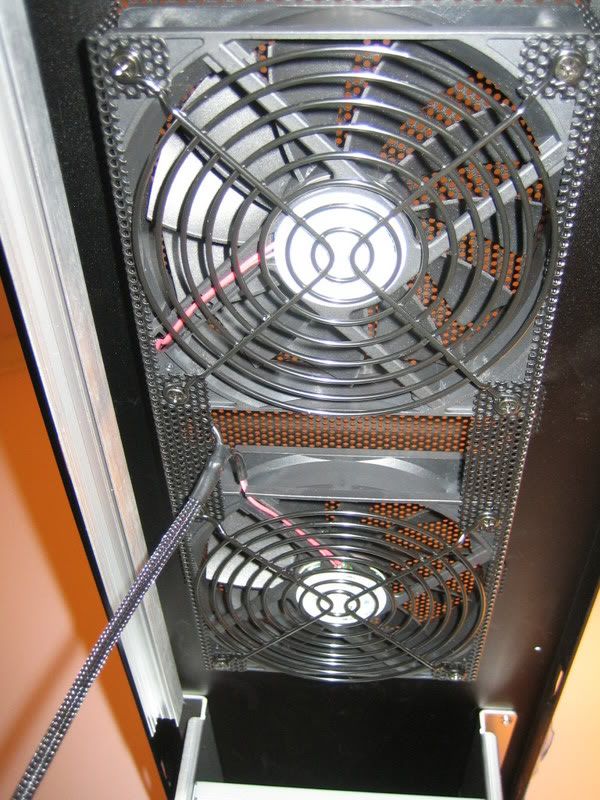
To doll that part up some, I added some black tape to the mounting ears for the fan that goes there.
I figure black fan, black grill, and that black tape makes it look a little more integrated.
While on the black fan grill kick, I also changed the top case fan grills to black ones as well, while reversing the fans so they blow downward. I figure my memory could use a shot of cool outside air for 'active cooling'.
After making sure my fire extinguisher was close at hand, I proceeded to do some wiring. A few highlights include hidden MB wiring and some more of the famous ziptie anchors to route the wires.
And custom length SATA power cable connectors
So things look like this:
And some cables run through nooks and crannies so they dont show. Here I cut the front panel audio and firewire cables off as I dont use onboard audio + my sound card doesnt use those connections, along with I have no idea what uses firewire anymore. Only USB cables here.
The custom hard drive mount wiring looks a 'lil like this:
Speaking of silent computing, it was time to make a fan speed controller. Since I want a nice solid 7.0 volts going to my fans...I made this little jem. First some wires with some connectors:
Those same wires with heatshrink on them, along with another 'doner' wire and connector combo...
Which was used to make this:
And then it was magically transformed into this:
Still awake? You might be able to find my new fan controller stuck onto the back of the computer somewhere. I kept as much wiring out of the radiator area as possible for air flow consideration.
Kind of a tight squeeze, but it seems to have decent enough airflow through here for the end of the PA120.3 on the other side. Also, with the offset between the two radiators, there is not that much radiator back there behind the power supply.
And now a batch of photos of the finished product:
TJ07's are nice when too much cooling is just right, eh?