Tips on wiring inside a Thermaltake Tsunami?

dab.

n00b
Joined
Apr 24, 2006
Messages
55
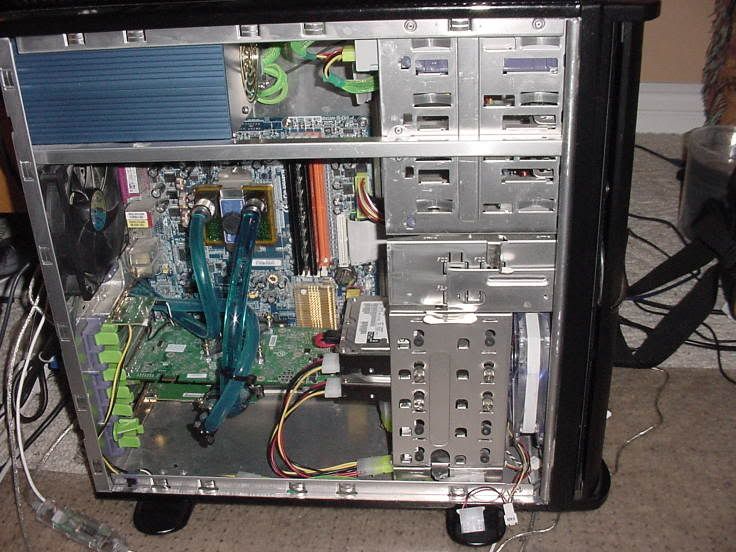
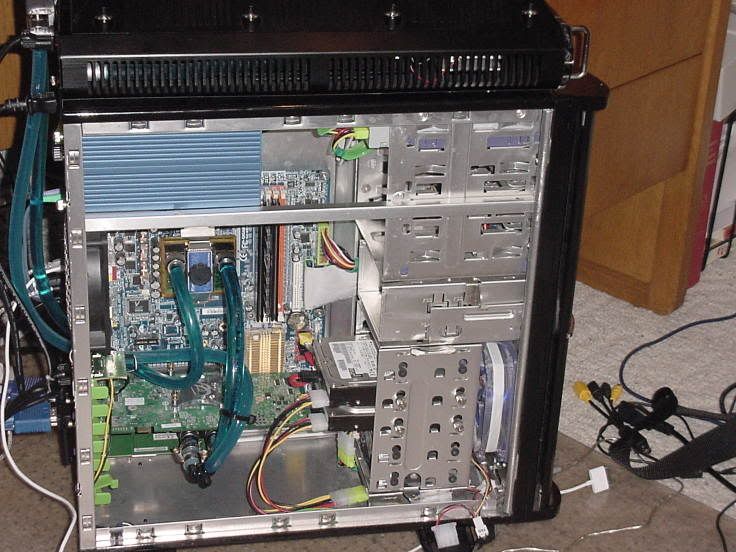
I'm going out to get some cable sleeving from Frys in a few minutes and am going to spend tomorrow re-wiring my computer. I have a Thermaltake Tsunami which is a fantastic case, in my opinion, but is a little bit cramped. I'd love to get some tips in able for it to look as clean as possible. Here's what it looks like right now...

Wiring.JPG


Thanks guys!
 
I can't tell if you did this from the resolution of the image, but did you turn the hard drive around and put the cables in from the back? That always helps me.
 
kelim said:
I can't tell if you did this from the resolution of the image, but did you turn the hard drive around and put the cables in from the back? That always helps me.

I uploaded a larger version of the image.

But I never thought about doing that. It's a great idea. I'll definately do that tomorrow.
 
If you ordered sleeving, that is a good start. Make sure you get the little power connector removal tool thing because it helps a lot when you are sleeving. Otherwise, use a paperclip.. lol.

For a start, I don't know if you are going to be able to turn the HDD around because of the fan right there. In my case, I was unable to turn around my HDD because of where the mounts are and the fan was in the way. Maybe move the HDD up to the FDD cage or 5.25'' cage so it might be possible if it doesn't work down below.

Second, some round IDE cables help with the clutter the 80's style ribbons leave behind. :p 
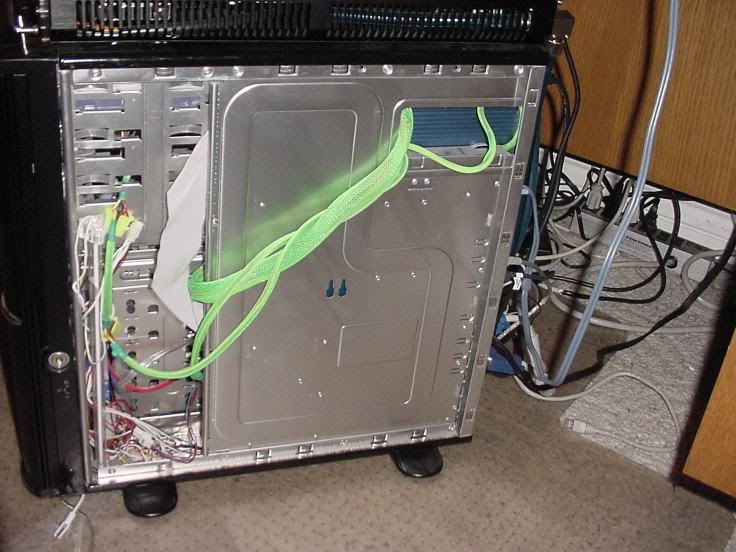
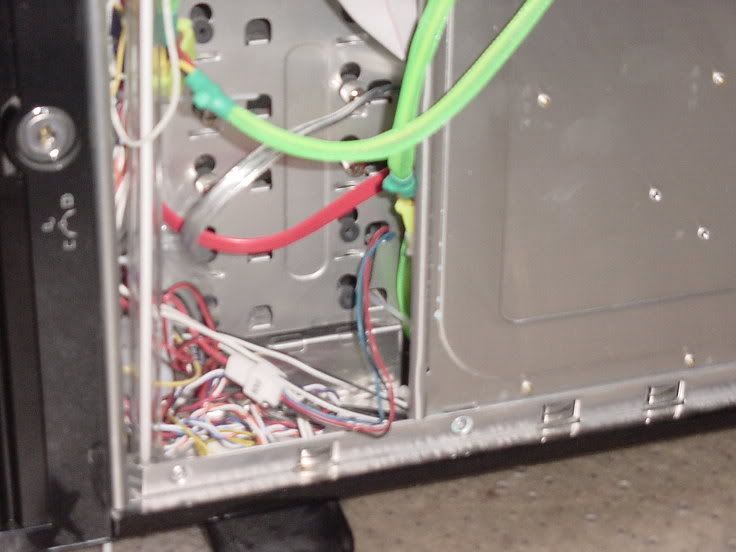
Then you are going to want to route your cables behind the motherboard and on the other side of the case out of view as much as possible. Use those mountable wire fasteners to hold everything down the the floor/walls of the computer case as much as possible.
 
Round IDE cables make a bigger mess. His IDE cables are alright as is. Just need to be tucked in a little better.
untitled16ep.jpg
 
flip the HD. Pull the wiring from the PSU out through the side, route it behing the mobo try, and make all your connection behind the HD tray. HD tray hides any nests nicely.
 
agree with teh above post, except i personally have never been able to flip the darn HDDs :(

last time i tried, the friggin SATA connectors broke :p [maybe i need right angle ones, dunno
 
Thanks for the tips!

I picked up a Vantec sleeving kit. This is my first time sleeving cables so I'm hoping that everything goes smoothly. The only thing that I'm worried about is taking off the Molex connectors. I don't have a tool that is made specifically for it so is there anything else that I could use that would work okay?
 
dab. said:
Thanks for the tips!

I picked up a Vantec sleeving kit. This is my first time sleeving cables so I'm hoping that everything goes smoothly. The only thing that I'm worried about is taking off the Molex connectors. I don't have a tool that is made specifically for it so is there anything else that I could use that would work okay?

paper clip as said above
 
i have the same case and just finished rewiring for the 3rd time so i think i got the case down pretty good. and the side pannels are still of so i guess i'll take you some photos.

first things first, dont bothertrying to flipp the hd, wont ever work unless you go buy 90's even who knows

second all the power cables should go behind the mobo tray and infront of the back side pannel

third keep the flat ide cables, i actually switched out my round green one for a flat one from my "80's" computer. fold the cables at right angles instead of just randomly twisting them around

pull all the front pannel wires taught(sp) and keep the exsess behind the hd racks.

9845.jpg

356245gh.jpg

1234.jpg

325y2vbt4uy6.jpg


hope those help bit
 
lozaning said:
i have the same case and just finished rewiring for the 3rd time so i think i got the case down pretty good. and the side pannels are still of so i guess i'll take you some photos.

first things first, dont bothertrying to flipp the hd, wont ever work unless you go buy 90's even who knows

second all the power cables should go behind the mobo tray and infront of the back side pannel

third keep the flat ide cables, i actually switched out my round green one for a flat one from my "80's" computer. fold the cables at right angles instead of just randomly twisting them around

pull all the front pannel wires taught(sp) and keep the exsess behind the hd racks.


picks coming


Thanks for the tips.

Yeah, I didn't think that flipping the HDD would work. I'll probably end up putting it in the floppy bay.
 
To flip the HD's i just drilled new holes. That aluminum is razor thing. You can almost push a drill bit through it by hand. To get the sata cable to fit in front of the fan you could defnitely use right angle connectors. i just drilled the holes to leave a little space so they fit. Flipping the HD takes a little work, but it's definitely worth it for a nice clean look. Even if the HD is slid out further because of flipping it, it still looks 10 times better without the wires there. I'll put a pic up when i get home.
 
Youll have to excuse the quality of the pics, for thats the best I can do for now.

My ghetto active cooling for the ram :D
Here you can see a lot of the wires running behind the mobo
0062hz.jpg


I drilled a few holes in the back and ran the front panel jumpers, the sata cable, and the videocard power though.
Also I switched the hd around, its a bit tricky to put it in unless you have long cables that you can attach to it while its outside,
0022se.jpg


I drilled a small hole right below where the motherboard ends and ran the cable though
0126zw.jpg


I took the 24pin power cord and ran it behind the drive cage (which is a tight fit)
Also shown here is my new Gskill which likes the active cooling.
0090tj.jpg


leet photoshooping :p
wiring6al.jpg
 
Here's what I've done. All my power cables are routed behind the mobo tray except for the mobo power cable, and some of the front panel connecters are behind the tray too.

psu.jpg


I've slid the extra IDE cable in between the drives, it fits right into the little gape there and looks really neat. And then I've got my power cables flat against the drives, so it looks cleaner.
drives.jpg


and then under my video and sound card is the front usb wires and the cold cathode control wire. I haven't gotten around to figuring a better way to route this, and probably won't till I put some new parts into my system.
under.jpg
 
I use to have a TT Tsunami, I remember there being a hole and gap between the power supply and the motherboard tray, the hole was blocked by the power supply. I ran cables through that hole, and stored unused cables along the right panel, taping them to the tray. I ran all my cables from behind, and snuck them into their places, and it looked very very clean.
No pics because this was a year and a half ago.
 
As soon as I get my new heatsink I'll take my motherboard out and do some modding, get back to you with the results. I like the hole in the motherboard tray for the top panel connections, gotta use that one. A few days ago I spliced some extra wire into my cold cathode power cable, so that it was long enough to wire the cathode to the front door. So, replacing those 2 wimpy LEDs I now have a cold cathode in the door, resulting in a very pretty sheet of blue light instead of the 2 points from the LEDs. I'll post pictures sometime in the next few days.
 
I routed my wires behind the drive cage, crossmember and motherboard tray. I also covered the space above the crossmember and the drive cages with aluminum. I think it gives it a cleaner look:

newpclit0017pb.jpg
 
skudmunky said:
As soon as I get my new heatsink I'll take my motherboard out and do some modding, get back to you with the results. I like the hole in the motherboard tray for the top panel connections, gotta use that one. A few days ago I spliced some extra wire into my cold cathode power cable, so that it was long enough to wire the cathode to the front door. So, replacing those 2 wimpy LEDs I now have a cold cathode in the door, resulting in a very pretty sheet of blue light instead of the 2 points from the LEDs. I'll post pictures sometime in the next few days.


Well, UPS has really messed up my shipment, so it will be a while till I get some new pics online. Silly bastards sent my package back to california! :(
 
i would also like to add to the reference pics :p although this is not a tsunami, it shares the same chassis as them ;)

cleanSLK-3000.jpg
 
Impressive. Must've taken you dedicated hours on first try or less than an hour with experience! :)

-J.
 
GeForceX said:
Impressive. Must've taken you dedicated hours on first try or less than an hour with experience! :)

-J.
oh i forgot to mention, thats not mine, thats one of the board member's comp, i forgot who but he is indeed very talented ;) props to him
 
Back
Top