![[H]ard|Forum](/styles/hardforum/xenforo/logo_dark.png)
Navigation
Install the app
How to install the app on iOS
Follow along with the video below to see how to install our site as a web app on your home screen.
Note: This feature may not be available in some browsers.
More options
-
Some users have recently had their accounts hijacked. It seems that the now defunct EVGA forums might have compromised your password there and seems many are using the same PW here. We would suggest you UPDATE YOUR PASSWORD and TURN ON 2FA for your account here to further secure it. None of the compromised accounts had 2FA turned on.
Once you have enabled 2FA, your account will be updated soon to show a badge, letting other members know that you use 2FA to protect your account. This should be beneficial for everyone that uses FSFT.
You are using an out of date browser. It may not display this or other websites correctly.
You should upgrade or use an alternative browser.
You should upgrade or use an alternative browser.
Road RagE II
- Thread starter PS-RagE
- Start date
hot. Sorry, I think Im gonna duplicate your system. Scary thing is, I went and ordered a tundra this morning, Silver on black leather Crew 4x4, package d. Im gonna rip out the jbl crap and order the same stuff basically. Gonna add in any rear fill?
You won't be disappointed - what a power house! When we went on our weeklong camping trip this year to the Lake Superior region, I was passing slower traffic towing the trailer while going uphill.
And to answer your question - no, I don't believe in rear fill, screws up the staging. I may some day consider 5.1 but it is not a concern at the moment.
MrMetal_53
[H]ard|Gawd
- Joined
- Apr 21, 2006
- Messages
- 1,197
I would just like to say that I know nothing about cars (or trucks, for that matter), but this mod looks great. And so does the Paradise Lost (I love that CD) 
How much do you think the stage would be ruined by putting the midbass drivers in the rear doors? I ask because my Dad wants the same system that im going to be getting in the tundra in his GT3 and is willing to pay for both systems hardware and all if I will go ahead and do the install on his car. I am planning out the install on both now. If I can put the midbass in back for the gt3 and possibly in the rear doors of the tundra that will leave a near stock look on the tundra which I would like.
So a cold rainy weekend means no camping trip and thus an "excuse" to get some work done on the back wall/subwoofer.
Keep in mind, I am not a bodyman and just going with things I have done in the past based on information pulled from the 'net.
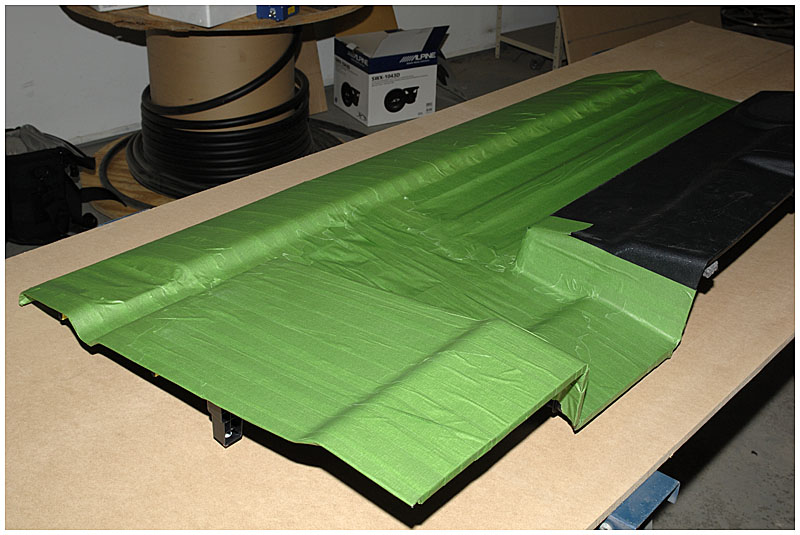
Anyhow, with the back wall removed, I covered it with green painter's tape. Previous experience has shown that fiber glass resin will not stick to this:
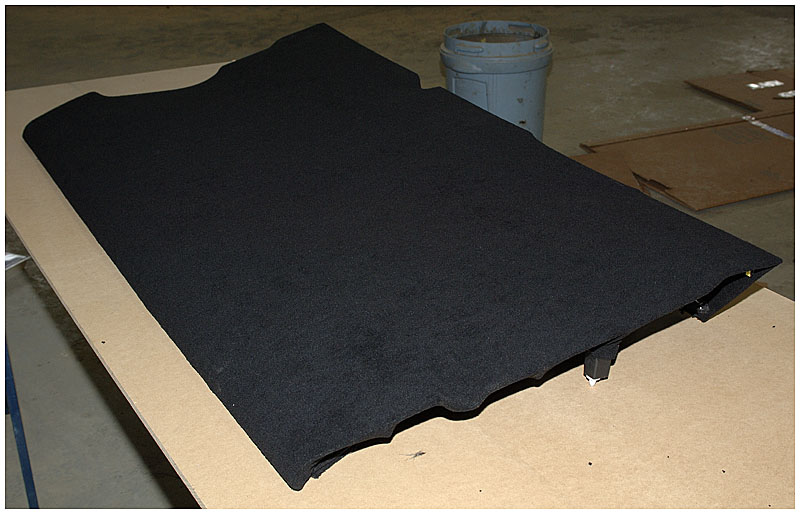
Next, I tightly stretch polar fleece around it doing my best to ensure it follows all the contours:
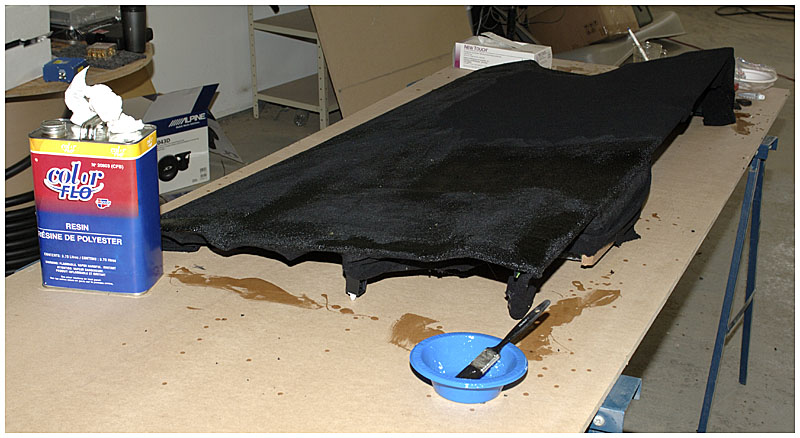
And now I soak it down with fiber glass resin:
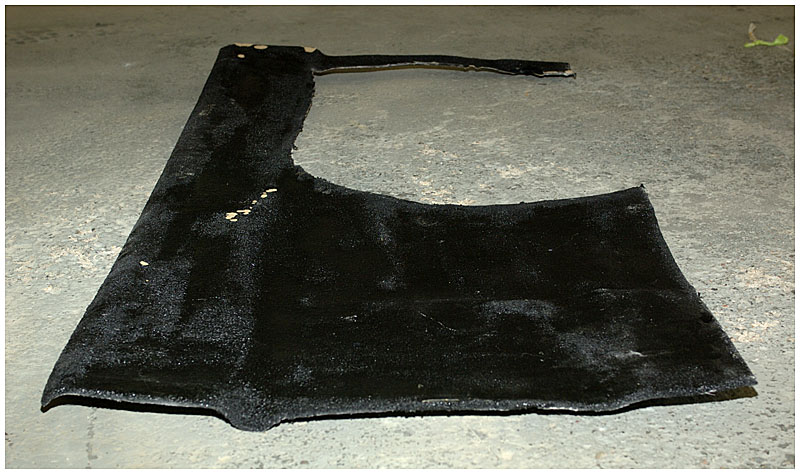
Once the resin has dried, I pull it away from the plastic and I have a form to work with that gives me the basic shape of the back wall (minus the subwoofer section):
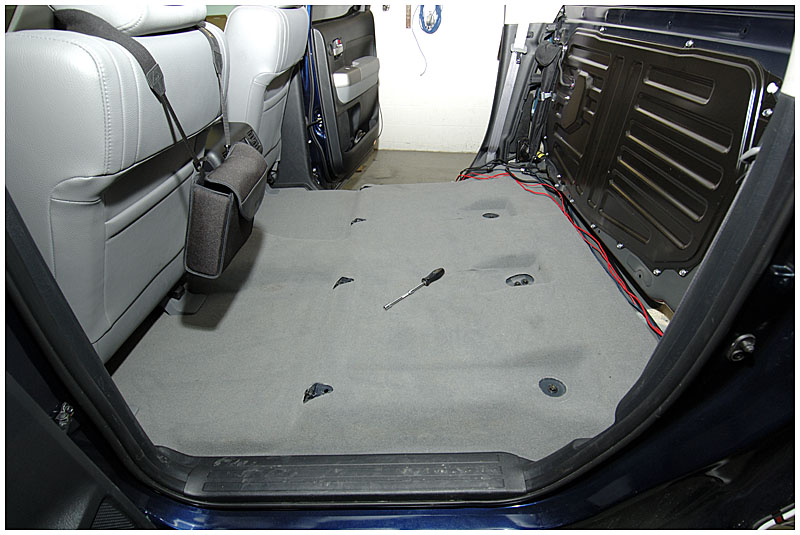
So once again, I completely gut the rear section of the Tundra including the temporarily installed radio components. Once the seats are out I replaced the bolts back in their holes both to protect the holes as well as to not lose the bolts:
This weekend's main job is to get the wall completely roughed in. That means working with fiber glass inside the truck. This stuff is the stickiest, messiest material of all. If any of it comes into contact with the interior, it will be ruined and have to be replaced. Therefore, I am not taking any chances and sectioned off the rear of the truck with two layers of a heavy plastic drop sheet:
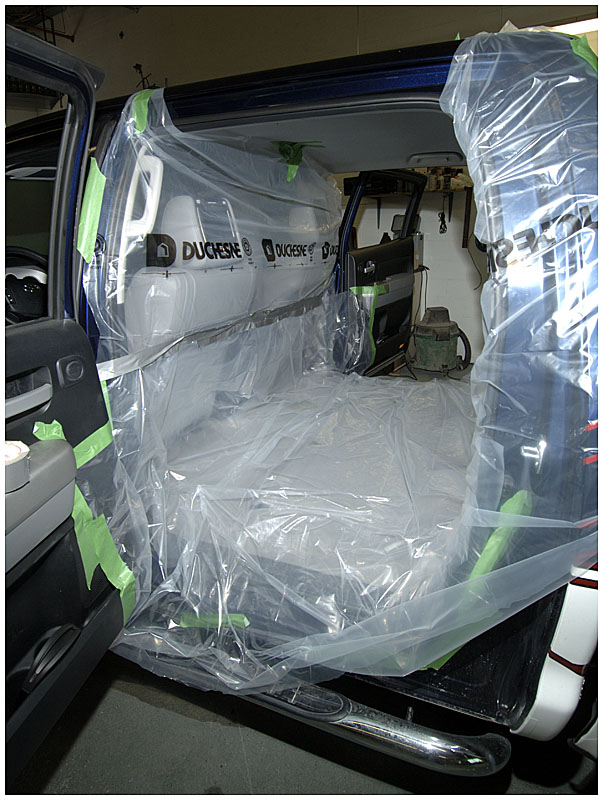
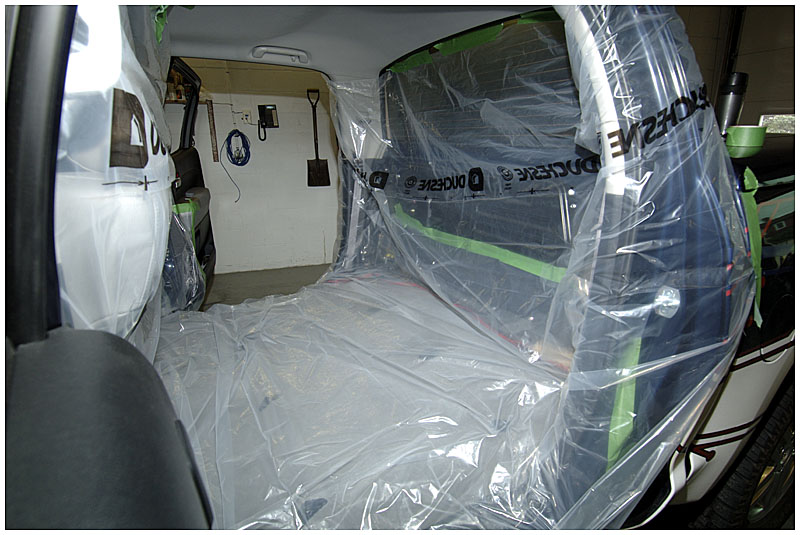
So with a test fit of the new back wall and some trimming I have my two pieces placed:

Now I have to figure out how I am going to keep the wall in place before I join it to the subwoofer enclosure.
So with a pot of coffee on and the Symphony X discography in shuffle mode on the iPod I'll see if I can have this done today.
.
Keep in mind, I am not a bodyman and just going with things I have done in the past based on information pulled from the 'net.
Anyhow, with the back wall removed, I covered it with green painter's tape. Previous experience has shown that fiber glass resin will not stick to this:
Next, I tightly stretch polar fleece around it doing my best to ensure it follows all the contours:
And now I soak it down with fiber glass resin:
Once the resin has dried, I pull it away from the plastic and I have a form to work with that gives me the basic shape of the back wall (minus the subwoofer section):
So once again, I completely gut the rear section of the Tundra including the temporarily installed radio components. Once the seats are out I replaced the bolts back in their holes both to protect the holes as well as to not lose the bolts:
This weekend's main job is to get the wall completely roughed in. That means working with fiber glass inside the truck. This stuff is the stickiest, messiest material of all. If any of it comes into contact with the interior, it will be ruined and have to be replaced. Therefore, I am not taking any chances and sectioned off the rear of the truck with two layers of a heavy plastic drop sheet:
So with a test fit of the new back wall and some trimming I have my two pieces placed:
Now I have to figure out how I am going to keep the wall in place before I join it to the subwoofer enclosure.
So with a pot of coffee on and the Symphony X discography in shuffle mode on the iPod I'll see if I can have this done today.
.
I really gotta see how you are gonna make those speakers fit in the door's. I have a solution for the gt3, gonna do a baffle into the front trunk to pass through the front. and of course the mids and highs in the doors. Subs where the rear seats go. As for my truck. I don't see how those doors are gonna fit all 3 drivers. Maybe fab a custom pod? If you go that route, please furnish schematics to me or sell me a pair of the pods lol. I made my order of gear yesterday and it should start arriving soon. Also would love to get my hands on the plans for the box that you built for the 10's for your truck. Gonna need that.
I go pick up my truck this morning and will snap some pics and post them later.
I go pick up my truck this morning and will snap some pics and post them later.
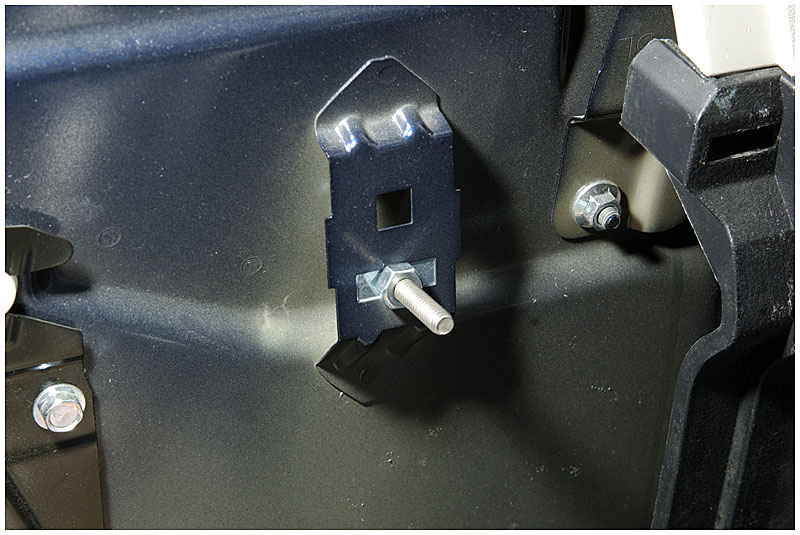
I decided to reuse the factory mounts and fed a bolt back through it. When this piece is done, it is going to be really heavy so I may not have to bolt it in place at all but if I do, this mount will be handy as it will give me some side-to-side play for adjustment.
Again using the fleece, I make an angled bridge between the MDF subwoofer enclosure and the fiber glass back wall. The fleece is simply hot glued to the wood but in order to keep a straight line at the junction to the wall I screwed down a metal bar.
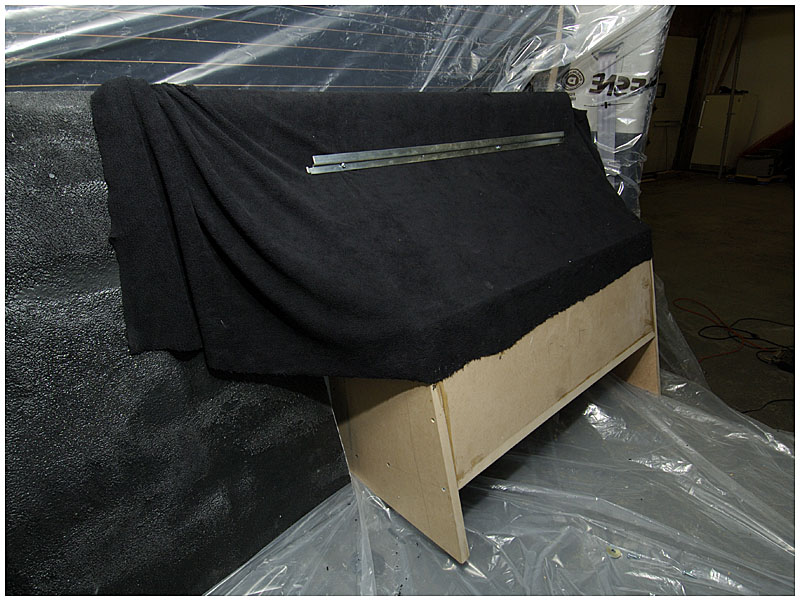
The fleece is soaked with resin and once it has hardened the first layer of glass is applied.
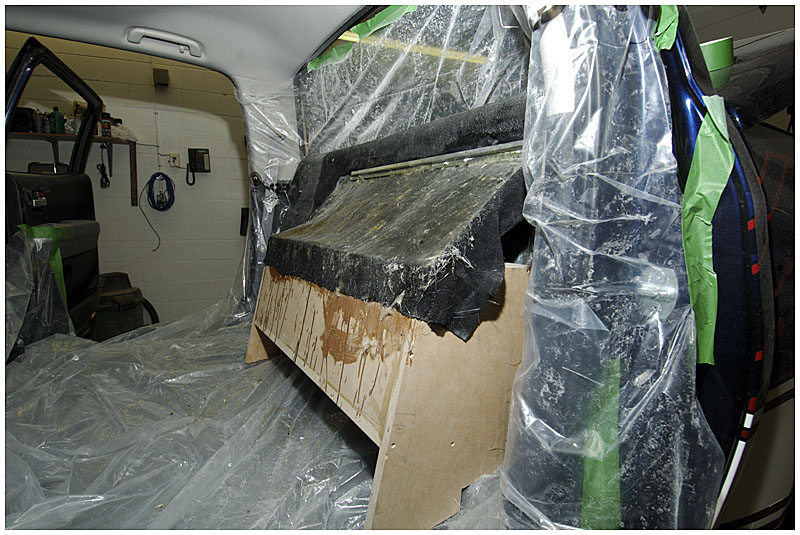
Next, the sides of the wall and the sub enclosure are bonded together. I need this to be as strong as possible before I remove it from the truck. It has to be a solid and inflexible so as not to change shape while working on it outside the truck otherwise it won't fit right.
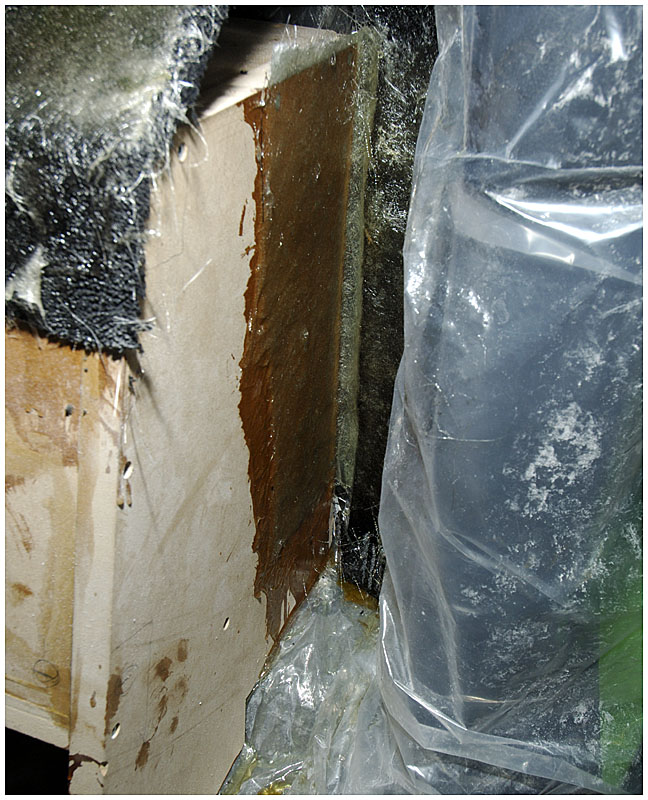
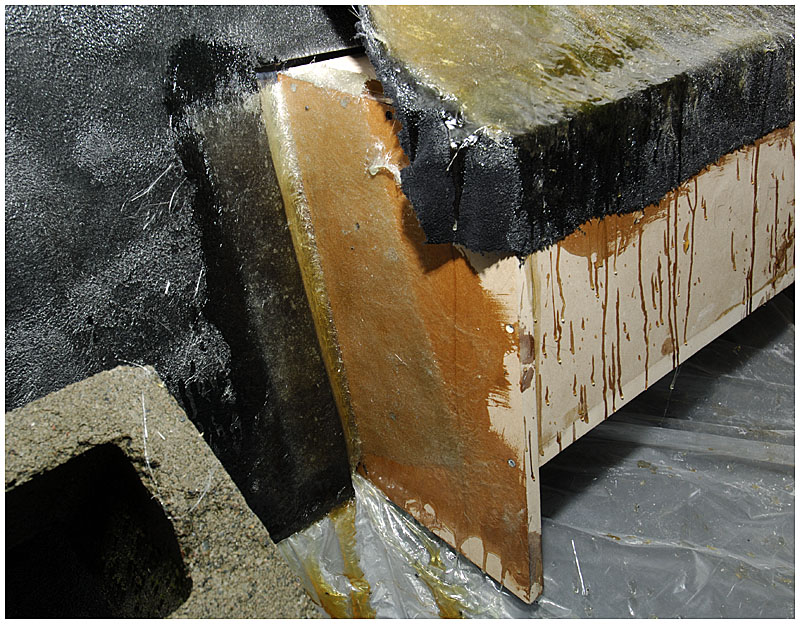
As I kind of expected, when I removed the metal bar from the top of the fiberglass bridge I found that the top of the bridge was not bonded to the wall.
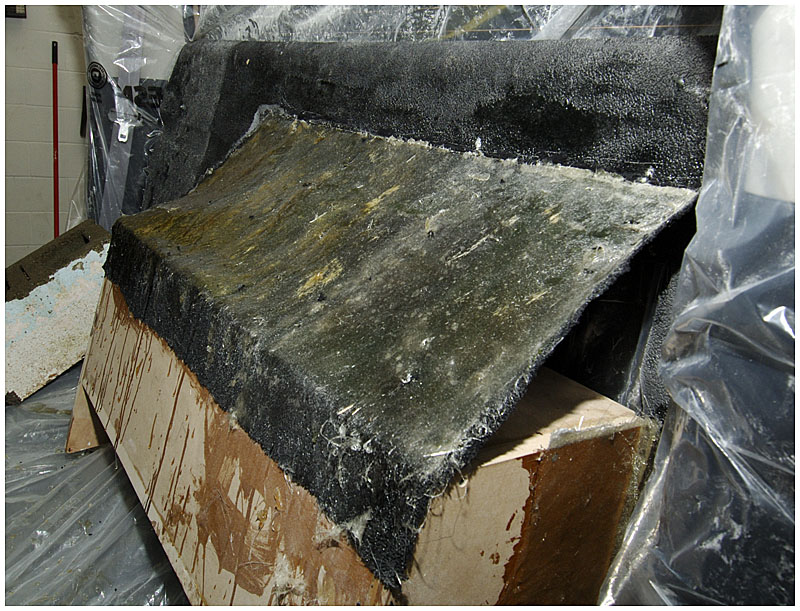
This actually works out in my favour as it lets me make a last minute adjustment to the back wall.
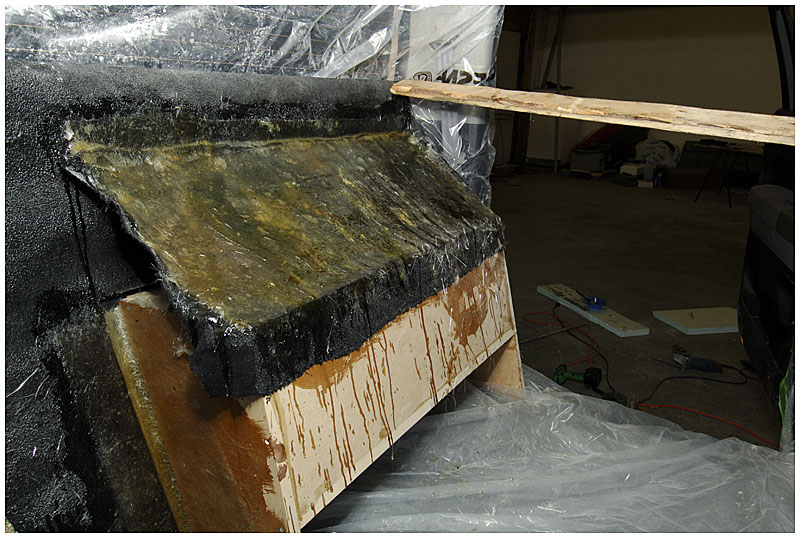
Now I just have to add a second layer of glass to all three joints and once hardened I can finally get this thing out of my truck! I know most people would shudder as I drilled holes or snipped harnesses but this part was the most nerve-wracking to me and I'll be glad to be doing the rest of this on a workbench and not in the truck!
.
Again using the fleece, I make an angled bridge between the MDF subwoofer enclosure and the fiber glass back wall. The fleece is simply hot glued to the wood but in order to keep a straight line at the junction to the wall I screwed down a metal bar.
The fleece is soaked with resin and once it has hardened the first layer of glass is applied.
Next, the sides of the wall and the sub enclosure are bonded together. I need this to be as strong as possible before I remove it from the truck. It has to be a solid and inflexible so as not to change shape while working on it outside the truck otherwise it won't fit right.
As I kind of expected, when I removed the metal bar from the top of the fiberglass bridge I found that the top of the bridge was not bonded to the wall.
This actually works out in my favour as it lets me make a last minute adjustment to the back wall.
Now I just have to add a second layer of glass to all three joints and once hardened I can finally get this thing out of my truck! I know most people would shudder as I drilled holes or snipped harnesses but this part was the most nerve-wracking to me and I'll be glad to be doing the rest of this on a workbench and not in the truck!
.
blairellis
Limp Gawd
- Joined
- Mar 11, 2007
- Messages
- 398
How's things coming along?
Slowly. I'm putting in an hour or two every night and all day Saturdays and Sundays but I'm not the best bodyman. The fleece "bridge" wasn't too efficient. It sagged while it was hardening and I just can't get it flat. I should have just used a piece of MDF in the first place and that is the direction I'm going next.
Still don't have the front components yet. "End of the month" they say again. They've been saying this since May.
Still don't have the front components yet. "End of the month" they say again. They've been saying this since May.
Looking good, may I ask.. Why all the Motorola decals?
prehaps he works for motorola???
i.e. it may be his truck, but they foot the bill, and its cramed full of thier goodies
my memory is a little fuzzy but i beleave an engineer, it was either that or a sales rep, and the latter dosent sound right.
LogitechFreak
Bad Trader
- Joined
- May 5, 2007
- Messages
- 564
prehaps he works for motorola???
i.e. it may be his truck, but they foot the bill, and its cramed full of thier goodies
my memory is a little fuzzy but i beleave an engineer, it was either that or a sales rep, and the latter dosent sound right.
yes he works at the motorola shop in his town.. if you read his original first post it says it.
Anyhow, while I am waiting for stereo parts, I still have other mods to do.
Last week, my back up lights came in so yesterday I took the day and installed them.
Here are the lightheads. These are Whelen 700 Series high intensity LED floods:
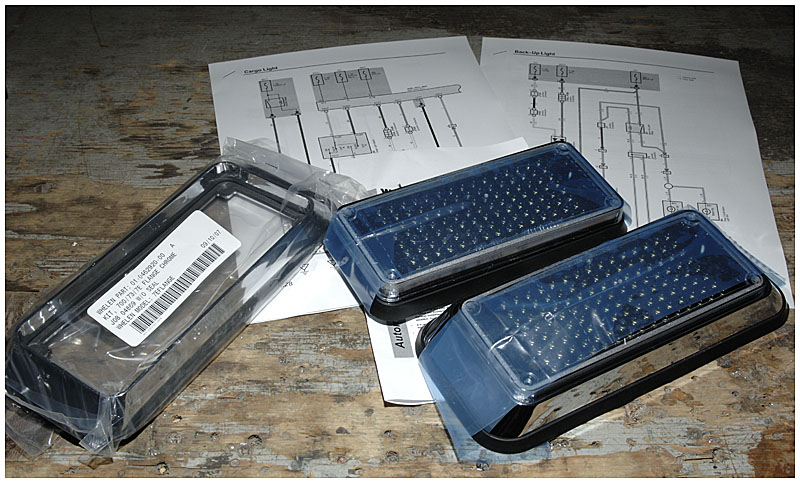
I want both to have them automatically come on when the truck is shifted to Reverse as well as to be able to manually fire them using the Cargo light switch.
Back to the schematics:
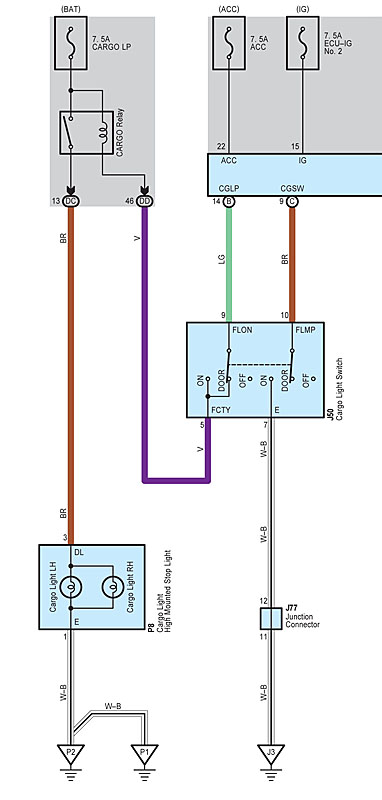
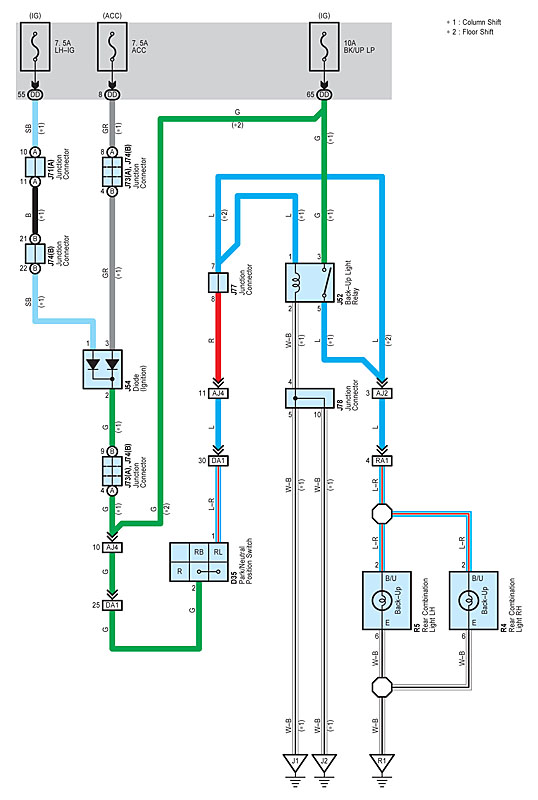
Both pretty simple circuits. Computer controlled like everything else in this truck.
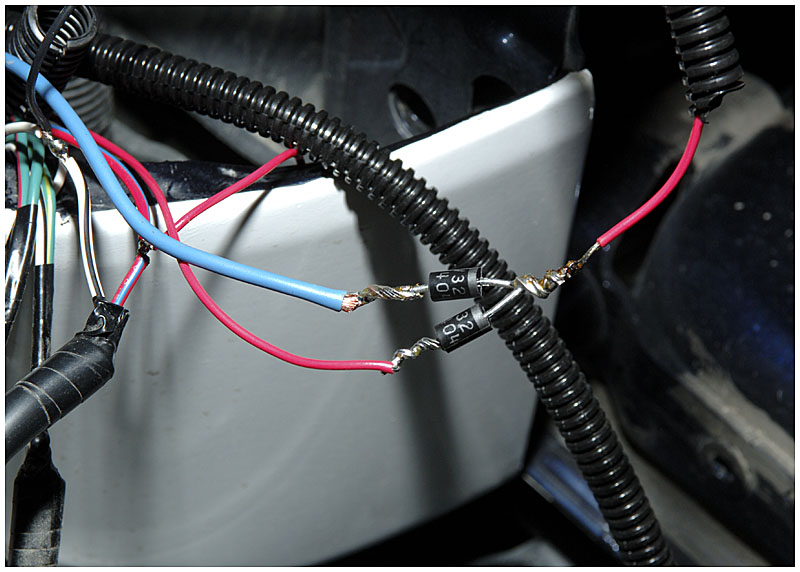
In order to have two different power sources (reverse lights and cargo lights) I have to seperate the circuits with diodes.
A quick trip to Radio Shack gets me a package of rectifier diodes with a 3A rating:
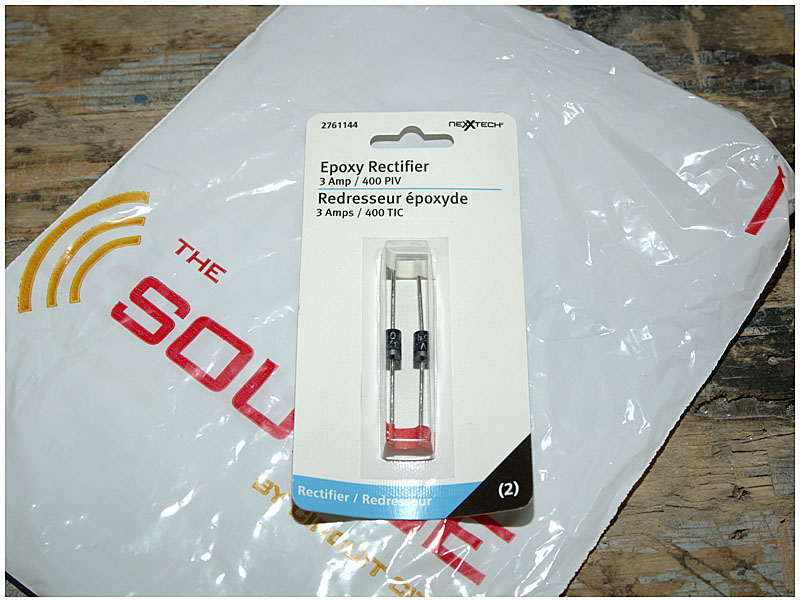
Diodes, of course, will only allow the flow of current in one direction. So when the reverse lights are on, the cargo lights will not be forced on and vice-versa.
Originally, I was going to use an automotive relay to provide power to these lightheads but it turns out they only draw 300mA each so I decided to cut them directly into the truck's wiring.
Before mounting though, I need to make sure that having them mounted to the bumper is not going to affect the sonar (shoulda checked that before ordering them - doh):
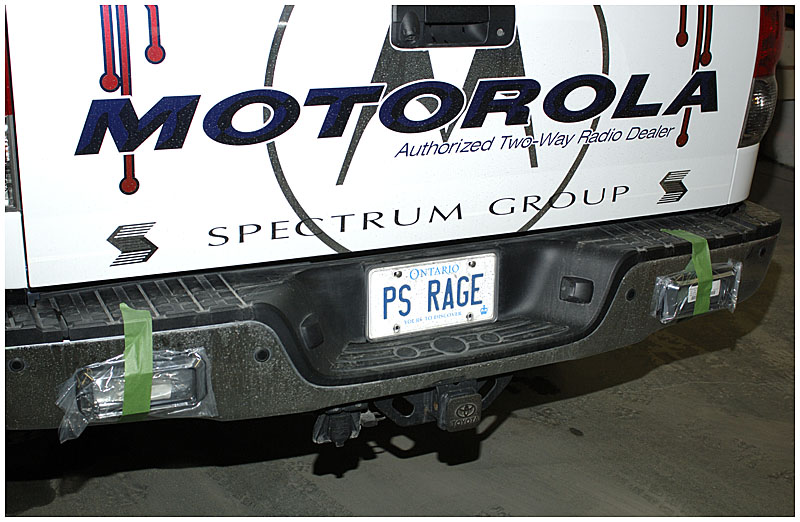
A quick test shows they have no effect on the sonar so next to mount them. They came with nylon expansion clips and stainless screws:
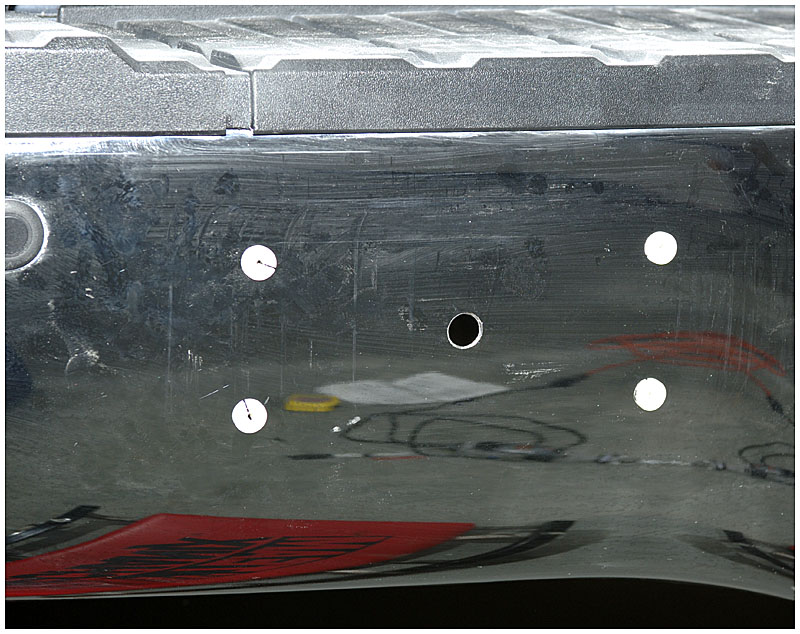
My camera is rather large, so I could not really manipulate it under the truck to get pictures.
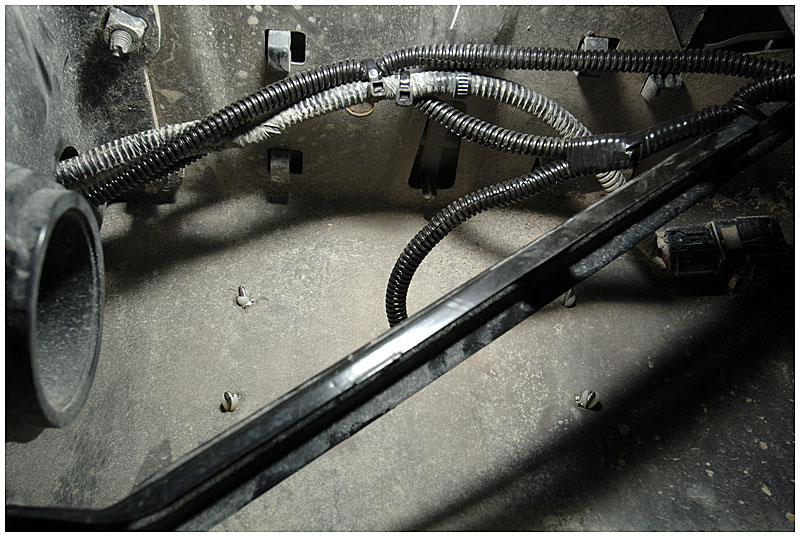
For the cargo light line, I cut into the wiring harness in the driver's side trough and pulled it through the firewall. It was fished through the frame to the driver's side tail lamp. I cut into the reverse light wires and the diodes were installed in the tail lamp. The blue wire is the long pull from the Cargo lights and the red is the cut into the Reverse lamps:
Its not pretty but it is protected:
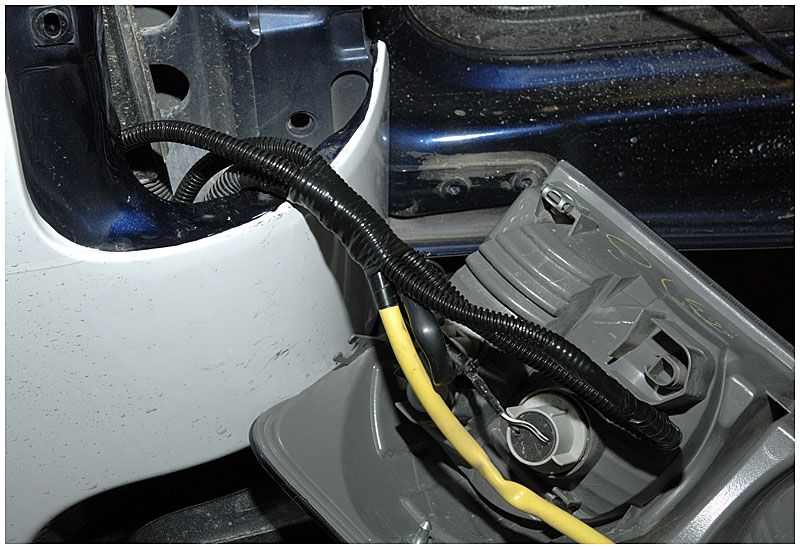
And here is the finished product. Looks good, IMO:
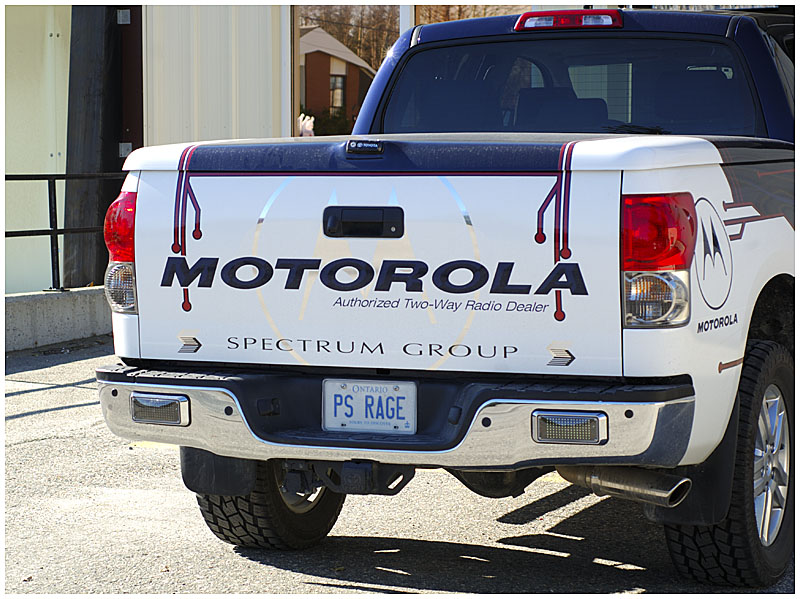
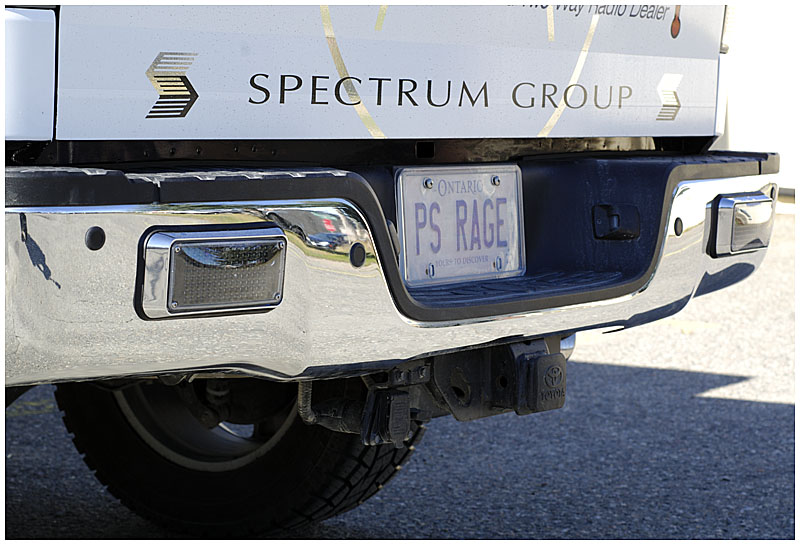
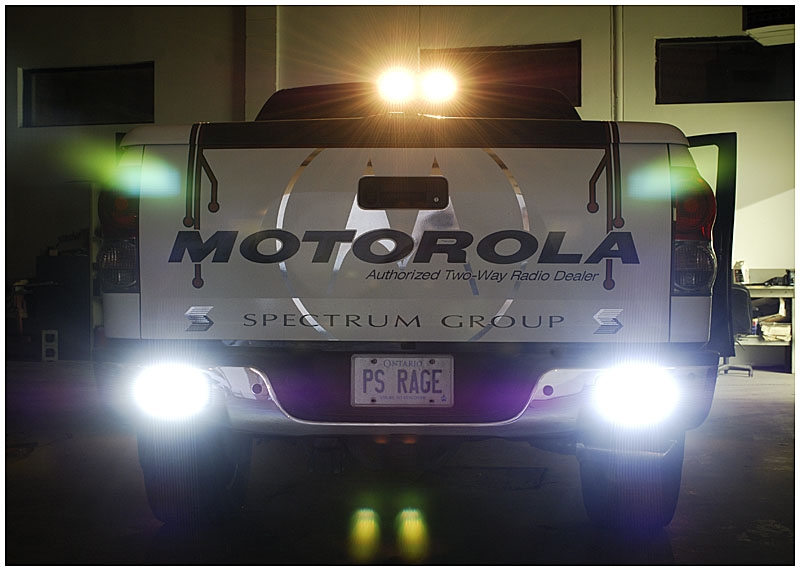
And here is where it counts.
Backup lights off:
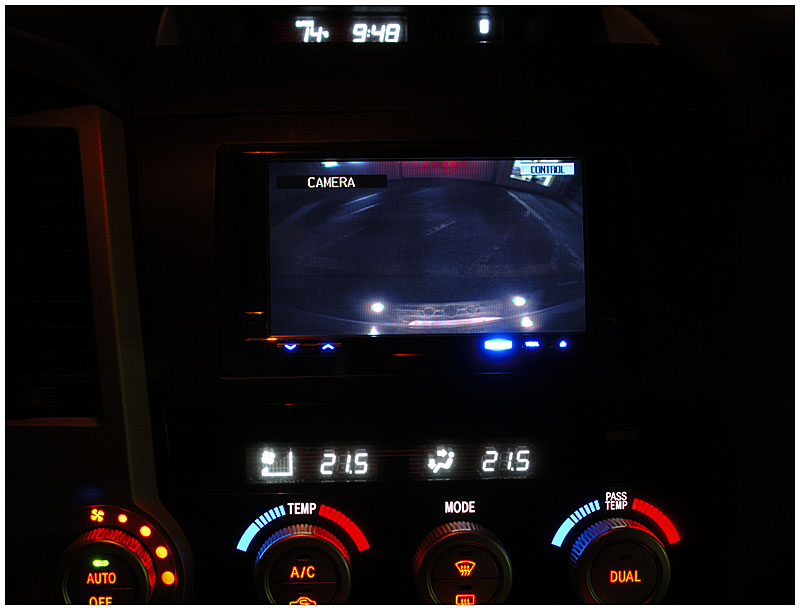
Backup lights on:
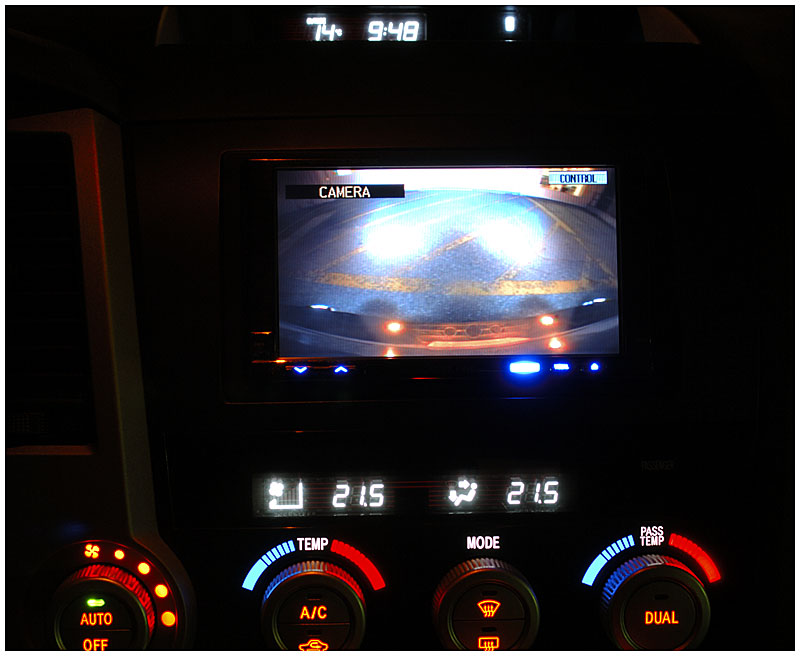
Last week, my back up lights came in so yesterday I took the day and installed them.
Here are the lightheads. These are Whelen 700 Series high intensity LED floods:
I want both to have them automatically come on when the truck is shifted to Reverse as well as to be able to manually fire them using the Cargo light switch.
Back to the schematics:
Both pretty simple circuits. Computer controlled like everything else in this truck.
In order to have two different power sources (reverse lights and cargo lights) I have to seperate the circuits with diodes.
A quick trip to Radio Shack gets me a package of rectifier diodes with a 3A rating:
Diodes, of course, will only allow the flow of current in one direction. So when the reverse lights are on, the cargo lights will not be forced on and vice-versa.
Originally, I was going to use an automotive relay to provide power to these lightheads but it turns out they only draw 300mA each so I decided to cut them directly into the truck's wiring.
Before mounting though, I need to make sure that having them mounted to the bumper is not going to affect the sonar (shoulda checked that before ordering them - doh):
A quick test shows they have no effect on the sonar so next to mount them. They came with nylon expansion clips and stainless screws:
My camera is rather large, so I could not really manipulate it under the truck to get pictures.
For the cargo light line, I cut into the wiring harness in the driver's side trough and pulled it through the firewall. It was fished through the frame to the driver's side tail lamp. I cut into the reverse light wires and the diodes were installed in the tail lamp. The blue wire is the long pull from the Cargo lights and the red is the cut into the Reverse lamps:
Its not pretty but it is protected:
And here is the finished product. Looks good, IMO:
And here is where it counts.
Backup lights off:
Backup lights on:
Concentric
[H]ard|Gawd
- Joined
- Oct 15, 2007
- Messages
- 1,029
Wow nice work dude, love the reversing lights.
A Tundra Solutions forum member (1tundradude) discovered in a Toyota document that the supply voltage for the back-up camera is supposed to be between 5 and 7 volts.
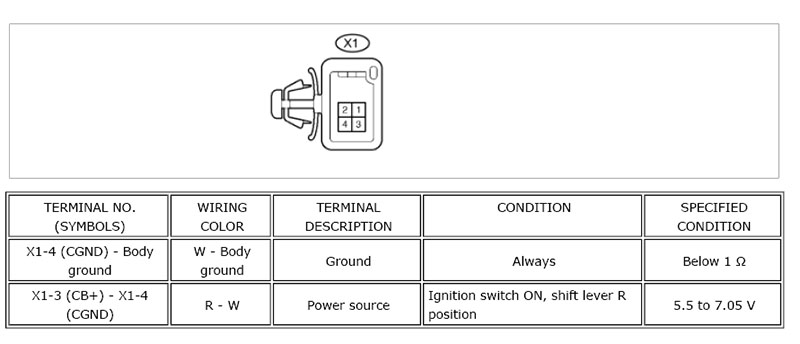
I've been running it at 12v for the last four months without any problems but if the spec says it should be lower this will no doubt extend the life of the device.
Luckily, this is an easy fix - all that is required is a Voltage Regulator.
I had on hand an NTE956 which is a generic version of an LM317. This is an adjustable voltage regulator whose output is set with a simple voltage divider:
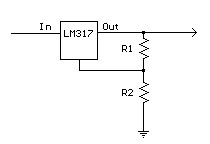
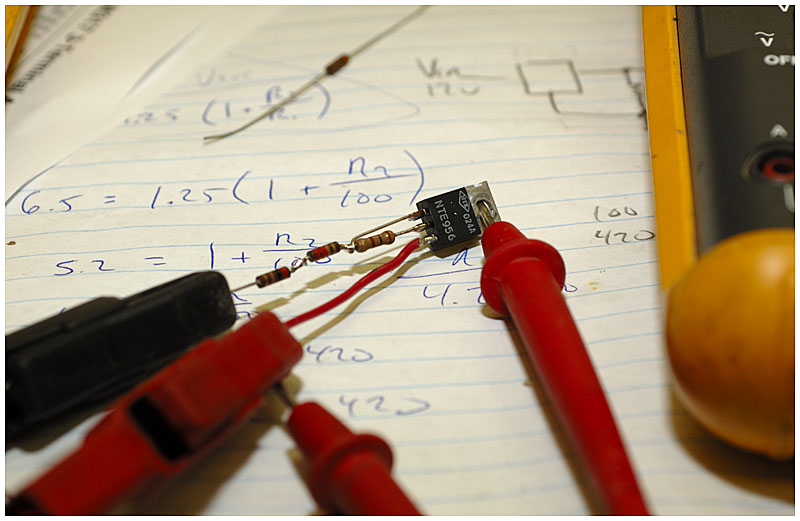
A couple quick calculations finds my resistor values (R1 = 100ohms and R2 = 420ohms) and I can solder it together. Of course it is rare to find the exact values for resistors so I had to put a 220 and a 200 in series.
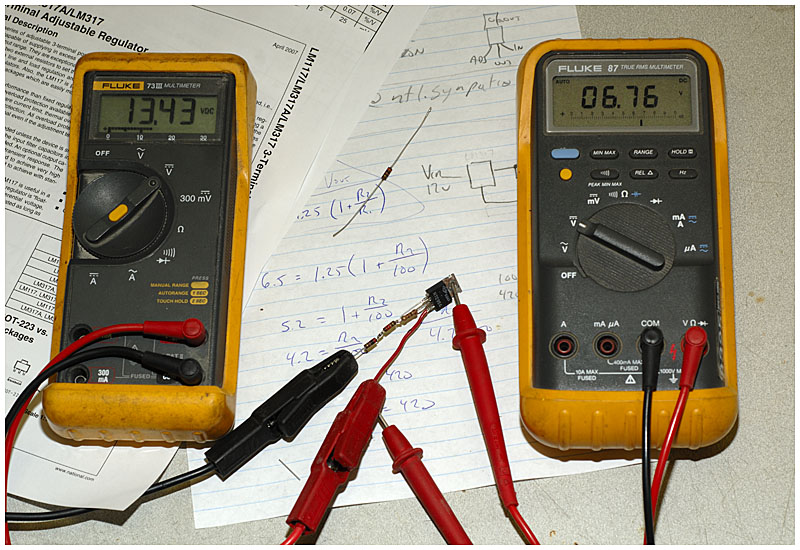
Works like a charm. Regardless of my input voltage, the output remains steady at 6.76v:
A bit of heat shrink to protect the contacts:
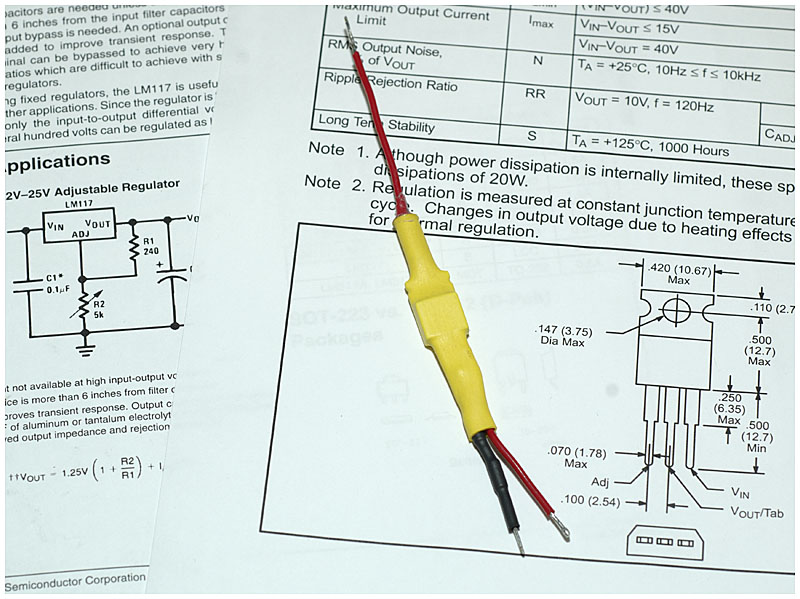
And solder it in line:
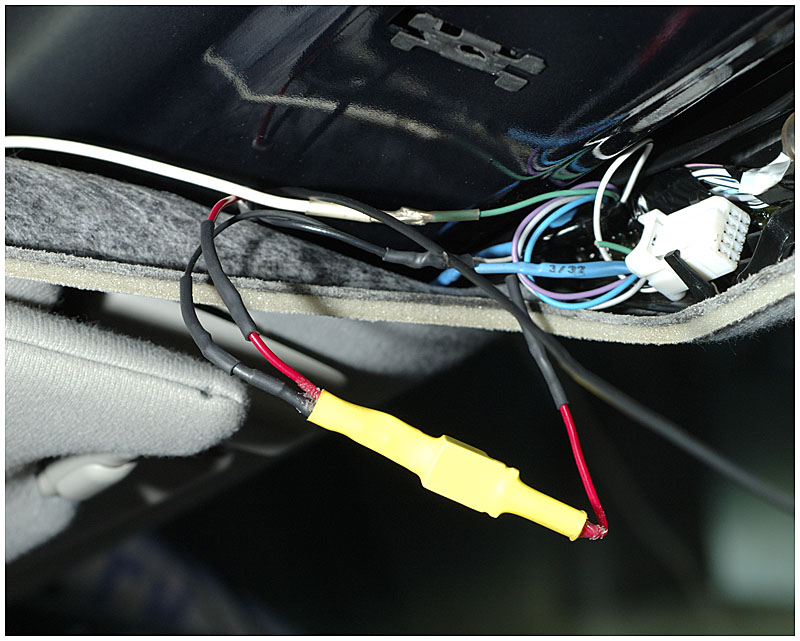
As an added bonus, much of the video noise I previously had on the display has cleaned up. Musta been pushing the video amplifiers too hard.
I've been running it at 12v for the last four months without any problems but if the spec says it should be lower this will no doubt extend the life of the device.
Luckily, this is an easy fix - all that is required is a Voltage Regulator.
I had on hand an NTE956 which is a generic version of an LM317. This is an adjustable voltage regulator whose output is set with a simple voltage divider:
A couple quick calculations finds my resistor values (R1 = 100ohms and R2 = 420ohms) and I can solder it together. Of course it is rare to find the exact values for resistors so I had to put a 220 and a 200 in series.
Works like a charm. Regardless of my input voltage, the output remains steady at 6.76v:
A bit of heat shrink to protect the contacts:
And solder it in line:
As an added bonus, much of the video noise I previously had on the display has cleaned up. Musta been pushing the video amplifiers too hard.
very cool
glad to be getting these updates again!! I love this because not only is it extremely detailed but its like how to customize a car and a computer at the same time Since most of us here already know the ins and outs of computers learning more about electronics in vehicles is awesome.
Thanks!!
glad to be getting these updates again!! I love this because not only is it extremely detailed but its like how to customize a car and a computer at the same time
Since most of us here already know the ins and outs of computers learning more about electronics in vehicles is awesome.Thanks!!

Welsper
Gawd
- Joined
- Jun 30, 2005
- Messages
- 766
Beautiful, man, very slick, wish I had the cash to do something like this....alas....Oh well, maybe some day! Keep up the awesome work.
FadedSpark
Supreme [H]ardness
- Joined
- Apr 21, 2005
- Messages
- 7,556
Are you near hamilton? if so, i NEED to see your truck!
Looks awesome
Looks awesome
filthysanchez
2[H]4U
- Joined
- Jul 19, 2006
- Messages
- 2,669
Any updates?
FadedSpark
Supreme [H]ardness
- Joined
- Apr 21, 2005
- Messages
- 7,556
About nine hours north of you
holy poop. oh well, definitely makes sense to have a truck then
Reflective plastic cover to prevent pictures on that License plate (nice custom plate btw)?
Amazing work, I wish I had that kind of money to pour into a new vehicle.
Reflective plastic cover to prevent pictures on that License plate (nice custom plate btw)?
Amazing work, I wish I had that kind of money to pour into a new vehicle.
thats funny.. looks like he managed to take a picture of it just fine..
watch miythbusters, they dont work... its just a plate protector
FadedSpark
Supreme [H]ardness
- Joined
- Apr 21, 2005
- Messages
- 7,556
thats funny.. looks like he managed to take a picture of it just fine..
watch miythbusters, they dont work... its just a plate protector
yep. canadian winters get license plates all nasty and unreflective
and considering hes 9 hours north of me (north bayish? ) itll be even worse... eek lmaoFadedSpark
Supreme [H]ardness
- Joined
- Apr 21, 2005
- Messages
- 7,556

There ya go
.
wow lmfao i should have known north bay was closer... oh well, havent had geography of Canada since grade 9... (3 years ago
)blairellis
Limp Gawd
- Joined
- Mar 11, 2007
- Messages
- 398
Anymore updates to report in on?