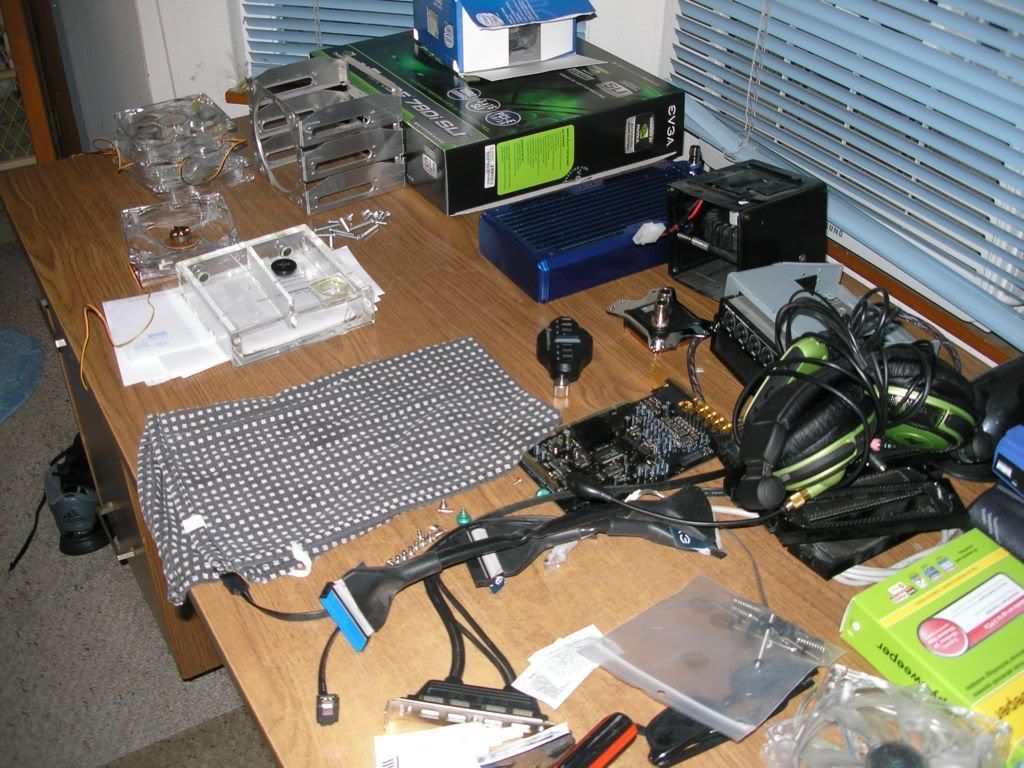
Rebuild Outlaw style

lohoutlaw

Weaksauce
Joined
Dec 15, 2008
Messages
74
Hey guys,

New here and i thought i would share my rebuild I'm doing to my rig.
W/Cing only for CPU as of now, do to V/C upgrade soon.
Yes this would be the same guy with the E8600 that boots to 4.0Ghz stable at 1.24v bios.
http://www.hardforum.com/showthread.php?t=1379589

But here we go,

Asus Rampage Formula
Intel E8600
OCZ Reapers PC9200 2 x 1gig
PcCool 750W 60AMP rail
XFX 260GTX 192 streaming flavor
ThermalTake Full Tower


Theme: Clear water with red lighting. This may change as i go :)

The mess:

PC310038.jpg


Some more stuff to add to the desk of junk! :) X 4
120mm Scythe SY1225SL12SH "Slip Stream" Case Fan (110.31 CFM, 37 dBA)

P1020050.jpg


More to come at a later date, i have allot of sleeving to do.
 
Some more junk to add to the pile!


4 x red led bulbs 3v

P1030052.jpg


Cant have led with out mounting grommets!

P1030053.jpg


This is for me for my personal use :)

P1030054.jpg
 
Ok here i go, slow but sure.

The test panel. Just to see if i can do it or sublet it out to a body shop for paint.

P1040055.jpg


Zee paint

P1040056.jpg
 
Sorry for the double/triple post.

Well beings i haven't touch a can of spay in 12yrs, i think it turned out rather well.

2 coats of primer and good coat of finish!
What do you think?

P1040059.jpg

P1040060.jpg
 
Looks very nice and (somewhat) shiny :) I'd say you've done a great job ^_^
 
Well i got the fans wired and sleeved, so you should not see any wires. :)

P1110080.jpg


Now for the hard part, i hope i remember how it goes back together.

P1110081.jpg


P1110082.jpg


Off to go paint the small stuff. :)
 
Rad and fans done!

Looks pretty cool.
Yes the theme is red, but trying to paint the rad would of been a pain in the arss.

P1110083.jpg

P1110084.jpg
 
4 red 3v LED's wired and ready, other then i ran out of heatshrink!
These will be running on my 3.3v line on my PSU.

P1110085.jpg
 
Ok so i change my mind again!!

Instead of repairing the hole that i made a while back for the 24 pin connector.

I have decided on getting some Diamond plate tape.
This will line the mobo tray were all all those useless holes are.
Yes the mobo stands are quit high on my case, so i should have plenty of clearance.
It will also create a nice effect inside the case with the red LED's

So that was my useless thought for the day!
 
Well its been awhile since i posted, but making some slow progress.

I'm looking for the clean affect and as you can see here, its clean! :)
Hopefully you wont see any of this when I'm done.

P1170102.jpg

P1170103.jpg


Here I'm thinking of adding 2 x 4 pin 12v molex connectors for some thing that may pop up in the future.
Just so i have a power source in the case, rather then trying to access more in the back.

P1170104.jpg


More later :signs013:
 
Have you tested how loud the slipstreams are? I'm sure they are due to the air they push, but im wondering :cool:

Awesome build log so far, keep it up.
 
TY guys,

No i haven't tested them yet, but they are the 110CFM version at Petra's
These will also be on the black Kaze Master Ace fan controller withe the blue LED display.

Thank you again, hope to be back soon with some more pics of my progress.
 
Decided i am going to add some power outlets to the bay.
This way if i need power for something I'm adding, it's there :)
As you can see it will have a nice fit with that grommet.

P1180106.jpg

P1180105.jpg

P1180107.jpg


Enjoy :D
 
Well today i started some thing new.
I ordered a grill for the top of my case, being i didn't use any of the ports and such up there.
As you can see the case grill is a tad larger then the grill i am adding, but i have thought about that. Just have not set it in stone yet.
And yes it will be black as well.
So here is some more work pics!.
Enjoy

P1200001.jpg

P1200002.jpg

P1200003.jpg

P1200004.jpg
 
NIce to see someone modding an armor, im hoping to do mine as soon as cashflow increases.

looking good sofar :)
 
Look what i got today.
1yrd of diamond plate tape!

I sure hope this gives me the affect I'm looking for.
Suppose to line the mobo tray to cover all those holes and such.
Yes its thin enough. Just got to make sure it doesn't curl up on me at a later date :rolleyes:

P1210005.jpg

P1210006.jpg
 
are you putting a tri rad up top under that grill? if so where are you putting the psu, doesnt look like like both would fit :confused:
 
are you putting a tri rad up top under that grill? if so where are you putting the psu, doesnt look like like both would fit :confused:

No, i just did the top because that looked ugly the way it was.
I have room up front in the bays to mount it!
A few pics back you will see the fans mounted to it.
 
And of course the mess now!!
The funny thing is, i know were every is :signs013:

Bad news, it's raining here so i cant do any painting :(

P1220007.jpg
 
Ok so i cleaned up my desk :rolleyes:

Today i started the paint work on case.
It will be a slow process do to weather here. (Cold and wet)
2 coats of primer so far.
Total of 3 coats of primer.

P1250015.jpg


1st coat of black :)

P1250021.jpg

P1250022.jpg
 
CAN YOU SAY FAIL :eek:

Apparently i had some moisture on the case on the second coat :(
To cold and wet here, time out time for paint.

I'm hoping i can just get some fine steel wool to feather the paint enough for the third coat. Just a couple of spots like this.

P1260023.jpg
 
Ouch, yeah I'm gonna assume you're the same as me in that I am always holding myself back from rushing my paint jobs. I get sooooo anxious that I don't want to wait for better conditions, etc. to get at it!
 
Delays delays delays,

Sanded down infected areas last night and re-primed.
The primer is now infected. :(

Thats it, I'm going to strip the paint and have the cage sand blasted.
It's going to cost me, but at least i will have a clean cage.
 
Ok so with Burns, "from BPC" suggestions :D


Stripped top piece of case to metal.
Cleaned with warm soap and water, prepped with Lacquer Thinner.

P1310030.jpg


1st coat of primer done.

P1310031.jpg


Prey for me guys :)
 
*preys on lohoutlaw*

Sorry, couldn't help it :D

Good luck with the painting ;)
 
I gave up after several attempts.
Finished sandblasting all pieces "had to tear down do to size"
OK so the case is at the body shop for painting.
Got a box of 100 rivet and need to pick up some black touch up paint to paint rivets black.

THANK YOU CORBY AUTO BODY for the contribution to my build.
 
Ok so after figuring out how to rip this card apart.
Here are some follow up pics of what i have done so far!

P2140055.jpg


Had to rip the sticker off the back of the card, what a mess.
Removed all 10 screws + the 2 back plate screws. Pry so slightly but gently to get the cover off the card.

P2140056.jpg


What you will see after removing 1st cover, is the 2 screws left on the card. Which secures the fan side of cover.
Carefully remove these screws and gently pry other cover off card. It was a bit tough being the goop was cured very well.
Also remember to unplug fan after removal.

P2140057.jpg


So as you may think that this is a glare on the pic, it's not.
This would be dirt/dust build up after 6 months of use. What a mess!

P2140060.jpg

P2140061.jpg


After a little cleaning and setting some of the thermal pads.

P2150062.jpg

P2150063.jpg


Well it seems i have ran out of AS5 :(
Must wait till they open to complete the project.
 
So i got a bit further today.
It turn out just the way i wanted :)

P2150067.jpg


P2150068.jpg


I got a small amount of soldering to do before i slap the water in :th_alc:
 
Ok so here i was almost done with the wiring.
Worked fine in the beginning.
Then a huge decrease in power. From bright and shinny to dimmed lights and then dead.

I have checked the voltage each time i did some work on it and it seemed fine.
But then again the puppies peed on it last week as well. Hence checking the voltage.
So either i screwed up or the dogs did it! Not sure.
On hold till i scrounge enough funds to buy a new PSU

So in a way i am thankful and glad it died now instead of at boot.
I would of hated to fry my $300.00 board or CPU.

Peace out until then :)
 
Back
Top