Yip - modding fever run amok!
No - actually i was very disappointed in these mice.
And that was after thinking they would be far better than my disastrous Corsair M90's.
Some history for those interested - else skip to the pics please.....
The Corsair Mice:
Buttons too far apart and the "overlapping" or 'layout' just did just not work for me.
But it was the pathetic software that killed it for me. Firmbooting it ever so often to try program the darn things.....
......and then the MMO 7 came on the scene....
The RAT 7 MMO:
It has integrated an idea i've been musing about for at least 6 months - a HAT.
So when a friend and myself saw these we just knew we were buying them.
Initially the mouse felt like my other RATs(7's & 9's).....which is pretty good [with pinkie rest]
However - although the HAT button has lots of potential, it was just too darn hard to use all in 4 directions.
And when one did manage to use them the mouse occ. tilted backwards and/or required a complete repositioning of the hand.
A big NO NO in FPS games.
The only other gripe was really with the most idiotic things i have ever seen - lock buttons on the L + R buttons.
And NOT able to disable those locks, NOR being able to alter or remap them either is insult after injury.
It must be a tiny fraction of people who even use those locks - i've Google'd and searched for reviews and reasons and none have come up.
The MOD
So in this MOD we decided to fix the faults we could - or at least improve upon the standard model. And first was the HAT.
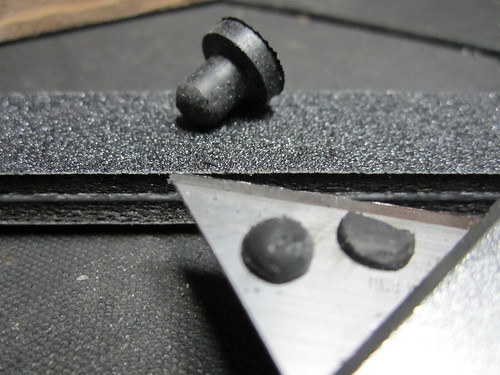
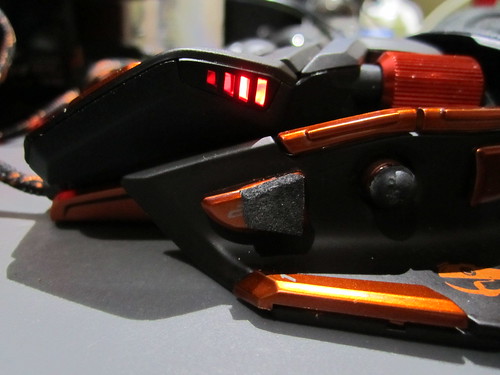
Simply gluing a small rubber nubbin onto it was an amazing improvement.
In the first pic you can see the rubber tip on the hat button. [ignore the tiny nipple on the end - that got sanded off]
The rubber was the tip cut off from an automotive grommet which had a 'stalk' sticking out the one side with this rounded tip at the end.
So look around for anything that has a suitable rubber tip to use. Fairly rigid or hard rubber. Not too soft!
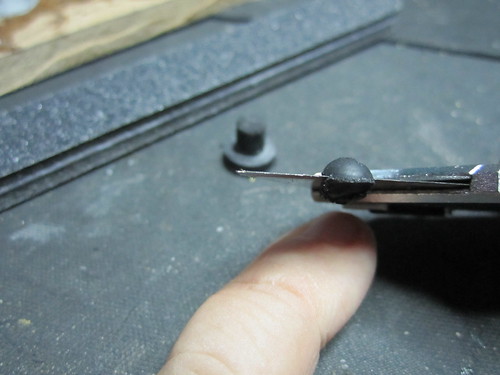
Next part - to ease the use and accessibility of the front button we added a tiny strip of adhesive backed foam.
The hat mod above did not really alter this buttons functionality very much - but the 3mm thick piece of foam made it so easy to click - just a 'tip-of-thumb-nudge'.
Ps - in above pic the front button foam is 'missing' - this pic must be from one of the other mod sequences - we usually added the foam last...
Major Mod;
Those two mods are fairly simple and quick.
But the next part was where we move the whole left button assembly forward,
So only do this if you are comfortable with tweaks and mods and voiding warranties, and: disclaimer - Do this at your own responsibility.
The LA [left assembly] is screwed down with a single screw - just below the scroll button. It has a matching washer with two guide holes and a 90 deg nib to locate it properly.
1) Remove the screw. Once the screw is removed one can just pry the LA module off the seat - but keep in mind it remains attached to the main body via a short cable.
2) Then - and this step is probably not critical - but it helps a LOT - sand off the screw support - see below.
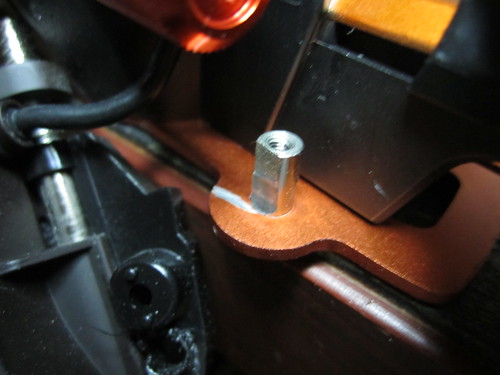
ouch - the dremel did just nick the orange base. meh - it gets covered.
And in case some notice the plastic housing hanging below the screw support - and notice the hole next to the original support.
That was my first try and i gently used a soldering iron the make a snug hole.
But it pulled the LA too close to the main body and occ it snagged the scroll wheel.
Instead we did like below - making a notch or cut-out wit ha square end matching the sanded screw support.
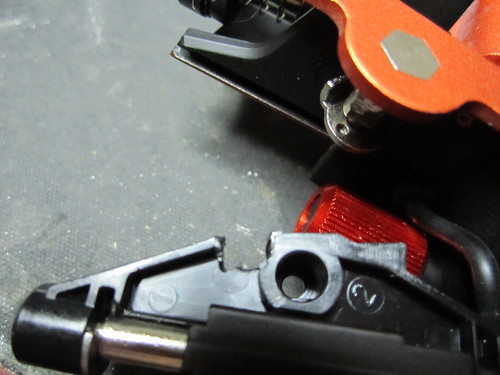
And here is a pic of it fitted with the original screw nearly fully tightened.
Notice the "slot" i made using a soldering iron tip - to locate the original washer unit's 90 bend tip.
When i tighten the screw down the washer 90 angle bites into that 'slot'.
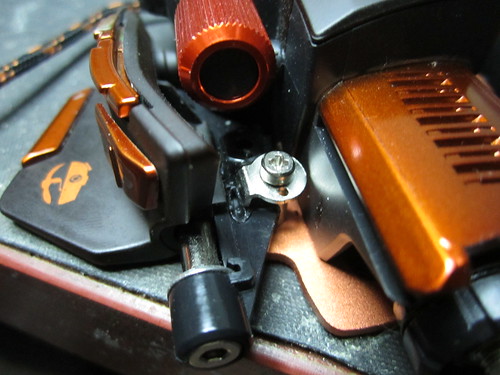
The screw alone holds the LA quite firmly just on its own - but it can swivel or pull out if one is not careful or after prolonged use.
So to make sure there is no such problem we used a 5 minute epoxy to glue over, behind and in front of the screw.
NB - the whole LA section can still adjust!
So when you glue the screw be sparing and make sure glue does not spill over.
Below you can see i used a bit of electricians tape to cover the gap on the underside.
That stopped the glue from running out, and gave it a smooth finish.
But it 'nearly dribbled onto the gear screw - so try keep that in mind.

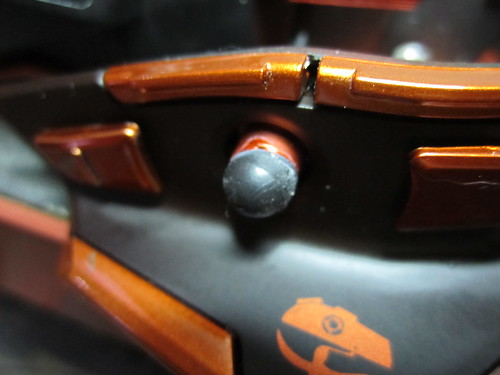
Above pic gives a nice view of the overall 'angle' of the LA - it is nearly parallel, and the "old" mounting socket can be seen just just sticking out.
So the LA can still be adjusted - but with the new fwd hole or mounting - we thus have an extra 1 cm fwd travel that we felt was necessary
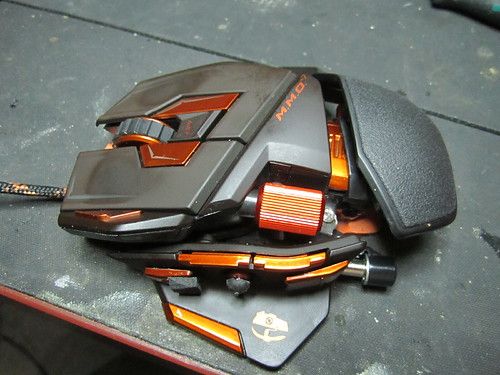
And below is another shot of all three mods in one....
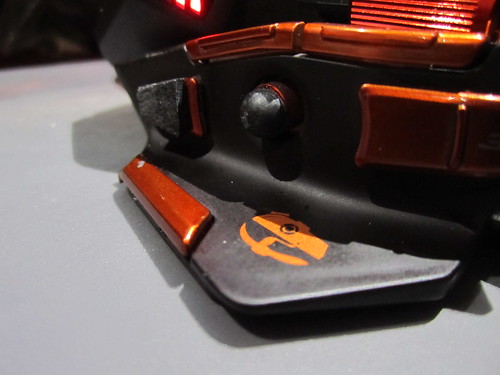
and another ...
Moving the LA was imperative to my tastes (and my friends)
So before doing it first see how you relate to the standard fixture.
We felt it was just too far back, and spreads open when adjusting fwd.
Whereas the mod keeps it tracking parallel and feels so much better wrt the thumb.
As a matter of interest - we did try a very short HAT button extender - but it was not nearly as easy and nice as the one in the pics (about 4 mm)
We used super glue to fit the rubber.
And the front button is self adhesive foam - easy to remove.
.
No - actually i was very disappointed in these mice.
And that was after thinking they would be far better than my disastrous Corsair M90's.
Some history for those interested - else skip to the pics please.....
The Corsair Mice:
Buttons too far apart and the "overlapping" or 'layout' just did just not work for me.
But it was the pathetic software that killed it for me. Firmbooting it ever so often to try program the darn things.....
......and then the MMO 7 came on the scene....
The RAT 7 MMO:
It has integrated an idea i've been musing about for at least 6 months - a HAT.
So when a friend and myself saw these we just knew we were buying them.
Initially the mouse felt like my other RATs(7's & 9's).....which is pretty good [with pinkie rest]
However - although the HAT button has lots of potential, it was just too darn hard to use all in 4 directions.
And when one did manage to use them the mouse occ. tilted backwards and/or required a complete repositioning of the hand.
A big NO NO in FPS games.
The only other gripe was really with the most idiotic things i have ever seen - lock buttons on the L + R buttons.
And NOT able to disable those locks, NOR being able to alter or remap them either is insult after injury.
It must be a tiny fraction of people who even use those locks - i've Google'd and searched for reviews and reasons and none have come up.
The MOD
So in this MOD we decided to fix the faults we could - or at least improve upon the standard model. And first was the HAT.
Simply gluing a small rubber nubbin onto it was an amazing improvement.
In the first pic you can see the rubber tip on the hat button. [ignore the tiny nipple on the end - that got sanded off]
The rubber was the tip cut off from an automotive grommet which had a 'stalk' sticking out the one side with this rounded tip at the end.
So look around for anything that has a suitable rubber tip to use. Fairly rigid or hard rubber. Not too soft!
Next part - to ease the use and accessibility of the front button we added a tiny strip of adhesive backed foam.
The hat mod above did not really alter this buttons functionality very much - but the 3mm thick piece of foam made it so easy to click - just a 'tip-of-thumb-nudge'.
Ps - in above pic the front button foam is 'missing' - this pic must be from one of the other mod sequences - we usually added the foam last...
Major Mod;
Those two mods are fairly simple and quick.
But the next part was where we move the whole left button assembly forward,
So only do this if you are comfortable with tweaks and mods and voiding warranties, and: disclaimer - Do this at your own responsibility.
The LA [left assembly] is screwed down with a single screw - just below the scroll button. It has a matching washer with two guide holes and a 90 deg nib to locate it properly.
1) Remove the screw. Once the screw is removed one can just pry the LA module off the seat - but keep in mind it remains attached to the main body via a short cable.
2) Then - and this step is probably not critical - but it helps a LOT - sand off the screw support - see below.
ouch - the dremel did just nick the orange base. meh - it gets covered.
And in case some notice the plastic housing hanging below the screw support - and notice the hole next to the original support.
That was my first try and i gently used a soldering iron the make a snug hole.
But it pulled the LA too close to the main body and occ it snagged the scroll wheel.
Instead we did like below - making a notch or cut-out wit ha square end matching the sanded screw support.
And here is a pic of it fitted with the original screw nearly fully tightened.
Notice the "slot" i made using a soldering iron tip - to locate the original washer unit's 90 bend tip.
When i tighten the screw down the washer 90 angle bites into that 'slot'.
The screw alone holds the LA quite firmly just on its own - but it can swivel or pull out if one is not careful or after prolonged use.
So to make sure there is no such problem we used a 5 minute epoxy to glue over, behind and in front of the screw.
NB - the whole LA section can still adjust!
So when you glue the screw be sparing and make sure glue does not spill over.
Below you can see i used a bit of electricians tape to cover the gap on the underside.
That stopped the glue from running out, and gave it a smooth finish.
But it 'nearly dribbled onto the gear screw - so try keep that in mind.
Above pic gives a nice view of the overall 'angle' of the LA - it is nearly parallel, and the "old" mounting socket can be seen just just sticking out.
So the LA can still be adjusted - but with the new fwd hole or mounting - we thus have an extra 1 cm fwd travel that we felt was necessary
And below is another shot of all three mods in one....
and another ...
Moving the LA was imperative to my tastes (and my friends)
So before doing it first see how you relate to the standard fixture.
We felt it was just too far back, and spreads open when adjusting fwd.
Whereas the mod keeps it tracking parallel and feels so much better wrt the thumb.
As a matter of interest - we did try a very short HAT button extender - but it was not nearly as easy and nice as the one in the pics (about 4 mm)
We used super glue to fit the rubber.
And the front button is self adhesive foam - easy to remove.
.
Last edited: