• Some users have recently had their accounts hijacked. It seems that the now defunct EVGA forums might have compromised your password there and seems many are using the same PW here. We would suggest you UPDATE YOUR PASSWORD and TURN ON 2FA for your account here to further secure it. None of the compromised accounts had 2FA turned on.
    Once you have enabled 2FA, your account will be updated soon to show a badge, letting other members know that you use 2FA to protect your account. This should be beneficial for everyone that uses FSFT.

Project: SuperCube

Petra

Gawd
Joined
Jul 8, 2003
Messages
640
Last Updated: 4/18/05 - 11:20PM PDT

Hey everyone! To start things off, I was kinda hesitant about posting this (especially since I didn't bother to make a worklog for what I did to my gaming rig most recently), however, I figured 'eh what the hell...' I'm a computer geek (meaning all platforms/operating systems/hardware) and I'm pretty sure that quite a few of you guys are the same way. So, keeping that in mind, here's what's going on...

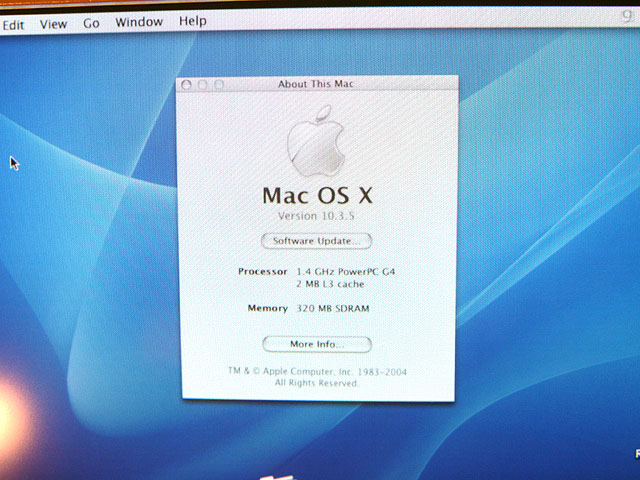
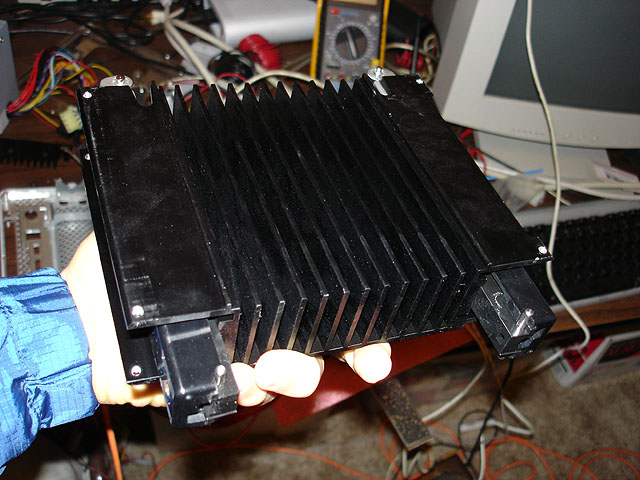
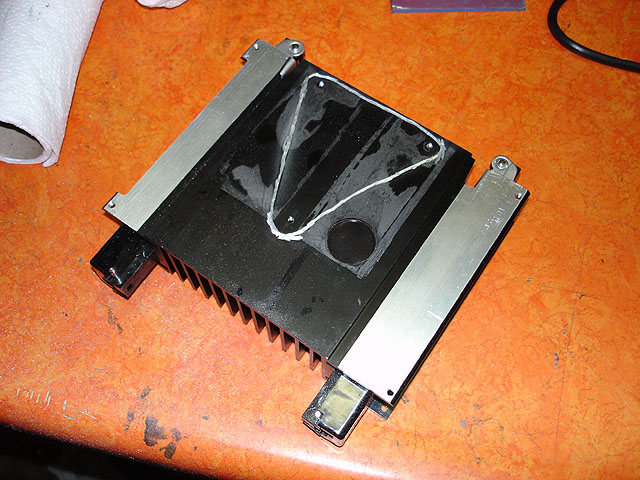
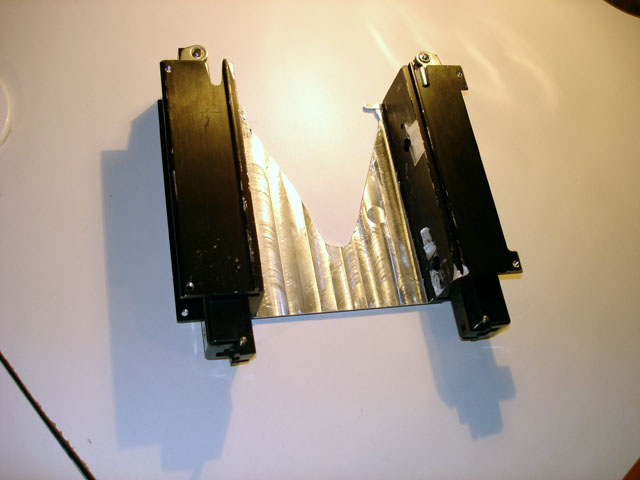
History: Okay, quick bit of history... Basically, the G4 Cube has intrigued me since its release several years ago. Small case, totally silent (aside from HDD noise), cool looking, etc. Last month I spotted an 'incomplete' Cube on eBay for a reasonable price (was just missing its HDD and the HDD mounting hardware) so I bought it and began to plot and scheme. Getting Apple parts cheap was no big deal because I used to work as a tech at a service & repair place that specializes in Macs.

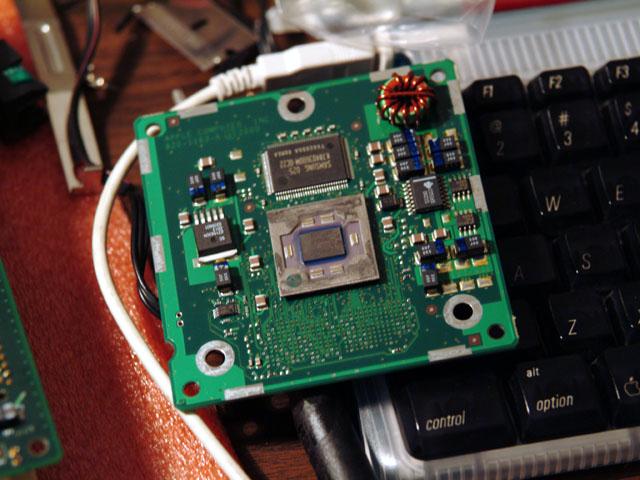
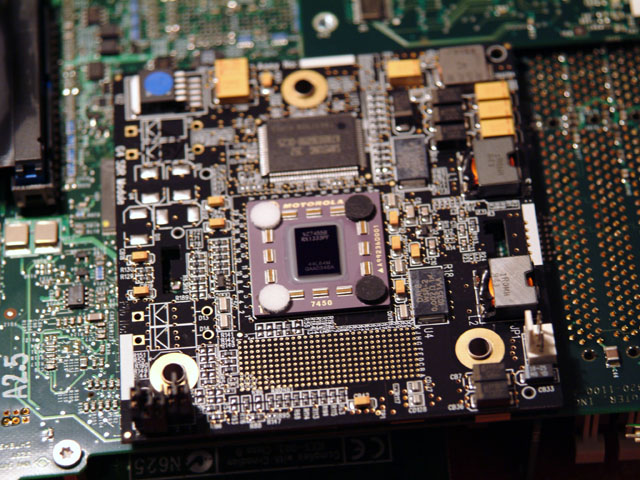
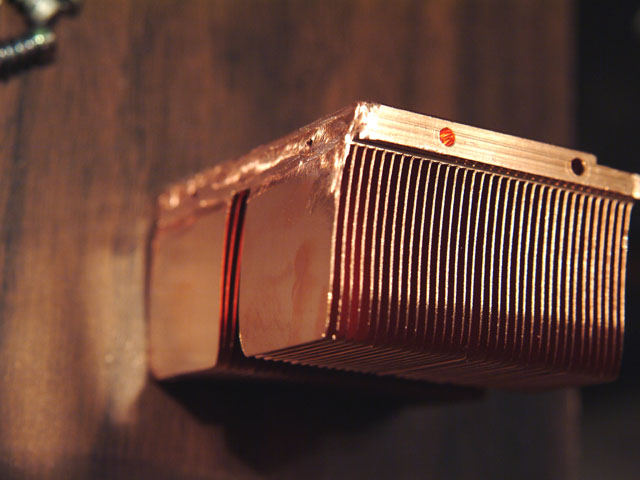
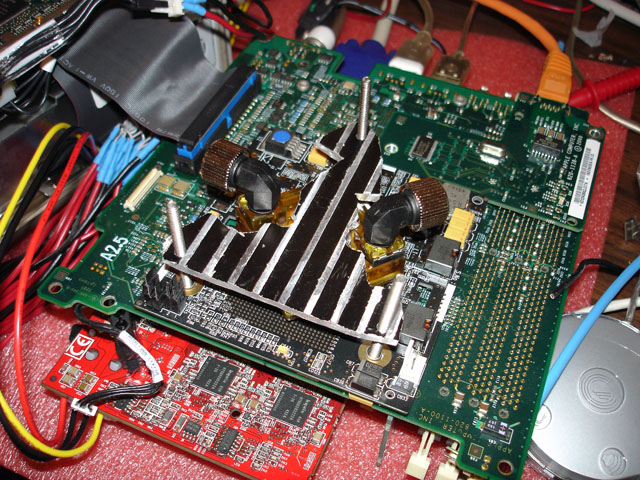
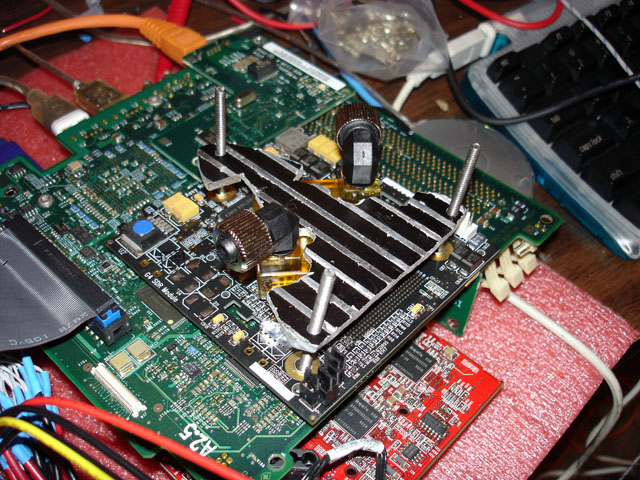
The Project: Essentially, I'm planning on "modernizing" this particular Cube while still keeping it in its original enclosure--my final goal being a dual 1.4-1.5GHz (or higher) G4 Cube with a 120GB HDD, 2x DVD-RW, 1.5GB RAM, and a Radeon 9800Pro. Actually achieving this will be rather interesting primarily due to the power and cooling limitations of the Cube's design (If you are familiar with the Cube, then you probably know about the VRM (Voltage Regulator Module) that converts the 28v from the external PSU to the 12v, 5v, and 3.3v that most of the components use. Put too much load on it and it'll fry, get it too hot and it'll fry. In both cases, when the VRM fries, it usually takes the HDD and optical drive along with it...and sometimes other stuff too.) The project will be broken into 2 phases... by the end of phase 1 the Cube should have its VRM replaced with a standard mATX PSU to work in conjunction with the Cube's standard PSU, 120GB HDD, 2x DVD-RW, a temporary (single) 1.4GHz PPC 7455 G4, and a Radeon 9000Pro or something. I could go into more detail right now but I don't want to bore you guys with a bunch of text right now... I can just explain stuff as I go along. :rolleyes:

The Victim:
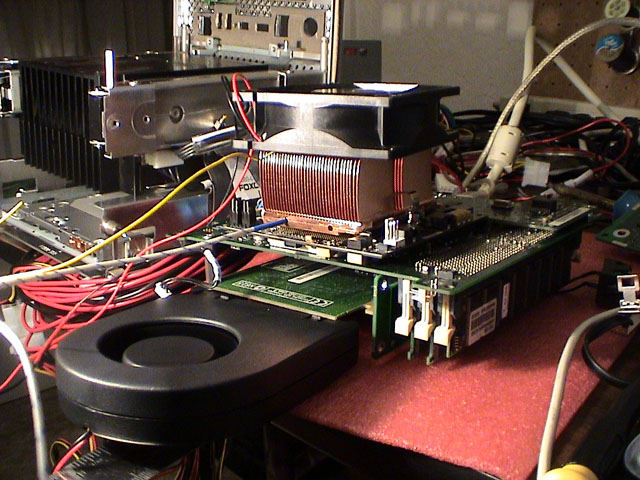
Alright, here's the Cube that's to be operated on! I've already put in the HDD and the DVD-RW but it's all gonna have to come out before I can make some modifications to the chassis.
trinityCube.jpg


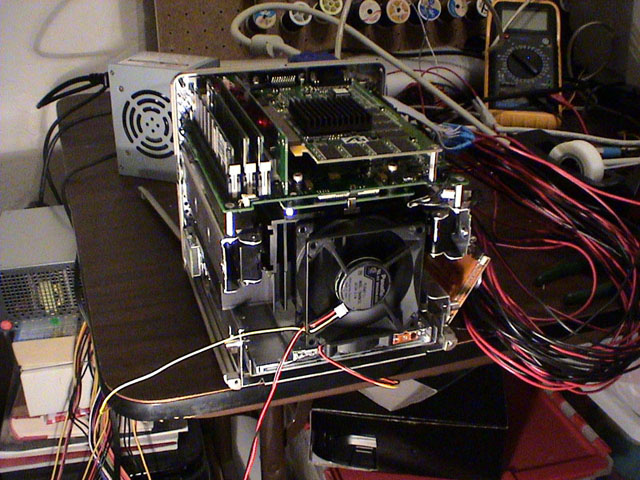
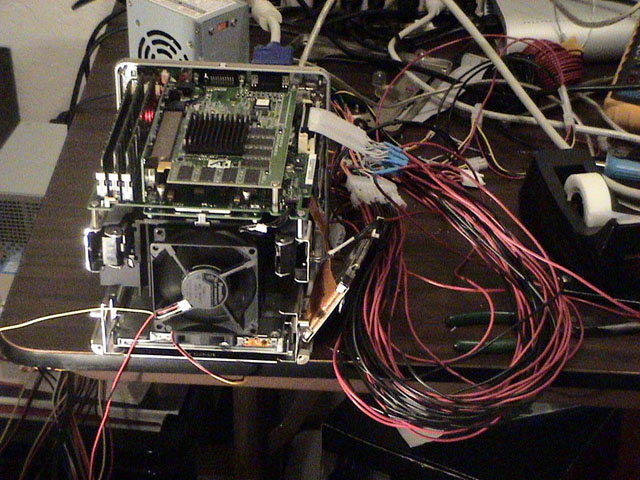
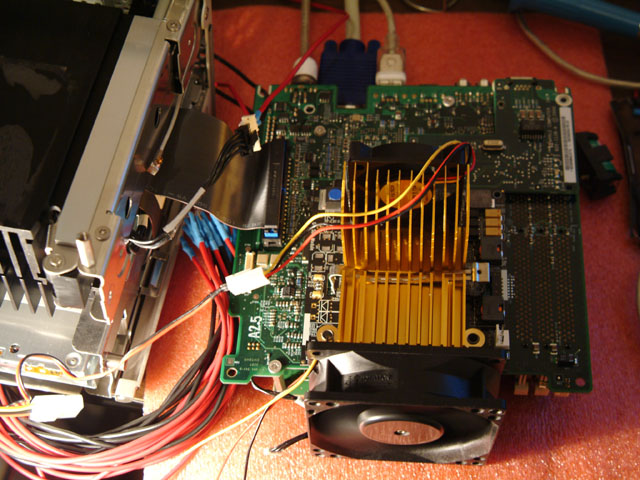
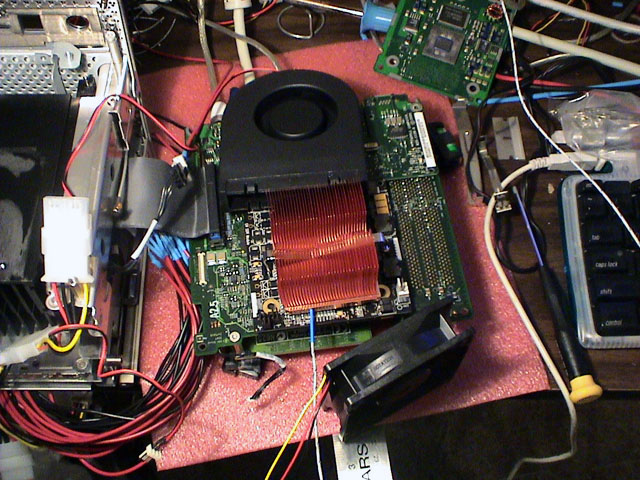
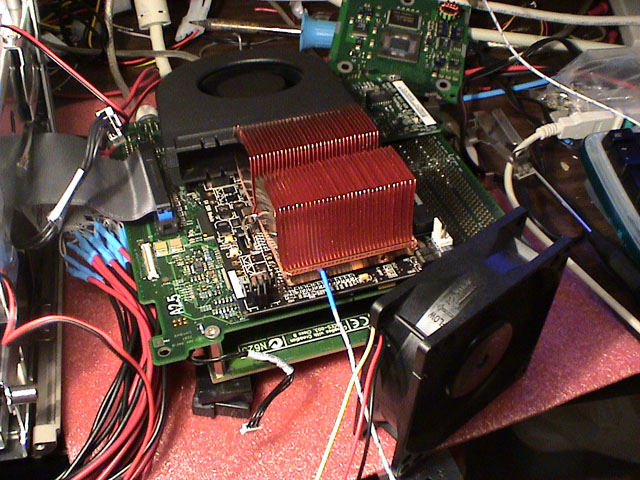
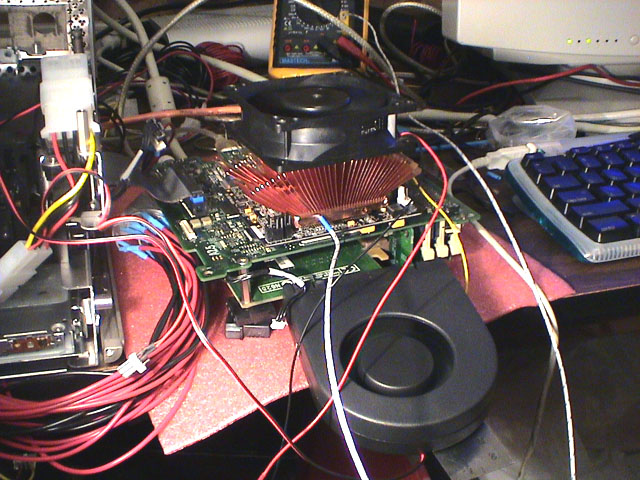
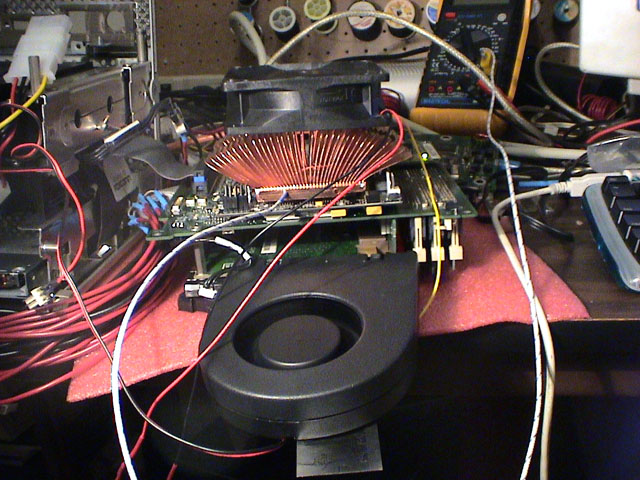
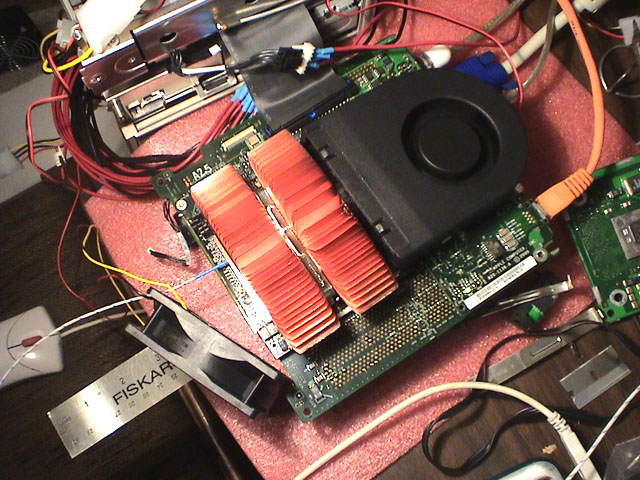
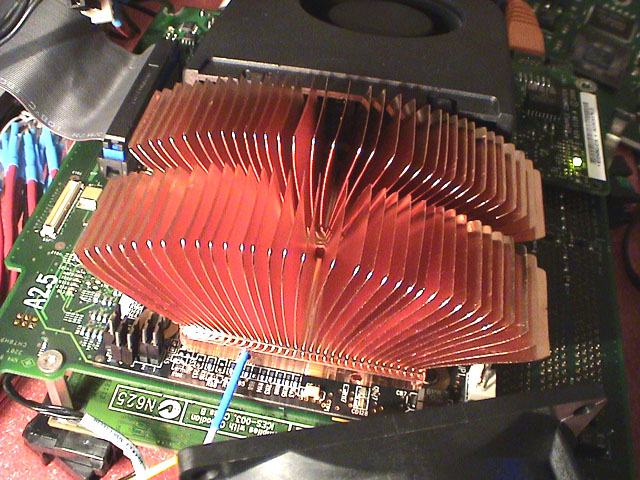
I've already started the mATX conversion (mainly to test it and stuff) so here's a quick rundown of what's been done and what's currently in progress. Also, please excuse the crappy pics... I don't have access to either of the S2 Pros at the moment so I'm stuck with this shitty Sony DSC-W1.

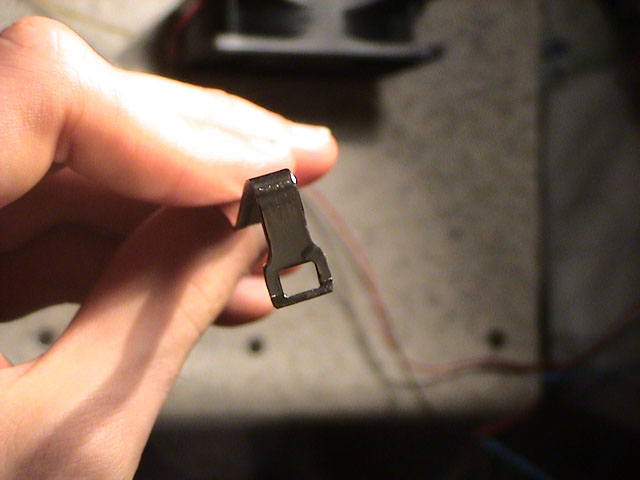
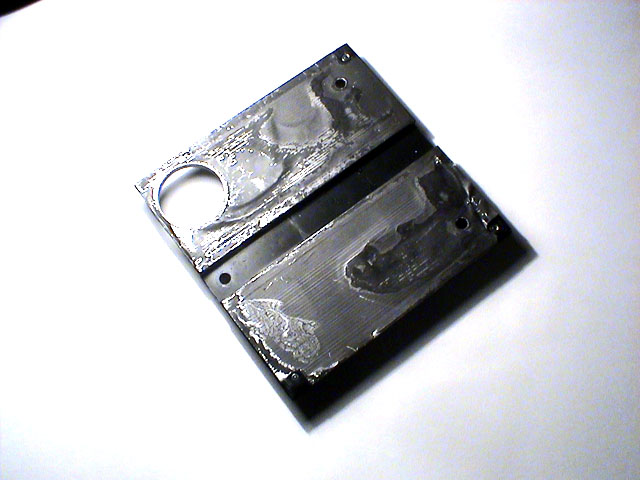
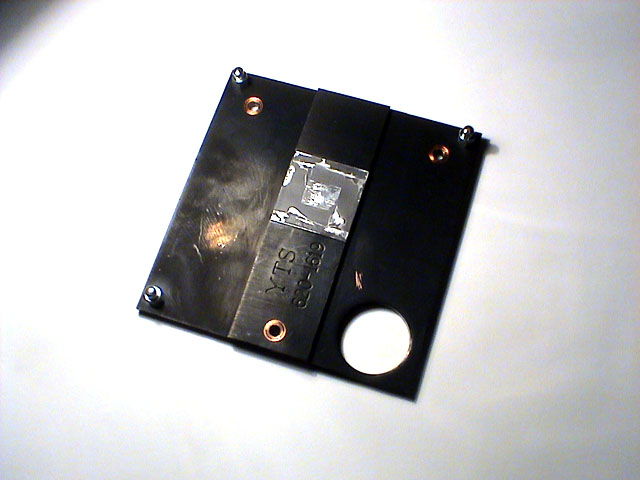
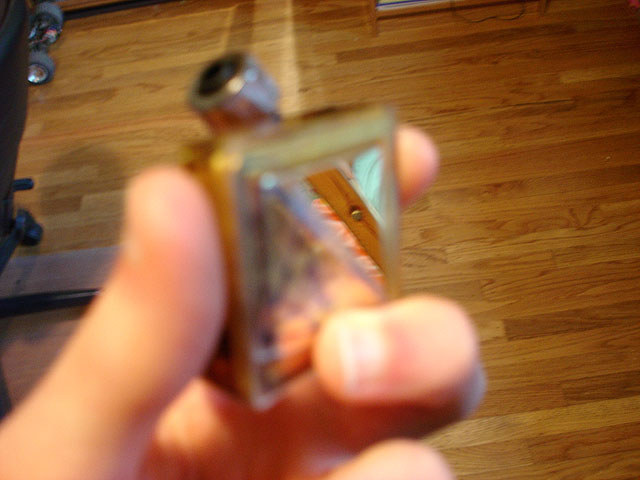
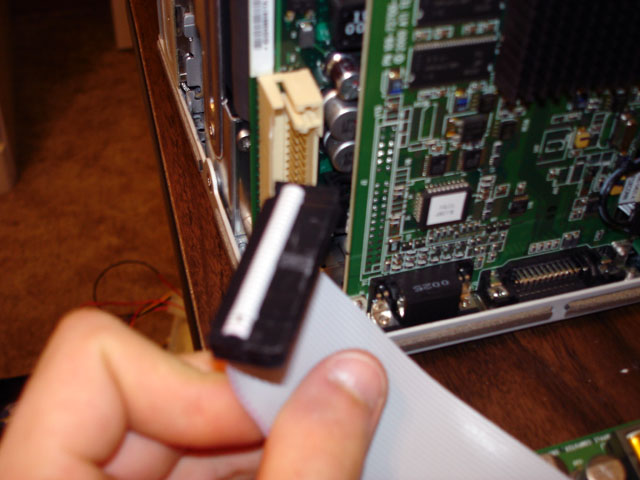
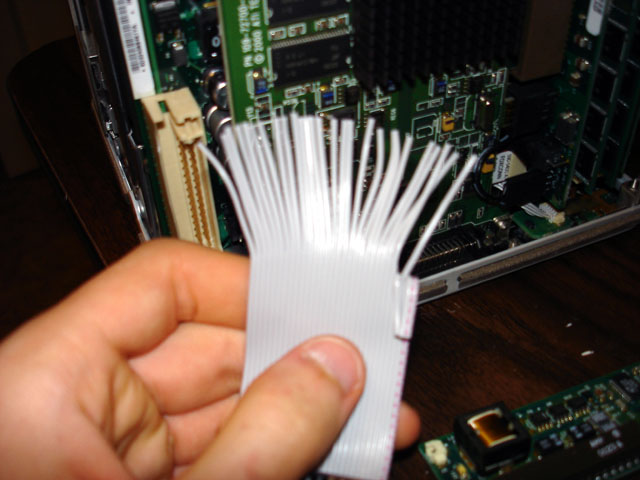
First, I started by cutting off the key tab thing on my 30 pin ribbon cable:
ribbonCon.jpg


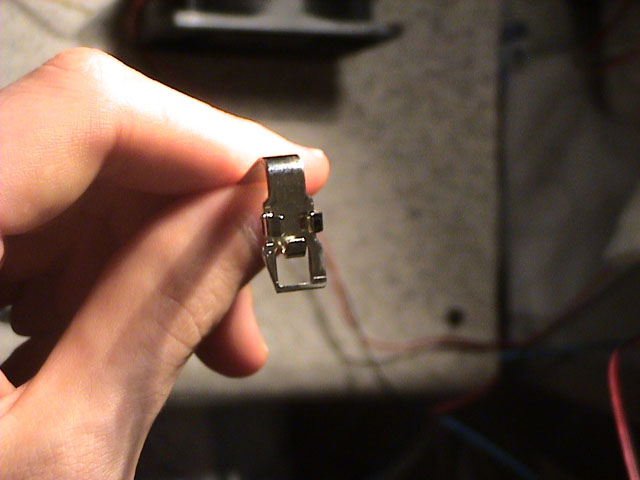
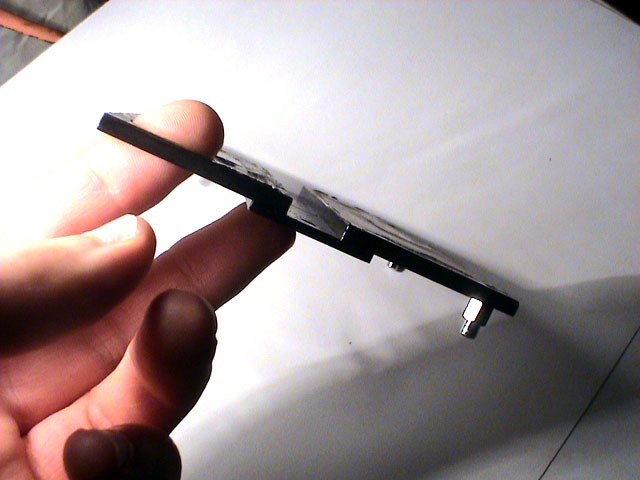
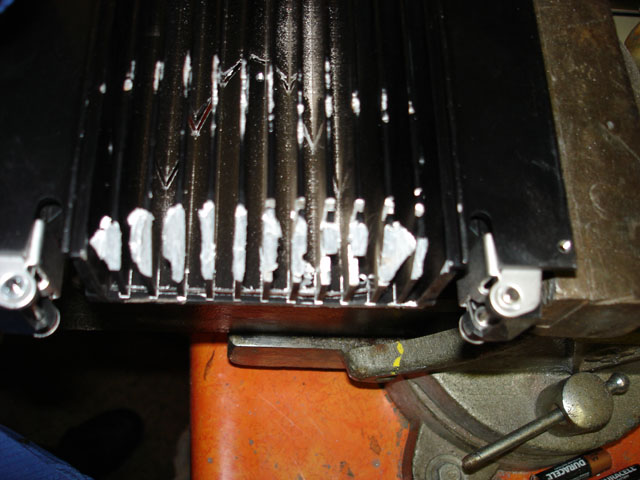
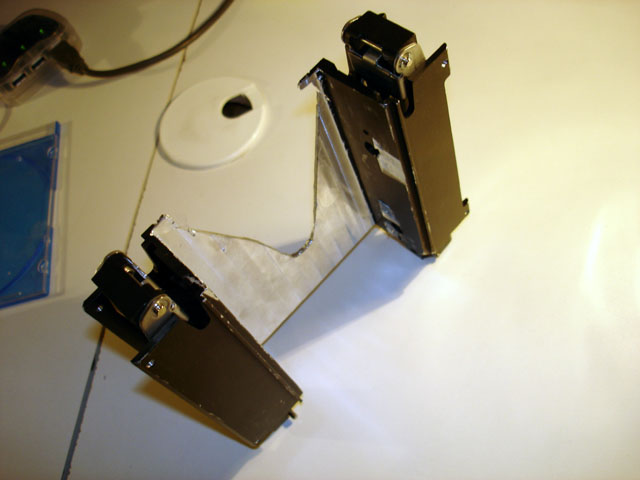
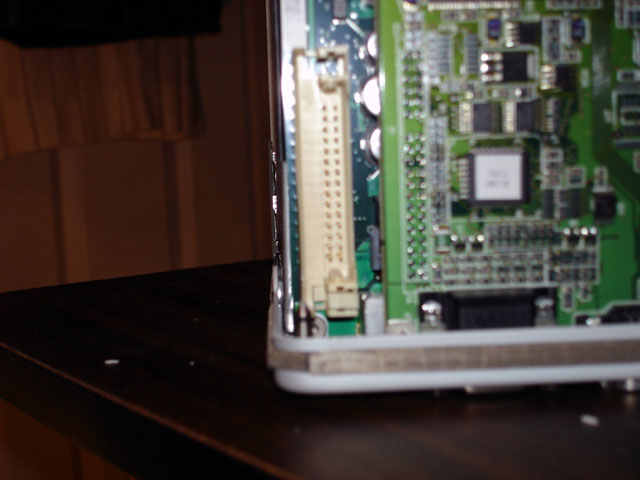
Then I shaved down the two little nubby things inside the socket on the mobo that the VRM normally sits in so that my 30 pin connector would actually fit in there properly:
moboPinIn.jpg


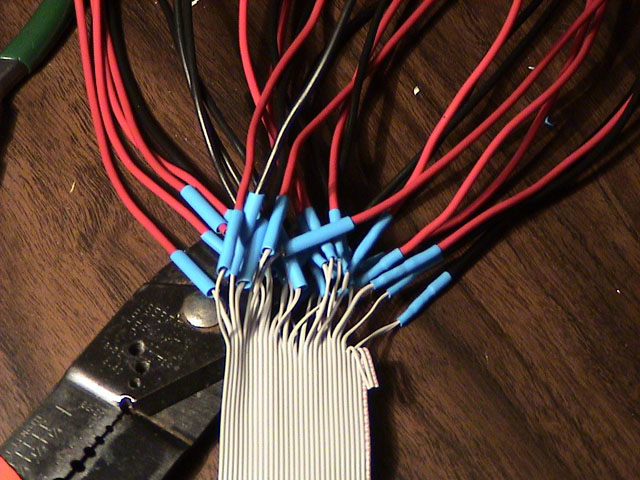
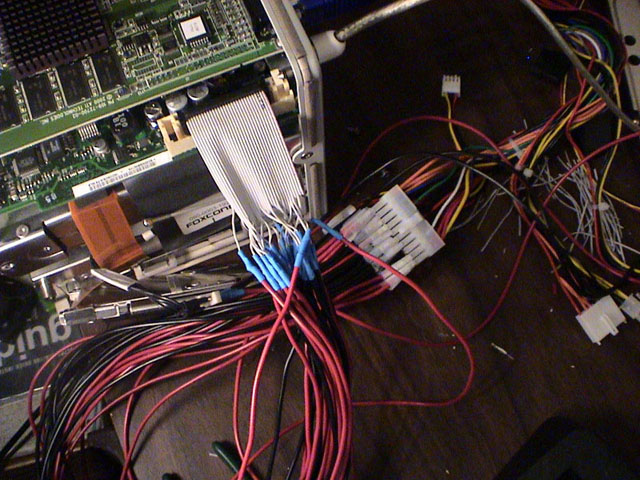
Next I cut, separated, and stripped (not shown) the needed wires on the ribbon cable:
ribbon1.jpg


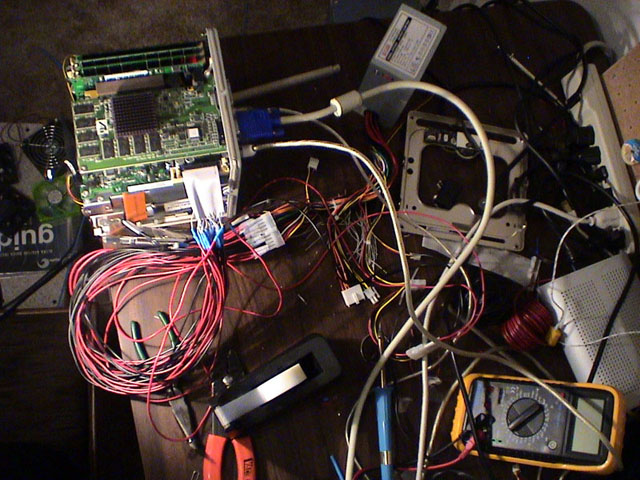
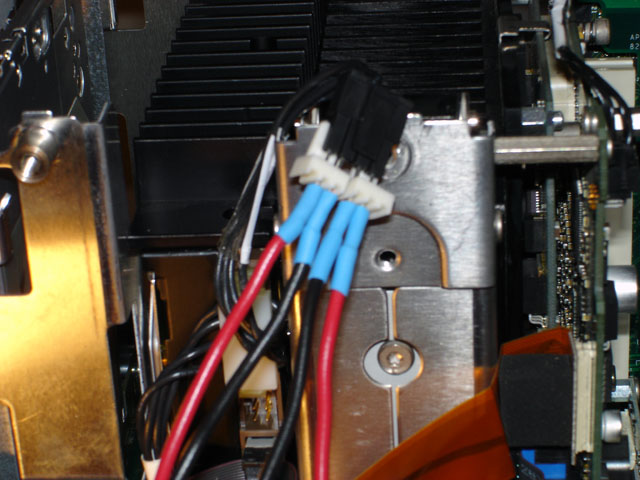
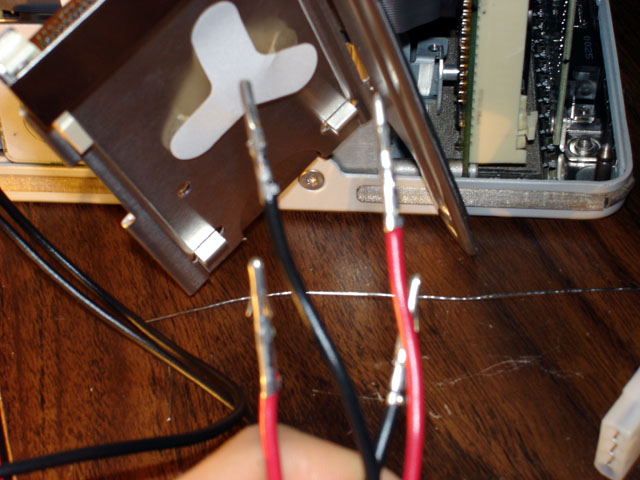
After that, I began making the wiring setup to power the HDD and DVD-RW out of a couple of male 3 pin connectors, some wire, and some male molex pins:
perifConn1.jpg

pins1.jpg


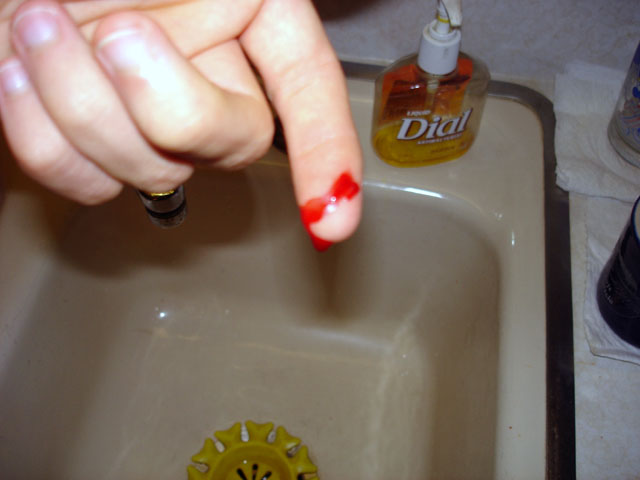
While I was pounding pins out of a male ATX connector (like the one you would see on a mobo) with my T10 Torx and a set of wire strippers (used as a makeshift hammer), I managed to get one of the pins stuck in the connector so I decided to use some pliers to pull it through... However, when the pin came out, it managed to make a short but rather deep gash in my left index finger that actually started bleeding enough to drip all over the place. Eh, minor wound... I usually document the first injury sustained while working on a project. (Hmm.... the color is a little off... damn camera.... too lazy to correct it in Photoshop...)
cutFinger.jpg


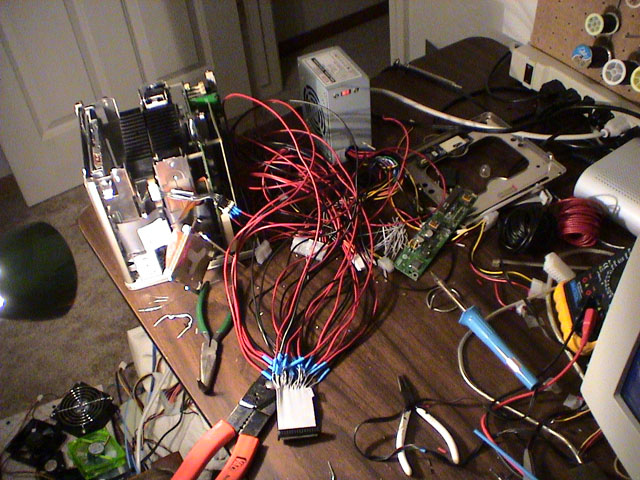
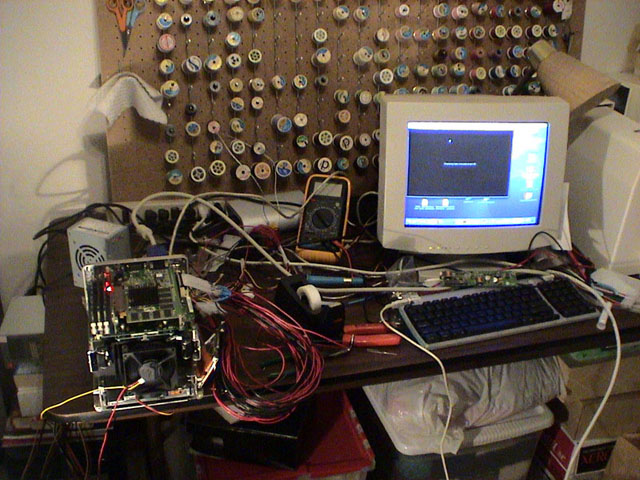
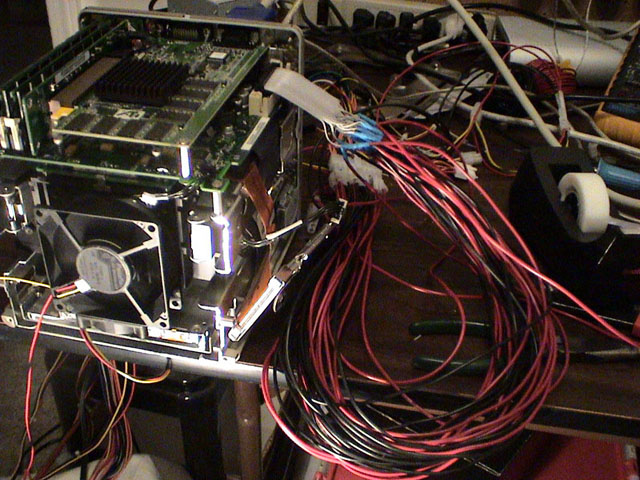
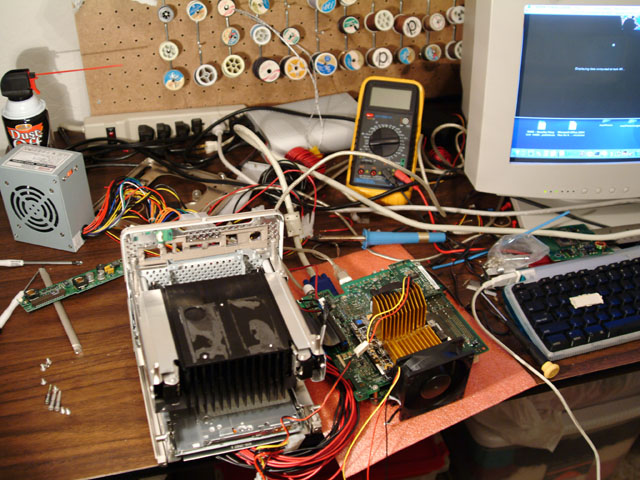
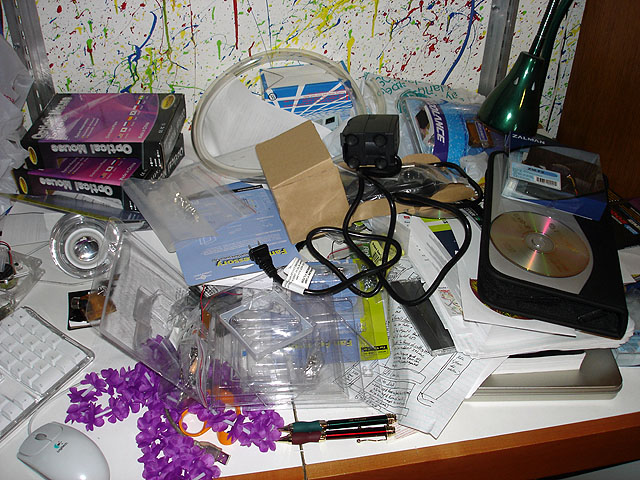
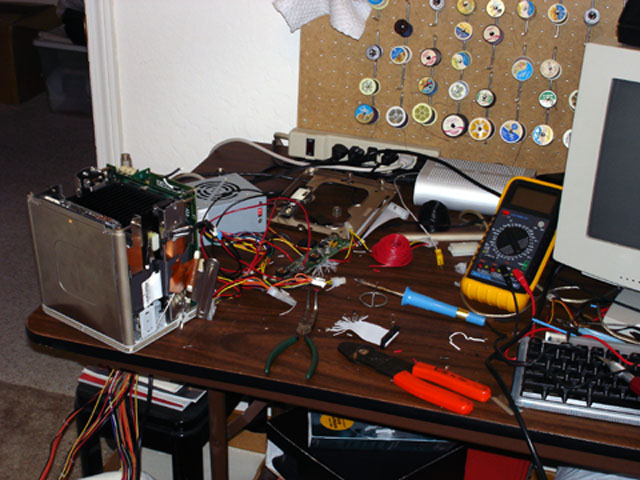
The tiny desk I'm working on for now:
desk1.jpg


The whole idea here is to make the mATX PSU conversion easily reversible, which is why I'm going through all of the extra trouble to make connectors and stuff rather than just directly soldering things. Anyway, more to come... once I make some more progress :rolleyes: :D
 
looks like that is gonna be fun. now i wanna put a mATX PC in one of those... too bad they don't make cheap mATX x86 duallies... that'd rock:D

good luck!
 
Sorry for the total lack of updates lately but the last several days have really been hell for me and I've had very little time to do much of anything (including work on this). However, I should be able to put up a decent update with some notable progress within the next day or so... as well as answers to some of the questions that I've gotten via e-mail about the project.

For now, I'll leave you with a few shots of what that 3" section of ribbon cable has turned into. (I still need to heat some of that heatshrink)
ribbon2.jpg

desk2.jpg
 
a red spidery mess of yuckyness? why not just use rounded cables?


pssssh... mac modding so silllly :p
 
XeRo_Dark said:
a red spidery mess of yuckyness?
Well, the white Flexo wire sleeving that I bought should do a pretty good job of cleaning up the mess...oh, and there are black wires in there too :p (gotta have some super easy way of telling the ground wires from the others ;) )

why not just use rounded cables?
Because this crazy mess of wires isn't going to be carrying data... it's going to be carrying power and, last I checked, rounded data cables don't use 18 gauge copper wire (3 inches of the thiner wire shouldn't really cause any problems but, since the total wire length is about 27 inches, standard ribbon cable wire for the full length of the power connector's wires is totally out of the question). The only reason that ribbon cable is in there at all is because I'm using it for it's 30-pin connector.


As a side note, I'm planning on having an update in the works for tomorrow night. :)
 
is that uATX power supply that powmax? Does yours smell funny when it's running? Mine does.. Pisses me off actually. There are some cool sites around that have 1u and uATX power supplies that are high quality and not too expensive (sub $40). If you want i can do a bit of digging and look around for you!
 
Igor, it's ALIVE!! MuHAHAHA! :D
aliveWhole1.jpg


That's right! It works! Woo-hoo! *ahem* Anyway, yeah, the photo above shows the mATX PSU VRM replacement being tested (running AltiVec Fractal Carbon for some medium load testing, incase you were wondering). Here are some detail shots:

aliveHail.jpg

aliveRight.jpg

aliveCloseRight1.jpg

aliveCloseWires.jpg

aliveFront.jpg


Sorry for the crappy pics but I'm stuck using the digi cam feature on my video camera for now. :( (The lens that I need to use for close-up work with the S2 had to be sent to Nikon for repair because it isn't focusing properly at certain ranges...again... and the little Sony DSC-W1 that I was using before went on vacation with my grandparents.)

Anyway, I haven't actually put the ATX and Molex connector on the pinned wires yet because I need to sleeve them first (I don't have the proper tools to remove the male ATX and Molex pins from the connectors without destroying the pins) which is why all of the pins are taped up and jammed into the PSU's ATX and Molex connector. Not a nice solution but good enough for testing :rolleyes: . I'm going through all of this pin and connector madness because I want to make the ATX PSU conversion easily removable and I want to make it so that I can plug any normal ATX/mATX PSU into the Cube without modifications being needed.

I'm pretty tired right now and I have work tomorrow so enjoy the pictures... I have a 3 day weekend coming up so I should be able to make some progress (that is, if I don't end up killing all my time reviewing the sticks of Crucial Ballistix that I just got in this afternoon). The next step for the SuperCube project will be totally disassembling the Cube, doing some chassis modding (mainly just an 80mm hole in the bottom to allow unrestricted airflow for the Panaflo 12L @ 7v that is going to be in the bottom of the Cube as an intake fan), modding the stock heatsink assembly to make way for the copper skived fin heatsink that I'm planning on using for the new CPU (the copper HS is from a Volcano 7+), and then comes cleaning up all of the wiring. Oh, and let's not forget the new video card...need to get that still... heh :rolleyes:

If you have any questions, just post 'em.

BTW, diredesire, yeah that PSU is the little 230w Powmax mATX and it does seem to smell a little odd if you get close to it. Usually I would never buy a Powmax PSU but this one was small and only cost like $20... definitely better than around $80 for one of those Shuttle SFF 250w PSUs, though.

*edit* I just noticed something... If you look at the first photo in this post, you'll see the Cube's VRM sitting just above the keyboard.
 
looks cool so far. Dual G4s make me sad :( wish you could fit a G5 in to one of those. Maybe with the G5 iMacs coming out the boards will be smaller.
 
Yeah. I haven't had any explosions from my PowMax either, but i've had some bad experiences with the brand... I've seen some Sparkle PSU's around the net that are decently priced...
http://servercase.com/miva/miva?/Merchant2/merchant.mv+Screen=CTGY&Store_Code=SC&Category_Code=1U+PS
http://servercase.com/miva/miva?/Merchant2/merchant.mv+Screen=CTGY&Store_Code=SC&Category_Code=Special+Power
Another good site was in that NES thread that i can't seem to find... Good luck anyways! progress is looking good :D
 
ok i just lost it.... whats with the IDE cable going to the power?
 
DRJ1014 said:
ok i just lost it.... whats with the IDE cable going to the power?

For starters, it's not an IDE cable (IDE cables are usually either 40-pin 80 wire or 40-pin 40 wire. This particular cable is a 30-pin 30 wire.)... That aside, I'm really only using it for its 30-pin connector. To put it simply, the connector that is attached to the DC/DC VRM board which usually is seated there is, for the most part, identical to the 30-pin connector on the end of that ribbon cable. By using a short section of the ribbon cable and its connector, rather than soldering the wires directly, I can more easily make this portion of the mod reversible and transferrable to other Cubes. Though, the ribbon cable also happens to bend around corners more easily than that big clump of 18 gauge copper wire does (which will allow me to run the large bundle of wires through the chassis on the CPU side of the mobo because the flat ribbon cable can easily make the bend around the mobo while still leaving clearance for a larger video card).

BTW, diredesire, thanks for the links but I think I'll wait and see how well this PSU holds up under the final phase 1 load before I go out and get a different one and, since the Cube will be able to use pretty much any normal ATX/mATX PSU, I have a lot to choose from. I'll probably end up taking this PSU apart and putting it into a nicer enclosure (with some mods) which more closely matches the style of the Cube and its standard PSU (though, I'll probably stick a Panaflo 12L (L1a) into it rather than keep its stock fan which is kinda loud).

I'm considering going for a partial disassembly of the Cube over the weekend just to do some load testing with the new CPU before I strip the whole thing down and start cutting....
 
Hey no prob, just wanted to let you know there are other compact options out there that don't have "Pow" in the name... ;D
That smell just irritates me, and i really wonder why it smells like that. I agree the supply fan is loud though. You're goign to have enough room in that sucker to fit a normal ATX PSU? Impressive.
 
diredesire said:
Hey no prob, just wanted to let you know there are other compact options out there that don't have "Pow" in the name... ;D
That smell just irritates me, and i really wonder why it smells like that. I agree the supply fan is loud though. You're goign to have enough room in that sucker to fit a normal ATX PSU? Impressive.
I think you totally missed the boat. The PSU will be external. Read the reply before yours and you'll see that he's going to transplant the standard ATX PSU into a more attractive casing. The cube isn't much bigger than a standard ATX PSU, so it'd be impossible to fit it inside.
 
OKANG said:
I think you totally missed the boat. The PSU will be external. Read the reply before yours and you'll see that he's going to transplant the standard ATX PSU into a more attractive casing. The cube isn't much bigger than a standard ATX PSU, so it'd be impossible to fit it inside.
ah, i seem to have glossed over that point when he started the project with a uATX PSU. hah.
 
Again, sorry for the lack of updates recently but I've been rather busy with some of my other random projects... Anyway, on with the pics and comments... heh

cube450.jpg

Here, you can see a quick photo of the, now removed, stock 450MHz PPC G4 processor card. That big black rectangle just above the CPU is one of the L3 backside cache chips (there's another one on the other side of the module).

cube14cpu.jpg

Here's a shot of the new 1.4GHz PPC G4 processor card for phase 1. As you can see, the PCB is a lot more cluttered than the original but the L3 cache chips are in about the same place. The jumpers in the lower left control the CPU multiplier :D

cube14Stock.jpg

cube14StockClose.jpg

Here are a couple of shots of the Cube running with the 1.4GHz G4 processor and the card's stock heatsink. As you can see, I had to remove the Cube's mobo from the chassis to install the CPU card and run it with the card's stock heatsink installed. For whatever reason, the fan on the heatsink didn't turn on when plugged into the fan header on the processor card so I had to plug it directly into a PSU with a 3 to 4-pin adapter. The Panaflo 12L, in these photos, is in place mainly to provide a little extra airflow over the HSF as well as push some air underneath the mobo to where the video card is. All pretty simple at this point, really.

cube14ss.jpg

Here's a quick shot of the "About this Mac" window showing the Cube running a 1.4GHz PPC G4 CPU with 2MB of L3 cache and a mere 320MB of RAM (which I will soon bump to 1GB). As an interesting side note, that AltiVec Fractal Carbon app that I mentioned previously also happens to display the processor's computational abilities in megaflops (which varies from fractal to fractal--kind of a 'test by test' results thing). With the stock 450MHz G4, the Cube topped out at about 1600-1700 megaflops (that's right, 1.6-1.7 gigaflops with a 450MHz CPU :D ). With the 1.4GHz G4, the Cube topped out at about 6100 megaflops (I do believe I remember it hitting 7 gigaflops on a few fractals but I'm not totally sure).

cubeHS.jpg

cubeHS2.jpg

Here are a couple of shots of the copper HS from a Volcano 7+ that I cut a set of fins off of each end with my Dremel to allow for a better fit on the processor card. I'm planning on using this HS instead of the card's stock HS and in place of the Cube's stock HS.

cubeClip1.jpg

cubeClip2.jpg

The retention clip that came with the HS happened to be a little too long and it also was meant to latch onto all 3 of the socket lugs on a Socket A mobo but, for this use, I had to cut down the clip to latch onto just one center tab that's in the PCB of the processor upgrade. I also had to do a bunch of bending to reduce the pressure that the clip applies and add a piece of dense foam under one side of the clip to distribute the pressure more evenly over the CPU die because the center of pressure for this clip is just to the left of the die (which would have caused the HS to sit crooked and not make proper contact with the CPU die).

cubeModHS1.jpg

cubeModHS2.jpg

cubeModHS3.jpg

The first photo above shows my original test setup (a Panaflo 12L @ 7v sitting on top of the HS and a high-flow blower to cool the video card and other components on the bottom of the mobo). Unfortunately, this setup led to the CPU getting hot enough to cause instability.

The lower 2 photos show my current testing setup where I just reversed the blower and the 12L. This setup seems to keep the CPU in the high 30's while under load (in a room that was like 80F at the time). It quickly occurred to me what the problem was/is with this heatsink... The fin pack is too dense. Simply put, there are a lot of fins packed very close together. The end result of this high fin density is that the HS requires a large amount of air pressure to work effectively (not really a large amount of air flow, just pressure). Because this will eventually have to work inside the cube chassis with just a 12L @7v, I believe I may have found a solution... bend the fins. I'm pretty sure that if I just reduce the fin density by bending the fins further apart (think of the old Zalman passive/semi-passive 'flower' heatsinks) then the HS should be able to work a lot better in a low pressure situation. I have yet to give this a try, however, I'll be sure to post results as soon as I do.

I'll bet there are a few of you who are wondering why I don't just use the Cube's stock HS as it's pretty big to start with. Well, basically, the stock HS really isn't that great and, to use it, I would have to fabricate a custom heatspreader plate to allow the CPU to make proper contact with the HS (similar to the stock plate which I'll post a pic of tomorrow).

Well, that's it for now.

Quick Edit: At this point in phase 1, all I really have left to buy is some RAM (no big deal) and a Radeon 9000 Pro Mac Edition. I can get the 64MB version for about $85-$100 shipped on eBay or the retail 128MB version for $135.44 shipped (according to PriceGrabber). As for phase 2, well, that leaves me wondering wether anyone happens to know someone who works for ATi or Powerlogix who may be able to get me a deal because the Radeon 9800 Pro Mac Edition 128MB runs about $314 (not counting shipping and tax) and the Dual 1.3GHz G4 upgrade from Powerlogix is about $749 :eek: (I'd prefer dual 1.4's, though) Needless to say, this is going to be interesting... :rolleyes:
 
The Cubes are alright but have always had cxooloing issues at one point I had 8 of them in my lab
 
Here are a few photos of the Cube's stock heatspreader/heatsink mount plate:

cubePlate1.jpg

cubePlate2.jpg

cubePlate3.jpg

I was kinda surprised to discover that this plate is made of solid copper (then again, it is pretty heavy for a "heatspreader" :rolleyes: ). Normally, this plate is mounted to the top of the CPU card (over the CPU) and then, when you put the mobo back into the chassis, it screws into the main heatsink with 3 spring screws which go through the back of the mobo, through the CPU card, through the heatspreader, and into the heatsink. You'll notice that the top of the plate has on it what looks like a thick foil coated in paraffin wax stuff (used as TIM between the plate and the heatsink). Now, there is no way that this kind of heatsink setup could be very efficient but, if you're just using it for a 450MHz CPU, who cares! :D This design, however, can start running into trouble with hotter processors, however.

I decided not to use Apple's cooling setup for 2 main reasons:

1) It may work fine for an old 450MHz CPU but current Cube-specific upgrades with low power/heat 1.2GHz PPC 7457 CPUs, in my opinion, really push the Cube's cooling setup to its limits--even with the addition of a fan... and I'm trying to stick a 1.4GHz PPC 7455 CPU into the Cube (significantly higher power consumption and heat output).

2) The replacement CPU card that I'm using doesn't have the proper holes in it to allow for the plate to mount (some of the components may also have trouble clearing the plate) and I don't want to have to try fabricating a totally new heatspreader plate thing just to use this CPU with Apple's stock heatsink.

Anyway...back to the whole bending fins thing...

cubeHSFlower1.jpg

cubeHSFlower2.jpg

Looks quite a bit different, doesn't it? It really does remind me of those old Zalman heatsinks... Basically, all I really had to do here was attack the poor heatsink with flat-blade screwdrivers of various sizes and *poof* instant mini-Zalman for a fraction of the price :D . Though, I had to do a little more grinding work on the mounting clip to make the ends fit between the fins (not a problem).

cubeFlowerT1.jpg

cubeFlowerT2.jpg

With the changes made to the HS, I went ahead and tried my original test cooling configuration again (blower underneath to cool video card and Panaflo 12L @ 7v on top to cool the CPU). I ran AltiVec Fractal Carbon on the Cube for about an hour and everything seemed to work fine. CPU load temperature leveled off at about 42C according to my multimeter's thermal probe, which you can see inserted into one of the rather deep holes in the base of the HS, (the room was about 78-80F) and the computer worked without issue.

cubeFlowerT3.jpg

cubeFlowerT4.jpg

Next, I went ahead and tested the other cooling configuration that I had previously been working with (12L blowing under the mobo and high-flow blower aimed at the side of the HS). With this configuration, the CPU load temperature leveled off at about 37C.

It is pretty obvious that bending the fins further apart really made a difference in how well the heatsink performed. Now knowing that the CPU won't nuke itself when being hit with just a Panaflo 12L @ 7v, I'm a lot more confident that this is going to work when placed into the Cube's chassis and case--I just have to do some cutting. :)
 
I'me having trouble figuring out whats going on here but damn it looks cool.
 
If u do fit it all in that case how are u going to get any airflow for those fans or that heatsink?
 
As an (ex) Mac-Fanatic, I am amazed at what you have done with this thing. The Cube is still a cool machine to own, and your setup has just tripled the clock speed.
I have an idea for my own mod: Take an old Fruity-style imac and gut it. Put a 14"-15" LCD where the CRT was, and put a normal ATX board, etc. etc. etc. into the resulting cavity. Chuck in a few 120mm fans, and you have an easy-to-carry lanparty system!
(yes, this is a dumb idea, and I know it.)
 
XeRo_Dark said:
a red spidery mess of yuckyness? why not just use rounded cables?


pssssh... mac modding so silllly :p

I agree with both of these comments
 
I'd be careful trusting those thermal readings. Most thermal probes rest on the die itself where as your multimeters probe suffers from the insulation of a few mm of copper and your thermal paste.
 
Pretty cool guy. You should know that some Cubes won't work with Dual CPU upgrade cards, something to do with the firmwire I think (I don't really remember since it's been sometime since I last checked). How about building a little watercooling setup for that Cube instead? Now that would be really awesome to see. :D
 
Very impressive HSF mod, Petra. And hey, if you need a spare Volcano 7+ (heatsink, fan, or both) let me know, I've got one lying around. ;)
 
Very nice mod! Keep up the great work! ;)

You have my utmost respect with your wiring work. I'm modding some molex connectors and power supply cables for use in a project, and rather than having to solder, etc... I simply bought some "quick splices" yesterday from Lowes and saved myself some work. Here's hoping that does the trick!

In the meantime, a buddy has a spare Apple Cube chassis, so he's watching with great interest as well. And while my only Apple is a 1GHz 12" Powerbook, I wanted a Cube case before he did. Believe me, we are not only amazed with your work, we're DEFINATELY looking forward to the finished product. You the man! :D
 
O......M.....G.... I can hardly believe that this made it onto the [H]'s homepage :eek: Woo! Super cool :D To be honest, I didn't think that anything I did would ever get onto the homepage...unless it happened to be some crazy computer related stunt/test/project to promote the Tech site that I'm trying to get going (site isn't done yet).

Okay, anyway, sorry for the lack of updates but my internet connection at home has been totally FUBAR for the past 3 days :mad: (this is actually the first time it has worked long enough to post something). I'll post a more complete update as well as comments/thanks/answers to most of your posts once Comcast gets their act together.

...Damn you people, though! You now have me considering wether or not to fall back onto my original ideas for watercooling the Cube--not really because I need it but because it would be freaking awesome!

As a side note, I've decided to sell off some of the Cube's original parts to help fund the project. The original VRM that I no longer need will be the first part to go (mainly because it is one of the most valuable parts of the Cube, aside from the motherboard). This one part alone should pay for almost the full cost of the Radeon 9000 Pro or a sizable chunk of the watercooling parts that I may end up going for.

More to come once Comcast gets things working again...which may be a couple of days :rolleyes: (hopefully everything will be resolved by Monday)

BTW, you guys rock!
 
Ya, Im Petras brother. Petras going to be water cooling the cube with a septrate unit. It will be so cool! :p
 
Any pics, something or a small update? I almost forgot about this mod.
 
Umm.. ya my brother petra is kinda bussy so it will be a few days befor he updates this thread.
Right now im cutting away at this metal part for petra in my metals class, I dont know what the part is, but my brother said its coasts like $200, and I better not screw up because they dont make the part anymore. So thats what we are doing to the cube right now.

(the part is going the the core of the hole computer, id be nice if my brother petra gets home so I can ask him what it is. But in my metals class im trying to cut of these heat sink fin things off so he can put a fan in there or somthing.) :(
 
I'm not a mac fan but I'm very interested to see how this turns out.....update please....
 
Very intreaging. Seriously considering having ago at putting a real pc in one of them. How is the apple logo applied, would it be possible to get off?

Looking good anyway, keep up the good work.
 
They use some sort of adhesive to the little Apple logos, you'll have to soak them in alcohol and then take a putty knife to it.
SanchoMB said:
Very intreaging. Seriously considering having ago at putting a real pc in one of them. How is the apple logo applied, would it be possible to get off?

Looking good anyway, keep up the good work.
 
I'm baaaaaaaaack
icon_twisted.gif


I regret that the SuperCube project had to be put on hold like that but I'd rather not go into the myriad of events which prompted its postponement (after all, this is a worklog...not some whiney, bitchy blog :rolleyes: )

Anyway, without further adieu, back to work! :D

Lets see now, where did I leave off... Ah! Right, I was just about to gut the rest of the cube chassis. Okay, here is the Cube's stock heatsink...

cubeHSuncut.jpg


As you can probably guess, those heatsink fins have got to go to make room for some of stuff that's going into the Cube. However, I can't just chuck the whole assembly because the whole Cube is practically built around the damn thing. It houses all of the latching mechanisms which operate the handle which allows you to pull the Cube core out of the Cube's case and the parts that actually hold the Cube's core inside the case when it is upright.

cubeHSfins1.jpg


I quickly realized that something that, at first glance, seemed quite simple really wasn't. The above image shows the result of about an hour of Dremel work and a few million cutoff wheels. The aluminum that was used for this heatsink is really soft which makes it quite hard to work with. It clogs up just about any tool you use (like my tungsten-carbide cutter bit and the big table grinder I have). So, I decided to make a few cuts in the bottom to make space for a CPU cooler to stick through as well as save the portion of the base plate that has the original mounting holes in it (because I didn't feel like having to make something later that needed to line up perfectly when Apple already did it for me).

cubeHSbottomOutline.jpg


Now, back to those heatsink fins... It's really useful having a younger brother who happens to go to the same high school that I graduated from several years ago... Basically, he was able to indirectly hook me up with the equipment that they have in their metals workshop and, a few days later, *bam* the fins were gone. (I find it rather amusing that in his post he somehow misinterpreted the importance that I placed on not screwing up as meaning that the part had a high monetary value... eh, kids :rolleyes: )

The results:

cubeHSmilled.jpg

cubeHSmilled2.jpg


Aside from a little cosmetic damage, I'd say that looks pretty badass :D
 
With that done, I decided to add another level of complexity and [H]ardness to the project by throwing in a 9800Pro that I flashed & taped, watercooling everything, and building a cool external unit to house the watercooling parts, extra PSU, and a few other things (the latter two are still a work in progress, as you will see below).

First up, a few quick goodies from DangerDen, SVC, FrozenCPU, Fry's, my electronics closet-o-mystery, and good 'ole Orchard Supply Hardware.

cubeCPUwb1.jpg


That's the Koolance GPU waterblock that I'll be using to cool the CPU... and, I do realize that I bash Koolance a lot but, for this project, the overall size (or lack thereof) of their blocks and the 1/4" ID tubing that they use happens to be just what I need. Yeah, you can try cramming 1/2" or 3/8" ID Tygon into that Cube... I think that it's still gonna be a tight fit even with the 1/4" ID Tygon that I'm using. Gotta love how crazy reflective the bottom of that block is--doesn't necessarily mean that it's flat but it sure is cool to look at :rolleyes: .

cubeVPUwb1.jpg


...and there's the very low profile waterblock that I'll be using on that 9800Pro.

cubePump1.jpg


Nifty little Eheim S1000 submersible pump. 1000LPH (~264GPH) with a max head of 2m (~6.6 feet) should be enough to get the job done when paired with this nifty BlackIce Micro and either one or two Zalman ZM-F2's

cubeRad1.jpg

cubeRad2.jpg

cubeRad3.jpg


Now, the strange duct thing I have going on here probably won't end up in the final external watercooling unit... I was just experimenting with a push-pull setup and noise levels. Though, the final design of the unit is kinda up in the air at the moment... I'm thinking of making it out of 1/4" Plexi with the res and submerged pump on the lower level and the radiator, PSU, and other stuff on an upper level inside the unit. All in all, I would prefer it not to be larger than the Cube (in terms of height and width) and I was thinking of painting the inside of the upper portion white to kinda match the Cube (maybe sick one of those Apple logos on there?).

cubeRadeon1.jpg


The 9800Pro is probably a little overkill....but at least it will give the Cube support for CoreImage under the upcoming release of OS 10.4

I'll bet you're wondering what happened to that triangular section I removed from the Cube's stock heatsink... Well, I'm going to use it as a CPU waterblock hold-down plate (along with some [soon to be modded] DD Maze4 mounting hardware that I picked up). As you can see, it looks pretty bad...but aesthetics really don't matter for this piece as it won't be seen. I still have some trimming to do to it before the CPU's waterblock will fit over the CPU die properly but I plan on addressing that after work tomorrow.

cubeBlockMount1.jpg

cubeBlockMount2.jpg


...all of this junk sure made a mess of the only part of my desk that doesn't have computers on it...

roomDesk1.jpg


Though, shortly after taking that photo, I cleaned it off to take this photo...

hlbox.jpg


Ah... sources of such sweet, sweet happiness.... :D

Anyway, more updates to come! (and, no, you won't be waiting 2 months this time :p )
 
Back
Top