[Project] Project Pegasus *Scratch Mod* (Stargate Atlantis DHD)

Alien10140

n00b
Joined
Feb 12, 2009
Messages
6
Logo-small.png
The following is a collaborative work between myself and my buddy (Deadly Dragon). This is a scratch mod meaning the case will not use any major parts from an existing case. This is our first time attempting a mod of this magnitude and would love to hear any critique and/or suggestions that people may have. We would also like to let everyone know that we are both active college students and therefor may only have the time and/or money >.< to update this work log once a month or so.

Description:
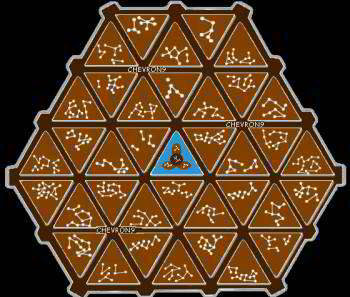
This mod is based off a prop in Stargate Atlantis. The prop is the DHD located in the ancient city of Atlantis. This device is used in the movie to dial the Stargate. We plan on making this as a 1/1 scale replica with a computer inside. There will be slight modifications to it for detail and computer paraphernalia. We also plan on having all 37 buttons on the DHD be operational. They will light up when pressed and will also input into the system as keystrokes from a secondary keyboard so you will be able to log in to your system by "Dialing the Gate".

Hardware:
Not sure yet. This case is all about the exterior look and feel. The internals are planned to be top of the line once we get there but we won't be doing any fancy overclocking or water cooling.

Additional Photos:
http://s30.photobucket.com/albums/c333/alien10140/Project Pegasus - PC Case Mod/?start=20
All of the following photos and more will be here in this album and will be updated before the worklog is.

Index:
The Team (See Below)
The Inspiration (See Below)
The Concept and design (See Below)
Materials
Cumulative update 8/20/2008 - 2/11/2009
Cumulative Update 2/12/2009 - 5/19/2009

+_+_+_+_+_+_+_+_+_+_+_+_+_+_+_+_+_+_+_+_+_+_+_+_+_+_+_+_+_+_+

The Team:

Deadly Dragon (Chanse) - Drafter, "Numbers Guy", Computer Guru, Law Enforcement Major
P7140468.jpg


Alien (Alex) - Computer Guru, Fiber Glass Man, "Geek", Motion Pictures and Television Major
P7260543-1.jpg

Fishmeal (Andrew) - Photographer, "Extra Hands Man" >.>
P7250520.jpg


+_+_+_+_+_+_+_+_+_+_+_+_+_+_+_+_+_+_+_+_+_+_+_+_+_+_+_+_+_+_+

The Inspiration:

Atlantis_DHD.JPG

Stargate-Atlantis-Computer-DHD-Simu.png

vamtot6c.jpg


+_+_+_+_+_+_+_+_+_+_+_+_+_+_+_+_+_+_+_+_+_+_+_+_+_+_+_+_+_+_+

The Concept and Design:

Early concepts that turned out to be to small.
wireframeofkeys.jpg

wireframeofbox-1.jpg

P7080427.jpg


Finalized concepts
Top Piece with Keypad
keypadrendrer.jpg

Bottom Box
boxbody.jpg

Assembled, multiple angles
boxbuilt.jpg

Space management for computer components
PCinternals4view.jpg

Just Components
PCinternalsiso.jpg

Cardboard mock up
P7140467.jpg

P7140465.jpg

Completed mock up
P7150471.jpg
 
Last edited:
Materials:
The main body of the case is made of wood and fiberglass.
(More Coming soon)
List:
Lots of Fiber Glass
2 Part Epoxy
A Big roll of Mylar
Acetone
Heat Shrink Tubeing
A **** load of LEDs
Wire Stripper
Acrylic drill bit
Electrical Wire
Micro Switches
Disposable cups, spoons, paint brushes
putty spreader cut to be serrated on one side
Fiberglass scissors
Micro Balloons
Latex Gloves
Custom Plexi Glass shapes
Flexible Keyboard
General tools
There is more but I can't think of them atm.

Flexible keyboard internals for Keypad input (more on this once we get to building that part ^.^)
P7080421.jpg

P7080423.jpg

P7080424.jpg


Tap Plastics - supplier for all our our plexiglass, fiberglass and resin.
P7120459.jpg


HSC - Supplier for our micro switches, wires, heat shrink tubeing and more...
P7160480.jpg

P7160478.jpg

P7160473.jpg

P7160475.jpg


Micro Balloons - Used for thickening resin
P7250506.jpg

P2140213.jpg

Fiber Glass
P2140206.jpg

P2140210.jpg

Custom Plexi Glass
P2140208.jpg

Cups and putty spreader
P2140217.jpg

Micro Switches
P2140219.jpg

Wire stripper and drill bits
P2140220.jpg

Epoxy
P2140223.jpg

Heat Shrink Tubing
P2140222.jpg


Snacks! Nom Nom Nom Nom >.<
P7250518.jpg

P7250519.jpg
 
Cumulative update 8/20/2008 - 2/11/2009:
This update is to catch everyone up to our current progress. So far we have shopped and bought 90% of the materials required for the project. We have also fiber glassed the boards and cut them for the bottom box. It may not seem like a lot but it takes a long time to fiber glass: 24hours for the resin to cure x5 boards 2 layers on one side and 1 layer on the other makes for a good 10 days plus limited college student time = ~6months >.> Oh, and don't forget the cutting :p We also want to note that the resin gets unusable and tacky in under 30 min on a hot day so we had to move at warp speed...


So our first layer is a big flat thick board and used it as our base to give our boards a nice stable,flat and clean surface to cure on. On top of that we lay out a large roll of Mylar as our release agent. Mylar is an excellent release agent in the fact that its reusable and fairly cheap, the only downside is that it only works for flat objects and you have to clean off the access resin from it between each board to prevent impurities from occurring.
P7210491.jpg


After that we put the board down and then the fiberglass on top of that and cut the fiberglass to size leaving some overlap. We also take a grease pencil and loosely mark the corners of the board on the Mylar.
P7250498.jpg


We then remove the fiberglass and board. We mix up some 2 part apoxy resin and spread it evenly on the Mylar within the constraints of our markings using some throw out brushes.
P7250501.jpg


Next we carefully lay the fiberglass down on top of the resin and Mylar and brush the fiberglass ensuring that there are ZERO air pockets and that the fiberglass fully absorbs the resin. Then we add a second layer of fiberglass and more resin.
P7260544-1.jpg


We let that sit for a good 30-45min until it begins to get tacky and then we mix up a batch of resin with micro balloons in it to thicken it. This requires a LOT of stirring and agitates the resin making it set even faster... its a pain in the ass :S This is done to make it adhere better to the smooth surface of the wood. We pour that on the 2 layers of tacky fiberglass already down and then comb it out to make the resin a bit rough to also help the wood adhere to the resin. Next we apply the wood to the top, toss some weight on it and let it sit for 24 hours. The next day we would pull it up and apply on final layer of fiberglass to the back side.
P7250510.jpg

P7250512.jpg

P7250513.jpg

P7250514.jpg

P7250517.jpg


A few months later we kicked our asses into gear and started cutting and got 1 of the 2 boxes all cut out. These are those fiberglass and wood pieces taped together.
0201091124b.jpg

0201091124a.jpg

0201091124.jpg

0201091124c.jpg


That's it, we should have another update come sun or mon :D
 
Cumlative Update 2/12/2009 - 5/19/2009

First we would like to apologize for the long delay in between posts and production. We are both full time college students and have been dealing with massive final projects and tests that took all of our time and concentration. But its summer now W00T! So expect more frequent updates.

We haven't done a whole lot. Mostly we have gotten the majority of the cuts done and are now working on piecing together the boxes. In the next few days we should be able to start glassing them together.

P2150229.jpg

P2150230.jpg

P5190257.jpg


After everything was cut for one box we started putting the box to together with a nail gun and finishing nails. This holds all the pieces in place so that we can put the glass and epoxy on without having to hold it together for 24 hours while it cures.
P5190219.jpg

P5190223.jpg

We had to grind a few of the boards down to fit as they were a 1/16 off or so but it fit all together quite nicely.
P5190230.jpg


We also had to sand all the edges that were going to be glassed and the surfaces that would be painted on because the method we used to make the fiberglass boards in the first place leaves a very smooth and shinny surface that epoxy and paint will not adhere to very well.
P5190218.jpg

As you can see here the difference between the unsanded and sanded boards.
P5190228.jpg

The nailed together box ready to be glassed.
P5190235.jpg

P5190237.jpg

P5190238.jpg
 
Sorry to say that mates,
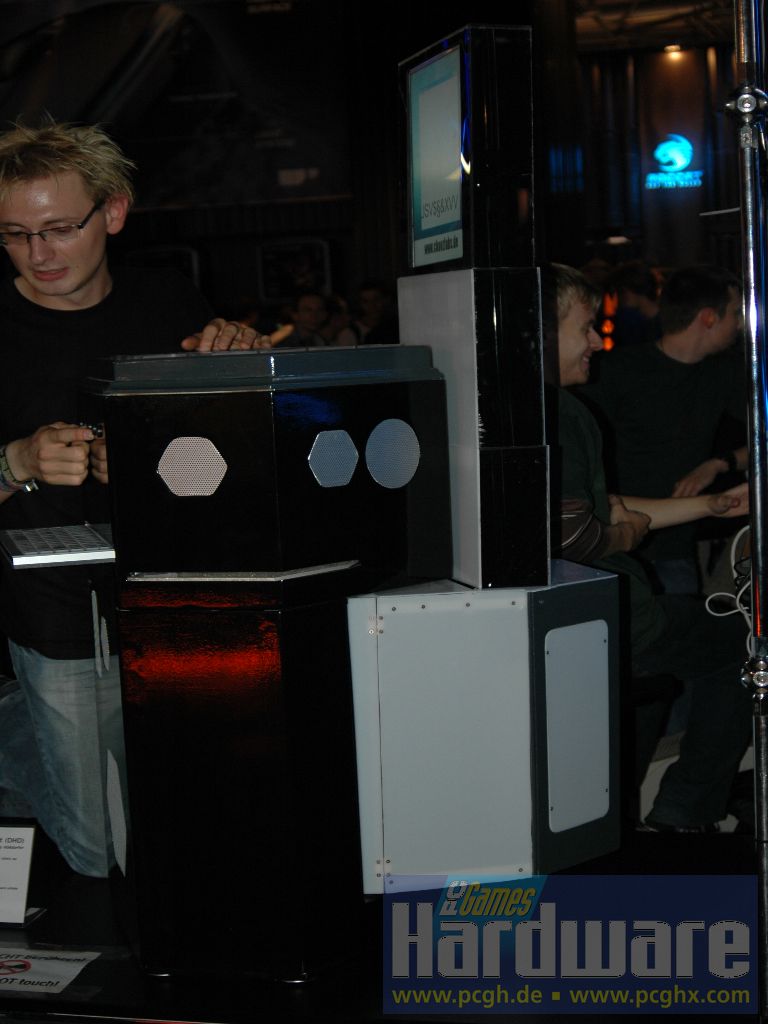
but someone beat you to it - and made a lot more complicated thing out of it. The name of the modder is "Andreas Hoelldorfer", and he participated in the Games Convention Modding Masters of 2008 with "Projekt Atlantis". Here are a few pics, one unfinished and one crappy sideshot from the final build:

(the keys all are separately backlit, they light up when you press them and are connected to a selfmade keymatrix which is fed into a self-programmed microcontroller, so the whole "keyboard" actually works like any ordinary USB keyboard would!)


Seen from the side, the lower back unit is motorized. It slides out to the back and then the LCD moves up from its resting position until it towers above the whole unit. The additional "normal" keyboard is a pull-out-affair, as well as the side tray for putting a mouse on.

Poor guy was in a rush to finish it for the contest, the paintjob could've been done better, but the stuff he built into it really works. When I first saw it all folded up, it looked nice, but when he powered it up and it unfolded itself, my thoughts were racing between "clever guy" and "just plain wow". :D

Now 1up that, engrave chevrons into the keys, flash the last 5 or 6 in a different colour whenever the "enter" key is pressed, go wild on the bodyword. This mod rocked, and yours can too! The world needs MORE STARGATE MODS! :D
 
Back
Top