Navigation
Install the app
How to install the app on iOS
Follow along with the video below to see how to install our site as a web app on your home screen.
Note: This feature may not be available in some browsers.
More options
You are using an out of date browser. It may not display this or other websites correctly.
You should upgrade or use an alternative browser.
You should upgrade or use an alternative browser.
Project: Pirate Sonata
- Thread starter R@Mo
- Start date
hellomynameis
2[H]4U
- Joined
- Nov 7, 2003
- Messages
- 2,888
Very nice and clean cuts from what I see here.
Mad Machinist
[H]ard|Gawd
- Joined
- Nov 29, 2001
- Messages
- 1,162
Needs a cannon................... 
Very very nice mod, havnt seen many pirate themed cases, though many normal skull themed cases, but this is fuckin shweet.
On your side pannel id say go with red instead of blue, and to get a cool effect of the sword being metal, you could get some spray adhesive and some uber thin foil and do a outline around the entire sword, kinda like chroming a model. It would add a big holy shit to the mod
On your side pannel id say go with red instead of blue, and to get a cool effect of the sword being metal, you could get some spray adhesive and some uber thin foil and do a outline around the entire sword, kinda like chroming a model. It would add a big holy shit to the mod
Finally, an update:
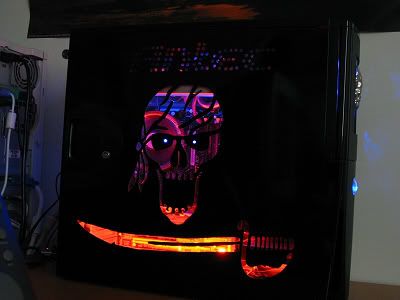
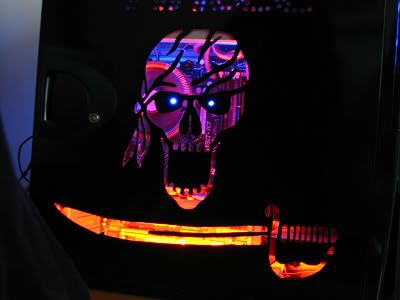
Just finished working on the LED eyes in the side panel. I learned how to solder along the way too! I connected 2 blue 3.3V LED's in parallel, and since the HDD header on the motherboard is 3.3V, I didn't need a resistor at all. Here's the finished result:
LED's Off:

LED's On:

Download Video [Right-click, Save Target As please!]
Note: The LED's in the video are blinking whenever the hard drive is accessed, NOT whenever the music is playing. I compressed a large folder to get the blinking to happen more often.
Just finished working on the LED eyes in the side panel. I learned how to solder along the way too!
I connected 2 blue 3.3V LED's in parallel, and since the HDD header on the motherboard is 3.3V, I didn't need a resistor at all. Here's the finished result:LED's Off:
LED's On:
Download Video [Right-click, Save Target As please!]
Note: The LED's in the video are blinking whenever the hard drive is accessed, NOT whenever the music is playing. I compressed a large folder to get the blinking to happen more often.
The pictures look really good, but I cannot view the video. It appears as though you have exceeded your bandwidth. Try a new (better) host.
Your mod is really looking good. Keep up the good work and most important, keep us updated!
Try a new (better) host.Your mod is really looking good. Keep up the good work and most important, keep us updated!
rogue_jedi
Supreme [H]ardness
- Joined
- Sep 6, 2002
- Messages
- 4,821
the leds look really cool. good work!

XeRo_Dark said:On your side pannel id say go with red instead of blue, and to get a cool effect of the sword being metal, you could get some spray adhesive and some uber thin foil and do a outline around the entire sword, kinda like chroming a model. It would add a big holy shit to the mod
Good idea, it would definately help to impress, but I wouldn't know where to start with something like that. Maybe if I could get a permanent silver marker I could outline the entire cutout which could improve the overall look.That kicks ass. Kinda eerie to see a computer "winking" at you.
Or you could use your newfound soldering skills. That reminds me of the other day. I was at school helping a teacher move some stuff and a worker was in the same room installing a sink. I see him bring out a welding type instrument and a big huge reel of solder looking material. That guy had some skill. It went on real easy and decorated quite well. It was shiny looking even at the distance I was at, maybe 10ft or so.
Ok now that I've lost my mind and have bored you with my nostalgia, I'll go run rampant through the streets burning for a connection.
R@Mo said:Good idea, it would definately help to impress, but I wouldn't know where to start with something like that.
Or you could use your newfound soldering skills.
That reminds me of the other day. I was at school helping a teacher move some stuff and a worker was in the same room installing a sink. I see him bring out a welding type instrument and a big huge reel of solder looking material. That guy had some skill. It went on real easy and decorated quite well. It was shiny looking even at the distance I was at, maybe 10ft or so. Ok now that I've lost my mind and have bored you with my nostalgia, I'll go run rampant through the streets burning for a connection.
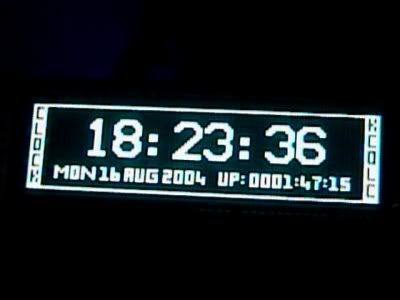
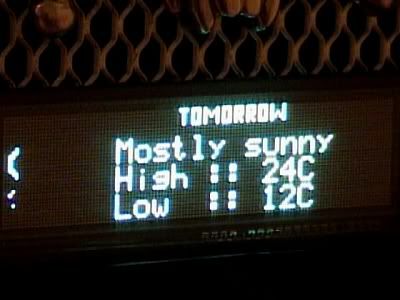
Sorry for the lack of updates recently. I was waiting for the Noritake VFD I ordered last week to arrive, and finally it has!
I couldn't wait to get it hooked up so I rushed home as soon as I could, connected it, and when I tried it out in LCDC it froze after the first few screens. So I did that soldering fix to the COM port connector (thanks to TAG & Cheese from Bit-tech ) which got it up and running right away.
Here are some pics (it looks way better in person!!).
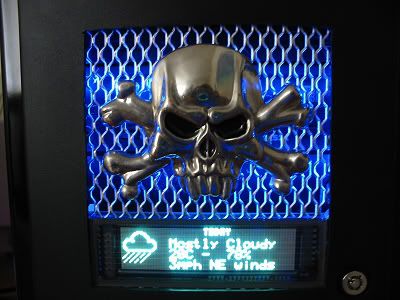
Time:
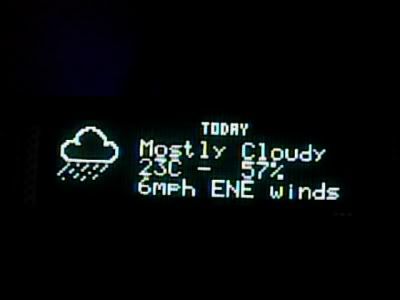
Weather:
Winamp:

Now that I have it working, I need to figure out where (and how) to mount it!
More updates coming soon!
I couldn't wait to get it hooked up so I rushed home as soon as I could, connected it, and when I tried it out in LCDC it froze after the first few screens.
So I did that soldering fix to the COM port connector (thanks to TAG & Cheese from Bit-tech ) which got it up and running right away. Here are some pics (it looks way better in person!!).
Time:
Weather:
Winamp:
Now that I have it working, I need to figure out where (and how) to mount it!
More updates coming soon!
rogue_jedi
Supreme [H]ardness
- Joined
- Sep 6, 2002
- Messages
- 4,821
looks cool what is cpu usage like when you're using the VFD? i've heard certain places that it can be pretty bad... dunno what software that was with or anything though.
what is cpu usage like when you're using the VFD? i've heard certain places that it can be pretty bad... dunno what software that was with or anything though.rogue_jedi said:looks cool
CPU usage is hovering between 0% and 3% most of the time, although on some transitions it could hit as high as 5% (yay
). Memory usage is around 3MB for LCDC while the screen is on.Time for another update as promised!
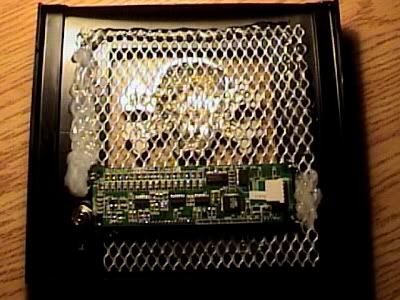
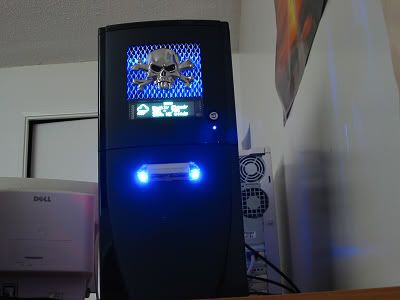
Well, I've decided to mount the VFD in the front of my case, but since I want it to always be visible I'm going to embed it into the front door of the case, in front of the optical drives.
Remember that chrome skull belt buckle I show'd y'all before? No? Well here's a reminder:

Finally, boys and girls, in this very post, you will be able to see how I will incorporate this fine piece of worksmanship into my case. But first, I needed some metal mesh!! So off to Home Depot I went, and picked up one of these:

That my friends is a gutter guard. What's so good about it? It's flexible, it's light, but best of all, it only costs $4 CAD! First I sanded it down, then painted it shiny silver then added some clearcoat into the mix. Here it is marked and ready to be cut.
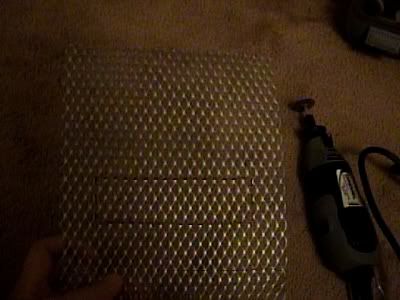
And here it is after having the VFD outline cut into it:

Next, a test fit and proof-of-concept:
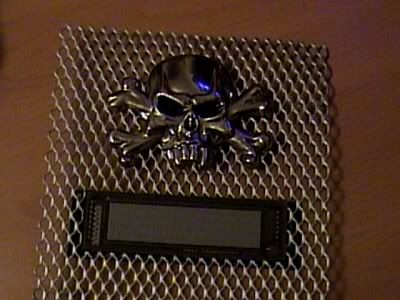
Now you all know my master plan mwaaaahahahha!! Pretty darn sweet if I do say so myself!
Everything will be fit into a window in the front case door shortly. All that's left is to figure out how to rout the cables out of sight and how to solidly attach the VFD to the mesh (so far I'm thinkin paperclips, so if anyone has any better ideas feel free to share them).
Until next time, here is a video of the VFD in action! (Video removed to save bandwidth. PM me if you want it.)
Well, I've decided to mount the VFD in the front of my case, but since I want it to always be visible I'm going to embed it into the front door of the case, in front of the optical drives.
Remember that chrome skull belt buckle I show'd y'all before? No? Well here's a reminder:
Finally, boys and girls, in this very post, you will be able to see how I will incorporate this fine piece of worksmanship into my case.
But first, I needed some metal mesh!! So off to Home Depot I went, and picked up one of these:
That my friends is a gutter guard. What's so good about it? It's flexible, it's light, but best of all, it only costs $4 CAD!
First I sanded it down, then painted it shiny silver then added some clearcoat into the mix. Here it is marked and ready to be cut.
And here it is after having the VFD outline cut into it:
Next, a test fit and proof-of-concept:
Now you all know my master plan mwaaaahahahha!!
Pretty darn sweet if I do say so myself! Everything will be fit into a window in the front case door shortly. All that's left is to figure out how to rout the cables out of sight and how to solidly attach the VFD to the mesh (so far I'm thinkin paperclips, so if anyone has any better ideas feel free to share them).
Until next time, here is a video of the VFD in action! (Video removed to save bandwidth. PM me if you want it.)
^^^^FiZ said:That's fucking badass. Can't wait to see it incorporated into your case.
Update time!
In my last update, I cut a hole in the steel mesh and showed you guys how I was planning on mounting my sexy new VFD in the front of the case door. The problem was figuring out how to attach the VFD to the mesh.
The first thing that came to mind was using paperclips. But that presented a new problem: how was I going to fill the space between the 4 VFD mounting holes and the mesh? (I needed the mesh aligned with the front glass of the VFD) So off I went searching for things around the house that I may be able to use. Little did I realise the answer lay INSIDE my case!!
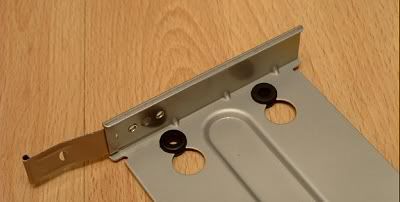
Ooooh, rubber grommets!!! PERFECT!
But were paperclips really the answer? I looked around a little more and found this:
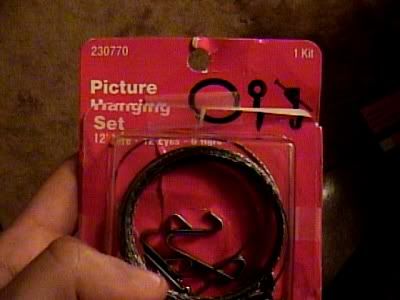
The frame hanging wire in this picture hanging set had the advantages that it was more flexible and a lot less brittle than paperclips (no chance of breaking!), so I decided to use it instead.
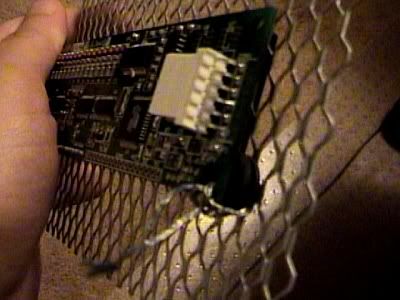
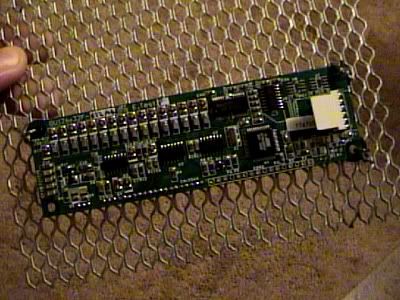
So off I went, attaching each corner of the VFD to the mesh. A simple double knot on the frame wire did the trick. Nice and secure - there's no way the VFD can come loose from the mesh now. Sweet!
Three down, one to go:
Next, I attached the mesh to the back of the case door, and I attached the skull belt buckle to the mesh. The glue gun is your friend!
The view from the other side:
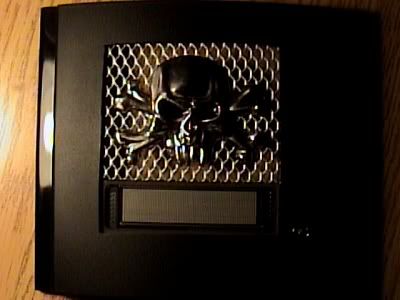
I lost the functionality of the lock on the door by doing this mod, but I've never had to use it anyway, so no big loss.
And now, what you've all been waiting for, the money shots!!


And finally, a special treat for everyone. (Right-click, Save Target As please!)
Until next time, keep modding!
In my last update, I cut a hole in the steel mesh and showed you guys how I was planning on mounting my sexy new VFD in the front of the case door. The problem was figuring out how to attach the VFD to the mesh.
The first thing that came to mind was using paperclips. But that presented a new problem: how was I going to fill the space between the 4 VFD mounting holes and the mesh? (I needed the mesh aligned with the front glass of the VFD) So off I went searching for things around the house that I may be able to use. Little did I realise the answer lay INSIDE my case!!
Ooooh, rubber grommets!!! PERFECT!
But were paperclips really the answer? I looked around a little more and found this:
The frame hanging wire in this picture hanging set had the advantages that it was more flexible and a lot less brittle than paperclips (no chance of breaking!), so I decided to use it instead.
So off I went, attaching each corner of the VFD to the mesh. A simple double knot on the frame wire did the trick. Nice and secure - there's no way the VFD can come loose from the mesh now. Sweet!
Three down, one to go:
Next, I attached the mesh to the back of the case door, and I attached the skull belt buckle to the mesh. The glue gun is your friend!
The view from the other side:
I lost the functionality of the lock on the door by doing this mod, but I've never had to use it anyway, so no big loss.
And now, what you've all been waiting for, the money shots!!
And finally, a special treat for everyone. (Right-click, Save Target As please!)
Until next time, keep modding!

flat4 said:looks real good. i have one question. what does the VFD connect to? and where did u get it?
It connects to the 9-pin serial port (COM1) and its made by Noritake. You can read a review of it here.
CoRPS said:Without having to ghetto rig it out the back of like a expansion slot, how can you set it up inside the case on the mobo?
Or.. Am I missing something?
Well, you could always solder the wires straight onto the back of the motherboard's serial port, although I personally don't have the guts to try such a thing. Failing that, you could make a hole elsewhere to route the wires, not necessarily through an expansion slot.
rogue_jedi
Supreme [H]ardness
- Joined
- Sep 6, 2002
- Messages
- 4,821
some motherboards have headers onboard for one or both of the serial ports, depending on what is on the backplane. so you can sometimes get it entirely internal with that method. failing that, running a cable out the back seems to be the best way to do it without some fancy modding. you could use a ribbon cable to it is flatter, but that's about the only thing i can think of to make it less obtrusive if you have to resort to running the cable out the back.
I'm sorry about the lack of updates. I've been really busy lately with school work. My Honours project presentation about the security of the RSA cryptosystem is coming up on September 13th, and I have yet to figure out what exactly I'll be talking about for 20 long minutes. I get the butterflies just thinking about all the eyes that will be on me. Wish me luck!
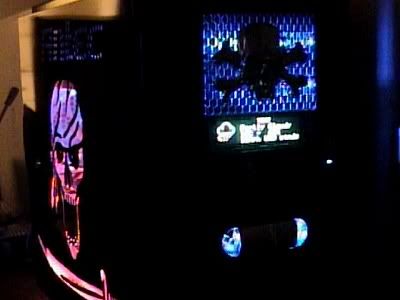
Back on topic: My good friend S@M was visiting Ottawa last weekend and he stayed over at my place, and he brought his Canon A40 with him!! So I finally managed to take some decent pictures of my case. Thanks S@M!!
Click on each picture to view a 1024 by 768 version. Hope you like them!

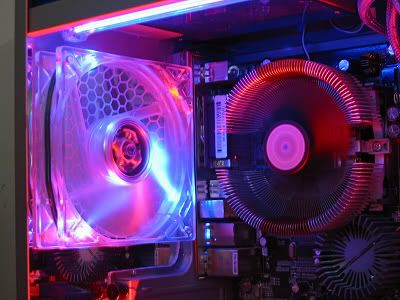
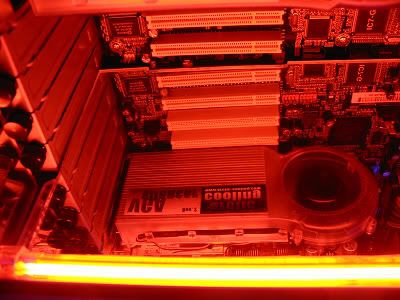
So, what do you think?
Back on topic: My good friend S@M was visiting Ottawa last weekend and he stayed over at my place, and he brought his Canon A40 with him!! So I finally managed to take some decent pictures of my case. Thanks S@M!!
Click on each picture to view a 1024 by 768 version. Hope you like them!


So, what do you think?
rogue_jedi
Supreme [H]ardness
- Joined
- Sep 6, 2002
- Messages
- 4,821
i like it. oh, and good luck on the presentation! i've done a thesis presentation (and i had a sore throat/was losing my voice and it was in a lab with the fans on... not fun) and i know it isn't easy to prepare for... but you should be alright (just put the same amount of effort into the presentation as you did the case)
i didn't realize the bottom was so shiny and what's with the dell in the 2nd to last pic?
) and i know it isn't easy to prepare for... but you should be alright (just put the same amount of effort into the presentation as you did the case)i didn't realize the bottom was so shiny
and what's with the dell in the 2nd to last pic?Just a question, where did you get the VFD, and how much did you paid for in CDN??
I was thinking of an LCD at somepoint, but seeing that thing, it seems much nicer. How hard was it to wire up?
Thanks, and nice mods,
edit: Oh, and which software are you using for it?
I was thinking of an LCD at somepoint, but seeing that thing, it seems much nicer. How hard was it to wire up?
Thanks, and nice mods,
edit: Oh, and which software are you using for it?
rogue_jedi said:i didn't realize the bottom was so shiny
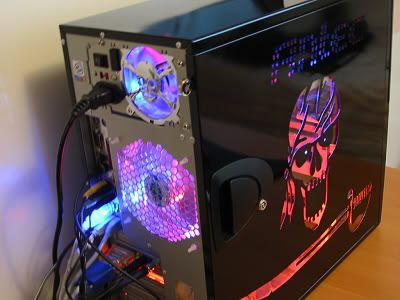
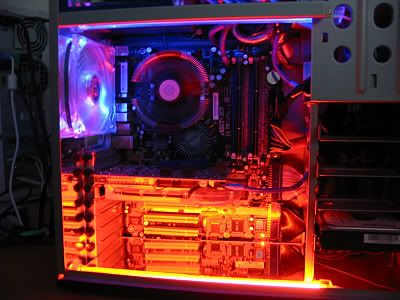
I cut plexi mirrors for the bottom and the back of the case. It gives a better sense of depth and reflects light nicely, so that it feels like the whole case 'glows'.
That Dell is my old PC - a P3 500 circa 1999. I still use it today to backup my data.
trust_no1 said:Just a question, where did you get the VFD, and how much did you paid for in CDN??
I was thinking of an LCD at somepoint, but seeing that thing, it seems much nicer. How hard was it to wire up?
Thanks, and nice mods,
edit: Oh, and which software are you using for it?
Most of these questions have been answered before, but I'll answer them again anyway.
I got the VFD from Noritake Canada. It cost me $198.95 CAD after taxes and shipping. It connects to the 9-pin serial port (COM1). I'm using LCDC 1.05 to power it. You can read a review of the VFD here. It's an awesome display and IMO its worth every cent.If you end up getting one and need help setting it up, just PM me and I'll be glad to help out.
R@Mo said:Most of these questions have been answered before, but I'll answer them again anyway.
If you end up getting one and need help setting it up, just PM me and I'll be glad to help out.
Thanks, sorry if I'm making you repeat yourself. I read through it all, checked all the links, but didn't catch you bought it from the site itself.
Alright, I'll keep a note of that, whenever I get one.
(I'll assume you have the same model as in the review. . .
)UnknownSouljer
[H]F Junkie
- Joined
- Sep 24, 2001
- Messages
- 9,041
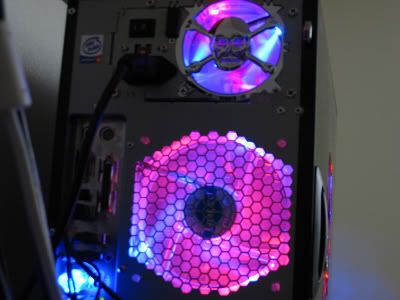
I dunno if someone has mentioned this idea, but you might want to concider putting LEDs into the skull on the front of the case to match the one on your sidepanel. Of course this is an opportuninity to use different colored LEDs too, I think red would look really good.
UnknownSouljer said:I dunno if someone has mentioned this idea, but you might want to concider putting LEDs into the skull on the front of the case to match the one on your sidepanel. Of course this is an opportuninity to use different colored LEDs too, I think red would look really good.
I thought the same too, but it would be too many LED's from what I've read.
Skier said:I was thinking it was going to turn out a bit too "overdone," but the effect as a whole is very, very nice. I dig it, excellent work!
Gangsta said:man, you did an awesome job on that sonata
IT L
Thanks!
trust_no1 said:(I'll assume you have the same model as in the review. . .)
A valid assumption.
UnknownSouljer said:I dunno if someone has mentioned this idea, but you might want to concider putting LEDs into the skull on the front of the case to match the one on your sidepanel. Of course this is an opportuninity to use different colored LEDs too, I think red would look really good.
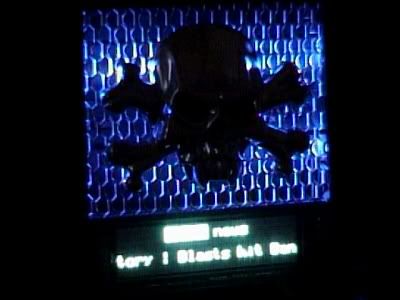
Adding LED's in the front skull's eyes would be overdoing it. I won't be lighting the skull up so its more visible in the dark either; I kind of like the silhouette of a skull and bones over a glowing blue mesh.