![[H]ard|Forum](/styles/hardforum/xenforo/logo_dark.png)
Unfortunately I don't have a complete worklog for this beast but it has plenty of backstory dating way back to before September 2002 which is when I bought my "Darkrider" case (a classic Antec design used by thermaltake and some other manufacturers)
v1.0 specs were:
AMD XP1700 (Thoroughbred "B") @ 2040Mhz (12 X 170Mhz FSB)
1024MB DDR PC3200 @ 340Mhz
Abit KX7333-R
Radeon 8500 Pro 64MB
2 X Seagate Barracuda IV 80Gb
Alpha PAL 8045 Heatsink
Sound Blaster Audigy DE
This pic was from my system in 2003, in that very same 1 year old "Darkrider"
v1.1
upgrades:
AMD XP2500 (Barton @ 2255Mhz)
Abit AT7MAX2
Radeon 9800 Pro 256MB
2 X Seagate Barracuda 7200.7 120Gb SATA
Enermmax 550W

A little over 2 years ago I had my first watercooling setup, and I was pretty unhappy with it, I went through a number of crap upgrades and ended up with a damaged paint job and a desire to go for something a little more extreme.
This is a pic of my system in July of 2005 before the modding began
v2.0
AMD Athlon 64 3500+
Abit AN8 (this mobo sucked ass, totally hated it and was my last Abit)
ATI Radeon X850Pro 256MB
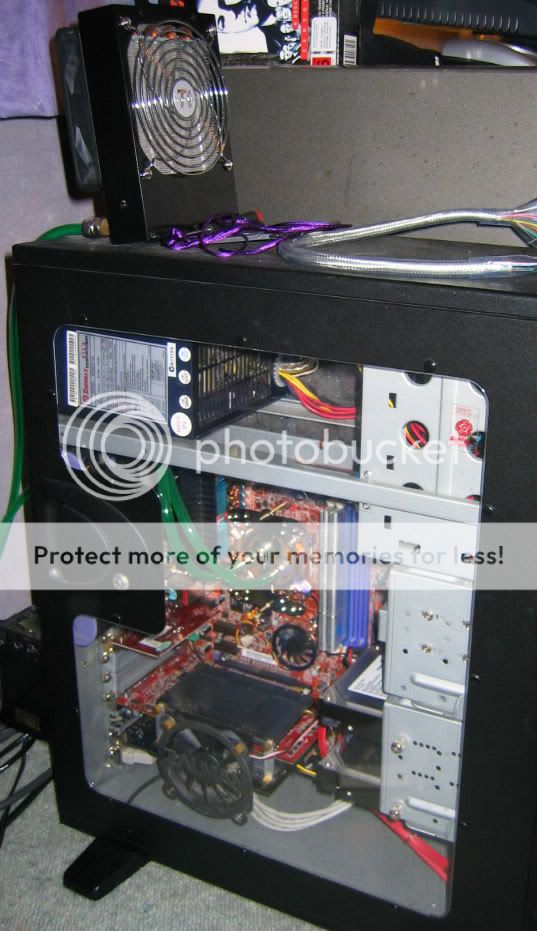
So I started buying my parts, system specs were:
v3.0
Opteron 175
4GB Corsair XMS
DFI Lanparty UT
Radeon X1900XT
I was working at the Ports of Auckland (New Zealand) at the time, so I took my ageing Darkrider and asked them to cut out the hard drive mounts and put a hole in the front of my case, then I took it to my panel beater friend and asked him to paint it inside and out, I have pics, but it is pointless showing them now because the system was fully built already, so now we move on to my current build.
The plan was to take my existing system and haul it in to 2008, I decided to get an Asus Maximus Formula because the P5B-E I have in my server is bullet proof, so why not go for something extreme from Asus and see how it does, the only problem, no one has stock any more, so, I went for the Maximus II Formula at only $15 more.
I already had a Core 2 Duo E6600 in my HTPC rig plus 4GB of Corsair XMS2 that I originally had in my server, here it all is with waterblock installed:

This is my case with radiator installed, I did a bit of research and ended up buying the Swiftech Apex Ultra plus water cooling kit, the idea was to keep the majority of the water cooling contained within the case, after some measuring I decided that I could get everything in along with a couple of hard drives if I remove the hard drive mounting and mount the hard drives to the back of the case, in order to get the power and SATA cables to the hard drives, holes were cut to allow the cables through, then eight holes were drilled to accommodate the mounting holes on the bottom of the hard drives.
The water pump is basically mounted with the provided double sided tape, I had to find a balance between having the tubing bent as little as possible while not interfering with what ever video card I happen to have installed.

These next pics show how the rad is mounted from the front, also you can see my baybus for controlling fan speed


And with the front plastic installed, as you can see it covers up the nasty looking hole quite well.
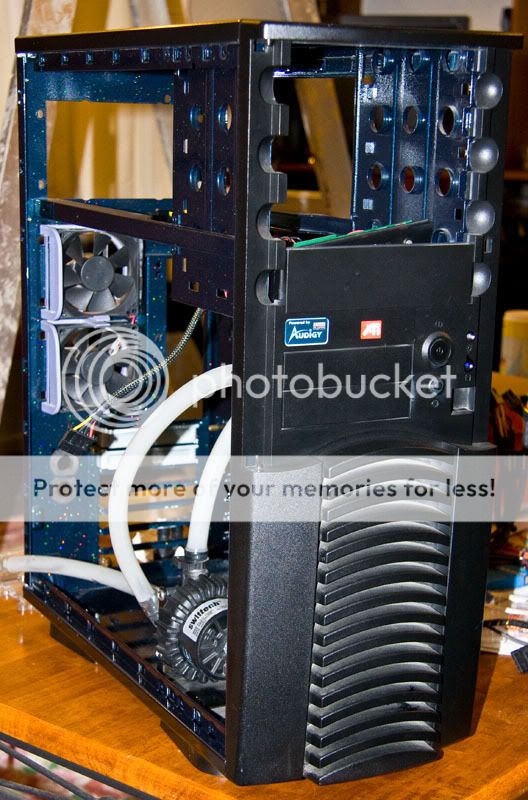
Next step was to install the motherboard and connect it up to the loop:

Then all that is left is mounting the waterblock to my Radeon 4870, and installing it:


All done, once I had primed the watercooling and tested for leaks overnight, all that was left to do was take pics, install windows and then, time for some overclocking!


Managed a pretty sweet overclock too!

-- Project Phobos --
Completion time - over 6 years? latest update build time was about 10 hours.
Final system specs:
v4.0
Silverstone Strider 850W Modular
Swiftech Apex Ultra plus water cooling
Darkrider case
Core 2 Duo E6600 @ 3.6Ghz 450 FSB x 8 Vcore 1.48v, CPUPLL 1.61v
Asus Maximus II Formula
AMD-ATI Radeon 4870 @ 780Mhz core, 1100Mhz Memory
2 X Seagate Barracuda ES ST3250620NS 250Gb SATA2 16MB Buffer RAID 0
Corsair Twin2X 4GB PC6400 800Mhz @ 5-5-5-12 900Mhz 2.15v
--Update 29th of October 2008--
Well, I fried my CPU, not sure how, ended up RMAing the mobo and bought a spanky new Q6600 (E0) and decided to make some changes while I had it in bits.

First order of business - cleaning, I stripped everything back to base and cleaned everything, pulled out my water blocks and cleaned them.

Next - Lapping the water blocks and CPU, I didn't take any photos, only the end result of the CPU and CPU water block.
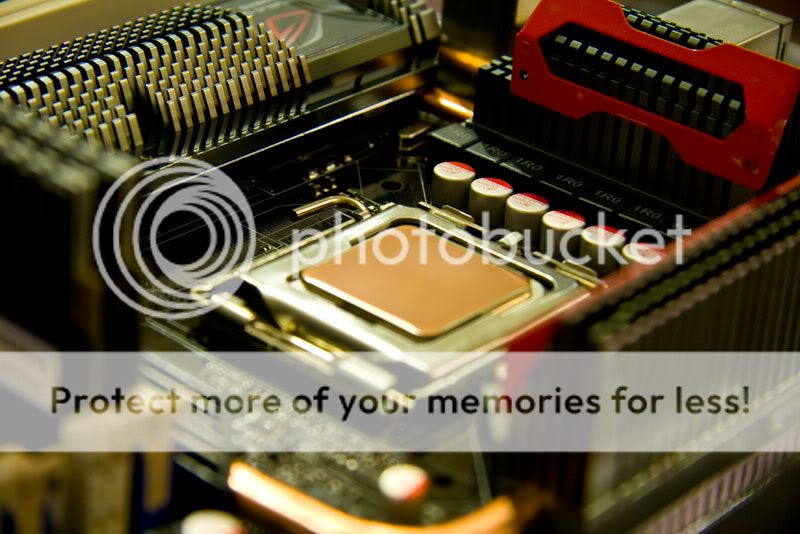

I decided to change the colour of my liquid, so got Feiser One in blue, and changed all the tubing to Tygon 1/2" ID.
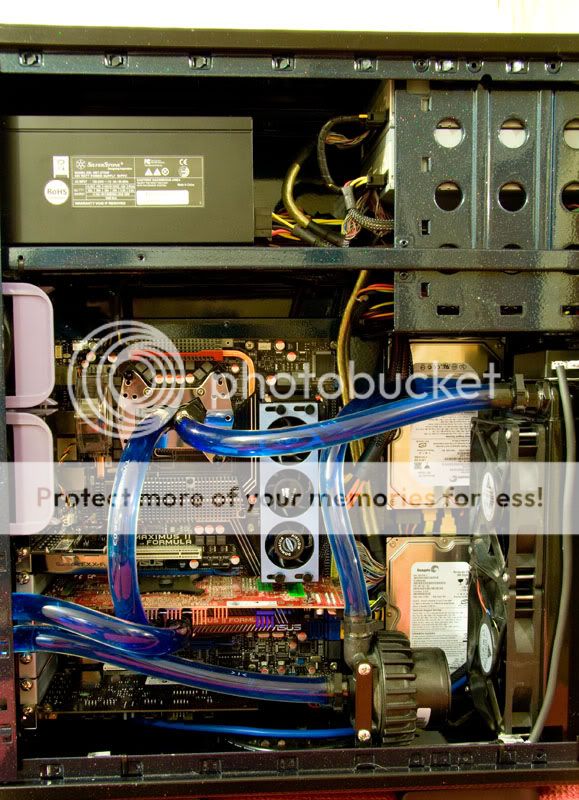
Might as well upgrade the ram while I'm at it, got myself 8GB of Corsair dominator.
You can't really see it here but I shifted the Zalman heatsinks from the ram on the video card to the mosfets and installed Swiftec heatsinks on the ram
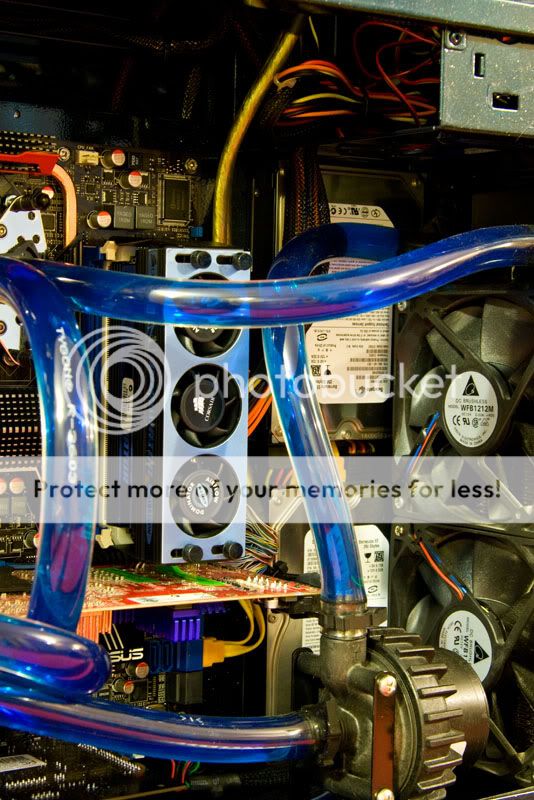
Mounted the UV lights properly (no more hotglue) and here it is all lit up.


And finally, my poor old window was looking pretty beat up, so using the polishing kit I bought to lap the CPU and water blocks, I polished up the window, finishing off with car polish to get rid of the light haze left in the process.

New specs are (Updated 16/03/2009):
V4.2
Silverstone Strider 850W Modular
Swiftech Apex Ultra plus water cooling
Darkrider case
Core 2 Quad Q6600 @ 3.4Ghz 425 FSB x 8 Vcore 1.456v, CPUPLL 1.55v
Asus Maximus II Formula
Asus Radeon 4870 1GB @ 800Mhz core, 1100Mhz Memory
2 X Western Digital RE 500Gb SATA2 16MB Buffer RAID 0
Corsair Dominator 8GB PC8500 1066Mhz @ 5-5-5-12 1096Mhz 2.3v
Soundblaster X-Fi Titanium PCIe
v1.0 specs were:
AMD XP1700 (Thoroughbred "B") @ 2040Mhz (12 X 170Mhz FSB)
1024MB DDR PC3200 @ 340Mhz
Abit KX7333-R
Radeon 8500 Pro 64MB
2 X Seagate Barracuda IV 80Gb
Alpha PAL 8045 Heatsink
Sound Blaster Audigy DE
This pic was from my system in 2003, in that very same 1 year old "Darkrider"
v1.1
upgrades:
AMD XP2500 (Barton @ 2255Mhz)
Abit AT7MAX2
Radeon 9800 Pro 256MB
2 X Seagate Barracuda 7200.7 120Gb SATA
Enermmax 550W
A little over 2 years ago I had my first watercooling setup, and I was pretty unhappy with it, I went through a number of crap upgrades and ended up with a damaged paint job and a desire to go for something a little more extreme.
This is a pic of my system in July of 2005 before the modding began
v2.0
AMD Athlon 64 3500+
Abit AN8 (this mobo sucked ass, totally hated it and was my last Abit)
ATI Radeon X850Pro 256MB
So I started buying my parts, system specs were:
v3.0
Opteron 175
4GB Corsair XMS
DFI Lanparty UT
Radeon X1900XT
I was working at the Ports of Auckland (New Zealand) at the time, so I took my ageing Darkrider and asked them to cut out the hard drive mounts and put a hole in the front of my case, then I took it to my panel beater friend and asked him to paint it inside and out, I have pics, but it is pointless showing them now because the system was fully built already, so now we move on to my current build.
The plan was to take my existing system and haul it in to 2008, I decided to get an Asus Maximus Formula because the P5B-E I have in my server is bullet proof, so why not go for something extreme from Asus and see how it does, the only problem, no one has stock any more, so, I went for the Maximus II Formula at only $15 more.
I already had a Core 2 Duo E6600 in my HTPC rig plus 4GB of Corsair XMS2 that I originally had in my server, here it all is with waterblock installed:
This is my case with radiator installed, I did a bit of research and ended up buying the Swiftech Apex Ultra plus water cooling kit, the idea was to keep the majority of the water cooling contained within the case, after some measuring I decided that I could get everything in along with a couple of hard drives if I remove the hard drive mounting and mount the hard drives to the back of the case, in order to get the power and SATA cables to the hard drives, holes were cut to allow the cables through, then eight holes were drilled to accommodate the mounting holes on the bottom of the hard drives.
The water pump is basically mounted with the provided double sided tape, I had to find a balance between having the tubing bent as little as possible while not interfering with what ever video card I happen to have installed.
These next pics show how the rad is mounted from the front, also you can see my baybus for controlling fan speed
And with the front plastic installed, as you can see it covers up the nasty looking hole quite well.
Next step was to install the motherboard and connect it up to the loop:
Then all that is left is mounting the waterblock to my Radeon 4870, and installing it:
All done, once I had primed the watercooling and tested for leaks overnight, all that was left to do was take pics, install windows and then, time for some overclocking!
Managed a pretty sweet overclock too!
-- Project Phobos --
Completion time - over 6 years? latest update build time was about 10 hours.
Final system specs:
v4.0
Silverstone Strider 850W Modular
Swiftech Apex Ultra plus water cooling
Darkrider case
Core 2 Duo E6600 @ 3.6Ghz 450 FSB x 8 Vcore 1.48v, CPUPLL 1.61v
Asus Maximus II Formula
AMD-ATI Radeon 4870 @ 780Mhz core, 1100Mhz Memory
2 X Seagate Barracuda ES ST3250620NS 250Gb SATA2 16MB Buffer RAID 0
Corsair Twin2X 4GB PC6400 800Mhz @ 5-5-5-12 900Mhz 2.15v
--Update 29th of October 2008--
Well, I fried my CPU, not sure how, ended up RMAing the mobo and bought a spanky new Q6600 (E0) and decided to make some changes while I had it in bits.
First order of business - cleaning, I stripped everything back to base and cleaned everything, pulled out my water blocks and cleaned them.
Next - Lapping the water blocks and CPU, I didn't take any photos, only the end result of the CPU and CPU water block.
I decided to change the colour of my liquid, so got Feiser One in blue, and changed all the tubing to Tygon 1/2" ID.
Might as well upgrade the ram while I'm at it, got myself 8GB of Corsair dominator.
You can't really see it here but I shifted the Zalman heatsinks from the ram on the video card to the mosfets and installed Swiftec heatsinks on the ram
Mounted the UV lights properly (no more hotglue) and here it is all lit up.
And finally, my poor old window was looking pretty beat up, so using the polishing kit I bought to lap the CPU and water blocks, I polished up the window, finishing off with car polish to get rid of the light haze left in the process.
New specs are (Updated 16/03/2009):
V4.2
Silverstone Strider 850W Modular
Swiftech Apex Ultra plus water cooling
Darkrider case
Core 2 Quad Q6600 @ 3.4Ghz 425 FSB x 8 Vcore 1.456v, CPUPLL 1.55v
Asus Maximus II Formula
Asus Radeon 4870 1GB @ 800Mhz core, 1100Mhz Memory
2 X Western Digital RE 500Gb SATA2 16MB Buffer RAID 0
Corsair Dominator 8GB PC8500 1066Mhz @ 5-5-5-12 1096Mhz 2.3v
Soundblaster X-Fi Titanium PCIe
