
Project: Large Wooden Tower - Liquid Cooled

Spotswood

Gawd
Joined
Sep 5, 2009
Messages
711
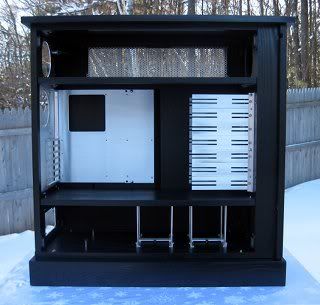
The Large Wooden Tower case build is done:
LeftSideNoDoor-320.jpg


(That particular case was sized to hold an EATX MB and two 120x4 radiators in the top chamber. However, the basic design of the case could be easily adjusted to accommodate 140mm radiators, EVGA's 4-Way SLI MB, etc.)

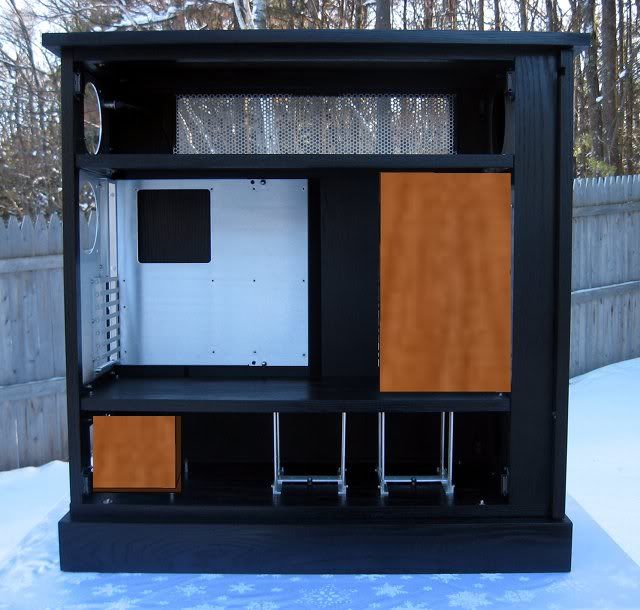
This next phase of the project involves adding the wc-ing goodness. :D But before I can do that the case requires some further customizations involving stealthing the 5.25-inch drive cage and power supply area, as in:
LeftSideNoDoorToDoCovers.jpg


The power supply "cover" is really just a simple two-sided divider.

PSDividerParts.jpg


PSDividerTIs.jpg


AssembledPSDivider.jpg


PSDivider.jpg
 
That's pretty BA, man. I wish there were some pictures from the front though. :D

So, putting the rad's in the top?
 
Ooooooooo water in this baby now??? COOL BEANS!

My god is it going to be heavy :D haha, please once you've completed it stick a picture up of it on the scales!

-- subbed
 
I mounted the quad radiators with a couple of sets of (UN)Designs Rad Brackets.

RadsMounted1.jpg


RadsMounted2.jpg


Eventually there will be two 120mm fans mounted to these case holes that will supply fresh air to the radiator fans (in a push configuration).

RadsMounted3.jpg
 
Nice!...and loud!

Yours just might be louder than mine, and I have my 2 triple rads with 88cfm fans on the outside. :D Still BA nonetheless. ;)
 
The slot for the radiator tubing was cut into the top shelf with a router, guided by a template.

RadiatorTubingTemplate.jpg


RadiatorTubingSlot.jpg


And a mock-up of how the tubing will eventually be routed:
RadiatorTubing.jpg
 
Looks awesome! You have inspired me to at least think of making something nicer looking than the giant junk heap I currently use.
 
The latest task was to fabricate the 5-1/4" drive bay cover. The water cooling pumps, reservoirs and an SSD will all eventually hang off of the cover.

The first order of business was to cut the 5.2mm oak veneer plywood to size. Using my trusty router, this went quickly. (Afterword, I was amazed how badly this cut looks in the photo. Believe me, the final result was a razor sharp edge). There's no better way to cut veneer plywood than with a router.

RouterCutPlywood.jpg


Next up was to cut some holes in the cover to provide a path for the air coming in from the front intake fan. I had an old template lying around the shop from a previous project, but it was awkward to use on such a small piece of material. I ended up using that template to make another template.

TemplateTemplate.jpg


OpticalCoverParts.jpg


OpticalDriveCover.jpg


All that's left to do is apply some stain and finish.
 
Back
Top