Mike_Check
n00b
- Joined
- Oct 31, 2006
- Messages
- 32
Hey guys!
Long time reader for the [H] very, very infrequent poster. Thought I'd try my hand at a worklog to see what all the fuss is about
------
First thing you'll notice is this worklog is a 'Redux', that is I am re-modding a previously modded case. Originally I modded the case because I wanted a more quiet computer as it sat about half a meter away from my bed. A quick (and by 'quick' I of course mean 'length and in-depth') perusal of Silentpcreview.com and around the 'Tubes I found out what needed to be done so off I set on my first modding adventure.
Bearing in mind this was it waaay back ago when I had limited tools (a drill) and little experience (I was like... 16):
Dodgily mounting a 120mm fan in an 80mm fan spot.
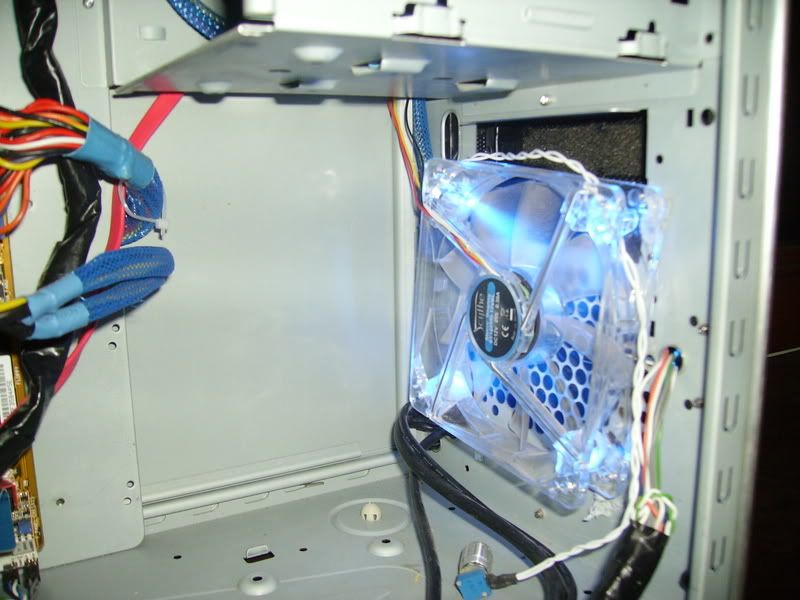
(Yes, that's blu-tack)
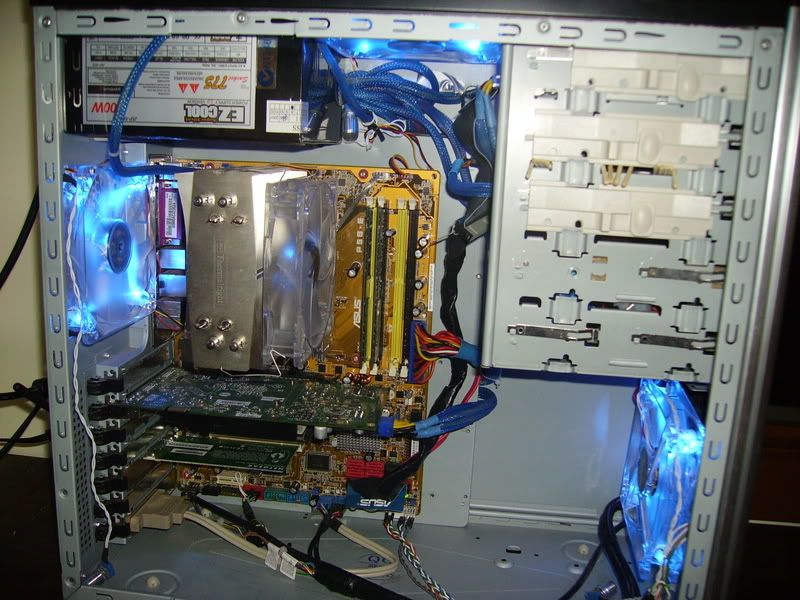
The whole system. Notice the cutout at the top for PSU wire routing. Also a 120mm blowhole was added.
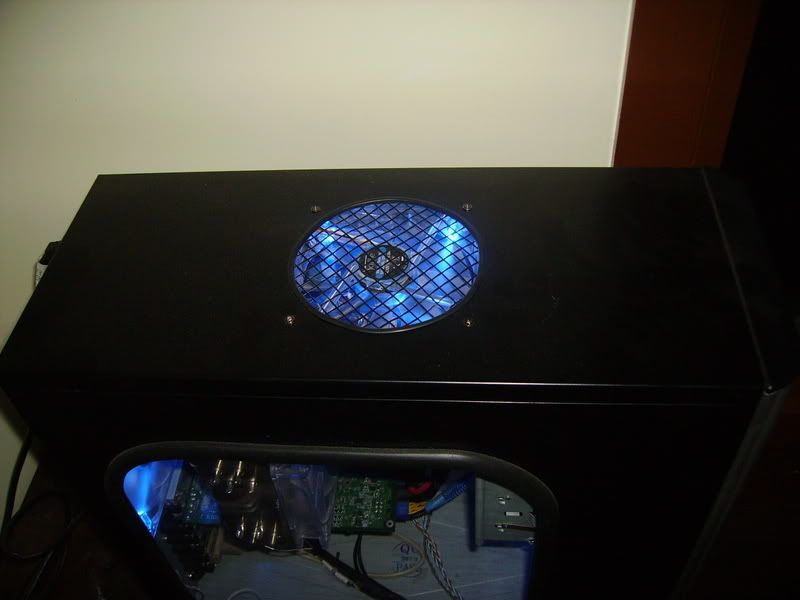
Blowhole up close. I was actually pretty proud of how that turned out.
-----
Now; onto the Redux...
This Chirstmas season I got a lovely, shiny and cordless Dremel from my parents. Any half serious case-modder knows that the number 1 tool by far is a Dremel; so off to work I went cleaning up my previous endevours:
The back grill was cleaned to a proper fit.

I cut out an actual hole for the new 120mm intake and created actual mounts (bye bye Blu-tack!)

I also cleaned up and added a few more cable routing hole now I have more control over what and where I can cut.
PCI-X Connector:

Picked up a few fans a mate was getting rid off for the new look (blue is, like, totally last year):

------
Things to note:
- I don't actually know what system I'm putting in this...
- You'll notice there is no 3.5" bays. I took them out in favour of the 120mm intake.
- Hard Drive(s) get suspended with elastic in the 5.25" bays to eliminate all HDD noise
Things to be done:
- Carbon fiber vinyl (I'm not telling where though!)
- Make ducts for front intake
- Finish off HDD suspension in 5.25" bays
- Finish off cable management cleaning.
------
That's it for now.
Sister's 21st this weekend so gotta go up and see the rents. Next update will be next week sometime.
Until then,
Thanks for reading and criticism/comments are more than welcome.
M
Long time reader for the [H] very, very infrequent poster. Thought I'd try my hand at a worklog to see what all the fuss is about
------
First thing you'll notice is this worklog is a 'Redux', that is I am re-modding a previously modded case. Originally I modded the case because I wanted a more quiet computer as it sat about half a meter away from my bed. A quick (and by 'quick' I of course mean 'length and in-depth') perusal of Silentpcreview.com and around the 'Tubes I found out what needed to be done so off I set on my first modding adventure.
Bearing in mind this was it waaay back ago when I had limited tools (a drill) and little experience (I was like... 16):
Dodgily mounting a 120mm fan in an 80mm fan spot.
(Yes, that's blu-tack)
The whole system. Notice the cutout at the top for PSU wire routing. Also a 120mm blowhole was added.
Blowhole up close. I was actually pretty proud of how that turned out.
-----
Now; onto the Redux...
This Chirstmas season I got a lovely, shiny and cordless Dremel from my parents. Any half serious case-modder knows that the number 1 tool by far is a Dremel; so off to work I went cleaning up my previous endevours:
The back grill was cleaned to a proper fit.
I cut out an actual hole for the new 120mm intake and created actual mounts (bye bye Blu-tack!)
I also cleaned up and added a few more cable routing hole now I have more control over what and where I can cut.
PCI-X Connector:
Picked up a few fans a mate was getting rid off for the new look (blue is, like, totally last year):
------
Things to note:
- I don't actually know what system I'm putting in this...
- You'll notice there is no 3.5" bays. I took them out in favour of the 120mm intake.
- Hard Drive(s) get suspended with elastic in the 5.25" bays to eliminate all HDD noise
Things to be done:
- Carbon fiber vinyl (I'm not telling where though!)
- Make ducts for front intake
- Finish off HDD suspension in 5.25" bays
- Finish off cable management cleaning.
------
That's it for now.
Sister's 21st this weekend so gotta go up and see the rents. Next update will be next week sometime.
Until then,
Thanks for reading and criticism/comments are more than welcome.
M