project "BF1 option"

CapTen

Weaksauce
Joined
Aug 27, 2016
Messages
71

Battlefield 1!
Battlefield Probably one of the most popular games worldwide is the subject of this project. However, on a slightly different KIND.

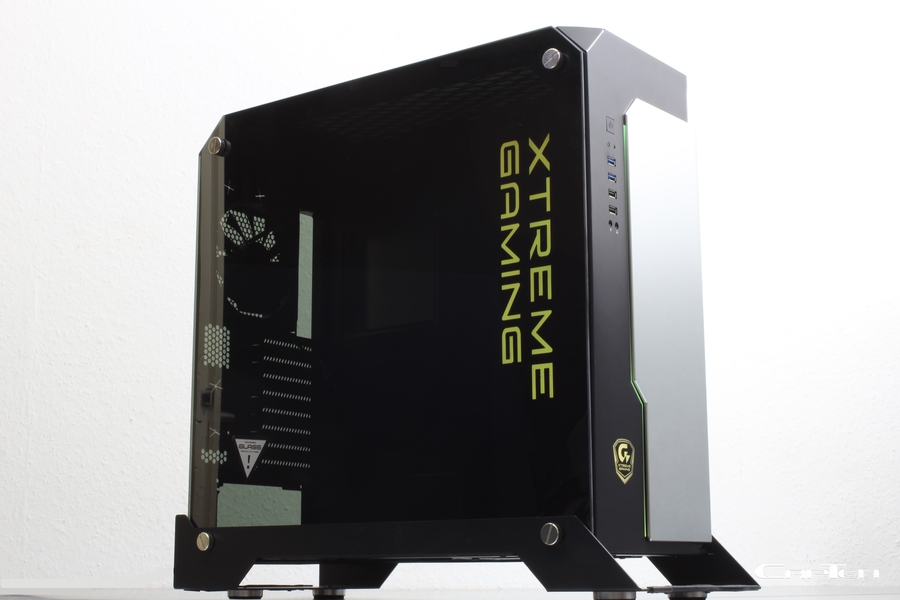
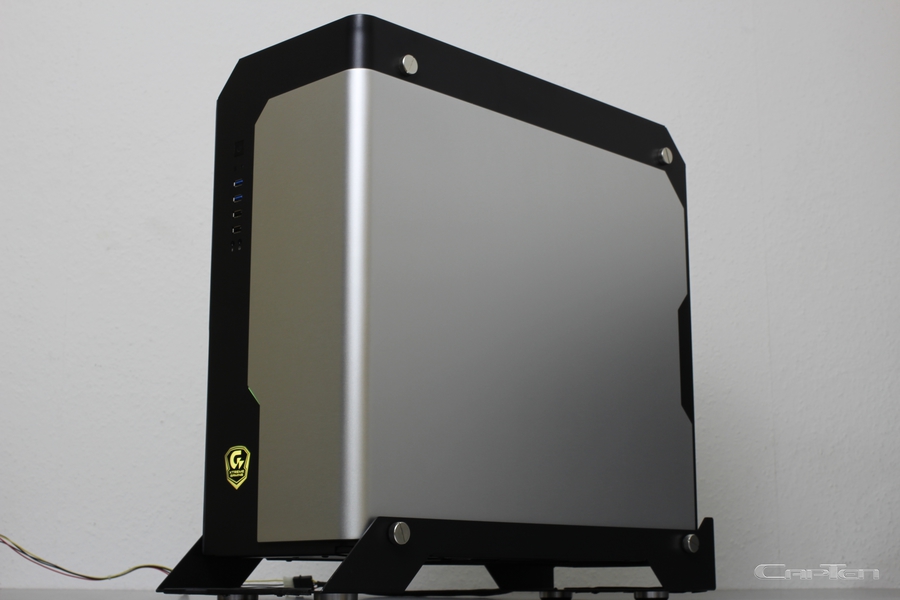
For use comes the Xtreme Gaming XC700W Case.
The case is predominantly in black and has accents in orange and white.
The colors of the Extreme Gaming logo will be reflected in the whole concept.
This will be achieved by fluorescent orange plexiglass.
The interior is as discreet as possible without impairing its functions and with
Plexiglass cladding.
The motto in the interior is always Battlefield 1 and Extreme Gaming!
All cables are made in orange, silver and black.
All fans are color-adjusted.
A UV and white LED lighting should illuminate the interior.
The graphics card is to be installed by means of a Risercard upright.

Now the different kind!
From the outside, the Case will receive the Battlefield 1 lettering from 3mm Plexiglas as well as the
Vehicle and weapon symbols from the game's options menu. These are made from 3mm
Fluorescent orange plexiglas and multilayer in different colors on the case
Attached to achieve an optical depth. Also here will be extreme gaming design
Elements that will connect the symbols.​


Hardware:

CPU: Intel Core I7 6700K
Mainboard: Gigabyte GA-Z170X-SOC FORCE
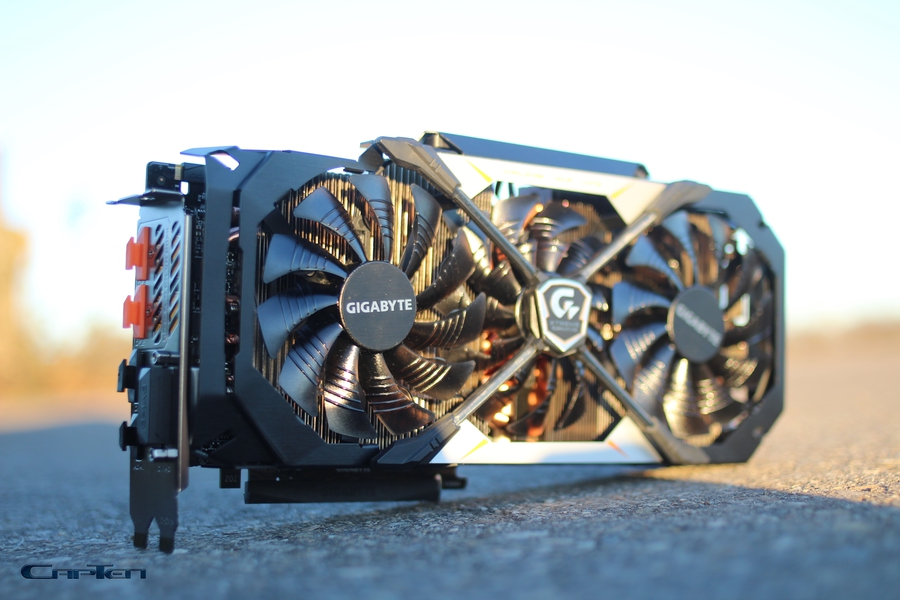
GPU: GeForce® GTX 1080 Xtreme Gaming Premium Pack 8G
Ram: 16Gb DDR4 HyperX Fury 2666Mhz
SSD: 256gb Intel 600P M2
Case:Xtreme Gaming XC700W
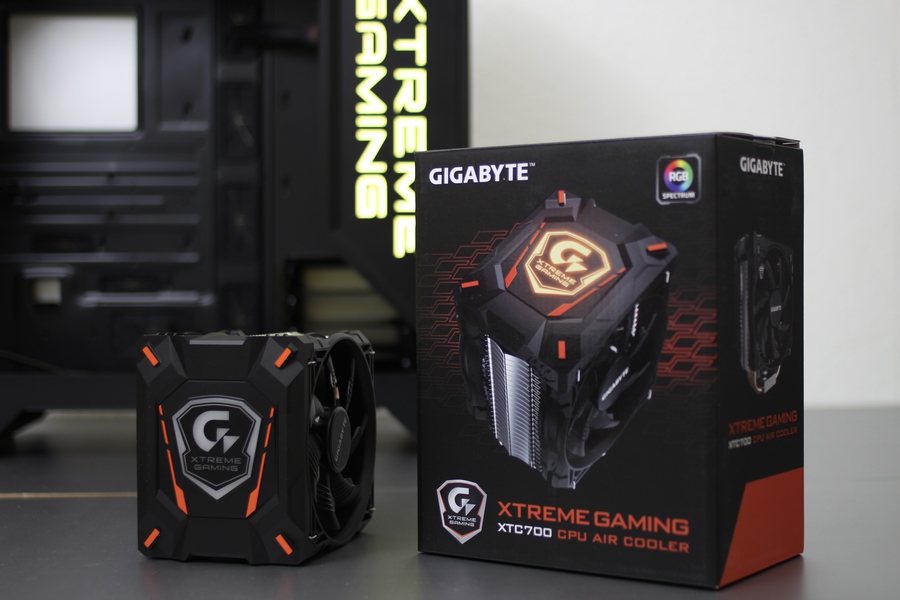
CPU cooler:Xtreme Gaming XTC700
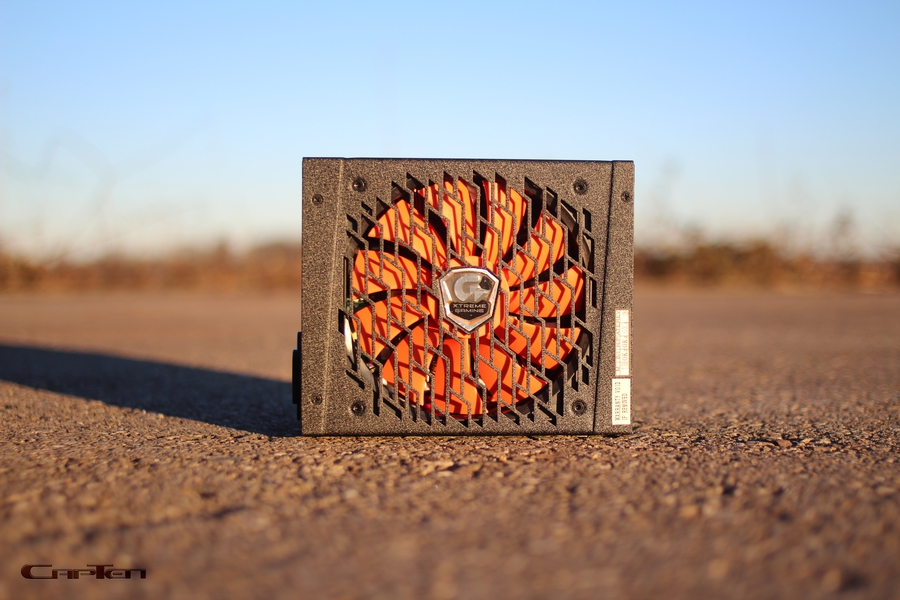
PSU: Xtreme Gaming XP1200M

Peripherien

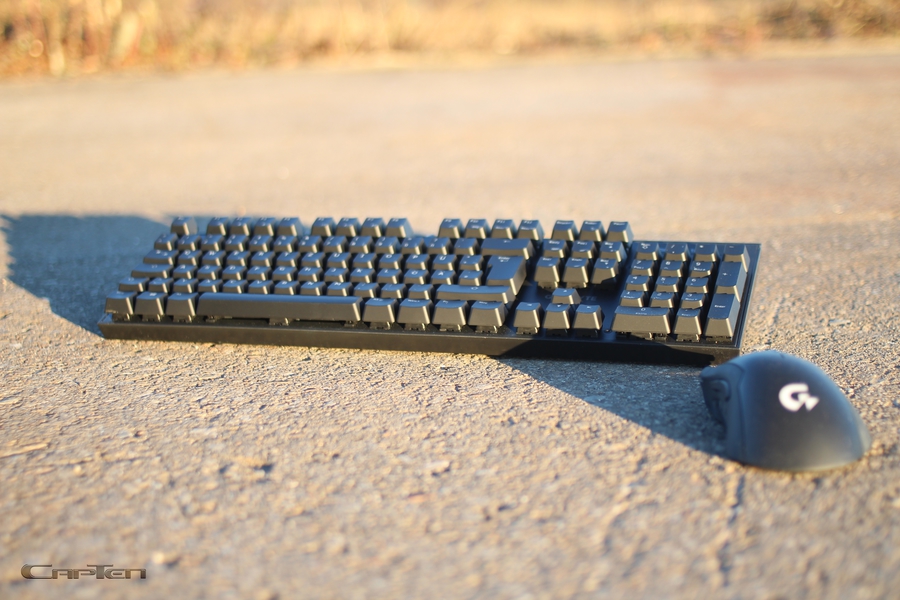
Keyboard:Gigabyte Force K85
Mouse:Xtreme Gaming XM300


First of all, a small preview of some of the components.

img_2055mqsn4.jpg


img_2063l9s3j.jpg


img_2089gfsoz.jpg


img_1795x8suv.jpg


img_1780xfsaj.jpg


img_17715rs0f.jpg


PS: Sorry to all that I have so long nothing of me hear.
After the DCMM I started two new projects (Cheops and Alkesh), I first built a nice premium milling table and a sled for my circular saw,
But as it is just so it comes firstly differently and secondly as one thinks.
The planning for this project started already at the Gamescom, drew itself however still until Christmas. The last part I got now only a week ago.
Yes for the CES, I was just before just synonymous to build something, even got 5 days of time: rofl:
As soon as I get a share for this project I will create, just like for everyone else, worklogs, sorry.
Unfortunately, I will not be able to continue working on Cheops and Alkesh as soon as I have (unfortunately) already projects for the Cebit and Computex to stand but we will see.
I try to get the best out of time and hope you like it anyway: rolleyes:

Greetings Ronny
 

Oh my English is so bad, I hope you understand at least the half. Sorry I give me the biggest effort, but there is at least a nice guide with a lot of Pictures

So, let's go!
Since I still had to wait for the Plexiglas I thought I look times whether I can integrate one of the tanks from the game into the Mod.
As template actually served these tanks


But during the work he reminded me of a dead space mask rather than a tank, so I went to the middle of this tank


So I have got nabbed an old window and flexed a few parts from the Window.
The tank will then be a cover for the CPU cooler.


this I have then temporarily glued together and yes that could be what


So it started right away with the holes for the rivets:D


for the top of the tank, I found a few remnants and small angles for the connection of all parts, I also cut and edged in matching radius.


Now the windows with the appropriate folding shutters marked and cut out


For the other elements I have used a few Plexiglas remainders, these also first cut to the right size and adapted to the optics


on the lower slope of the first tank is located a hemisphere. This I have cut from 3mm Plexi and then smoothed and rounded up I had no skin on my fingers XD


So now I should have everything,


Stop stop there are still missing rivets in the middle


so now I have all the parts Connected together and riveted together


ohhhh yes thats what i like


But something is missing, so I went to the second tank at this point and missed a nice cannon.
Unfortunately, I had until then the mainboard not and did not know how much space me to the window in the case remains at all so I had the point simply ignore.
First times I've looked for a ballpoint pen with a diameter of 8mm and a pair of matching Plexi tubes


I then all so justly sanded and cut as if it really would be a movable cannon.


Besides, I smoothed all the heads of the rivets


Then the folding windows were fitted with mini hinges and with the center punch I center marked all surfaces like bullet holes.


Now all parts were fixed with epoxy glue


Now I have cut out the sides still in the radius of the cpu cooler fan


And already it went to the priming


To adapt the whole later optically to the whole mod some parts of the tank with the fluorescent Plexiglas are deposited.
This results in a smooth transition from the actual "option" concept to the real game.

So what happens next you experience shortly 8)​
 

So it goes on.
While I'm still waiting for the Plexiglas, I've already made all the extension.
If you have any questions, just ask! ;)


Now finally came the charge Plexiglas so I could begin immediately


First of all, I saw all the plates cut to size.
With my new self-built sliding sledge for the circular saw this is really fun and goes much much faster and above all more precisely.
I am finally able to work with the circular saw millimeter exactly :vain:


Then I deburred the plates, for the BF1 lettering, free of film, antistatically cleaned and glued with Acryfix


For the whole pattern I have created stickers and these all glued to the appropriate plates.


Now it was going on and I was able to torment my scroll saws.
Luckily I had still bought massively on different sawblades, since I had often problems.
I cut all the large cuts with a large scrollsaw (Einhell TC-SS 405 pin saw blade)


And all very small things with a Mini Micromot from Proxxon (Typ DS-12)


The reason why I have ordered so much Plexi). First time I have about 2 weeks delivery time and as soon as you have too little material is always what is broken, is enough material because of course not: thinking:: phat:
Okay so stay calm and do not stress


After everything was sawn I pulled all edges with a cutter knife as a pulling blade and all edges deburred and satined


On the base plates, on which all BF symbols are glued, I have chamfered all edges with my self-made milling table :whistle:


Now I have all the parts of the film free, cleaned and glued to the respective plates.
As I had expected, unfortunately not very clean but I get the trick already somehow out. Unfortunately I did not have time to correct this.


At the "E" the glue was probably not yet completely dry grrr


For the Cpu cooler, I have cut out the remains now also small pieces and these from behind glued


Still a very small piece for the cannon tube


For the PSU cover I have also cut a piece, adapted and bent with a self-made Bender (for further information, please check out my Worklog Light Glass)


So for now, it was.
Next, we continue with the bracket to mount the graphics card upright.

greetings Ronny​
 
Hello!

And then:

In the search for a suitable bracket to mount the GPU upright, an HDD bracket had to believe. Comes from some other case kp.
This I then cut to the right size.


as outer frame I used two small aluminum brackets and riveted them.


Then everything primed and painted.


For the riser card, two 3mm spacers had to be attached.


The whole then attached to the case and the rivets still black with a brush applied.
The GPU output I have somehow cut open and the cutting edges with black applied. Unfortunately, I have not photographed or lost the photos. Sorry.


Fits cool like me and stable is also.


So, since the CPU cooler is already looking fat, I came somehow on the messy idea but still tank chains to block. The graphic card had to be used for this. This also offered itself just to XD
So I cut a piece of aluminum sheet


And then this in the form of the tank around the GPU bent


The whole then still blinded from the front


For the chain optics, residues of the orange fluorescent Plexiglas were then used
I had a few 3mm strips which I then only had to shorten to 4cm. The edges I have all slanted on one side. Cut edges, however, remain so, the closest to the chain optics.


Then went back again with massive rivets


Again, I decided to put accents in Plexiglas again. To make the shapes also visible in the dark.


The Noiseblocker and the appropriate color finally came.
This I then cleaned, taped to protecting surfaces, primed with plastic primer and painted.


Now I have mixed a little larger amount of epoxy glue and the Battlefield emblems on the window and the Plexiglas strip on the GPU cover, glued


Now we continue with the inner panel of the case and the appropriate emblems for it but this comes next week. :d​
 
After a few stressful weeks, we will continue on here.

Next I created the inner panel.
For this I cut a white Plexiglas plate, the cable guides sawed and the whole plate bent.


And then the section of the RGB control of the case set


So the cable straight away from the mainboard had to leave as always something from the MB Tray soft


Now I cut out the elements for the inner panel


and this was then glued to the panel.
The PSU cover was foliated and provided with mating elements on the subject


The CPU cooler still needed a flag, but I have one of the Extreme Gaming logos slightly folded (are made of aluminum) and attached to the front of the tank


Now went to the lighting of the case, LED white and UV. All stripes cut to the appropriate length, soldered and sleeved.


The bracket for the high-edge graphics card did not fit at the front and rear and had to be partly rebuilt and modified.
The graphics card unfortunately had not fit under the CPU cooler.
This is when you buy the mainboard as the last one. ;-)


The inner panel was now covered with black foil


And so the whole looks now :D


the same now even for the outside of the Case


Now the CPU cooler and the graphics card needs some lighting.
UV LEDs were used. A few stripes for the background lighting and a LED for the tank gun


For the GPU still built a small bridge on which the LEDs were attached


The whole upper part I liked his dust mat so absolutely not, so I also cut here's a piece of plexiglass handle, have chamfered edges and polished to a high gloss


As a spacer, a few stainless steel door handles had to hold some old cabinet.


The top cover I have still backside with the design of the fan covers foil so that it does not look so boring.


And so the whole thing then attached with orange thumbscrews


On the front of the case came the cover of the Battlefied game


And I am finished. :rock:

Final pics coming soon ;-)​
 
Back
Top