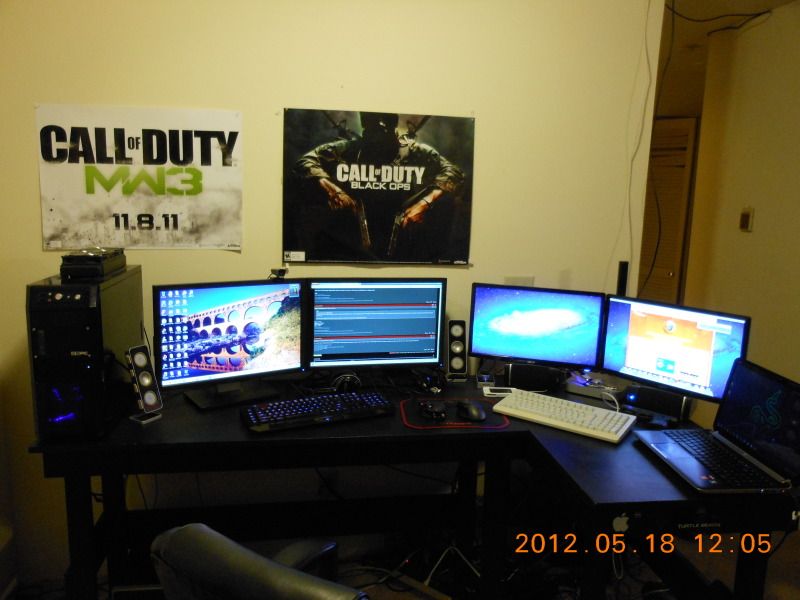
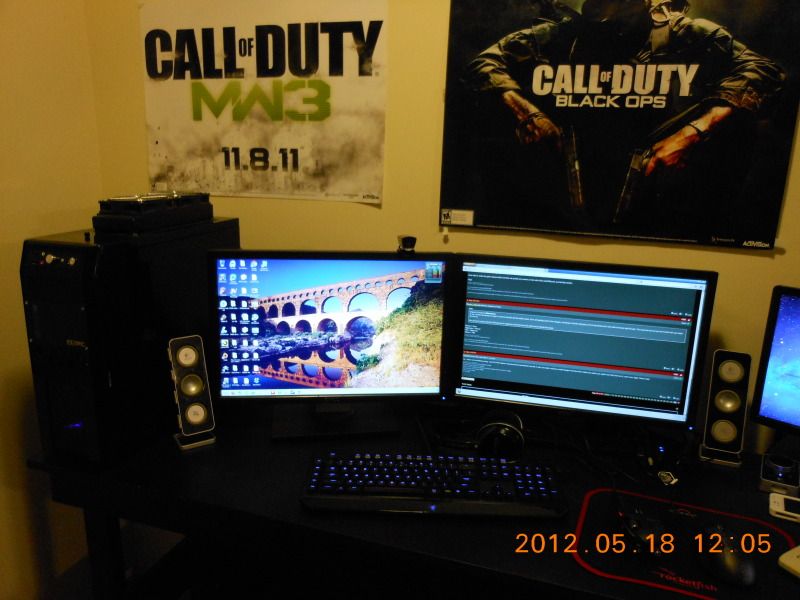
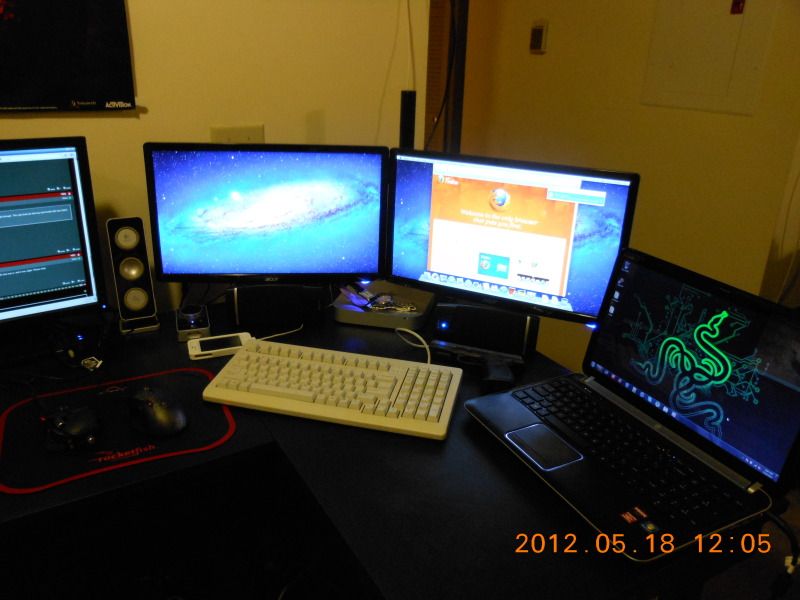
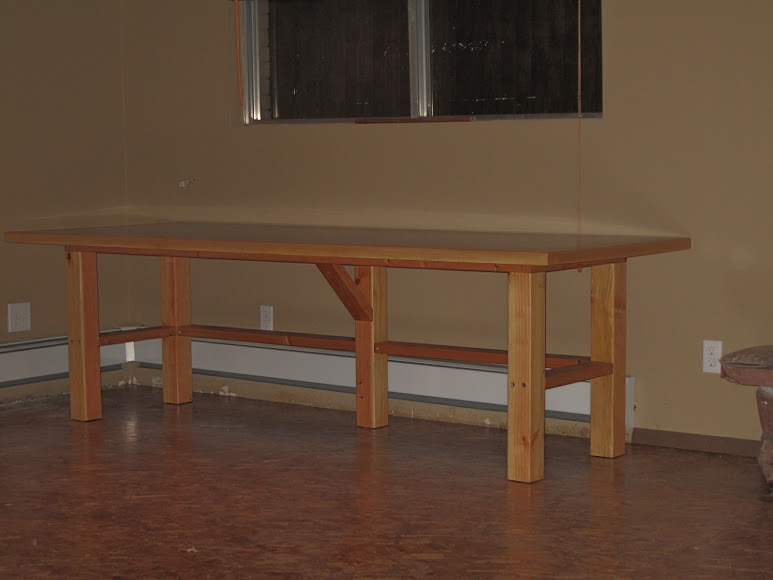
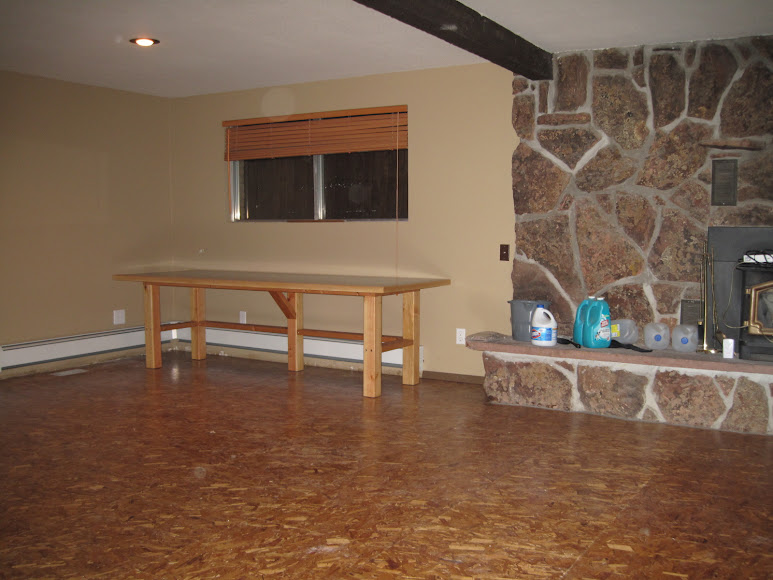
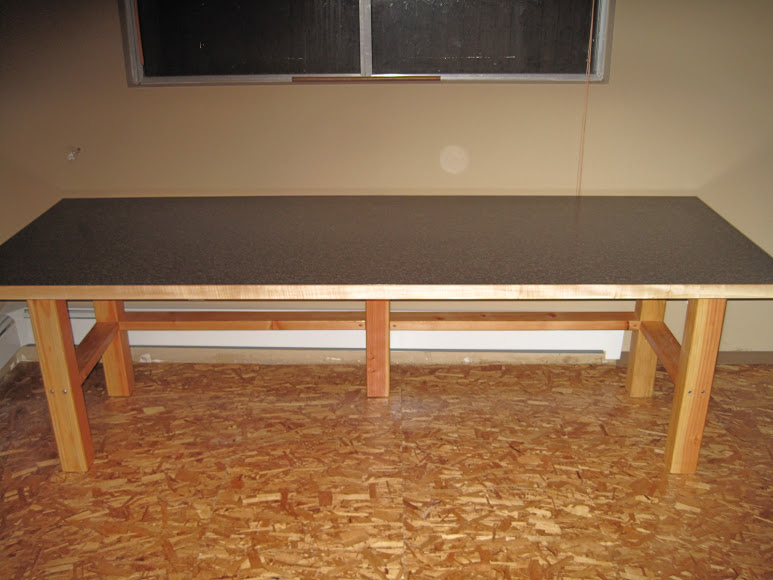
Post your Workstation 2012

Status
Not open for further replies.
its only 20" high??

Yup, it's about the equivalent of 3 36" screens. A 36" screen is actually only 30" long and 19" high. I've left a border of 1" all the way around. I was originally going to paint the border black but I think it ends up looking better this way. I'm also tired of painting and I'd rather just play on it at this point.

I would have gone bigger if I could but my man cave is actually more of a man "corner". I was faced with some space restrictions. That said, it fills my field of vision pretty well since I sit about 5.5' away from the screens. It's pretty damn big when you're sitting in front of it :)
 
Hello All! I've been visiting the [H] since I bought my first Celeron 300A, but this is the first time I have ever posted my rig.

Sorry for the iPhone-quality pics!

img0572aw.jpg

<br>
img0575fx.jpg
 
Here's my setup with the 3 projectors. Thanks goes out to the guys at Home Theatre Shack for helping me with the screen paint. For anyone wondering it's a flat neutral grey (about an N5 on the Munsell scale - pretty much half-way between white and black).

Nope, not wondering what color exactly it is but WHY it's grey and not a lighter color like they usually are?
 
You've got a draconian dungeon theme going on there with the hanging lanterns and the red tapestry curtain... LOL

Nice lookin' setup too.
 
Nope, not wondering what color exactly it is but WHY it's grey and not a lighter color like they usually are?

This model of projector is pretty bright. Given how close it is, a white screen would be blinding. If you want to see something really cool then google "black diamond screens". They look completely black in ambient light but reflect light from the projector really well. I'd love 3 of those but they don't do custom sizes and it would be thousands of dollars.

Anyways, to further answer your question, grey screens improve the perceived contrast of the projector. It's also good for viewing in ambient light.
 
i would like to see a video of that projector setup! looks like a joy to use
 
Shit, I am dumb... I guess I posted in the wrong thread. However, I recently graduated and spend my days looking for work, full time. So, technically, it is my workstation. :p

Don't worry. Most of the "workstations" in this thread are the home setups and gaming stations we all have. You're in the right thread. Great setup btw.
 
well it may not be much but i changed my stuff around... to the left is my gaming/ general computer and the the right is my new mac mini "cheapest one" upgraded to 8 gig of ram.. and my HP DV6 laptop

DSCN0177.jpg

DSCN0178.jpg

DSCN0179.jpg
 
It was only a matter of time before I moved from a dual 30" setup to PLP:

PLP_1.jpg


2 x Dell 2007FP's and a Dell 3007WFP mounted on an Ergotron LX Tripple stand.
 
Nice setup. Is the stand large enough to hold the monitors without overlapping the bezels?
 
well it may not be much but i changed my stuff around... to the left is my gaming/ general computer and the the right is my new mac mini "cheapest one" upgraded to 8 gig of ram.. and my HP DV6 laptop

[]http://i23.photobucket.com/albums/b366/DJ_007/DSCN0177.jpg[/IMG]
[]http://i23.photobucket.com/albums/b366/DJ_007/DSCN0178.jpg[/IMG]
[]http://i23.photobucket.com/albums/b366/DJ_007/DSCN0179.jpg[/IMG]

Looking good Derek.
 
Nice setup. Is the stand large enough to hold the monitors without overlapping the bezels?
The stand is just about wide enough to do it but you will need to mod the outer brackets a little as the screens won't turn enough to make the front of the panles line up properly.
 
Posted a while back, recently moved and just got everything setup again. A little bare but it'll come along with time.

35n3gap.jpg


2dlw0au.jpg


9pxijk.jpg


1z3roua.jpg
 
So far, it's just my desks. I'll show more when I get machines on them. Also, this is one of my first posts ever, here, after lurking for ages. I've received so much inspiration from these threads over the years (not to mention, jealousy -- some of you are sickeningly clean, organized, fashionable, and clever!).

I've suffered $40 banquet tables as my office desk for more fifteen years as I could never find a pre-fabricated solution that fit my needs. Even the expensive $2,500 professional adjustable-height desks that could move from sitting to standing didn't suffice. They were all too small or too weak and didn't support what I thought was a reasonable weight.

Finally, i started looking at people's "workstations". I spent a lot of time here, specifically, digging through every single one of the many thousands of workstation posts in the annual threads. Literally spent an entire week combing through every page of several years of them, here. For awhile, I thought about going with some sort of solid-core door solution. I gave up as finding the size I wanted (96"x36) was difficult and I didn't know what kind of solid door to get (some are solid wood, some are staggered blocks of wood, and some are MDF-cored).

Other options were those Key-Lite aluminum pipe frame desks like Maker had at Makerfaire. Unfortunately, very expensive, not all that huge, and not necessarily beautiful.

Eventually, I came up with an idea. Something that would give me immense size, plenty of leg clearance, and enough durability that it could support hundreds of pounds. Not to mention, it would look decent, too. And here it is, in my family room, which I am turning into a large double-office.

The materials are affordable and the construction simple enough that just photos of the finished product should convey everything.

Dimensions:
3' deep, 8' wide, 27.5" clearance from floor to bottom of desktop, 29" total height.

Construction:
The frame and foundation is Douglas Fir and consists of 5 4x4s and a number of 2x4s on the sides and back as cross-supports for the legs. The top is constructed of 2x4s laid on their sides to form a box-frame and then bisected by a 2x4 for extra support in the center of the desk. An additional 2x4 is used for a 45-degree angle-brace attached to that center piece of the frame for additional (and perhaps unnecessary) support against any future sag or warp.

The desktop, itself is 3/4" plywood sandwiched with 3/4" MDF. A Labradore Granite sheet of formica is placed on top of that and then it is all trimmed around the edges with Douglas Fir. All wood is varnished with clear polyurethane.

Price
Each desk was approximately $250-$300 USD in materials.


G+ Photo Album: http:///ITo5H

One of the finished desks, dwarfing the 30" Apple Cinema Display sitting on it.

IMG_0327.JPG


The other desk, across the room.
IMG_0320.JPG


IMG_0319.JPG


IMG_0321.JPG


IMG_0323.JPG


IMG_0325.JPG


IMG_0316.JPG
 
Last edited:
Looks very nice, have you considered putting adjustable height screws on the bottom of each of the legs? I'm sure they are all the same length but just in case the floor isn't 100% level you an make it perfect :cool:
 
Yup, it's about the equivalent of 3 36" screens. A 36" screen is actually only 30" long and 19" high. I've left a border of 1" all the way around. I was originally going to paint the border black but I think it ends up looking better this way. I'm also tired of painting and I'd rather just play on it at this point.

I would have gone bigger if I could but my man cave is actually more of a man "corner". I was faced with some space restrictions. That said, it fills my field of vision pretty well since I sit about 5.5' away from the screens. It's pretty damn big when you're sitting in front of it :)

ah makes sense. its pretty pimp
 
So far, it's just my desks. I'll show more when I get machines on them. Also, this is one of my first posts ever, here, after lurking for ages. I've received so much inspiration from these threads over the years (not to mention, jealousy -- some of you are sickeningly clean, organized, fashionable, and clever!).

I've suffered $40 banquet tables as my office desk for more fifteen years as I could never find a pre-fabricated solution that fit my needs. Even the expensive $2,500 professional adjustable-height desks that could move from sitting to standing didn't suffice. They were all too small or too weak and didn't support what I thought was a reasonable weight.

Finally, i started looking at people's "workstations". I spent a lot of time here, specifically, digging through every single one of the many thousands of workstation posts in the annual threads. Literally spent an entire week combing through every page of several years of them, here. For awhile, I thought about going with some sort of solid-core door solution. I gave up as finding the size I wanted (96"x36) was difficult and I didn't know what kind of solid door to get (some are solid wood, some are staggered blocks of wood, and some are MDF-cored).

Other options were those Key-Lite aluminum pipe frame desks like Maker had at Makerfaire. Unfortunately, very expensive, not all that huge, and not necessarily beautiful.

Eventually, I came up with an idea. Something that would give me immense size, plenty of leg clearance, and enough durability that it could support hundreds of pounds. Not to mention, it would look decent, too. And here it is, in my family room, which I am turning into a large double-office.

The materials are affordable and the construction simple enough that just photos of the finished product should convey everything.

Dimensions:
3' deep, 8' wide, 27.5" clearance from floor to bottom of desktop, 29" total height.

Construction:
The frame and foundation is Douglas Fir and consists of 5 4x4s and a number of 2x4s on the sides and back as cross-supports for the legs. The top is constructed of 2x4s laid on their sides to form a box-frame and then bisected by a 2x4 for extra support in the center of the desk. An additional 2x4 is used for a 45-degree angle-brace attached to that center piece of the frame for additional (and perhaps unnecessary) support against any future sag or warp.

The desktop, itself is 3/4" plywood sandwiched with 3/4" MDF. A Labradore Granite sheet of formica is placed on top of that and then it is all trimmed around the edges with Douglas Fir. All wood is varnished with clear polyurethane.

Price
Each desk was approximately $250-$300 USD in materials.


G+ Photo Album: http:///ITo5H

One of the finished desks, dwarfing the 30" Apple Cinema Display sitting on it.


Very nice, I would love that much leg room. Not too familiar with google plus but that link seems to be broken.
 
So far, it's just my desks. I'll show more when I get machines on them. Also, this is one of my first posts ever, here, after lurking for ages. I've received so much inspiration from these threads over the years (not to mention, jealousy -- some of you are sickeningly clean, organized, fashionable, and clever!).

I've suffered $40 banquet tables as my office desk for more fifteen years as I could never find a pre-fabricated solution that fit my needs. Even the expensive $2,500 professional adjustable-height desks that could move from sitting to standing didn't suffice. They were all too small or too weak and didn't support what I thought was a reasonable weight.

Finally, i started looking at people's "workstations". I spent a lot of time here, specifically, digging through every single one of the many thousands of workstation posts in the annual threads. Literally spent an entire week combing through every page of several years of them, here. For awhile, I thought about going with some sort of solid-core door solution. I gave up as finding the size I wanted (96"x36) was difficult and I didn't know what kind of solid door to get (some are solid wood, some are staggered blocks of wood, and some are MDF-cored).

Other options were those Key-Lite aluminum pipe frame desks like Maker had at Makerfaire. Unfortunately, very expensive, not all that huge, and not necessarily beautiful.

Eventually, I came up with an idea. Something that would give me immense size, plenty of leg clearance, and enough durability that it could support hundreds of pounds. Not to mention, it would look decent, too. And here it is, in my family room, which I am turning into a large double-office.

The materials are affordable and the construction simple enough that just photos of the finished product should convey everything.

Dimensions:
3' deep, 8' wide, 27.5" clearance from floor to bottom of desktop, 29" total height.

Construction:
The frame and foundation is Douglas Fir and consists of 5 4x4s and a number of 2x4s on the sides and back as cross-supports for the legs. The top is constructed of 2x4s laid on their sides to form a box-frame and then bisected by a 2x4 for extra support in the center of the desk. An additional 2x4 is used for a 45-degree angle-brace attached to that center piece of the frame for additional (and perhaps unnecessary) support against any future sag or warp.

The desktop, itself is 3/4" plywood sandwiched with 3/4" MDF. A Labradore Granite sheet of formica is placed on top of that and then it is all trimmed around the edges with Douglas Fir. All wood is varnished with clear polyurethane.

Price
Each desk was approximately $250-$300 USD in materials.


G+ Photo Album: http:///ITo5H

One of the finished desks, dwarfing the 30" Apple Cinema Display sitting on it.

Those are some awesome looking desks. I think you have just given me an idea for building a custom home theater entertainment center.
 
Very nice, I would love that much leg room.

That was an important goal with this design. Most desks that I found had limited space to move around and the banquet tables I've been stuck with for years, because I couldn't find another solution I preferred, take up a lot of room underneath with the fold-out table-leg structure. I needed to make a desk with maximum possible leg room while still supporting the massive desktop, which I feared would sag, rack, and bow.

I also didn't really want to take up carpentry or woodworking just for a set of desks. All the online plans I found for solid desks and workbenches required some detailed steps and complicated wood-and-glue joints. On the other hand, I didn't want to make a desk that looked like a house-frame -- lots of metal braces and nails/screws sticking out everywhere.

Through some trial and error and some guidance from my neighbor (who is a construction framer by profession), we managed to come up with something that seems to be remarkably stable (and heavy -- probably 250lbs!) *and* roomy!

Not too familiar with google plus but that link seems to be broken.

I just tried to edit it and it seems that [H] is stripping out the part of the URL that prefaces it. They were mostly the same photos as on here though, so no loss, I guess. :)
 
Those are some awesome looking desks. I think you have just given me an idea for building a custom home theater entertainment center.

You can also easily switch out the desktop surface with something of your preference. I went with formica as it's fairly durable, quite affordable, and all it needs is a sanded surface and a layer of contact cement to attach. You could get a sheet of stainless steel, instead, if you wanted. Or get slightly thicker trim around the edges and get a sheet of table glass for the surface.

Hell, another sweet looking option would be to use a sheet of stainless steel on the top and replace the wood trim with stainless steel corner pieces. Then, go buy some copper nails and drive them through the edges of the stainless steel desktop for a really beautiful contrast and a solid industrial look. If you call around, you can get a sheet of #3 or #4 stainless steel cut to the right size for maybe $100 to $175.

As these are going to be full-blown office desks, I actually plan to install those IKEA wire organizing baskets everyone loves in the back. The desk is so long that it could easily hold more than three of them, but I'm going to install two per desk - side by side. I thought about drilling some holes in the top for cable management, but with the size and the completely open back, I figured it'd look better without that. I may also decide to cover the back with peg-board at some point for further organizational options . . . though I may also change my mind about that, because I think the desks look sleek and very open/airy as they are (which did surprise me, considering the blocky construction we used, full of 4x4s and such).

Anyway, hope to see your finished product if you follow through with your project!
 
is that a particle plywood floor with finish :eek:

Stole the though out of my head. My brain hurts. I like it but you would need to sand and coat that a million times to make it smooth.

It's DriCore sub-flooring. It's a treated OSB with a raised rubber backing on the other side for moisture resistance. It's ideal for below-level floors and concrete (of which this room is both). When I bought this house two years ago, I gutted the basement and family room, which both had half tile and half carpet. For the basement (now home theater), I used DriCore. I liked it so much that, a year later, I put it in the family room, too (partially because I liked it and partially because I was getting tired of bare concrete!).

It's a little spendy, but I didn't want carpet, I didn't trust a hardwood floor on sub-level concrete, and I didn't want tile. Didn't leave me with too many options. I wanted a hardwood look, but not the hassle of hardwood (not just the moisture issues, but maintenance in an area that might have a lot of office chairs and foot traffic).

I don't know what most people would think of it, but I like it. Of course, I tend to be more utilitarian than the average person, too. If I could have found a reasonably priced alternative that wasn't solid hardwood flooring, carpet, or etched concrete (awesome, but cold!) -- I'd probably have considered it. :)

The benefits of it are:

1) Any moisture through the concrete shouldn't cause any problems.
2) Since it's raised slightly from the concrete and promotes air-flow, it's a few degrees warmer on the feet.
3) It conducts bass fantastically (in fact, I originally discovered DriCore on AVSForum, where a number of home theater enthusiasts used it for their rooms).
4) It's strong - supposedly holds 4,000lb/sqft.
5) It's a subfloor. So, while I can paint or varnish it (I did several clear poly coats), I can change my mind later (especially if I have to sell the house and I don't think others will appreciate the look as much as I do) and put a carpet on it. Or vinyl. Or engineered hardwood.
6) It was super easy to put in. Leave a 1/4" gap all around the perimeter for air-flow, start laying it left to right with the tongue-in-groove 2'x2' tiles using a rubber mallet and a block of wood, use provided rubber shims to level it out where needed, cut to fit for odd areas and you're done. 500sqft took about one day. Then a very light sanding and several coats of poly over the course of the next few days.
7) I no longer worry about the 80% humidity stormy-days here in Denver, the issues of a 40yr old house with subfloor concrete and moisture, or the humidity from my evaporative cooler in the summer. :D

There are other similar flooring solutions to this that accomplish the same thing, such as Delta FL (it's basically just the plastic/rubber underside that is on DriCore, but in a sheet/roll form without a wood surface) and a lot are probably cheaper. At the time, DriCore was the only option I found and since I used that in the home theater, I figured I'd use it in the family room/office, too. The rest of the house (hallway on the top floor and the main entry room) are both hardwood. Probably installed when the house was built and okay, but not in perfect condition.
 
Last edited:
Stole the though out of my head. My brain hurts. I like it but you would need to sand and coat that a million times to make it smooth.

no you lightly sand it. I have finished garage shelving the same way, then POLY POLY POLY, maybe some sealer first

It's a little spendy, but I didn't want carpet, I didn't trust a hardwood floor on sub-level concrete, and I didn't want tile. Didn't leave me with too many options. I wanted a hardwood look, but not the hassle of hardwood (not just the moisture issues, but maintenance in an area that might have a lot of office chairs and foot traffic).

I don't know what most people would think of it, but I like it. Of course, I tend to be more utilitarian than the average person, too. If I could have found a reasonably priced alternative that wasn't solid hardwood flooring, carpet, or etched concrete (awesome, but cold!) -- I'd probably have considered it. :)

The benefits of it are:

1) Any moisture through the concrete shouldn't cause any problems.
2) Since it's raised slightly from the concrete and promotes air-flow, it's a few degrees warmer on the feet.
3) It conducts bass fantastically (in fact, I originally discovered DriCore on AVSForum, where a number of home theater enthusiasts used it for their rooms).
4) It's strong - supposedly holds 4,000lb/sqft.
5) It's a subfloor. So, while I can paint or varnish it (I did several clear poly coats), I can change my mind later (especially if I have to sell the house and I don't think others will appreciate the look as much as I do) and put a carpet on it. Or vinyl. Or engineered hardwood.
6) It was super easy to put in. Leave a 1/4" gap all around the perimeter for air-flow, start laying it left to right with the tongue-in-groove 2'x2' tiles using a rubber mallet and a block of wood, use provided rubber shims to level it out where needed, cut to fit for odd areas and you're done. 500sqft took about one day. Then a very light sanding and several coats of poly over the course of the next few days.
7) I no longer worry about the 80% humidity stormy-days here in Denver, the issues of a 40yr old house with subfloor concrete and moisture, or the humidity from my evaporative cooler in the summer. :D

if you decide to cover it, look at cork tiles. softens your steps, mold/mildew resistant

dri-core is very nice stuff

i got a better one

7248428650_0f615e20e7_c.jpg

very nice
 
Status
Not open for further replies.
Back
Top