Ok I think this project is along far enough now to not be vaporware so I thought i'd give the overall idea and post some images [will post more later].
I just upgraded to a pro account at photobucket so images shouldn't be an issue where they are hosted as stated in the FAQ.
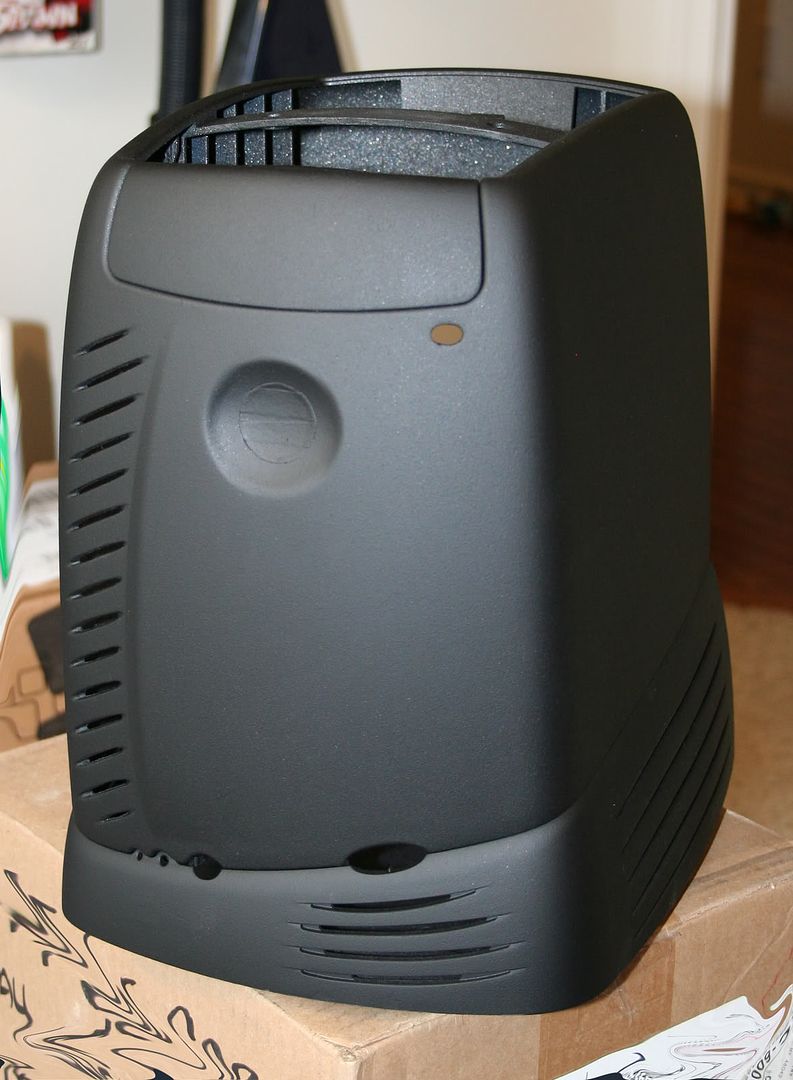
So to summarize.. i'm taking this:

and modding it into this as seamlessly as possible:

Not my links because i don't have any stock pics before modding. Sorry.
Also this is an xbox 360 mod using a computer case.. technically its computer related but i leave that up to the mods to decide. I felt some of the people here would get a kick out of this [hopefully]. The main goal is to integrate it with the use of some soldering, desoldering, switch re-placement, and an integrated power brick IN the case. I have also added cooling enhancements such as the 12v mod [not finished], 5 x 40mm case fans to be added as intake, x-clamp mod, some exhaust fans, and I *should* have a fan per heatsink once this is all done with as well. the best part out of all of this is that I've started all of this with a Red Ring of Death console that i bought for $50 and fixed with the x-clamp.
And I am a very busy man so if updates don't come as often as some would like feel free to ping me and encouragement is always welcome. I mod a ton of things at once, whether it be computers, game consoles, paintball guns, etc. so I basically pick which one i want to work on that night. Community push can help determine that.
Ok without further delays here are some started pics and i'll describe the progress you don't see [earlier work].


The ring of light board was removed from the motherboard and extended using wires in sleeving. Hot glue serves as an aid in keeping those connnections soldered. I changed the LEDs on the ring of light to blue and also still have red for error LEDs [hope i never see them again].
The dvd eject button was removed from the board and will be under the dvd drive tray cover.
The RF input receiver was also desoldered and moved. The goal here is to cut both of these and use 3-pin fan connectors so they are capable of being removed. Basically i want to be able to take this xbox motherboard out of the case without having to un-glue everything.
The ring of light board has a white cover that goes over it and that will be superglued to spacers that are super glued to the inside of the button that was mounted in the front of the O2 case. Basically this means when i want to remove the motherboard i can simple unhook the ROL board from its clipped on cover and it comes right off.
I've dremeled out some fins in the front of the case that are not finished. They look rougher than they are. These are for the 4 stacked 40mm x 10mm fans i have to mount in the front of the case. The fifth case fan will go where the stock o2 speaker was down in the front bottom right. Its a 40mm x 20mm fan. These are all quiet and move very little air, but a little air is better than the no air the stock 360 has for intake.
The rear fans will most likely be swapped out for some 80mm enlobal enermax fans, but i've not tested that yet.
The indents on the side of the case for the original sound board connectors [the hole on the left side of the case] have been filled with milliput and sanded smooth. The USB connectors and controller connectors will be moved to this location at a later date via some more wires.
Oh, i also fixed the stuck DVD drive this console had originally too by super gluing some cardboard [non-corrugated] onto the magnet. Works fine now. This console really was in bad shape when I got it.
The final exterior of the O2 will be painted black with Alsa Soft Touch Clear sprayed on if all goes according to plan, too.
I'll update more when i get home and pull some pics off the camera and upload them.
Hope this interrests some of you and I hope it qualifies to be in this section of the forums. I would rather post this here than on the 360 forums elsewhere to be honest.
So far i've ran into numerous problems with desoldering that pics can't describe.. let me just say that lead free solder SUCKS and it should never be used IMO. I've got to invest in a $300+ soldering station now just to finish desoldering so i don't damage anything else.
I'm no Ben Heck so its possible this whole thing doesn't work when its done lol. But there's no fun in not trying. I had one soldering accident thus far but the console still boots fine so.. crossing fingers.
I am looking for ideas for the stock O2 buttons on the bottom.. i'd like to use them to be honest. There were two volume buttons on the right hole, an LED on the far left, and two more buttons in between [or two LEDS and one button.. cant remember]. I was thinking of maybe covering up the hole i drilled for the dvd eject and putting it down there, but i'm clueless for the rest. Any ideas would be nice. Otherwise thats a ton of milliput to cover them all because i'd hate to just leave them in non-functional.
L8r
I just upgraded to a pro account at photobucket so images shouldn't be an issue where they are hosted as stated in the FAQ.
So to summarize.. i'm taking this:
and modding it into this as seamlessly as possible:
Not my links because i don't have any stock pics before modding. Sorry.
Also this is an xbox 360 mod using a computer case.. technically its computer related but i leave that up to the mods to decide. I felt some of the people here would get a kick out of this [hopefully]. The main goal is to integrate it with the use of some soldering, desoldering, switch re-placement, and an integrated power brick IN the case. I have also added cooling enhancements such as the 12v mod [not finished], 5 x 40mm case fans to be added as intake, x-clamp mod, some exhaust fans, and I *should* have a fan per heatsink once this is all done with as well. the best part out of all of this is that I've started all of this with a Red Ring of Death console that i bought for $50 and fixed with the x-clamp.
And I am a very busy man so if updates don't come as often as some would like feel free to ping me and encouragement is always welcome. I mod a ton of things at once, whether it be computers, game consoles, paintball guns, etc. so I basically pick which one i want to work on that night. Community push can help determine that.
Ok without further delays here are some started pics and i'll describe the progress you don't see [earlier work].


The ring of light board was removed from the motherboard and extended using wires in sleeving. Hot glue serves as an aid in keeping those connnections soldered. I changed the LEDs on the ring of light to blue and also still have red for error LEDs [hope i never see them again].
The dvd eject button was removed from the board and will be under the dvd drive tray cover.
The RF input receiver was also desoldered and moved. The goal here is to cut both of these and use 3-pin fan connectors so they are capable of being removed. Basically i want to be able to take this xbox motherboard out of the case without having to un-glue everything.
The ring of light board has a white cover that goes over it and that will be superglued to spacers that are super glued to the inside of the button that was mounted in the front of the O2 case. Basically this means when i want to remove the motherboard i can simple unhook the ROL board from its clipped on cover and it comes right off.
I've dremeled out some fins in the front of the case that are not finished. They look rougher than they are. These are for the 4 stacked 40mm x 10mm fans i have to mount in the front of the case. The fifth case fan will go where the stock o2 speaker was down in the front bottom right. Its a 40mm x 20mm fan. These are all quiet and move very little air, but a little air is better than the no air the stock 360 has for intake.
The rear fans will most likely be swapped out for some 80mm enlobal enermax fans, but i've not tested that yet.
The indents on the side of the case for the original sound board connectors [the hole on the left side of the case] have been filled with milliput and sanded smooth. The USB connectors and controller connectors will be moved to this location at a later date via some more wires.
Oh, i also fixed the stuck DVD drive this console had originally too by super gluing some cardboard [non-corrugated] onto the magnet. Works fine now. This console really was in bad shape when I got it.
The final exterior of the O2 will be painted black with Alsa Soft Touch Clear sprayed on if all goes according to plan, too.
I'll update more when i get home and pull some pics off the camera and upload them.
Hope this interrests some of you and I hope it qualifies to be in this section of the forums. I would rather post this here than on the 360 forums elsewhere to be honest.
So far i've ran into numerous problems with desoldering that pics can't describe.. let me just say that lead free solder SUCKS and it should never be used IMO. I've got to invest in a $300+ soldering station now just to finish desoldering so i don't damage anything else.
I'm no Ben Heck so its possible this whole thing doesn't work when its done lol. But there's no fun in not trying. I had one soldering accident thus far but the console still boots fine so.. crossing fingers.
I am looking for ideas for the stock O2 buttons on the bottom.. i'd like to use them to be honest. There were two volume buttons on the right hole, an LED on the far left, and two more buttons in between [or two LEDS and one button.. cant remember]. I was thinking of maybe covering up the hole i drilled for the dvd eject and putting it down there, but i'm clueless for the rest. Any ideas would be nice. Otherwise thats a ton of milliput to cover them all because i'd hate to just leave them in non-functional.
L8r
")