• Some users have recently had their accounts hijacked. It seems that the now defunct EVGA forums might have compromised your password there and seems many are using the same PW here. We would suggest you UPDATE YOUR PASSWORD and TURN ON 2FA for your account here to further secure it. None of the compromised accounts had 2FA turned on.
    Once you have enabled 2FA, your account will be updated soon to show a badge, letting other members know that you use 2FA to protect your account. This should be beneficial for everyone that uses FSFT.

Knight Rider CWC

marquee

Limp Gawd
Joined
Dec 13, 2005
Messages
158
Let me give you a little background story on Knight Rider CWC. Knight Rider is referring to the old show Knight Rider with the car call K.I.T.T
The case was started as a school project that I can do anything I want as long as I can relate it back to design process so I grasped this chance to mod and get marks.

The case will be all black panels, candy red chassis and peripherals accented with candy red. My original idea called for a tail pipe out the side of the case. But I am scraping that. I am going to do a nice window.

So you might be asking what CWC mean. CWC is a project that was started for school this year, and basically designed my own water cooling system. Other then the pump it was suppose to be custom. I started design on the water block and kind of came to a road block when I needed it CNCed. I was also suppose to make a custom res, and in line water filter. But now I am going to stick to getting the water block done on a drill press. Although recently a few people have approached me to CNC it for me but they have been a little slow on replying back.

This summer I pledged to finish off Knight Rider case cause last June was one year since it was started. Also I had CWC in my hand and I was like what the hek why not combine the two. So now you got Knight Rider CWC case mod.
BTW CWC=Custom Water Cooling

Case Mod Gods seem to be the heart of many great mods so I present with no farther ado

Knight Rider CWC Project Work Log

Enjoy and please comment it will only make my project only better when I get advise from veterans. But do not think I am a modding noob.
 
I got the camera again

Here I go again.

Here she is, under UV light.

UVgoodness002.jpg


UVgoodness010.jpg


For some reason, again there is crap in my water. I think its crap or might just be foaming up of the water as it gettes air rated. That swiftech stuff made my water kinda foam up. BTW Guy red dye and swiftech addtive dont mix. I added the red dye stuff and still the water is UV green. I didn't know the swiftech stuff had UV dye in it.

UVgoodness004.jpg


This bad boy will be mounted some were for easy acces later.
UVgoodness005.jpg


Test PSU.
UVgoodness006.jpg


As you can see still need to get a screw and nut that are long enough go through the Rad, but that are still thin.
UVgoodness007.jpg
 
Here are some more stuff that I am working for this case.


HDD mounted in PSU box and were PSU use to go.
UVgoodness031.jpg


Remember the side panle I was working on. Well for the LAN I shot it with a coat of black and toke it. But as soon as I got back I started to sand. I stoped though. Will be back at the Bondo thing soon.
4b4c1448.jpg


This is a plexi glass pump cover I am designing. Not sure to use it or not. Also if you can see, because of all the flame talk lately here at wizd forums I have drawen out a nice set of flames that I will cut out if I get a nice scroll saw with super thin blade.
1250coverver2.jpg
 
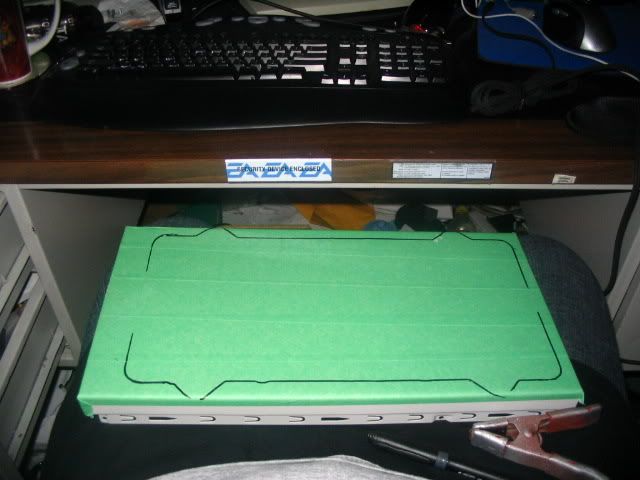
Today I did more some more marking-up and taping-up.
Tapedup003.jpg


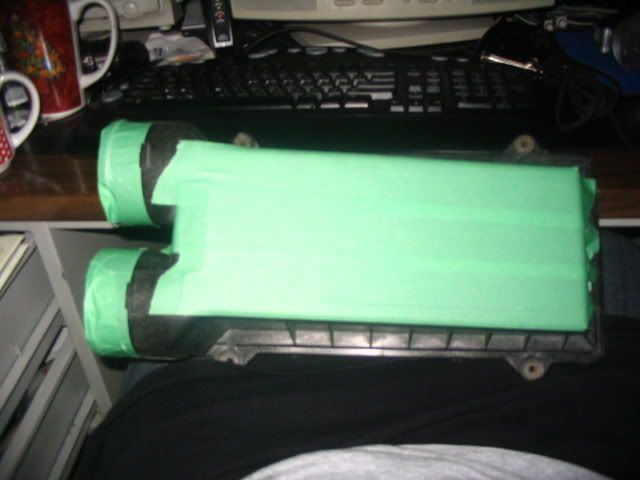
Like I told you the Air cleaner cover is going on top of the top panle as a rad shround.

Here it is all clamped down.
Tapedup006.jpg


Now time for marking.
Tapedup007.jpg


Tapedup008.jpg


The places I missed because of the clamps I used a ruler to finish.
Tapedup009.jpg


You can see that there is a 2cm difference from the edge of the cover to the inside of the cover space.
Tapedup012.jpg


Nice and marked up. Marquee Mods Rules!


Time to game for a while.
Coverdrilling005.jpg
 
Topchrome009.jpg


Topchrome007.jpg


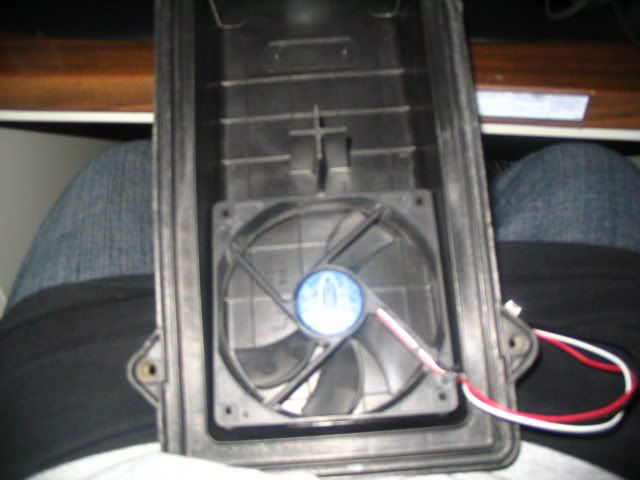
2 cm needs to be cut off because there is a chiped area on the duct. After I trim it down 2cm I am not sure what I might do with it. I might put 80mm fans in them. Or turn it in to a dual res design. With 2 80mm cyclinder like res's. That would look cool. I am also thinking of finishing the end to look like polished metal. Kinda like tail pipe.

All I know for now is I need to trim 2 cm.

My freind said put some tap on the inside and JB weld the endge to finish it but I am not sure that will look nice?
 
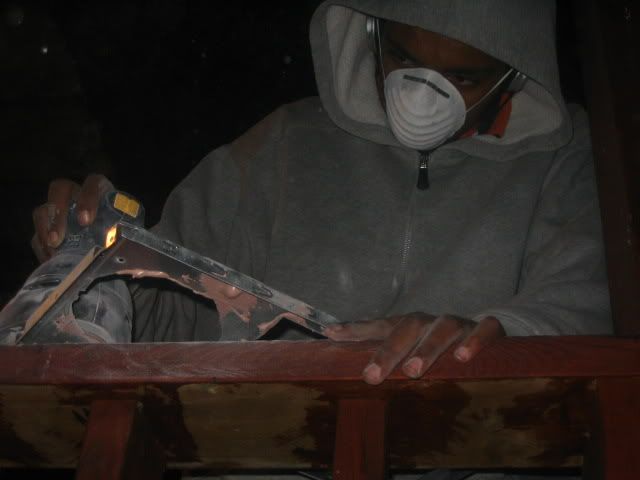
I am back at it guys. Today I am cutting the top panle. This is were the air cleaner cover will go and the the rad also. The air cleaner cover will act like a shroud for the rad also.

My tools and work area

Cut-Moddinganddailylife.jpg


Modding is FUN! Sparks are a moodder's shadow, sparks are a modder's inner fire, sparks are the reason we mod, we are modders, we are flames, but together we are a blazing fire.

97206257.jpg


Getting up and close with the sparks m8s.
2ce29541.jpg

Really close.

97206257.jpg

a937e437.jpg


Just when you think you can finish the cutting with one blade the blade gets smaller and smaller.
a937e437.jpg


I thought I was finished cutting then this. Hanging by a thread.
25e00e5d.jpg


Now time to grrind down the sides.
I used the metal blade first then the stone sander.
59f101eb.jpg


All done for now.

f186e44f.jpg
 
Modder and daily things.

TV and modding tools go together well.

Wolds first TV remote and dremel
9584f695.jpg


Fixing switchs with dremel. The only tool you will ever need as a modder..


Trying to type with dremel. Don't need fingure dremel does it all with more then 50,000 tips.
5501c097.jpg


Modder.


I also bought some stuff to start the Knight Rider Lights.
UVanddaylight005.jpg
 
Ok some more work was done. It was very small but work was still done.

I lined up the holes and started to drill.

This is the mock-up. Just showing the massive amount of air flow.
Coverdrilling014.jpg


Coverdrilling013.jpg


Tools needed to make a perfect hole. Hammer, drill bit, sharp object (nail will do), and clamps. I only used one clamp when marking the drill spot. After marking it, make sure to make it dented with a starter punch (sharp object) so that the drill bits catchs. I like to slowly drill for a nice clean drill hole.

Coverdrilling006.jpg


Mr.Hammer and sharp object. I dont recoumed using dremel bits thoug.
Coverdrilling009.jpg


The right drill bit for the right hole.
Coverdrilling010.jpg


Coverdrilling012.jpg


All done drilling

Coverdrilling017.jpg


Coverdrilling022.jpg
 
This weeks agenda
-cut rear 120mm
-cut front 120mm
-grind down speak mount
-general cleaning of the chasis
-also create template for window shape.

I am so lost when it come to what I am goign to do for the window?


Adendaweek2002.jpg


Adendaweek2007.jpg
 
Today I have so many pics. I didn't do much but it was very documented today.

First thing on todays agenda was taking out the rivets.
Takenoutrivetsandfans001.jpg


There are alot of rivets. I had to take out like7 for the front and like 6 for the back. Plus the front had like 6 more do the drive bay.

Takenoutrivetsandfans015.jpg


I worked in my laps to take out he drive bay rivets
Takenoutrivetsandfans010.jpg
 
All layed out waiting for the dremel. This brought to you by Marquee Mods, your future source of modding products.
Takenoutrivetsandfans017.jpg


Damn I am down to the last few mm of the blade. At least these real dremel blades last longer then the stuiped mastercraft blades.
Takenoutrivetsandfans021.jpg


Since I was low I started cutting the hard to reach area the curves.

Takenoutrivetsandfans022.jpg


This is the difference betwean the three blades I have. The super small one is a used dremel blade.

Takenoutrivetsandfans023.jpg


Grinding time now

Takenoutrivetsandfans026.jpg
 
Toke a break to enjoy the out doors.

Now time to drill the holes. I used a broken fan and carfuly alined the holes and put presure on the fan to keep it in place and drill the holes.

Takenoutrivetsandfans032.jpg


All done.

Takenoutrivetsandfans036.jpg


Here is the worlds first 2" mid tower frame. LOL
Takenoutrivetsandfans041.jpg
 
Today I broke out the bondo and worked on the Chassis. There were a few holes that needed to be filled. Also there are some areas that are shallow and need to be filled.

Here are the two brother before bondo.
Chassisbondo003s.jpg


Areas that will need to be watched
Chassisbondo004s.jpg

Chassisbondo005s.jpg


Chassisbondo006s.jpg


Chassisbondo007s.jpg

Chassisbondo008s.jpg

Chassisbondo014s.jpg

Chassisbondo015s.jpg

Chassisbondo016s.jpg

Chassisbondo017s.jpg


On the first layer I put allot of bondo. Its because I am going to sand it with a machine so I was a little muddled and excusive

BTW this is what happens to $2000 Cisco router when its gets obsolete.
Chassisbondo019s.jpg
 
Ok to day was sanding day. I was also suppost to put anther layer of bondo but I was to lazy. School work lately has been killing me.

Well any way here is todays work.

Dress right guys. In Canada it has started to snow. The snow anit keeping on the ground but its could.

Sanding1005.jpg


Tools

Sanding1007.jpg

Sanding1010.jpg

Sanding1011.jpg


Sanding1011.jpg


When I was finished areas that I will need more bondo work later.
Sanding1017.jpg


Sanding1019.jpg


Sanding1023.jpg

Sanding1024.jpg
 
Today I went out and got a cheap rivetor, some rivets and some plexi glass.

Plexi glass is .220" 24 x 12
Newstuff001.jpg

Newstuff003.jpg


Some of the plexi will be used for the side window which I hope to etch, but also for the pump cover.


You know what this means Starbuck. It means I can make you one 1250 pump cover too.
 
I will post the rest of the work log including the famous Paint guide later tonight. :cool:
 
Awesome work.

Know what would kick butt as an addition? Get a couple 10 element LED bars and (if you know how) put them next to eachother with the short sides touching. You could then wire them up so they look like KITT the car is talking. You could put this on the front of the case, perhaps in a 5 1/4 bay.

Just a thought.
 
Later tonight you will see the design sketchs, is show that I am going to do the KITT car LED chaser in the front.

I know what you are talking about DarkenReaper, But in the future I hope to get a LCD screen and do that talking/controle panle thing. It will look cool. I have so many ideas for this case that I can't do because the money anit here. :(

But dont worry this case will look nice, stay tuned everyone, as this case takes form.
 
Try not to bend the bondoed frame to much. Stuff likes to crack.
 
Last package came. It was suppost to be 1 red cathode tube.
Paintingandpacke001.jpg


But they sent me a whole kit.
Paintingandpacke002.jpg


I went to buy the paint. And this is what greated me at the door. Stuiped snow. I hate this white stuff.
Paintingandpacke004.jpg


Bought 2 part paint system
Paintingandpacke006.jpg


Paintingandpacke009.jpg


Paintingandpacke013.jpg


Paintingandpacke011.jpg


Paintingandpacke012.jpg


Paintingandpacke015.jpg


Paintingandpacke024.jpg


Now that looks so much better

Paintingandpacke026.jpg


Paintingandpacke031.jpg
 
Althought the rist rest looks good, had one problem with paint dripping.
Paintingandpacke022.jpg


Paintingandpacke020.jpg


Paintingandpacke048.jpg


Paintingandpacke049.jpg


Paintingandpacke040.jpg


Time to paint the hub.

Paintingandpacke035.jpg


Paintingandpacke038.jpg


Paintingandpacke056.jpg


Paintingandpacke062.jpg


Paintingandpacke085.jpg


Now the mouse and hub

Paintingandpacke079.jpg


Paintingandpacke088.jpg


Paintingandpacke090.jpg


Paintingandpacke084.jpg


Paintingandpacke088.jpg


Now that came out well.
 
Marquee’s guide to great paint job.

You will need these things.

Sand Paper
180 grit
220 grit
320 grit
400 grit
600 grit
800 grit
1000 grit
1500 grit
2000 grit

Paint
Filling primer*
Normal primer
Paint color of choice
Clear coat

Candy look
Color tint and base coat.

Other things
Tack cloth
Some sort of glove (like rubber gloves)

Explaining My Technique
First off I would like to start by saying that my techniques were created by refining many tactics and methods. Just like many first time modders, I looked for advice by reading step by step guides and reviews on how to improve my methods of work. Then I tried to do one, it was kind of successful, but since then I have come across difficulties and some miner kinks that I have fixed. Note by no means is my guide a perfect one.

Using filling primer
Filling primer, a thicker primer to the can finishes quicker but if used right give even noob a nice paint job. When starting to paint the object, you must sand the surface to get rid of the clear coats or any surface errors. This is a good place to identify any surface dents that might need to be filled and scratches that will need some sanding. For noobs I suggest using filling primer as there first coat of primer. This way the sanding you just did will be easily filled. I found in my experiences as a newbie that my sand with low cores grit was very bad, in terms of leaving to many surface scratches that were hard to fill. Nevertheless after reaching a 220 grit move on to a 320 grit. Remember to make sure you are sanding in perpendicular motion. Meaning, sanding from right to left then sand up and down.

Like so:
First sand /\ \/ second sanding < >

Make sure to sand in alternating pattern. After every coat, sand is opposite direction.

Explaining the Colour Coats
After reaching 400 grit sanding make sure to move on to the colour coats. If you read any paint can it tells you to sand lightly and this really has some weight when painting the colour layers. From here on paint a coat then sand all the way to 100 grit. Then move to clear coat. Spray clear coat then 1500, then if you can get it clear then 2000. After the last layer I don’t like to sand. I personally don’t have much exprince with finishing the paint job, in terms of wax or some sort of after market creams. One thing that did happen to me is once I tried to use a turtle wax finisher after painting my first case the G5 theme, I had used a tremclad silver rust proof paint and the paint started to come off when buffed with turtle wax.

Candy Finish

The candy finish is a fun paint job. For some modders this will be supper easy. For other this will be moderate skill level needed. You start off with these things:

With Dupli-Color MetalCast paint system. You need a MetalCast ground coat. Its silverfish and the paint has some sort of additive that allow the later tint coat to bond together better. This is the thing I love about the Metal cast system. The paint has some sort of additive that if you apply enough paint that the gloss comes to the top and give you a nice smooth finish. So after reach about 800 grit I moved to the ground coat. A thing layer every 5-10min, at least 4 times. Then as paint can says, from the last layer I wait 30min and then applied the tint layer. Same with tint layer, apply 5-10min a thin layer then after about 4 layers stop and let dry.

Wait a couple days, let the paint cure and then apply clear coat. The MetalCast system to tell you the truth though, if applied right the surf might be able to do with out clear coat. But if you want your paint job to last years I suggest to clear coat it for sure.

Secrets of Marquee
I have found that using tack cloth before each coat has dramatically made my paint job better.

Painting inside, in highly ventilated area has also bettered my work. The outside has wind and may thing in the air that get stuck on the paint while paint out side.

Use a clamp and wear glove. Move the object around to paint all the hard to reach areas.

Clear of the area of paint with a cloth to get rit of dust that might get stuck to painted surface.

Prep is everything. The more you sand, the more detailed the sanding is, the better the paint job will look. Take you time. Painting is a art for those with patients not a thing that should be rushed or done to quickly.

Have a nice cold drink will sanding. It will make the time pass faster. Play some music flow to the beat.

My guide is not perfect, no a complete guide. I strongly recommend reading the mnpctech guide.


Here is an overview:


Colour Painting

Sand with 180 grit if needed. 180 is corse and I like to start with 220
Prime
Sand with 220 grit
Prime
Sand with 320 grit
Prime
Sand with 400 grit
Move on to Colour paint
Sand with 600 grit
Colour coat
Sand with 800 grit
Colour coat
Sand with 1000 grit
Colour coat
Sand with 1500 grit
Clear-Coat
Sand with 2000 grit
Clear-coat


Candy Finish

Sand with 320 grit
Prime
Sand with 400 grit
Prime
Sand with 800 grit
Ground Coat
30min Tint colour
Clear coat after cureing

*make sure that you ground and clear coat layer are not sanded off and that the ground and tint are applied nice and smooth. A few layers are required to have nice clear look. Avoid any orange peal effect.

What it look like before
Nov17thLargeupdaye040.jpg


Sanding one
Nov17thLargeupdaye043.jpg


Prime
Nov17thLargeupdaye050.jpg


Sand
Nov17thLargeupdaye054.jpg


Paintingandpacke035.jpg


The paint
Paintingandpacke006.jpg


Get ready for ground coat
Paintingandpacke009.jpg


Ground coat. This is what I was talking about, how the clear coat comes to the top of enought paint is applied.
Paintingandpacke011.jpg


Paintingandpacke012.jpg


Paintingandpacke013.jpg


Paintingandpacke038.jpg


Tint coat, after 30min
Paintingandpacke015.jpg


Paintingandpacke056.jpg


Paintingandpacke062.jpg
 
This will be my last photo update for a while guys. Its a mock-up of the water cooling, lights (UV & RED) and the top panel cover on my G5 chassis. The Knight Rider Chassis will be the same but will future a 120mm rear fan and also a 120mm front fan; Other then that the two chassis will be the same.

Also on the Knight Rider I will be cutting some holes on the mother board tray for the PSU cables and hard drive cables. I want to keep them hidden till they reach there right hardware there supplying with power.

I have I also came up with a new way to mount my hard drives. The new way is not in my sketches but will be soon.

On the sketches you will see the front Bezel design and some other little thing floating around in my mind. Also in the sketch you will see the window etching I want to do.

The case in the dark. Man no X-mas tree for me, my computer will do. LOL

nov20018.jpg


nov20014.jpg


nov20022.jpg


This is were the rad will be placed with some spacers.

nov20026.jpg


I love the look of this dual tube thing. So sexy.
nov20038.jpg


nov20039.jpg


In the end the though the pump will be on its side for some space problems

nov20033.jpg


And also be a few cm above the floor of the chassis

nov20031.jpg

i fixed a tag for you - cheebs
 
Here is a never before seen protype sketch.
KR_sketchs0018.jpg


Also here are some new sketchs that lookd more like what I am going to do.

Here is a sketch were I was playing with some ideas for the front. I was thinking of the front bezel and how it will work.
KR_sketchs0019.jpg


The front and top panel will look like this sketch but I am no 100% sure on the side. I was thinking of adding a cowel to the side but I am sure. Also I am thinking how the 24" x 12" peice of acrylic sheet will make a nice window for the side of teh cause.
KR_sketchs0021.jpg
 
Some good news m8.

I got my stuff today. I have no camera but x-mas came early for me. OMG the Hiper PSU is something special:cool: . From when I opened the latch for the container it came in I knew I was dealing with a quality PSU. The AOC fans are sleeved with a UV red, and UV red heat shrink. I got my black thumb screws and my black fan screws to. I can’t wait to take pics and show the net. Maybe by Monday some time I will get the pics up
 
Yesterday also some good news I got a web cam. Its was for free I got it, and can take pictures up to 640x4.. Which is great because I can start taking pic of the new stuff right away and the stuff I have done. Its not the best when it comes to detail but I am hoping that there is a digital camera under the Christmas tree for me.
 
looks great so far, can't wait to see the finished product
but where the hell is the super pursute mode ??? ;)
 
Maybe in the next mod case which is themed after anther Knight Rider car, KRO will have super prusute mode, what i really want is a watch that can turn on and off my computer, and give my computer commands that are preprogramed.


Here is what many people have been waiting for. All my stuff I order came in and some new tools and stuff for modding also bought.

1_G.jpg


18_G.jpg


19_G.jpg


20_G.jpg


23_G.jpg


24_G.jpg


26_G.jpg


29_G.jpg


36_G.jpg

*******************************************************************


numbered_2.jpg


1)Resin for the fiber glass cloth.
2) 2 can of red tint for candy finish
3) Ground coat for candy finish
4) Mothers metal and meg finish

*****************************************************************
*****************************************************************
*****************************************************************
*****************************************************************

numbered_1.jpg


1)Polishing and buffin pads for sander
2)Scroll saw
3)dremel 60 grit sander
4)L-shaped leveler and right angle
5)Fiber class cloth
6)JB weld
7)5-min epoxy
8)150 grith sanding discs

Also there is some Carbon fiber dremel cut of disc between the polishing discs and 5-min epoxy.
 
Here is one of the mods. Since the Rad will be mounted on the top panel replacing were the PSU went, there need to be a mod there. Right under the rad will be the HDs. Two hard drives for now. and then the Rad will screw into the top panel.

To start I need to cut the old PSU back plate. Then I drilled holes on the bottom in order to later rivet it to a flat sheet. The HD mounts will come out from the sheet metal and screw into the hard drives. When I was searching for a piece of metal is act as a mock up for the HD sheet I found that a CD-ROM bottom plate fit nicely. I am going to find an old CD-ROM with a flat sheet and use it.

1_G_001.jpg


3_G.jpg


4_G.jpg


6_G_001.jpg


7_G_001.jpg


8_G_001.jpg


9_G_001.jpg


12_G_001.jpg
 
Thanks guys. The finished product will make you have to change your paints. :D


Last night I worked a little on the CP ( Control panel). It is designed to look like kits voice and CP. It looks cool.

voice.gif


CP_MS_sketch.gif


1) Squares that light up when switch turns on, IR scanner is the LED chaser, turbo is extra fan
2) Holes for switches, 1/2"
3) Top will be painted but side will have red glow coming out.
4) Side plate will not be painted but will glow red, and will have a boarder etched into it.


***************************************************************
***************************************************************
***************************************************************


Here is a sketch from before to show you were it will go, the colours have been inverted to show the sketch lines better.

31711A_23_Ath64FX_160_10fps.gif


I started with a sheet that was not in use


1_G.jpg


3_G.jpg


Cardboard cut out.

4_G_001.jpg


6_G.jpg


10_G.jpg


11_G.jpg


12_G.jpg


13_G.jpg


It stil needs to be sanded and rounded off though. Not the end of the CP.
 
Today I got all the things need to make the custom fiberglass front bezel and some one said to me, with all this jazz you have in the case, why make the front so plain. Well I said to make it look clean. They said why not do something funky like the rest of the case. I thought for awhile what might I do. Nothing came to mind. I want to stick with my idea of plain front bezel but I wanted to ask the world first. What do you guys think? Plain front bezel or should I go with some sort of design?
 
Back
Top