![[H]ard|Forum](/styles/hardforum/xenforo/logo_dark.png)
Navigation
Install the app
How to install the app on iOS
Follow along with the video below to see how to install our site as a web app on your home screen.
Note: This feature may not be available in some browsers.
More options
You are using an out of date browser. It may not display this or other websites correctly.
You should upgrade or use an alternative browser.
You should upgrade or use an alternative browser.
Frank's 2013 upgrade.......
- Thread starter The1stCAV
- Start date
excited!
Me too - now all I need is a case of Negra Modello and put it all together.

- Joined
- Nov 11, 2009
- Messages
- 8,718
Bring it on!!!!!!!Wra18th - get out of the corner, fidgeting time is now officially over - the build is on!!!!!!!!
I put the case together to get a feel for scale and as I was I kept telling myself - this piece will get black carbon fiber, this one will get red, etc. So I knew it was coming back apart to do the modding to the case. However I had to see it together and get a real feel for what is to come. Then I realized - I am NOT picking this monster up - no its getting casters and going to be on the floor. This means, the rack where it sits now will be moved to the other side of the desk. The desk's corner piece will be removed so the rack can sit there. The side desk will then flip behoind me and I will get a short desk piece to sit to my right, using the corner piece again, but in the corner behind and to my right. This will free up the space to the left that Frank will sit in his new case - I will need to go make him a small platform to roll on to though.
So without more words for the pic browsers, here we go - the beginning of the build. The case is finally in hand.............lets build something beautiful shall we?


So without more words for the pic browsers, here we go - the beginning of the build. The case is finally in hand.............lets build something beautiful shall we?

- Joined
- Jun 20, 2001
- Messages
- 1,044
That's a huge bitch. A sexy huge bitch.
That's a huge bitch. A sexy huge bitch.
No doubt - check the door handles. He is 36 inches high without casters. Those are coming soon too, I just knew it was all coming back apart so I can start to fiber the various parts. But yeah, one huge sexy monster of a case. They did good!
- Joined
- Nov 11, 2009
- Messages
- 8,718

- Joined
- Nov 11, 2009
- Messages
- 8,718


- Joined
- Jul 29, 2011
- Messages
- 7,503
Looking great so far, I followed your last build and this one is shaping up to be even more awesome. I'm not a big fan of "cube" style cases but I think your attention to detail and photography are going to force me to like this one!
Looking great so far, I followed your last build and this one is shaping up to be even more awesome. I'm not a big fan of "cube" style cases but I think your attention to detail and photography are going to force me to like this one!
Well I also wasn't a huge fan of "cube" cases, so I went with a rectangle -
I can say once in hand, wow, what an epic case. I am totally loving this thing so far. It is a MAJOR finger print and dust magnet - so keeping it clean will be a task. I am going to wrap that thing when I go to work in it, too pretty of a surface to let it get scratched while I build in it.Now on to some more goodies.......3M DiNoc Carbon Fiber Vinyl wrapped radiators and a PSU.


Well, I got a suprise when I logged into FB today - East Coast Mods contacted me and wanted to let me know they really liked the innovative stitching I used on Frank's cables in his last iteration. Check out what they said/did, I was humbled and appreciative.

Frank.. We At EastCoastMods thought your innovation should be Noted and Awarded.. We at EastCoastMods have Awarded you and others for innovations in the Modding field.. There will be more but you are one of the Few that have given to the Craft a new perspective on how things can and should be done .. Thanks.. If you would like for us to resend this award just let me know through this PM... Thanks for your Talent and your awesome innovation.. EastCoastMods salutes you....
I decided the black carbon fiber would work best to cover these EK blocks. I wasn't too impressed with the circles and wanted them to match the rest of the carbon fiber wrapped items as well, so here is the outcome of wrapping them with the black carbon fiber DiNoc - it seemed to play much nicer than the red does.


- Joined
- Nov 11, 2009
- Messages
- 8,718
looks sweet!

xbiker321
Limp Gawd
- Joined
- Mar 9, 2013
- Messages
- 272
Wow, this is insane..
Thanks man, I certainly enjoyed the outcome as well.looks sweet!
And "we have only just begun"...........where is that Carpenters CD?Wow, this is insane..
Thanks man, wasn't sure it was noticed with the subsequent postings being flooding in - one day the thread is dead waiting on a case, next thing you know - holy shit he's poting left and right - lol. So that should explain why I love modding so. I think many of those aspects most people that mod or do any hobby like this can relate to. Its just that this particular one I like to do, so this is the hobby that lets me be creative and build what best suites my needs and visions. Love your input hound - stick around, we got lots more to go..................................a "Mountain" to climbLooking fantastic, and I enjoyed your write up of why you build/mod--I too turn to building for inspiration and a mental jump start. Now I just need to get the funds to do more!
This might be a bit of a stretch but bear with me......
I'm not a poet nor am I a fan of most poetry. There are a few exemptions to this, most notably "Charge of the Light Brigade" and "Rime of the Ancient Mariner". My knowledge of the latter is limited to the Iron Maiden song of the same name whic is just about as epic as the poem itself. Anyway.....as we all waited around anxiously for Franks new cage to arrive (especially Wraith huddled in his corner in the fetal position) I thought a few lines from Mariner with a slight change of lyrics would be appropriate. So.....
Day after day, day after day,
We stuck, nor breath nor motion;
As idle as a painted ship
Upon a painted ocean.
Watercooling everywhere
Radiators wrapped in carbon
Watercooling everywhere
No case to be installed in.
My lips were wet, my throat was cold,
The Modello I had drank;
Sure I had drunken in my dreams,
And yet there still was Frank. .
I woke, and we were sailing on
As in a gentle weather:
'Twas night, calm night, the Moon was high;
And Frank I put together.
Thank God MM came through on time with an epic case and the build can now proceed. Hopefully my take on poetry provided a laugh. On with the build!!!
I'm not a poet nor am I a fan of most poetry. There are a few exemptions to this, most notably "Charge of the Light Brigade" and "Rime of the Ancient Mariner". My knowledge of the latter is limited to the Iron Maiden song of the same name whic is just about as epic as the poem itself. Anyway.....as we all waited around anxiously for Franks new cage to arrive (especially Wraith huddled in his corner in the fetal position) I thought a few lines from Mariner with a slight change of lyrics would be appropriate. So.....
Day after day, day after day,
We stuck, nor breath nor motion;
As idle as a painted ship
Upon a painted ocean.
Watercooling everywhere
Radiators wrapped in carbon
Watercooling everywhere
No case to be installed in.
My lips were wet, my throat was cold,
The Modello I had drank;
Sure I had drunken in my dreams,
And yet there still was Frank. .
I woke, and we were sailing on
As in a gentle weather:
'Twas night, calm night, the Moon was high;
And Frank I put together.
Thank God MM came through on time with an epic case and the build can now proceed. Hopefully my take on poetry provided a laugh. On with the build!!!
Braov dude Bravo (wheres that standing ovation emoticon?)This might be a bit of a stretch but bear with me......
I'm not a poet nor am I a fan of most poetry. There are a few exemptions to this, most notably "Charge of the Light Brigade" and "Rime of the Ancient Mariner". My knowledge of the latter is limited to the Iron Maiden song of the same name whic is just about as epic as the poem itself. Anyway.....as we all waited around anxiously for Franks new cage to arrive (especially Wraith huddled in his corner in the fetal position) I thought a few lines from Mariner with a slight change of lyrics would be appropriate. So.....
Day after day, day after day,
We stuck, nor breath nor motion;
As idle as a painted ship
Upon a painted ocean.
Watercooling everywhere
Radiators wrapped in carbon
Watercooling everywhere
No case to be installed in.
My lips were wet, my throat was cold,
The Modello I had drank;
Sure I had drunken in my dreams,
And yet there still was Frank. .
I woke, and we were sailing on
As in a gentle weather:
'Twas night, calm night, the Moon was high;
And Frank I put together.
Thank God MM came through on time with an epic case and the build can now proceed. Hopefully my take on poetry provided a laugh. On with the build!!!
Ahh and it will be just in time for him to make his public debut at Quakecon 2013 - that is the plan atm.Looking great Cav! Can't wait to see Frank in person!


- Joined
- Nov 11, 2009
- Messages
- 8,718
is it hard to remove that stuff?
is it hard to remove that stuff?
Not really - and doesnt mess up what is under it either.
Some more pics I took of the goodies that got carbon fiber wrapped this weekend. It is tough to show details on things like the CPU block because its so shiny, it reflects the seam making it look like it wasn't cut at the junciton, so I took more pics of the block to show the detail of the DiNoc install as well as just some cool shots of them all. Enjoy.........


triviumnate
Gawd
- Joined
- Feb 16, 2005
- Messages
- 852
any updates?
No updates yet - waiting on more Carbon Fiber vinyl to arrive (will be here Thursday) to do the floors of the case in, so I can get started. Also waiting on the bracket (Ordering today once the eBay auction I have going ends in about 30 minutes if the winning bidder is timely on their payment - had another auction end 3 days agao, dude still hasn't paid for that one) I will need to install in the bottom of the Water Barrel 24 for the dual mod top for the dual D5 pumps, then we get rolling again.............
UPDATE: Just made this order - we should be back on track once it and some others arrive

UPDATE: Just made this order - we should be back on track once it and some others arrive
Last edited:
The other thing holding me back was screws for the radiators and fans. I had not gotten around to doing a count to see how many of what I needed. Well then the hunt began to find the screws and in red they were not to be found. So I ended up picking these up at Amazon.....
Socket Cap Screws/Hex Socket Screws M4 X 10MM (Pack of 100)
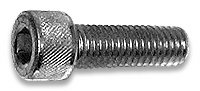
100 screws should barely take care of the 2 radiators in front believe it or not.
Radiator 1: 6x120mm fans @ 4 screws per fan = 24 screws
Radiator 2: 24 Screws
3x120mm Fans in top front of bottom case: 12 screws (I decided the Swiftech rad wasn't going to lend much to performance so why even use it, so its not going in this build)
3x120mm Fans in top front of top case: 12 screws
MO-RA3 Fan Side: 9x120mm fans @ 4 screws each = 36 Screws
TOTAL COUNT: 108 Screws
So knowing I was going to be short on screws, I decided to do something different on the MO-RA3. I know I can use a allen wrench and put it through the top hole if I use a short screw to attach the fan to the MO-RA3, much like I did before. So I also knew I figured out how to make it so I could have full push/pull with 120mm fans front and back on the MO-RA3. Because I had Mountain Mods build the 3x3 array for the MO-RA3 spacing, I can use short screws on the panel side to mount all 9-120mm fans with, leaving the top left and right far corners without a screw. The rest of the screw places on the fans I can use screws and nuts to secure the fans to the case. What this will do is secure all 9 fans to the case, allowing only the four corners to be without screws, then I get 4 identical 40mm screws and I can feed those through the 120mm fans and into the corner threaded holes on the MO-RA3 LT non-fan side. The only fan holes that exist on the non-fan side are the four corners because they are part of the MO-RA3 frame. This will allow me to use those to mount the MO-RA3 against the fans and against the back panel. This solves one side of the MO-RA3 and how I was going to be able to mount push/pull fans on it.
Because the fans I originally purchased for the MO-RA3 were never used and I know I will never get my money back out of them, I decided to keep them. They are gold colored at the moment and I will be painting the fans a metal black color, almost close to the mirror black powder coat - well close I guess as you can get from a spray can. These are non-LED fans and are 38mm thick compared to the standard 25mm thick fan. So these are the ones being secured via the short 10mm screws and nuts to the case. So this reduced the need to purchase 9 more fans as well.
Then on the inside/fan side of the MO-RA 3 LT, I will mount 9 of the other 120mm fans with the 10mm screws as well, however because the MO-RA3 has fan holes on this side the screws will be perfect as well to mount these fans here. I also owned fan covers/grills for the MO-RA3 as shown in the pictures, well because these standard sized fans will be used, the cover will go on flush with the unit and look neat and clean inside the case. This solved how I was going to dress the inside of the MO-RA3 instead of just having a huge block of silver fins of the radiator sitting there. Now they will have 9 fans over them and a cover. This will also provide much better push/pull on all radiators and allow for better cooling I hope.
This means that I needed the following:
Radiator 1: 24 - M4 30mm screws
Radiator 2: 24 - M4 30mm screws
Radiator 3 space: 12 - M4 30mm screws
Radiator 4 space: 12 - M4 30mm screws
MO-RA3 Fan side: 36 - M4 10mm screws
MO-RA3 Non-Fan side: 36 - M4 10mm screws + 36-M4 nuts
M4 30mm Screws needed: 72
M4 10mm Screws needed: 72 + 36 M4 Nuts
TOTAL SCREWS FOR FANS: 144
Looks like I am going to be doing a lot of screwing...........
So I ordered a package of 100 of the 10mm and package of 100 of the nuts for them.
Socket Cap Screws/Hex Socket Screws M4 X 10MM (Pack of 100)
Steel Hex Nut, DIN, M4-0.7 (Pack of 100)
Socket Cap Screws/Hex Socket Screws M4 X 10MM (Pack of 100)
100 screws should barely take care of the 2 radiators in front believe it or not.
Radiator 1: 6x120mm fans @ 4 screws per fan = 24 screws
Radiator 2: 24 Screws
3x120mm Fans in top front of bottom case: 12 screws (I decided the Swiftech rad wasn't going to lend much to performance so why even use it, so its not going in this build)
3x120mm Fans in top front of top case: 12 screws
MO-RA3 Fan Side: 9x120mm fans @ 4 screws each = 36 Screws
TOTAL COUNT: 108 Screws
So knowing I was going to be short on screws, I decided to do something different on the MO-RA3. I know I can use a allen wrench and put it through the top hole if I use a short screw to attach the fan to the MO-RA3, much like I did before. So I also knew I figured out how to make it so I could have full push/pull with 120mm fans front and back on the MO-RA3. Because I had Mountain Mods build the 3x3 array for the MO-RA3 spacing, I can use short screws on the panel side to mount all 9-120mm fans with, leaving the top left and right far corners without a screw. The rest of the screw places on the fans I can use screws and nuts to secure the fans to the case. What this will do is secure all 9 fans to the case, allowing only the four corners to be without screws, then I get 4 identical 40mm screws and I can feed those through the 120mm fans and into the corner threaded holes on the MO-RA3 LT non-fan side. The only fan holes that exist on the non-fan side are the four corners because they are part of the MO-RA3 frame. This will allow me to use those to mount the MO-RA3 against the fans and against the back panel. This solves one side of the MO-RA3 and how I was going to be able to mount push/pull fans on it.
Because the fans I originally purchased for the MO-RA3 were never used and I know I will never get my money back out of them, I decided to keep them. They are gold colored at the moment and I will be painting the fans a metal black color, almost close to the mirror black powder coat - well close I guess as you can get from a spray can. These are non-LED fans and are 38mm thick compared to the standard 25mm thick fan. So these are the ones being secured via the short 10mm screws and nuts to the case. So this reduced the need to purchase 9 more fans as well.
Then on the inside/fan side of the MO-RA 3 LT, I will mount 9 of the other 120mm fans with the 10mm screws as well, however because the MO-RA3 has fan holes on this side the screws will be perfect as well to mount these fans here. I also owned fan covers/grills for the MO-RA3 as shown in the pictures, well because these standard sized fans will be used, the cover will go on flush with the unit and look neat and clean inside the case. This solved how I was going to dress the inside of the MO-RA3 instead of just having a huge block of silver fins of the radiator sitting there. Now they will have 9 fans over them and a cover. This will also provide much better push/pull on all radiators and allow for better cooling I hope.
This means that I needed the following:
Radiator 1: 24 - M4 30mm screws
Radiator 2: 24 - M4 30mm screws
Radiator 3 space: 12 - M4 30mm screws
Radiator 4 space: 12 - M4 30mm screws
MO-RA3 Fan side: 36 - M4 10mm screws
MO-RA3 Non-Fan side: 36 - M4 10mm screws + 36-M4 nuts
M4 30mm Screws needed: 72
M4 10mm Screws needed: 72 + 36 M4 Nuts
TOTAL SCREWS FOR FANS: 144
Looks like I am going to be doing a lot of screwing...........
So I ordered a package of 100 of the 10mm and package of 100 of the nuts for them.
Socket Cap Screws/Hex Socket Screws M4 X 10MM (Pack of 100)
Steel Hex Nut, DIN, M4-0.7 (Pack of 100)
Me too - now all I need is a case of Negra Modello and put it all together.
Awesome job man. BTW Negra Modelo is by far my favorite beer. Good choice bro!
Awesome job man. BTW Negra Modelo is by far my favorite beer. Good choice bro!
Only way to be liquid cooled while building IMO - else I have to go Shiner Bock or Becks Dark...........
More goodness to come - we just hit the old familiar - hurry up and wait moments....oh yeah shit I needed that and that and that - ok order - wait - its here yeah, umm crap cannot do this and that - must order that and that to get this done so that can be done next - (facepalm) never ends...........but we are making progress
I seem to recall a person once told me they liked how I would discuss everything along the way, that when I posted pics I would explain them, not just throw them up. Well apparently I forgot that until now, so I will try to do my due diligence and do the commentary between pics a swell so it’s clear to those who are not fully up on the things and what I intend to use them for can get a clearer mental picture. Those who just like to browse the pretties, carry on as usual - lol.
OK, the below is for the Dual D5 AlphaCool Repack 5.25 Reservoir I have in Frank right now. These are two additional pumps that are going to be used in this build, they will replace the ones in the Repack right now. Those that are in the Repack will be then reallocated to the Bitspower Dual Mod Top Extreme kit that I will mount in the Water Barrel 24 below. Because these are going to be basically hidden in the 5.25" bay, they didn't need as much bling as the ones going into the Water Barrel. So they got a little CF love.


Just a front shot showing the case as it stands at this time. Waiting on the radiator screws which should be here Monday or Tuesday next week. You may see some Glad Press N Seal back there, this is what I will use to wrap the case to help keep it pristine as I work in it. It scratches so easy and grabs finger prints and dust like crazy, so that will be what I use to try to keep the case pretty as I work in it.

Some parts sitting in the bottom of the Water Barrel 24, the MO-RA3 LT rad with its grill cover on, some CF pieces and the thread I hope to use to sew the cables when I get that far. That is stainless Steel fine thread.


Parts waiting to be installed or modded. I have those fans stacked back there that will be painted (see further down) with a black metallic flake paint. Those fans will go between the MO-RA3 and the case panel. I will be painting them in a black metallic flake to basically make them blend in and just be.

This is how the MO-RA3 will go in the case. The fan side will be inside, I will more than likely use 9x120mm Crystal Series Red LED Xigmatech 120mm fans on this side, then cover them with the grill for this rad. This will give light inside the bottom case, and serve as the push fans for the radiator. The back side you see is cut for 120mm fans too. Those are where I will mount the 120mm fans stacked on the desk that are getting painted black. I will leave the furthest out corners unsecured. Those four corners will allow me to put the rad up there and insert longer screws that will allow me to mount that rad up against the thicker 120mm fans at the rear and mount the radiator inside. Those will act as the "Pull" fans.

Here you see the two red CF wrapped radiators leaning in front. This is where the red CF parts will go that I have shown in close ups. The floor of this unit will be done in black CF.

The mighty Watercool MO-RA3 Radiator.I have yet to see how this thing performs. I have owned it well over a year if not longer and still have not put it to use - this time it is going to be used very well and play a key role in keeping things chillin within Frank. Considering its a Watercool product, it has to do good IMO. I mean, Frank is going to be using Watercool Heatkillers for CPU and GPU's - may as well use this rad to keep em cool.


The gold colored fans are getting a hit of some black metal flake spray paint. This is about the same color as the Mirror Black Powder coat of the case. The case is obviously prettier, but it will help these pull fans to blend in with the back bottom panel of the Water Barrel 24 when installed and somewhat allow them to hide between the radiator and the panel.

Now to let them dry so I can come back and touch them up and turn them over.

OK, the below is for the Dual D5 AlphaCool Repack 5.25 Reservoir I have in Frank right now. These are two additional pumps that are going to be used in this build, they will replace the ones in the Repack right now. Those that are in the Repack will be then reallocated to the Bitspower Dual Mod Top Extreme kit that I will mount in the Water Barrel 24 below. Because these are going to be basically hidden in the 5.25" bay, they didn't need as much bling as the ones going into the Water Barrel. So they got a little CF love.
Just a front shot showing the case as it stands at this time. Waiting on the radiator screws which should be here Monday or Tuesday next week. You may see some Glad Press N Seal back there, this is what I will use to wrap the case to help keep it pristine as I work in it. It scratches so easy and grabs finger prints and dust like crazy, so that will be what I use to try to keep the case pretty as I work in it.
Some parts sitting in the bottom of the Water Barrel 24, the MO-RA3 LT rad with its grill cover on, some CF pieces and the thread I hope to use to sew the cables when I get that far. That is stainless Steel fine thread.
Parts waiting to be installed or modded. I have those fans stacked back there that will be painted (see further down) with a black metallic flake paint. Those fans will go between the MO-RA3 and the case panel. I will be painting them in a black metallic flake to basically make them blend in and just be.
This is how the MO-RA3 will go in the case. The fan side will be inside, I will more than likely use 9x120mm Crystal Series Red LED Xigmatech 120mm fans on this side, then cover them with the grill for this rad. This will give light inside the bottom case, and serve as the push fans for the radiator. The back side you see is cut for 120mm fans too. Those are where I will mount the 120mm fans stacked on the desk that are getting painted black. I will leave the furthest out corners unsecured. Those four corners will allow me to put the rad up there and insert longer screws that will allow me to mount that rad up against the thicker 120mm fans at the rear and mount the radiator inside. Those will act as the "Pull" fans.
Here you see the two red CF wrapped radiators leaning in front. This is where the red CF parts will go that I have shown in close ups. The floor of this unit will be done in black CF.
The mighty Watercool MO-RA3 Radiator.I have yet to see how this thing performs. I have owned it well over a year if not longer and still have not put it to use - this time it is going to be used very well and play a key role in keeping things chillin within Frank. Considering its a Watercool product, it has to do good IMO. I mean, Frank is going to be using Watercool Heatkillers for CPU and GPU's - may as well use this rad to keep em cool.
The gold colored fans are getting a hit of some black metal flake spray paint. This is about the same color as the Mirror Black Powder coat of the case. The case is obviously prettier, but it will help these pull fans to blend in with the back bottom panel of the Water Barrel 24 when installed and somewhat allow them to hide between the radiator and the panel.
Now to let them dry so I can come back and touch them up and turn them over.
Last edited:
Matthew Kane
Supreme [H]ardness
- Joined
- Dec 1, 2007
- Messages
- 4,233
Holy shit...Frank just got bigger and better.
I tested some last night on the case - works way better then the mailers. I used to do that and tape it down so the paper would protect, paper rips easy, this stuff doesn't - paper moves, this stuff if you press, is like shink wrap on those areas - I like it so far.I am astonished at what a good idea using the Glad Press and Seal is. I usually use sheets from the local coupon mailers, but this sounds way better.
Holy shit...Frank just got bigger and better.
Oh just you wait - lol, yeah gonna be much bigger and badder
Carbon Fiber Wrapping the exit/pull fans for the bottom/back side of the Water Barrel 24. The screws will be here between Monday - Wednesday, so I should be able to do the full migration over the Easer weekend. So for right now I am preparing all these parts to do the full move from the Corsair 800D to the new case complete with all water blocks, radiators, etc.
So I started wrapping the fans to cover the wires, seeing this is the wire side or the exit side of the air flow.
I figured I would show a step by step basically of what it takes per fan. I start out with a blank fan obviously.

Then I stick a pre-cut sheet of fiber wrap on the fan, but I try not to press it on, just lay it on, it has enough sticky it will stick just fine without me pushing on it.

Then I cut slices from the corners out. This allows the wrap to stretch easier when it has this cut relief in the vinyl, but I take it a bit further.

Once I get the basic trim done, I go for a bit more, to make it stretching into the corners and curves a bit easier.

I then begin stretching the fiber vinyl and forming it around the bends and working it - this is the most time consuming process because it takes a constant flow of warm air and a great deal of "touch" - however touching can get warm, so its a balance between fingers getting too warm and the vinyl getting too cool. However I do not do the corners until I have all the straights done, tucked in, trimmed off, etc.

Once done, I then trim the corners, trace the round of the bend as I trim the top portion of the vinyl. One thing about the red vinyl that is really bad is the fact the white paper shows much more than the black did. This requires some creative touch ups, so in places I had to use red paint pens where applicable (along spines) and a black Sharpie pain pen where needed. Then we have a finished product.

Here is a close up to show the detail of the wrap.

Here is where they will be used. I expect to mount these all here and the red contrast I think will make these fans look pretty decent as the back side and lower portion fans. They are not going to be seen much, but when they do, you can tell there was some time tended to them. I think they look pretty good there, however I could not get a good shot where that red did not seem to be overpowering. In the actual rig though, it looks much better in real life.

So I started wrapping the fans to cover the wires, seeing this is the wire side or the exit side of the air flow.
I figured I would show a step by step basically of what it takes per fan. I start out with a blank fan obviously.
Then I stick a pre-cut sheet of fiber wrap on the fan, but I try not to press it on, just lay it on, it has enough sticky it will stick just fine without me pushing on it.
Then I cut slices from the corners out. This allows the wrap to stretch easier when it has this cut relief in the vinyl, but I take it a bit further.
Once I get the basic trim done, I go for a bit more, to make it stretching into the corners and curves a bit easier.
I then begin stretching the fiber vinyl and forming it around the bends and working it - this is the most time consuming process because it takes a constant flow of warm air and a great deal of "touch" - however touching can get warm, so its a balance between fingers getting too warm and the vinyl getting too cool. However I do not do the corners until I have all the straights done, tucked in, trimmed off, etc.
Once done, I then trim the corners, trace the round of the bend as I trim the top portion of the vinyl. One thing about the red vinyl that is really bad is the fact the white paper shows much more than the black did. This requires some creative touch ups, so in places I had to use red paint pens where applicable (along spines) and a black Sharpie pain pen where needed. Then we have a finished product.
Here is a close up to show the detail of the wrap.
Here is where they will be used. I expect to mount these all here and the red contrast I think will make these fans look pretty decent as the back side and lower portion fans. They are not going to be seen much, but when they do, you can tell there was some time tended to them. I think they look pretty good there, however I could not get a good shot where that red did not seem to be overpowering. In the actual rig though, it looks much better in real life.
- Joined
- Nov 11, 2009
- Messages
- 8,718

So the order arrived yesterday via USPS that I ordered from Performance PC's. The goodies are that shopping cart I had posted previously, but contains the extenders I need to get the radiator connectors post the fans and so I can use the fittings on them easier. It contains the Bitspower Mod Kit for the dual D5's that will sit in the Water Barrel 24 - because they are going to be a part of the visuals, these got the Black Sparkle "pretty" covers. I al picked up a couple more Crystal Link connectors and some Crystal Links to use. Not knowing what sizes I actually needed, I picked up one of each. Then there is a bracket that I will use to mount the Bitspower Dual D5 Mod Top to - a big thanks to Harry @ Monster PC's for the suggestion on this bracket. Last but not least are the dual Phobya 150 Reservoir brackets that will allow me to drop in dual red led's in each bracket. The original one broke on me, so this was a necessary replacement if I was going to use it in Frank this go around.

One thing that has been bugging me is knowing the Red of these connectors, no matter how cool they look standalone - they clash with the reds I am using in Frank. So I began trying various things to them to make them work with the build.

I tried to wrap them with the red CF like on the radiator and they just looked cheap. Honestly they were not appealing and I quickly removed the film. It wasn't the solution, however the black seemed to work much better and blend more naturally.

So this is what I think I will be doing to these parts. I took out the calipers and was able to cut these to exact widths as the red and apply. I was even able to get it pretty close to a seamless application.

This is the vision for the Bitspower Dual D5 Mod Top Extreme. Because these dual pumps are on display below in the Water Barrel, these got the pretty Black Sparkle finished mod kits to go on the mod top. Using the previously carbon fibered pumps I had sitting here, I was able to put them together to show the intended results. While doing so I realized how much I liked the hint of red behind the holes in the bottom part of the kits. These are not the pumps going in here, but I realized I will need to do the red at least at the base of the ones that do go in here to give me this same affect.


Here is the loop vision for this iteration of Frank. You can see where the dual D5 fits in the Water Barrel 24 in the loop. These dual D5 Bitspower modded pumps are going to be in the center of the bottom case, so it will be centerpiece item. With this loop I expect the D5 in the Repack to "Push" the fluid through the mosfet, then the CPU, then the South Bridge (SB) blocks before feeding the GPU's. The GPU blocks will feed in series, then out the bottom to the MO-RA3 LT radiator that should take the bulk of the heat out of the water. Then the dual D5 Bitspower Modded kits will "Pull" this fluid from the board, through the MO-RA3, and push it to the Phobya 150 Reservoir that will then begin to push through the three radiators I have in the front. It will go through the Black Ice Extreme 3x120mm radiator, then the Alphacool UT60 3x120mm Radiator, then finally the Swiftech (figured why not, it can't hurt to be in the loop), and out of there to the other D5 on the Alphacool Repack that finishes pulling the liquid from the radiators to the Repack Reservoir to start the whole loop over again.

One thing that has been bugging me is knowing the Red of these connectors, no matter how cool they look standalone - they clash with the reds I am using in Frank. So I began trying various things to them to make them work with the build.
I tried to wrap them with the red CF like on the radiator and they just looked cheap. Honestly they were not appealing and I quickly removed the film. It wasn't the solution, however the black seemed to work much better and blend more naturally.
So this is what I think I will be doing to these parts. I took out the calipers and was able to cut these to exact widths as the red and apply. I was even able to get it pretty close to a seamless application.
This is the vision for the Bitspower Dual D5 Mod Top Extreme. Because these dual pumps are on display below in the Water Barrel, these got the pretty Black Sparkle finished mod kits to go on the mod top. Using the previously carbon fibered pumps I had sitting here, I was able to put them together to show the intended results. While doing so I realized how much I liked the hint of red behind the holes in the bottom part of the kits. These are not the pumps going in here, but I realized I will need to do the red at least at the base of the ones that do go in here to give me this same affect.
Here is the loop vision for this iteration of Frank. You can see where the dual D5 fits in the Water Barrel 24 in the loop. These dual D5 Bitspower modded pumps are going to be in the center of the bottom case, so it will be centerpiece item. With this loop I expect the D5 in the Repack to "Push" the fluid through the mosfet, then the CPU, then the South Bridge (SB) blocks before feeding the GPU's. The GPU blocks will feed in series, then out the bottom to the MO-RA3 LT radiator that should take the bulk of the heat out of the water. Then the dual D5 Bitspower Modded kits will "Pull" this fluid from the board, through the MO-RA3, and push it to the Phobya 150 Reservoir that will then begin to push through the three radiators I have in the front. It will go through the Black Ice Extreme 3x120mm radiator, then the Alphacool UT60 3x120mm Radiator, then finally the Swiftech (figured why not, it can't hurt to be in the loop), and out of there to the other D5 on the Alphacool Repack that finishes pulling the liquid from the radiators to the Repack Reservoir to start the whole loop over again.
awesome attention to detail
lol, its a labor of love I tell ya
I started putting things in the Water Barrel 24 just to see the size relations and approximate placements of the items.


Matthew Kane
Supreme [H]ardness
- Joined
- Dec 1, 2007
- Messages
- 4,233
With the carbon fibre sticker, is it safe to say that over time with any parts exposed to some sort of heat inside the pc, the carbon accent won't start peeling off from the sides?
With the carbon fibre sticker, is it safe to say that over time with any parts exposed to some sort of heat inside the pc, the carbon accent won't start peeling off from the sides?
No this is 3M DiNoc - not the knock off cheapo stuff, though I did buy some of that too, everything within the case thus far will be the 3M DiNoc and once cut, put in place, then heated, it basically takes that form and hardens. It takes some high heat to soften it again and make it plyable, which it become and even restick and that is why the DiNoc is freaking awesome. However no there is no chance of it getting too hot inside the case - its water cooled with 46 or more fans, I do not think we are going to have heat issues in this case. Plus this DiNoc is what they use on cars and motorcycles etc that withstand the elements, pressure washers, etc - I think the minimal warmth these may experience along with constant love with soft cloths and air compressors to keep it clean, we should not be worried about the DiNoc resetting itself or peeling off anytime soon. I think this stuff has like a 5+ year life on a car. So I think we should be good to go inside Frank with some