![[H]ard|Forum](/styles/hardforum/xenforo/logo_dark.png)
Navigation
Install the app
How to install the app on iOS
Follow along with the video below to see how to install our site as a web app on your home screen.
Note: This feature may not be available in some browsers.
More options
You are using an out of date browser. It may not display this or other websites correctly.
You should upgrade or use an alternative browser.
You should upgrade or use an alternative browser.
Exo-S
- Thread starter Mystikal
- Start date

Working Title ExoSkeleton
Me and my buddy starting thinking about our own casemod. My Buddy SqUed is great with with iron and has always good input and solutions. Together we decided to build a new case for me, from scratch.
Transport of the case will be easy. We bought ourselves an American Audio ABS DDR-4 flightcase 4 HE[/b]. That was our first limitation. It had to fit in this flightcase for transport to lan-parties.

Hardware
Hardware which will be used (it’s currently in my own game-pc:
-MSI G41M-P21
-Intel® Core™2 Quad Processor Q9550
-4GB RAM
-MSI HD6870DC
-Corsair 120GB SSD
-Corsair H50 waterkoeling
-Coolermaster 600Watt PSU Silent Pro M
As you can see, minimal in it’s hardware as well. So no dvd player, 3,5inch harddisk etc.
Global Idea at start of project
-Should fit in our flightcase and should be easy to put in and out.
-SSD will not be visible and will come together with the PSU in the bottom of the case.
-Cablemanagement
-Led lighting with led controller to adjust colour of light.
-Case will black non shining.
First drawings for the impression:

Idea is to work with iron bars, that will go through halfway the case at both sides. In the double bottom the PSU and SSD will be located. On top of the PSU/SSD cover will be the motherboard.

A detail what we want to do with the PSU cover. We want to use metal shields to cover the PSU-box.
Update 1
First we created the bottom, using 20mm metal studs. They have been cut open and soldered together with silver.
Soldering the bottom frame.


Bottom getting into shape. This is the bottom view.

Fits like a glove, after polishing and sanding.

Polishing, probably this will be matte black with some power coating.

Putting the PSU on the bottom. You see that we have narrowed down the bottom frame in order to get the PSU to fit.

In the bottom a hole will be drilled for the PSU. If we unscrew the bottom plate, only the bottomplate will be come loose. All other elements will be fitted to the top part of the frame.
Some additional pictures.


Me and my buddy starting thinking about our own casemod. My Buddy SqUed is great with with iron and has always good input and solutions. Together we decided to build a new case for me, from scratch.
Transport of the case will be easy. We bought ourselves an American Audio ABS DDR-4 flightcase 4 HE[/b]. That was our first limitation. It had to fit in this flightcase for transport to lan-parties.
Hardware
Hardware which will be used (it’s currently in my own game-pc:
-MSI G41M-P21
-Intel® Core™2 Quad Processor Q9550
-4GB RAM
-MSI HD6870DC
-Corsair 120GB SSD
-Corsair H50 waterkoeling
-Coolermaster 600Watt PSU Silent Pro M
As you can see, minimal in it’s hardware as well. So no dvd player, 3,5inch harddisk etc.
Global Idea at start of project
-Should fit in our flightcase and should be easy to put in and out.
-SSD will not be visible and will come together with the PSU in the bottom of the case.
-Cablemanagement
-Led lighting with led controller to adjust colour of light.
-Case will black non shining.
First drawings for the impression:
Idea is to work with iron bars, that will go through halfway the case at both sides. In the double bottom the PSU and SSD will be located. On top of the PSU/SSD cover will be the motherboard.
A detail what we want to do with the PSU cover. We want to use metal shields to cover the PSU-box.
Update 1
First we created the bottom, using 20mm metal studs. They have been cut open and soldered together with silver.
Soldering the bottom frame.
Bottom getting into shape. This is the bottom view.
Fits like a glove, after polishing and sanding.
Polishing, probably this will be matte black with some power coating.
Putting the PSU on the bottom. You see that we have narrowed down the bottom frame in order to get the PSU to fit.
In the bottom a hole will be drilled for the PSU. If we unscrew the bottom plate, only the bottomplate will be come loose. All other elements will be fitted to the top part of the frame.
Some additional pictures.
Last edited:
Update 2
The PSU Cover
Continued with the PSU cover. We had a look to the angle, but this seems to be a nice angle to start with.


The idea of the bars is clear in below picture. Between the bars we will get 3mm space for the led lightning. Basic shape has been arrived, no we should further work on the detail.


Possible also bars on the top, depending on how it looks.

We have created spacers for the bottom plate using m5 bolts.


Backside of the PSU. We needed a bracket to fit the PSU.

Getting in a comfortable angle
 [/img]
The PSU Cover
Continued with the PSU cover. We had a look to the angle, but this seems to be a nice angle to start with.
The idea of the bars is clear in below picture. Between the bars we will get 3mm space for the led lightning. Basic shape has been arrived, no we should further work on the detail.
Possible also bars on the top, depending on how it looks.
We have created spacers for the bottom plate using m5 bolts.
Backside of the PSU. We needed a bracket to fit the PSU.
Getting in a comfortable angle
Update 3
Created a hole in the bottom in the plate for the PSU fan. Looking for the right drill

This size was a little bit to big...

This seems to be just right.

Starting drilling with some oil of course. The iron is really though.

Some additional pics.

Bottomside.

This was the original idea with the bars..

But we came with a new and better plan… For that we needed to adjust the PSU cover.
It looks worse, but it is not so bad…


The new idea is shown below. In the oblique angle the SSD will be placed on raisers. This SSD will be visible for 80%, 20% will be covered by the PSU cover. Ideal for the cablemanagement!

In the oblique angle the 2 usb ports will be located.


Created a hole in the bottom in the plate for the PSU fan. Looking for the right drill
This size was a little bit to big...
This seems to be just right.
Starting drilling with some oil of course. The iron is really though.
Some additional pics.
Bottomside.
This was the original idea with the bars..
But we came with a new and better plan… For that we needed to adjust the PSU cover.
It looks worse, but it is not so bad…
The new idea is shown below. In the oblique angle the SSD will be placed on raisers. This SSD will be visible for 80%, 20% will be covered by the PSU cover. Ideal for the cablemanagement!
In the oblique angle the 2 usb ports will be located.
Update 4
Started working on the motherboard tray, which consists of these metal studs. Backside of motherboard will be visible through the holes. The backplate will be made in such a way that is can also be used for ATX boards and not only my current mATX board.


We started drawing the shields on the PSU cover, and it took us over 50 drawings and 100 of lines to get to this design which is not symetric.
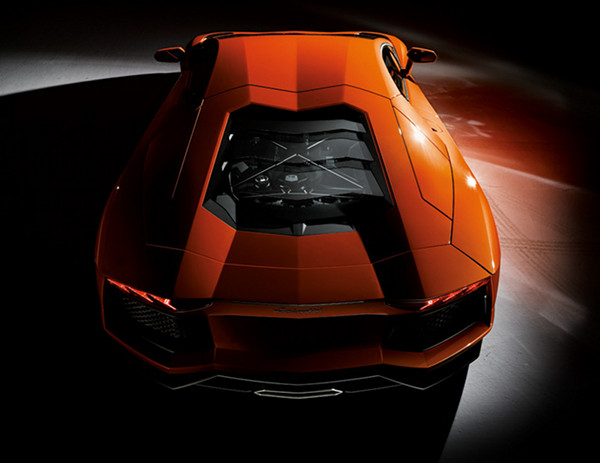
Our inspiration was found by Lamborghini Aventador.
The lines you see below will be the space between the shields. Space between the shields will be around 2mm.
Side

Front/top

The round button will be for the power en reset button. In the part above the SSD-bay will be 2 usb ports located.
Side/top

In global the idea will look like this.

Update 5
Some more work done.


These buttons for power and reset will be bought.

Unfortunately the idea with the leds did not work good. The leds are laying down in a ring which makes it impossible to shine their light to the side. It can only shine to the top. Therefor we switched to CCFL.


Did some shopping...
4 CCFL blue 10cm
1 Converter
1 Sleeved PSU 24 pin extensioncable
2 Sleeved GPU 6pin extensioncable
1 Internal USB hub
2 Power switch
2 Power switch cable
Global ideal, final lights will be blue, but this gives a good impression of our ideas. Also the SSD bay will have its own lightning.

Started working on the motherboard tray, which consists of these metal studs. Backside of motherboard will be visible through the holes. The backplate will be made in such a way that is can also be used for ATX boards and not only my current mATX board.
We started drawing the shields on the PSU cover, and it took us over 50 drawings and 100 of lines to get to this design which is not symetric.
Our inspiration was found by Lamborghini Aventador.
The lines you see below will be the space between the shields. Space between the shields will be around 2mm.
Side
Front/top
The round button will be for the power en reset button. In the part above the SSD-bay will be 2 usb ports located.
Side/top
In global the idea will look like this.
Update 5
Some more work done.
These buttons for power and reset will be bought.
Unfortunately the idea with the leds did not work good. The leds are laying down in a ring which makes it impossible to shine their light to the side. It can only shine to the top. Therefor we switched to CCFL.
Did some shopping...
4 CCFL blue 10cm
1 Converter
1 Sleeved PSU 24 pin extensioncable
2 Sleeved GPU 6pin extensioncable
1 Internal USB hub
2 Power switch
2 Power switch cable
Global ideal, final lights will be blue, but this gives a good impression of our ideas. Also the SSD bay will have its own lightning.
Dremel the cover.


Impression.


With some proud I can announce our first sponsor.

Thanks Andrea for your fantastic mail, we are getting a mouse sponsored which fits the case!
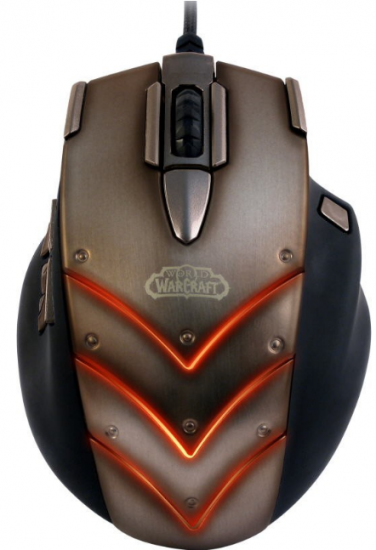
And our second sponsor will be NDF Special Light Products in Roosendaal. They will produce custom CCFL's of 2.4mm to our specific design wishes! Thank you so much Coen, for your support and all the tips you gave us in relation to lightning!

And we also have our third sponsor right now.

Rotako is a company located in Zevenbergen, The Netherlands which is a divers company in the metal-world can be divided in four lines of business:
Engineering: From idea to solution, through innovative assembly
Assembly: Created solutions, installed at site.
Production: Watercutting technique and construction work
Maintenance: Professional maintenance.
We want to thank Hans Rongen and Rotako for the help, with the watercutting machine for our Exo-S logo!
---------- Bericht toegevoegd om 15:56 ---------- Vorige bericht geplaatst om 15:56 ----------
Update: Only some sanding and finishing touch in general. But it gives a good idea and we are very happy with the result so far...
Furthermore the idea we have with regards to the cooling and how to implement it in the case.


And with the watercooling unit in it...

Case will be end up matte black.
Impression.
With some proud I can announce our first sponsor.
Thanks Andrea for your fantastic mail, we are getting a mouse sponsored which fits the case!
And our second sponsor will be NDF Special Light Products in Roosendaal. They will produce custom CCFL's of 2.4mm to our specific design wishes! Thank you so much Coen, for your support and all the tips you gave us in relation to lightning!
And we also have our third sponsor right now.
Rotako is a company located in Zevenbergen, The Netherlands which is a divers company in the metal-world can be divided in four lines of business:
Engineering: From idea to solution, through innovative assembly
Assembly: Created solutions, installed at site.
Production: Watercutting technique and construction work
Maintenance: Professional maintenance.
We want to thank Hans Rongen and Rotako for the help, with the watercutting machine for our Exo-S logo!
---------- Bericht toegevoegd om 15:56 ---------- Vorige bericht geplaatst om 15:56 ----------
Update: Only some sanding and finishing touch in general. But it gives a good idea and we are very happy with the result so far...
Furthermore the idea we have with regards to the cooling and how to implement it in the case.
And with the watercooling unit in it...
Case will be end up matte black.
And the next update. The frame was 1cm to short to fit the motherboard nicely. It was getting to close to the radiator on top of the case. So we extended the frame with one cm (we don't have more space, due to the fact that it would not fit into the ABS Flightcase.
Furthermore we created the top framework above the radiator of the Corsair cooling unit.
And we created the topbar (part of the framework for the radiator) in which the CFFL will be placed which will shine its light on the motherboard.
Pictures say more than words....
Adding the 1cm to the length of the frame...

Topbar in place of the frame.

Radiator frame almost finished.

Sloppy overview picture of the work done today..

Furthermore we created the top framework above the radiator of the Corsair cooling unit.
And we created the topbar (part of the framework for the radiator) in which the CFFL will be placed which will shine its light on the motherboard.
Pictures say more than words....
Adding the 1cm to the length of the frame...
Topbar in place of the frame.
Radiator frame almost finished.
Sloppy overview picture of the work done today..
Update:
Created the raisers for the motherboard, finished the topbar in which we also included a CCFL.
And starting experimenting with the lights. As seen below this is a first test, but just putting the lights below the PSU cover. We will get better 'shine-through' results when we fix the properly.
Furthermore we have an idea, but we are not quite sure if we need to do it. We are doubting to create also a shielded cover for the graphics card and create the same effect with the CCFL.
Below a picture of the first impression with the lights. It is starting to become something, but we are not yet there...

And another long night of modding...
Today we 'finished' the back of the Exo-Skeleton. We created an IO-bracket and the bracket for the PCI-cards.
And we started on the design of the graphics card shielded cover.
Some welding on the IO-bracket. Made out of REAL IKEA cupboard steal! No, we are not going to announce our 3rd sponsor... .
.

A little bit out of focus.. I missed, sorry guys!

Positioning the graphics card. No this is not the actual graphics card and motherboard, but we use these to measure. It is an 8800GTX :cooldude:.

Starting to work on the PCI bracket.

Almost frying the motherboard! :rock:

Solding the m4 nut into the pci bracket, so we can fix the graphics card with the tumb screws.


It was a bit to deep, so removed the top and soldered it with a new 'top-cap'

Some end results of today's work. Again took a lot of effort creating those brackets out of nothing.. But we are satisfied with the result.


Furthermore a first look on the possible grahics card cover. Still not 100% sure if it is the way to go, but we are going to create it anyway, to see how it looks.

Created the raisers for the motherboard, finished the topbar in which we also included a CCFL.
And starting experimenting with the lights. As seen below this is a first test, but just putting the lights below the PSU cover. We will get better 'shine-through' results when we fix the properly.
Furthermore we have an idea, but we are not quite sure if we need to do it. We are doubting to create also a shielded cover for the graphics card and create the same effect with the CCFL.
Below a picture of the first impression with the lights. It is starting to become something, but we are not yet there...
And another long night of modding...
Today we 'finished' the back of the Exo-Skeleton. We created an IO-bracket and the bracket for the PCI-cards.
And we started on the design of the graphics card shielded cover.
Some welding on the IO-bracket. Made out of REAL IKEA cupboard steal! No, we are not going to announce our 3rd sponsor...
.
A little bit out of focus.. I missed, sorry guys!
Positioning the graphics card. No this is not the actual graphics card and motherboard, but we use these to measure. It is an 8800GTX :cooldude:.
Starting to work on the PCI bracket.
Almost frying the motherboard! :rock:
Solding the m4 nut into the pci bracket, so we can fix the graphics card with the tumb screws.
It was a bit to deep, so removed the top and soldered it with a new 'top-cap'
Some end results of today's work. Again took a lot of effort creating those brackets out of nothing.. But we are satisfied with the result.
Furthermore a first look on the possible grahics card cover. Still not 100% sure if it is the way to go, but we are going to create it anyway, to see how it looks.
Some updates on the case. To start with, this should have been the first photo on this build log. This is where it all started, a piece of old metal used to construct the PSU cover and possible the graphics cards.

Furthermore we created the front usb bracket in the psu cover.

Also we drilled the holes for the bulgin switches and put them in place. They look pretty nice here, especially when the case will be powdercoated matt black.

A topview of the ExoSkeleton. Please remind that the hardware we show here is old stuff for measurements and global ideas only.

And a bottom-up view of the ExoSkeleton.

We coming slowly to the end of this build, but still a lot to do. Especially the sanding will be a big job.
After a night full of pci-bracket dissapointment (and it is still not okay..) , we also found the time to start on the shielded cooling case for the Corsair watercooler.
Idea is also to put some blue light into this mini shielded case. The idea of the shielded graphics card will no longer be executed. We made a start, but the iron in the case became to massive, therefor we stopped with that idea. It was not beautiful anymore.
We started with an drill, which we cut off a piece.
 [/url]

After that we made it open, in order to get the tubes in.

Creating the shields.


And the end product (still needs to get some more detail). Space between the shields is not equal yet, but we just run out of time..

Furthermore we created the front usb bracket in the psu cover.
Also we drilled the holes for the bulgin switches and put them in place. They look pretty nice here, especially when the case will be powdercoated matt black.
A topview of the ExoSkeleton. Please remind that the hardware we show here is old stuff for measurements and global ideas only.
And a bottom-up view of the ExoSkeleton.
We coming slowly to the end of this build, but still a lot to do. Especially the sanding will be a big job.
After a night full of pci-bracket dissapointment (and it is still not okay..) , we also found the time to start on the shielded cooling case for the Corsair watercooler.
Idea is also to put some blue light into this mini shielded case. The idea of the shielded graphics card will no longer be executed. We made a start, but the iron in the case became to massive, therefor we stopped with that idea. It was not beautiful anymore.
We started with an drill, which we cut off a piece.
After that we made it open, in order to get the tubes in.
Creating the shields.
And the end product (still needs to get some more detail). Space between the shields is not equal yet, but we just run out of time..


We have created the raisers for the SSD. Those will be powder coated matte black as well.

Furthermore we started working on the bar in which the Exo-S logo should be mounted on.
We took a bar and created and we divided into 2 'chambers' in order for us to get the Exo-S logo illuminated red and in the other chamber we will mount a CCFL which will shine over the motherboard from the front to the back.


Fitted between the frame.

The Exo-S logo, perfectly created if I may say so! We used hex nuts in order for us to replace the light when necessary.


And the first try with some leds. No you see the separate leds reflecting on the iron. Once powder coated matte black, it will give a more overall flow instead of the bright leds.
But it comes out exactly as planned. The reason why we don't use CCFL for this, is because with CCFL it is not possible to create that bright red color. It turns a little bit to yellow/pink.

We were not yet completely satisfied with the top part of the frame so we added another bar, which really finalizes the top. On the right side we will create the same bar of course.
But this gives a more 'in balance' look of the top part of the frame.

---------- Bericht toegevoegd om 15:58 ---------- Vorige bericht geplaatst om 15:58 ----------
And in the meantime we have brought the Exo-S to the stainless steel grinder...
Result: A 'complete' new look for the Exo-S, than the Exo-S we have worked on the last months.
Tomorrow we will bring the Exo-S to the powdercoater and hopefully we will get it back, somewhere middle of next week.
See below for the pics.


Furthermore we started working on the bar in which the Exo-S logo should be mounted on.
We took a bar and created and we divided into 2 'chambers' in order for us to get the Exo-S logo illuminated red and in the other chamber we will mount a CCFL which will shine over the motherboard from the front to the back.
Fitted between the frame.
The Exo-S logo, perfectly created if I may say so! We used hex nuts in order for us to replace the light when necessary.
And the first try with some leds. No you see the separate leds reflecting on the iron. Once powder coated matte black, it will give a more overall flow instead of the bright leds.
But it comes out exactly as planned. The reason why we don't use CCFL for this, is because with CCFL it is not possible to create that bright red color. It turns a little bit to yellow/pink.
We were not yet completely satisfied with the top part of the frame so we added another bar, which really finalizes the top. On the right side we will create the same bar of course.
But this gives a more 'in balance' look of the top part of the frame.
---------- Bericht toegevoegd om 15:58 ---------- Vorige bericht geplaatst om 15:58 ----------
And in the meantime we have brought the Exo-S to the stainless steel grinder...
Result: A 'complete' new look for the Exo-S, than the Exo-S we have worked on the last months.
Tomorrow we will bring the Exo-S to the powdercoater and hopefully we will get it back, somewhere middle of next week.
See below for the pics.
See attached the photo's after the powdercoating. We are not really satisfied with the coating so far (not visible on the photo's), so we brought the case back, so they can re-do the coating.
For those who were interested. Case weighs 8.1KG


---------- Bericht toegevoegd om 15:59 ---------- Vorige bericht geplaatst om 15:58 ----------
The Exo-S is back from the coater!
A few pictures of the person who solved all problems. It took him over 6 hours, but we are happy with the result! The paint is still wet on the pictures, therefor it shines more than when the paint is dry.


To the next phase!
For those who were interested. Case weighs 8.1KG
---------- Bericht toegevoegd om 15:59 ---------- Vorige bericht geplaatst om 15:58 ----------
The Exo-S is back from the coater!
A few pictures of the person who solved all problems. It took him over 6 hours, but we are happy with the result! The paint is still wet on the pictures, therefor it shines more than when the paint is dry.
To the next phase!
The unboxing pics are complimentary...


[

The mobo build into the EXO-S. For some reason it doesn't seem to boot... 8)

---------- Bericht toegevoegd om 15:59 ---------- Vorige bericht geplaatst om 15:59 ----------
We got a major sat-back with the Exo-S....
The motherboard I/O backpanel does not fit the case ???. We thought those backpanels were 100% standard, but it looks this is not completely the case or we measured a bit to short from our 'test' motherboard.
See attached pictures.


So we are a bit dissapointed with this and we are looking into this how to solve this issue. Nevertheless it looks like we need to go back to the painter after we have fixed this issue.
Basically at this moment we see 3 different options to solve this matter.
Option 1:

Option 2:

Option 3

Whatever we do, we need to go back to the painter and hopefully it is possible to restore and paint only a part of the case. It is not 100% visible, but nevertheless we want to have a good result.
Bare with us....
[
The mobo build into the EXO-S. For some reason it doesn't seem to boot... 8)
---------- Bericht toegevoegd om 15:59 ---------- Vorige bericht geplaatst om 15:59 ----------
We got a major sat-back with the Exo-S....
The motherboard I/O backpanel does not fit the case ???. We thought those backpanels were 100% standard, but it looks this is not completely the case or we measured a bit to short from our 'test' motherboard.
See attached pictures.
So we are a bit dissapointed with this and we are looking into this how to solve this issue. Nevertheless it looks like we need to go back to the painter after we have fixed this issue.
Basically at this moment we see 3 different options to solve this matter.
Option 1:
Option 2:
Option 3
Whatever we do, we need to go back to the painter and hopefully it is possible to restore and paint only a part of the case. It is not 100% visible, but nevertheless we want to have a good result.
Bare with us....
Finally some new pics...
Last week we started to get on with the lights. We tried them for the first time in the EXO-S, to see what the effect exactly is.
Pictures say more than words...


8 pieces, in total we have 14, we are probably going to use 8 or 10.


At the end we were not totale satisfied with the result. We are now going to use high reflection plastic to stick on the inside of the PSU cover. They use this plastic also on road signs and should 'bounce' back the lights. The matt black inside of the psu cover 'absorps' all light. We don't want that, it needs to burst out between the shields.
Tomorrow we will continue and hopefully later this week another update.
Yesterday we applied the folie to the inside of the PSU cover. This was a horrible job, but is now finished..
The picture before the folie was applied:
The pictures after the folie was applied:


To different worlds and in real-life even more. However the photo also shows a great improvement. We are finally happy with the result even with the lights on in the room. However the case is designed to 'operate' in a darker room with dimmed light.
The CCFL's are just taped for now, later this week we will glue them to the case and start with the cable management of the 7 CCFL's.
For now we are happy with the result and one step further in finishing the Exo-S.
Last week we started to get on with the lights. We tried them for the first time in the EXO-S, to see what the effect exactly is.
Pictures say more than words...
8 pieces, in total we have 14, we are probably going to use 8 or 10.
At the end we were not totale satisfied with the result. We are now going to use high reflection plastic to stick on the inside of the PSU cover. They use this plastic also on road signs and should 'bounce' back the lights. The matt black inside of the psu cover 'absorps' all light. We don't want that, it needs to burst out between the shields.
Tomorrow we will continue and hopefully later this week another update.
Yesterday we applied the folie to the inside of the PSU cover. This was a horrible job, but is now finished..
The picture before the folie was applied:
The pictures after the folie was applied:
To different worlds and in real-life even more. However the photo also shows a great improvement. We are finally happy with the result even with the lights on in the room. However the case is designed to 'operate' in a darker room with dimmed light.
The CCFL's are just taped for now, later this week we will glue them to the case and start with the cable management of the 7 CCFL's.
For now we are happy with the result and one step further in finishing the Exo-S.


A few random remaks:
CPU pin was not correct on the mobo. So my buddy took his knive and made the adjustment..
Corsair koeler did not fit next to the motherbord, so we removed a usb connection and a small switch. There is simply no room...
Corsair H50 cooler was not made for a 1156 socket, so we adjusted it so it could fit.
Graphics card backplate adjusted, it did not fit 100%.
There is still a lot to do, but we made some big steps today!
And the photo's


Where is the wrong pin....


CPU pin was not correct on the mobo. So my buddy took his knive and made the adjustment..
Corsair koeler did not fit next to the motherbord, so we removed a usb connection and a small switch. There is simply no room...
Corsair H50 cooler was not made for a 1156 socket, so we adjusted it so it could fit.
Graphics card backplate adjusted, it did not fit 100%.
There is still a lot to do, but we made some big steps today!
And the photo's
Where is the wrong pin....
Part 3
The big Exo-S quiz... what is this?


Very small update...
We are going to place the inverter onder the bottom tray of the Exo-S. We just didn't have enough space left in the PSU cover with all the cables etc.
Tonight will probably the last night modding the Exo-S itself. Placing above mentioned bracket and installing the SSD will be the last things we need to do.
Tipping some black paint on some screws and some other very minor things need to be done as well.
After that we are going to focus on the transport case in order to transport the Exo-S safely to the various lan's I participate during the year..
Cable management anyone :X

A slightly better solution for all the cables which were bundled and soldered.

Tonight we might be able to boot up the Exo-S for the first time and start installing Windows 7.
The big Exo-S quiz... what is this?
Very small update...
We are going to place the inverter onder the bottom tray of the Exo-S. We just didn't have enough space left in the PSU cover with all the cables etc.
Tonight will probably the last night modding the Exo-S itself. Placing above mentioned bracket and installing the SSD will be the last things we need to do.
Tipping some black paint on some screws and some other very minor things need to be done as well.
After that we are going to focus on the transport case in order to transport the Exo-S safely to the various lan's I participate during the year..
Cable management anyone :X
A slightly better solution for all the cables which were bundled and soldered.
Tonight we might be able to boot up the Exo-S for the first time and start installing Windows 7.
This converter:

needs to be isolated with this:

And be placed on the bottom of the EXO-S case, below the PSU. At the top left you see the custom created bracket for the inverter that will be used to mount to inverter to the bottom plate.


3 holes made in the bottom. 2 for the CCFL cables, one for the power to the PSU
 [/url]
 [/url]
All the cables of the CCFL lights:
 [/url]
 [/url]
Custom made sleeved Tie-wraps. Fits perfect in the total picture.


For the first time on a desk, since it's birth...


And we have juice... Thanks to Asus Benelux and in special Rogier!
 [/url]
Full frontal shots was out of focus. We are still planning to do a proper final pic shot! But we need a little bit more time for that!
From:
To:

See you at the next update! We are going to take care of the transport case!
needs to be isolated with this:
And be placed on the bottom of the EXO-S case, below the PSU. At the top left you see the custom created bracket for the inverter that will be used to mount to inverter to the bottom plate.
3 holes made in the bottom. 2 for the CCFL cables, one for the power to the PSU
All the cables of the CCFL lights:
Custom made sleeved Tie-wraps. Fits perfect in the total picture.
For the first time on a desk, since it's birth...
And we have juice... Thanks to Asus Benelux and in special Rogier!
Full frontal shots was out of focus. We are still planning to do a proper final pic shot! But we need a little bit more time for that!
From:
To:
See you at the next update! We are going to take care of the transport case!
Last edited:
Okay, after a few weeks of some flu we are back to tackle the transpot case.
This is the standard American Audio ABS case. We purchased this back in november 2010, which was the beginning of our mod!


The height of the case was not sufficient, so we removed the inner bottom and top part and made one ourselves. After some measurement this is the bottom plate.

These metal strips where on the front and backside. To easily (and without damaging) insert the Exo-S into the case, we had to remove the ones in the front.

Bottom plate is already screwed to the case

To avoid any scratches to the paintwork, we glued this foam to the innerside.

And the otherside as well.

Lets fit this baby... and it fits like a glove... This baby will not move during transport to the couple one LAN parties we are attending each year!
We also did the top, but did not make any picture of it..
 [/url]

The lit on the backside we used the same foam.

And the Exo-S in the case...

We are now planning to create the same Exo-S logo in the case. Let's see if we can get some one to create a metal plate with the Exo-S logo, just like on on the case (only bigger). Ofcourse we will put some led light behind this logo as well with a switch and battery.

On this photo you can also see there is a small space for a plate. We need to think what we are going to do with that... Unfortunately, we had no one dedicated sponsor, otherwise a nice logo of that brand would fit perfectly!
See you at the next update!
This is the standard American Audio ABS case. We purchased this back in november 2010, which was the beginning of our mod!
The height of the case was not sufficient, so we removed the inner bottom and top part and made one ourselves. After some measurement this is the bottom plate.
These metal strips where on the front and backside. To easily (and without damaging) insert the Exo-S into the case, we had to remove the ones in the front.
Bottom plate is already screwed to the case
To avoid any scratches to the paintwork, we glued this foam to the innerside.
And the otherside as well.
Lets fit this baby... and it fits like a glove... This baby will not move during transport to the couple one LAN parties we are attending each year!
We also did the top, but did not make any picture of it..
The lit on the backside we used the same foam.
And the Exo-S in the case...
We are now planning to create the same Exo-S logo in the case. Let's see if we can get some one to create a metal plate with the Exo-S logo, just like on on the case (only bigger). Ofcourse we will put some led light behind this logo as well with a switch and battery.
On this photo you can also see there is a small space for a plate. We need to think what we are going to do with that... Unfortunately, we had no one dedicated sponsor, otherwise a nice logo of that brand would fit perfectly!
See you at the next update!
soulrider4ever
Weaksauce
- Joined
- Feb 8, 2012
- Messages
- 64
Nice, keep up the awesome work.
- Joined
- May 2, 2006
- Messages
- 7,888
That looks awesome, makes me want to learn metal working!
And the Exo-S is now for the first time in my house. We are not totally finished, but it is already running. There is a LAN-event coming, so I need to start practicing MW3, to make sure my gear matches my MW3 skills ;-).
I need to adjust the cables at the back, so they are not visible anymore. And we are going to make a monitor stand which will match the Exo-S case.
Keep you updated, and looking forward to your comments.


A little bit ouf of focus, some pictures where shot without the camera tripod.


And a total overview of my current game-room.

I need to adjust the cables at the back, so they are not visible anymore. And we are going to make a monitor stand which will match the Exo-S case.
Keep you updated, and looking forward to your comments.
A little bit ouf of focus, some pictures where shot without the camera tripod.
And a total overview of my current game-room.
And the Exo-S is now for the first time in my house. We are not totally finished, but it is already running. There is a LAN-event coming, so I need to start practicing MW3, to make sure my gear matches my MW3 skills ;-).
I need to adjust the cables at the back, so they are not visible anymore. And we are going to make a monitor stand which will match the Exo-S case.
Keep you updated, and looking forward to your comments.
A little bit ouf of focus, some pictures where shot without the camera tripod.
And a total overview of my current game-room.
I need to adjust the cables at the back, so they are not visible anymore. And we are going to make a monitor stand which will match the Exo-S case.
Keep you updated, and looking forward to your comments.
A little bit ouf of focus, some pictures where shot without the camera tripod.
And a total overview of my current game-room.
Deathskythee
Gawd
- Joined
- Apr 8, 2002
- Messages
- 650
that is amazing
And after some time, another kick..
We have the plans to start working on the Exo-S next week. We still want to add the Exo-S logo in to the transport case.
Furtermore are we going to make a monitor stand which will align with the PSU cover. We want to include an external USB hub into this monitor stand. Ofcourse this stand will also be illuminated with blue light.
First rough drawing.

In addition an overview of our current Exo-S logo. First one is out of metal and will be used in the monitor stand. The 2nd is made by a 3D printer in black ABS and will be used in the transport case.
3th and 4th are draft examples.

We have the plans to start working on the Exo-S next week. We still want to add the Exo-S logo in to the transport case.
Furtermore are we going to make a monitor stand which will align with the PSU cover. We want to include an external USB hub into this monitor stand. Ofcourse this stand will also be illuminated with blue light.
First rough drawing.
In addition an overview of our current Exo-S logo. First one is out of metal and will be used in the monitor stand. The 2nd is made by a 3D printer in black ABS and will be used in the transport case.
3th and 4th are draft examples.

- Joined
- Dec 16, 2010
- Messages
- 3,182
Case looks amazing.
Looks like you skipped the eye protection in some of those early cut/grind pics
Looks like you skipped the eye protection in some of those early cut/grind pics

skeeder
[H]ard|Gawd
- Joined
- Jul 9, 2004
- Messages
- 1,316
love this. I only wish the Light setup could be switched to a different color a buttons notice (I'm partial to red color). That would of complicated it for sure...but impressive build!
computersmakemeQQ
Limp Gawd
- Joined
- Jan 30, 2012
- Messages
- 164
This is an incredible design and extremely well carried out. Wow!
This night we finally started to build the monitor stand for the Exo-S.
Once again we started with the frame. This frame will be used to put the monitor on, but this is under the actual monitor stand. The foot of the monitor not be visible. There will be another cover on top of this cover with the PSU cover design that will align with the design of the Exo-S.
Besides that we also started with the Exo-S logo in the transport case. There will be a non visible swithc on the front/bottom of the transport case to put on the led light behind the Exo-S.
The photo's will do the talking.


Once again we started with the frame. This frame will be used to put the monitor on, but this is under the actual monitor stand. The foot of the monitor not be visible. There will be another cover on top of this cover with the PSU cover design that will align with the design of the Exo-S.
Besides that we also started with the Exo-S logo in the transport case. There will be a non visible swithc on the front/bottom of the transport case to put on the led light behind the Exo-S.
The photo's will do the talking
.
Thank you, maybe one day it will!Honestly, this is one of the most impressive case-mods I've ever seen. Considering it's from scratch, and you've built it to sit in the ABS box for transport protection is a great concept. Really deserves to be on the front page of [H].
Especially to give the good example, look to the protection this evening!Case looks amazing.
Looks like you skipped the eye protection in some of those early cut/grind pics
Thank you! No, changing colours is not really our thing.love this. I only wish the Light setup could be switched to a different color a buttons notice (I'm partial to red color). That would of complicated it for sure...but impressive build!
This thread needs to be stickied. Amazing work guys!
Thank you!
We have exactly the same problem! We both have very busy jobs, a family with kids and we both love gaming (and RC cars). Therefor it is taking such a long time! But we enjoy it, we don't want it to be finished to quickly!Wow, incredible case. I love it. Wish I could take up modding/making cases as a hobby but I'm too busy playing games and working!
Thank you. I know his skills are amazing! Therefor I let him do all the grinding and soldering! I am making photo's ;-).your friends metal working skills are great. its amazing how he solders all those little pieces together, grinds it down, and it looks almost perfect, factory made every time. awesome case man.
NastyNative
Gawd
- Joined
- Jan 28, 2009
- Messages
- 522
Dude I just got the biggest Chubby right now!
I love the style of the case and how its wide open.
Everything is very accessible!
My brother is a metal shop worker and I have been to the shop
to help him. I know how hard and time consuming it could be.
It looks perfect!
I love the style of the case and how its wide open.
Everything is very accessible!
My brother is a metal shop worker and I have been to the shop
to help him. I know how hard and time consuming it could be.
It looks perfect!