RogueTadhg
[H]ard|Gawd
- Joined
- Dec 14, 2011
- Messages
- 1,527
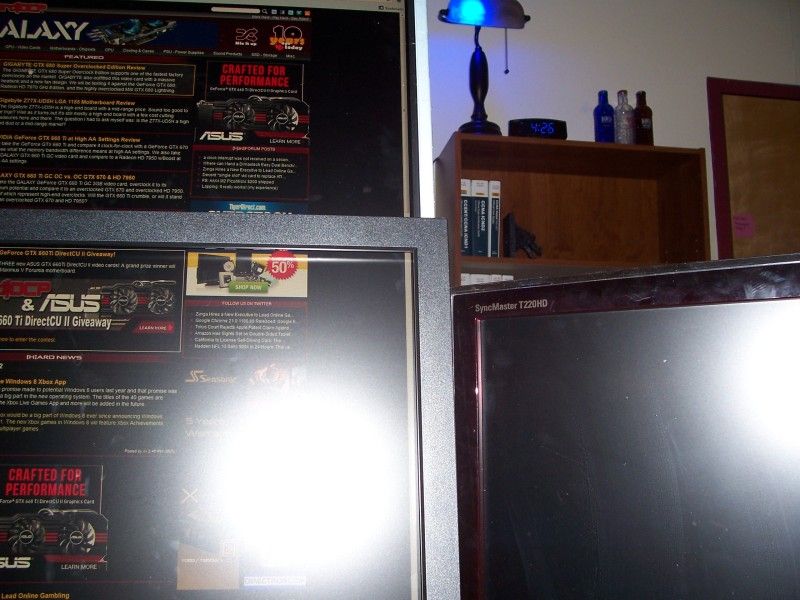
I was looking for a monitor a while back, seeing what different screens looked like on people's setups. One of the most interesting ways that I've seen were debezelled monitors.
I was unable to find any tutorials on debezeling a U3011. Since i've been a long-time lurker of [H], I thought I would contribute with my own:
Tools:
2 Flat Head screw drivers. Longer the better. Not the small Electrical Flat Heads, either!
1 Philips Screw driver. Smaller, I don't have an exact size.
1 Torx T10 driver. Non-security. Longer the better.
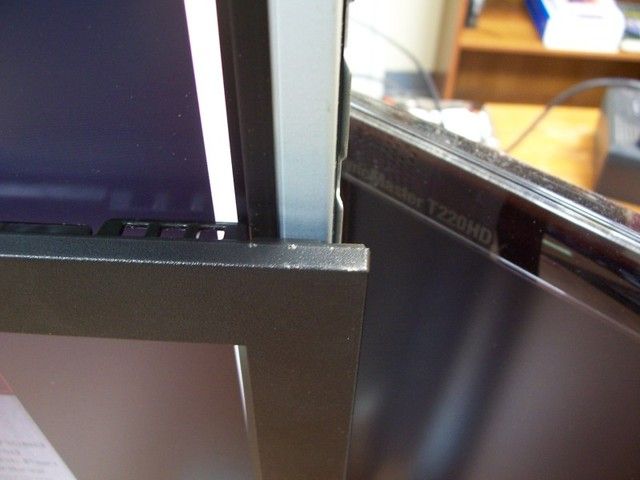
Size Savings: 1' to 11/16' (A little more than 25% shave around the edge.)
Purpose: Portrait Mode, Make the border thinner.
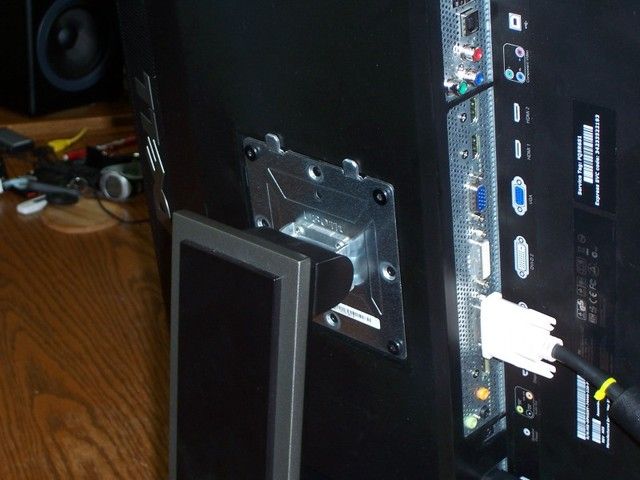
Step 1: Disconnect cabling
Step 2: Flip Monitor on the face, downwards on a wide table. Flat.
Step 3: [Torx]Use your Torx to undo the screws for the Stand.
- Go around to each screw to untighten, first. They might be stuck, I had to give mine a firm twist just to unlock them.
- Then, Take them out with one hand on the stand to hold it up.
- The other hand is taking the screws out.
Step 4: Holding the base, lift upwards, and downwards to the bottom of the monitor to pull it from the Monitor.
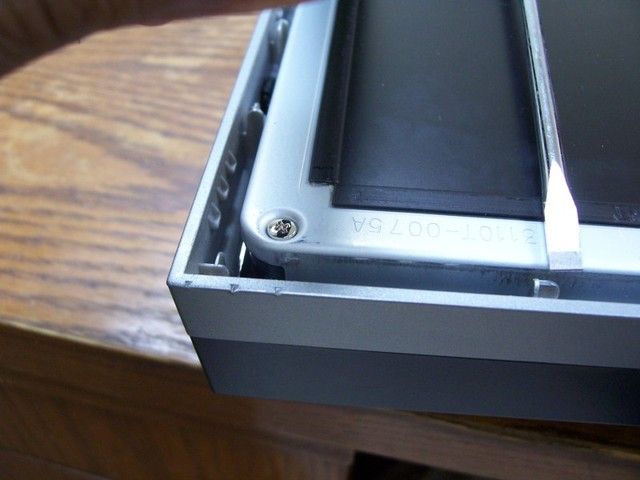
Step 5: [Philips] Unscrew the four screws holding the plate/shield assembly.
Step 6: [Flat Head] Pop loose the plastic shield from the metal.
- It's held in place with 4 joints on opposite ends. Just give them a firm pop, and a small ring of black plastic will come off.
- Use either a twisting motion, or just push the handle downwards into the desk.
- Put the shield somewhere.
Step 7: [Philips] Flip the metal plate around, so that the pointy locking mechanism are facing up, and back. [See image]
Step 8: Screw the metal plate, only.
Step 9: Screw the base back onto the screen
You can't push the monitor all the way back. That bezel has got to go!
Note: You can also just shove shims under the stand [Which I eventually did anyways], so you don't strain yourself to view the top most half. Removing the bezel helps to keep it balanced.
Hmm... How to do this...
Step 1: Flip the monitor on it's back. That's right.
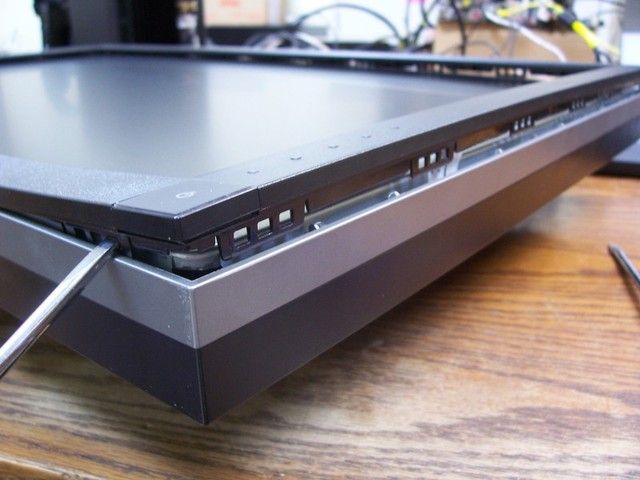
Step 2: [Both Flat2] Pull the front bezel off. You can manage to get up enough to shove the smaller flat head in there.
- When you have it up, go ahead and slowly make your way around the inside parameter with the second flat head.
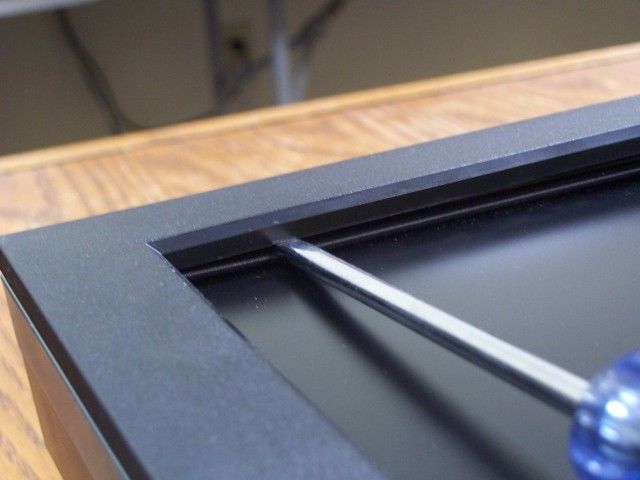
Step 3: To better guage how much distance you have to play with inside the bezel, put a flathead ontop of it and use a sharpie to mark the depth. You'll need to use a combination of Twisting and Pulling down
Warning: A longer handle gives you more leverage, and less likely you'll forcefully push the handle breaking the screen. This is the easiest way to do it as the flaps are almost flush with the outside bezel.
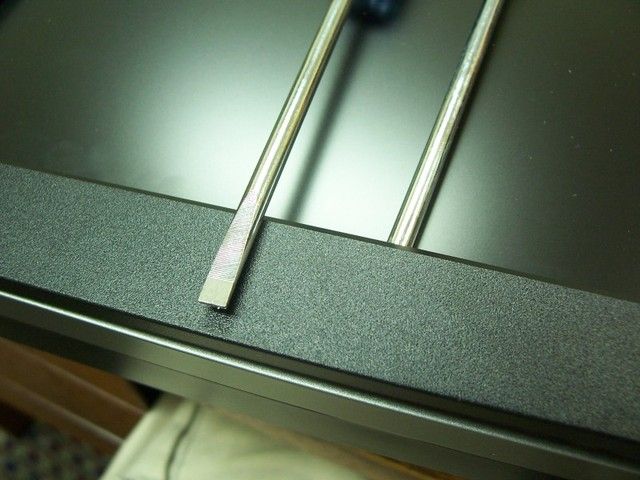
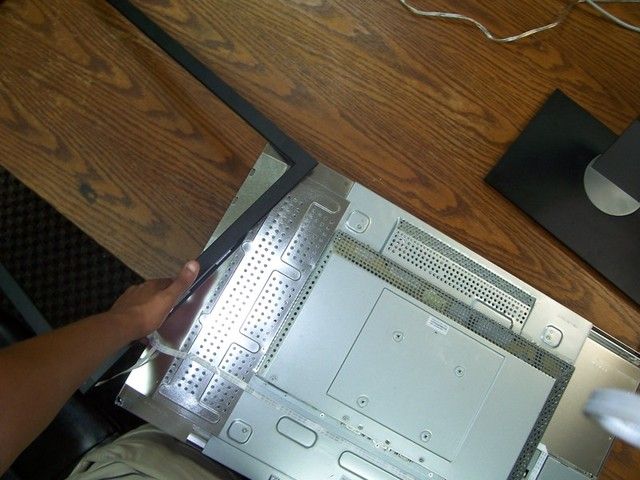
Step 4: Work your way around the outside. When you get more slack you can use the outside like I did here:
The light at the end of the tunnel!
Step 5: When you have the bezel almost off - except for the buttons; Sit the monitor on it's top-side, onto the desk, close to the edge of the desk.
- The back will be towards you, and the input connectors facing upwards
- Leave the front mostly hanging free.
Step 6: Slowly push the screen out of the back. You'll need to move the screen around so the connectors can get free.
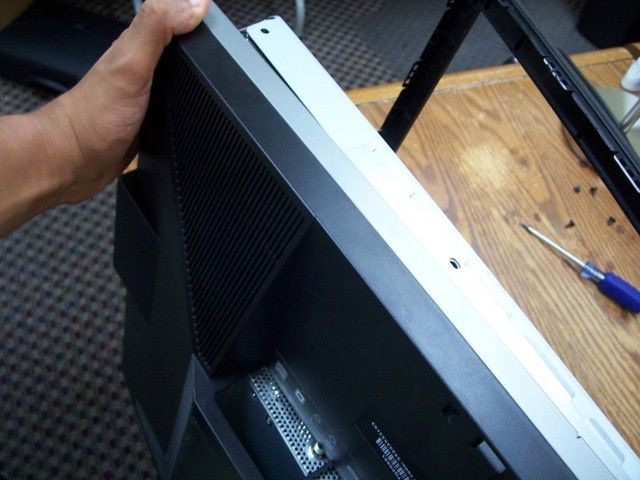
Step 7: With one hand on the screen, set the back on the floor.
Step 8: Start to set the monitor's screen on the desk. You can keep both hands on the screen while the bezel comes out from under it. Think about opening a book and place it on the table, page-side down. That's the motion of the ocean.
Note: You'll need a lot of space to this this step.
Close ups on the buttons:
#1
#2
Without the Black backing - It's just glued on and can be pulled off with a little help from a flat screw driver.
#1
#2
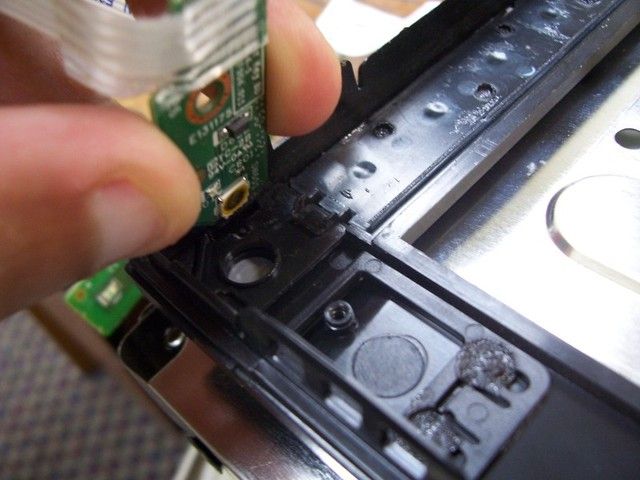
Step 9: [Flat] The buttons are stuck to the front bezel with glue. You'll need both flat heads and use leverage. There's quite a bit of adhesive...
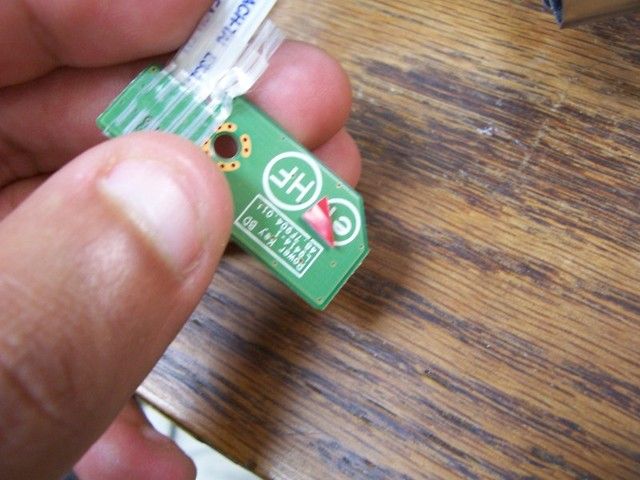
Note: The PCB is covered with a clear plastic shielding. It is sandwhiched between the board and the front bezel. Adhesive is what holds the sandwhich together - both sides. In case you're worried about killing the buttons.
#1
#2
#3

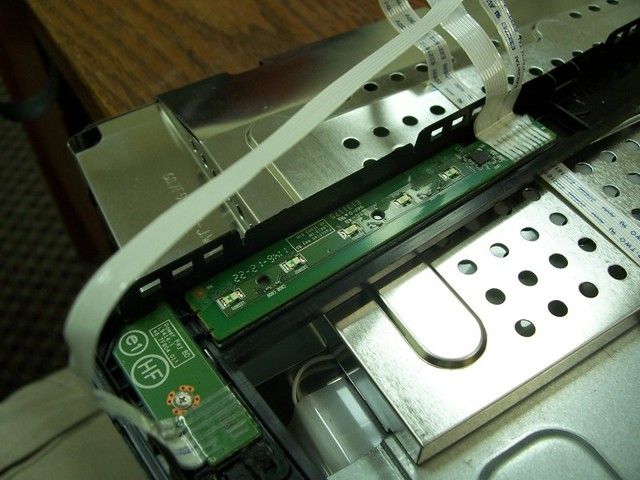
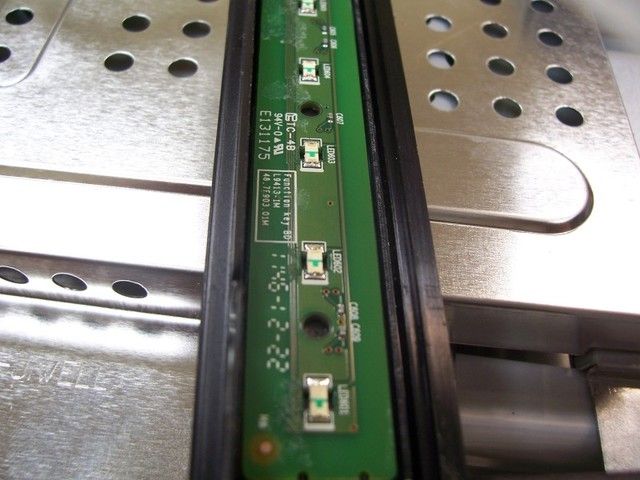
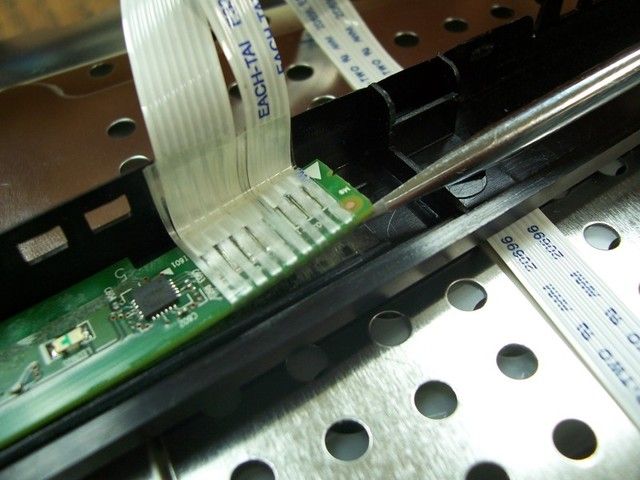
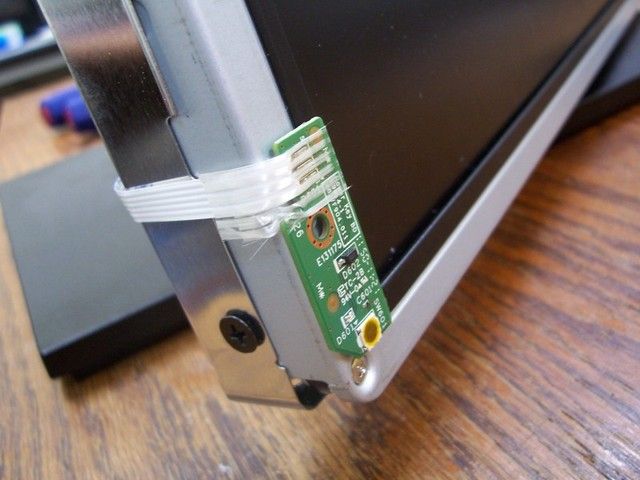
Step 10: [Philips] Use the philips to un-screw the second part of the button assembly. You can see the large gold contact, which acts as the power button, as well as the smaller LED.
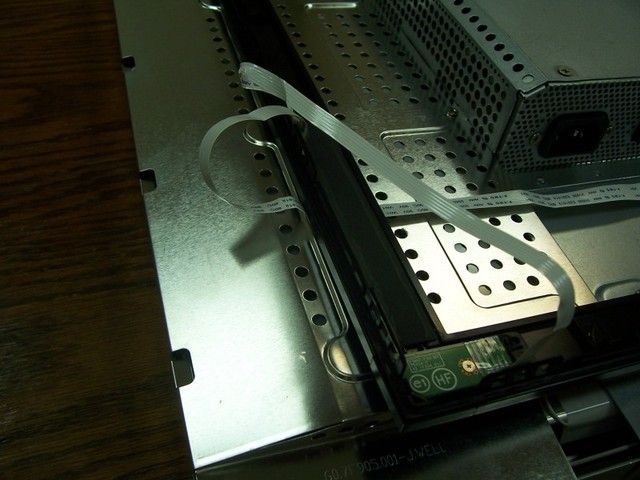
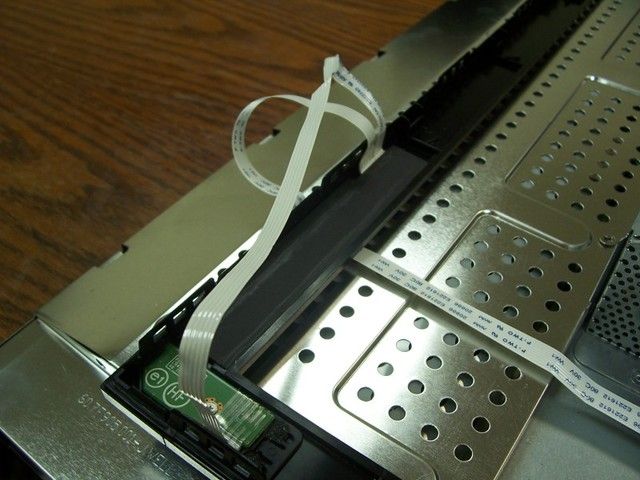
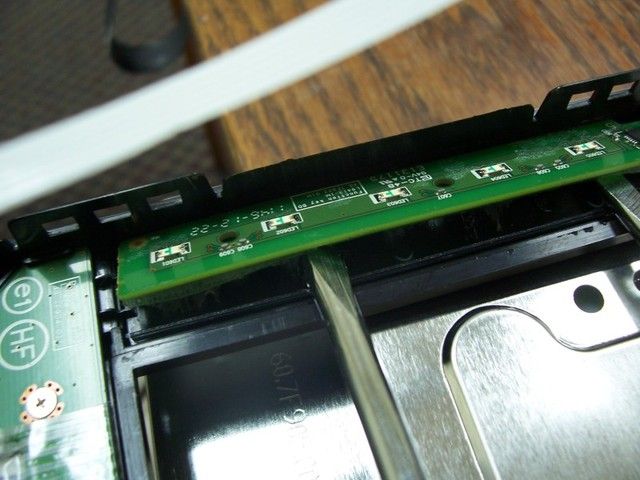
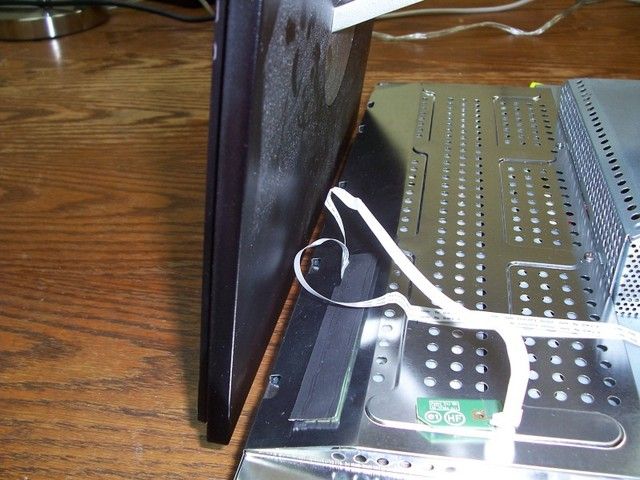
Step 11: The ribbon is held to the back with 3 small pieces of adhesive. You don't need to remove the last one. I marked where they were with a small blue sharpie (Optional).
- I stuck the menu buttons towards the back. And I placed the black covering back ontop.
- I used a 2 small pieces of 3m Double-sided tape to stick the power button/LED assembly back to the front.
#1
#2
#3
Step 12: Place the base back on the screen.
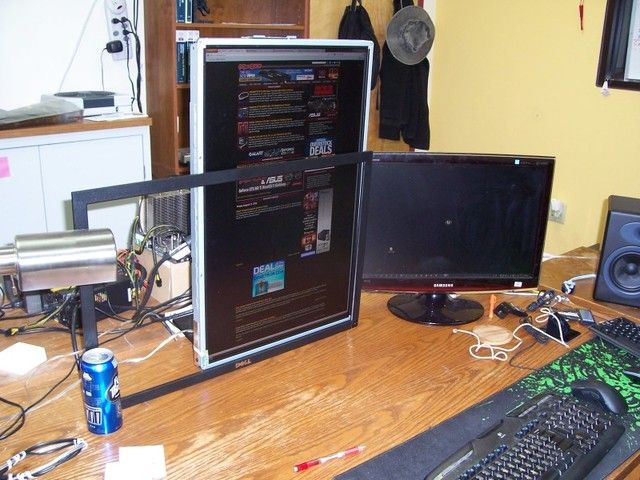
Step 13: It still doesn't go all the way back. But it's definitely an improvement. I got it as much down as possible, and used sticky notes to shim the monitor flat up/down:
Some size difference!
I was unable to find any tutorials on debezeling a U3011. Since i've been a long-time lurker of [H], I thought I would contribute with my own:
Tools:
2 Flat Head screw drivers. Longer the better. Not the small Electrical Flat Heads, either!
1 Philips Screw driver. Smaller, I don't have an exact size.
1 Torx T10 driver. Non-security. Longer the better.
Size Savings: 1' to 11/16' (A little more than 25% shave around the edge.)
Purpose: Portrait Mode, Make the border thinner.
Step 1: Disconnect cabling
Step 2: Flip Monitor on the face, downwards on a wide table. Flat.
Step 3: [Torx]Use your Torx to undo the screws for the Stand.
- Go around to each screw to untighten, first. They might be stuck, I had to give mine a firm twist just to unlock them.
- Then, Take them out with one hand on the stand to hold it up.
- The other hand is taking the screws out.
Step 4: Holding the base, lift upwards, and downwards to the bottom of the monitor to pull it from the Monitor.
Step 5: [Philips] Unscrew the four screws holding the plate/shield assembly.
Step 6: [Flat Head] Pop loose the plastic shield from the metal.
- It's held in place with 4 joints on opposite ends. Just give them a firm pop, and a small ring of black plastic will come off.
- Use either a twisting motion, or just push the handle downwards into the desk.
- Put the shield somewhere.
Step 7: [Philips] Flip the metal plate around, so that the pointy locking mechanism are facing up, and back. [See image]
Step 8: Screw the metal plate, only.
Step 9: Screw the base back onto the screen
You can't push the monitor all the way back. That bezel has got to go!
Note: You can also just shove shims under the stand [Which I eventually did anyways], so you don't strain yourself to view the top most half. Removing the bezel helps to keep it balanced.
Hmm... How to do this...
Step 1: Flip the monitor on it's back. That's right.
Step 2: [Both Flat2] Pull the front bezel off. You can manage to get up enough to shove the smaller flat head in there.
- When you have it up, go ahead and slowly make your way around the inside parameter with the second flat head.
Step 3: To better guage how much distance you have to play with inside the bezel, put a flathead ontop of it and use a sharpie to mark the depth. You'll need to use a combination of Twisting and Pulling down
Warning: A longer handle gives you more leverage, and less likely you'll forcefully push the handle breaking the screen. This is the easiest way to do it as the flaps are almost flush with the outside bezel.
Step 4: Work your way around the outside. When you get more slack you can use the outside like I did here:
The light at the end of the tunnel!
Step 5: When you have the bezel almost off - except for the buttons; Sit the monitor on it's top-side, onto the desk, close to the edge of the desk.
- The back will be towards you, and the input connectors facing upwards
- Leave the front mostly hanging free.
Step 6: Slowly push the screen out of the back. You'll need to move the screen around so the connectors can get free.
Step 7: With one hand on the screen, set the back on the floor.
Step 8: Start to set the monitor's screen on the desk. You can keep both hands on the screen while the bezel comes out from under it. Think about opening a book and place it on the table, page-side down. That's the motion of the ocean.
Note: You'll need a lot of space to this this step.
Close ups on the buttons:
#1
#2
Without the Black backing - It's just glued on and can be pulled off with a little help from a flat screw driver.
#1
#2
Step 9: [Flat] The buttons are stuck to the front bezel with glue. You'll need both flat heads and use leverage. There's quite a bit of adhesive...
Note: The PCB is covered with a clear plastic shielding. It is sandwhiched between the board and the front bezel. Adhesive is what holds the sandwhich together - both sides. In case you're worried about killing the buttons.
#1
#2
#3
Step 10: [Philips] Use the philips to un-screw the second part of the button assembly. You can see the large gold contact, which acts as the power button, as well as the smaller LED.
Step 11: The ribbon is held to the back with 3 small pieces of adhesive. You don't need to remove the last one. I marked where they were with a small blue sharpie (Optional).
- I stuck the menu buttons towards the back. And I placed the black covering back ontop.
- I used a 2 small pieces of 3m Double-sided tape to stick the power button/LED assembly back to the front.
#1
#2
#3
Step 12: Place the base back on the screen.
Step 13: It still doesn't go all the way back. But it's definitely an improvement. I got it as much down as possible, and used sticky notes to shim the monitor flat up/down:
Some size difference!