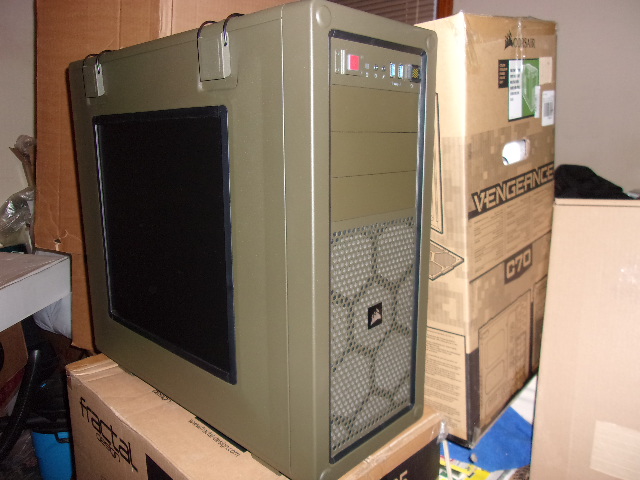
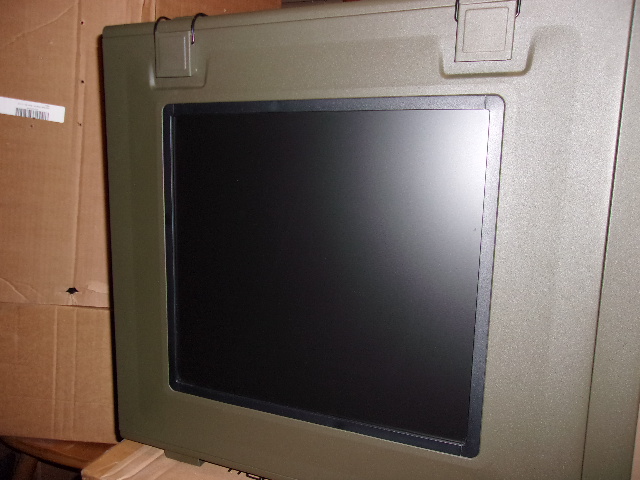
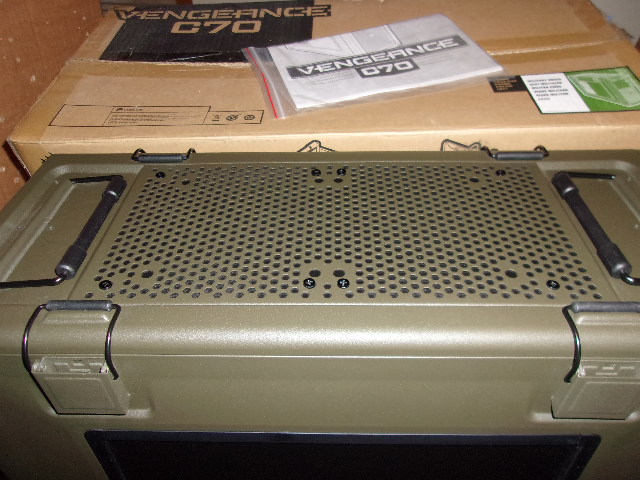
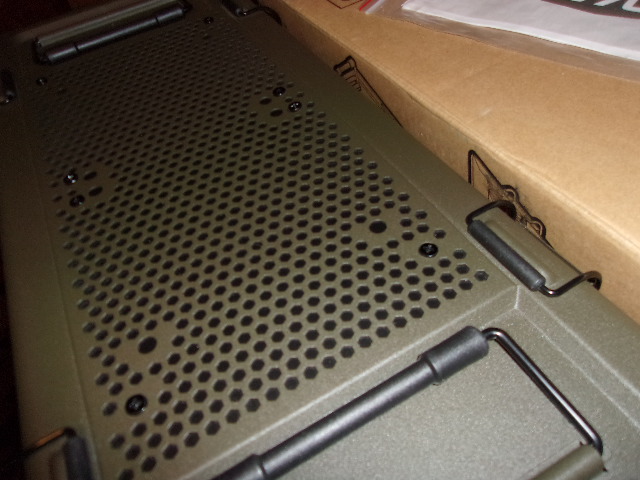
"Buttoned Up" my Corsair C70 - Side Panel Window Mod

Spartacus

2[H]4U
Joined
Apr 29, 2005
Messages
2,130
I actually did this mod on my C70 back in July, but am just getting around to posting about it here.

I have a system I use for testing and diagnostics that was in an old crappy generic tower and decided to get a
Corsair C70 replacement case for a couple of reasons....

For practical reasons, I liked the quick release side panel latches that make getting into the case very quick and
easy. The machine is used for testing hardware, imaging drives, etc. so it's nice to have those latches.

It also has strong sturdy handles on the top of the tower that make picking up the case to move it nice and easy.
Something I do a lot of in my home office, working as an independent IT consultant.

The case is nice and large, plenty of room inside, and it looks cool. So plenty of reason for me to snag one when
it went on sale. Price matched Amazon at Microcenter.

So I moved the hardware from the old case to the C70 and was happy with it for 4-5 months. I knew even when I bought
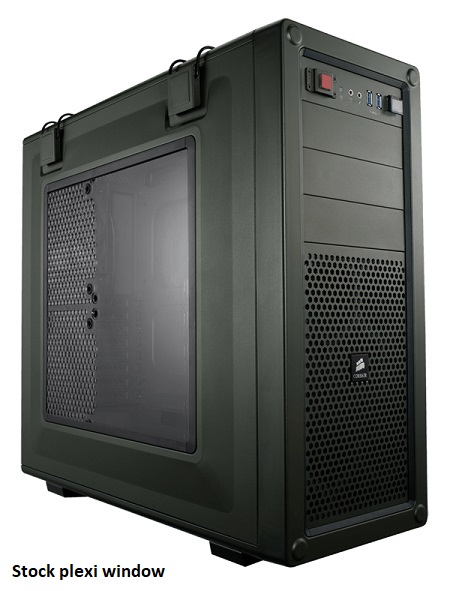
it that I was going to change that stock plexi window side panel with the fan mounts in it. It looks bad, and you'll see
that as a complaint from buyers and online reviews.

I decided to replace the plexi window with a flat black aluminum panel. I also wanted to seal up the open top vents on
the tower that let dust and debris fall inside the case.

So I ordered a flat black painted aluminum panel from Amazon. The description was "Matte Black / White Painted
Aluminum Sheet .040" x 12" x 24"". The 12" side was just barely wide enough to cover the side panel window and the
top vent. The 24" side gave me plenty of material to cut the two pieces I needed with a small scrap left over. I bought
some bags of rubber grommets from ACE Hardware to mount the new aluminum panel. I took one of the window trim
pieces with me to the hardware store to make sure I got the right size grommets. From memory I think they were the
1/4" size and were in plastic bags of 6 in the electrical section, not where they have the millions of parts in the drawers.
The grommets fit on the posts and are just a hair taller than the posts when installed. The screws will compress them
slightly when screwed down (don't over tighten).

I'm not an especially skilled guy with regard to shop skills but I got through it ok and it looks like a factory job. I used
a brand new set of sharp tin snips to cut the aluminum by hand and a cordless drill for the mounting holes.

This guy has smoked plexi replacement windows for the C70, but they were never in stock, so I just decided to do
my own thing and went with the flat black aluminum. The video is still good to see how the swap is done.

If anybody is interested, I can post a few more details about cutting the aluminum and getting it installed.


Pics:


c70_g_up.jpg


100_0088.JPG


100_0087.JPG


100_0089.JPG


100_0090.JPG


.

ETA: With the military theme of the case, I call this "buttoning up" the case. Similar to the way a tank
commander would order "button up" (close hatches and vents) before going into battle.


.
 
Last edited:
For some reason I forgot Corsair made the C70 in white, they look nice too.

I could see going either black or white for a replacement side panel. The sheet of aluminum I bought was painted black/white
with the black side being the protected side with the peel off plastic. The white side was not protected and had scratches.

The seller on Amazon was https://onlinemetalsupply.com

I imagine you could contact them and get white or whatever color you like. Cost was about $22 plus shipping. I do recommend
getting the 12" x 24" sheet size as it's perfect for this project.

Safety PSA:

Make sure to use safety glasses or goggles to protect your eyes. Cutting and drilling sheet metal throws off lots of small and
sharp metal particles that you don't want in your eyes. You may also want to wear shop gloves. Cut metal edges are razor sharp!

Measuring & cutting:

The easy way to measure the size of the panel you need for the window is to use the stock plexi window as a template.
Line it up on top of your sheet metal and then tape it down on the edges so it doesn't move. Once you tape it, you still have to
handle the work pieces carefully because the two pieces could shift (and did for me) and throw off the alignment.

If you get the sheet metal with the 12" dimension on one side, it's not quite enough to match the short side of the stock plexi
window. Just split the difference so it's centered. It will be wide enough when it's finished due to the window trim pieces.

It will be easier to work with if you cut the sheet size you need and then worry about the mounting holes later.

I used a new pair of heavy tin snips to cut the .040" thick aluminum, and it turned out well but it was challenging. As you start
cutting, you quickly realize that you can't continue the cut as there is no room for the tin snip blades. The solution is to carefully
curve the other piece of material down away from you as you cut. This will cause a "ripply" edge so make sure you are doing
this bending to the edge that is not on the piece you are using for the window.

If you are also cutting the piece for the top vents, measure and cut from the other side of the sheet you have left. That way
there will only be one cut edge on both of the pieces you are keeping. The scrap piece left over will have been in the middle
and will have two cut ripply edges.

Sorry I don't remember the dimensions for the top piece. I measured on the top of the case and added something like .25" to
make sure I had an 1/8" overlap. No cutting needed on the 12" side of the sheet.

I strongly recommend using a file or sanding drum, etc. for the cut aluminum edges, as noted above those edges will be
razor sharp after cutting! Dressing up the edges will remove the burrs and dull the sharp edges.

Drilling the mounting holes:

Ok, so once your main window piece is cut, get it centered up on your stock plexi template again. You're now going to mark
some mounting holes. Here's where you're going to curse at me for telling you to get the 12" on a side sheet! The holes on
that 12" side land right on the edge of the sheet of aluminum. Trying to drill holes on an edge is a nightmare, it keeps causing
the work piece to shift as the drill bit forces itself past the edge instead of making a nice semi-circular hole.

The solution is this.... measure and mark only the holes on the other sides of the piece where you can drill the full hole.
Then drill only those holes. Once you have those holes, now you can really secure the stock plexi window template to your
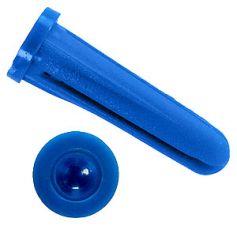
aluminum sheet using those holes. I used those drywall screw anchor expanding plastic pieces stuffed into the plexi holes
to secure them. You could use nuts and bolts too, but be very careful not to over tighten and cause dimples in the aluminum.
The drywall anchors worked well because they filled the holes and minimized shifting.

89-conical-anchors-plastic.jpg


So after you have the plexi template secured well to the aluminum sheet, now you can drill the rest of the holes on the edges.
Drill right through the plexi window holes, use them as drill guides. If you use the correct drill bit and are careful, you won't
mess up the plexi window doing this. Just make sure not to use a drill bit larger than the plexi holes, it should pass through
freely by hand before drilling.

If you still have trouble with the holes on the edges using this suggestion, don't worry, you can fix it with the tin snips. If that's
the case, just make small triangle cuts where the holes go. Or you could use a round file, rasp, or small grinding stone to
widen out the holes on the edges.

The holes don't have to be absolutely perfect, they are going to be covered up by the grommets and window trim anyway.
You just need the holes to allow the aluminum sheet to drop into place flat onto the window trim mounting posts.

You'll see that a couple of the window trim pieces have a locator pin that does not have screw threads in it. I cut those off
flush so I would'nt have to drill more holes in the aluminum for them.

So once you get the aluminum test fitted, peel off the protective plastic and install it. Then follow the video above as you
place the grommets and secure the screws. Be careful not to over tighten the screws, they can strip out the mounting posts.

That's about it. I know I have to take my time and go slowly on these projects. When I start getting pissed off, that's when
I have to put it down and walk away for a while. lol

Let me know if you guys have any questions.

.
 
Last edited:
Ok, I forgot the part about the piece for the top vents....

Once you get that piece cut, you can lay it on top of the case and mark the holes on the back side of the piece by
going through the inside of the case.

I had the rubber bushings Corsair provides with the case in the 8 holes meant for the larger fans. The rubber bushings
will help keep the aluminum plate from shifting while you make your markings. A heavy book on top will really help.

I used a red felt tip pen and it showed up well on the white back side of the aluminum.

Then when you get all of the holes marked, it's a good idea to lightly center punch the marks so the drill bit won't walk
as you are drilling.

I don't remember the drill bit size for the black fan screws that come with the case. Do some tests on a block of wood
to select a drill bit just smaller than the screws. If you end up drilling the holes too large, plan B would be to use some
black screws and washers/nuts on the inside. It would look the same but would require you to go buy more parts.
I think I actually just grabbed a spare fan to determine which drill bit fit those holes, that was easy.

As a final step, I used a counter sink bit to smooth and deburr the holes. This is also a good thing to do on the larger
aluminum sheet above.

When you install the cover for the vents, you may want to use a clean rag to cover the mobo so you don't get any small
aluminum shavings dropping from the screw holes on the mobo. If the holes are the right size and deburred, you won't get
any shavings.

I ended up removing the rubber bushings in the top vent, they just deform and look goofy with the screws in place.

That's it for that one.... let me know if any questions.

.
 
Last edited:
One note regarding air flow on the case after doing this....

You are closing off a lot of vents, both in the side window and the top vents too. If you have top mounted fans or a radiator,
obviously you can't cover up the top vents.

One surprise is that while I thought the case would get quieter... it actually got louder. The stock Corsair fans had to work
harder and I could hear them more than before. Kind of like when you put your hand over a vacuum cleaner hose and the
motor starts racing.

My solution on that was to use some Noctua noise reduction wires to drop the speed of the fans. Yet another reduction
in overall cooling but it's working well.

Even with all of that cooling loss, I have a 4690K running fine at 4.5GHz with a Reeven Justice cooler. The case still has
the front and rear mounted fans and the vents on the bottom of the tower. Cooling is still fine for my needs. And it's quiet.

.
 
If you wanted to do a new plexi window instead of the aluminum and can't get one from mnpctech.com, you could use these
same instructions except use the appropriate cutting method on the plexi. I'd probably use my jigsaw with the right blade.

It would be far easier to order one pre-made if you can wait for it to be in stock.


ETA: I found a sheet of diamond plate!

https://www.shapirosupply.com/al-treadbrite-3003-h13-br-045-x-1-x-2.html

How would a firetruck red C70 look with the diamond plate side panel?

Chromed latches?

.
 
Last edited:
Back
Top