![[H]ard|Forum](/styles/hardforum/xenforo/logo_dark.png)
This is my pride and joy: the Black Widow. It started off as some case (can't remember what it was) and went from there. I
really liked the Black Widow bike OCC (Discovery Channel's American Chopper) and I wanted a computer like it. So I made it.
The webbing is made from anodized aluminum rods all cut and handbent to shape. Alot of hours went into that. Once the pieces
were all made I put everything together with epoxy. I would have preferred welding it but the 4mm rod is too thin for the
weld to actually penetrate. And the anodizing doesn't help things either. The webs are mounted to the side panels using three
motherboard stand-offs to make the webs float from the case 3 / 4 inch.
The paint was done with a deep red mix from Rona with metallic red Dupli-Color spray paint over it to create the blood red
I wanted. The pin-stripe across the front was wrapped up the sides and over the side panel to create a single line. I did this
to create more organic curves on the mod and to act as a counter-balance to the downward lines of the webs.
The side window was cut in a two step process. After laying out my window size with masking tape I marked the four corners
of the window and used a 2.5" hole saw to create the nice rounded corners. The idea was to create more counter-balance to the
webbing. I then proceeded to use the Dremel with the cutting blade in a free hand motion along each side. I used shallow cuts
to create the edges and to properly line it up with the holes I already cut. (Tip: always mark and cut from the inside of
the panel. This way if you gouge or score you panel wrong you don't have to try and hide it with paint. Just smooth the
burrs down afterwards) This window is attached using an invisible mounting method. Alot of modders like to use two-sided
tape to hold their windows in but thats not hardcore enough for me. I took several nuts and epoxed them around the edge of the
window on the inside. I marked the spots and carefully drilled into the plexiglass (leave the protective wrapping on the
glass when doing this or you'll end up with scratches all over it). Once the holes were drilled and everything was finished
I just slipped the glass over the nuts and the window was attached firmly and invisibly.
As usual it got my watercut logo on the front.
This project took me nearly four months to complete including paint.
This is the only time I've ever used a manufacturer's sticker on a mod and the only reason I did this was to make it
clear it was a 64-bit processor for a trade show I was going to.
The system specs are:
Athlon 64 2800+ (1.8 GHZ) Processor
MSI VIA K8T800 s754 motherboard
512 MB PC-3200 DDR400 SDRAM
250 GB S-ATA Western Digital 7200 RPM HDD
Radeon 9600XT 128 MB Video w/ TV-Out
LG GSA-4081B DVD+RW
Enermax 400W Power Supply
Windows XP Professional
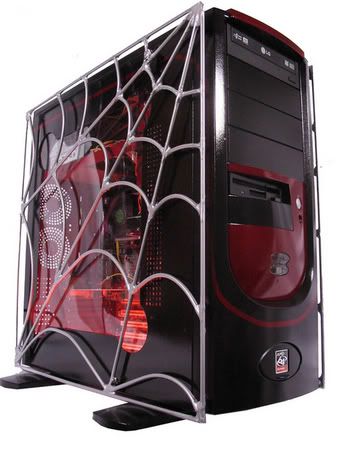
The Black Widow in all its glory.
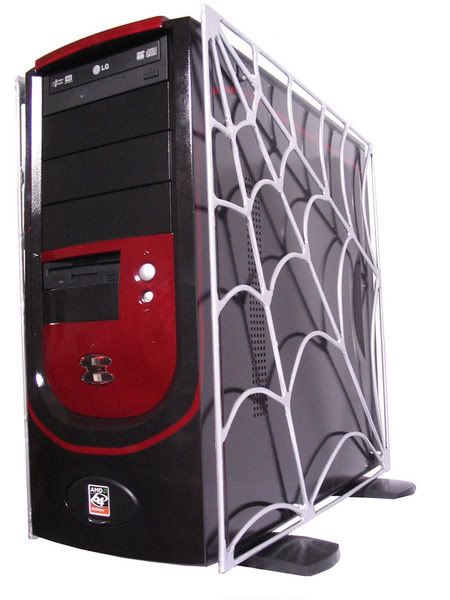
The opposite side. You can see that both sides have the webbing panels.
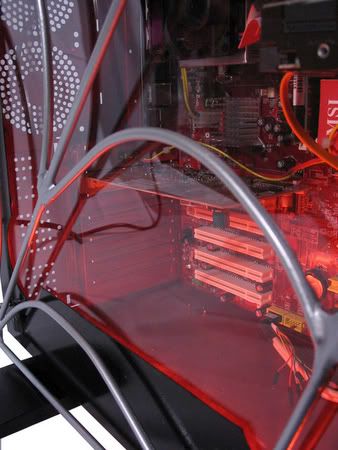
A close-up of the webbing. You can how I trim and smoothed the epoxy to make it (hopefully) blend together like one piece.
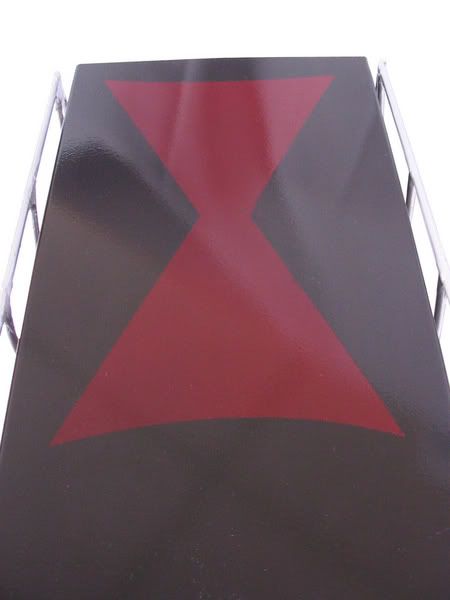
A close-up of the Black Widow trademark: the hourglass. I layed this out with paint mask after creating the shape in
Corel Draw and using a sign program I have to print it on my plotter. The plotter cuts very thinly into the paint mask
material to allow you remove the excess while leaving your design to transfer it to your target.
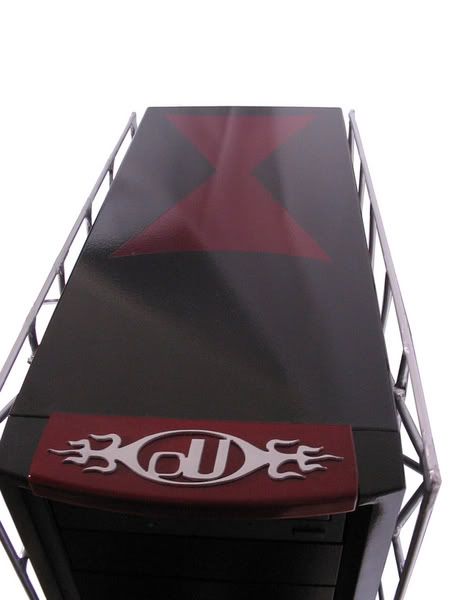
A full shot of the top panel with my signature watercut logo. This is put on every single computer that gets built in
my shop.
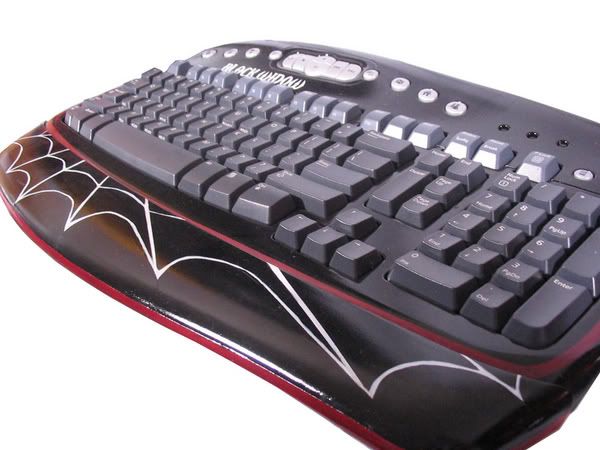
Even the keyboard got modded. If you're ever going to mod a keyboard be sure to have either a spare keyboard or
make sure you know where every key goes before doing this or you "K" key might produce "?" The webbing on the wristrest was
all painted by hand.
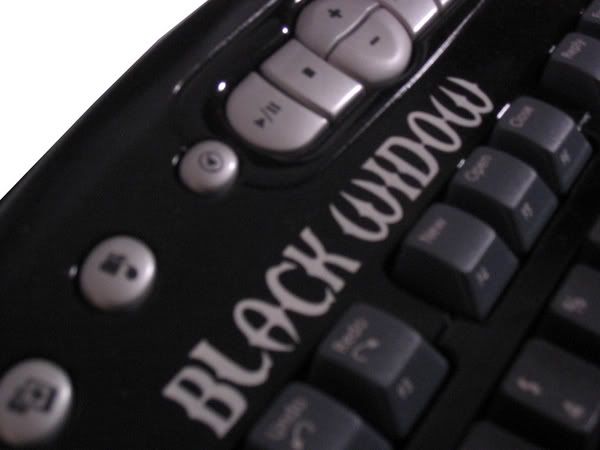
A close-up of the lettering on the keyboard identifying the mod. These letters were hand painted with a 3mm brush.
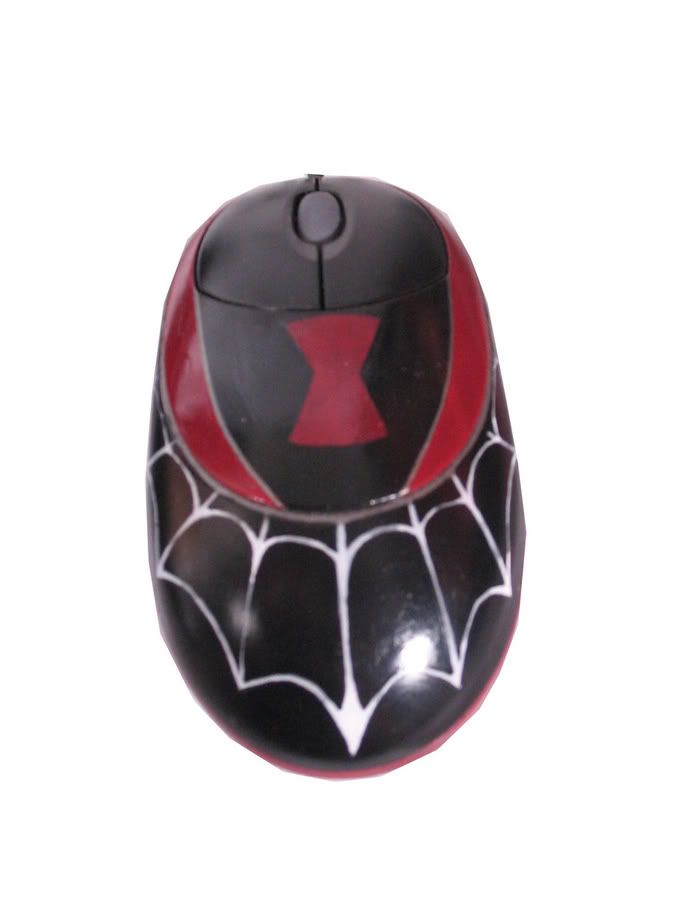
The mouse also got modded. Well, if you're gonna mod the kb you gotta mod the mouse. All of the design work on the mouse
was handpainted.
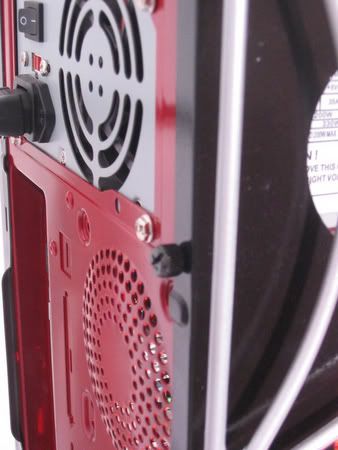
A shot of the rear. You can really see the colour of the chasis and just how dark that red really is. I really like using
thumbscrews and use them on every single computer (mod or otherwise) that I build.
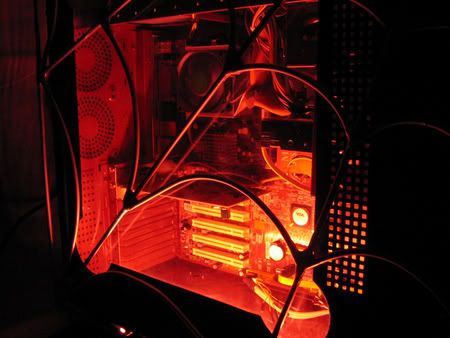
Lastly, an interior shot of the case all light up. Thats only one cold cathode illuminating the interior. The original case
side panel had the line of squared perforations on the side and I wanted to keep that so I made an effort not to cut it off
or through it when I was making the window.
really liked the Black Widow bike OCC (Discovery Channel's American Chopper) and I wanted a computer like it. So I made it.
The webbing is made from anodized aluminum rods all cut and handbent to shape. Alot of hours went into that. Once the pieces
were all made I put everything together with epoxy. I would have preferred welding it but the 4mm rod is too thin for the
weld to actually penetrate. And the anodizing doesn't help things either. The webs are mounted to the side panels using three
motherboard stand-offs to make the webs float from the case 3 / 4 inch.
The paint was done with a deep red mix from Rona with metallic red Dupli-Color spray paint over it to create the blood red
I wanted. The pin-stripe across the front was wrapped up the sides and over the side panel to create a single line. I did this
to create more organic curves on the mod and to act as a counter-balance to the downward lines of the webs.
The side window was cut in a two step process. After laying out my window size with masking tape I marked the four corners
of the window and used a 2.5" hole saw to create the nice rounded corners. The idea was to create more counter-balance to the
webbing. I then proceeded to use the Dremel with the cutting blade in a free hand motion along each side. I used shallow cuts
to create the edges and to properly line it up with the holes I already cut. (Tip: always mark and cut from the inside of
the panel. This way if you gouge or score you panel wrong you don't have to try and hide it with paint. Just smooth the
burrs down afterwards) This window is attached using an invisible mounting method. Alot of modders like to use two-sided
tape to hold their windows in but thats not hardcore enough for me. I took several nuts and epoxed them around the edge of the
window on the inside. I marked the spots and carefully drilled into the plexiglass (leave the protective wrapping on the
glass when doing this or you'll end up with scratches all over it). Once the holes were drilled and everything was finished
I just slipped the glass over the nuts and the window was attached firmly and invisibly.
As usual it got my watercut logo on the front.
This project took me nearly four months to complete including paint.
This is the only time I've ever used a manufacturer's sticker on a mod and the only reason I did this was to make it
clear it was a 64-bit processor for a trade show I was going to.
The system specs are:
Athlon 64 2800+ (1.8 GHZ) Processor
MSI VIA K8T800 s754 motherboard
512 MB PC-3200 DDR400 SDRAM
250 GB S-ATA Western Digital 7200 RPM HDD
Radeon 9600XT 128 MB Video w/ TV-Out
LG GSA-4081B DVD+RW
Enermax 400W Power Supply
Windows XP Professional
The Black Widow in all its glory.
The opposite side. You can see that both sides have the webbing panels.
A close-up of the webbing. You can how I trim and smoothed the epoxy to make it (hopefully) blend together like one piece.
A close-up of the Black Widow trademark: the hourglass. I layed this out with paint mask after creating the shape in
Corel Draw and using a sign program I have to print it on my plotter. The plotter cuts very thinly into the paint mask
material to allow you remove the excess while leaving your design to transfer it to your target.
A full shot of the top panel with my signature watercut logo. This is put on every single computer that gets built in
my shop.
Even the keyboard got modded. If you're ever going to mod a keyboard be sure to have either a spare keyboard or
make sure you know where every key goes before doing this or you "K" key might produce "?" The webbing on the wristrest was
all painted by hand.
A close-up of the lettering on the keyboard identifying the mod. These letters were hand painted with a 3mm brush.
The mouse also got modded. Well, if you're gonna mod the kb you gotta mod the mouse. All of the design work on the mouse
was handpainted.
A shot of the rear. You can really see the colour of the chasis and just how dark that red really is. I really like using
thumbscrews and use them on every single computer (mod or otherwise) that I build.
Lastly, an interior shot of the case all light up. Thats only one cold cathode illuminating the interior. The original case
side panel had the line of squared perforations on the side and I wanted to keep that so I made an effort not to cut it off
or through it when I was making the window.


