Antec Sonata case mod

Joined
Dec 22, 2004
Messages
636
I do not have a name yet but am in the process of thinking of one. I have always wantred to paint my case and recently came across some great prices on watercooling parts which will be incorporated into this build. The build will consist of the following:

Antec Sonata
Black Ice GT240
Storm Rev1
DD Maze4
Mcp600

As for the rig specs I dunno yet as I am thinking of selling everything I have off right now while waiting for Conroe to pan out.

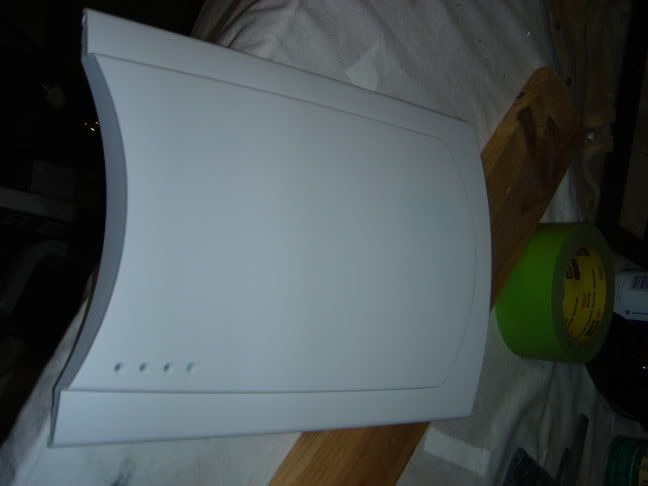
The canvas - Antec Sonata
antec_p.jpg


So far I have disassembled the case and sanded for painting. Currently in the progress of designing window cut out but I need some help on a measurement. I need to know the distance between the lip marked and the bottom of the bar which is also marked. I cannot measure as the case is apart already and flex's so I cannot get a good reading on it.
antec_s.jpg


Pics to come once my bro finds the CF card for his camera.

Tim
 
Fair amount of pictures coming tonight of some new tools and the window cut out and a mock up of rad mounted.
 
i've always been interested in modded sonatas.

looking forward to seeing what type of window cut out you design with the latch and all.
 
stormshadow said:
i've always been interested in modded sonatas.

looking forward to seeing what type of window cut out you design with the latch and all.
The latch was a pain as I couldn't cut the window how I initially wanted to but it turned out pretty nice.

Just gotta resize the photos and host them. Time is what I need though to get that done, so busy right now.
 
Here is my makeshift work area
Work%20area.jpg


The window
window%201.jpg


And a paint handle
paint%20handle.jpg


New drill bits, one on the left was $40 :eek:
new%20bits.jpg


The $10 bit for the $10 fillport :p
fill%20port.jpg
 
The mock up of the radiator from the side
rad%20side.jpg


A little closer
rad%20side%202.jpg


A look from the back
rad%20back.jpg


How the water will get in the case
barb%20inlets.jpg


How the radiator mounts
rad%20mounting.jpg


And the barb inlets drilled out
inlets%20drilled.jpg
 
Damn bro that's looking {Tony the Tiger} GRRRRREAT {/Tony the Tiger}
:) :)

EDIT: Are you the racer in the family?
 
The next step is to round off all of the edges and further prep for painting. I also need to order my fans and coolant. Not much further planned out then that as this coming week is going to be a busy one.

When I do paint I am thinking flat black inside and gloss white outside, I got the idea from stormshadows and really liked the flat black. Originally I was going to do a Lime green or Tangerine orange outside and gloss white inside but recently changed my mind.
 
stryder2720 said:
Damn bro that's looking {Tony the Tiger} GRRRRREAT {/Tony the Tiger}
:) :)

EDIT: Are you the racer in the family?
Thank you and yes I am the racer. My father and my brother used to race and I am the only one participating atm.
 
Cpt Twitchy said:
That you and yes I am the racer. My father and my brother used to race and I am the only one participating atm.

Sweet! My neighbor raced 125cc shifters a few years ago and was going to go big time...but ended up quiting.
 
stryder2720 said:
Sweet! My neighbor raced 125cc shifters a few years ago and was going to go big time...but ended up quiting...I think. Berek McEwen ring a bell?
I don't race go karts, I race what are called quarter midgets. They are similar but what I run has seatbelts and a roll cage and run on 1/20mile oval tracks. It doesn't seem to big but it has bred some of the top drivers you see in nascar today.
 
Are you going to build something around the rad? Cause it looks kinda weard in my opinion...
 
I do not see it as there is much room inside because I would have to sacrafice my hdd trays or severly limit the amount of 3.5" bays I have which I do not want to do.
 
I do not see it as there is much room inside because I would have to sacrafice my hdd trays or severly limit the amount of 5.25 bays I have which I do not want to do.

I was thinking more along the lines of mounting the rad where the front fan is supposed to go. No bays consumed that way.

But its all about what works for you. The way you're proposing has its own advantages. I especially like that you've made the effort to have the barbs facing into the case, which is going to result in a cleaner look.

Have fun with the build. Will check in again later.
 
Looking good, but I am wondering if you will have to hollow a 120 mm to fit in the middle of the back? How are you going to be able to fit the cables for the monitor in there even if your second fan is pulling instead of pushing? :confused:
 
brasherman said:
Looking good, but I am wondering if you will have to hollow a 120 mm to fit in the middle of the back? How are you going to be able to fit the cables for the monitor in there even if your second fan is pulling instead of pushing? :confused:
The monitor just barely fits in so that is ok there. I am going to gut that fan (loud and annoying) and mount 2 yate loons on the back.

Thank you for all of the tips and suggestions everyone. Much progress probably will not be made until after this coming week.
 
i dunno if someone posted this but, if you dont have a radbox or anything to push the rad out a little more, how are u gonna be able to plug in all ur stuff into the their ports?
 
strikeout said:
i dunno if someone posted this but, if you dont have a radbox or anything to push the rad out a little more, how are u gonna be able to plug in all ur stuff into the their ports?
The video just barely and the nic is below the rad and sound is angled at the tips and usb is all open. There should be no problem getting it all plugged in with the addition of some patience.
 
Well I got all the parts in now except for the fans which I still need to order. I am letting the rad soak with vinegar inside and will soon be cleaning water blocks.

Here are some pics of how dirty the parts are.

Residue around the top
Top%20residue%201.jpg


Residue on the mid plate
Mid%20residue.jpg


The ever so clogged jets
Jet%20residue.jpg


And quite a few filled ports
Clogged%20ports.jpg


The maze4 was not very clean either
maze%204%20build%20up.jpg

maze4%20build%20up.jpg


This I was quite upset about, the bent up mounting rods.
bent%20shafts.jpg


I was very suprised about the build up in the residue as the previous owner was using pentosin whish is one of the top additives used in watercooling. As for the bent rods on the maze4 I am very upset because it appears it was all due insufficient packing :mad:
 
After soaking my rad in vinegar I noticed a weird blueish goop near the inlets and think that may also be what wound up in the block which, in my eyes it is quite possible if the previous ower did not clean out his rad before using it.
 
Sorry for the lack of updates but I have been swamped with school and all lately. I will try to run out and pick up some paint this weekend.
 
Cross Country season is coming to an end and I am having more time to mess with my rig so I ordered some fan headers last tonight. Considering how cheap sleeving material is at svc right now (less then $1 per 5' ) I decided to order sleeving for my PSU instead of just for my fans and case cables. Where I am stuck is what are good tools to use for sleeving a PSU. Price is not an issue as I truely believe in "you get what you pay for" especially when it come to tools. I would like tools for male and female molex connectors and atx connectors. I think a small screw driver works for 3pin and FDD connectors, please correct me if I am wrong. I would like to buy from SVC as I am already getting a lot of stuff from them. http://svc.com/sleeving-tools.html Some answers by 5pm would be greatly appreciated as I'd like to order close to when I get home.

Thanks
Tim
 
Finished the seleving of PSU and as usual sorry for my horrible picture taking.

Cpt&

Picture%20010.JPG

Picture%20014.JPG

Picture%20016.JPG


Sleeving the Sata cables was the worst of them because the ends are like fused on so I had to splice the lines put sleeving on re solder then heatshrink over each wire and sleeve. It was miserable. I swore I would never sleeve another psu but looking at my back up psu I am thinking of doing it, gives me something to do and a chance to do better.

For the window what kind of plastic is recommended, Acrylic, vinyl, polycarbonate or something else?

Thanks
Tim
 
ive always found acrylic is best, poly tends to be too brittle, not sure about vinyl. If you scratch the window its also easy to polish out the scratches using a plastic polish.
 
skunkmunkey said:
ive always found acrylic is best, poly tends to be too brittle, not sure about vinyl. If you scratch the window its also easy to polish out the scratches using a plastic polish.
thank you very much. Will be ordering that soon probably 1/8th inch or so. What size do you recomend and what kind of epoxy or such to mount it?
 
on my case i used 1/4 inch (couldn't get smoked acrylic in a thinner size) but i think 1/8 inch is the ideal size. I would use a clear epoxy if you want it to be permanent or i find using silicone glass sealant works well as you can remove the window if needed.
 
It has been a while since I have posted an update. First I didn't have anymore money to fund this project so it got put on the back burner but more recently this wonderful pacific northwest weather has made finding an opportunity to paint near impossible. It is either too cold or there is far too much humidity.

Most of the front painted up.
Picture%20008.jpg


A little close up with too much flash.
Picture%20007.jpg


Top needs bondo to smooth center and handle will be painted soon (weather permitting).
Picture%20010.jpg


Some paint for the accent pieces such as the handle and hdd/cd drive mounts.
Picture%20012.jpg


And the loop in its early stages. Going to order some EK barbs, AM2 mounting and trim the tubes.
Picture%20009.jpg


Regards,
Tim
 
Well yet again weather is keeping me from having good days for painting so I did some other kind of work on the case today.

I didn't want to hack at the case anymore so I decided to put the cold cathode switch as part of the fan bus. Tomorrow I will get a little file and I'll mock fit her.

IMG_4638.JPG


I will hide the box thing for the Cathodes here

IMG_4648.JPG


I cleaned up the wiring for the cathodes and pre measured the wire length for when I install it in the finished case (whenever that is :p )

IMG_4649.JPG


I wanted to see what the rad looked like with fans mounted up. No progress but it is more pictures :D

IMG_4658.JPG


IMG_4659.JPG


Here I will be making a little fan box to make things cleaner inside the case.

IMG_4660.JPG
 
Looking great so far. Can't wait to see more :D

Damn.. I should really do something with my sonata here.
 
Thanks Shakko. I will try and get some more done on it today but there isn't a whole lot I can get done until the weather is satisfactory for painting. Hopefully I can make it to the store and get some new tools I need.
 
Just a little pic. I smoothed out that case badge thing on my case and it turned out very nice. I'm not done with it yet. Just primer right now, but you get the idea of the clean look. Looking forward to the results!

DSC01311.jpg
 
DUDE, sorry to go off topic but in the 1st post i couldnt help but notice the kart wheels. Is it ures? what are they from?
 
nice. how much power has that thing got? sorry to go off topic btw. i've got atwin engine pro kart (11hp :p) but goes to 80mph fairly swiftly :)
 
Its a 188cc Powroll engine based off of a Honda block. All air cooled and puts out around 40hp on methanol. Our little 188cc ran with the big 230cc-250cc guys as we had some stuff done different internally. They hit about 65mph tops on a 1/20mile track, easily could have gone over 100 had we been allowed on larger tracks.
 
I got the Rad all wire up and ready to go. I will make some extenders to hook the fans up to the Fanbus. The painting is coming along well but I am quickly learning about runs.

Cpt&


IMG_4662.JPG


Edit: Do you guys think I should paint the rad flat black or white or just leave it as it is?

Tim
 
Back
Top