![[H]ard|Forum](/styles/hardforum/xenforo/logo_dark.png)
Sledgehammer70
Weaksauce
- Joined
- Dec 3, 2005
- Messages
- 82
I did a small mod to allow proper airflow for my GTX 240 radiator which will play host to cooling my 2 GTX 480's when I actually get them. I was able to get my GTX 295 on water in the mean time but for now here is the small break down of the mod I did.
I started by breaking down the lower part of the case to make room for my 2nd Radiator. While doing this mod strips this case down by 2 hard drives, it was necessary for the clean look I would like to accomplish with this water cooling build. I grabbed a quick screenshot of what the case looked like before I started taking things apart & hacking away at Rivets & of course after photos.
Case untouched showing the bay we removed highlighted with a red outline.
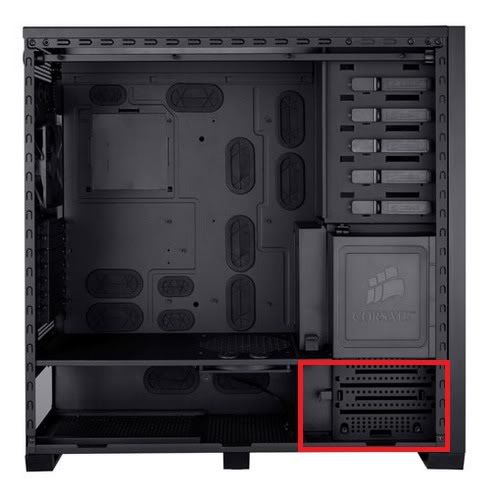
In general I started by breaking down the case to pretty much nothing, side panels removed, lower PSU bay covers removed and all other lose parts such as the drive bay covers and front bezel.
Most of the work is going to take place on the front of the case where the lower drive bay is mounted with 4 rivets. The actual metal slats just slide into some holes in other places. So only having to remove a few rivets isn't to hard.
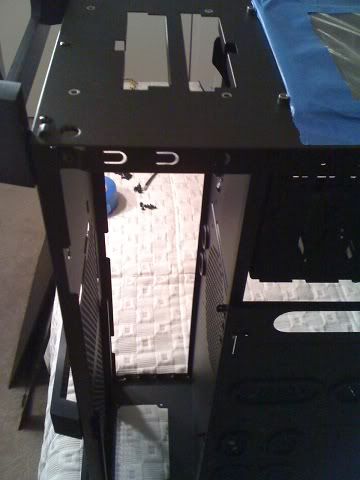
Here is an image of the 4 leftover rivet holes in the case that will be covered by the front bezel along with the 2 6-32 x 3/8" socket cap head screws I used to mount the upper drive bay back to the front panel of the case.
http://i714.photobucket.com/albums/ww148/sledgehammer70/IMG_0627.jpg
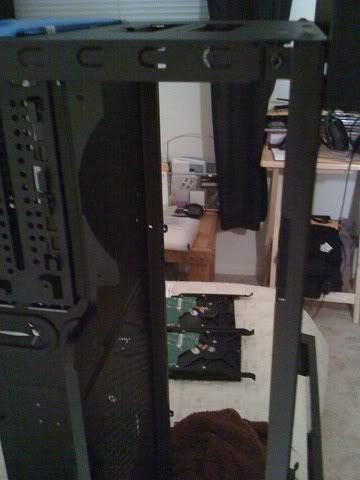
The last 2 images will give you a look of what the case now looks like with the bottom drive bays removed. Overall the mod took about 20 minutes to do and about 20 minutes to clean up.
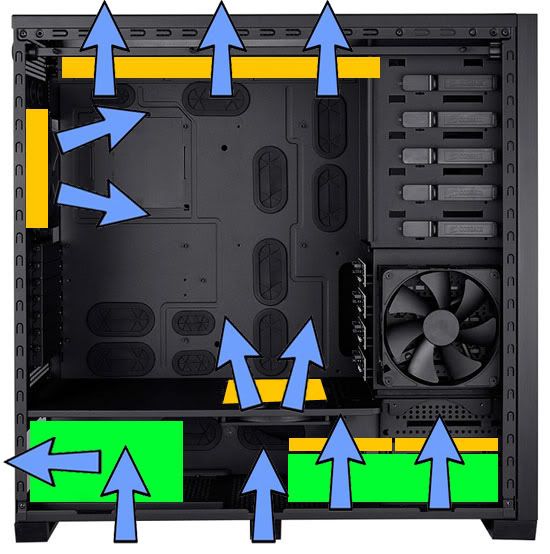
I have also created a small chart to show how I plan to cool my case. While the bulk of the system is fully water cooled proper airflow is still needed to keep the radiators cool. I am utilizing a good fan controller that will allow me to low the RPM's of my fans to be whisper silent along with utilizing radiators that are designed to work well with low airflow. The system is able to push a ton of air but the goal is for cold & quite operation while pushing the hardware above standard specs.
Now the cutting begins:
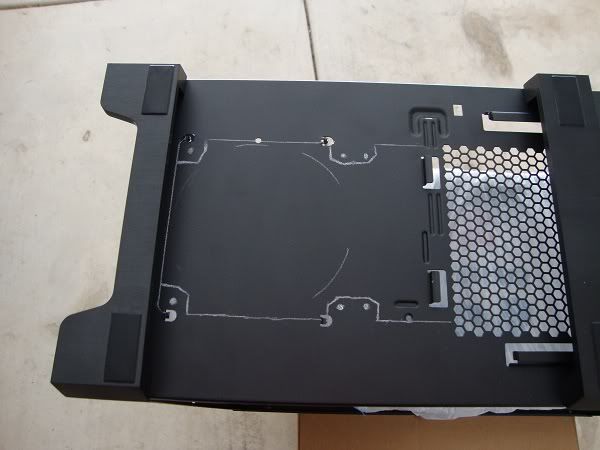
I started by finding the center of my case and temp mounted 2 120mm fans to the bottom to give me my outline. I cut just inside the lines to allow a pretty precise fit, but I was not worried about being perfect as I plan to line the bottom of the radiator with weather stripping to provide an air tight seal.
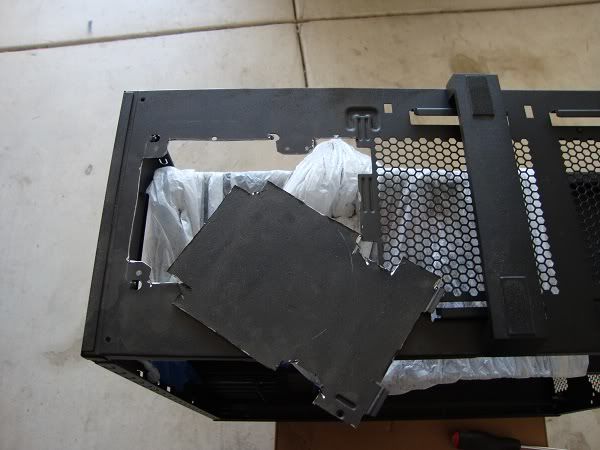
After I made my cuts I took a quick snap shot of the metal piece I will be removing. The metal at this point is still rough and needs a good sanding. As you can see the cutting made a bit of a mess hence why I lined the case with plastic trash bags so I wouldn't have to do to much cleaning after the cutting. The overall cutting took 3 Dremel cutting wheels, I had purchased 5 just in case.
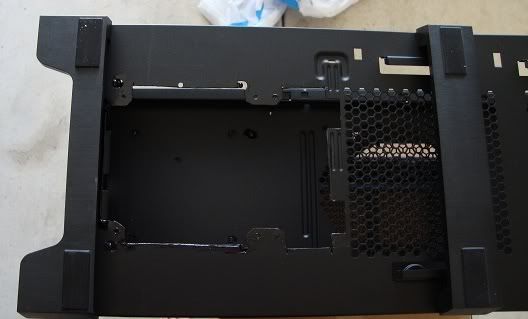
I than used the sanding tools that came with my Dremel tool to sand down the sharp edges. I than touched up the rough metal with black paint. (Still wet int his image) I had also drilled the 6 holes i would need to mount the radiator to the bottom of the case.
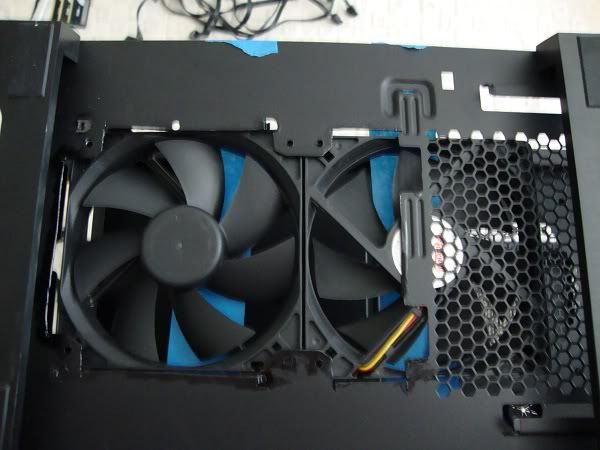
It is hard to understand what I am actually doing here without the radiator to show you what is going on. So I went ahead and jerry-rigged a few 120MM fans to just show you what area the radiator will cover. In the actual build the fans will sit on top of the radiator sucking in the air.
I might try a Push/Pull setup in the lower area, but I think it will constrict the overall airflow and the space will than be completely filled up.
To address the issue of dust and other crap getting sucked in I purchased 2 DEMCiflex 140mm Magnetic Fan Dust Filters which do not restrict airflow and catch the smallest of particles.
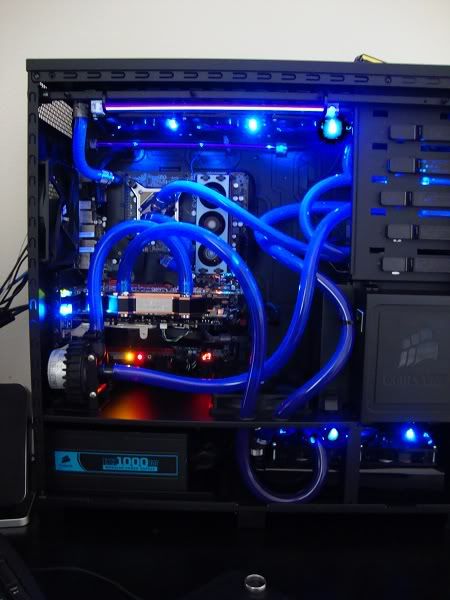
And the final image of the system with it all buttoned up and done with the GTX 295 on water.
I started by breaking down the lower part of the case to make room for my 2nd Radiator. While doing this mod strips this case down by 2 hard drives, it was necessary for the clean look I would like to accomplish with this water cooling build. I grabbed a quick screenshot of what the case looked like before I started taking things apart & hacking away at Rivets & of course after photos.
Case untouched showing the bay we removed highlighted with a red outline.
In general I started by breaking down the case to pretty much nothing, side panels removed, lower PSU bay covers removed and all other lose parts such as the drive bay covers and front bezel.
Most of the work is going to take place on the front of the case where the lower drive bay is mounted with 4 rivets. The actual metal slats just slide into some holes in other places. So only having to remove a few rivets isn't to hard.
Here is an image of the 4 leftover rivet holes in the case that will be covered by the front bezel along with the 2 6-32 x 3/8" socket cap head screws I used to mount the upper drive bay back to the front panel of the case.
http://i714.photobucket.com/albums/ww148/sledgehammer70/IMG_0627.jpg
The last 2 images will give you a look of what the case now looks like with the bottom drive bays removed. Overall the mod took about 20 minutes to do and about 20 minutes to clean up.
I have also created a small chart to show how I plan to cool my case. While the bulk of the system is fully water cooled proper airflow is still needed to keep the radiators cool. I am utilizing a good fan controller that will allow me to low the RPM's of my fans to be whisper silent along with utilizing radiators that are designed to work well with low airflow. The system is able to push a ton of air but the goal is for cold & quite operation while pushing the hardware above standard specs.
Now the cutting begins:
I started by finding the center of my case and temp mounted 2 120mm fans to the bottom to give me my outline. I cut just inside the lines to allow a pretty precise fit, but I was not worried about being perfect as I plan to line the bottom of the radiator with weather stripping to provide an air tight seal.
After I made my cuts I took a quick snap shot of the metal piece I will be removing. The metal at this point is still rough and needs a good sanding. As you can see the cutting made a bit of a mess hence why I lined the case with plastic trash bags so I wouldn't have to do to much cleaning after the cutting. The overall cutting took 3 Dremel cutting wheels, I had purchased 5 just in case.
I than used the sanding tools that came with my Dremel tool to sand down the sharp edges. I than touched up the rough metal with black paint. (Still wet int his image) I had also drilled the 6 holes i would need to mount the radiator to the bottom of the case.
It is hard to understand what I am actually doing here without the radiator to show you what is going on. So I went ahead and jerry-rigged a few 120MM fans to just show you what area the radiator will cover. In the actual build the fans will sit on top of the radiator sucking in the air.
I might try a Push/Pull setup in the lower area, but I think it will constrict the overall airflow and the space will than be completely filled up.
To address the issue of dust and other crap getting sucked in I purchased 2 DEMCiflex 140mm Magnetic Fan Dust Filters which do not restrict airflow and catch the smallest of particles.
And the final image of the system with it all buttoned up and done with the GTX 295 on water.
